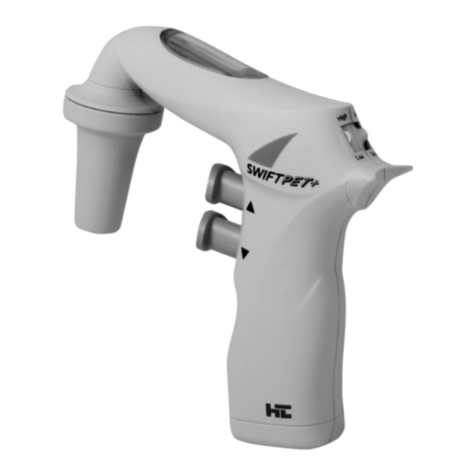
HTL SWIFTPET User manual

SSWWIIFFTTPPEETT
ENGLISH 1 – 8
DEUTSCH 9 – 16
FRANÇAIS 17 – 24
ESPAπOL 25 – 32
POLSKI 33 – 40
êìëëäàâ
41 – 48

1
CD
E
F
G
H
K
A
B
SSWWIIFFTTPPEETT
ENGLISH
A- Aspiration button
B- Dispense button
C- Suction speed switch - PP
D- Dispense mode switch - PP
E- Low battery indicator
F- Nosepiece - PP
G- Pipette holder - SI
H- Membranefilter - PP / PTFE
J- Safety valve
K- Connector gasket
NiMH battery
Casing - PP
DEUTSCH
A- Entnahmetaste
B- Ausgabetaste
C- Geschwindigkeitsschalter - PP
D- Schalter der Ausgabebetriebsart
- PP
E- LOWBAT-Anzeige
F
- Schutzabdeckung für den Halter - PP
G- Pipettenhalter - SI
H- Membranfilter - PP / PTFE
J- Rückschlagventil
K- Dichtung des Verbindungsstückes
NiMH - Akku
Casing - PP
FRANÇAIS
A- Bouton-poussoir de prise
B- Bouton-poussoir de refoulement
C- Sélécteur de vitesse - PP
D- Sélécteur du mode de
refoulement - PP
E- Indicateur de décharge
F- Capot de fixation - PP
G- Pince (fixation) de la pipette - SI
H- Filtre ∫ membrane - PP / PTFE
J- Clapet anti-retour
K- oint du raccord
Accumulateur NiMH
Support - PP
ESPAπOL
A - Botón de succión
B - Botón de dispensación
C - Selector de velocidad PP
D - Selector de modo de dispensación
- PP
E - Indicador de carga de batería
F - Cono de protección PP
G - Boquilla de conexión para pipeta SI
H - Membrana filtrante
- Válvula
K - unta de acople
Batería: Ni-MH
Carcaza: PP
POLSKI
A- Przycisk pobierania
B- Przycisk wydawania
C- Prze∏àcznik pr´dkoÊci
pobierania - PP
D- Prze∏àcznik trybu wydawania - PP
E- Wskaênik niskiego poziomu baterii
F- Os∏ona uchwytu pipety - PP
G- Uchwyt pipety - SI
H- Filtr membranowy - PP / PTFE
J- Zaworek zwrotny
K- Uszczelka ∏àcznika
Bateria NiMH
Obudowa - PP
êìëëäàâ
A- äÌÓÔ͇ ̇·Ë‡ÌËfl
B- äÌÓÔ͇ ‚˚ÔÛÒ͇ÌËfl
C- èÂÂÍβ˜‡ÚÂθ ÒÍÓÓÒÚË - PP
D- èÂÂÍβ˜‡ÚÂθ ÂÊËχ
‚˚ÔÛÒ͇ÌËfl - PP
E- àÌ Ë͇ÚÓ ÌËÒÍÓ„Ó ÛÓ·Ìfl
Á‡fl ÍË ·‡Ú‡ÂË
F- ëÚ‡Í‡Ì ÂʇÚÂÎfl ÔËÔÂÚÍË - PP
G- ÑÂʇÚÂÎfl ÔËÔÂÚÍË - SI
H- åÂÏ·‡ÌÌ˚È ÙËÎ¸Ú - PP / PTFE
J- é·‡ÚÌ˚È Í·ԇÌ
K- èÓÍ· ͇ Òo ËÚÂÎfl
ŇڇÂfl NiMH
äÓÔÛÒ - PP

1
TABLE OF CONTENTS
1 - INTRODUCTION .............................................................................................................. 2
2 - WORK SAFETY INSTRUCTIONS ..................................................................................... 2
3 - LIMITATIONS OF USE ..................................................................................................... 3
4 - STARTING THE SWIFTPET ............................................................................................. 3
5 - ASPIRATING AND DISPENSING LIQUIDS ...................................................................... 3
6 - TROUBLESHOOTING ...................................................................................................... 4
7 - REPLACING THE FILTER AND CLEANING THE VALVES ............................................... 6
8 - CHARGING THE BATTERY .............................................................................................. 6
9 - MAINTENANCE ................................................................................................................7
10 - COMPONENTS ................................................................................................................7
11 - ORDERING INFORMATION ............................................................................................. 8
12 - SPARE PARTS .................................................................................................................. 8
SSWWIIFFTTPPEETT
2
1 - INTRODUCTION
The SWIFTPET pipetting aid is a device intended for pipetting liquids with the use of meas-
uring pipettes. It can work with all types of glass or plastic pipettes in the volume range
from 1 ml to 100 ml.
The SWIFTPET is equipped with replaceable membrane filters, which protect the mechanism
of the device from contamination by the vapours of solutions being drawn into the pipette.
The two-step drawing speed control system enables both very fast dispensing of large
volumes and precise measuring of small volumes.
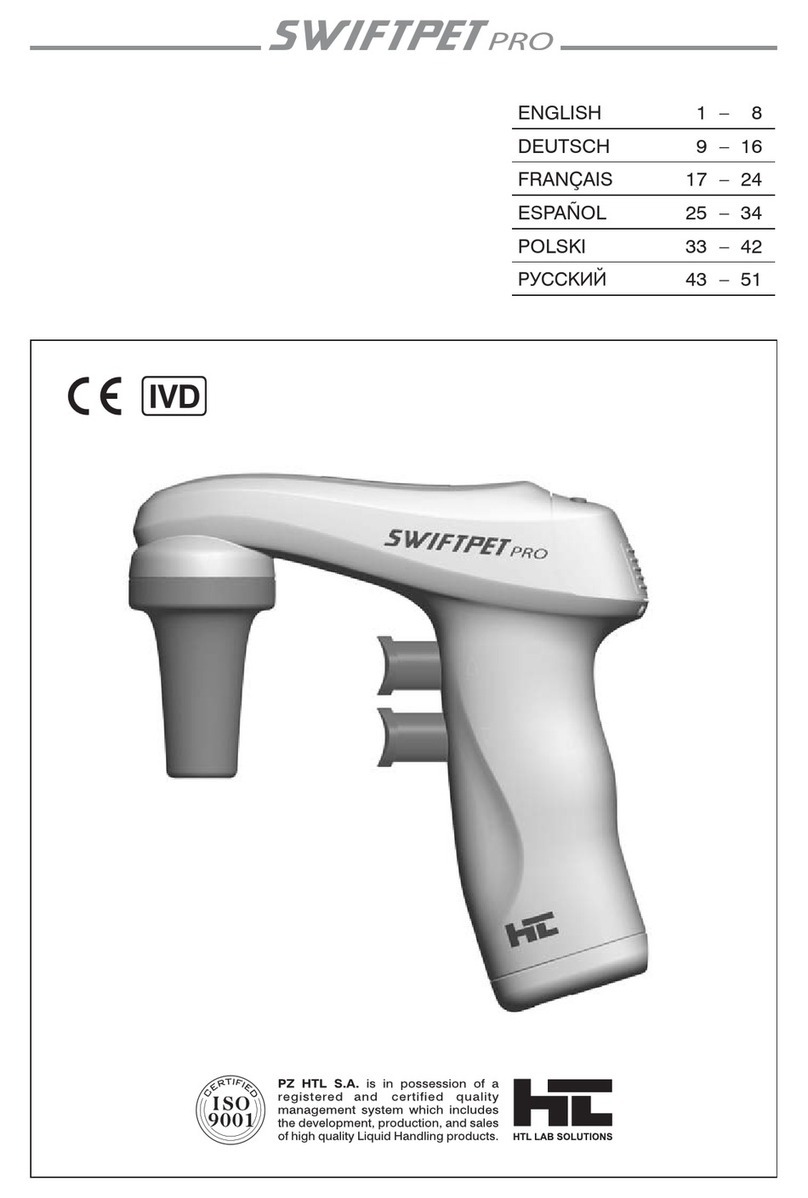
Fig. 1 shows the external parts of the pipetting aid with a description of the materials used.
2 - WORK SAFETY INSTRUCTIONS
Before starting the work with the SWIFTPET every user should read these operating
instructions carefully.
Using the device inconsistently with the operating instructions may result in damaging
the device.
The device should be maintained only at an authorised service centre, otherwise the manu-
facturer will be relieved from any liability under the warranty.
• During the work with the SWIFTPET general safety regulations regarding risks related
with laboratory work should be observed. Protective clothing, goggles and gloves should
be worn.
•
The SWIFTPET shall be used only for measuring liquids in conditions specified
by the manufacturer, which are limited due to the chemical and mechanical resistance
of the device, as well as the user safety.
• The pipetting aid should not be used in an environment where explosion risk is present.
•
The information and instructions provided by the manufacturers of the reagents must
be ob
served.
•
Only original spare parts and accessories, recommended by the manufacturer, shall be used
.
• Only the original charger, supplied by the manufacturer, shall be used for charging
the battery.
• In case of incorrect functioning of the pipetting aid, work shall be stopped. The device
shall be cleaned in accordance with the operating instructions and/or sent for repair to an
authorised service centre.
• In the case of mechanical damage to the casing, the device shall be immediately sent
for repair to an authorised service centre.
• The use of excessive force during work shall be avoided.
ENGLISH

3
3 - LIMITATIONS OF USE
• The SWIFTPET may not be used for measuring substances, the vapours of which
damage the following plastics: PP, SI, ABS, EPDM, POM.
• The pipetting aid may not be used in an environment where explosion risk is present.
• Flammable liquids shall not be measured - in particular substances with flash-point below
0 °C (ether, acetone).
• The pipetting aid shall not be used for drawing acids with a concentration above 1 mol.
• The pipetting aid shall not be used for drawing solutions with a temperature above 50 °C.
• The pipetting aid may work in temperature range from +10 °C to +35 °C.
4 - STARTING THE SWIFTPET
Before starting the work check whether the battery inside the pipetting aid has not become
discharged. To check this press the aspiration button (fig. 1A) and watch whether the low
battery indicator lights up (fig. 1E). If the indicator does not light up, the pipetting aid is ready
for work.
If the low battery indicator lights up, the pipetting aid shall be left for charging (recommended
action), or the charger shall be connected and the work continued during charging.
The SWIFTPET may be charged only with the original charger.
The mains voltage shall conform with the specification on the charger.
Charging shall be done in accordance with section 8 of the instruction manual.
5 - ASPIRATING AND DISPENSING LI UIDS
Attaching a pipette
Before attaching a pipette check whether the pipette is not damaged, has no dents
or sharp edges in the gripping part. Check whether the gripping part is dry.
The pipette shall be gripped as close to the upper end as possible and carefully inserted
into the pipette holder until resistance is noticed (fig. 2A). Do not apply excessive force
so as not to damage thin pipettes and to avoid injury risk. A pipette that has been correctly
attached and sealed in the holder should not tilt to the sides.
After attaching a pipette hold the device in such a way as to keep the pipettor in vertical
position. The shape of the device casing makes it possible to put aside the pipetting aid with
an attached pipette. After finished work it is recommended not to leave the device
with an attached pipette for a longer period, for example overnight or over a weekend.
Do not put aside the pipetting aid if there is liquid in the pipette.
Filling the pipette
Before aspirating is started, set the suction speed switch using the HIGH/LOW switch (fig. 1C):
• HIGH position - fast aspirating
• LOW position - slow aspirating
SSWWIIFFTTPPEETT
4
It is recommended to choose the LOW position for pipettes with a volume up to 5 ml,
and the HIGH position for pipettes with a volume greater than 5 ml. Holding the pipetting
aid in such a way that the pipette is in vertical position immerse the pipette end in the liquid
to be drawn up (fig. 2B), and press the aspiration button gently. The pipette filling speed
depends
on how deep the aspirating button has been pressed. The deeper the button
is pressed the faster the liquid is aspirated into the pipette.
It is recommended to draw a slightly greater liquid volume than required (due to meniscus
above the required volume mark), adjusting the aspiration speed, particularly in the final fillin
g
stage, so as not to overfill the pipette.
Setting the volume
After filling the pipette its end shall be dried with absorbent paper, that does not leave impu-
rities, in order to remove the solution rests from the outside surface of the pipette. Then set
the required liquid volume precisely. Pressing the dispense button gently (fig. 2C), dispense
the excessive liquid from the pipette until the meniscus of the liquid aligns exactly with
the required volume mark on the pipette.
Emptying the pipette
Holding the vessel in inclined position, place the pipette end in contact with the vessel wall
and press the dispense button gently (fig. 2C). The dispensing intensity may be adjusted
depending on how deep the dispense button has been pressed. The deeper the button
is pressed the faster the outflow of liquid from the pipette.
The SWIFTPET has two dispense modes. The dispense mode is selected with
the GRAV/BLOW switch (fig. 1D).
• GRAV position - the dispense is effected in gravity mode, which means that the liquid
flows out of the pipette by its own weight. The outflow speed is adjusted depending
on how deep the dispense button has been pressed.
•
BLOW position - the dispense is effected in gravity mode like in the GRAV mode, however,
when the dispense button is pressed to the end position, the pump is started and fast
emptying of the pipette with a blow is effected.
Attention:
During gravimetrical dispensing the pipette is not completely emptied due to the
characteristics of pipettes used with the pipetting aid.6 -
6 - TROUBLESHOOTING
If during your work the functioning of the pipetting aid is incorrect, check the cause
and remove the fault.
ENGLISH

5
Check the pipette holder and the
connector gasket for mechanical
damage - if there is damage,
replace the damaged part with
a new one.
The pipette holder and/or
the connector gasket is
damaged (fig.1G, fig 1K).
Check whether all parts are pre-
sent and correctly installed.
The pipette holder, the filter,
or the connector gasket
is installed incorrectly.
Check whether the pipette has
been correctly inserted in the
holder.
The pipette is inserted
incorrectly.
Check the pipette for damage
-
cracks, dents - if present, repla-
ce
the pipette with a new one.
The pipette is damaged.Liquid leaks from the
pipette (the aspiration
and the dispense buttons
are not pressed)
Check the pipette holder and the
connector gasket for mechanical
damage - if there is a damage,
replace the damaged part with
a new one.
The pipette holder
and/or the connector gas-
ket is damaged (fig. 1K).
Check the valve for flooding.
If it is wet - rinse it and dry.
Check the valve for blockage
or displacement due to exces
sive
force during pipette instal
lation
- if it is blocked or displaced
try
to set it in the right position.
The check valve is blocked
(fig. 1 ).
Take the pipette out of the holder.
Disassemble the pipette holder.
Take out the filter - check it for
impurities - if it is dirty, replace it
with a new one.
The filter is dirty (fig. 1H).The pump is working, but
the pipetter aid does not
draw liquid or draws liquid
very slowly.
If the holder is damaged, replace
it with a new one.
The pipette holder is dam-
aged.
Take the pipette out of the holder.
Disassemble the pipette holder
and check for mechanical
damage.
Clean, wash and dry the pipette
holder.
The pipette holder is dirty
or wet (fig.1G).
The pipette falls out (the
holding force of the pipette
is to small), or tilts to the
side too much.
ActionPossible causeProblem
SSWWIIFFTTPPEETT
6
If the above actions do not remedy the incorrect functioning of the pipetting aid, the device
shall be sent to HTL service.
Before sending the product should be cleaned and decontaminated. Filled in questionnaire
available at www.htl.com.pl with precise specification of solutions used and the type
of laboratory, in which the device has been used, shall be sent together with the product.
7 - REPLACING THE FILTER AND CLEANING THE VALVES
Note:
The work safety instructions given in section 2 shall be observed when disassembling
the pipetting aid.
The filter replacement is necessary, if drawing efficiency deterioration is observed.
The direct reason may be dirty filter after a long period of use.
The procedure is shown in (fig. 3).
• Remove the pipette.
• Unscrew the nosepiece (fig. 3A).
• Remove the membrane filter (fig. 3A) and the pipette holder (fig. 3B).
• Rinse the holder with the safety valve using a wash bottle (fig. 3C).
• Blow liquid out of the holder and leave it until it is completely dry.
• Install new membrane filter (fig. 3D) and assemble the device in reverse order.
8 - CHARGING THE BATTERY
The SWIFTPET has a low battery indicator. If the control lamp (fig. 1E) lights up, when
the aspiration button is pressed, it means that the battery is discharged and should be charged
.
Note:
The SWIFTPET may be charged only with the original charger. The mains voltage must
conform with the specification on the charger.
Using other chargers than the original one may damage the battery of the pipetting aid.
Charging the battery in the SWIFTPET pipetting aid is controlled by a time circuit, which controls
the entire process. When the battery has been charged, the charging circuit disconnects
automatically. This is indicated by the control lamp (fig. 1E), which shines continuously.
Charging:
1. Charging temperature: 10 °C to 35 °C.
2.
Charging is done with the charger included with each pipetter aid. Battery charging is sig-
nalled by the control lamp, which flashes during charging.
3. Full charging time: 11-14 hours.
4.
The charging condition is signalled by the control lamp, which starts shining continuously
when the charging is complete.
The pipetting aid has a NiMH type battery with a capacity of 1700 mAh.
ENGLISH

7
The service life of the battery: approx. 1000 charging cycles, if used correctly. It is not possible
to overcharge the battery, if all instructions of the manufacturer are followed.
Note:
Charging shall not be interrupted. If the charging process is interrupted, the next
charging may take place after the battery has been completely discharged.
9 - MAINTENANCE
Cleaning
The SWIFTPET does not require any maintenance. The external parts of the pipetting aid
may be cleaned with a swab moistened with isopropyl alcohol.
The nosepiece and the pipette holder with the check valve may be autoclaved at 121 °C
for 20 mi
nutes. The filters included in the set may be sterilised by autoclaving at 121 °C
for not more than 15 minutes.
Storage
The SWIFTPET shall be stored in a dry place. The allowable storage temperature: -20 °C
to +50 °C.
During breaks in the work the pipetting aid shall be placed in the wall hanger included with
the pipetting aid.
The pipetting hanger may be fitted on a wall on a hook or stuck with the adhesive tape
attached to the hanger. The surface for the hanger should be smooth, clean and
degreased. Before sticking the pipetting hanger remove the protective film from the tapes
attached to the hanger.
Note:
Do not store the pipetting aid with a filled pipette.
10 - COMPONENTS
The SWIFTPET set is supplied with the following components:
• Pipetting aid
• Charger
• Pipetting hanger
• Membranefilter 0.2 µm - 2 pcs
• Instruction manual
SSWWIIFFTTPPEETT
8
11 - ORDERING INFORMATION
The following versions of the SWIFTPET differ with the type of included charger, depending
on the mains voltage.
Versions Voltage Catalogue number
Continental Europe 220 V / 50 Hz 0301
USA 120 V / 60 Hz 0302
UK/Ireland 230 V / 50 Hz 0303
Australia 240 V / 50 Hz 0304
12 - SPARE PARTS
Item Part name Catalogue no. Number of
in fig.1 pieces in pack
FNosepiece 9022 1
GPipette holder 9021 1
HMembranefilter 0.2 µm 9023 1
Membranefilter 0.45 µm 9024 1
KConnector gasket 9025 1
LContinental Europe 220 V / 50 Hz 9015 1
Power USA 120 V / 60 Hz 9016 1
supply: UK/Ireland 230 V / 50 Hz 9017 1
Australia 240 V / 50 Hz 9018 1
ENGLISH

9
INHALTSVERZEICHNIS
1 - EINFÜHRUNG ................................................................................................................ 10
2 - SICHERHEIT .................................................................................................................. 10
3 - EINSCHRÄNKUNGEN FÜR DEN EINSATZ ................................................................... 11
4 - INBETRIEBNAHME ......................................................................................................... 11
5 - ENTNAHME UND ABGABE VON FLÜSSIGKEIT .......................................................... 11
6 - FEHLERBESEITIGUNG .................................................................................................. 12
7 - FILTERAUSTAUSCH UND REINIGUNG DER VENTILE ................................................. 14
8 - AUFLADEN DES AKKUS ................................................................................................ 14
9 - WARTUNG ..................................................................................................................... 15
10 - LIEFERUMFANG............................................................................................................. 15
11 - ANGABEN FÜR EINE BESTELLUNG ............................................................................ 16
12 - ERSATZTEILE ................................................................................................................ 16
SSWWIIFFTTPPEETT
1 - EINFÜHRUNG
Die Pipettierhilfe SWIFTPET dient zum Abmessen von Flüssigkeit mittels Messpipetten. Das
Gerät ist für alle Pipetten (Kunststoff und Glas) mit einem Volumen von 1 ml bis 100 ml
geeignet. SWIFTPET ist mit austauschbaren Membranfiltern ausgestattet, damit der Me-
chanismus des Gerätes durch Dämpfe der entnommenen Lösungen nicht verunreinigt wird.
Das zweistufige System zur Regelung der Entnahmegeschwindigkeit ermöglicht einerseits
eine sehr schnelle Dosierung großer Volumen, andererseits eine präzise Abmessung kleiner
Volumen.
Auf Abb. 1 sind die von außen sichtbaren Komponenten der Pipettierhilfe (mit Angabe des
jeweils eingesetzten Materials) dargestellt.
2 - SICHERHEIT
Machen Sie sich vor dem Einsatz der SWIFTPET mit dieser Betriebsanleitung vertraut.
Das Gerät kann beschädigt werden, falls es entgegen den Richtlinien der Betriebsanleitung
benutzt wird.
Serviceleistungen dürfen nur in autorisierten Vertragswerkstätten vorgenommen werden,
andernfalls übernimmt der Hersteller keine Garantie.
• Beachten Sie bei der Handhabung der Pipettierhilfe SWIFTPET die allgemeinen
Laborsicherheitsvorschriften. Tragen Sie Schutzkleidung, eine Schutzbrille sowie Schutz-
handschuhe.
• Die Pipettierhilfe SWIFTPET ist nur zum Abmessen von Flüssigkeit bei den vom Hersteller
angegebenen Bedingungen einzusetzen, die wegen der chemischen und mechanischen
Beständigkeit des Gerätes, aber auch in Hinsicht auf die Sicherheit des Nutzers, begrenzt
sind.
•
Benutzen Sie die Pipettierhilfe auf keinen Fall in einer explosionsgefährdenden Atmosphäre.
• Beachten Sie die Angaben und Richtlinien der Reagenz-Hersteller.
• Verwenden Sie ausschließlich vom Hersteller empfohlene Original-Ersatzteile und
Zubehör. Zweifel sind mit dem Hersteller oder Regionalvertreter zu klären.
• Benutzen Sie zum Aufladen des Akkus ausschließlich das vom Hersteller gelieferte
Ladegerät.
• Unterbrechen Sie die Arbeit bei inkorrekter Funktionsweise. Reinigen Sie das Gerät
gemäß Bedienungsanleitung /oder senden Sie es einer autorisierten Vertragswerkstatt zur
Reparatur.
• Bei einer mechanischen Beschädigung des Gehäuses senden Sie das Gerät zur
Reparatur in eine autorisierte Vertragswerkstatt.
• Vermeiden Sie bei der Handhabung übermäßigen Krafteinsatz.
DEUTSCH
10

11
3 - EINSCHRÄNKUNGEN FÜR DEN EINSATZ
• Verwenden Sie die Pipettierhilfe SWIFTPET nicht zum Abmessen von Substanzen, deren
Dämpfe die folgenden Materialien zerstören: PP, SI, ABS, EPDM, POM.
• Verwenden Sie die Pipettierhilfe nicht in einer explosionsgefährdenden Atmosphäre.
• Pipettieren Sie keine leicht entzündbaren Flüssigkeiten - insbesondere Substanzen mit
einer Entflammungstemperatur unter 0 °C (Äther, Azeton).
• Pipettieren Sie keine Säuren mit einer Konzentration von mehr als 1 Mol
• Pipettieren Sie keine Lösungen mit Temperaturen von über 50 °C
• Die Pipettierhilfe kann bei einer Temperatur von +10 °C bis +35 °C eingesetzt werden.
4 - INBETRIEBNAHME
Stellen Sie vor Inbetriebnahme sicher, dass der Geräte-Akku geladen ist. Hierzu die Entnah-
me-Taste (Abb. 1A) drücken und prüfen, ob die LOWBAT-Anzeige aufleuchtet (Abb. 1E).
Die Pipettierhilfe ist betriebsbereit, wenn dies nicht der Fall ist.
Beim Aufleuchten der LOWBAT-Anzeige die Pipettierhilfe aufladen (Empfehlung: erst aufladen,
dann weiterarbeiten) oder das Ladegerät anschließen und während des Aufladevorgangs
arbeiten. Die Pipettierhilfe SWIFTPET darf nur mit dem Original-Ladegerät aufgeladen werden.
Die Netzspannung muss mit der Kennzeichnung auf dem Ladegerät übereinstimmen.
Details zum Aufladen siehe Punkt 8 der Betriebsanleitung.
5 - ENTNAHME UND ABGABE VON FLÜSSIGKEIT
Befestigung der Pipette.
Bevor Sie die Pipette befestigen, ist sicherzustellen, dass sie nicht beschädigt ist und
keine Absplitterungen und scharfen Kanten am Halterteil hat. Prüfen Sie, ob das
Halterteil trocken ist.
Halten Sie die Pipette so weit oben wie möglich. Führen Sie die Pipette vorsichtig bis zum
Anschlag in den Halter der Pipettierhilfe. (Abb. 2A). Vermeiden Sie übermäßigen
Kraftaufwand, da die dünnen Pipetten leicht brechen und man sich schnell verletzen kann.
Die gut im Halter befestigte und abgedichtete Pipette darf sich nicht seitlich verschieben.
Halten Sie nach dem Befestigen der Pipette das Gerät so, dass sich die Pipette in
Senkrechtstellung befindet. Sie können die Pipettierhilfe mit der befestigten Pipette able-
gen, wenn sich keine Flüssigkeit in der Pipette befindet. Es empfiehlt sich, das Gerät nach
dem Abschluss der Arbeiten für längere Zeit, z.B. nachts oder übers Wochenende, nicht mit
montierter Pipette abzulegen.
Legen Sie die Pipettierhilfe nie ab, wenn sich Flüssigkeit in der Pipette befindet.
Füllen der Pipette
Schalten Sie die Geschwindigkeit mit dem Schalter HIGH/LOW (Abb. 1C) ein:
• Stellung HIGH - Schnellentnahme bei Volumen ab 5 ml
• Stellung LOW - Langsamentnahme bei Volumen bis 5 ml
SSWWIIFFTTPPEETT
Halten Sie die Pipettierhilfe so, dass sich die Pipette in Senkrechtstellung befindet. Tauchen
Sie die Pipettenspitze in die zu entnehmende Flüssigkeit. (Abb. 2B) Drücken Sie die
Entnahmetaste leicht. Die Ansauggeschwindigkeit hängt davon ab, wie weit Sie die
Entnahmetaste drücken, d.h. je weiter gedrückt wird, desto schneller wird Flüssigkeit in die
Pipette gefüllt.
Es ist zu empfehlen, etwas mehr Flüssigkeit zu entnehmen, als zur Abmessung vorgesehen
wird (der Meniskus über der Marke des geforderten Volumens). Reduzieren Sie die Entnah-
megeschwindigkeit in der Endphase der Entnahme damit die Pipette nicht überfüllt wird.
Einstellung des Volumens
Nach dem Füllen der Pipette trocknen Sie die Pipettenspitze mit einem saugfähigen Papier,
um Reste der Lösung an der Außenfläche der Pipette zu beseitigen. Das geforderte
Volumen stellen Sie ein, indem Sie überschüssige Flüssigkeit aus der Pipette entfernen.
Dazu drücken Sie vorsichtig die Ausgabetaste (Abb. 2C), bis der Meniskus der Flüssigkeit
genau mit der geforderten Volumenmarke auf der Pipette übereinstimmt.
Entleeren der Pipette
Halten Sie das Gefäß schräg und legen Sie die Pipettenspitze an die Gefäßwand an.
Drücken Sie vorsichtig die Ausgabetaste. (Abb. 2C). Die Abgabegeschwindigkeit hängt
davon ab, wie weit die Ausgabetaste gedrückt wird, d.h. je weiter gedrückt wird, desto
schneller tritt Flüssigkeit aus.
Die Pipettierhilfe SWIFTPET hat zwei Ausgabe-Betriebsarten. Die Ausgabe-Betriebsart
stellen Sie mit dem Schalter GRAV/BLOW ein (Abb. 1D).
• Stellung GRAV - die Ausgabe erfolgt in der Gravitations-Betriebsart, die Flüssigkeit fließt
infolge des Eigengewichts aus der Pipette. Die Schnelligkeit des Ausflusses hängt davon
ab, wie weit die Ausgabetaste gedrückt wird.
• Stellung BLOW - die Ausgabe erfolgt in der Gravitations-Betriebsart - so wie bei
Betriebsart GRAV, nach dem Drücken der Ausgabetaste bis zum Anschlag schaltet sich
eine Pumpe ein, woraufhin Schnellentleerung der Pipette mit Ausblasen erfolgt.
6 - FEHLERBESEITIGUNG
Falls während der Arbeit Unzulänglichkeiten in der Funktionsweise der Pipettierhilfe fest-
gestellt werden, sind die Ursachen zu bestimmen und Fehler zu beseitigen.
Pipettenhalter gegen einen
neuen austauschen.
Beschädigter
Pipettenhalter.
Pipette aus dem Halter ziehen,
Pipettenhalter demontieren und
auf mechanische Beschädigung
prüfen, reinigen, abspülen und
trocknen.
Verunreinigter, nasser
Pipettenhalter (Abb. 1G).
Die Pipette fällt heraus
(zu geringe Haltekraft der
Pipette), starke seitliche
Bewegungsfreiheit.
Verfahrensweise Mögliche Ursache Problem
DEUTSCH
12
13
Falls der Fehler nicht behoben werden konnte, schicken Sie die Pipettierhilfe bitte an den
zuständigen HTL-Service. Vor dem Versand muss das Gerät gereinigt und sterilisiert wer-
den. Legen Sie bitte das ausgefüllte Formblatt bei und geben Sie die genaue Spezifizierung
der eingesetzten Lösungen an und die Art des Labors, wo das Gerät eingesetzt wurde.
Pipettenhalter und die Dichtung
des Verbindungsstückes auf
mechanische Beschädigung
prüfen, - ggf. das beschädigte Teil
gegen ein neues austauschen.
Pipettenhalter, Filter oder
Dichtung des Verbindungs-
stückes sind falsch montiert
Prüfen, ob alle Teile korrekt mon-
tiert wurden.
Pipettenhalter, Filter oder
Dichtung des Verbindungs-
stückes sind falsch montiert
Prüfen, ob die Pipette korrekt im
Halter befestigt wurde.
Falsch befestigte Pipette
Prüfen, ob die eingesetzte
Pipette beschädigt ist- Sprünge,
Absplitterungen, wenn dies der
Fall ist, die Pipette gegen eine
neue austauschen.
Beschädigte PipetteFlüssigkeit tropft aus der
Pipette (Entnahmetaste
sowie Ausgabetaste sind
nicht gedrückt)
Prüfen, ob der Pipettenhalter und
die Dichtung des Verbindungs-
stückes mechanisch beschädigt
sind - wenn dies der Fall ist, das
beschädigte Teil gegen ein neues
austauschen.
Beschädigter Pipettenhalter
und/oder beschädigte
Dichtung des Verbin-
dungsstückes (Abb. 1K)
Prüfen, ob es zu einer Überflu-
tung des Ventils gekommen ist.
Wenn es nass ist, Ventil abspülen
und trocknen. Prüfen, ob das
Ventil durch zu tiefes Einführen
der Pipette blockiert oder ver-
schoben ist. Ventil in die korrekte
Stellung bringen.
Blockiertes
Rückschlagventil (Abb. 1 )
Die Pipette aus dem Halter ziehen,
Pipettenhalter demontieren, dann
das Filter herausziehen und auf
Verunreinigung prüfen, - wenn
dies der Fall ist, muss ein neues
Filter eingesetzt werden.
Verunreinigtes Filter.
(Abb. 1H)
Die Pumpe funktioniert
nicht, mit der Pipettierhilfe
kann keine Entnahme
vorgenommen werden
oder diese erfolgt sehr
langsam.
SSWWIIFFTTPPEETT
7 - FILTERAUSTAUSCH UND REINIGUNG DER VENTILE
Hinweis:
Beachten Sie vor der Demontage der Pipettierhilfe die Sicherheitshinweise aus
Kapitel 2.
Ein Filteraustausch ist erforderlich, wenn festgestellt wird, dass sich die Effektivität der
Entnahme verringert. Die direkte Ursache kann die Verunreinigung des Filters durch dessen
lange Nutzung sein.
Die Verfahrensweise ist auf Abb. 3 dargestellt.
• Pipette herausnehmen.
• Befestigungskappe des Pipettenhalters abschrauben (Abb. 3A)
• Membranfilter (Abb. 3A) und Pipettenhalter (Abb. 3B) herausnehmen.
• Den Halter mit dem Rückschlagventil sorgfältig mittels Spritzflasche abspülen (Abb. 3C).
• Flüssigkeit vom Halter durchblasen und ihn anschließend trocknen lassen.
• Ein neues Membranfilter montieren (Abb. 3D), Montage in entgegengesetzter Reihenfolge
vornehmen.
8 - AUFLADEN DES AKKUS
Die Pipettierhilfe SWIFTPET verfügt über eine Akkuentladungs-Anzeige. Wenn bei gedrückter
Entnahmetaste die Kontrolllampe aufleuchtet (Abb. 1E), ist das ein Zeichen dafür, dass der
Akku bereits entladen ist und aufgeladen werden muss.
Hinweis:
Die Pipettierhilfe SWIFTPET darf nur mit dem Original-Ladegerät aufgeladen werden,
da es sonst zu einer Beschädigung der Pipettierhilfe oder Zerstörung der Akkus kom-
men kann
Die Netzspannung muss mit der Kennzeichnung auf dem Ladegerät übereinstimmen. Das
Aufladen des Akkus in der SWIFTPET wird von einer Zeitschaltung kontrolliert, die den ge-
samten Prozess überwacht. Nach dem Aufladen des Akkus wird der Ladekreis automatisch
abgeschaltet, was durch konstantes Leuchten der Kontrolllampe angezeigt wird (Abb. 1E).
Aufladen
Hinweis:
Die Aufladung darf nicht unterbrochen werden. Im Falle einer Unterbrechung der
Aufladung darf man mit dem nächsten Ladeprozess erst nach vollständiger Entladung
des Akkus beginnen.
1. Ladetemperatur von 10 °C bis 35 °C
2. Das Aufladen erfolgt mit dem mitgelieferten Ladegerät. Während des Ladevorgangs
blinkt die Kontrolllampe.
3. Zeit der vollständigen Aufladung: 11 - 14 Stunden.
4. Der Ladevorgang ist beendet, wenn die Kontrolllampe dauerhaft leuchtet.
DEUTSCH
14

15
Die Pipettierhilfe verfügt über einen NiMH-Akku einer Kapazität von 1700 mAh.
Lebensdauer eines Akkus: circa 1000 Ladezyklen bei vorschriftsmäßiger Nutzung. Es ist
nicht möglich, dass der Akku überladen wird, wenn alle Richtlinien des Herstellers eingehal-
ten werden.
9 - WARTUNG
Reinigung
Die Pipettierhilfe SWIFTPET ist wartungsfrei. Die Außenteile können mit einem mit Isopro-
pylalkohol getränkten Wattebausch gereinigt werden.
Kappe und Pipettenhalter mit Rückschlagventil können in einem Autoklav bei einer
Temperatur von 121 °C - 20 Minuten lang - gereinigt werden. Die mitgelieferten Filter können
in einem Autoklav bei einer Temperatur von 121 °C für eine Zeit von mehr als 15 Minuten
gereinigt werden.
Aufbewahrung
Bewahren Sie die Pipettierhilfe SWIFTPET an einem trockenen Ort auf. Zulässige
Lagertemperaturen in einem Intervall von: -20 °C bis +50 °C.
Während Arbeitspausen ist der Pipettenheber an einer Wandaufhängung anzubringen, die
zum Zubehör des Pipettenhebers gehört.
Die Aufhängung kann an einem Haken an die Wand angebracht oder mit einem Klebeband
angeklebt werden. Die Fläche, auf der die Aufhängung anzubringen ist, muss glatt, sauber
und entfettet sein. Vor dem Ankleben der Aufhängung ist die Schutzfolie vom Klebeband zu
entfernen, welches auf der Aufhängung angebracht wurde.
Hinweis:
Die Pipettierhilfe darf nicht mit gefüllter Pipette aufbewahrt werden.
10 - LIEFERUMFANG
Geliefert wird die Pipettierhilfe SWIFTPET inklusive folgender Komponenten:
• Pipettenheber
• Ladegerät
• Aufhängung für den Pipettenheber
• Membranfilter 0.2 µm - 2 Stück.
• Bedienungsanleitung
SSWWIIFFTTPPEETT
11 - ANGABEN FÜR EINE BESTELLUNG
Die unten stehenden Ausführungen des Pipettenhebers SWIFTPET unterscheiden sich
durch den Typ des mitgelieferten Ladegeräts - je nach der angewandten Spannung.
Ausführung Spannung Katalognummer
Europa (Kontinent) 220 V / 50 Hz 0301
USA 120 V / 60 Hz 0302
England / Irland 230 V / 50 Hz 0303
Australien 240 V / 50 Hz 0304
12 - ERSATZTEILE
Posten Bezeichnung Katalognummer Stückzahl in
nach Abb. 1 der Komponente der Verpackung
FSchutzabdeckung für den Halter 9022 1
GPipettenhalter 9021 1
HMembranfilter 0.2 µm 9023 1
Membranfilter 0.45 µm 9024 1
KDichtung des Verbindungsstückes 9025 1
LEuropa 220 V / 50 Hz 9015 1
Ladegerätdes USA 120 V / 60 Hz 9016 1
des Typs: England 230 V / 50 Hz 9017 1
Australien 240 V / 50 Hz 9018 1
DEUTSCH
16

17
TABLE DES MATIERES
1 - INTRODUCTION ............................................................................................................ 18
2 - RECOMMANDATIONS CONCERNANT LA SÉCURITÉ DU TRAVAIL ........................... 18
3 - RESTRICTIONS CONCERNANT L’UTILISATION .......................................................... 19
4 - MISE EN SERVICE DU SWIFTPET ................................................................................ 19
5 - PRISE ET REFOULEMENT DU LIQUIDE ....................................................................... 19
6 - ÉLIMINATION DES DEFECTUOSITÉS .......................................................................... 20
7 - REMPLACEMENT DU FILTRE ET NETTOYAGE DES CLAPETS .................................. 22
8 - CHARGEMENT DE L’ACCUMULATEUR ÉLÉCTRIQUE ................................................ 22
9 - CONSERVATION ............................................................................................................ 23
10 - ACCESSOIRES LIVRES AVEC LE SWIFTPET .............................................................. 23
11 - INFORMATIONS CONCERNANT LA COMMANDE ....................................................... 24
12 - PIÉCES DE RECHANGE ................................................................................................ 24
SSWWIIFFTTPPEETT
18
1 - INTRODUCTION
Le pipetteur SWIFTPET est un dispositif qui sert ∫ mesurer des liquides, ∫ l’aide des
pipettes de titrage. Il peut ˘tre utilisé avec tous les types de pipettes, de capacité de 1 ml,
jusqu’∫ 100 ml, en verre ou en mati¯re plastique.
Le pipetteur SWIFTPET est équipé de filtres ∫ membrane interchangeable, qui prot¯gent
le mécanisme du dispositif contre le salissement par des vapeurs de liquides prélevés.
Un syst¯me ∫ deux étages, de réglage de vitesse du prél¯vement, permet un rapide
dosage des volumes considérés, de m˘me que la mesure précise des volumes faibles.
Sur le dessin 1 sont présentés les éléments extérieurs du pipetteur avec la description des
matériaux utilisés.
2 - RECOMMANDATIONS CONCERNANT LA SÉCURITÉ DU TRAVAIL
Chaque utilisateur, avant de commencer le travail avec le pipetteur SWIFTPET doit
prendre connaissance du présent mode d’utlisation.
L’utilisation du dispositif, non-conforme au mode d’emploi, peut provoquer son en-
dommagement.
Le dispositif doit ˘tre mis en état seulement par un service autorisé. Sinon, le pro-
ducteur décline toute responsabilité concernant la garantie.
• Pendant le travail avec le pipetteur SWIFTPET il est nécessaire d’observer les consignes
générales de la sécurité du travail, concernant les dangers liés au travail de laboratoire.
Il faut utiliser des v˘tements de protection, des gants de protection et des lunettes.
• Le pipetteur SWIFTPET doit ˘tre utilisé uniquement pour le dosage des liquides dans des
conditions recommandées par le producteur, restreintes du point de vue de la résistence
chimique et mécanique du dispositif, de m˘me que du point de vue de la sécurité de
l’utilisateur.
•
Il est interdit d’utiliser le pipetteur dans un milieu qui risque de provoquer une déflagration.
•
Il faut se conformer aux informations et aux recommandations des producteurs des réactifs.
• On peut utiliser uniquement des accessoires et des pi¯ces de rechange originaux,
recommandés par le producteur. Dans le cas de doute il faut contacter le producteur
ou le distributeur local.
• Pour le chargement de l’accumulateur il faut utiliser uniquement un chargeur original.
• Dans le cas où le fonctionnement du pipetteur n’est pas normal il faut cesser de l’utiliser.
Il faut nettoyer le dispositif conformément au mode d’emploi et/ou le remettre dans un
service apr¯s-vente.
• Dans le cas d’un endommagement mécanique du support, le dispositif doit ˘tre immédia-
tement remis dans un service autorisé.
• Pendant le travail il ne faut pas agir avec de la force.
FRANÇAIS

19
3 - RESTRICTIONS CONCERNANT L’UTILISATION
• Le pipetteur SWIFTPET ne peut pas ˘tre utilisé pour le dosage de substances dont les
vapeurs détériorent les mati¯res plastiques, telles que: PP, SI, ABS, EPDM, POM.
•
Il est interdit d’utiliser le pipetteur dans un milieu qui risque de provoquer une déflagration.
• Il ne faut pas doser des liquides inflammables – et surtout des substances dont le point
d’inflammabilité se situe au-dessous de 0 °C (éther, acétone).
• Il ne faut pas utiliser le dispositif pour le dosage d’acides dont la concentration dépasse
1 mole.
• Il ne faut pas utiliser le dispositif pour le dosage de solutions, si leur température dépasse
50 °C.
• Le pipetteur peut travailler dans une plage de température de +10 °C ∫ +35 °C.
4 - MISE EN SERVICE DU SWIFTPET
Avant de commencer le travail il est nécessaire de vérifier si l’accumulateur qui se trouve
∫ l’intérieur du pipetteur, n’est pas déchargé. Pour ceci il suffit d’appuyer le bouton-poussoir
de prise (dessin 1A) et observer l’indicateur du niveau “trop bas” de la charge de l’accumu-
lateur (dessin 1E). Si l’indicateur ne s’allume pas, ceci indique que le pipetteur est pr˘t
∫ l’emploi.
Si l’indicateur s’allume il faut charger l’accumulateur (ce qui est recommandé) ou bien
brancher le chargeur et utiliser le pipetteur pendant la charge de l’accumulateur. Le pipetteur
SWIFTPET peut ˘tre chargé uniquement ∫ l’aide d’un chargeur original.
La tension de réseau doit ˘tre conforme ∫ celle mentionnée sur le chargeur.
La charge doit ˘tre effectuée conformément aux prescriptions du point 8 de l’instruction.
5 - PRISE ET REFOULEMENT DU LI UIDE
Fixation de la pipette
Avant de fixer la pipette il faut vérifier si elle n’est pas endommagée, ou fragmentée
et ne poss¯de pas d’ar˘tes vives ∫ l’endroit de fixation. Il faut vérifier si l’endoit
de fixa
tion est sec.
Saisir la pipette le plus pr¯s de sa partie supérieure et l’introduire avec précaution dans
la pince pour pipette, jusqu’a une résistance perceptible (dessin 2A). Il faut procéder avec
precaution pour ne pas endommager les pipettes et éviter de se blesser. Une pipette bien
fixée et étanchée dans la pince ne doit pas basculer sur les côtés.
Apr¯s la fixation de la pipette il faut tenir le dispositif de telle façon, que la pipette reste dans
une position verticale. La forme du support du dispositif permet de remettre le pipetteur
∫ côté avec une pipette fixée. Il n’est pas recommandé de laisser le dispositif avec une
pipette fixée, apr¯s son utilisation, pour une période plus longue, p.ex. pour la nuit ou
le week-end.
Il ne faut pas poser le pipetteur sur le côté quand il contient encore un liquide.
SSWWIIFFTTPPEETT
20
Le remplissage de la pipette
Avant de commencer la prise du liquide il faut régler le niveau de la vitesse de l’aspiration
∫ l’aide du sélecteur HIGH/LOW (dessin 1C):
• position HIGH - aspiration rapide
• position LOW - aspiration lente
Il est recommandé d’utiliser la position LOW pour les pipettes dont le volume ne dépasse
pas 5 ml, est la position HIGH pour des pipettes ayant un volume plus grand. Tenant
le pipetteur de telle façon que la pipette se trouve dans une position verticale, immerger
le bout de la pipette dans le liquide aspiré (dessin 2B), et appuyer délicatement sur le bou-
ton-poussoir de prise. La vitesse de remplissage de la pipette dépend de l’enfoncement
du bouton-poussoir. Plus il sera enfoncé, plus vite le liquide sera aspiré dans la pipette.
Il est recommandé d’aspirer un peu plus de liquide que le volume demandé (ménisque
au dessus du marqueur du volume désiré), en réglant la vitesse d’aspiration, surtout dans
la phase finale du remplissage, de façon ∫ ne pas obtenir le trop plein.
Réglage du volume
Apr¯s avoir rempli la pipette il faut sécher son bout avec un buvard qui ne laisse pas d’im-
puretés, et enlever les restes de la solution de la surface extérieure de la pipette.
Ensuite pour obtenir le volume exact du liquide il faut appuyer délicatement le bouton-
poussoir du vidange (dessin 2C), et refouler l’excédent du liquide, jusqu’au moment
où le ménisque de la solution ne corresponde avec la ligne de l’échelle.
La vidange de la pipette
En tenant le récipient incliné, appuyer le bout de la pipette contre la paroi du récipient
et appuyer délicatement le bouton-poussoir du refoulement (dessin 2C). L’intensité
du refoulement peut ˘tre réglé par l’enfoncement du bouton-poussoir. Plus profondément
ce bouton est enfoncé, plus l’écoulement du liquide de la pipette est rapide.
Le pipetteur SWIFTPET est doté de deux modes de refoulement. On peut choisir le mode
∫ l’aide du sélecteur GRAV/BLOW (dessin 1D).
• position GRAV – le refoulement est réalisé dans le mode gravitationnel, le liquide s’écoule
de la pipette sous son propre poids. La vitesse de l’écoulement est réglée par la profon-
deur d’enfoncement du bouton-poussoir.
• position BLOW – le refoulement est réalisé dans le mode gravitationnel, comme dans le
mode GRAV, mais apr¯s l’enfoncement du bouton-poussoir jusqu’au fond une petite
pompe se met en marche et la pipette est vidé rapidement grâce au soufflage.
6 - ÉLIMINATION DES DÉFECTUOSITÉS
Si pendant le travail vous constatez un fonctionnement incorrect du pipetteur vérifiez
la cause et éliminez le défaut.
FRANÇAIS

21
Dans le cas où l’exécution des procédures sus-mentionnées ne permet pas le fonction-
nement correct du pipetteur il faut envoyer le dispositif au service HTL.
Vérifier si la fixation de la pipette
et le joint ne sont pas endomma-
gés mécaniquement – si oui,
il faut remplacer la pi¯ce défec-
tueuse.
Endommagée – la pince
(fixation) de la pipette
et/ou le joint du raccord.
(dessin 1G, dessin 1K).
Vérifier si toutes les pi¯ces sont
∫ leur place et si elles ont été cor-
rectement montées.
La pince de la pipette,
le filtre ou le joint ont été
incorrectement montés
Vérifier si la pipette a été correc-
tement fixée.
La pipette est mal fixée
Vérifier si la pipette n’est pas
endommagé – cassures, ébré-
chements – si oui, remplacer
la pipette.
La pipette endommagéeLe liquide s’écoule
(les boutons-poussoirs de
la prise et du refoulement
ne sont pas enfoncés)
Vérifier si la fixation de la pipette
et le joint ne sont pas endomma-
gés mécaniquement – si oui, il faut
remplacer la pi¯ce défectueuse.
La pince (fixation) de la
pipette et/ou le joint du
raccord sont endomma-
gés. (dessin 1K)
Vérifier si le clapet n’a pas été
inondé, Si le clapet est humide
il faut le rincer le et sécher.
Vérifier si le clapet n’est pas blo-
qué ou déplacé par une pipette
trop enfoncée. Si c’est le cas,
essayer de le replacer dans
la position correcte.
Le clapet anti-retour est
bloqué. (dessin 1 )
Enlever la pipette, Démonter la
pince de la pipette, Vérifier l’état
du filtre. S’il est encrassé il faut le
remplacer.
Le filtre est bloqué par des
impuretés. (dessin 1H)
La pompe fonction-ne, le
pipetteur n’aspire pas de
li-quide ou l’aspire tr¯s
lentement
Si la pince est endommagée,
il faut la remplacer.
La pince fixant la pipette
est endommagée
Enlever la pipette de la pince.
Démonter la pince et vérifier
si elle n’est pas endomma-gée
mécaniquement. Nettoyer, laver
et sécher la pince.
La pince de la pipette est
sale ou humide.(dessin 1G)
La pipette tombe (la force
fixant la pipette est trop
faible), elle bascule sur les
côtés
Procédure ∫ utiliserCause possibleLe probl¯me
SSWWIIFFTTPPEETT
22
Avant l’envoi, le pipetteur doit ˘tre nettoyé et désinfecté. Il faut y joindre une spécification
détaillée des solutions utilisées et une information concernant le type du laboratoire dans
lequel le dispositif était utilisé. (www.htl.com.pl)
7 - REMPLACEMENT DU FILTRE ET NETTOYAGE DES CLAPETS
Remarque:
Pendant le démontage du pipetteur il faut respecter les recommadations concernant
la sécurité du travail, mentionnées au chapitre 2.
Le remplacement du filtre est nécessaire dans le cas d’une diminution de l’efficacité de la
prise (aspiration) du liquide. C’est l’encrassement du filtre – résultat de l’utilisation de
longue durée – qui peut ˘tre la cause d’une telle réduction.
La procédure est présentée sur le (dessin 3).
• Enlever la pipette.
• Dévisser le capot de fixation de la pipette (dessin 3A).
• Enlever le filtre ∫ membrane (dessin 3A) et la fixation de la pipette (dessin 3B).
• La fixation et le clapet anti-retour doivent ˘tre soigneusement lavés ∫ l’aide d’une pissette
(dessin 3C).
• Souffler le liquide qui se trouve dans la fixation et la sécher.
• Monter un nouveau filtre ∫ membrane (dessin 3D) et procéder au montage de l’ensemble
dans le sens inverse.
8 - CHARGEMENT DE L’ACCUMULATEUR ÉLÉCTRI UE
Le pipetteur SWIFTPET poss¯de une signalisation de décharge de l’accumulateur.
Si, apr¯s avoir appuyé sur le bouton-poussoir de la prise, le signal de contrôle s’allume
(dessin 1E) ceci veut dire que l’accumulateur est déchargé et qu’il est nécessaire
de le recharger.
Remarque:
Le pipetteur SWIFTPET peut ˘tre chargé seulement ∫ l’aide d’un chargeur original.
La tension dans le réseau doit ˘tre conforme ∫ celle marquée sur le chargeur.
L’utilisation d’un chargeur différent peut provoquer l’endommagement du pipetteur
ou la destruction des accumulateurs.
La charge de l’accumulateur de pipetteur SWIFTPET se fait sous contrôle d’un syst¯me
temporaire. Quand l’accumulateur est chargé, le syst¯me de charge se déclanche automa-
tiquement, ce qui est signalé par une lampe de contrôle (dessin 1E). Elle reste allumée
en permanence.
Charge:
1. Température de la charge: 10 °C ∫ 35 °C
2. La charge s’effectue ∫ l’aide d’un chargeur, accessoire de chaque pipetteur. La charge
est signalée par une lampe de contrôle clignotante.
FRANÇAIS

23
3. Temps de charge compl¯te: 11 - 14 heures
4. D¯s que la charge est finie la lampe de contrôle cesse de clignoter et reste allumée en
permanence.
Le pipetteur est muni d’un accumulateur du type NiMH, d’une capacité de 1700 mAh.
La longévité de l’accumulateur est d’environ 1000 cycles de charge ∫ condition que son
exploitation soit correcte. Il n’y a pas de danger de surcharge de l’accumulateur quand
toutes les recommandations du producteur sont respectées.
Remarque:
Il ne faut pas interrompre la charge. Si cela arrivait on pourrait recharger l’accumula-
teur, uniquement apr¯s sa décharge compl¯te.
9 - CONSERVATION
Nettoyage
Le pipetteur SWIFTPET n’a pas besoin de conservation. Les surfaces externes du dispositif
peuvent ˘tre nettoyées avec un tampon imbibé d’alcool isopropylique.
Le capot et la fixation de la pipette, avec le clapet anti-retour peuvent ˘tre autoclavés
pendant 20 minutes, ∫ la température de 121 °C. Les filtres faisant partie du lot peuvent ˘tre
stérilisés ∫ la température de 121 °C, pendant 15 minutes maximum.
Conservation
Le pipetteur SWIFTPET doit ˘tre conservé dans un endroit sec. La température de conser-
vation: -20 °C ∫ +50 °C.
Pendant l’arr˘t de travail le pipetteur doit rester suspendu sur un support (accessoire).
On peut accrocher ce support au mur
∫
l’aide d’un crochet, ou le coller au mur avec le ruban
adhésif qui se trouve sur le support. La surface du mur doit ˘tre lisse, propre et dégraissée.
Avant le collage il faut enlever le film protecteur qui recouvre les rubans adhésifs.
Remarque:
Il ne faut pas conserver le pipetteur avec la pipette remplie.
10 - ACCESSOIRES LIVRES AVEC LE SWIFTPET
L’emsemble de SWIFTPET comprend les éléments suivants:
• pipetteur
• chargeur
• support du pipetteur
• deux filtres ∫ membrane 0,2 µm
• instruction
SSWWIIFFTTPPEETT
24
11 - INFORMATIONS CONCERNANT LA COMMANDE
Les versions sous-mentionnées du pipetteur SWIFTPET diff¯rent par le type de chargeur
faisant partie du lot - conformément aux différentes tensions.
Version Tension Numéro de catalogue
Europe Continentale 220 V / 50 Hz 0301
USA 120 V / 60 Hz 0302
Angleterre/Irlande 230 V / 50 Hz 0303
Australie 240 V / 50 Hz 0304
12 - PIÈCES DE RECHANGE
Position selon Dénomination Numéro de catalogue Nombre de pi¯ces
le dessin 1 de la pi¯ce dans l’emballage
FCapot de fixation 9022 1
GPince de la pipette 9021 1
HFiltre ∫ membrane 0,2 µm 9023 1
Filtre ∫ membrane 0,45 µm 9024 1
Koint du raccord 9025 1
L
Europe Continentale 220 V / 50 Hz
9015 1
Chargeurdu USA 120 V / 60 Hz 9016 1
type: Angleterre/Irlande 230 V / 50 Hz 9017 1
Australie 240 V / 50 Hz 9018 1
FRANÇAIS

25
CONTENIDO
1 - INTRODUCCIÓN ............................................................................................................ 26
2 - RECOMENDACIONES RELATIVAS A LA SEGURIDAD LABORAL ............................... 26
3 - LIMITACIONES DE USO ................................................................................................ 27
4 - PUESTA EN FUNCIONAMIENTO DEL SWIFTPET ........................................................ 27
5 - TOMA Y DISPENSADO DE LÍQUIDOS .......................................................................... 27
6 - SOLUCION DE PROBLEMAS ........................................................................................ 28
7 - CAMBIO DE FILTRO Y LIMPIEZA DE VALVULA ............................................................ 30
8 - CARGA DE LA BATERÍA ................................................................................................ 30
9 - MANTENIMIENTO .......................................................................................................... 31
10 - CONTENIDO DEL KIT .................................................................................................... 31
11 - INFORMACIÓN PARA PEDIDOS ................................................................................... 32
12 - REPUESTOS .................................................................................................................. 32
SSWWIIFFTTPPEETT
26
1 - INTRODUCCIÓN
El instrumento SWIFTPET está un aparato destinado a la medición del volumen de líquidos
mediante pipetas graduadas, y puede emplearse en combinación con todo tipo de pipetas
desde 1 ml hasta 100 ml, tanto de vidrio como plásticas.
El
instrumento
SWIFTPET está dotado de dos membranas filtrantes, de recambio, que pro-
tegen
su mecanismo de la acción de los vapores procedentes de los líquidos con los
cuales se trabaja.
El sistema de regulación de la velocidad de succión, de dos niveles, permite una muy rápida
dosificación de grandes porciones, así como una muy precisa medición de dosis pequeñas.
En la Fig. 1 se muestran las piezas exteriores del instrumento, junto con una descripción
de los materiales empleados.
2 - RECOMENDACIONES RELATIVAS A LA SEGURIDAD LABORAL
Antes de iniciar el trabajo con el instrumento SWIFTPET, el usuario debe leer atenta-
mente las presentes instrucciones de uso.
Un uso inadecuado del instrumento puede ocasionar una avería del mismo.
Toda reparación del instrumento debe ser realizada únicamente por un establecimiento
de servicio autorizado. En caso contrario, el fabricante declina cualquier tipo de
responsabilidad que pudiera derivarse de los derechos de garantía.
• Durante el trabajo con el instrumento SWIFTPET deben respetarse las normas generales
de seguridad laboral relativas a los riesgos del trabajo en un laboratorio. Debe usarse
vestimenta de protección, así como gafas y guantes de protección.
• El instrumento SWIFTPET debe emplearse únicamente para la medición de líquidos en
las condiciones recomendadas por el fabricante, restringidas en función de la resistencia
química y mecánica del mismo, así como de la seguridad del usuario.
• Queda prohibido el uso del instrumento en condiciones de riesgo de explosión.
• Deben tenerse en cuenta en todo momento las informaciones y recomendaciones proce-
dentes de los fabricantes de los reactivos.
• Deben emplearse únicamente piezas de recambio originales y los accesorios recomen-
dados por el fabricante. En caso de duda deberá contactarse con el fabricante o distri-
buidor local.
•
La carga de la batería debe realizarse sólo y únicamente con el cargador original sumin-
istrado
por fabricante.
•
En caso de un funcionamiento inadecuado del instrumento deberá interrumpirse el trabajo,
limpiar el instrumento de acuerdo con las instrucciones de uso y/o recurrir a un establec-
imiento de servicio autorizado para realizar la reparación.
• En caso de un daño mecánico de la carcaza del instrumento deberá acudirse inmediata-
mente a un establecimiento autorizado para realizar la reparación.
• Durante el trabajo no debe emplearse una fuerza excesiva.
ESPAπOL

27
3 - LIMITACIONES DE USO
• El instrumento SWIFTPET no debe emplearse para la medición de sustancias cuyos
vapores dañen las fibras de PP, SI, ABS, EPDM o POM.
• El instrumento no debe emplearse en condiciones de riesgo de explosión.
• No debe emplearse para la medición de líquidos inflamables, particularmente aquellas
sustancias cuya temperatura de ignición se sitúa por debajo de 0 °C (éter, acetona).
• No debe emplearse para la toma de ácidos de concentración superior a 1mol.
• No debe emplearse para la toma de soluciones a temperatura superior a 50 °C.
• El instrumento puede emplearse en una temperatura de +10 °C a +35 °C.
4 - PUESTA EN FUNCIONAMIENTO DEL SWIFTPET
Antes de iniciar el trabajo compruebe que la batería situada en el interior del instrumento
esté cargada. Con este fin oprima el botón de toma (il. 1A) y observe si se enciende el indi-
cador de bajo nivel de batería (il. 1E). Si el indicador no se enciende, el instrumento está
preparado para su uso.
En caso de que se encendiera el indicador de bajo nivel de batería, deberá conectar el
instrumento cargador y dejarlo en carga (recomendable). Puede trabajar mientras el instru-
mento se está cargando. Para cargar la batería del SWIFTPET debe emplearse únicamente
un cargador original.
La tensión de la red debe corresponder a la que se indica en el cargador.
La carga debe realizarse de acuerdo con el punto 8 de las presentes instrucciones.
5 - TOMA Y DISPENSADO DE LÍ UIDOS
Montaje de la pipeta
Antes del montaje compruebe que la pipeta no está dañada y no muestra roturas
ni bordes cortantes en la parte superior. Asegúrese de que la parte superior esté seca.
Tome la pipeta por la parte más cercana posible a su extremo superior, e introdúzcala con
cuidado en la boquilla del instrumento hasta notar resistencia (il.2A). No se debe emplear
una fuerza excesiva, ya que las pipetas finas podrían dañarse fácilmente, con el sub-
siguiente riesgo de provocar heridas. La pipeta, correctamente montada y estancada, no
debe ladearse.
Una vez montada la pipeta, el instrumento debe sujetarse de tal forma que la pipeta se
encuentre
siempre en posición vertical. La forma de la carcaza del instrumento permite
apoyarlo una vez introducida la pipeta, sin que sea necesario estar sujetándolo todo el
tiempo. No obstante, se recomienda que, una vez concluido el trabajo, no se deje aban-
donado el instrumento con la pipeta montada durante mucho tiempo, por ejemplo, durante
una noche o un fin de semana.
El instrumento no debe apoyarse cuando la pipeta contiene líquido.
SSWWIIFFTTPPEETT
28
Llenado de pipetas
Antes de iniciar la toma de líquidos hay que seleccionar la velocidad de succión con el
selector HIGH/LOW (il. 1C):
• posición HIGH – succión rápida
• posición LOW – succión lenta
Para las pipetas de hasta 5 ml se recomienda seleccionar la posición LOW, mientras que
para pipetas mayores a 5 ml se recomienda seleccionar la posición HIGH. Sujetando el
instrumento de manera que la pipeta se encuentre en posición vertical, sumergir la punta
de la misma en el líquido que va a tomarse (il. 2B), y apretar cuidadosamente el botón de
succión. La velocidad de llenado de la pipeta dependerá de la posición hasta donde se
presione el botón: cuanto más profundamente se presione el mismo, mayor resultará la
velocidad de toma del líquido.
Se recomienda tomar una cantidad de líquido ligeramente superior a la que se pretende
obtener (menisco por encima de la marca del volumen deseado), regulando la velocidad
de toma, sobre todo en la fase final del llenado, para evitar el desbordamiento.
Selección de la cantidad
Una vez llena la pipeta debe secarse su extremo con un papel absorbente, que no deje
impurezas, con el fin de eliminar los restos de líquido de la superficie exterior de
la misma. A continuación deberá que seleccionarse cuidadosamente el volumen de líquido
deseado. Apretando suavemente el botón de dispensado (il. 2C), expulsar de la pipeta
la cantidad sobrante hasta que el menisco del líquido se sitúe exactamente en la marca
que indica el volumen deseado.
Vaciado de la pipeta
Sujetando el recipiente en posición inclinada, hay que acercar la punta de la pipeta a la
pared del mismo y apretar suavemente el botón de dispensado (il. 2C). La velocidad de
dispensado puede regularse mediante la presión del botón de dispensación: cuanto más
se presiona el mismo, más rápidamente se expele el líquido de la pipeta.
El SWIFTPET dispone de dos modos de dispensación seleccionables mediante el selector
GRAV/BLOW (il. 1D).
• posición GRAV – el dispensado se realiza por gravitación: el líquido abandona la pipeta
por su propio peso. La velocidad de flujo se regula según la presión ejercida en el botón
de dispensación.
• posición BLOW – el dispensado se realiza también por gravitación, al igual que en el
modo
GRAV, pero una vez apretado el botón de dispensación hasta el fondo, se acciona
una bomba, ocasionando
un vaciado rápido por presión de aire.
6 - SOLUCION DE PROBLEMAS
Si durante la operación del instrumento nota un funcionamiento inadecuado del mismo,
compruebe la causa y elimine el problema.
ESPAπOL

29
Asegúrese de que la boquilla de
conexión y la junta de acople
no presentan daños mecánicos.
Si fuera así, reemplace la parte
dañada.
Daños en la boquilla
de conexión y/o en la junta
de acople. (il. 1G, il. 1K)
Compruebe que están todas las
partes y que se encuentran cor-
rectamente montadas.
La boquilla de conexión,
filtro o junta de acople
incorrectamente montados.
Compruebe que la pipeta está cor-
rectamente montada en la boquilla.
Pipeta mal montada.
Asegúrese de que la pipeta
en uso no está dañada (roturas,
melladuras). Si fuera así, reem-
place la pipeta.
Pipeta dañada.El líquido se sale de la
pipeta (los botones de
succión y dispensado
no están accionados)
Asegúrese de que la boquilla de
conexión y la junta de acople
no presentan daños mecánicos.
Si fuera así, reemplace la parte
dañada.
Daños en la boquilla de
conexión y/o en la junta
de acople. (il. 1K)
Compruebe que la válvula no ha
sido inundada.
Si está mojada, lávela con agua y
séquela.
Compruebe que la válvula no ha
resultado bloqueada o desplaza-
da al introducirse la pipeta con
excesiva fuerza. Si es así, intente
colocarla en posición adecuada.
Válvula bloqueada. (il. 1 )
Extraiga la pipeta de la boquilla.
Desmonte el cono.
Extraiga el filtro y compruebe su
estado. Cuando esté muy sucio
reemplácelo.
Filtro gastado. (il. 1H)
La bomba de aire funciona,
pero el instrumento no
extrae el líquido o lo extrae
muy lentamente.
Si la boquilla de conexión está
dañada, reemplácela.
Boquilla de conexión
dañada.
Extraiga la pipeta de la boquilla.
Desmonte el cono y asegúrese
de que la boquilla de conexión
no presenta daños mecánicos.
Limpie, lave y seque boquilla.
Boquilla de conexión para
pipetas sucia o mojada.
(il. 1G)
La pipeta se desconecta
(fuerza de sujeción
insuficiente), o se ladea
fuertemente.
SoluciónPosible causaProblema
SSWWIIFFTTPPEETT
30
En el caso de que procediendo según estas indicaciones no se consiguiera hacer fun-
cionar correctamente el instrumento, deberá enviarse el mismo al servicio técnico de HTL.
Antes de realizar el envío, el instrumento debe quedar limpio y esterilizado y se le adjuntará
un formulario (www.htl.com.pl) en el que se especificarán las soluciones químicas con las
que se ha trabajado y el tipo de laboratorio donde ha sido utilizado el mismo.
7 - CAMBIO DE FILTRO Y LIMPIEZA DE VALVULA
Atención:
Durante el desmontaje del instrumento deben respetarse los consejos relativos a la
seguridad laboral, según se indica en el capítulo 2.
Es necesario cambiar el filtro en caso de que se constatara una disminución en la efectividad
de la toma. Esto puede estar causado directamente por la acumulación de impurezas en el
filtro tras un uso prolongado.
La ilustración 3 representa la manera de proceder en este caso.
• Retire la pipeta.
• Desenrosque el cono que fija la boquilla de la pipeta (il. 3A).
• Retire el filtro de membrana (il. 3A) y la boquilla de conexión (il. 3B).
•
Lave cuidadosamente, con un pulverizador, boquilla con su válvula de retención (il. 3C).
• Elimine el líquido de la boquilla soplando y déjela hasta que esté completamente seca.
• Instale una nueva membrana filtrante (il. 3D) y monte el instrumento siguiendo el orden
inverso que al desmontaje.
8 - CARGA DE LA BATERÍA
El SWIFTPET posee un indicador de batería descargada. Si, con el botón de succión
accionado, se encendiera la luz del indicador (il. 1E), la batería está descargada y deberá
recargarse.
Atención:
Para recargar la batería del SWIFTPET debe usarse únicamente el cargador original.
La tensión de la red debe corresponder a la que se indica en el cargador.
El uso de un cargador diferente podría estropear la batería o provocar daños en el in-
strumento.
La carga de la batería del SWIFTPET se lleva a cabo bajo el control de un tempori
zador
que controla todo el proceso. Una vez cargada la batería, el temporizador desconecta
automáticamente el sector de alimentación, lo cual es señalizado por el indicador (il. 1E),
que emite entonces una señal continua.
Carga:
1. La temperatura de carga debe ser de 10 °C a 35 °C.
2.
La carga se realiza mediante el cargador que forma parte del equipo de cada instrumento.
Mientras se está cargando la batería, el indicador de carga emitirá una señal intermitente.
ESPAπOL

31
3. El tiempo de carga completa es de 11 a 14 hs.
4. Cuando la batería queda completamente cargada, el testigo emitirá una señal continua.
El instrumento posee una batería de NiMH y su capacidad es de 1700 mAh.
La vida útil de la batería es de aproximadamente 1.000 ciclos de carga/descarga, bajo un
uso adecuado. Siguiendo todas las indicaciones del fabricante no hay riesgo de sobrecar-
ga de la batería.
Atención:
El proceso de carga no debe interrumpirse. Cuando esto ocurra no se volverá
a cargar la batería antes de que ésta no vuelva a descargarse completamente.
9 - MANTENIMIENTO
Limpieza
El SWIFTPET no requiere de un mantenimiento especial. La partes exteriores pueden
limpiarse con un algodón empapado en alcohol isopropílico.
El cono de protección, la boquilla de conexión y la válvula de retención, pueden esterilizarse
en un autoclave a 121 °C durante 20 minutos. Los filtros suministrados con el instrumento
pueden esterilizarse en un autoclave a 121 °C durante no más de 15 minutos.
Almacenamiento
El SWIFTPET debe guardarse en un lugar seco. La temperatura de almacenamiento es de
-20 °C a +50 °C.
Cuando no se utilice, incluso durante cualquier interrupción del trabajo, el aparato deberá
colgarse en el soporte de pared suministrado con todo el juego.
Este soporte puede fijarse a la pared con un gancho o con cinta autoadhesiva pegada
al soporte. La superficie donde se vaya a fijar el soporte debe ser lisa y estar limpia
y desengrasada. Antes de pegar el soporte con la cinta adhesiva deberá retirarse de ella
la película protectora.
Atención:
El instrumento no debe guardarse con la pipeta llena.
10 - CONTENIDO DEL KIT
El instrumento SWIFTPET se suministra con los siguientes accesorios:
•Cargador de batería
•Soporte de aparato
• Membrana filtrante de 0.2 µm (2 piezas).
• Manual de usuario
SSWWIIFFTTPPEETT
32
11 - INFORMACIÓN PARA PEDIDOS
Las versiones de SWIFTPET que se especifican a continuación se distinguen por el tipo de
cargador suministrado, según la tensión correspondiente en cada caso.
Versión Tensión Número de catálogo
Europa continental 220 V / 50 Hz 0301
EE UU 120 V / 60 Hz 0302
Inglaterra/Irlanda 230 V / 50 Hz 0303
Australia 240 V / 50 Hz 0304
12 - REPUESTOS
Índice Nombre de la pieza Número de catálogo
Número de piezas
según Fig.1 por embalaje
FCono de protección 9022 1
GBoquilla de conexión 9021 1
HMembrana filtrante 0.2 µm 9023 1
Membrana filtrante 0.45 µm 9024 1
Kunta de acople 9025 1
LEuropa continente 220 V / 50 Hz 9015 1
Cargador
EE UU 120 V / 60 Hz 9016 1
Inglaterra/Irlanda 230 V / 50 Hz 9017 1
Australia 240 V / 50 Hz 9018 1
ESPAπOL

33
SPIS TREÂCI
1 - WST¢P ........................................................................................................................... 34
2 - ZALECENIA DOTYCZÑCE BEZPIECZE¡STWA PRACY ............................................... 34
3 - OGRANICZENIE STOSOWANIA .................................................................................... 35
4 - URUCHOMIENIE SWIFTPET ......................................................................................... 35
5 - POBIERANIE I WYDAWANIE CIECZY ........................................................................... 35
6 - USUWANIE USTEREK ................................................................................................... 36
7 - WYMIANA FILTRA I CZYSZCZENIE ZAWORÓW ........................................................... 38
8 - ¸ADOWANIE AKUMULATORA ....................................................................................... 38
9 - KONSERWAC A ............................................................................................................ 39
10 - KOMPLETAC A .............................................................................................................. 39
11 - INFORMAC E O ZAMÓWIENIU ..................................................................................... 40
12 - CZ¢ÂCI ZAMIENNE ....................................................................................................... 40
SSWWIIFFTTPPEETT
34
1 - WST¢P
Pipetor SWIFTPET jest urzàdzeniem przeznaczonym do odmierzania cieczy przy u˝yciu
pipet miarowych i wspó∏pracuje ze wszystkimi rodzajami pipet o pojemnoÊciach od 1 ml do
100 ml, zarówno szklanymi jak i wykonanymi z tworzyw sztucznych.
Pipetor SWIFTPET wyposa˝ony jest w wymienne filtry membranowe, które zabezpieczajà
mechanizm urzàdzenia przed zabrudzeniem oparami pobieranych roztworów.
Dwustopniowy system regulacji pr´dkoÊci pobierania, pozwala na bardzo szybkie dozo-
wanie du˝ych i ma∏ych obj´toÊci cieczy.
Na rys. 1 pokazano zewn´trzne cz´Êci pipetora z opisem zastosowanych materia∏ów.
2 - ZALECENIA DOTYCZÑCE BEZPIECZE¡STWA PRACY
Ka˝dy u˝ytkownik przed rozpocz´ciem pracy z pipetorem SWIFTPET powinien zapoz-
naç si´ dok∏adnie z niniejszà instrukcjà obs∏ugi.
U˝ywanie urzàdzenia niezgodnie z instrukcjà obs∏ugi mo˝e spowodowaç jego uszko-
dzenie.
Urzàdzenie powinno byç serwisowane tylko w autoryzowanym serwisie, w prze-
ciwnym wypadku producent nie ponosi ˝adnej odpowiedzialnoÊci gwarancyjnej.
• Przy pracy z pipetorem SWIFTPET nale˝y przestrzegaç ogólnych przepisów bezpie-
czeƒstwa pracy dotyczàcych zagro˝eƒ zwiàzanych z pracà w laboratorium.
Nale˝y u˝ywaç odzie˝y ochronnej, okularów i r´kawic ochronnych.
• Pipetor SWIFTPET nale˝y stosowaç wy∏àcznie do odmierzania cieczy w warunkach zale-
canych przez producenta, ograniczonych ze wzgl´du na odpornoÊç chemicznà
i mechanicznà urzàdzenia, jak i bezpieczeƒstwo u˝ytkownika.
• Nie wolno u˝ywaç pipetora w atmosferze gro˝àcej wybuchem.
• Nale˝y stosowaç si´ do informacji i zaleceƒ producentów odczynników.
• Nale˝y stosowaç wy∏àcznie oryginalne cz´Êci zamienne i akcesoria zalecane przez pro-
ducenta. W przypadku wàtpliwoÊci nale˝y skontaktowaç si´ z producentem lub lokalnym
dystrybutorem.
• Do ∏adowania akumulatora nale˝y u˝ywaç wy∏àcznie oryginalnej firmowej ∏adowarki.
• W przypadku wystàpienia nieprawid∏owej pracy pipetora nale˝y przerwaç prac´.
Urzàdzenie nale˝y oczyÊciç zgodnie z instrukcjà obs∏ugi i/lub przekazaç do naprawy do
autoryzowanego serwisu.
• W przypadku mechanicznego uszkodzenia obudowy urzàdzenie nale˝y natychmiast
przekazaç do naprawy do autoryzowanego serwisu.
• W czasie pracy nie nale˝y u˝ywaç nadmiernej si∏y.
POLSKI

35
3 - OGRANICZENIE STOSOWANIA
• Pipetora SWIFTPET nie mo˝na stosowaç do odmierzania substancji, których opary
niszczà tworzywa: PP, SI, ABS, EPDM, POM.
• Pipetora nie nale˝y u˝ywaç w atmosferze gro˝àcej wybuchem.
• Nie nale˝y odmierzaç cieczy ∏atwopalnych - a w szczególnoÊci substancji o temperaturze
zap∏onu poni˝ej 0 °C (eter, aceton).
• Nie nale˝y stosowaç do pobierania kwasów o st´˝eniu wi´kszym ni˝ 1 mol.
• Nie nale˝y pobieraç roztworów o temperaturze wi´kszej ni˝ 50 °C.
• Pipetor mo˝e pracowaç w temperaturze od +10 °C do +35 °C.
4 - URUCHOMIENIE SWIFTPET
Przed rozpocz´ciem pracy nale˝y sprawdziç czy akumulator umieszczony wewnàtrz pipetora
nie uleg∏ roz∏adowaniu. W tym celu nale˝y nacisnàç przycisk pobierania (rys.1A)
i obser-
wowaç czy zapali∏ si´ wskaênik niskiego poziomu baterii (rys. E). e˝eli wskaênik
nie zapali∏ si´ to oznacza, ˝e pipetor jest gotowy do pracy.
e˝eli zapali∏ si´ wskaênik niskiego poziomu baterii nale˝y pozostawiç pipetor do na∏a-
dowania (zalecane), lub pod∏àczyç ∏adowark´ i pracowaç w czasie ∏adowania.
Pipetor SWIFTPET mo˝na ∏adowaç tylko oryginalnà ∏adowarkà.
Napi´cie w sieci powinno byç zgodne z oznaczeniem podanym na ∏adowarce.
¸adowanie nale˝y przeprowadziç zgodnie z punktem 8 instrukcji.
5 - POBIERANIE I WYDAWANIE CIECZY
Mocowanie pipety
Przed zamocowaniem pipety sprawdê czy pipeta nie jest uszkodzona, nie ma wykru-
szeƒ i ostrych kraw´dzi w cz´Êci chwytowej. Sprawdê czy cz´Êç chwytowa jest sucha.
Pipet´ nale˝y chwyciç mo˝liwie blisko górnego koƒca i ostro˝nie w∏o˝yç w uchwyt pipety
do wyczuwalnego oporu, (rys. 2A). Nie nale˝y u˝ywaç zbyt du˝ej si∏y ze wzgl´du na
∏atwoÊç uszkodzenia cienkich pipet i niebezpieczeƒstwo skaleczenia. Dobrze zamocowana
i uszczelniona w uchwycie pipeta, nie powinna przechylaç si´ na boki.
Po zamocowaniu pipety urzàdzenie nale˝y trzymaç tak, aby pipeta znajdowa∏a si´
w pozycji pionowej. Kszta∏t obudowy urzàdzenia umo˝liwia od∏o˝enie pipetora z zamoco-
wanà pipetà. Zaleca si´, aby po skoƒczonej pracy nie pozostawiaç urzàdzenia z zamonto-
wanà pipetà na d∏u˝szy okres czasu np. na noc czy na weekend.
Nie nale˝y odk∏adaç pipetora, je˝eli w pipecie znajduje si´ ciecz.
Nape∏nianie pipety
Przed rozpocz´ciem pobierania nale˝y ustawiç poziom pr´dkoÊci prze∏àcznikiem
HIGH/LOW (rys. 1C):
• pozycja HIGH - szybkie pobieranie
• pozycja LOW - wolne pobieranie
SSWWIIFFTTPPEETT
36
Zaleca si´ ustawienie w pozycji LOW dla pipet o pojemnoÊci do 5 ml, a dla pipet
o pojemnoÊci wi´kszej od 5 ml zaleca si´ ustawienie prze∏àcznika w pozycji HIGH.
Trzymajàc pipetor tak, aby pipeta znajdowa∏a si´ w pozycji pionowej nale˝y zanurzyç
koniec pipety w pobieranej cieczy (rys. 2B) i delikatnie nacisnàç przycisk pobierania.
Pr´dkoÊç nape∏niania pipety zale˝y od g∏´bokoÊci wciÊni´cia przycisku pobierania.
Im g∏´biej b´dzie wciÊni´ty przycisk tym szybciej b´dzie pobierana ciecz do pipety.
Zaleca si´ pobieranie nieznacznie wi´kszej iloÊci cieczy ni˝ zamierzono odmierzyç (menisk
powy˝ej znacznika ˝àdanej obj´toÊci), regulujàc pr´dkoÊç pobierania, szczególnie w koƒ-
cowej fazie nape∏niania tak, aby nie dopuÊciç do przepe∏nienia pipety.
Ustawianie obj´toÊci
Po nape∏nieniu pipety nale˝y jej zakoƒczenie osuszyç nie pozostawiajàcà zanieczyszczeƒ
bibu∏à, w celu usuni´cia pozosta∏oÊci roztworu na zewn´trznej powierzchni pipety.
Nast´pnie nale˝y ustawiç dok∏adnie ˝àdanà obj´toÊç cieczy. Delikatnie naciskajàc przycisk
wydawania (rys. 2C), nale˝y wydaç nadmiarowà iloÊç cieczy z pipety a˝ do momentu, w którym
menisk cieczy dok∏adnie pokryje si´ z ˝àdanym znacznikiem obj´toÊci na pipecie.
Opró˝nianie pipety
Trzymajàc naczynie w pozycji pochylonej, koniec pipety nale˝y przy∏o˝yç do Êcianki naczynia
i delikatnie nacisnàç przycisk wydawania (rys. 2C). IntensywnoÊç wydawania mo˝na regu-
lowaç g∏´bokoÊcià wciÊni´cia przycisku wydawania. Im g∏´biej wciÊni´ty jest przycisk tym
wyp∏yw cieczy z pipety jest szybszy.
Pipetor SWIFTPET ma dwa tryby wydawania. Tryb wydawania ustawia si´ przy pomocy
prze∏àcznika GRAV/BLOW (rys. 1D).
• pozycja GRAV - wydawanie realizowane jest w trybie grawitacyjnym, ciecz wyp∏ywa
z pipety pod wp∏ywem w∏asnego ci´˝aru. SzybkoÊç wyp∏ywu reguluje si´ g∏´bokoÊcià
wciÊni´cia przycisku wydawania.
• pozycja BLOW - wydawanie realizowane jest w trybie grawitacyjnym tak jak w trybie
GRAV, natomiast po wciÊni´ciu do koƒca przycisku wydawania, w∏àcza si´ pompka
i realizowane jest szybkie opró˝nianie pipety z wydmuchem.
Uwaga:
Ze wzgl´du na w∏aÊciwoÊci pipet miarowych pipeta przy wydawaniu grawitacyjnym
nie jest opró˝niana ca∏kowicie.
6 - USUWANIE USTEREK
eÊli w czasie pracy stwierdzisz nieprawid∏owe dzia∏anie pipetora sprawdê przyczyn´
i usuƒ usterk´.
POLSKI
Table of contents
Languages:
Other HTL Laboratory Equipment manuals

HTL
HTL OPTIPETTE OP8-10 User manual

HTL
HTL HTL-SIM User manual

HTL
HTL DISCOVERY Comfort DV8-10 User manual

HTL
HTL DISCOVERY PRO Series User manual

HTL
HTL DISCOVERY Comfort DV2 User manual

HTL
HTL DISCOVERY Comfort DV8-10 User manual

HTL
HTL Discovery Pro User manual

HTL
HTL SWIFTPET + User manual

HTL
HTL SWIFTPET PRO User manual

HTL
HTL CLINIPET+ User manual