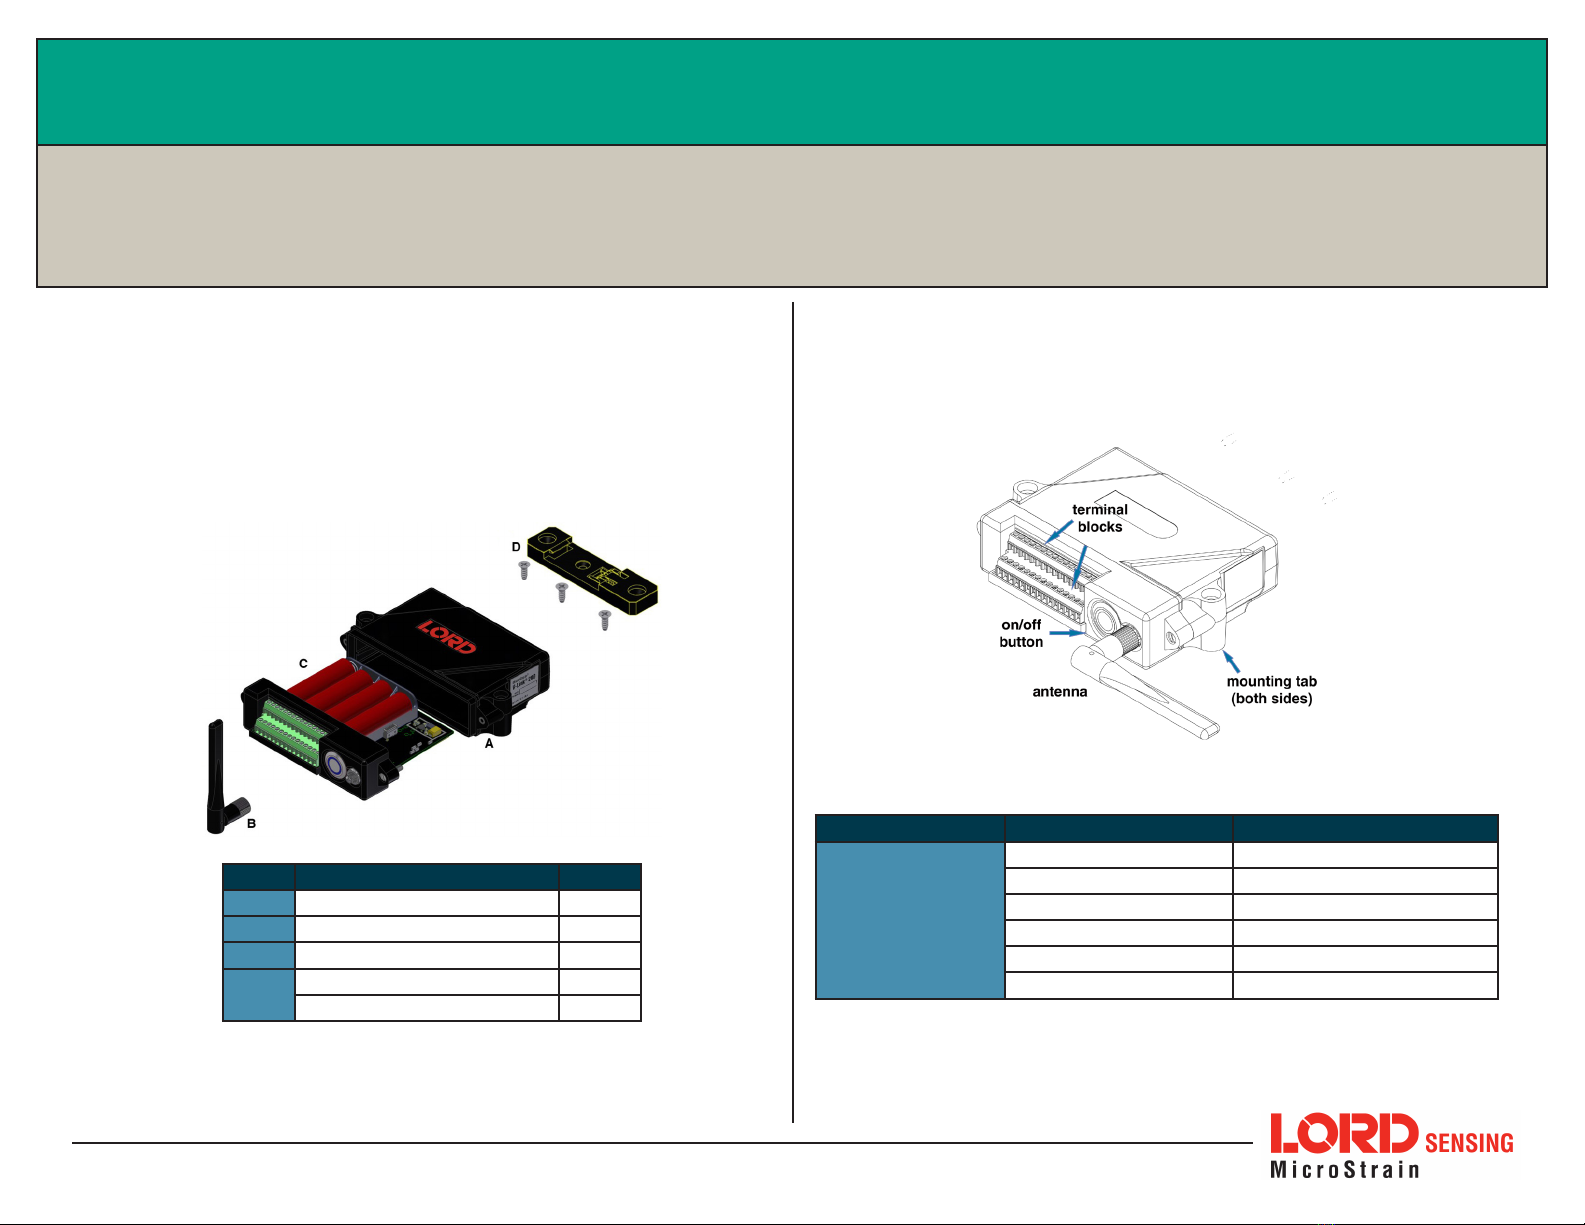
TC-Link-200 Quick Start Guide
LORD Corporation MicroStrain®Sensing Systems
459 Hurricane Lane, Suite 102 Williston, VT 05495 USA
Phone: 802-862-6629
Copyright © 2018 LORD Corporation
Document XXXX-XXXX Revision X. Subject to change without notice. www.microstrain.com
12 Radio Specifications
The TC-Link-200 employs a 2.4GHz IEEE 802.15.4- compliant radio
transceiver for wireless communication. The radio is a direct-sequence spread
spectrum radio and can be configured to operate on 16 separate frequencies
ranging from 2.405 GHz to 2.480 GHz. Following the 802.15.4 standard, these
frequencies are aliased as channels 11 through 26. For all newly manufactured
nodes, the default setting is 2.425 GHz (channel 15).
TC-Link-200
FCC ID: XJQMSLINK0012
IC ID: 8505A-MSLINK0012
This device complies with Part 15 of the United States FCC Rules, and
Industry Canada’s license-exempt RSSs. Operation is subject to the following
two conditions: 1) This device may not cause interference, and
2) This device must accept any interference, including interference that may
cause undesired operation of the device. Changes or modifications, including
antenna changes not expressly approved by LORD Corporation could void
the user’s authority to operate the equipment.
Cet appareil est conforme à la Partie 15 des Règles de la FCC des États-
Unis et aux RSSS exempts de licence d’Industrie Canada. Le fonctionnement
est soumis aux deux conditions suivantes: 1) Cet appareil ne doit pas
causer d’interférences et 2) Cet appareil doit accepter toute interférence, y
compris les interférences pouvant entraîner un fonctionnement indésirable
de l’appareil. Les changements ou modifications, y compris les changements
d’antenne non expressément approuvés par LORD Corporation, pourraient
annuler l’autorisation de l’utilisateur d’utiliser l’équipement.
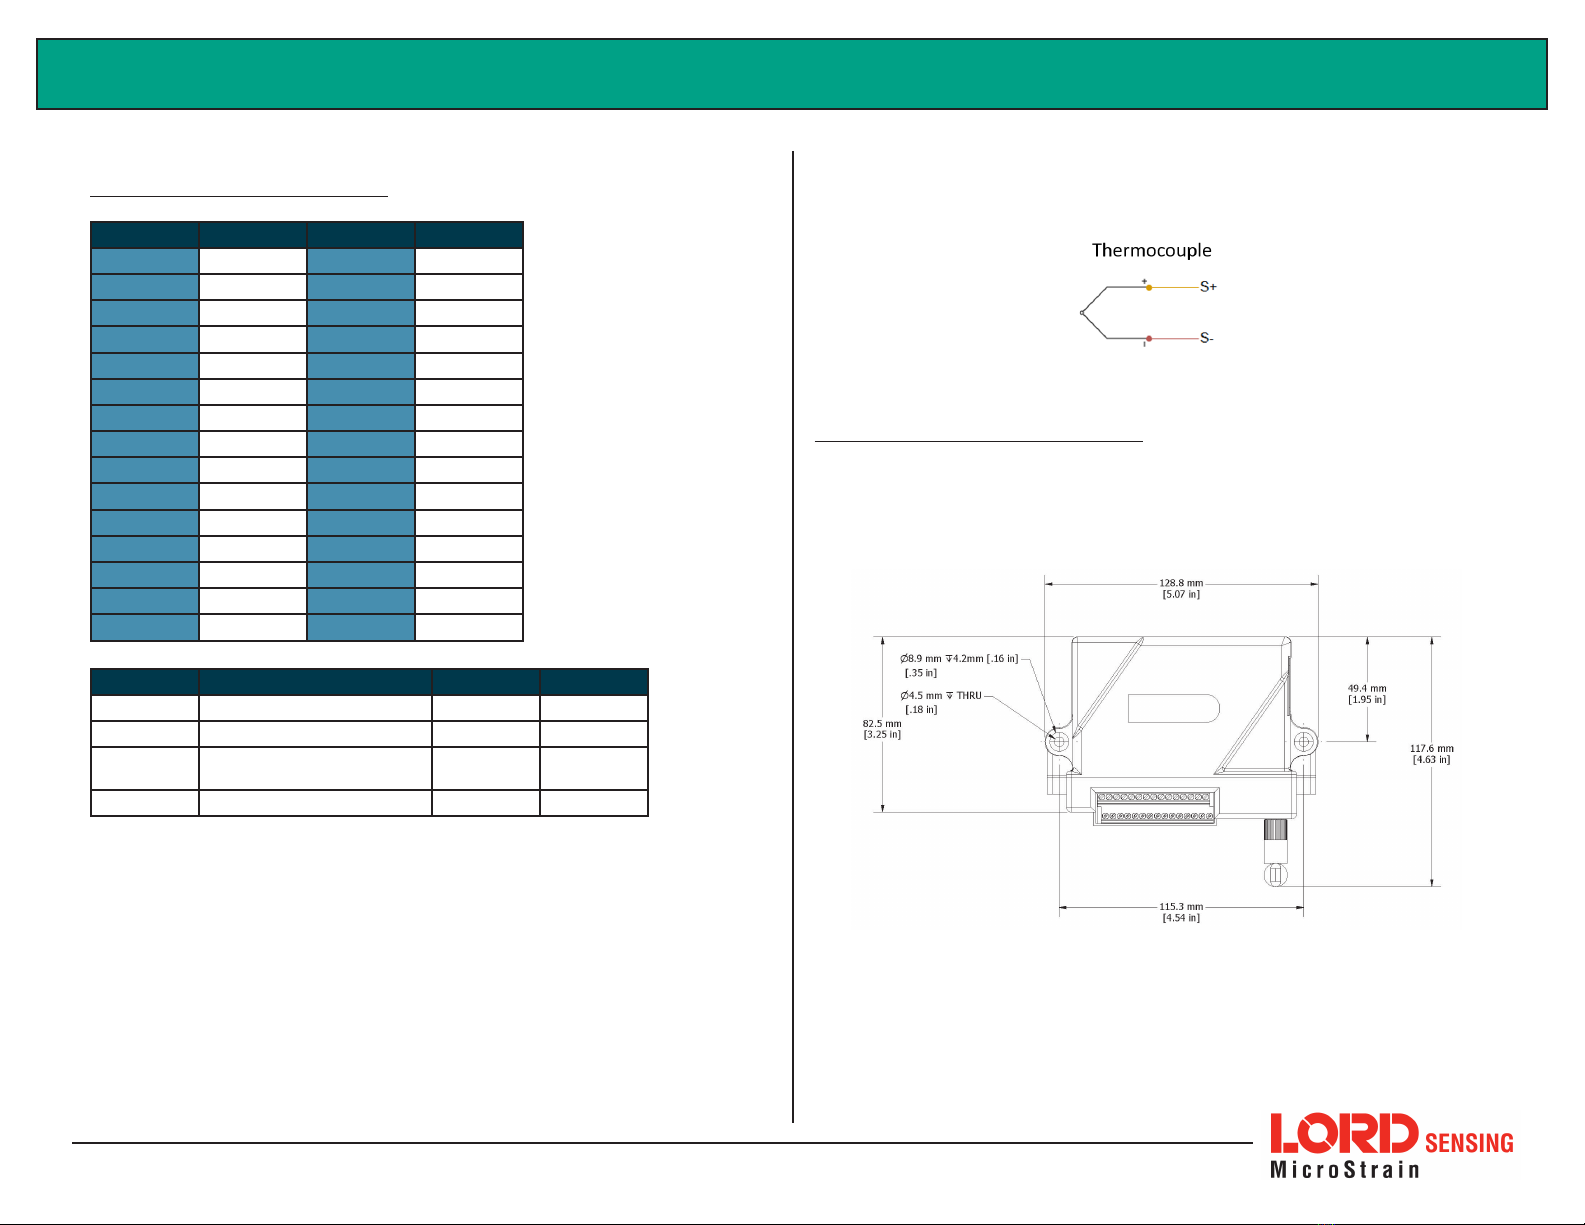
11. Power Supply
Apply only the input voltage range specified for the TC-Link-200. Connect
to a power source that is near the device, is accessible, and adheres to all
national wiring standards. Compliance with wiring standards is assumed in
the installation of the power source and includes protection against excessive
currents, short circuits, and ground faults. Failure to do so could result in
personal injury and permanent damage to the device.