10 | LP Morgan Installation Instructions
LP Morgan Galleria Curve Manual
1. The assembled screen is placed on the floor, arc uppermost and must
be supported at the centre of the frame.
2. Two (or three) persons are required to assemble the frame and insert
the fabric.
3. Unroll a short length of fabric and align the fabric on the back of
the frame.
4. Follow the sequence and fit EzyGrip into the correct channel .
5. Cut EzyGrip to 300 mm lengths and ensure the strips are inserted into
the correct channel.
6. Insert Ezygrip strips along one end of the frame.
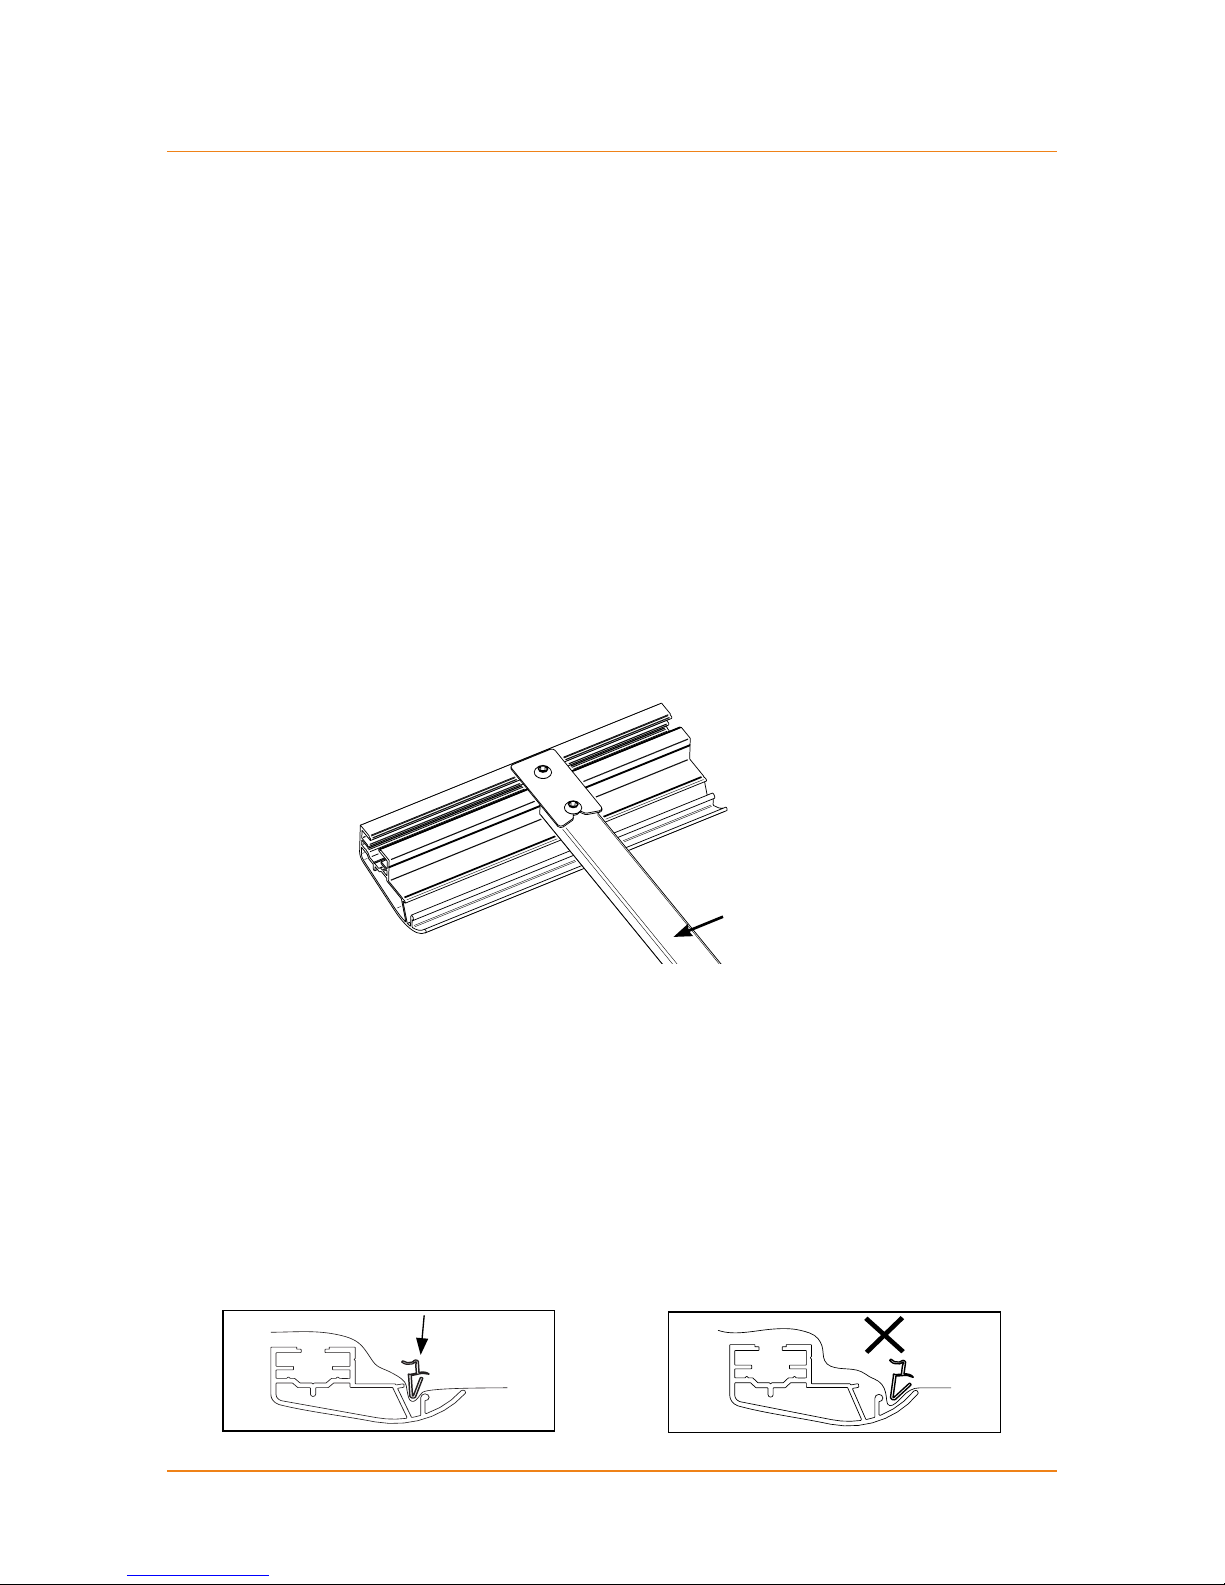
7. Secure lengths of EzyGrip with Clamping Strip to stop it pulling out as
tension is applied to the fabric surface.
8. Pull on the roll to ensure the fabric is kept taut. Pull to tension the fabric
at all times but avoid lifting the fabric as the EzyGrip may pop out.
9. Release a short length of fabric off the roll as the EzyGrip strips are
secured in place.
10. Place three cut strips of EzyGrip one side of the curved frame;
then insert 3 cut strips of EzyGrip on the opposite side.
11. Maintain the pattern of fixing 3 strips at a time, moving one side to the
other, pulling and tensioning the fabric at all times.
12. Secure lengths of EzyGrip with Clamping Strip to stop it pulling out as
tension is applied to the fabric surface.
13. Use Self Tapping Tek Screws supplied, to fix the Clamping Strip in place.
14. Fix Clamping Strip over the (handle of) EzyGrip to ensure it is kept
in place.
15. Place Clamping Strip on flat face of Galleria extrusion and drill through
both strip and frame.
16. There is no need to predrill.
17. The bracing bars should be removed only to insert the fabric as it
is unrolled.
18. Remove each bracing bar to allow insertion of the EzyGrip and fixing of
the fabric. Once the correct tension is applied to the screen surface and
EzyGrip inserted, replace the bracing bar.
Attaching the screen material (Plana AT)