LP Morgan Rondo User manual

LP Morgan Rondo Deluxe Pull Down
• Installation Instructions
• Screen Care
• Warranty
LP Morgan
Rondo
User’s Manual
Herma Projection Screen Technology
Installer: Please leave this manual with the owner

www.herma.com.au
Table of Contents
To the Owner: 1
Mechanical Installation: 2
Wall: 2
Ceiling: 2
Recessed: 2
Screen Use 3
Screen Care: 8
Warranty: 9

Herma Projection Screen Technology
Page 1
To The Owner
Congratulations on purchasing an LP Morgan Projection Screen.
This cinema quality screen uses the finest optical and mechanical
components to give you maximum enjoyment and a truly cine-
matic experience.
Please take a moment to review this manual, it will ensure many
years of trouble-free service for your new LP Morgan screen.
Unpacking the screen.
When unpacking the screen, please handle all parts with care.
Your LP Morgan Rondo screen comes with the following:
1 Screen Case
2 Wall mount brackets (3 for screens over 2 metres wide)
2 Ceiling mount brackets (3 for screens over 2 metres wide)
1 Pull down rod
1 User’s Manual

www.lpmorgan.com.au
Page 2
Mechanical Installation
Wall Installation:
The aluminium brackets should be fixed to the rear wall using
fasteners that are appropriate to the wall type.
1. Ensure that the brackets are perfectly level and spaced
correctly. The unique extrusion on the back of your screen
will allow the brackets to be placed anywhere along its
length. To make sure the brackets are correctly spaced
they should be as far apart as possible (minimum
900mm) but no further apart than the total screen width.
2. Once the brackets are in place, hook the top back corner
of the screen casing over the bracket and pivot the bot-
tom back corner in. The screen is now securely in place
and will not come off unless the bottom back edge is
pulled away from the wall first.
Ceiling / Overhead Installation:
1. Ensure that the brackets are perfectly level and spaced
correctly. The unique extrusion on the back of your screen
will allow the brackets to be placed anywhere along its
length. To make sure the brackets are correctly spaced,
they should be as far apart as possible (minimum
900mm) but no further apart than the total screen
length.
2. Once the brackets are in place, hook the top back corner
of the screen casing over the bracket and pivot the bot-
tom back corner in. The screen is now securely in place,
and will not come off unless the bottom back edge is
pulled away from the wall first.
Above Ceiling or Concealed Installation:
Herma recommends using the LP Morgan Rondo HideAway to
mount your screen above the ceiling. Please refer to separate
mounting instructions for installing the HideAway. If pelmet
mounting, please ensure that there is enough clearance so,
should the screen need to be removed or relocated, there is no
need to also remove any pelmets or trim.

Herma Projection Screen Technology
Page 3
The screen mechanism has been specially designed for ease of
use and to maximise the life of the screen. We recommend you
follow these simple instructions to ensure you many years of
continued visual enjoyment from your LP Morgan screen.
Lowering the screen:
•
Using the pull down ring, lower the screen with a gentle even ac-
tion. If out of reach, use the pull down rod supplied.
•
NEVER lower the screen past the STOP stickers. This could cause
damage to the screen surface and the mechanism.
Raising the screen:
•
Again using the pull down ring, give a quick, short tug down to
release the mechanism. The screen will automatically retract.
•
The LP Morgan Deluxe Pull Down features a unique inertia braking
device and stopping mechanism to ensure the screen slows down
and stops at a predetermined position to further simplify use and
increase the life of the screen
Setting the Upper Stopping Limit:
•
You may wish to lower or raise the stopping limit of the deluxe pull
down screen to suit your installation requirements.
•
Begin with the screen in its retracted position
•
Remove the front cover
•
Turn screw on right hand side of roller - anticlockwise to lower the
limit, clockwise to raise it. While turning the screw, the screen will
move to the desired stopping position.
•
Replace the front cover.
Screen Use

Screen Care
Maintaining a clean screen surface
Your cinema quality optical viewing surface is delicate. Great
care is taken to ensure your screen leaves the factory free from
foreign particles and is perfectly flat. It is important that you
keep the screen surface clean at all times. Any foreign particles
can cause repetitive indentations on the screen. It is your
responsibility to keep the surface free from grit or foreign matter
which could cause damage to the surface.
•
A soft cloth or brush may be used to lightly whisk away
any loose dirt or dust particles. Do not use a sharp
instrument to remove any particles. Softly brush from
the centre to the edges.
•
NEVER attempt to use solvents, chemicals or abrasive
cleaners on the screen.
•
The screen may be cleaned with a mild solution of
detergent and water and a sponge or lint free cloth. Rub
lightly to remove any stubborn marks, then blot with a
damp sponge to absorb excess water. Use a clean
sponge with clear water to wash off any detergent
residue. Dry the screen with a soft cloth / towel so that
the detergent does not have time to dry on the screen.
•
Avoid getting any foreign materials on it, as cleaning may
prove to be very difficult or even impossible (paint, ink,
etc.) Never paint in the vicinity of the screen unless the
screen surface is completely protected.
With reasonable care you may expect many years of trouble free
use from your LP Morgan screen.
Cleaning your screen case
•
The casing can be cleaned with water and a mild
detergent and a soft cloth to wash off any marks. Rinse
and dry with a clean cloth or towel.
www.herma.com.au
Page 4

Warranty Information
Herma Projection Screen Technology
Page 5
All LP Morgan products are warranted by Herma.
Customers must fill out the online warranty form, or the warranty card included
with the product and post it back to Herma at the reply paid address shown on the
back cover in order to qualify for the manufacturer’s warranty.
www.herma.com.au/warranty
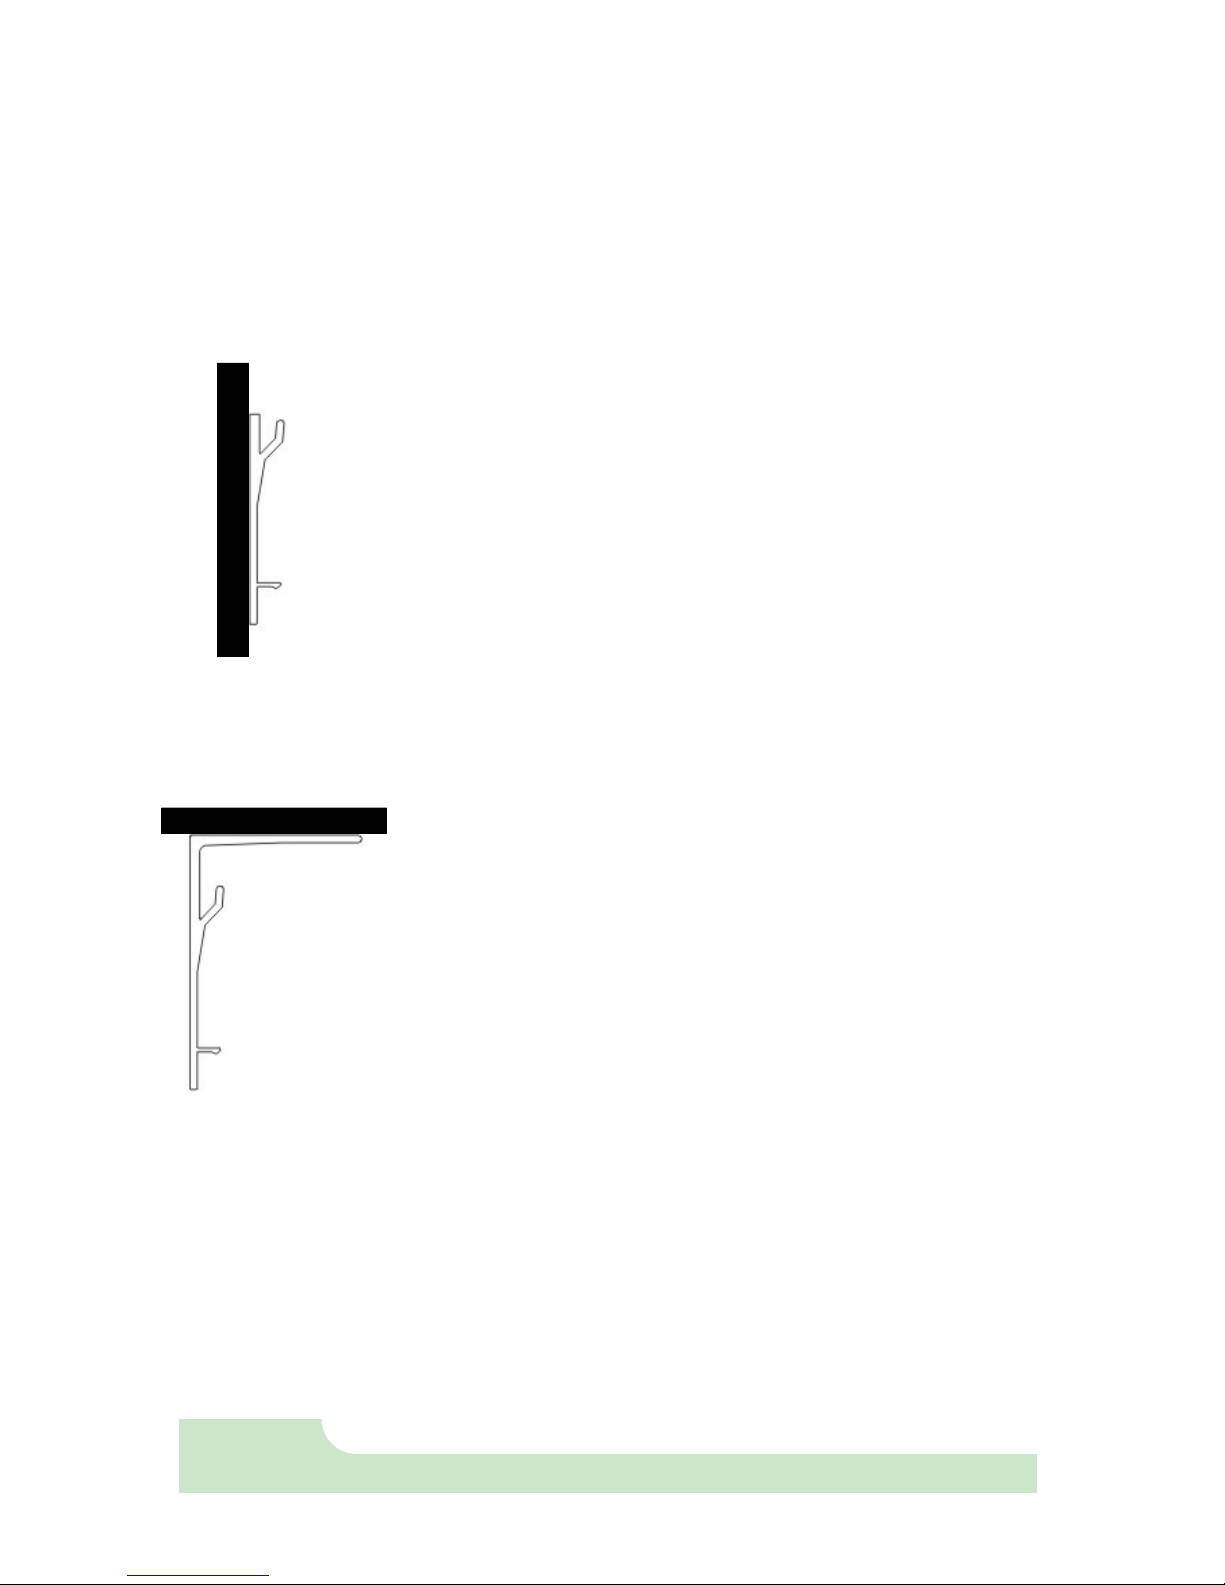
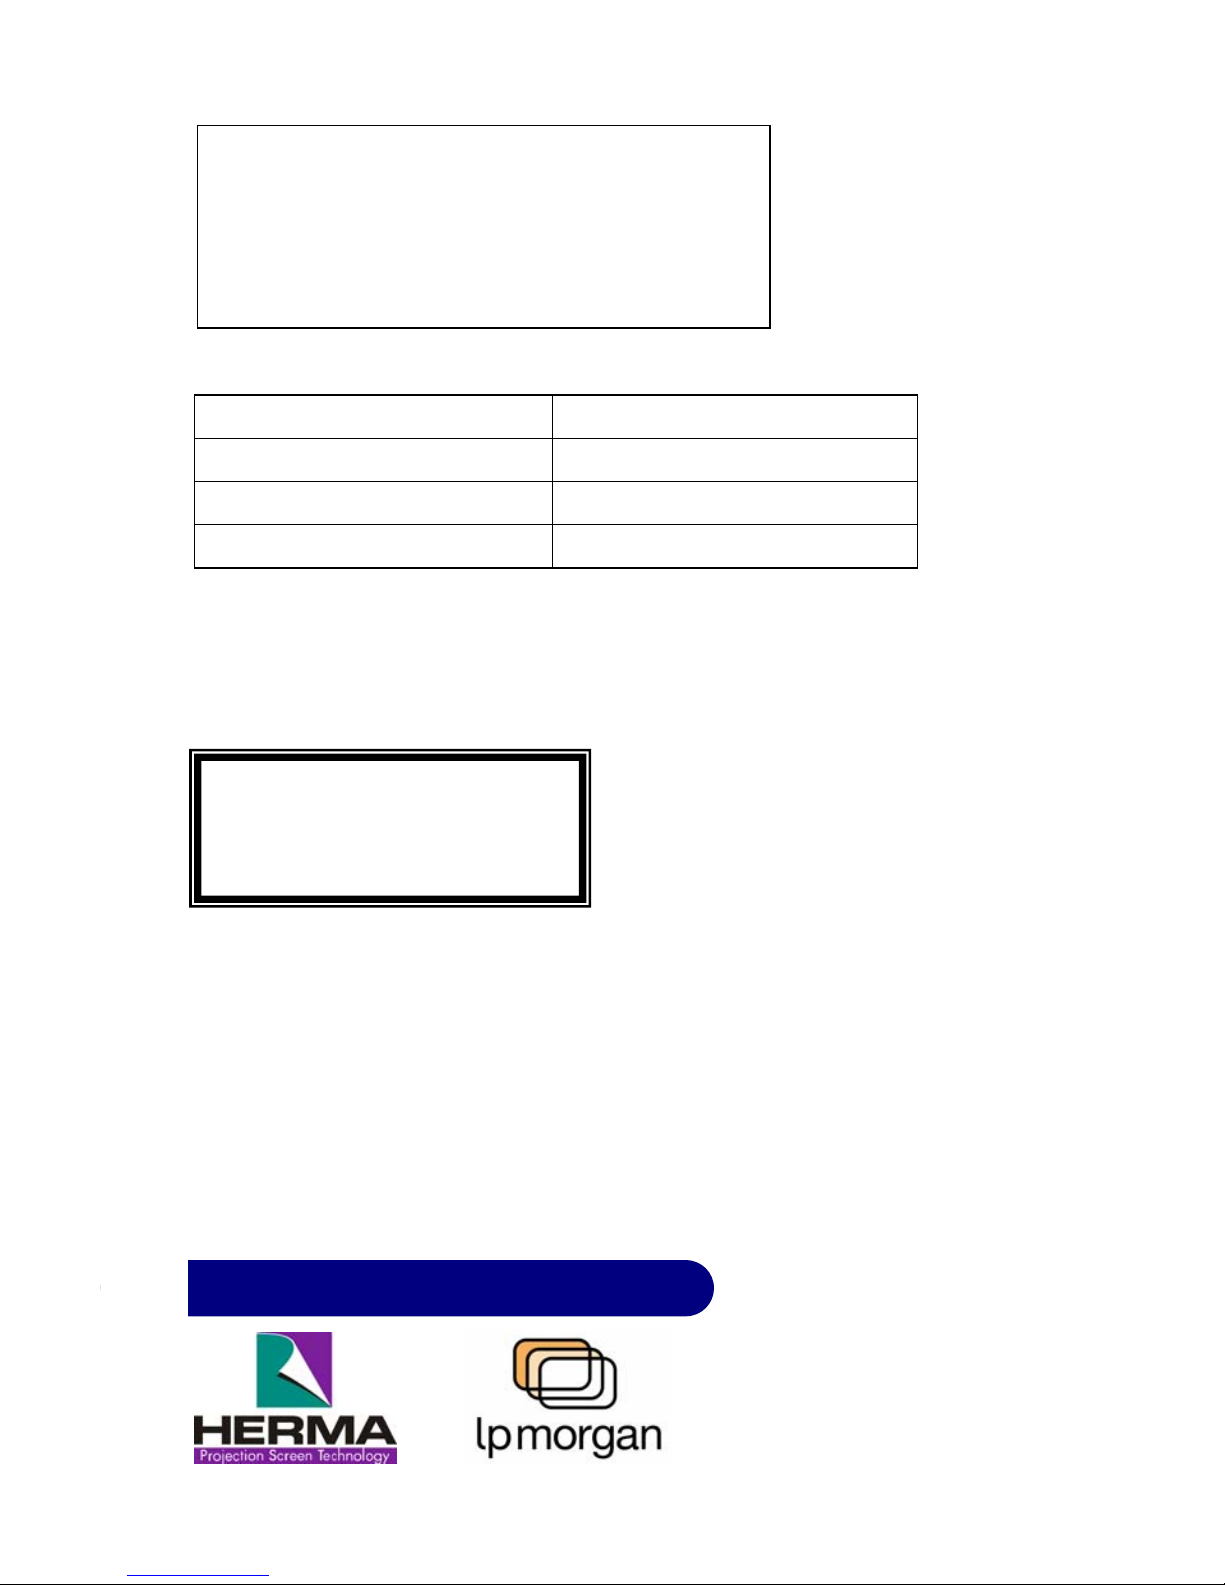
The warranty covers defects in workmanship and materials, provided this product has been
installed in a normal environment and maintained according to the written instructions.
Herma warrants the product against loss of usefulness, discolouration or deterioration of
optical quality within the warranty period as a result of manufacturing or material defects.
This warranty applies only within Australia.
CONDITIONS –
•
Herma will repair or replace, with the least possible delay, any defective equipment.
Any equipment replaced pursuant to the terms of this warranty shall be retained by
Herma
•
All costs related to installation and re-installation of the Herma Projection Screen
equipment covered by this warranty are not the responsibility of Herma Projection
Screen Technology. Herma will not be responsible for any consequential damages
during or following installation procedures.
•
The user is responsible for any freight costs relating to repair or replacement. Equip-
ment must be returned to Herma in suitable packing to prevent damage in tran-
sit. Herma will not accept any responsibility for damage to the equipment caused by
inadequate or unsuitable packing, or for any damage howsoever caused whilst the
goods are in transit.
Herma Projection Screen Technology shall not be liable for any injury, loss or damage, direct
or consequential, arising out of the use of, misuse of, or inability to use, the equipment.
This Warranty does not cover any equipment which has been subjected to misuse, abuse,
neglect, accidental or intentional damage, improper voltage or any alteration which affects the
reliability or performance of the equipment not attributable to faulty manufacture, parts or
labour and without limiting the generality of the foregoing shall not apply where the defect
arose as the result of the following circumstances:
This Warranty does not cover any equipment where usage, adaptation or installation
(including wiring of electrical connections) are not in accordance with our written installation
and operating instructions.
Warranty Period: Rondo Casing and Roller: 2 years from date of installation not to exceed
27 months from date of invoice.
Screen Surface: 1 year from date of installation not to exceed 15 months
from date of invoice.

This LP Morgan Rondo Pull Down Pack Contains:
QTY
1 Pull Down Rod
2 or 3 Wall Brackets
2 or 3 Ceiling Brackets
Two Brackets Three Brackets
72V, 84V, 90V 100V, 120V, 150V
82H 92H, 100H, 110H, 120H, 140H
1500AV, 1830AV 2000AV, 2440AV
Physical Address:
Factory 4A, 6 Albert Street
PRESTON, VIC 3072
Phone: +61 3 9480 6233
Fax: +61 3 9480 6533
Email: info@herma.com.au
Web: www.herma.com.au
Warranty Registration
Reply Paid 76217
PRESTON VIC 3072
Your LP Morgan Retailer is able to
provide information on your screen.
If we can be of any further help,
please contact us.
Herma Projection Screen Technology
Table of contents
Other LP Morgan Projection Screen manuals

LP Morgan
LP Morgan Screenboard User manual

LP Morgan
LP Morgan HideAway LPM30HID220 User manual

LP Morgan
LP Morgan Galleria Curve User manual

LP Morgan
LP Morgan CineTheatre Galleria Curve User manual

LP Morgan
LP Morgan LPM DUO User manual

LP Morgan
LP Morgan Rondo Opus User manual

LP Morgan
LP Morgan Galleria Eclipse User manual

LP Morgan
LP Morgan Galleria User manual
Popular Projection Screen manuals by other brands

Kauber
Kauber FRAME Series installation manual

Draper
Draper Premier XL 220 instructions

LUMENE
LUMENE Movie Palace Premium 3D Assembly instructions and user's manual

ES
ES HT Series user guide

Silver Ticket
Silver Ticket STR-169120 Assembly Installation Guide

Draper
Draper Targa Installation & operating instructions