LRX VULTURE User manual

LRX VULTURE
Check for the latest manual updates at www.lrx-lighting.com
SPECIFICATIONS SUBJECT TO CHANGE WITHOUT NOTICE
1
1
WARNING
READ EQUIPMENT MANUFACTURES
MANUAL BEFORE USING THIS PRODUCT

LRX VULTURE
Check for the latest manual updates at www.lrx-lighting.com
SPECIFICATIONS SUBJECT TO CHANGE WITHOUT NOTICE
2
2
SAFETY INSTRUCTIONS
Prior to operation a daily inspection and log are required.
User must be authorized, qualified, and certified in jurisdiction of use.
It is the user’s responsibility and obligation to determine and comply with all
applicable laws and regulations.
Do not operate if unit appears damaged.
Always use approved safety cables secured to a point capable of supporting the
total weight of the load.
In case of malfunction disconnect all power supplies, discontinue use, notify
supplier.
Area under fixture must always be cordoned off and kept clear of all personnel.
If using a power trolley with this fixture, please refer to “LRX Power Trolley”
manual.
THERE ARE NO USER SERVICEABLE PARTS.
IF YOU ARE UNSURE ABOUT ANYTHING SUSPEND USE OF THE PRODUCT.
Questions? Contact LRX LLC service representative, for contact details go to
lrx-lighting.com and click on the contact page.
For the latest version of this manual please visit “lrx-lighting.com”
DANGER
Dangerous voltages are present when power is supplied to the fixture.
Ensure all power supplies are disconnected when connecting or disconnecting
any cabling.
Power must be removed when not in use and when the data signal is removed.
Ensure fixture meets all local codes prior to operation.
Electrical Safety Protocol : Power lockout procedures must be followed.
Safe electrical and working practices must be observed.
LRX VULTURE
Check for the latest manual updates at www.lrx-lighting.com
SPECIFICATIONS SUBJECT TO CHANGE WITHOUT NOTICE
3
3
WARNING
This fixture has rotating parts with pinch points.
Fixture may move without warning.
No personal within range of motion.
Never operate with any covers missing.
UNPACKING THE VULTURE
Go to LRX-LIGHTING.COM/VULTURE and watch the “UNPACKING VIDEO”
Unpacking the Vulture
Removal of shipping case cover requires two people. Always use lifting
points to avoid potential pinch points. Rotate case lid forward, then lift.
Undo the internal transport ratchet strap –located at the base of the Vulture.
If there are any concerns regarding handling, please contact your supervisor.
Heavy lift, minimum two persons, the Vulture weight is approximately 120
pounds.
Installation of the fixture onto a truss creates several potential pinch points, use
fixture lifting handles provided.
Ensure hanger bolts are installed, and then tighten the ratchet straps. Ratchet
straps must always have a minimum of one and a half wraps around the ratchet
drum.
Extension Arm Assembly:
Rotate output shafts to vertical.
Install output extension arms using the hardware provided,
torque bolts to 23 ft/lb.
Install 360 pick up arms using hardware provided, torque bolts to 23 ft/lb.
LRX VULTURE
Check for the latest manual updates at www.lrx-lighting.com
SPECIFICATIONS SUBJECT TO CHANGE WITHOUT NOTICE
4
4
Preparing the Arri-360 for mounting:
Remove Arri-360 yoke from fixture, (remove two bolts on each side).
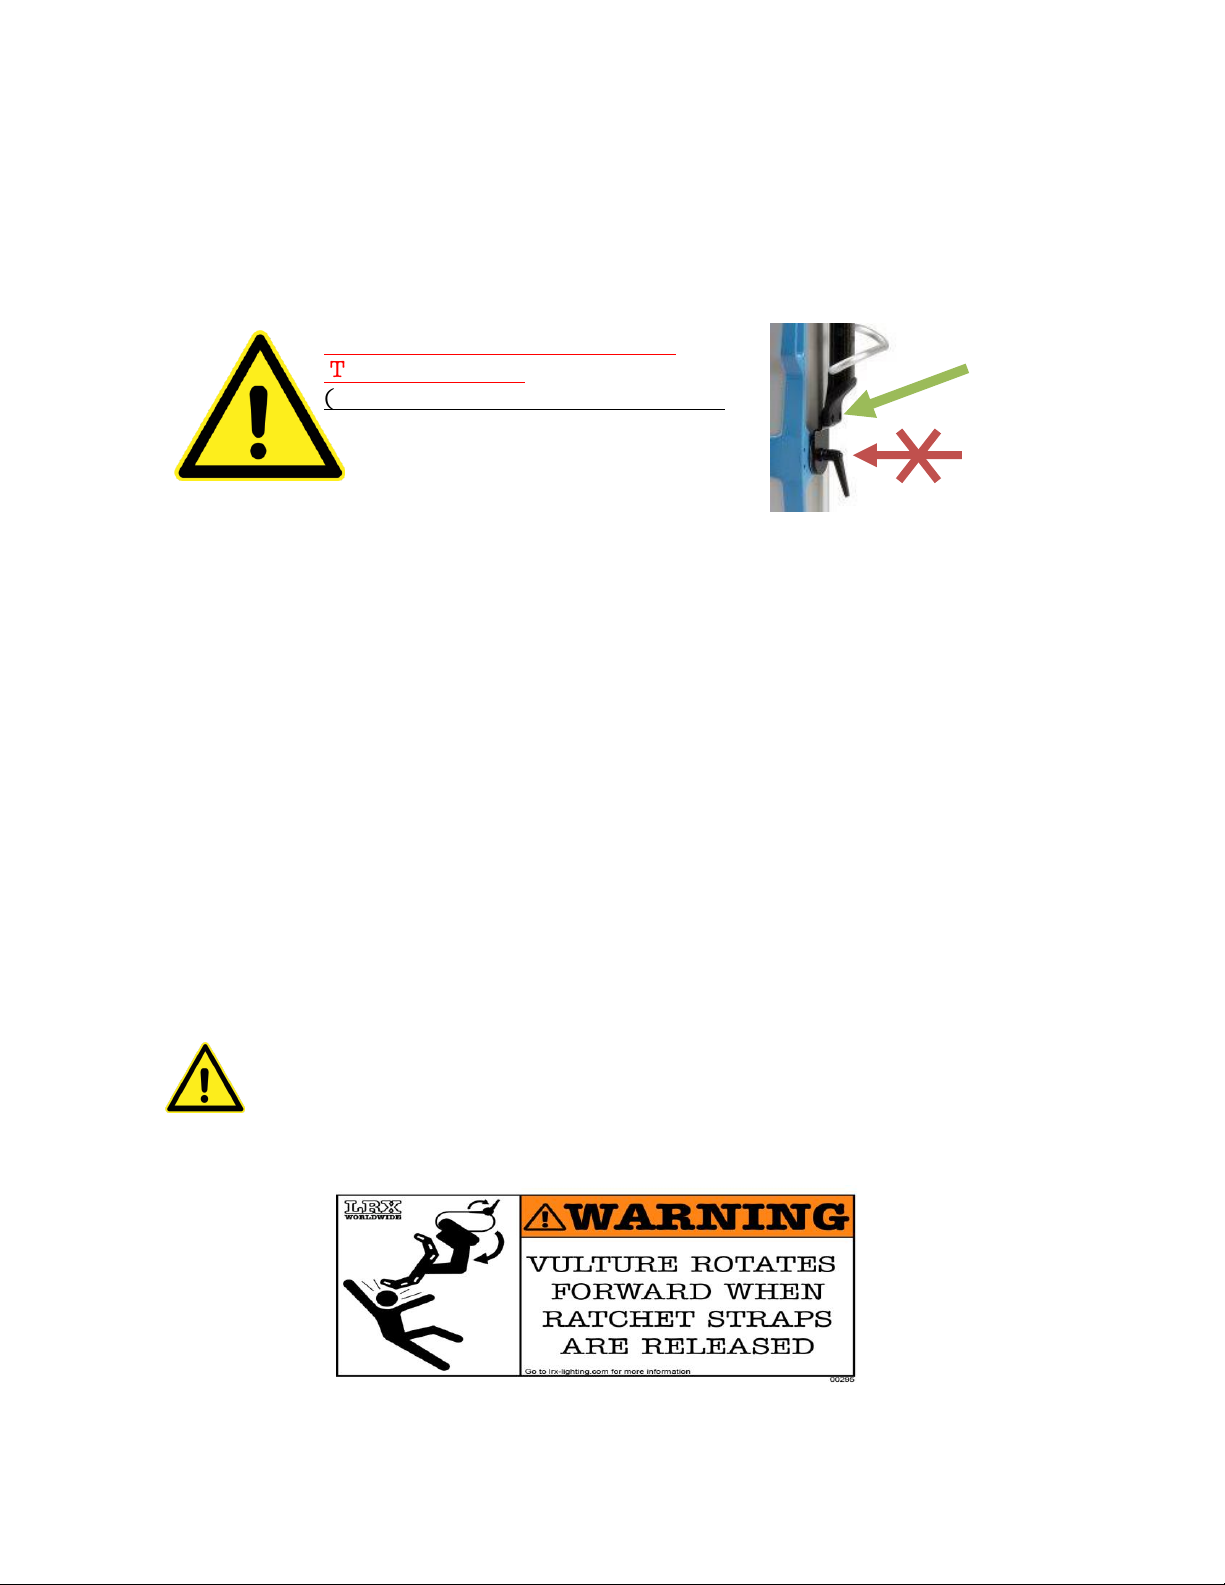
DO NOT REMOVE the Arri-360
TILT LOCK BOLT
(Located at the center of the lever)
Installing the Arri-360 fixture into the Vulture assembly:
Slightly flex Vulture arms inward to allow pins to locate to fixture
mounting pins. Watch your fingers; the spring back may create a crushing
hazard!!
Install the four retaining pins.
Install safety cables as required.
Test the range of motion.
Please Note: Mounting options for other fixtures and linear tubes are available.
Uninstalling the fixture and placing into the shipping case:
Remove accessories from Vulture and place them in their storage location.
Use the homing feature to park the Vulture; or use hand controller to rotate the
output arms to vertical and then rotate the hanger assembly parallel to base.
NOTE:
The Vulture will swing forward when the ratchet straps are released;
ensure no personnel are in front of the unit.
Lower the Vulture into shipping frame and secure the ratchet strap.

LRX VULTURE
Check for the latest manual updates at www.lrx-lighting.com
SPECIFICATIONS SUBJECT TO CHANGE WITHOUT NOTICE
1
1

LRX VULTURE
Check for the latest manual updates at www.lrx-lighting.com
SPECIFICATIONS SUBJECT TO CHANGE WITHOUT NOTICE
7
7
If LRX truss is to be installed, ensure that load is centered and evenly applied
to basket. Maximum capacity for LRX truss is 500 pounds evenly distributed.
Never use damaged or compromised trusses or equipment.
Follow all lift manufactures guidelines for load/wind capacities and de-rating
as required. Refer to the aerial equipment operator manuals & special
supplement for “Authorized and Trained Set Lighting Technicians and Studio
Grips”.
`
Using two truss plates (1/2” X 3”)
per side, a minimum of two
structural members must be
captured. Fasten using ½”bolts
with washers, lock washers and
nuts –four places
Load must be centered front
to back as well as side to side
LRX VULTURE
Check for the latest manual updates at www.lrx-lighting.com
SPECIFICATIONS SUBJECT TO CHANGE WITHOUT NOTICE
2
2
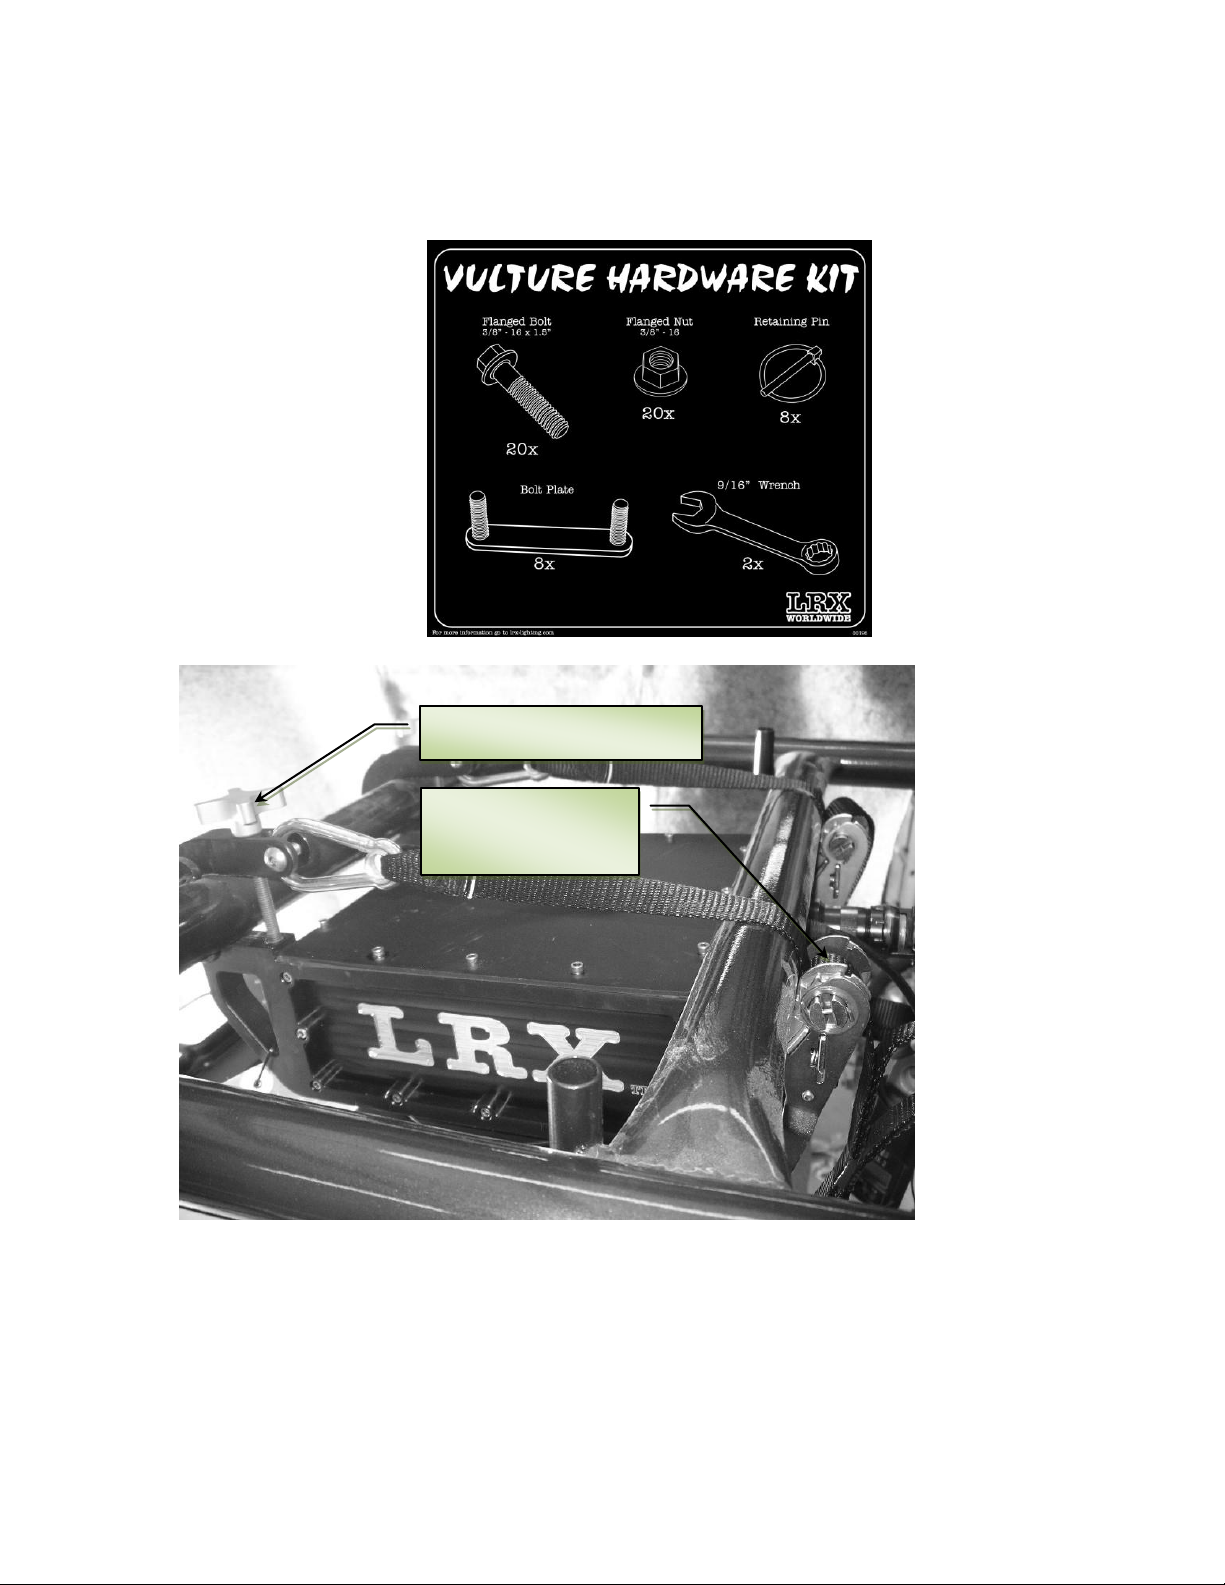
Hanger Tee Bolt
1.5 Wraps
Minimum

A
DETAIL A
SCALE 1 : 4
3/8"-16 X 1.25" Bolt
Torque to 23 ft/lbs
3/8" -16 Flange Nut
Vulture Extension Arm
Vulture 360 Arm

Unbolt Yoke Here
Remove yoke/stirrup from lamp fixture.
•
Rotate Vulture output plates to vertical.
•
Install Vulture extension arms & 360 arms using hardware
•
provided, leave bolts slightly loose until fixture is mounted.
Mate 360 light fixture to Vulture arms, torque hardware to
•
23 ft./lb.
Mount LED power supply on the rear side of extension
•
arms.
Install customer supplied safety cables.
•
Test tilt & pan to ensure light fixture does not contact
•
Vulture or other structures.
IMPORTANT: Do not remove tilt lock bolt
DETAIL A
SCALE 1 : 3.5
Install retaining pin - 4 plcs

LRX VULTURE
Check for the latest manual updates at www.lrx-lighting.com
SPECIFICATIONS SUBJECT TO CHANGE WITHOUT NOTICE
5
5
HAND CONTROLLER
The hand controller will allow fixture selection, (up to 32 fixtures), provide
control of tilt, pan, and flood/spot functions.
All switches act as momentary type.
SPEED INCREASE
SPEED DECREASE
Other manuals for VULTURE
1
Table of contents
Other LRX Lighting Equipment manuals


