F14-100说明书
F14-100
US 0339
US 0339
Por favor lea y guarde estas instrucciones. Lea atentamente este manual de instrucciones
antes de usar el producto. Protegerse y proteger a los demás mediante la observación de
toda la información de seguridad, advertencias y precauciones. El incumplimiento de las
instrucciones podría resultar en lesiones personales y / o daños al producto oa la
propiedad. Por favor, guarde las instrucciones para referencia futura.
Manual de instrucciones y el manual de piezas 10C906 & 10C907
Descripción
Información de la lámpara LED lupa
Especificaciones
10C906 120V~240V 6.5W Negro abrazadera
10C907 120V~240V 6.5W Blanco abrazadera
Description
Portable Desk Lamp
Specifications
6MNR6 120V 13W 13W CFL (not included) Clip On
- Para uso en interiores.
- No exponga el lente de aumento para la luz solar directa
ya que esto podría representar un peligro de incendio.
- For Indoor Use Only.
- Before replacing bulb switch the unit off and unplug the unit. Next, allow unit to
cool off before replacing the bulb.
- Always unplug the unit when cleaning or other related maintenance.
- Do not look directly at lighted bulb.
- Keep lamp away from flammable materials that have the potential to catch on fire.
- Bulb and shade can get HOT! Avoid contact with heated parts when turning unit off.
- Do not touch lamp shade to adjust lamp when lit.
- To reduce the risk of fire, use only 13W compact fluorescent lamp (not included)
Instrucciones de Seguridad Importantes
LIMITADA DE UN AÑO DE GARANTIA
Modelo Voltios Watios Color Tipo de Montaje
WARNING
!
WARNING
!
CAUTION
!
CAUTION
!
CAUTION
!
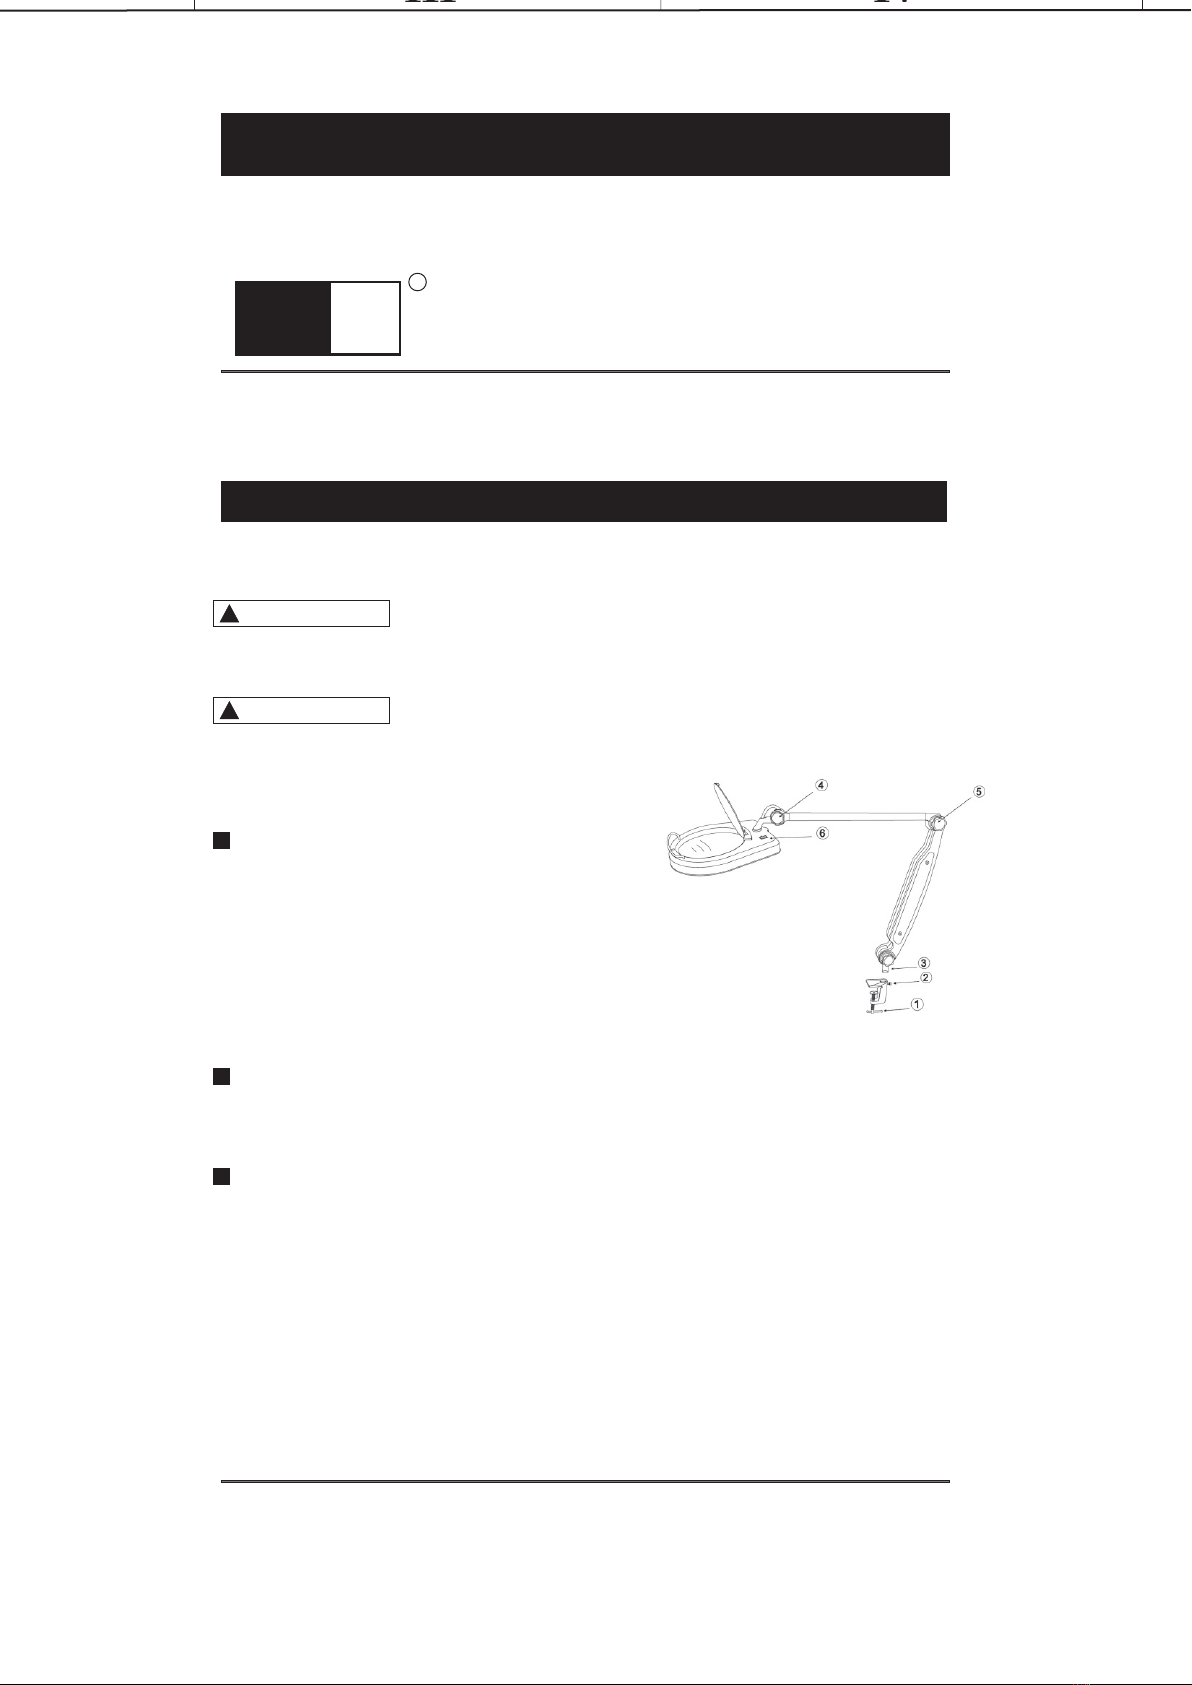
Asamblea
10C906 & 10C907
Fabricado por Grainger International, Inc.
Impreso en China 08/11
Formulario# 824
No altere el enchufe. Contacte a un electricista calificado si tiene problemas con su
tomacorriente.
Si este producto no funcione de manera satisfactoria, debido a un defecto de fabricación
o el retorno pobres unidad de transcurrido un año desde la fecha de compra, el retorno al
lugar de compra y que serán reemplazados de forma gratuita. Daños incidentales o
consecuentes están excluidos de esta garantía.
Luma
Pro
R
上一上
If power cord is damaged do not attempt to use unit
For indoor Use Only
Sólo utilice el adaptador de autorización para operar la unidad.
If power cord is damaged do not attempt to use unit
For indoor Use Only
Lamp Replacement
1.Turn unit off and unplug. Allow unit to cool. Remove diffuser
from the shade (See Fig.2).
2.Remove expired bulb and install the new replacement bulb.
3.Reinstall the diffuser securely.
1. Retire la lámpara y la abrazadera de la caja de
embalaje.
2. Apretar el tornillo en forma de T (1), fijar la pinza
sobre la mesa.
3. Quite el tornillo (2) de la abrazadera, Inserte el poste
de luz (3) en la abrazadera. Entonces tornillo (2) en la
abrazadera y asegurar el poste (3) con fuerza.
4. Afloje el botón redondo (4) y (5) y ajustarlo a
posición aplicable, el tornillo el botón redondo con fuerza.
5. Enchufe en el tomacorriente y encienda el interruptor On / Off (6) y disfrutar de.
Model Volts Watts Lamp Bulb Type Mounting Type