6 7
MPWP100D-3 By MacAllister MPWP100D-3 By MacAllister
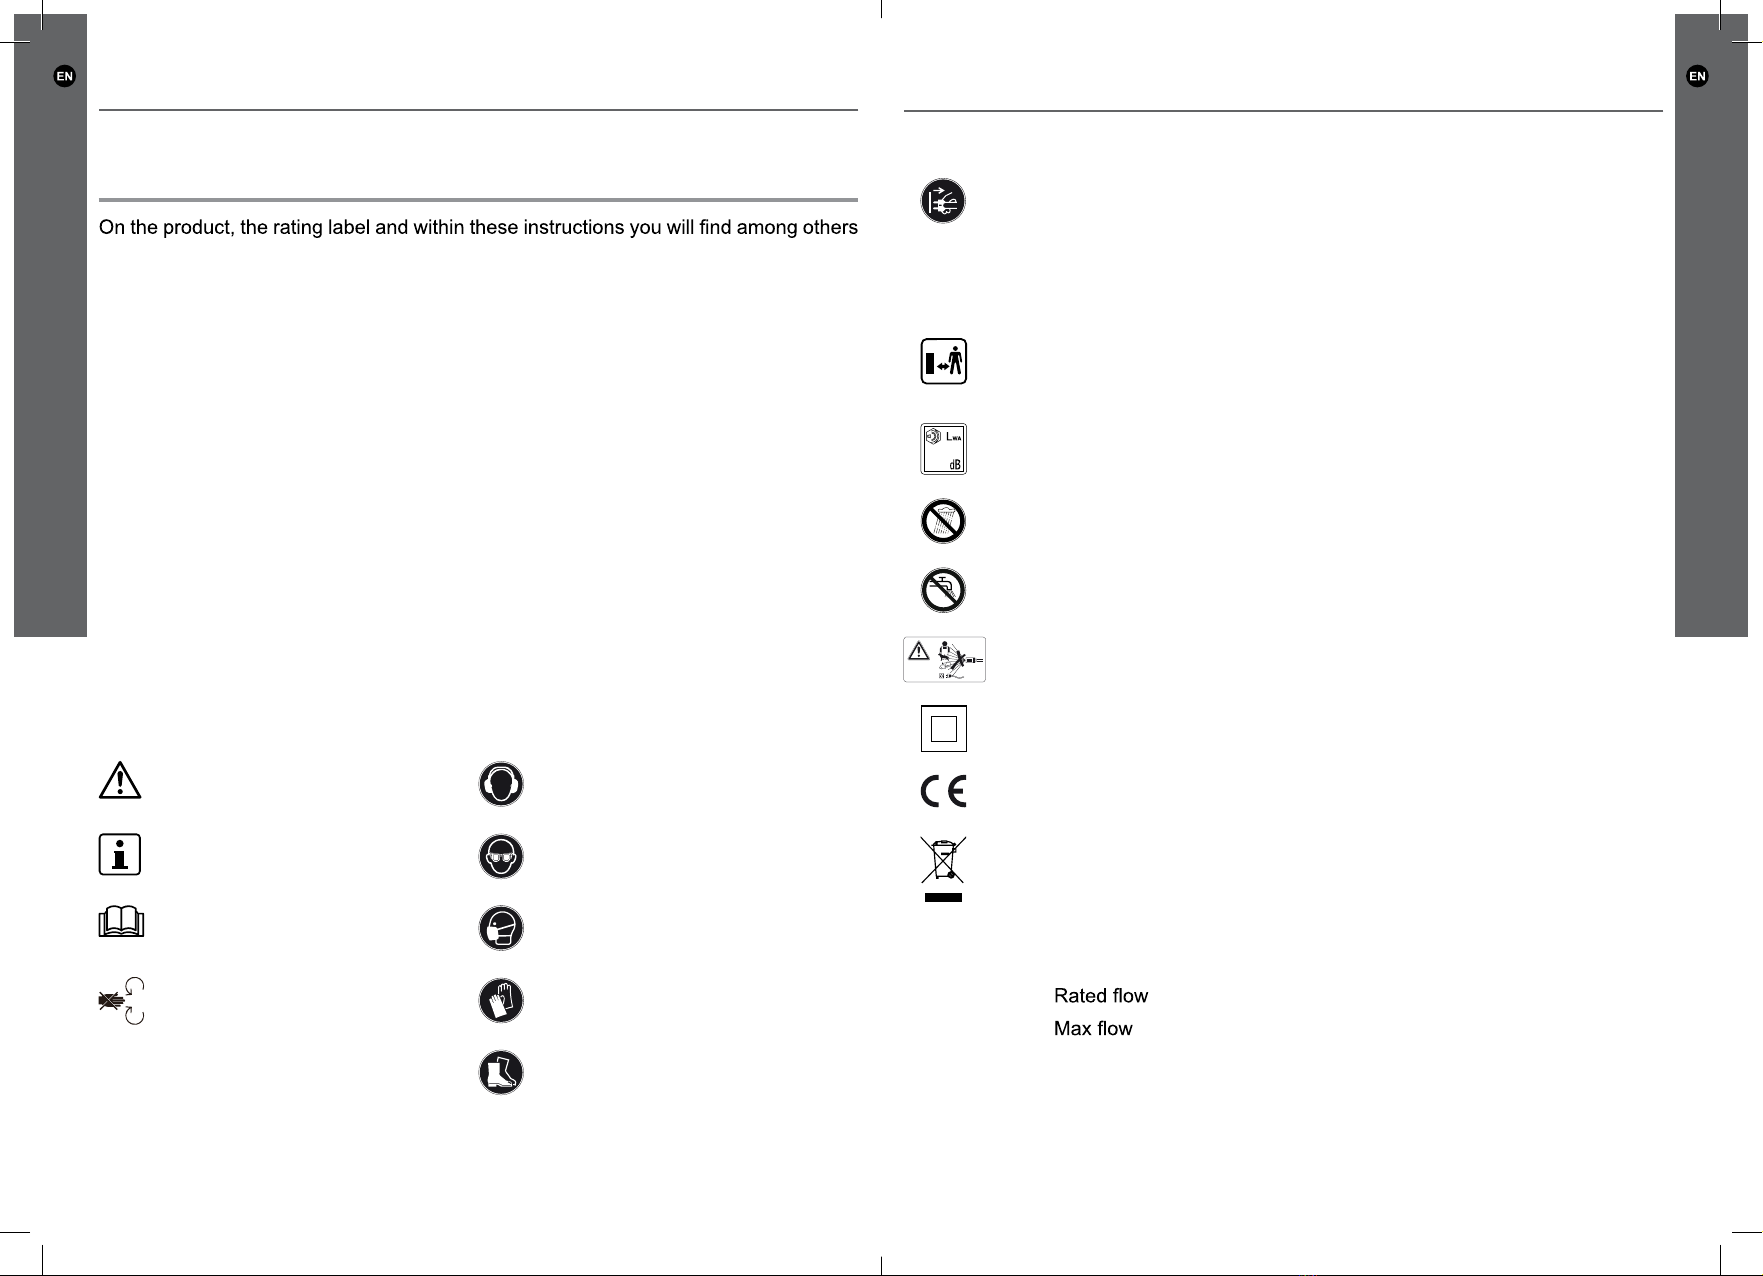
Safety information
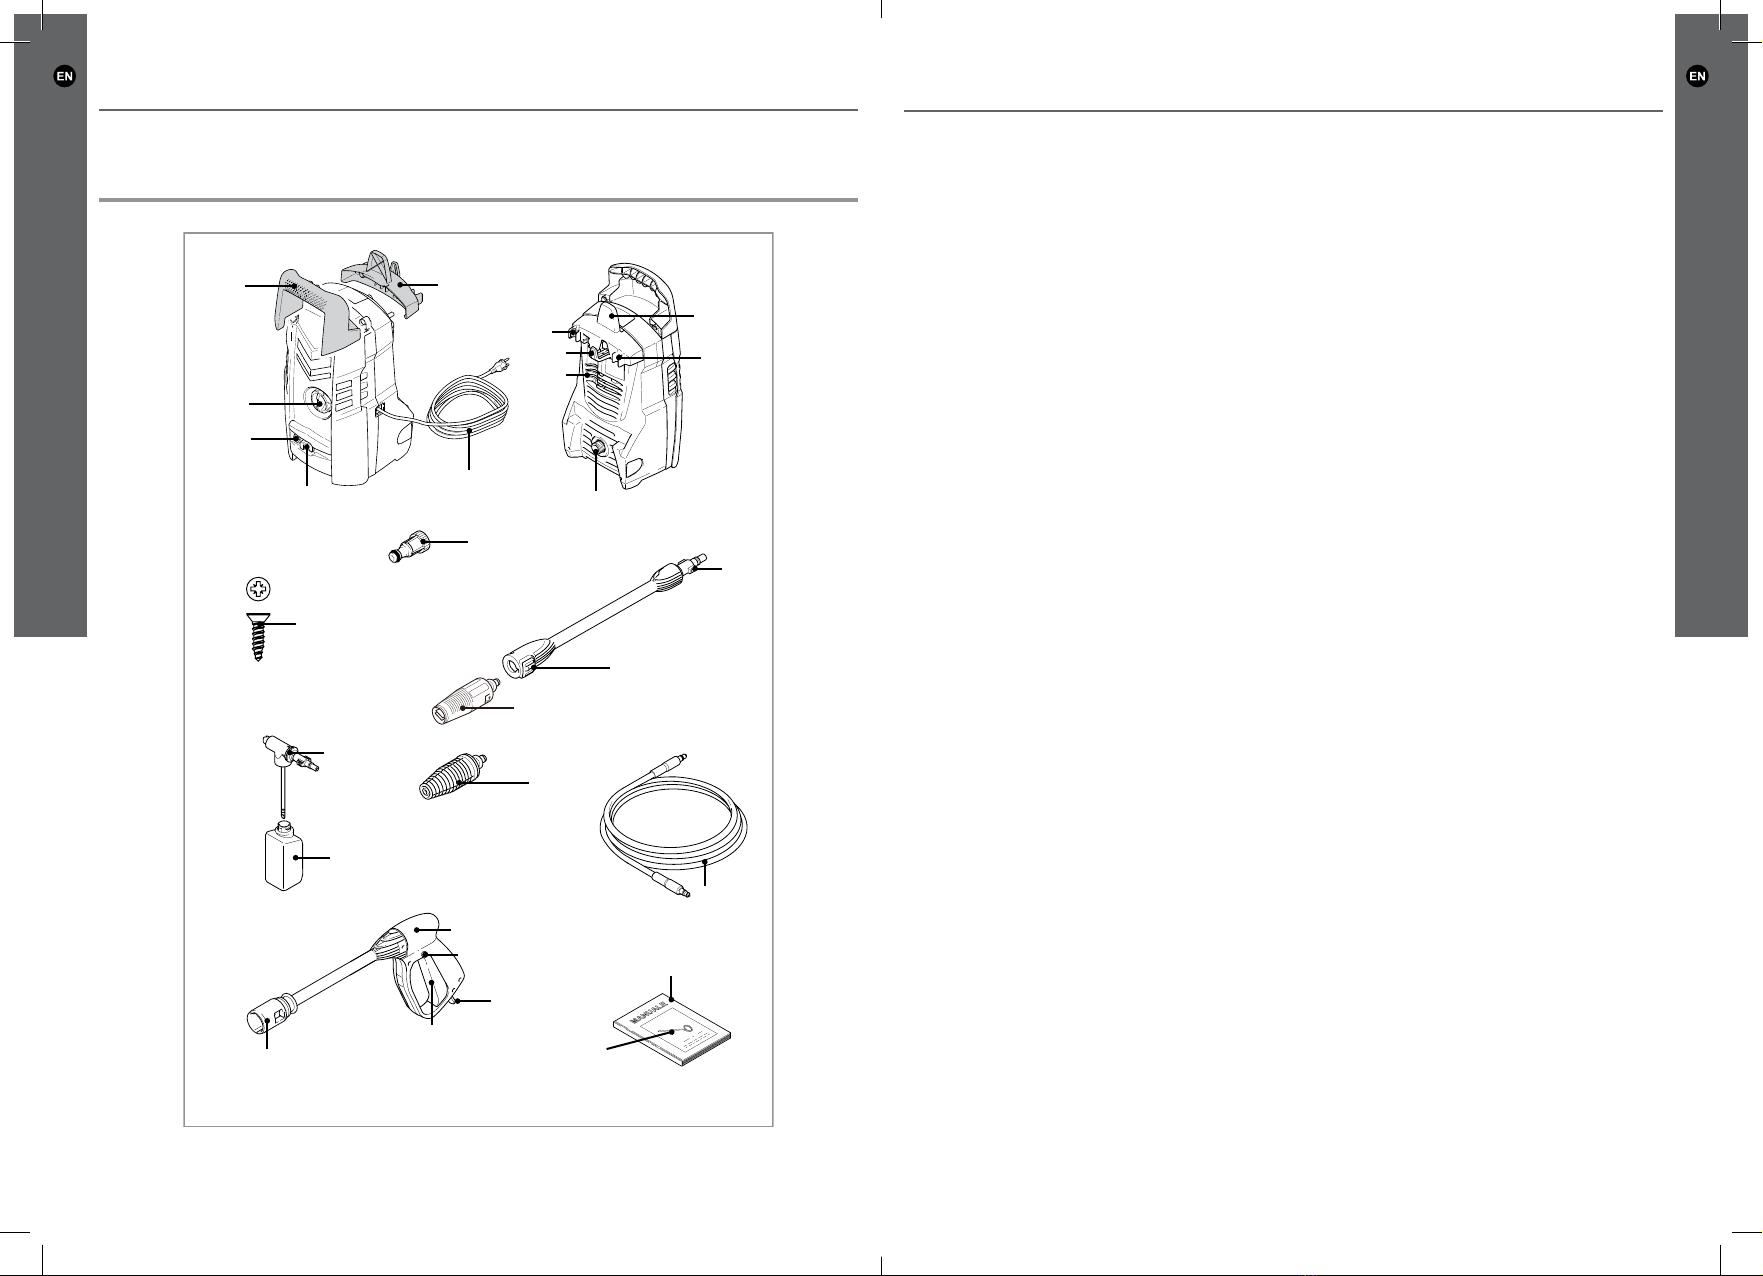
Getting Started . . .
Getting Started . . .
Safety information
28.
WARNING: Do not move the product by pulling on the
pressure hose.
29.
WARNING: When directed towards tyres, tyre valves or other
pressurised components, the high pressure jet is potentially
dangerous. Do not use the rotating nozzle kit, and always
keep the jet at a distance of at least 30 cm during cleaning.
30. WARNING: Protected all electrical conductors against the
water jet.
31.
WARNING: During start-up, the product may generate
interference on the electricity supply system.
32.
WARNING: Use only authorised electrical extension cords
with suitable conductor gauge.
33.
WARNING: High pressure may cause parts to rebound:
wear all the protective clothing and equipment needed to
ensure the operator’s safety.
34.
WARNING:
pulling the trigger.
35. WARNING: Comply with the regulations of the local water
supply authority. Under EN 12729 (Type BA) the product
can be connected directly to the mains drinking water supply
device with drainage facility. Make sure that the hose is at
least a diameter of 12.7 mm (1/2”) and is reinforced!
36.
WARNING:Maintenance and/or repair work on electrical
37.
WARNING: Discharge residual pressure before disconnecting
the hose from the product.
38.
WARNING: Check before each use, and at regular intervals,
that all metal fasteners are tight and the product’s components
are in good condition; inspect for broken or worn parts.
39. WARNING: Use only detergents compatible with the high
pressure hose / electrical power cord cladding materials.
40.
WARNING: Avoid skin contact with detergents, in particular
eyes with clean water and seek immediate medical attention!
41.
Please wear appropriate personnel protection equipment
(PPE) while operating the equipment, e.g. safety boots,
safety gloves, safety helmets with visors, hearing protection
etc.
GP59-3663602939658-GB-V07.indd 6-7 9/11/16 12:29 pm
42. The electric supply connection shall be made by a
qualified electrician and comply with IEC 60364- 1. It
is recommended that the electric supply to this
machine should include a residual current device that
will interrupt the supply if the leakage current to earth
exceeds 30 mA for 30 ms or a device that will prove
the earth circuit.
43. If the supply cord is damaged, it must be replaced by
the manufacturer, its service agent or similarly qualified
persons in order to avoid a hazard.
Vibration and noise reduction
To reduce the impact of noise and vibration emission, limit the
time of operation, use low-vibration and low-noise operating
modes as well as wear personal protective equipment. Take
the following points into account to minimize the vibration and
noise exposure risks: