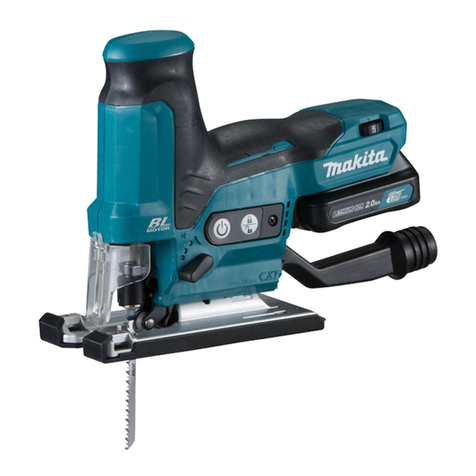
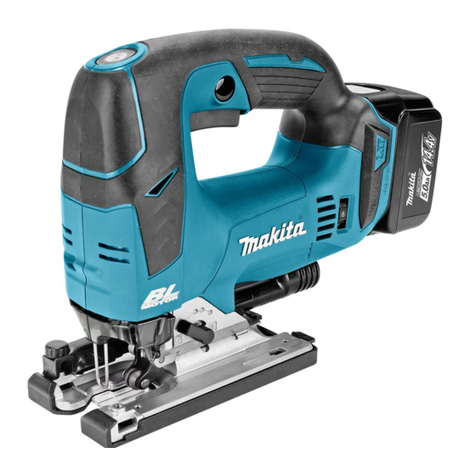
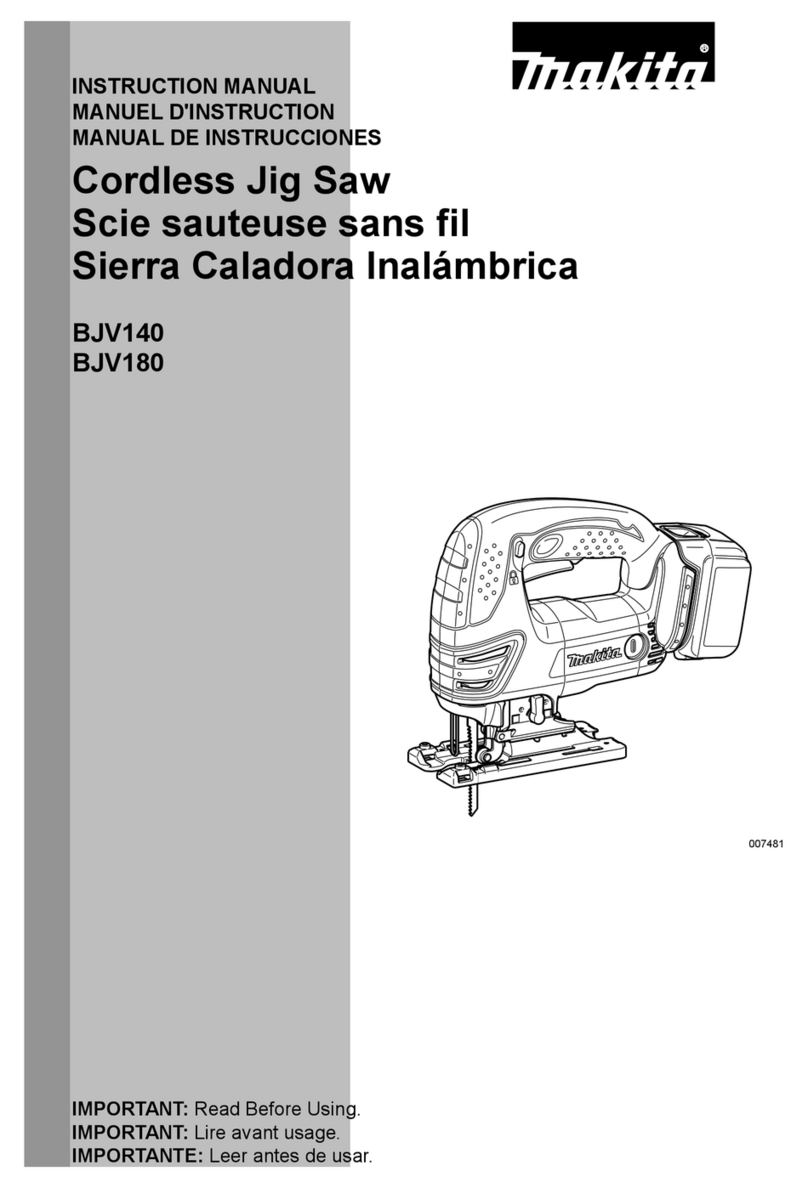
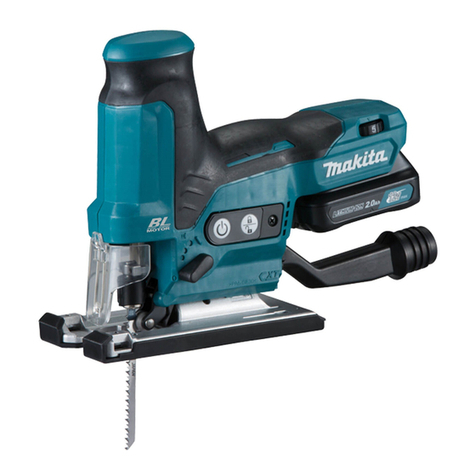
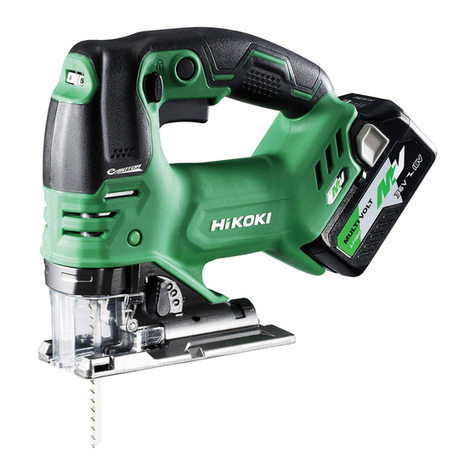
Makita DJV185 User manual

INSTRUCTION MANUAL
MANUEL D'INSTRUCTION
MANUAL DE INSTRUCCIONES
Cordless Jig Saw
Scie sauteuse sans l
Sierra Caladora Inalámbrica
DJV185
IMPORTANT: Read Before Using.
IMPORTANT : Lire avant usage.
IMPORTANTE: Lea antes de usar.

2ENGLISH
ENGLISH (Original instructions)
SPECIFICATIONS
Model: DJV185
Length of stroke 23 mm (7/8")
Strokes per minute 800 - 3,000 /min
Blade type B type
Max. cutting capacities Wood 135 mm (5-5/16")
Mild steel 10 mm (3/8")
Aluminum 20 mm (13/16")
Overall length (with BL1860B) 259 mm (10-1/4")
Rated voltage D.C. 18 V
Net weight 2.0 - 2.3 kg (4.4 - 5.1 lbs)
• Duetoourcontinuingprogramofresearchanddevelopment,thespecicationshereinaresubjecttochange
without notice.
• Specicationsmaydierfromcountrytocountry.
• Theweightmaydierdependingontheattachment(s),includingthebatterycartridge.Thelightestandheavi-
est combinations, according to EPTA-Procedure 01/2014, are shown in the table.
Applicable battery cartridge and charger
Battery cartridge BL1815N / BL1820B / BL1830B / BL1840B / BL1850B / BL1860B
Charger DC18RC / DC18RD / DC18RE / DC18SD / DC18SE / DC18SF /
DC18SH / DC18WC
• Some of the battery cartridges and chargers listed above may not be available depending on your region of
residence.
WARNING: Only use the battery cartridges and chargers listed above. Use of any other battery cartridges
andchargersmaycauseinjuryand/orre.
SAFETY WARNINGS
General power tool safety warnings
WARNING Read all safety warnings, instructions,
illustrations and specications provided with this
power tool. Failure to follow all instructions listed below
mayresultinelectricshock,reand/orseriousinjury.
Save all warnings and instruc-
tions for future reference.
The term "power tool" in the warnings refers to your
mains-operated (corded) power tool or battery-operated
(cordless) power tool.
Work area safety
1. Keep work area clean and well lit. Cluttered or
dark areas invite accidents.
2. Do not operate power tools in explosive atmo-
spheres, such as in the presence of ammable
liquids, gases or dust. Power tools create sparks
which may ignite the dust or fumes.
3. Keep children and bystanders away while
operating a power tool. Distractions can cause
you to lose control.
Electrical safety
1. Power tool plugs must match the outlet. Never
modify the plug in any way. Do not use any
adapter plugs with earthed (grounded) power
tools. Unmodiedplugsandmatchingoutletswill
reduce risk of electric shock.
2. Avoid body contact with earthed or grounded
surfaces, such as pipes, radiators, ranges and
refrigerators. There is an increased risk of elec-
tric shock if your body is earthed or grounded.
3. Do not expose power tools to rain or wet con-
ditions. Water entering a power tool will increase
the risk of electric shock.
4. Do not abuse the cord. Never use the cord for
carrying, pulling or unplugging the power tool.
Keep cord away from heat, oil, sharp edges
or moving parts. Damaged or entangled cords
increase the risk of electric shock.
5. When operating a power tool outdoors, use an
extension cord suitable for outdoor use. Use of
a cord suitable for outdoor use reduces the risk of
electric shock.
6. If operating a power tool in a damp location is
unavoidable, use a ground fault circuit inter-
rupter (GFCI) protected supply. Use of a GFCI
reduces the risk of electric shock.

3ENGLISH
7.
Power tools can produce electromagnetic elds
(EMF) that are not harmful to the user. However,
users of pacemakers and other similar medical
devices should contact the maker of their device and/
or doctor for advice before operating this power tool.
Personal safety
1. Stay alert, watch what you are doing and use
common sense when operating a power tool.
Do not use a power tool while you are tired or
under the inuence of drugs, alcohol or med-
ication. A moment of inattention while operating
powertoolsmayresultinseriouspersonalinjury.
2. Use personal protective equipment. Always
wear eye protection. Protective equipment such
as a dust mask, non-skid safety shoes, hard hat or
hearing protection used for appropriate conditions
willreducepersonalinjuries.
3. Prevent unintentional starting. Ensure the
switch is in the o-position before connecting
to power source and/or battery pack, picking
up or carrying the tool. Carrying power tools with
yourngerontheswitchorenergisingpowertools
that have the switch on invites accidents.
4. Remove any adjusting key or wrench before
turning the power tool on. A wrench or a key left
attached to a rotating part of the power tool may
resultinpersonalinjury.
5. Do not overreach. Keep proper footing and
balance at all times. This enables better control
of the power tool in unexpected situations.
6. Dress properly. Do not wear loose clothing or
jewellery. Keep your hair and clothing away
from moving parts.Looseclothes,jewelleryor
long hair can be caught in moving parts.
7. If devices are provided for the connection of
dust extraction and collection facilities, ensure
these are connected and properly used. Use of
dust collection can reduce dust-related hazards.
8.
Do not let familiarity gained from frequent use
of tools allow you to become complacent and
ignore tool safety principles. A careless action can
causesevereinjurywithinafractionofasecond.
9.
Always wear protective goggles to protect your
eyes from injury when using power tools. The
goggles must comply with ANSI Z87.1 in the USA.
It is an employer's responsibility to enforce the
use of appropriate safety protective equipment
by the tool operators and by other persons in
the immediate working area.
Power tool use and care
1. Do not force the power tool. Use the correct
power tool for your application. The correct
powertoolwilldothejobbetterandsaferatthe
rate for which it was designed.
2. Do not use the power tool if the switch does
not turn it on and o. Any power tool that cannot
be controlled with the switch is dangerous and
must be repaired.
3. Disconnect the plug from the power source
and/or remove the battery pack, if detachable,
from the power tool before making any adjust-
ments, changing accessories, or storing power
tools. Such preventive safety measures reduce
the risk of starting the power tool accidentally.
4. Store idle power tools out of the reach of chil-
dren and do not allow persons unfamiliar with
the power tool or these instructions to operate
the power tool. Power tools are dangerous in the
hands of untrained users.
5. Maintain power tools and accessories. Check
for misalignment or binding of moving parts,
breakage of parts and any other condition that
may aect the power tool’s operation. If dam-
aged, have the power tool repaired before use.
Many accidents are caused by poorly maintained
power tools.
6. Keep cutting tools sharp and clean. Properly
maintained cutting tools with sharp cutting edges
are less likely to bind and are easier to control.
7. Use the power tool, accessories and tool bits
etc. in accordance with these instructions, tak-
ing into account the working conditions and
the work to be performed. Use of the power tool
foroperationsdierentfromthoseintendedcould
result in a hazardous situation.
8. Keep handles and grasping surfaces dry,
clean and free from oil and grease. Slippery
handles and grasping surfaces do not allow for
safe handling and control of the tool in unexpected
situations.
9. When using the tool, do not wear cloth work
gloves which may be entangled. The entangle-
ment of cloth work gloves in the moving parts may
resultinpersonalinjury.
Battery tool use and care
1. Recharge only with the charger specied by
the manufacturer. A charger that is suitable for
onetypeofbatterypackmaycreateariskofre
when used with another battery pack.
2. Use power tools only with specically desig-
nated battery packs. Use of any other battery
packsmaycreateariskofinjuryandre.
3. When battery pack is not in use, keep it away
from other metal objects, like paper clips,
coins, keys, nails, screws or other small metal
objects, that can make a connection from one
terminal to another. Shorting the battery termi-
nalstogethermaycauseburnsorare.
4. Under abusive conditions, liquid may be
ejected from the battery; avoid contact. If con-
tact accidentally occurs, ush with water. If
liquid contacts eyes, additionally seek medical
help.Liquidejectedfromthebatterymaycause
irritation or burns.
5. Do not use a battery pack or tool that is dam-
aged or modied.Damagedormodiedbatteries
may exhibit unpredictable behaviour resulting in
re,explosionorriskofinjury.
6. Do not expose a battery pack or tool to re or
excessive temperature.Exposuretoreortem-
perature above 130 °C may cause explosion.
7. Follow all charging instructions and do not
charge the battery pack or tool outside the
temperature range specied in the instruc-
tions. Charging improperly or at temperatures
outsidethespeciedrangemaydamagethe
batteryandincreasetheriskofre.

4ENGLISH
Service
1. Have your power tool serviced by a qualied
repair person using only identical replacement
parts. This will ensure that the safety of the power
tool is maintained.
2. Never service damaged battery packs. Service
of battery packs should only be performed by the
manufacturer or authorized service providers.
3. Follow instruction for lubricating and chang-
ing accessories.
4. Do not modify or attempt to repair the appli-
ance or the battery pack except as indicated in
the instructions for use and care.
Cordless jig saw safety warnings
1. Hold the power tool by insulated gripping
surfaces, when performing an operation where
the cutting accessory may contact hidden wir-
ing. Cutting accessory contacting a “live” wire may
make exposed metal parts of the power tool “live”
and could give the operator an electric shock.
2. Use clamps or another practical way to secure
and support the workpiece to a stable plat-
form. Holding the workpiece by hand or against
your body leaves it unstable and may lead to loss
of control.
3.
Always use safety glasses or goggles. Ordinary
eye or sun glasses are NOT safety glasses.
4. Avoid cutting nails. Inspect workpiece for any
nails and remove them before operation.
5. Do not cut oversize workpiece.
6. Check for the proper clearance around the

workpiece before cutting so that the jig saw
blade will not strike the oor, workbench, etc.
7. Hold the tool rmly.
8. Make sure the jig saw blade is not contacting
the workpiece before the switch is turned on.
9. Keep hands away from moving parts.
10. Do not leave the tool running. Operate the tool
only when hand-held.
11.
Always switch o and wait for the jig saw blade
to come to a complete stop before removing
the jig saw blade from the workpiece.
12. Do not touch the jig saw blade or the work-
piece immediately after operation; they may be
extremely hot and could burn your skin.
13. Do not operate the tool at no-load
unnecessarily.
14. Some material contains chemicals which may
be toxic. Take caution to prevent dust inhala-
tion and skin contact. Follow material supplier
safety data.
15. Always use the correct dust mask/respirator
for the material and application you are work-
ing with.
SAVE THESE INSTRUCTIONS.
WARNING: DO NOT let comfort or familiarity
with product (gained from repeated use) replace
strict adherence to safety rules for the subject
product. MISUSE or failure to follow the safety
rules stated in this instruction manual may cause
serious personal injury.
Symbols
The followings show the symbols used for tool.
volts
direct current
no load speed
revolutions or reciprocation per minute
Important safety instructions for
battery cartridge
1.
Before using battery cartridge, read all instruc-
tions and cautionary markings on (1) battery char-
ger, (2) battery, and (3) product using battery.
2. Do not disassemble or tamper with the battery
cartridge.Itmayresultinare,excessiveheat,
or explosion.
3. If operating time has become excessively
shorter, stop operating immediately. It may
result in a risk of overheating, possible burns
and even an explosion.
4.
If electrolyte gets into your eyes, rinse them out
with clear water and seek medical attention right
away. It may result in loss of your eyesight.
5. Do not short the battery cartridge:
(1) Do not touch the terminals with any con-
ductive material.
(2) Avoid storing battery cartridge in a con-
tainer with other metal objects such as
nails, coins, etc.
(3) Do not expose battery cartridge to water
or rain.
A battery short can cause a large current
ow, overheating, possible burns and even a
breakdown.
6. Do not store and use the tool and battery car-
tridge in locations where the temperature may
reach or exceed 50 °C (122 °F).
7. Do not incinerate the battery cartridge even if
it is severely damaged or is completely worn
out. The battery cartridge can explode in a re.
8. Do not nail, cut, crush, throw, drop the battery
cartridge, or hit against a hard object to the
battery cartridge. Such conduct may result in a
re,excessiveheat,orexplosion.
9. Do not use a damaged battery.
10.
The contained lithium-ion batteries are subject to
the Dangerous Goods Legislation requirements.
For commercial transports e.g. by third parties,
forwarding agents, special requirement on pack-
aging and labeling must be observed.
For preparation of the item being shipped, consulting an
expert for hazardous material is required. Please also
observe possibly more detailed national regulations.
Tapeormaskoopencontactsandpackupthe
battery in such a manner that it cannot move
around in the packaging.

5ENGLISH
11. When disposing the battery cartridge, remove
it from the tool and dispose of it in a safe
place. Follow your local regulations relating to
disposal of battery.
12. Use the batteries only with the products
specied by Makita. Installing the batteries to
non-compliantproductsmayresultinare,exces-
sive heat, explosion, or leak of electrolyte.
13. If the tool is not used for a long period of time,
the battery must be removed from the tool.
14. During and after use, the battery cartridge may
take on heat which can cause burns or low
temperature burns. Pay attention to the han-
dling of hot battery cartridges.
15. Do not touch the terminal of the tool imme-
diately after use as it may get hot enough to
cause burns.
16. Do not allow chips, dust, or soil stuck into the
terminals, holes, and grooves of the battery
cartridge.Itmaycauseheating,catchingre,
burst and malfunction of the tool or battery car-
tridge,resultinginburnsorpersonalinjury.
17. Unless the tool supports the use near
high-voltage electrical power lines, do not use
the battery cartridge near high-voltage electri-
cal power lines. It may result in a malfunction or
breakdown of the tool or battery cartridge.
18. Keep the battery away from children.
SAVE THESE INSTRUCTIONS.
CAUTION: Only use genuine Makita batteries.
Use of non-genuine Makita batteries, or batteries that
have been altered, may result in the battery bursting
causingres,personalinjuryanddamage.Itwill
also void the Makita warranty for the Makita tool and
charger.
Tips for maintaining maximum
battery life
1. Charge the battery cartridge before completely
discharged. Always stop tool operation and
charge the battery cartridge when you notice
less tool power.
2. Never recharge a fully charged battery car-
tridge. Overcharging shortens the battery
service life.
3. Charge the battery cartridge with room tem-
perature at 10 °C - 40 °C (50 °F - 104 °F). Let
a hot battery cartridge cool down before
charging it.
4. When not using the battery cartridge, remove
it from the tool or the charger.
5. Charge the battery cartridge if you do not use
it for a long period (more than six months).
FUNCTIONAL
DESCRIPTION
CAUTION: Always be sure that the tool is
switched o and the battery cartridge is removed
before adjusting or checking function on the tool.
Installing or removing battery
cartridge
CAUTION: Always switch o the tool before
installing or removing of the battery cartridge.
CAUTION: Hold the tool and the battery car-
tridge rmly when installing or removing battery
cartridge. Failure to hold the tool and the battery
cartridgermlymaycausethemtoslipoyourhands
and result in damage to the tool and battery cartridge
andapersonalinjury.
To install the battery cartridge, align the tongue on the
battery cartridge with the groove in the housing and slip
it into place. Insert it all the way until it locks in place
with a little click. If you can see the red indicator as
showninthegure,itisnotlockedcompletely.
To remove the battery cartridge, slide it from the tool
while sliding the button on the front of the cartridge.
1
2
3
Fig.1
►1. Red indicator 2. Button 3. Battery cartridge
CAUTION: Always install the battery cartridge
fully until the red indicator cannot be seen. If not,
itmayaccidentallyfalloutofthetool,causinginjuryto
you or someone around you.
CAUTION: Do not install the battery cartridge
forcibly. If the cartridge does not slide in easily, it is
not being inserted correctly.

6ENGLISH
Tool / battery protection system
The tool is equipped with a tool/battery protection sys-
tem.Thissystemautomaticallycutsopowertothe
motor to extend tool and battery life. The tool will auto-
matically stop during operation if the tool or battery is
placed under one of the following conditions:
Overload protection
When the tool or battery is operated in a manner that
causes it to draw an abnormally high current, the tool
automatically stops without any indication. In this sit-
uation,turnthetooloandstoptheapplicationthat
caused the tool to become overloaded. Then turn the
tool on to restart.
Overheat protection
When the tool or battery is overheated, the tool stops
automatically and the lamp blinks. In this case, let the
tool and battery cool before turning the tool on again.
Overdischarge protection
When the battery capacity is not enough, the tool stops
automatically. In this case, remove the battery from the
tool and charge the battery.
Protections against other causes
Protection system is also designed for other causes
that could damage the tool and allows the tool to stop
automatically. Take all the following steps to clear the
causes, when the tool has been brought to a temporary
halt or stop in operation.
1. Turnthetoolo,andthenturnitonagainto
restart.
2. Charge the battery(ies) or replace it/them with
recharged battery(ies).
3. Let the tool and battery(ies) cool down.
If no improvement can be found by restoring protection
system, then contact your local Makita Service Center.
Indicating the remaining battery
capacity
Only for battery cartridges with the indicator
Press the check button on the battery cartridge to indi-
cate the remaining battery capacity. The indicator lamps
light up for a few seconds.
1
2
Fig.2
►1. Indicator lamps 2. Check button
Indicator lamps Remaining
capacity
Lighted O Blinking
75% to 100%
50% to 75%
25% to 50%
0% to 25%
Charge the
battery.
The battery
may have
malfunctioned.
NOTE: Depending on the conditions of use and the
ambienttemperature,theindicationmaydierslightly
from the actual capacity.
NOTE:Therst(farleft)indicatorlampwillblinkwhen
the battery protection system works.
Selecting the cutting action
This tool can be operated with an orbital or a straight
line (up and down) cutting action. The orbital cutting
actionthruststhejigsawbladeforwardandincreases
cutting speed.
1
Fig.3
►1. Cutting action changing lever

7ENGLISH
To change the cutting action, turn the cutting action
changing lever to the desired cutting action position.
Refer to the table to select the appropriate cutting
action.
Position Cutting action Applications
0Straight line cutting
action
For cutting mild
steel, stainless
steel and plastics.
For clean cuts in
wood and plywood.
ISmall orbital
cutting action
For cutting mild
steel, aluminum
and hard wood.
II Medium orbital
cutting action
For cutting wood
and plywood.
For fast cutting in
aluminum and mild
steel.
III Large orbital
cutting action
For fast cutting in
wood and plywood.
Lighting up the front lamp
CAUTION: Do not look in the light or see the
source of light directly.
To turn on the lamp, press the lock/unlock button. To
turnothelamp,pressthelock/unlockbuttonagain.
1
2
Fig.4
►1. Lamp 2. Lock/unlock button
NOTICE: When the tool is overheated, the lamp
blinks. Cool down the tool fully before operating
the tool again.
NOTE:Useadryclothtowipethedirtothelensof
the lamp. Be careful not to scratch the lens of lamp, or
it may lower the illumination.
Switch action
To turn on the tool, press the lock/unlock button. The
tool turns into the standby mode. To start the tool, press
the start/stop button in the standby mode. To stop the
tool, press the start/stop button again. The tool turns
intothestandbymode.Toturnothetool,pressthe
lock/unlock button in the standby mode.
1
2
Fig.5
►1. Lock/unlock button 2. Start/stop button
NOTE: If the tool is left for 10 seconds without any
operation in the standby mode, the tool automatically
turnsoandthelampgoeso.
NOTE:Youcanalsostopandturnothetoolby
pressing the lock/unlock button while the tool is
operating.
To decreases the brightness of the lamp, press and hold
the lock/unlock button when turning into the standby
mode. About 1 second after you start pressing the lock/
unlock button, the brightness of the lamp will start to
decrease, so release the lock/unlock button when you
reach the desired brightness. It turns the tool into the
standby mode, too. About 3 seconds after you start
pressing the lock/unlock button, the brightness of the
lamp will be minimized and the brightness will not
change after that.
NOTE: The brightness of the lamp cannot be
adjustedwhilethetoolisinstandbymode.Toadjust
thebrightnessofthelamp,turnothetool.
NOTE: There is no memory function for the bright-
nessofthelamp.Ifyouturnthelampoandthenturn
it on, the brightness of the lamp will be maximized
each time.

8ENGLISH
Speed adjusting dial
Thetoolspeedcanbeadjustedbyturningthespeed
adjustingdial.Youcangetthehighestspeedat5and
the lowest speed at 1.
1
Fig.6
►1.Speedadjustingdial
Refer to the table to select the proper speed for the
workpiece to be cut. However, the appropriate speed
maydierwiththetypeorthicknessoftheworkpiece.In
general, higher speeds will allow you to cut workpieces
fasterbuttheservicelifeofthejigsawbladewillbe
reduced.
Workpiece Number
Wood 4 - 5
Mild steel 3 - 5
Stainless steel 3 - 4
Aluminum 3 - 5
Plastics 1 - 4
NOTICE: The speed adjusting dial can be turned
only as far as 5 and back to 1. Do not force it past
5 or 1, or the speed adjusting function may no
longer work.
Electronic function
The tool is equipped with the electronic functions for
easy operation.
Soft start
The soft-start function minimizes start-up shock, and
makes the tool start smoothly.
Constant speed control
Electronic speed control for obtaining constant speed.
Possibletogetnenish,becausethetoolspeedis
kept constant even under load condition.
Soft no-load rotation function
Toreducethevibrationandalignthejigsawbladewith
the cutting line easily, the tool automatically reduces
the tool speed until the tool starts cutting the workpiece
whenthespeedadjustingdialissetat2orhigher.Once
the tool starts cutting the workpiece, the tool speed
reaches the preset speed and keeps the speed until the
tool stops.
NOTE: When the temperature is low, this function
may not be available. Also, depending on the mate-
rial,jigsawblade,andtoolspeed,thisfeaturemay
not be available.
Disabling or enabling the soft no-load
rotation function
To disable or enable the soft no-load rotation function,
follow the steps below.
1. Makesurethatthetoolisturnedo.
2. Setthespeedadjustingdialto"1".
3. Press the lock/unlock button to turn on the tool.
4. Setthespeedadjustingdialto"5"byturningit,
and then set it to "1" by turn it back.
The lamp blinks twice to indicate that the soft no-load
rotation function is disabled. To enable this function
again, perform the same procedure again.
NOTE: If the soft no-load rotation function is disabled,
the lamp blinks twice when the tool is turned on.
NOTE: You can also disable or enable the soft
no-load rotation function by changing the speed
adjustingdialfrom"5"to"1"andchangingitfrom"1"
to "5".
Electric brake
This tool is equipped with an electric brake. If the tool
consistently fails to quickly stop after the start/stop
button or the lock/unlock button is pressed, have the
tool serviced at a Makita service center.
ASSEMBLY
CAUTION: Always be sure that the tool is
switched o and the battery cartridge is removed
before carrying out any work on the tool.
Installing or removing jig saw blade
CAUTION: Always clean out all chips or for-
eign matter adhering to the jig saw blade and/or
blade holder.Failuretodosomaycauseinsucient
tighteningofthejigsawblade,resultinginaserious
personalinjury.
CAUTION: Do not touch the jig saw blade or
the workpiece immediately after operation. They
may be extremely hot and could burn your skin.
CAUTION: Always secure the jig saw blade
rmly.Insucienttighteningofthejigsawblademay
causethebladebreakageorseriouspersonalinjury.
CAUTION: Use only B type jig saw blades.
UsingbladesotherthanBtypecausesinsucient
tighteningofthejigsawblade,resultinginaserious
personalinjury.
CAUTION: When you remove the jig saw
blade, be careful not to hurt your ngers with the
top of the jig saw blade or the tips of workpiece.

9ENGLISH
Beforeinstallingthejigsawblade,makesurethatthe
blade clamp lever is in the released position.
Toinstallthejigsawblade,insertthejigsawblade
(teethfacingforward)intothejigsawbladeholder.The
bladeclamplevermovestothexedpositionandthe
jigsawbladeislocked.Makesurethatthebackedge
ofthejigsawbladetsintotheroller.Pullthejigsaw
bladelightlytomakesurethatthejigsawbladedoes
notfalloduringoperation.
1
32
Fig.7
►1. Jig saw blade holder 2. Blade clamp lever
(released position) 3.Bladeclamplever(xed
position)
1
2
3
Fig.8
►1. Jig saw blade holder 2. Jig saw blade 3. Roller
CAUTION: If the blade clamp lever does not
move to the xed position, the jig saw blade is
not installed completely. Do not press the blade
clamp lever by hand to the xed position. It may
damage the tool.
Toremovethejigsawblade,pushthebladeclamplever
forwardasfarasitwillgo.Thisallowsthejigsawblade
to be released.
1
2
3
Fig.9
►1. Jig saw blade holder 2. Blade clamp lever 3. Jig
saw blade
NOTE:Ifitisdiculttoremovethejigsawblade,turn
the cutting action changing lever to the position "III"
andmovethejigsawbladeholdertothebottom.To
movethejigsawbladeholdertothebottom,return
thebladeclampleverfullytothexedpositiononce
and slightly switch on the tool several times.
NOTE: Occasionally lubricate the roller.
Hex wrench storage
When not in use, store the hex wrench as shown in the
guretokeepitfrombeinglost.
1
Fig.10
►1. Hex wrench

10 ENGLISH
OPERATION
CAUTION: Always hold the base ush with
the workpiece.Failuretodosomaycausejigsaw
bladebreakage,resultinginaseriousinjury.
CAUTION: Advance the tool very slowly when
cutting curves or scrolling. Forcing the tool may
causeaslantedcuttingsurfaceandjigsawblade
breakage.
Turnthetoolonwithoutthejigsawblademakingany
contactandwaituntilthejigsawbladeattainsfull
speed.Thenrestthebaseatontheworkpieceand
gently move the tool forward along the previously
marked cutting line.
2
1
Fig.11
►1. Cutting line 2. Base
Bevel cutting
CAUTION: Always be sure that the tool is
switched o and the battery cartridge is removed
before tilting the base.
With the base tilted, you can make bevel cuts at any
angle between 0° and 45° (left or right).
Fig.12
Loosen the bolt on the back of the base with the hex
wrench. Move the base so that the bolt is positioned in
the center of the cross-shaped slot in the base.
3
2
1
Fig.13
►1. Hex wrench 2. Bolt 3. Base
Tilt the base until the desired bevel angle is obtained.
The edge of the motor housing indicates the bevel
angle by graduations. Then tighten the bolt to secure
the base.
2
1
Fig.14
►1. Edge 2. Graduation
Front ush cuts
Loosen the bolt on the bottom of the base with the
hex wrench and slide the base all the way back. Then
tighten the bolt to secure the base.
3
2
1
Fig.15
►1. Hex wrench 2. Bolt 3. Base

11 ENGLISH
Cutouts
Cutouts can be made with either of two methods:
“Boring a starting hole” or “Plunge cutting”.
Boring a starting hole
For internal cutouts without a lead-in cut from an edge,
pre-drill a starting hole 12 mm (15/32") or more in
diameter.Insertthejigsawbladeintothisholetostart
your cut.
Fig.16
Plunge cutting
You need not bore a starting hole or make a lead-in cut
if you carefully do as follows.
1. Touch the front edge of the base to the workpiece,
andtiltthetoolwiththejigsawbladepointpositioned
justabovetheworkpiecesurface.
2. Apply pressure to the tool so that the front edge of
the base will not move when you switch on the tool and
gently lower the back end of the tool slowly.
3. Asthejigsawbladepiercestheworkpiece,slowly
lower the base of the tool down onto the workpiece
surface.
4. Complete the cut in the normal manner.
Fig.17
Finishing edges
Totrimedgesormakedimensionaladjustments,runthe
jigsawbladelightlyalongthecutedges.
Fig.18
Metal cutting
Always use a suitable coolant (cutting oil) when cutting
metal.Failuretodosowillcausesignicantjigsaw
blade wear. The underside of the workpiece can be
greased instead of using a coolant.
Dust extraction
Installing or removing the dust cover
Installthedustcoverasshowninthegure.
1
Fig.19
►1. Dust cover

12 ENGLISH
To remove the dust cover, press one side of the cover,
andthenremoveitasshowninthegure.
1
Fig.20
►1. Dust cover
Installing or removing the dust
nozzle
You can connect this tool to a Makita vacuum cleaner
by attaching the dust nozzle.
Insert the dust nozzle all the way into the tool.
1
Fig.21
►1. Dust nozzle
To remove the dust nozzle, pull out the dust nozzle
while pressing the button on the dust nozzle.
1
2
Fig.22
►1. Button 2. Dust nozzle
Connecting the tool to the vacuum cleaner
Connect the hose of the vacuum cleaner to the dust
nozzle.
Fig.23
Rip fence
Optional accessory
CAUTION: Always be sure that the tool is
switched o and the battery cartridge is removed
before installing or removing accessories.
Straight cuts
When repeatedly cutting widths of 160 mm (6-5/16") or less,
use of the rip fence will assure fast, clean, straight cuts.
1
Fig.24
►1. Rip fence (Guide rule)

13 ENGLISH
To install, insert the bar part into the square hole of the base
with the fence part facing down. Slide the rip fence to the
desired cutting width position, then tighten the bolt to secure it.
1
23
Fig.25
►1. Hex wrench 2. Bolt 3. Rip fence (Guide rule)
Circular cuts
When cutting circles or arcs of 170 mm (6-11/16") or
less in radius, install the rip fence as follows.
1
Fig.26
►1. Rip fence (Guide rule)
CAUTION: Do not touch the tip of the circular
guide pin. The sharp tip of the circular guide pin can
causeinjury.
1. Insert the bar part into the square hole of the base
with the fence part facing up.
2.
Insert the circular guide pin through either of the two
holes on the fence part. Screw the threaded knob onto the
circular guide pin to secure the circular guide pin.
4
3
1
2
5
Fig.27
►1. Threaded knob 2. Rip fence (Guide rule)
3. Circular guide pin 4. Bolt 5. Hex wrench
3. Slide the rip fence to the desired cutting radius,
and tighten the bolt to secure it in place.
NOTE:AlwaysusejigsawbladesNo.B-17,B-18,
B-26 or B-27 when cutting circles or arcs.
Anti-splintering device
Optional accessory
CAUTION: The anti-splintering device cannot
be used when making bevel cuts.
For splinter-free cuts, the anti-splintering device can
be used. To install the anti-splintering device, move the
toolbaseallthewayforwardandtitfromthebackof
tool base.
When you use the cover plate, install the anti-splintering
device onto the cover plate.
1
2
Fig.28
►1. Base 2. Anti-splintering device
Cover plate
Use the cover plate when cutting decorative veneers,
plastics, etc. It protects sensitive or delicate surfaces
from damage. Fit it on the bottom of the tool base.
1
2
Fig.29
►1. Cover plate 2. Base

14 ENGLISH
Guide rail adapter set
Optional accessory
When cutting parallel and uniform width or cutting straight,
the use of the guide rail and the guide rail adapter will assure
the production of fast and clean cuts. To install the guide rail
adapter, insert the rule bar into the square hole of the base
as far as it goes. Secure the bolt with the hex wrench securely.
1
2
3
Fig.30
►1. Hex wrench 2. Rule bar 3. Bolt
Insert the rule bar into the square hole of the guide rail
adapter,andsecurethescrewrmly.Placetheguide
rail adapter on the guide rail.
32
1
Fig.31
►1. Guide rail adapter 2. Guide rail 3. Screw
NOTICE:AlwaysusejigsawbladesNo.B-8,B-13,
B-16, B-17 or 58 when using the guide rail and the
guide rail adapter.
MAINTENANCE
CAUTION: Always be sure that the tool is
switched o and the battery cartridge is removed
before attempting to perform inspection or
maintenance.
NOTICE: Never use gasoline, benzine, thinner,
alcohol or the like. Discoloration, deformation or
cracks may result.
To maintain product SAFETY and RELIABILITY,
repairs,anyothermaintenanceoradjustmentshould
be performed by Makita Authorized or Factory Service
Centers, always using Makita replacement parts.
OPTIONAL
ACCESSORIES
CAUTION: These accessories or attachments
are recommended for use with your Makita tool
specied in this manual. The use of any other
accessories or attachments might present a risk of
injurytopersons.Onlyuseaccessoryorattachment
for its stated purpose.
If you need any assistance for more details regard-
ing these accessories, ask your local Makita Service
Center.
• Jig saw blades
• Rip fence (guide rule) set
• Guide rail adapter set
• Anti-splintering device
• Cover plate
• Dust nozzle
• Dust cover
• Makita genuine battery and charger
NOTE: Some items in the list may be included in the
tool package as standard accessories. They may
dierfromcountrytocountry.
MAKITA LIMITED WARRANTY
Please refer to the annexed warranty sheet for the
most current warranty terms applicable to this product.
If annexed warranty sheet is not available, refer to the
warranty details set forth at below website for your
respective country.
United States of America: www.makitatools.com
Canada: www.makita.ca
Other countries: www.makita.com

15 FRANÇAIS
FRANÇAIS (Mode d’emploi original)
SPÉCIFICATIONS
Modèle : DJV185
Longueur de course 23 mm (7/8")
Nombre de courses par minute 800 - 3 000 /min
Type de lame Type B
Capacités de coupe max. Bois 135 mm (5-5/16")
Acier doux 10 mm (3/8")
Aluminium 20 mm (13/16")
Longueur hors-tout (avec BL1860B) 259 mm (10-1/4")
Tension nominale C.C. 18 V
Poids net 2,0 - 2,3 kg (4,4 - 5,1 lbs)
• Étantdonnél’évolutionconstantedenotreprogrammederechercheetdéveloppement,lesspécications
contenuesdanscemanuelsontsujettesàmodicationsanspréavis.
• Lesspécicationspeuventvariersuivantlespays.
• Le poids peut varier selon les accessoires, y compris la batterie. La plus légère et la plus lourde combinaisons,
selon la procédure EPTA 01/2014, sont indiquées dans le tableau.
Batteries et chargeurs applicables
Batterie BL1815N / BL1820B / BL1830B / BL1840B / BL1850B / BL1860B
Chargeur DC18RC / DC18RD / DC18RE / DC18SD / DC18SE / DC18SF /
DC18SH / DC18WC
• Suivant la région où vous habitez, il se peut que certaines des batteries et certains des chargeurs énumérés
ci-dessus ne soient pas disponibles.
MISE EN GARDE : Utilisez exclusivement les batteries et chargeurs énumérés ci-dessus. L’utilisation
de toute autre batterie ou tout autre chargeur peut entraîner une blessure et/ou un incendie.
CONSIGNES DE
SÉCURITÉ
Consignes de sécurité générales
pour outils électriques
MISE EN GARDE Veuillez lire l’ensemble des
consignes de sécurité, instructions, illustrations et
spécications fournies pour cet outil électrique. Il
existe un risque de décharge électrique, d’incendie et/
ou de blessures graves si toutes les instructions énu-
mérées ci-dessous ne sont pas respectées.
Conservez toutes les mises en
garde et instructions pour réfé-
rence future.
Leterme«outilélectrique»quiguredanslesavertis-
sementsfaitréférenceàunoutilélectriquebranchésur
une prise de courant (par un cordon d’alimentation) ou
alimentéparbatterie(sansl).
Sécurité de la zone de travail
1. Maintenez la zone de travail propre et bien
éclairée. Les zones de travail encombrées ou
sombres ouvrent grande la porte aux accidents.
2.
N’utilisez pas les outils électriques dans les atmos-
phères explosives, par exemple en présence de
liquides, gaz ou poussières inammables. Les outils
électriques produisent des étincelles au contact des-
quelleslapoussièreoulesvapeurspeuvents’enammer.
3. Assurez-vous qu’aucun enfant ou curieux ne
s’approche pendant que vous utilisez un outil
électrique. Vous risquez de perdre la maîtrise de
l’outil si votre attention est détournée.
Sécurité en matière d’électricité
1.
Les ches d’outil électrique sont conçues pour
s’adapter parfaitement aux prises de courant. Ne
modiez jamais la che de quelque façon que ce
soit. N’utilisez aucun adaptateur de che sur les
outils électriques avec mise à la terre. En ne modi-
antpasleschesetenlesinsérantdansdesprises
de courant pour lesquelles elles ont été conçues,
vous réduirez les risques de choc électrique.
2.
Évitez tout contact corporel avec les surfaces
mises à la terre, telles que tuyaux, radiateurs, cuisi-
nières et réfrigérateurs. Le risque de choc électrique
estplusélevésivotrecorpssetrouvemisàlaterre.

16 FRANÇAIS
3. N’exposez pas les outils électriques à la pluie
ou à l’eau. La présence d’eau dans un outil élec-
trique augmente le risque de choc électrique.
4. Ne maltraitez pas le cordon. N’utilisez jamais
le cordon pour transporter, tirer ou débrancher
l’outil électrique. Maintenez le cordon à l’écart
des sources de chaleur, de l’huile, des objets à
bords tranchants et des pièces en mouvement.
Le risque de choc électrique est plus élevé lorsque
les cordons sont endommagés ou enchevêtrés.
5. Lorsque vous utilisez un outil électrique à l’ex-
térieur, utilisez un cordon prolongateur conçu
pour l’usage extérieur. Les risque de choc élec-
trique est moindre lorsqu’un cordon conçu pour
l’usage extérieur est utilisé.
6. Si vous devez utiliser un outil électrique dans
un endroit humide, utilisez une source d’ali-
mentation protégée par un disjoncteur de fuite
à la terre.L’utilisationd’undisjoncteurdefuiteàla
terre réduit le risque de choc électrique.
7. Les outils électriques peuvent produire des
champs électromagnétiques (CEM) qui ne sont
pas préjudiciables à l’utilisateur. Les utilisa-
teurs de stimulateur cardiaque ou autres appareils
médicaux similaires doivent toutefois demander
conseilaufabricantet/ouàleurmédecinavant
d’utiliser cet outil électrique.
Sécurité personnelle
1. Restez alerte, attentif à vos mouvements et
faites preuve de bon sens lorsque vous utili-
sez un outil électrique. N’utilisez pas les outils
électriques si vous êtes fatigué ou avez pris
une drogue, de l’alcool ou un médicament. Un
moment d’inattention pendant l’utilisation d’un
outil électrique peut entraîner une grave blessure.
2. Portez des dispositifs de protection person-
nelle. Portez toujours une protection oculaire.
Les risques de blessure seront moins élevés si
vous utilisez des dispositifs de protection tels
qu’unmasqueanti-poussière,deschaussuresà
semelleantidérapante,unecoiurerésistanteou
une protection d’oreilles.
3.
Évitez les démarrages accidentels. Assurez-
vous que l’interrupteur est en position d’arrêt
avant de brancher l’outil à la prise de courant
et/ou au bloc-piles, et avant de prendre ou de
transporter l’outil. Vous ouvrez la porte aux acci-
dents si vous transportez les outils électriques avec
le doigt sur l’interrupteur ou si vous les branchez
alors que l’interrupteur est en position de marche.
4. Retirez toute clé de réglage ou de serrage
avant de mettre l’outil électrique sous tension.
Toute clé laissée en place sur une pièce rotative
de l’outil électrique peut entraîner une blessure.
5. Ne vous étirez pas exagérément. Assurez-vous
d’une bonne prise au sol et d’un bon équilibre
en tout temps. Cela vous permettra d’avoir une
meilleure maîtrise de l’outil électrique dans les
situations imprévues.
6. Habillez-vous convenablement. Ne portez pas
de vêtement ample ou des bijoux. Maintenez
vos cheveux et vos vêtements à l’écart des
pièces mobiles. Les vêtements amples, les
bijouxetlescheveuxlongspeuventresterpris
dans les pièces mobiles.
7. Si des accessoires sont fournis pour raccorder
un appareil d’aspiration et de collecte de la
poussière, assurez-vous qu’ils sont correc-
tement raccordés et qu’ils sont utilisés de
manière adéquate. L’utilisation d’un appareil de
collectepermetderéduirelesrisquesliésàla
présence de poussière dans l’air.
8. Évitez d’être complaisant et d’ignorer les
principes de sécurité de l’outil en raison de la
familiarité acquise par un usage fréquent des
outils. Un geste imprudent peut entraîner une
grave blessure en une fraction de seconde.
9. Portez toujours des lunettes à coques de pro-
tection pour protéger vos yeux contre les bles-
sures lors de l’utilisation d’outils électriques.
Les lunettes à coques doivent être conformes
à ANSI Z87.1 aux États-Unis.
L’employeur a la responsabilité d’imposer
l’utilisation d’équipements de protection de
sécurité adéquats aux utilisateurs des outils
électriques et à toute autre personne se trou-
vant dans la zone de travail immédiate.
Utilisation et entretien des outils électriques
1.
Ne forcez pas l’outil électrique. Utilisez l’outil
électrique adéquat suivant le type de travail à
eectuer. Si vous utilisez l’outil électrique adéquat et
respectezlerégimepourlequelilaétéconçu,ileec-
tuera un travail de meilleure qualité et plus sécuritaire.
2.
N’utilisez pas l’outil électrique s’il n’est pas
possible de l’allumer et de l’éteindre avec son
interrupteur. Un outil électrique dont l’interrupteur est
défectueux représente un danger et doit être réparé.
3.
Avant d’eectuer tout réglage, de remplacer un
accessoire ou de ranger l’outil électrique, débran-
chez la che de la source d’alimentation et/ou retirez
la batterie de l’outil électrique si elle est amovible.
Ces mesures préventives de sécurité réduisent les
risques de démarrage accidentel de l’outil électrique.
4.
Après l’utilisation d’un outil électrique, rangez-le
hors de portée des enfants et ne laissez aucune
personne l’utiliser si elle n’est pas familiarisée
avec l’outil électrique ou les présentes instruc-
tions d’utilisation. Les outils électriques repré-
sentent un danger entre les mains de personnes qui
n’en connaissent pas le mode d’utilisation.
5. Eectuez l’entretien des outils électriques et
des accessoires. Assurez-vous que les pièces
mobiles ne sont pas désalignées ou coincées,
qu’aucune pièce n’est cassée et que l’outil
électrique n’a subi aucun dommage aectant
son bon fonctionnement. Le cas échéant,
faites réparer l’outil électrique avant de l’utili-
ser. De nombreux accidents sont causés par des
outils électriques mal entretenus.
6.
Maintenez les outils tranchants bien aiguisés et
propres.Unoutiltranchantdontl’entretienesteectué
correctement et dont les bords sont bien aiguisés ris-
queramoinsdesecoinceretseraplusfacileàmaîtriser.
7. Utilisez l’outil électrique, ses accessoires, ses
embouts, etc., en respectant les présentes
instructions, en tenant compte des conditions
de travail et du type de travail à eectuer.
L’utilisation d’un outil électrique pour d’autres
usages que ceux prévus peut entraîner une situa-
tion dangereuse.

17 FRANÇAIS
8. Gardez les poignées et surfaces de saisie
sèches, propres et exemptes d’huile et de
graisse. Les poignées et surfaces de saisie glis-
santes ne permettent pas une manipulation sûre
et une bonne maîtrise de l’outil dans les situations
inattendues.
9. Lors de l’utilisation de l’outil, ne portez pas
de gants de travail en tissu qui risquent de
s’enchevêtrer dans l’outil. L’enchevêtrement de
gants de travail en tissu dans les pièces en mou-
vement peut entraîner une blessure.
Utilisation et entretien des outils alimentés par
batterie
1. Pour recharger, utilisez uniquement le char-
geur spécié par le fabricant. L’utilisation d’un
chargeur conçu pour un type donné de bloc-piles
comporte un risque d’incendie lorsqu’il est utilisé
avec un autre type de bloc-piles.
2. N’utilisez un outil électrique qu’avec le bloc-
piles conçu spéciquement pour cet outil. Il y a
risque de blessure ou d’incendie si un autre bloc-
piles est utilisé.
3. Lorsque vous n’utilisez pas le bloc-piles, ran-
gez-le à l’écart des objets métalliques tels que
trombones, pièces de monnaie, clés, clous,
vis ou autres petits objets métalliques qui
risqueraient d’établir une connexion entre les
bornes. La mise en court-circuit des bornes de
batterie peut causer des brûlures ou un incendie.
4. Dans des conditions d’utilisation inadéquates
de la batterie, il peut y avoir fuite d’électrolyte;
évitez tout contact avec ce liquide. En cas
de contact accidentel, rincez avec beaucoup
d’eau. Si le liquide pénètre dans vos yeux, il
faut aussi consulter un médecin. L’électrolyte
qui s’échappe de la batterie peut causer des
irritations ou des brûlures.
5. N’utilisez pas une batterie ou un outil s’il est
endommagé ou modié. Les batteries endom-
magéesoumodiéespeuventavoiruncomporte-
ment imprévisible dont peut résulter un incendie,
une explosion ou un risque de blessure.
6. N’exposez pas une batterie ou un outil au feu
ou à une température excessive. L’exposition
aufeuouàunetempératuresupérieureà130°C
peut entraîner une explosion.
7. Suivez toutes les instructions de charge et ne
chargez pas la batterie ou l’outil à l’extérieur
de la plage de température spéciée dans les
instructions. Charger de manière inadéquate
ouàdestempératureshorsdelaplagespéciée
peut endommager la batterie et augmenter le
risque d’incendie.
Réparation
1. Faites réparer votre outil électrique par un
réparateur qualié qui utilise des pièces de
rechange identiques aux pièces d’origine. Le
maintien de la sûreté de l’outil électrique sera ainsi
assuré.
2. N’essayez jamais de réparer les batteries
endommagées. La réparation des batteries ne
doitêtreeectuéequeparlefabricantouparun
fournisseur de service après-vente agréé.
3. Suivez les instructions de lubrication et de
remplacement des accessoires.
4. Ne modiez pas ou n’essayez pas de réparer
l’appareil ou la batterie autrement que tel
qu’indiqué dans les instructions d’utilisation
et d’entretien.
Consignes de sécurité pour scie
sauteuse sans l
1. Tenez l’outil électrique par ses surfaces de
prise isolées pendant toute utilisation où l’ac-
cessoire de coupe pourrait venir en contact
avec un câblage dissimulé. En cas de contact
del’accessoiredecoupeavecunlsoustension,
lespiècesmétalliquesàdécouvertdel’outilélec-
trique pourraient se mettre sous tension et trans-
mettreunedéchargeélectriqueàl’utilisateur.
2. Utilisez des dispositifs de serrage ou un autre
moyen pratique pour xer et soutenir la pièce
sur une surface de travail stable. La pièce sera
instable et vous risquerez d’en perdre la maîtrise
si vous la tenez avec une main ou l’appuyez sim-
plement contre une partie du corps.
3. Portez toujours des lunettes de sécurité ou
des lunettes à coques. Les lunettes ordinaires
et les lunettes de soleil NE sont PAS des
lunettes de sécurité.
4. Évitez les clous. Avant de commencer le tra-
vail, vériez la pièce pour en retirer tous les
clous.
5. Ne sciez pas de pièces dont la taille dépasse la
capacité de coupe de la scie.
6. Avant de commencer la coupe, assurez-vous
qu’il y a susamment d’espace autour de la
pièce pour que la lame de scie sauteuse ne
heurte pas le plancher, l’établi, etc.
7. Tenez l’outil fermement.
8. Avant d’allumer l’outil, assurez-vous que la
lame de scie sauteuse ne touche pas la pièce.
9. Gardez vos mains éloignées des pièces
mobiles.
10. Ne quittez pas l’outil pendant qu’il tourne.
N’utilisez l’outil qu’une fois que vous l’avez
bien en main.
11. Avant de retirer la lame de scie sauteuse de la
pièce, coupez toujours le contact et attendez
l’arrêt complet de la lame de scie sauteuse.
12. Ne touchez ni la lame de scie sauteuse ni la
pièce immédiatement après la coupe; elles
risquent d’être extrêmement chaudes et de
vous brûler la peau.
13. Ne faites pas tourner inutilement l’outil à vide.
14. Certains matériaux contiennent des produits
chimiques qui peuvent être toxiques. Prenez
les précautions nécessaires pour éviter l’in-
halation des poussières et le contact avec la
peau. Respectez les consignes de sécurité du
fournisseur du matériau.
15. Utilisez toujours un masque antipoussières
ou un masque ltrant approprié au matériau à
travailler et à l’application utilisée.
CONSERVEZ CE MODE
D’EMPLOI.

18 FRANÇAIS
MISE EN GARDE : NE VOUS LAISSEZ PAS
tromper (au l d’une utilisation répétée) par un
sentiment d’aisance ou de familiarité avec le
produit en négligeant les consignes de sécurité
qui accompagnent le produit. L’UTILISATION
INCORRECTE ou l’ignorance des consignes de
sécurité du présent manuel d’instructions com-
porte un risque de blessure grave.
Symboles
Les symboles utilisés pour l’outil sont indiqués
ci-dessous.
volts
courant continu
vitesseàvide
tours ou alternances par minute
Consignes de sécurité importantes
pour la batterie
1. Avant d’utiliser la batterie, lisez toutes les
instructions et les mises en garde apposées
sur (1) le chargeur de batterie, (2) la batterie et
(3) le produit utilisant la batterie.
2. Ne démontez pas et ne modiez pas la batte-
rie. Cela peut entraîner un incendie, une chaleur
excessive ou une explosion.
3. Cessez immédiatement l’utilisation si le temps
de fonctionnement devient excessivement
court. Il y a risque de surchaue, de brûlures,
voire d’explosion.
4. Si l’électrolyte pénètre dans vos yeux, rin-
cez-les à l’eau claire et consultez immédiate-
ment un médecin. Il y a risque de perte de la
vue.
5. Ne court-circuitez pas la batterie :
(1) Ne touchez les bornes avec aucun maté-
riau conducteur.
(2) Évitez de ranger la batterie dans un
conteneur avec d’autres objets métal-
liques tels que clous, pièces de monnaie,
etc.
(3) Évitez d’exposer la batterie à l’eau ou à la
pluie.
Un court-circuit de la batterie pourrait provo-
quer un fort courant, une surchaue, parfois
des brûlures et même une panne.
6.
Ne rangez pas et n’utilisez pas l’outil ou la bat-
terie dans des emplacements où la température
peut atteindre ou dépasser 50 °C (122 °F).
7. Ne jetez pas la batterie au feu même si elle est
sérieusement endommagée ou complètement
épuisée. La batterie peut exploser au contact
du feu.
8. Évitez de clouer, de couper, d’écraser, de lan-
cer ou d’échapper la batterie, ou de heurter un
objet dur contre la batterie. Cela peut entraî-
ner un incendie, une chaleur excessive ou une
explosion.
9. N’utilisez pas une batterie si elle est
endommagée.
10. Les batteries lithium-ion fournies sont sou-
mises aux exigences de la législation sur les
marchandises dangereuses.
Des exigences particulières sur l’emballage et
l’étiquetage doivent être respectées lors du trans-
port commercial par des tiers, des transitaires, etc.
Pourpréparerlamarchandiseàexpédier,consul-
tez un expert en matériaux dangereux si néces-
saire. Respectez aussi les éventuelles réglemen-
tations nationales plus détaillées.
Recouvrez de ruban isolant les contacts exposés,
et emballez la batterie de sorte qu’elle ne puisse
passedéplaceràl’intérieurdel’emballage.
11. Lors de l’élimination de la batterie, retirez-la
de l’outil et éliminez-la dans un endroit sûr.
Respectez la réglementation locale concernant
l’élimination de la batterie.
12. N’utilisez les batteries qu’avec les produits
spéciés par Makita. Installer les batteries sur
des produits non conformes peut entraîner un
incendie, une chaleur excessive, une explosion ou
une fuite d’électrolyte.
13. Si l’outil reste inutilisé pour une période pro-
longée, la batterie doit en être retirée.
14. Pendant et après l’utilisation, la batterie peut
accumuler de la chaleur, ce qui peut causer
des brûlures ou des brûlures à basse tempé-
rature. Faites attention lors de la manipulation
des batteries chaudes.
15. Ne touchez pas la borne de l’outil immédiate-
ment après l’utilisation, car elle peut être assez
chaude pour causer des brûlures.
16. Ne laissez pas les copeaux, les poussières ou
la terre se coincer dans les bornes, les trous et
les rainures de la batterie. Cela pourrait causer
unréchauement,unincendie,unéclatementet
une défaillance de l’outil ou de la batterie et entraî-
ner des brûlures ou des blessures corporelles.
17. À moins que l’outil ne soit compatible avec
l’utilisation à proximité des lignes électriques
haute tension, n’utilisez pas la batterie à
proximité d’une ligne électrique haute tension.
Cela peut entraîner un dysfonctionnement ou une
panne de l’outil ou de la batterie.
18. Gardez la batterie à l’écart des enfants.
CONSERVEZ CES
INSTRUCTIONS.
ATTENTION : Utilisez exclusivement les bat-
teries fabriquées par Makita. Les batteries autres
que celles fabriquées par Makita ou les batteries
modiéespeuventexploseretcauserunincendie,
une blessure ou des dommages. Cela annule aussi la
garantie Makita de l’outil et du chargeur Makita.

19 FRANÇAIS
Conseils pour maintenir la durée
de service maximale de la batterie
1. Rechargez la batterie avant qu’elle ne soit
complètement déchargée. Arrêtez toujours
l’outil et rechargez la batterie quand vous
remarquez que la puissance de l’outil diminue.
2. Ne rechargez jamais une batterie complète-
ment chargée. La surcharge réduit la durée de
service de la batterie.
3. Chargez la batterie à une température
ambiante comprise entre 10 °C et 40 °C (50 °F
et 104 °F). Si la batterie est chaude, laissez-la
refroidir avant de la charger.
4. Lorsque vous n’utilisez pas la batterie, reti-
rez-la de l’outil ou du chargeur.
5. Chargez la batterie si elle est restée inutilisée
pendant une période prolongée (plus de six
mois).
DESCRIPTION DU
FONCTIONNEMENT
ATTENTION : Assurez-vous toujours que
l’outil est éteint et que sa batterie est retirée avant
de l’ajuster ou de vérier son fonctionnement.
Installation ou retrait de la batterie
ATTENTION : Éteignez toujours l’outil avant
d’installer ou de retirer la batterie.
ATTENTION : Tenez fermement l’outil et la
batterie lors de l’installation ou du retrait de cette
dernière. Si l’outil et la batterie ne sont pas tenus
fermement, ils risquent de vous glisser des mains et
de subir des dommages, ou encore de vous blesser.
Pour installer la batterie, alignez sa languette sur la
rainure pratiquée dans le boîtier et glissez la batterie en
place.Insérez-laàfondjusqu’àcequevousentendiez
un léger déclic. Si vous pouvez voir l’indicateur rouge
telqu’illustrésurlagure,celasigniequ’ellen’estpas
complètement verrouillée.
Pour retirer la batterie, faites-la glisser hors de l’outil
toutenglissantleboutonquisetrouveàl’avant.
1
2
3
Fig.1
►1. Indicateur rouge 2. Bouton 3. Batterie
ATTENTION : Installez toujours la batterie
à fond jusqu’à ce que vous ne puissiez plus
voir l’indicateur rouge. Autrement elle risque de
tomber accidentellement de l’outil et d’entraîner des
blessures.
ATTENTION : Ne forcez pas sur la batterie
pour l’installer. Si la batterie ne glisse pas facile-
ment, c’est qu’elle n’est pas insérée correctement.
Dispositif de protection de l’outil et
de la batterie
L’outil est équipé d’un système de protection d’outil/
batterie. Ce système coupe automatiquement l’alimen-
tation du moteur pour augmenter la durée de vie de
l’outil et de la batterie. L’outil s’arrête automatiquement
pendant l’utilisation lorsque l’outil ou la batterie est dans
l’une des situations suivantes :
Protection contre la surcharge
Lorsque l’outil ou la batterie est utilisé d’une manière
entraînant une consommation anormalement élevée de
courant, l’outil s’arrête automatiquement sans aucune
indication. Dans cette situation, éteignez l’outil et
arrêtez l’activité qui entraîne une surcharge de l’outil.
Rallumez ensuite l’outil pour redémarrer.
Protection contre la surchaue
Lorsquel’outiloulabatteriesurchaue,l’outils’arrête
automatiquement et la lampe clignote. Le cas échéant,
laissez refroidir l’outil et la batterie avant de rallumer
l’outil.
Protection contre la décharge
excessive
Lorsquelachargedelabatterien’estpassusante,
l’outil s’arrête automatiquement. Le cas échéant, retirez
la batterie de l’outil et chargez-la.
Protections contre d’autres causes
Le dispositif de protection est aussi conçu pour d’autres
causes qui pourraient endommager l’outil et permet
d’arrêter automatiquement l’outil. Prenez toutes les
mesures suivantes pour éliminer les causes lorsque le
fonctionnement de l’outil a été interrompu temporaire-
ment ou arrêté.
1. Éteignez l’outil et remettez-le de nouveau en
marche.
2. Chargez la/les batterie(s) ou remplacez-la/les par
une/des batteries rechargée(s).
3. Laissez l’outil et la/les batteries se refroidir.
Si la situation ne s’améliore pas en restaurant le dis-
positif de protection, contactez votre centre de service
Makita local.

20 FRANÇAIS
Achage de la charge restante de la
batterie
Uniquement pour les batteries avec voyant
Appuyezsurleboutondevéricationdelabatteriepour
acherlachargerestantedelabatterie.Lestémoins
indicateurs s’allument pendant quelques secondes.
1
2
Fig.2
►1. Témoins indicateurs 2.Boutondevérication
Témoins indicateurs Charge
restante
Allumé Éteint Clignotant
75%à100%
50%à75%
25%à50%
0%à25%
Chargez la
batterie.
La batterie a
peut-être mal
fonctionné.
NOTE : Suivant les conditions d’utilisation et la
température ambiante, il se peut que l’indication soit
légèrementdiérentedelachargeréelle.
NOTE :Lapremièrelampetémoin(àl’extrémité
gauche) clignote lorsque le dispositif de protection de
la batterie s’active.
Sélection du mode de coupe
Cet outil peut être utilisé en mode de coupe orbitale
ou rectiligne (haut et bas). Le mode de coupe orbitale
pousse la lame de scie sauteuse vers l’avant et accé-
lère la vitesse de coupe.
1
Fig.3
►1. Levier de changement de mode de coupe
Pour changer de mode de coupe, tournez le levier
de changement de mode de coupe sur la position de
mode de coupe désirée. Reportez-vous au tableau pour
sélectionner le mode de coupe approprié.
Position Mode de coupe Applications
0Mode de coupe
rectiligne
Pour couper
l’acier doux, l’acier
inoxydable et les
plastiques.
Pour des coupes
nettes dans le bois
et le contreplaqué.
IModedecoupeà
petite orbite
Pour couper l’acier
doux, l’aluminium
et le bois dur.
II Modedecoupeà
orbite moyenne
Pour couper le bois
et le contreplaqué.
Pour couper rapi-
dement l’aluminium
et l’acier doux.
III Modedecoupeà
grande orbite
Pour couper rapi-
dement le bois et le
contreplaqué.
Other manuals for DJV185
6
Table of contents
Languages:
Other Makita Cordless Saw manuals

Makita
Makita HS011GZ User manual

Makita
Makita JV102D User manual

Makita
Makita BSS501Z User manual

Makita
Makita DJV181 User manual

Makita
Makita DRS780 User manual

Makita
Makita HS011G User manual

Makita
Makita DHS660 User manual

Makita
Makita JR103D User manual

Makita
Makita RS002GZ User manual

Makita
Makita XSH08 User manual

Makita
Makita DJR188 User manual

Makita
Makita DHS782 User manual

Makita
Makita 4331D User manual

Makita
Makita JR103D User manual

Makita
Makita HS301DZ User manual

Makita
Makita HS012G User manual

Makita
Makita UC120D User manual

Makita
Makita 4307D User manual

Makita
Makita GSH04 User manual

Makita
Makita DJR181 User manual