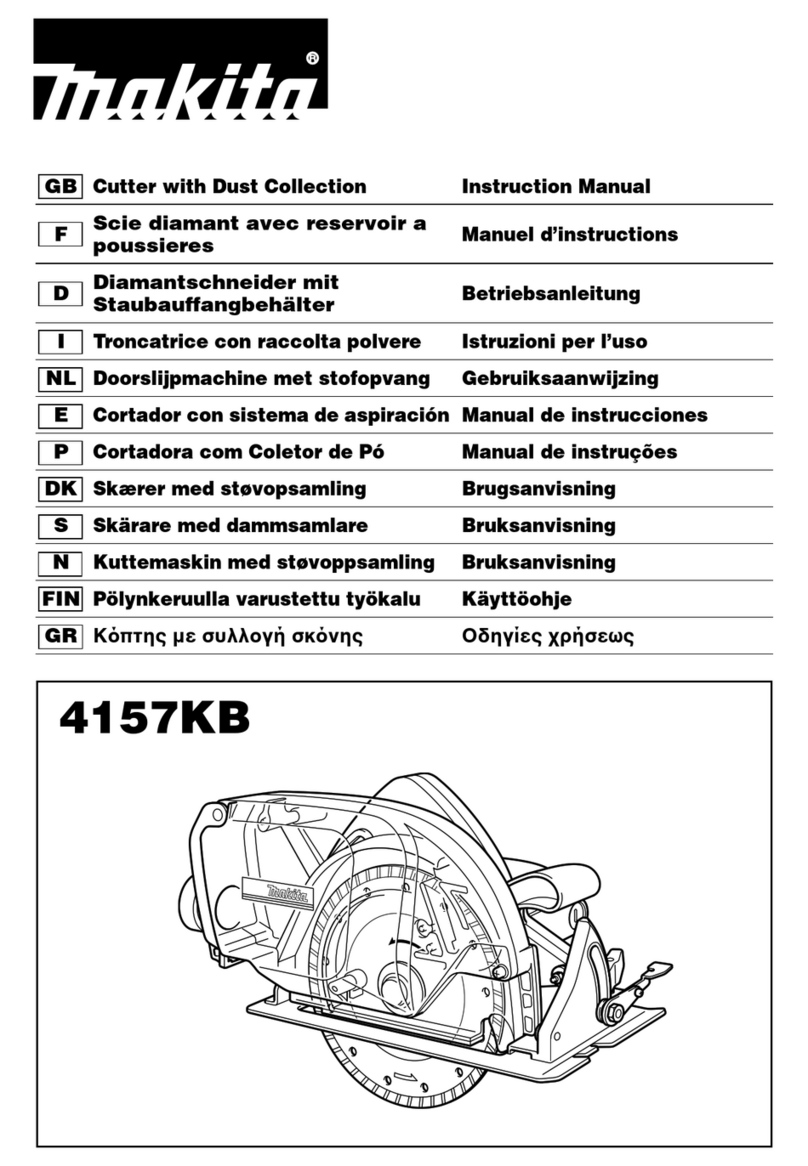
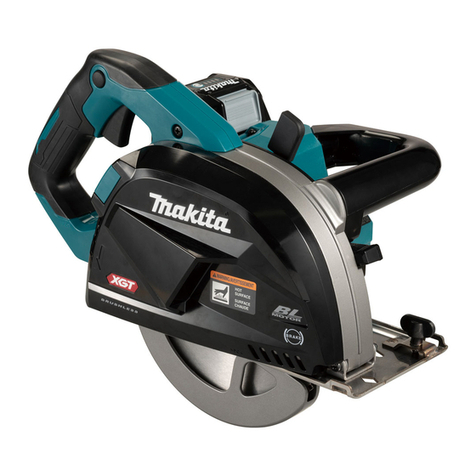
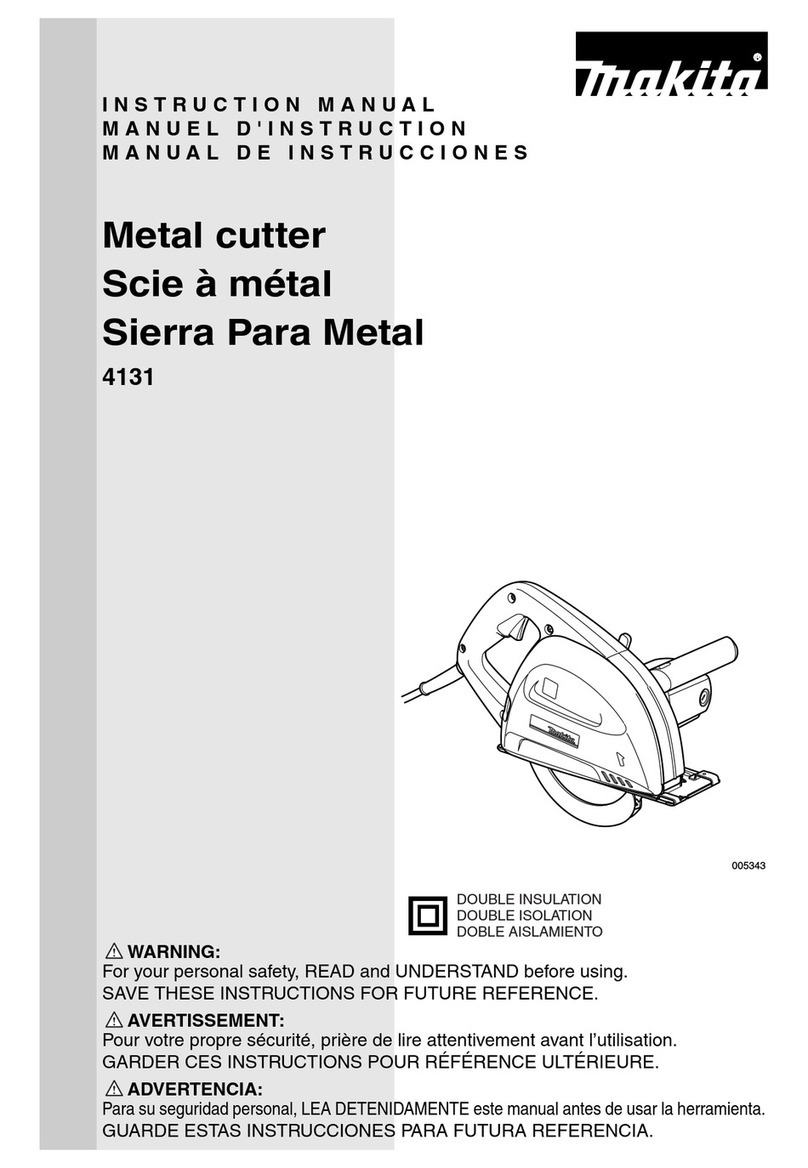
Makita DMC300 User manual

2
1
2
3
Fig.1
1
2
Fig.2
1
2
Fig.3
1
Fig.4
1
2
1
2
1
Fig.5
1
2
1
1
2
Fig.6
1
2
Fig.7

3
1
2
Fig.8
1
Fig.9
1
Fig.10
1
3
2
Fig.11
1
3
2
3
Fig.12

4
1
2
3
4
Fig.13
1
Fig.14
1
2
3
4
5
Fig.15
1
2
3
4
5
Fig.16
1
2
3
Fig.17
1
Fig.18

5
12
3
4
Fig.19
1
2
Fig.20
2
1
Fig.21
1
2
3
Fig.22
1
2
3
4
5
Fig.23
1
2
Fig.24

6
1
2
Fig.25
Fig.26
Fig.27
Fig.28
Fig.29

7
12
Fig.30
1
2
Fig.31

8ENGLISH
ENGLISH (Original instructions)
SPECIFICATIONS
Model: DMC300
Wheel outer diameter 76 mm
Wheel inner (arbor) diameter 10.0 mm / 9.5 mm (3/8") (country specic)
Max. wheel thickness 1.0 mm
Max. cutting
capacities
With dust collect cover 13.5 mm
Without dust collect cover 16.0 mm
Rated speed (n) / No load speed (n0)20,000 min-1
Overall length 271 mm *1
Rated voltage D.C. 18 V
Net weight 1.2 - 1.7 kg
*1. With battery cartridge (BL1860B) / Without dust collection cover
• Due to our continuing program of research and development, the specications herein are subject to change
without notice.
• Specications and battery cartridge may dier from country to country.
• The weight may dier depending on the attachment(s), including the battery cartridge. The lightest and heavi-
est combinations, according to EPTA-Procedure 01/2014, are shown in the table.
Applicable battery cartridge and charger
Battery cartridge BL1815N / BL1820B / BL1830B / BL1840B / BL1850B / BL1860B
Charger DC18RC / DC18RD / DC18RE / DC18SD / DC18SE / DC18SF /
DC18SH / DC18WC
• Some of the battery cartridges and chargers listed above may not be available depending on your region of
residence.
WARNING: Only use the battery cartridges and chargers listed above. Use of any other battery cartridges
and chargers may cause injury and/or re.
Symbols
The followings show the symbols which may be used
for the equipment. Be sure that you understand their
meaning before use.
Read instruction manual.
Wear safety glasses.
Only for EU countries
Due to the presence of hazardous compo-
nents in the equipment, used electrical and
electronic equipment may have a negative
impact on the environment and human
health.
Do not dispose of electrical and electronic
appliances with household waste!
In accordance with the European Directive
on waste electrical and electronic equip-
ment and its adaptation to national law,
used electrical and electronic equipment
should be collected separately and
delivered to a separate collection point
for municipal waste, operating in accor-
dance with the environmental protection
regulations.
This is indicated by the symbol of the
crossed-out wheeled bin placed on the
equipment.
Intended use
The tool is intended for cutting a sheet, tting, pipe, tile
or wall in metal, plastic, ceramic, plaster and similar
composite materials without use of water.

9ENGLISH
SAFETY WARNINGS
General power tool safety warnings
WARNING: Read all safety warnings, instruc-
tions, illustrations and specications provided
with this power tool. Failure to follow all instructions
listed below may result in electric shock, re and/or
serious injury.
Save all warnings and instruc-
tions for future reference.
The term “power tool” in the warnings refers to your
mains-operated (corded) power tool or battery-operated
(cordless) power tool.
Work area safety
1. Keep work area clean and well lit. Cluttered or
dark areas invite accidents.
2. Do not operate power tools in explosive atmo-
spheres, such as in the presence of ammable
liquids, gases or dust. Power tools create sparks
which may ignite the dust or fumes.
3. Keep children and bystanders away while
operating a power tool. Distractions can cause
you to lose control.
Electrical safety
1. Power tool plugs must match the outlet. Never
modify the plug in any way. Do not use any
adapter plugs with earthed (grounded) power
tools. Unmodied plugs and matching outlets will
reduce risk of electric shock.
2. Avoid body contact with earthed or grounded
surfaces, such as pipes, radiators, ranges and
refrigerators. There is an increased risk of elec-
tric shock if your body is earthed or grounded.
3. Do not expose power tools to rain or wet con-
ditions. Water entering a power tool will increase
the risk of electric shock.
4. Do not abuse the cord. Never use the cord for
carrying, pulling or unplugging the power tool.
Keep cord away from heat, oil, sharp edges
or moving parts. Damaged or entangled cords
increase the risk of electric shock.
5. When operating a power tool outdoors, use an
extension cord suitable for outdoor use. Use of
a cord suitable for outdoor use reduces the risk of
electric shock.
6. If operating a power tool in a damp location
is unavoidable, use a residual current device
(RCD) protected supply. Use of an RCD reduces
the risk of electric shock.
7. Power tools can produce electromagnetic
elds (EMF) that are not harmful to the user.
However, users of pacemakers and other similar
medical devices should contact the maker of their
device and/or doctor for advice before operating
this power tool.
Personal safety
1. Stay alert, watch what you are doing and use
common sense when operating a power tool.
Do not use a power tool while you are tired or
under the inuence of drugs, alcohol or med-
ication. A moment of inattention while operating
power tools may result in serious personal injury.
2. Use personal protective equipment. Always
wear eye protection. Protective equipment such
as a dust mask, non-skid safety shoes, hard hat or
hearing protection used for appropriate conditions
will reduce personal injuries.
3. Prevent unintentional starting. Ensure the
switch is in the o-position before connecting
to power source and/or battery pack, picking
up or carrying the tool. Carrying power tools with
your nger on the switch or energising power tools
that have the switch on invites accidents.
4. Remove any adjusting key or wrench before
turning the power tool on. A wrench or a key left
attached to a rotating part of the power tool may
result in personal injury.
5. Do not overreach. Keep proper footing and
balance at all times. This enables better control
of the power tool in unexpected situations.
6. Dress properly. Do not wear loose clothing or
jewellery. Keep your hair and clothing away
from moving parts. Loose clothes, jewellery or
long hair can be caught in moving parts.
7. If devices are provided for the connection of
dust extraction and collection facilities, ensure
these are connected and properly used. Use of
dust collection can reduce dust-related hazards.
8. Do not let familiarity gained from frequent use
of tools allow you to become complacent and
ignore tool safety principles. A careless action
can cause severe injury within a fraction of a
second.
9. Always wear protective goggles to protect
your eyes from injury when using power tools.
The goggles must comply with ANSI Z87.1 in
the USA, EN 166 in Europe, or AS/NZS 1336
in Australia/New Zealand. In Australia/New
Zealand, it is legally required to wear a face
shield to protect your face, too.
It is an employer's responsibility to enforce
the use of appropriate safety protective equip-
ments by the tool operators and by other per-
sons in the immediate working area.

10 ENGLISH
Power tool use and care
1. Do not force the power tool. Use the correct
power tool for your application. The correct
power tool will do the job better and safer at the
rate for which it was designed.
2. Do not use the power tool if the switch does
not turn it on and o. Any power tool that cannot
be controlled with the switch is dangerous and
must be repaired.
3. Disconnect the plug from the power source
and/or remove the battery pack, if detachable,
from the power tool before making any adjust-
ments, changing accessories, or storing power
tools. Such preventive safety measures reduce
the risk of starting the power tool accidentally.
4. Store idle power tools out of the reach of chil-
dren and do not allow persons unfamiliar with
the power tool or these instructions to operate
the power tool. Power tools are dangerous in the
hands of untrained users.
5. Maintain power tools and accessories. Check
for misalignment or binding of moving parts,
breakage of parts and any other condition that
may aect the power tool’s operation. If dam-
aged, have the power tool repaired before use.
Many accidents are caused by poorly maintained
power tools.
6. Keep cutting tools sharp and clean. Properly
maintained cutting tools with sharp cutting edges
are less likely to bind and are easier to control.
7. Use the power tool, accessories and tool bits
etc. in accordance with these instructions, tak-
ing into account the working conditions and
the work to be performed. Use of the power tool
for operations dierent from those intended could
result in a hazardous situation.
8. Keep handles and grasping surfaces dry,
clean and free from oil and grease. Slippery
handles and grasping surfaces do not allow for
safe handling and control of the tool in unexpected
situations.
9. When using the tool, do not wear cloth work
gloves which may be entangled. The entangle-
ment of cloth work gloves in the moving parts may
result in personal injury.
Battery tool use and care
1. Recharge only with the charger specied by
the manufacturer. A charger that is suitable for
one type of battery pack may create a risk of re
when used with another battery pack.
2. Use power tools only with specically desig-
nated battery packs. Use of any other battery
packs may create a risk of injury and re.
3. When battery pack is not in use, keep it away
from other metal objects, like paper clips,
coins, keys, nails, screws or other small metal
objects, that can make a connection from one
terminal to another. Shorting the battery termi-
nals together may cause burns or a re.
4. Under abusive conditions, liquid may be
ejected from the battery; avoid contact. If con-
tact accidentally occurs, ush with water. If
liquid contacts eyes, additionally seek medical
help. Liquid ejected from the battery may cause
irritation or burns.
5. Do not use a battery pack or tool that is dam-
aged or modied. Damaged or modied batteries
may exhibit unpredictable behaviour resulting in
re, explosion or risk of injury.
6. Do not expose a battery pack or tool to re or
excessive temperature. Exposure to re or tem-
perature above 130 °C may cause explosion.
7. Follow all charging instructions and do not
charge the battery pack or tool outside the
temperature range specied in the instruc-
tions. Charging improperly or at temperatures
outside the specied range may damage the
battery and increase the risk of re.
Service
1. Have your power tool serviced by a qualied
repair person using only identical replacement
parts. This will ensure that the safety of the power
tool is maintained.
2. Never service damaged battery packs. Service
of battery packs should only be performed by the
manufacturer or authorized service providers.
3. Follow instruction for lubricating and chang-
ing accessories.
Compact cut o safety warnings
1. The guard provided with the tool must be
securely attached to the power tool and
positioned for maximum safety, so the least
amount of wheel is exposed towards the oper-
ator. Position yourself and bystanders away
from the plane of the rotating wheel. The guard
helps to protect operator from broken wheel frag-
ments and accidental contact with wheel.
2. Use only bonded reinforced or diamond cut-o
wheels for your power tool. Just because an
accessory can be attached to your power tool, it
does not assure safe operation.
3. The rated speed of the accessory must be at
least equal to the maximum speed marked on
the power tool. Accessories running faster than
their rated speed can break and y apart.
4. Wheels must be used only for recommended
applications. For example: do not grind with
the side of cut-o wheel. Abrasive cut-o wheels
are intended for peripheral grinding, side forces
applied to these wheels may cause them to
shatter.
5. Always use undamaged wheel anges that are
of correct diameter for your selected wheel.
Proper wheel anges support the wheel thus
reducing the possibility of wheel breakage.
6. Do not use worn down reinforced wheels from
larger power tools. Wheels intended for a larger
power tool are not suitable for the higher speed of
a smaller tool and may burst.
7. The outside diameter and the thickness of your
accessory must be within the capacity rating
of your power tool. Incorrectly sized accessories
cannot be adequately guarded or controlled.
11 ENGLISH
8. The arbour size of wheels and anges must
properly t the spindle of the power tool.
Wheels and anges with arbour holes that do not
match the mounting hardware of the power tool
will run out of balance, vibrate excessively and
may cause loss of control.
9. Do not use damaged wheels. Before each
use, inspect the wheels for chips and cracks.
If power tool or wheel is dropped, inspect for
damage or install an undamaged wheel. After
inspecting and installing the wheel, position
yourself and bystanders away from the plane
of the rotating wheel and run the power tool
at maximum no load speed for one minute.
Damaged wheels will normally break apart during
this test time.
10. Wear personal protective equipment. Always
wear hearing protection. Depending on
application, use face shield, safety goggles
or safety glasses. As appropriate, wear dust
mask, gloves and shop apron capable of stop-
ping small abrasive or workpiece fragments.
The eye protection must be capable of stopping
ying debris generated by various operations.
The dust mask or respirator must be capable of
ltrating particles generated by your operation.
Prolonged exposure to high intensity noise may
cause hearing loss.
11. Keep bystanders a safe distance away from
work area. Anyone entering the work area
must wear personal protective equipment.
Fragments of workpiece or of a broken wheel may
y away and cause injury beyond immediate area
of operation.
12. Hold the power tool by insulated gripping
surfaces only, when performing an operation
where the cutting accessory may contact hid-
den wiring. Cutting accessory contacting a “live”
wire may make exposed metal parts of the power
tool “live” and could give the operator an electric
shock.
13. Never lay the power tool down until the acces-
sory has come to a complete stop. The spinning
wheel may grab the surface and pull the power
tool out of your control.
14. Do not run the power tool while carrying it at
your side. Accidental contact with the spinning
accessory could snag your clothing, pulling the
accessory into your body.
15. Regularly clean the power tool’s air vents. The
motorʼs fan will draw the dust inside the housing
and excessive accumulation of powdered metal
may cause electrical hazards.
16. Do not operate the power tool near ammable
materials. Sparks could ignite these materials.
Kickback and related warnings
Kickback is a sudden reaction to a pinched or snagged
rotating wheel. Pinching or snagging causes rapid
stalling of the rotating wheel which in turn causes the
uncontrolled power tool to be forced in the direction
opposite of the wheel’s rotation at the point of the
binding.
For example, if an abrasive wheel is snagged or
pinched by the workpiece, the edge of the wheel that is
entering into the pinch point can dig into the surface of
the material causing the wheel to climb out or kick out.
The wheel may either jump toward or away from the
operator, depending on direction of the wheel’s move-
ment at the point of pinching. Abrasive wheels may also
break under these conditions.
Kickback is the result of power tool misuse and/or
incorrect operating procedures or conditions and can be
avoided by taking proper precautions as given below.
1. Maintain a rm grip on the power tool and
position your body and arm to allow you to
resist kickback forces. Always use auxiliary
handle, if provided, for maximum control over
kickback or torque reaction during start-up.
The operator can control torque reactions or kick-
back forces, if proper precautions are taken.
2. Never place your hand near the rotating acces-
sory. Accessory may kickback over your hand.
3. Do not position your body in line with the
rotating wheel. Kickback will propel the tool in
direction opposite to the wheel’s movement at the
point of snagging.
4. Use special care when working corners, sharp
edges etc. Avoid bouncing and snagging the
accessory. Corners, sharp edges or bouncing
have a tendency to snag the rotating accessory
and cause loss of control or kickback.
5. Do not attach a saw chain, woodcarving blade,
segmented diamond wheel with a peripheral
gap greater than 10 mm or toothed saw blade.
Such blades create frequent kickback and loss of
control.
6. Do not “jam” the wheel or apply excessive
pressure. Do not attempt to make an excessive
depth of cut. Overstressing the wheel increases
the loading and susceptibility to twisting or binding
of the wheel in the cut and the possibility of kick-
back or wheel breakage.
7. When wheel is binding or when interrupting
a cut for any reason, switch o the power
tool and hold the power tool motionless until
the wheel comes to a complete stop. Never
attempt to remove the wheel from the cut while
the wheel is in motion otherwise kickback may
occur. Investigate and take corrective action to
eliminate the cause of wheel binding.
8. Do not restart the cutting operation in the
workpiece. Let the wheel reach full speed and
carefully re-enter the cut. The wheel may bind,
walk up or kickback if the power tool is restarted in
the workpiece.
9. Support panels or any oversized workpiece to
minimize the risk of wheel pinching and kick-
back. Large workpieces tend to sag under their
own weight. Supports must be placed under the
workpiece near the line of cut and near the edge
of the workpiece on both sides of the wheel.

12 ENGLISH
10. Use extra caution when making a “pocket cut”
into existing walls or other blind areas. The
protruding wheel may cut gas or water pipes, elec-
trical wiring or objects that can cause kickback.
11. Before using a segmented diamond wheel,
make sure that the diamond wheel has the
peripheral gap between segments of 10 mm or
less, only with a negative rake angle.
Additional Safety Warnings:
1. Never attempt to cut with the tool held upside
down in a vise. This can lead to serious acci-
dents, because it is extremely dangerous.
2. Check that the workpiece is properly
supported.
3. Some material contains chemicals which may
be toxic. Take caution to prevent dust inhala-
tion and skin contact. Follow material supplier
safety data.
4. Store wheels as per manufacturer recom-
mendations. Improper storage may damage the
wheels.
SAVE THESE INSTRUCTIONS.
WARNING: DO NOT let comfort or familiarity
with product (gained from repeated use) replace
strict adherence to safety rules for the subject
product. MISUSE or failure to follow the safety
rules stated in this instruction manual may cause
serious personal injury.
Important safety instructions for
battery cartridge
1. Before using battery cartridge, read all instruc-
tions and cautionary markings on (1) battery
charger, (2) battery, and (3) product using
battery.
2. Do not disassemble or tamper with the battery
cartridge. It may result in a re, excessive heat,
or explosion.
3. If operating time has become excessively
shorter, stop operating immediately. It may
result in a risk of overheating, possible burns
and even an explosion.
4. If electrolyte gets into your eyes, rinse them
out with clear water and seek medical atten-
tion right away. It may result in loss of your
eyesight.
5. Do not short the battery cartridge:
(1) Do not touch the terminals with any con-
ductive material.
(2) Avoid storing battery cartridge in a con-
tainer with other metal objects such as
nails, coins, etc.
(3) Do not expose battery cartridge to water
or rain.
A battery short can cause a large current
ow, overheating, possible burns and even a
breakdown.
6. Do not store and use the tool and battery car-
tridge in locations where the temperature may
reach or exceed 50 °C (122 °F).
7. Do not incinerate the battery cartridge even if
it is severely damaged or is completely worn
out. The battery cartridge can explode in a re.
8. Do not nail, cut, crush, throw, drop the battery
cartridge, or hit against a hard object to the
battery cartridge. Such conduct may result in a
re, excessive heat, or explosion.
9. Do not use a damaged battery.
10. The contained lithium-ion batteries are subject
to the Dangerous Goods Legislation require-
ments.
For commercial transports e.g. by third parties,
forwarding agents, special requirement on pack-
aging and labeling must be observed.
For preparation of the item being shipped, consult-
ing an expert for hazardous material is required.
Please also observe possibly more detailed
national regulations.
Tape or mask o open contacts and pack up the
battery in such a manner that it cannot move
around in the packaging.
11. When disposing the battery cartridge, remove
it from the tool and dispose of it in a safe
place. Follow your local regulations relating to
disposal of battery.
12. Use the batteries only with the products
specied by Makita. Installing the batteries to
non-compliant products may result in a re, exces-
sive heat, explosion, or leak of electrolyte.
13. If the tool is not used for a long period of time,
the battery must be removed from the tool.
14. During and after use, the battery cartridge may
take on heat which can cause burns or low
temperature burns. Pay attention to the han-
dling of hot battery cartridges.
15. Do not touch the terminal of the tool imme-
diately after use as it may get hot enough to
cause burns.
16. Do not allow chips, dust, or soil stuck into the
terminals, holes, and grooves of the battery
cartridge. It may cause heating, catching re,
burst and malfunction of the tool or battery car-
tridge, resulting in burns or personal injury.
17. Unless the tool supports the use near
high-voltage electrical power lines, do not use
the battery cartridge near high-voltage electri-
cal power lines. It may result in a malfunction or
breakdown of the tool or battery cartridge.
18. Keep the battery away from children.
SAVE THESE INSTRUCTIONS.
CAUTION: Only use genuine Makita batteries.
Use of non-genuine Makita batteries, or batteries that
have been altered, may result in the battery bursting
causing res, personal injury and damage. It will
also void the Makita warranty for the Makita tool and
charger.

13 ENGLISH
Tips for maintaining maximum
battery life
1. Charge the battery cartridge before completely
discharged. Always stop tool operation and
charge the battery cartridge when you notice
less tool power.
2. Never recharge a fully charged battery car-
tridge. Overcharging shortens the battery
service life.
3. Charge the battery cartridge with room tem-
perature at 10 °C - 40 °C (50 °F - 104 °F). Let
a hot battery cartridge cool down before
charging it.
4. When not using the battery cartridge, remove
it from the tool or the charger.
5. Charge the battery cartridge if you do not use
it for a long period (more than six months).
FUNCTIONAL
DESCRIPTION
CAUTION: Always be sure that the tool is
switched o and the battery cartridge is removed
before adjusting or checking function on the tool.
Installing or removing battery
cartridge
CAUTION: Always switch o the tool before
installing or removing of the battery cartridge.
CAUTION: Hold the tool and the battery car-
tridge rmly when installing or removing battery
cartridge. Failure to hold the tool and the battery
cartridge rmly may cause them to slip o your hands
and result in damage to the tool and battery cartridge
and a personal injury.
► Fig.1: 1. Red indicator 2. Button 3. Battery cartridge
To remove the battery cartridge, slide it from the tool
while sliding the button on the front of the cartridge.
To install the battery cartridge, align the tongue on the
battery cartridge with the groove in the housing and slip
it into place. Insert it all the way until it locks in place
with a little click. If you can see the red indicator as
shown in the gure, it is not locked completely.
CAUTION: Always install the battery cartridge
fully until the red indicator cannot be seen. If not,
it may accidentally fall out of the tool, causing injury to
you or someone around you.
CAUTION: Do not install the battery cartridge
forcibly. If the cartridge does not slide in easily, it is
not being inserted correctly.
Indicating the remaining battery
capacity
Only for battery cartridges with the indicator
► Fig.2: 1. Indicator lamps 2. Check button
Press the check button on the battery cartridge to indi-
cate the remaining battery capacity. The indicator lamps
light up for a few seconds.
Indicator lamps Remaining
capacity
Lighted O Blinking
75% to 100%
50% to 75%
25% to 50%
0% to 25%
Charge the
battery.
The battery
may have
malfunctioned.
NOTE: Depending on the conditions of use and the
ambient temperature, the indication may dier slightly
from the actual capacity.
NOTE: The rst (far left) indicator lamp will blink when
the battery protection system works.
Tool / battery protection system
The tool is equipped with a tool/battery protection sys-
tem. This system automatically cuts o power to the
motor to extend tool and battery life. The tool will auto-
matically stop during operation if the tool or battery is
placed under one of the following conditions.
Overload protection
When the tool/battery is operated in a manner that
causes it to draw an abnormally high current, the tool
stops automatically and the operation lamp will blink. In
this situation, turn the tool o and stop the application
that caused the tool to become overloaded. Then turn
the tool on to restart.
Overheat protection
When the tool/battery is overheated, the tool stops
automatically and the operation lamp will blink. In this
situation, let the tool cool down before turning the tool
on again.
Overdischarge protection
When the battery capacity becomes low, the tool stops
automatically. If the tool does not run along with the
switch operation, remove the battery from the tool and
charge it.

14 ENGLISH
Protections against other causes
Protection system is also designed for other causes
that could damage the tool and allows the tool to stop
automatically. Take all the following steps to clear the
causes, when the tool has been brought to a temporary
halt or stop in operation.
1. Turn the tool o, and then turn it on again to
restart.
2. Charge the battery(ies) or replace it/them with
recharged battery(ies).
3. Let the tool and battery(ies) cool down.
If no improvement can be found by restoring protection
system, then contact your local Makita Service Center.
Switch action
WARNING: NEVER use the tool if it runs when
you simply pull the switch trigger without press-
ing the lock-o button. A switch in need of repair
may result in unintentional operation and serious
personal injury. Return tool to a Makita service center
for proper repairs BEFORE further usage.
WARNING: NEVER defeat the lock-o button
by taping down or some other means. A switch with
a negated lock-o button may result in unintentional
operation and serious personal injury.
CAUTION: Before installing the battery car-
tridge into the tool, always check to see that the
switch trigger actuates properly and returns to
the “OFF” position when released.
CAUTION: Do not pull the switch trigger hard
without pressing in the lock-o button. This can
cause switch breakage.
CAUTION: The tool starts to brake the wheel
rotation immediately after you release the switch
trigger. Hold the tool rmly to respond the reac-
tion of the brake when releasing the switch trig-
ger. Sudden reaction can drop the tool o your hand
and can cause a personal injury.
To prevent the switch trigger from being accidentally
pulled, a lock-o button is provided. To start the tool,
press and hold the lock-o button, and then pull the
switch trigger. Release the switch trigger to stop.
► Fig.3: 1. Switch trigger 2. Lock-o button
Wheel selection
CAUTION: The outside diameter, thickness
and rated speed of your accessory must be within
the capacity rating of your power tool.
CAUTION: Wheels must be used only for
recommended applications.
Select one of the most appropriate types of cutting
wheels according to your application.
Wheel type Practical applications
Cut o wheel Cutting steel, stainless steel, metals
Tungsten carbide
grit wheel
Cutting plastics, plaster, composite
materials
Diamond Wheel Cutting tiles, ceramics
Wheel rotation direction
CAUTION: Always check the direction of
rotation before operation.
CAUTION: Use the reversing switch only after
the tool comes to a complete stop. A sudden switch
in rotation direction during operation brings the tool to
a sharp stop for safety reasons.
Wheel rotation can be changed in either forward or
reverse direction.
To set the forward rotation, slide the reversing switch to
the left until “F” indication appears on the switch.
To select the reverse rotation, slide the reversing switch
to the right until “R” indication appears on the switch.
► Fig.4: 1. Reversing switch
Chips, debris, sparks, and cutting particles tend to y
o along a tangent direction of the wheel rotation. Use
the wheel guard eectively to avoid continued exposure
towards cut-o particles so it can discharge some of
cutting dust and particles into an alternative direction.
A reaction to a rapid stalling of the rotating wheel could
make the tool uncontrolled in the direction opposite to
the wheel rotation.
Forward rotation
► Fig.5: 1. Cut-o particles 2. Reactions
Reverse rotation
► Fig.6: 1. Cut-o particles 2. Reactions
Wheel guard
CAUTION: Make sure that the wheel guard is
correctly and rmly positioned behind the cutting
wheel before operation.
Secure the wheel guard in a comfortable position, for
maximum safety and minimum exposure to possible
risk factors, according to your work conditions and
preferences.
Positioning forwards
► Fig.7: 1. Wheel guard 2. Cutting wheel
Positioning backwards
► Fig.8: 1. Wheel guard 2. Cutting wheel
Shaft lock
Press the shaft lock to prevent spindle rotation when
installing and removing a cutting wheel.
► Fig.9: 1. Shaft lock
NOTICE: Never actuate the shaft lock when the
spindle is moving. The tool may be damaged.

15 ENGLISH
Operation lamp
CAUTION: Do not look in the light or see the
source of light directly.
To turn on the operation lamp, press and hold the lock-
o button and pull the switch trigger.
The lamp goes out approximately 15 seconds after
releasing the switch trigger.
► Fig.10: 1. Operation lamp
NOTICE: When the tool is operated with exces-
sive load, the operation lamp ashes. In this situ-
ation, release the switch trigger, and then reduce
the load on the tool before operating again.
NOTICE: When the tool is overheated, the opera-
tion lamp ashes. In this case, release the switch
trigger, and then cool down the tool/battery before
operating again.
NOTE: Use a dry cloth to wipe the dirt o the lens of
the lamp. Be careful not to scratch the lens of lamp, or
it may lower the illumination.
Adjusting depth of cut
CAUTION: After adjusting the depth of cut,
always tighten the thumb screw securely.
With the dust collection cover installed, ne adjustments
in the cutting depth can be made up to 13.5 mm.
Loosen the thumb screw on the depth scale. Lift or
lower the tool handle into position to align the depth
indicators on the cover with your desired cutting depth
on the scale. Then tightening the thumb screw.
► Fig.11: 1. Thumb screw 2. Depth scale 3. Depth
indicator
CAUTION: For clean and safe cutting, set the
cutting depths so that a cutting wheel overpasses the
undersurface of workpiece by 2.0 mm or less. Setting
in proper cutting depths helps to reduce potential
for dangerous kickbacks which may cause personal
injury.
Sighting for straight cutting
With the dust collection cover installed, straight cut
operation can safely be performed by aligning the cut-
ting wheel toward the cutting direction before the actual
cut operation.
Align the guide notch in the base of dust collection
cover with your intended cutting line on the workpiece.
► Fig.12: 1. Guide notch 2. Base 3. Cutting line
Connecting a vacuum cleaner
Optional accessory
When you wish to perform clean cutting operation,
connect a Makita vacuum cleaner to the dust nozzle in
the dust collection cover using a front cus 22 (optional
accessory).
► Fig.13: 1. Front cus 22 2. Dust nozzle 3. Hose
4. Vacuum cleaner
Accidental re-start preventive
function
When installing the battery cartridge while pulling the
switch trigger, the tool will not start.
To start the tool, release the switch trigger rst. Press
and hold the lock-o button, and then pull the switch
trigger.
Electronic function
The tool is equipped with the electronic functions for
easy operation.
• Electric brake
This tool is equipped with an electric brake. If the
tool consistently fails to quickly cease to function
after the switch trigger is released, have the tool
serviced at a Makita service center.
• Constant speed control
The speed control function provides the constant
rotation speed regardless of load conditions.
• Active Feedback sensing Technology
The tool electronically detects situations in which
the cutting wheel may be at risk to be bound.
In the situation, the tool automatically stops to
prevent further rotation of the spindle (it does not
prevent kickback).
In this case, release the switch trigger rst,
remove the cause of sudden drop in the rotation
speed, and then pull the switch trigger to restart
the tool.
ASSEMBLY
CAUTION: Always be sure that the tool is
switched o and the battery cartridge is removed
before carrying out any work on the tool.
Hex wrench storage
When not in use, store the hex wrench as shown in the
gure to keep it from being lost.
► Fig.14: 1. Hex wrench
Removing and installing cutting
wheel
CAUTION: Use only the Makita hex wrench
supplied to remove and install a cutting wheel.
CAUTION: When installing a cutting wheel, be
sure to tighten the bolt securely.
NOTICE: When installing a diamond wheel for
its best performance, always make sure that the
arrows on the diamond wheel point in the same
direction as your desired wheel rotation.

16 ENGLISH
To remove a cutting wheel, press the shaft lock fully so
that the cutting wheel cannot revolve and use the hex
wrench to loosen the hex bolt counterclockwise. Then
remove the hex bolt, outer ange and cutting wheel.
► Fig.15: 1. Shaft lock 2. Hex wrench 3. Hex bolt
4. Loosen 5. Tighten
NOTICE: If the inner ange is removed, place
it back onto the spindle with its wheel mounting
part facing upwards.
To install a cutting wheel, follow the removal procedure
in reverse.
► Fig.16: 1. Hex bolt 2. Outer ange 3. Cutting wheel
4. Inner ange 5. Spindle
Installing and removing dust
collection cover
CAUTION: Make sure that the wheel guard
is securely locked by the stopper inside the dust
collection cover before operation.
CAUTION: Avoid using the dust collection
cover for metalwork which creates heats and y-
ing sparks as it may melt the plastic components
of the dust collection cover.
The dust collection cover enhances safe and ecient
cutting operation, providing a safeguard against rotat-
ing wheel, cutting stability, precise control over cutting
depth, and dust extraction solutions, especially at tile,
plaster, stoneware cuttings.
Installing dust collection cover
1. Loosen the thumb screw on the depth scale of the
dust collection cover. Lift the cover fully up, and then
tighten the thumb screw to secure the dust collection
cover in a raised position.
► Fig.17: 1. Thumb screw 2. Depth scale 3. Dust
collection cover
2. Set the wheel guard on the tool in a forward
position.
► Fig.18: 1. Wheel guard
3. Raise the tool handle slightly and place the front
half of the wheel guard at an angle into the dust col-
lection cover, throwing the bottom of the cutting wheel
down through the wheel slot in the base.
► Fig.19: 1. Wheel guard 2. Dust collection cover
3. Cutting wheel 4. Wheel slot
4. Install the rear half of the wheel guard in the dust
collection cover, while lowering the tool handle from a
raised position to a down position.
► Fig.20: 1. Wheel guard 2. Dust collection cover
5. Raise the tool handle again to hook the rear edge
of the wheel guard over the stopper inside the dust
collection cover.
► Fig.21: 1. Wheel guard 2. Stopper
6. Loosen the thumb screw. Swing the tool up and
down at your desired cutting depth. Then tighten the
thumb screw to secure the tool in place.
Removing dust collection cover
1. Loosen the thumb screw on the depth scale of the
dust collection cover. Lift the tool handle fully up, and
then tighten the thumb screw to secure the dust collec-
tion cover in a raised position.
► Fig.22: 1. Thumb screw 2. Depth scale 3. Dust
collection cover
2. Slide the release lever towards the thumb screw to
unlock the wheel guard from the stopper inside the dust
collection cover.
► Fig.23: 1. Release lever 2. Thumb screw 3. Wheel
guard 4. Dust collection cover 5. Stopper
3. Dismount the rear half of the wheel guard from
the dust collection cover, while lowering the tool handle
from a raised position to a down position.
► Fig.24: 1. Wheel guard 2. Dust collection cover
4. Pull the front half of the wheel guard, at a slight
upward and outward angle, apart from the dust collec-
tion cover.
► Fig.25: 1. Wheel guard 2. Dust collection cover
OPERATION
CAUTION: Always maintain a rm grip on the
tool during operation.
CAUTION: Do not force the tool. Forcing and
exerting excessive pressure or allowing the wheel to
bend, pinch or twist in the cut can cause overheating
of the motor and dangerous kickback of the tool.
CAUTION: When cutting plastics, be sure not
to overheat the cutting wheel. It may result in melt-
ing the workpiece.
CAUTION: Do not bang or bump a cutting
wheel when starting or during operation.
CAUTION: Always wear safety goggles or a
face shield during operation.
CAUTION: After operation, always switch o
the tool and wait until the wheel has come to a
complete stop before putting the tool down.
Down cutting
NOTICE: Exercise due care about using an eec-
tive cutting surface of the wheel so as to avoid
exposure towards cut-o particles.
NOTICE: Keep a cutting wheel stand straight in
workpiece and avoid tilting or swinging the tool
during operation.
Position the wheel guard correctly to provide maximum
protection from sparks and loose particles thrown from
the cutting wheel. Place the tool over workpiece without
the cutting wheel making any contact. Turn the tool on
and wait until the cutting wheel attains full speed. Then
slowly lower the tool over the workpiece surface, using
a moderate feed suited to your applications.

17 ENGLISH
Forward rotation
► Fig.26
Reverse rotation
► Fig.27
Straight cutting
CAUTION: Be sure that a cutting wheel
always works in an up-grinding motion. It other-
wise may cause the tool to be pushed uncontrolled
out of the cut.
NOTICE: Keep your cutting line straight and
apply steady pressure to obtain a uniform cut
through workpiece.
Set the base plate of dust collection cover on workpiece
to be cut without the cutting wheel making any contact.
Turn the tool on and wait until the cutting wheel attains
full speed. Then slowly move the tool over the work-
piece surface, keeping it at and advancing smoothly
until the cutting is completed.
Select the reverse rotation for push cutting, and the
forward rotation for pull cutting.
Push cutting in reverse rotation
► Fig.28
Pull cutting in forward rotation
► Fig.29
NOTE: Be aware that the dust collection cover tends
to function less eectively in pull cutting as some
cutting particles spread inside the cover against the
dust extraction ow.
MAINTENANCE
CAUTION: Always be sure that the tool is
switched o and the battery cartridge is removed
before attempting to perform inspection or
maintenance.
NOTICE: Never use gasoline, benzine, thinner,
alcohol or the like. Discoloration, deformation or
cracks may result.
To maintain product SAFETY and RELIABILITY,
repairs, any other maintenance or adjustment should
be performed by Makita Authorized or Factory Service
Centers, always using Makita replacement parts.
Dressing diamond wheel
If the cutting action of the diamond wheel begins to
diminish, use an old discarded coarse grit bench grinder
wheel or concrete block to dress the diamond wheel. To
do this, tightly secure the bench grinder wheel or con-
crete block and cut in it.
After use
Clean the dust inside the tool by running the tool at an
idle for a while. Accumulation of dust in the motor may
cause a malfunction of the tool.
Cleaning wheel guard and dust
collection cover
Clean inside the wheel guard and dust collection cover
at regular intervals. Blow or wipe o any dirt or dust
accumulated in them.
► Fig.30: 1. Wheel guard 2. Dust collection cover
Air vent cleaning
Clean the air vents of the tool at regular intervals for
smooth air circulation. Remove the dust cover from
inhalation vent and clean it whenever it becomes dirt
and clogged.
► Fig.31: 1. Dust cover 2. Inhalation vent
OPTIONAL
ACCESSORIES
CAUTION: These accessories or attachments
are recommended for use with your Makita tool
specied in this manual. The use of any other
accessories or attachments might present a risk of
injury to persons. Only use accessory or attachment
for its stated purpose.
If you need any assistance for more details regard-
ing these accessories, ask your local Makita Service
Center.
• Cut o wheel
• Diamond wheel
• Tungsten carbide grit wheel
• Hex wrench
• Makita genuine battery and charger
NOTE: Some items in the list may be included in the
tool package as standard accessories. They may
dier from country to country.

18
中文简体
中文简体 (原本)
规格
型号: DMC300
砂轮外径 76 mm
砂轮内(心轴)径 10.0 mm / 9.5 mm (3/8")(规格因国家而异)
最大砂轮厚度 1.0 mm
最大切割能力 带集尘盖 13.5 mm
不带集尘盖 16.0 mm
额定速度(n)/空载速度(n0)20,000 r/min
长度 271 mm *1
额定电压 D.C. 18 V
净重 1.2 - 1.7 kg
*1. 含电池组(BL1860B)/不带集尘盖
•生产者保留变更规格不另行通知之权利。
•规格和电池组可能因销往国家之不同而异。
•重量因附件(包括电池组)而异。根据EPTA-Procedure 01/2014,最重与最轻的组合见
表格。
适用电池组和充电器
电池组 BL1815N / BL1820B / BL1830B /
BL1840B / BL1850B / BL1860B
充电器 DC18RC / DC18RD / DC18RE / DC18SD /
DC18SE / DC18SF / DC18SH / DC18WC
•部分以上所列电池组和充电器是否适用视用户所在地区而异。
警告: 请仅使用以上所列电池组和充电器。使用其他类型的电池组或充电器可能会导
致人身伤害和/或失火。
符号
以下显示本设备可能会使用的符号。在使用
工具之前,请务必理解其含义。
阅读使用说明书。
佩带安全眼镜。
仅限于欧盟国家
由于本设备中包含有害成分,
因此使用过的电气和电子设备
可能会对环境和人体健康产生
负面影响。
请勿将电气和电子工具与家庭
普通废弃物放在一起处置!
根据欧洲关于废弃电气电子设
备的指令及其国家层面的修订
法案,使用过的电气和电子设
备应当单独收集并递送至城市
垃圾收集点,根据环保规定进
行处置。
此规定由标有叉形标志的带轮
垃圾桶符号表示。

19
中文简体
用途
本工具用于在不用水的情况下切割片材、接
头、管材、砖瓦或金属墙、塑料、陶瓷、石
膏和类似的复合材料。
安全警告
电动工具通用安全警告
警告: 阅读随电动工具提供的所有安全
警告、说明、图示和规定。不遵照以下所列
说明会导致电击、着火和/或严重伤害。
保存所有警告和说明书以备查
阅。
警告中的术语“电动工具”是指市电驱动(有
线)电动工具或电池驱动(无线)电动工具。
工作场地的安全
1. 保持工作场地清洁和明亮。杂乱和黑暗
的场地会引发事故。
2. 不要在易爆环境,如有易燃液体、气体
或粉尘的环境下操作电动工具。电动工
具产生的火花会点燃粉尘或气体。
3. 操作电动工具时,远离儿童和旁观者。注
意力不集中会使你失去对工具的控制。
电气安全
1. 电动工具插头必须与插座相配。绝不能
以任何方式改装插头。需接地的电动工
具不能使用任何转换插头。未经改装的
插头和相配的插座将降低电击风险。
2. 避免人体接触接地表面,如管道、散热
片和冰箱。如果你身体接触接地表面会
增加电击风险。
3. 不得将电动工具暴露在雨中或潮湿环境
中。水进入电动工具将增加电击风险。
4. 不得滥用软线。绝不能用软线搬运、拉
动电动工具或拔出其插头。使软线远离
热源、油、锐边或运动部件。受损或缠
绕的软线会增加电击风险。
5. 当在户外使用电动工具时,使用适合户
外使用的延长线。适合户外使用的电线
将降低电击风险。
6. 如果无法避免在潮湿环境中操作电动工
具 ,应 使 用 带 有 剩 余 电 流 装 置( RCD)保
护的电源。RCD的使用可降低电击风险。
7. 电动工具会产生对用户无害的电磁场
(EMF)。但是,起搏器和其他类似医
疗设备的用户应在操作本电动工具前咨
询其设备的制造商和/或医生寻求建议。
人身安全
1. 保持警觉,当操作电动工具时关注所从
事的操作并保持清醒。当你感到疲倦,
或在有药物、酒精或治疗反应时,不要
操作电动工具。在操作电动工具时瞬间
的疏忽会导致严重人身伤害。
2. 使用个人防护装置。始终佩戴护目镜。
防护装置,诸如适当条件下使用防尘面
具、防滑安全鞋、安全帽、听力防护等
装置能减少人身伤害。
3. 防 止 意 外 起 动 。在 连 接 电 源 和 /或电池包、
拿起或搬运工具前确保开关处于关断位
置。手指放在开关上搬运工具或开关处
于接通时通电会导致危险。
4. 在电动工具接通之前,拿掉所有调节钥
匙或扳手。遗留在电动工具旋转零件上
的扳手或钥匙会导致人身伤害。
5. 手不要过分伸展。时刻注意立足点和身
体平衡。这样能在意外情况下能更好地
控制住电动工具。
6. 着装适当。不要穿宽松衣服或佩戴饰品。
让你的头发和衣服远离运动部件。宽松衣
服、佩饰或长发可能会卷入运动部件。
7. 如果提供了与排屑、集尘设备连接用的
装置,要确保其连接完好且使用得当。
使用集尘装置可降低尘屑引起的危险。
8. 不要因为频繁使用工具而产生的熟悉感而
掉以轻心,忽视工具的安全准则。某个粗
心的动作可能在瞬间导致严重的伤害。
9. 使用电动工具时请始终佩带护目镜以免伤
害眼睛。护目镜须符合美国ANSI Z87.1、
欧洲EN 166或者澳大利亚/新西兰的AS/
NZS 1336的规定。在澳大利亚/新西兰,
法律要求佩带面罩保护脸部。

20
中文简体
雇主有责任监督工具操作者和其他近工
作区域人员佩带合适的安全防护设备。
电动工具使用和注意事项
1. 不要勉强使用电动工具,根据用途使用
合适的电动工具。选用合适的按照额定
值设计的电动工具会使你工作更有效、
更安全。
2. 如果开关不能接通或关断电源,则不能
使用该电动工具。不能通过开关来控制
的电动工具是危险的且必须进行修理。
3. 在进行任何调节、更换附件或贮存电动
工具之前,必须从电源上拔掉插头和/或
卸下电池包(如可拆卸)。这种防护性
的安全措施降低了电动工具意外起动的
风险。
4. 将闲置不用的电动工具贮存在儿童所及
范围之外,并且不允许不熟悉电动工具
和不了解这些说明的人操作电动工具。
电动工具在未经培训的使用者手中是危
险的。
5. 维护电动工具及其附件。检查运动部件是
否调整到位或卡住,检查零件破损情况和
影响电动工具运行的其他状况。如有损
坏,应在使用前修理好电动工具。许多
事故是由维护不良的电动工具引发的。
6. 保持切削刀具锋利和清洁。维护良好地
有锋利切削刃的刀具不易卡住而且容易
控制。
7. 按照使用说明书,并考虑作业条件和要
进行的作业来选择电动工具、附件和工
具的刀头等。将电动工具用于那些与其
用途不符的操作可能会导致危险情况。
8. 保持手柄和握持表面干燥、清洁,不得
沾有油脂。在意外的情况下,湿滑的手
柄不能保证握持的安全和对工具的控制。
9. 使用本工具时,请勿佩戴可能会缠结的
布质工作手套。布质工作手套卷入移动
部件可能会造成人身伤害。
电池式工具使用和注意事项
1. 仅使用生产者规定的充电器充电。将适
用于某种电池包的充电器用到其他电池
包时可能会发生着火危险。
2. 仅使用配有专用电池包的电动工具。使用
其他电池包可能会产生伤害和着火危险。
3. 当电池包不用时,将它远离其他金属物
体,例如回形针、硬币、钥匙、钉子、
螺钉或其他小金属物体,以防电池包一
端与另一端连接。电池组端部短路可能
会引起燃烧或着火。
4. 在滥用条件下,液体可能会从电池组中溅
出;应避免接触。如果意外碰到液体,用
水冲洗。如果液体碰到了眼睛,还应寻求
医疗帮助。从电池中溅出的液体可能会发
生腐蚀或燃烧。
5. 不要使用损坏或改装过的电池包或工具。
损坏或改装过的电池组可能呈现无法预测
的结果,导致着火、爆炸或伤害。
6. 不要将电池包暴露于火或高温中。电池
包暴露于火或高于130 ℃的高温中可能
导致爆炸。
7. 遵循所有充电说明。不要在说明书中指
定的温度范围之外给电池包或电动工具
充电。不正确或在指定的温度范围外充
电可能会损坏电池和增加着火的风险。
维修
1. 让专业维修人员使用相同的备件维修电
动工具。这将保证所维修的电动工具的
安全。
2. 决不能维修损坏的电池包。电池包仅能由
生产者或其授权的维修服务商进行维修。
3. 上润滑油及更换附件时请遵循本说明书
指示。
小型切割机安全警告
1. 随工具附带的砂轮罩必须牢固安装到电
动工具上并放置在最为安全的位置,使
得砂轮外露的部分尽可能地少。使您自
己和旁观者远离旋转的砂轮。砂轮罩可
防止操作者被砂轮碎片划伤或意外接触
到砂轮。
2. 请仅使用适合您的电动工具的粘结增强或
金刚石切割砂轮。因为虽然可将附件安装
到电动工具上,但无法确保操作安全。
3. 附件的额定速度必须至少等同于电动工
具上标示的最大速度。当运转速度大于
额定速度时,附件可能会破裂并飞出。
4. 仅可将砂轮用于推荐的应用情况。例如:
请勿用切割砂轮的侧面进行磨削。切割砂
轮用于进行外围磨削,对这些砂轮应用侧
力可能会导致其破碎。
5. 请务必使用未损坏的砂轮法兰,直径应
符合您所选的砂轮。正确的砂轮法兰可
减少砂轮破裂的危险。
6. 请勿使用从大型电动工具上拆下来的已
磨损的高强度轮。大型电动工具使用的
轮不适用于高速运转的小型工具,使用
时可能会爆裂。
Other manuals for DMC300
7
Table of contents
Languages:
Other Makita Cutter manuals

Makita
Makita 4190D User manual

Makita
Makita CC301D User manual

Makita
Makita 4100NS User manual

Makita
Makita 4112HS User manual

Makita
Makita DCS551Z User manual

Makita
Makita XSC02 User manual

Makita
Makita 4100NH3ZX User manual

Makita
Makita DCO181 User manual

Makita
Makita DT4000 User manual

Makita
Makita CE001GT202X User manual

Makita
Makita XEC01 Series User manual

Makita
Makita CC300D User manual

Makita
Makita 4105KB User manual

Makita
Makita SC103D User manual

Makita
Makita CC301D User manual

Makita
Makita DCC500 User manual

Makita
Makita DCS552 User manual

Makita
Makita DCS551RMJ User manual

Makita
Makita DCE090 User manual

Makita
Makita CP100D User manual