7ENGLISH
26.
handles.
27. Never attempt to start the motor if the machine
28.
29.
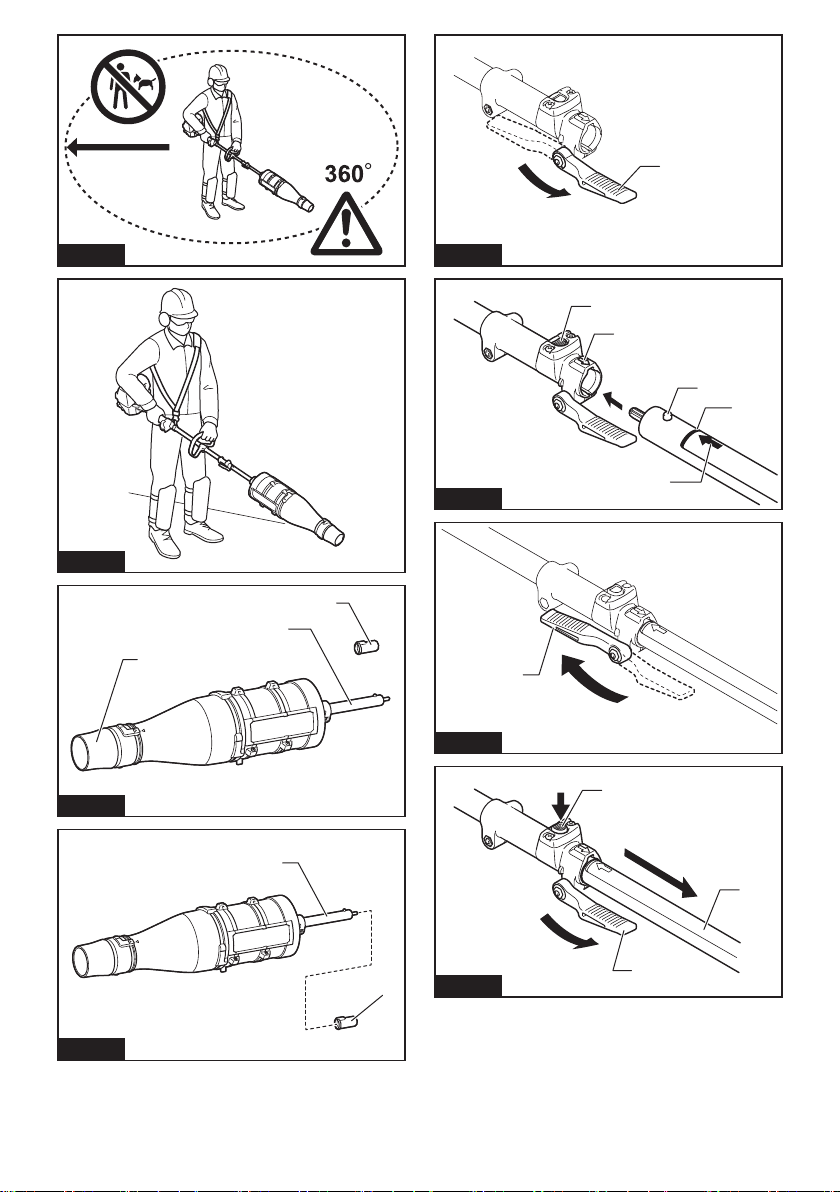
shoulder harness.
30.
Fig.2
31. Hold the front handle with the left hand and the
and thumbs around the handles.
32. Never attempt to operate the machine with one
33.
the condition before continuing work. Check
-
-
rized service center for the inspection and
repair.
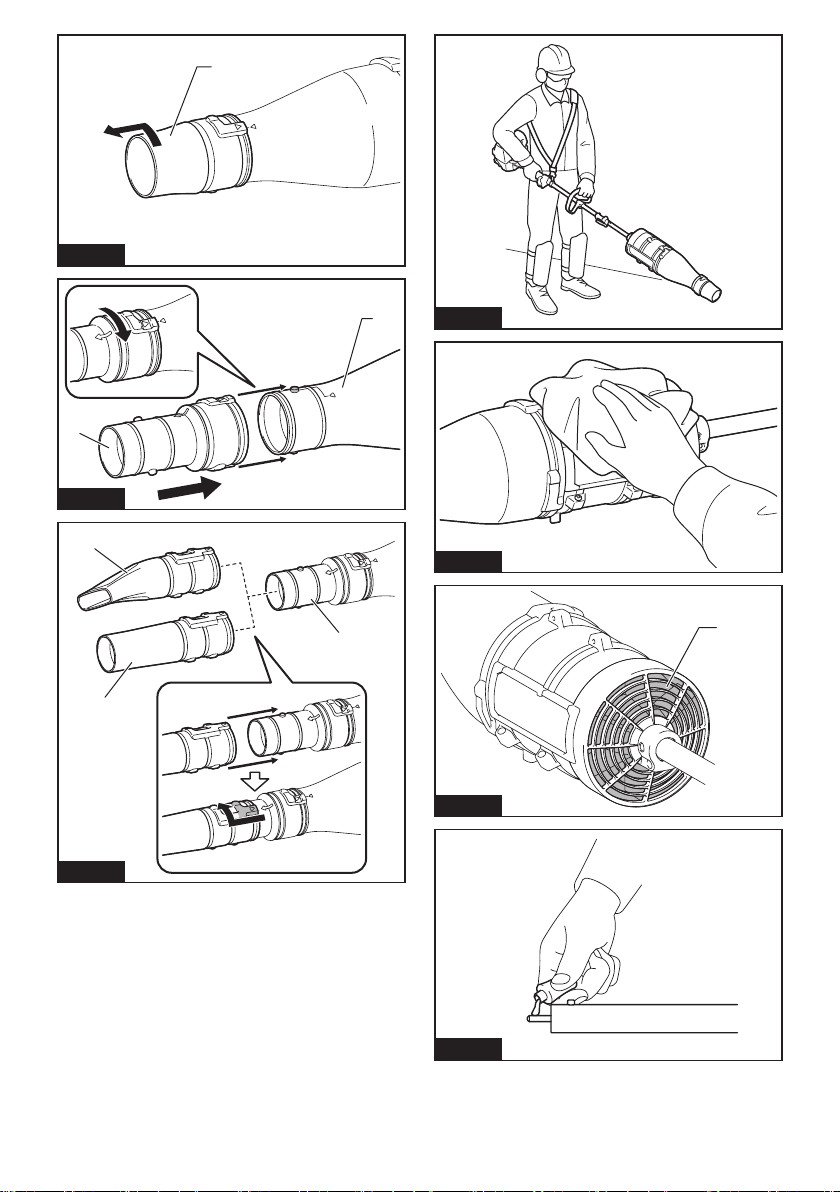
34. Follow the instruction manual of the power
unit for proper use of the control lever and
switch.
35.
materials.
36. Refer to the instruction manual of the power
unit for how to start and control the machine.
Refueling
1.
during refueling.
2. Refuel outdoors. Refueling in a closed room can
cause explosion of fuel vapor.
3. Avoid contact with fuel or engine oil. Do not
-
4.
cap and check for fuel leak. Move at least 3 m
before starting engine.
5. -
fuel.
Transportation
1. Stop the motor during transportation.
2. Ensure safe position of the machine during car
transportation to avoid fuel leakage.
3. Lift the entire machine from the ground when
Dragging the machine
causes fuel tank damage and fuel leakage, result-
4.
Vibration
1.
-
well maintain the machine and accessories.
Maintenance and storage
1.
the blower is in safe working condition.
2.
3.
of children.
4. -
the blower. Maintain the blower with care and
keep it clean.
5.
6. Do not expose the blower to rain. Store the
blower indoors.
7.
8.
9.
or the like for the purpose. Discoloration, defor-
result.
10.
11.
described in this instruction manual or the
instruction manual of the power unit. Ask our
authorized service center for such work.
12. Follow instructions for lubricating and chang-
ing accessories.
13. -
-
14.
inspect and maintain the machine at regular
interval.
15. -
ing and maintenance. Remove the spark plug
the engine gets cold.
16.
such as a wall.