8ENGLISH
Declaration of Conformity (For UK)
For UK only
We as the manufacturers: Makita Europe N.V.,
Business address: Jan-Baptist Vinkstraat 2 3070
Kortenberg BELGIUM. Authorize Hiroshi Tsujimura
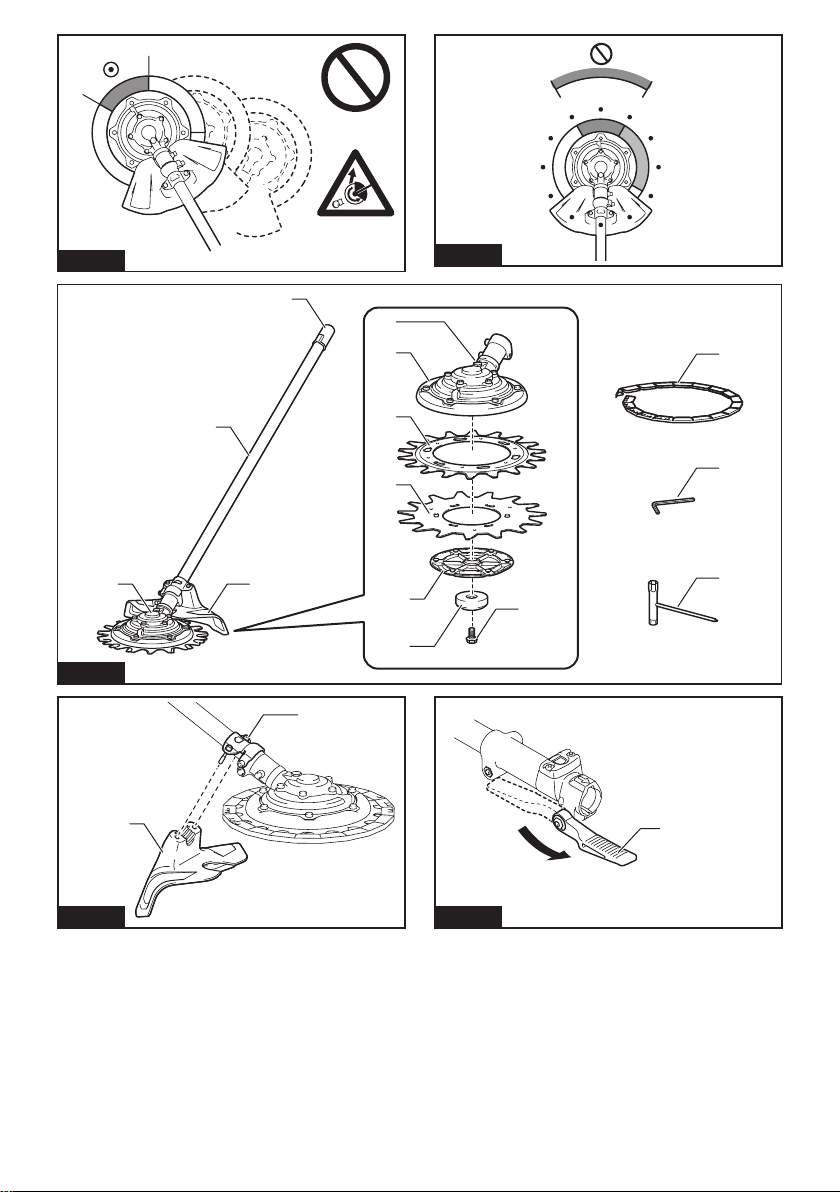
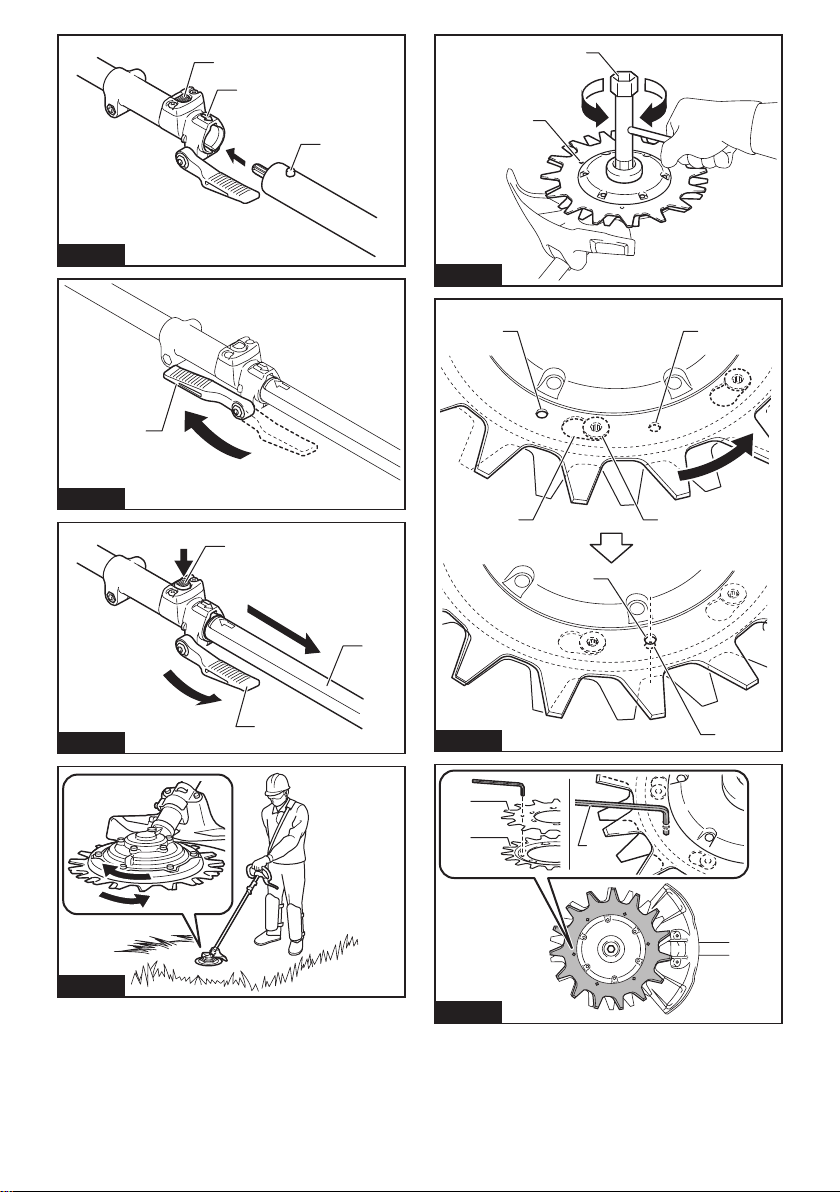
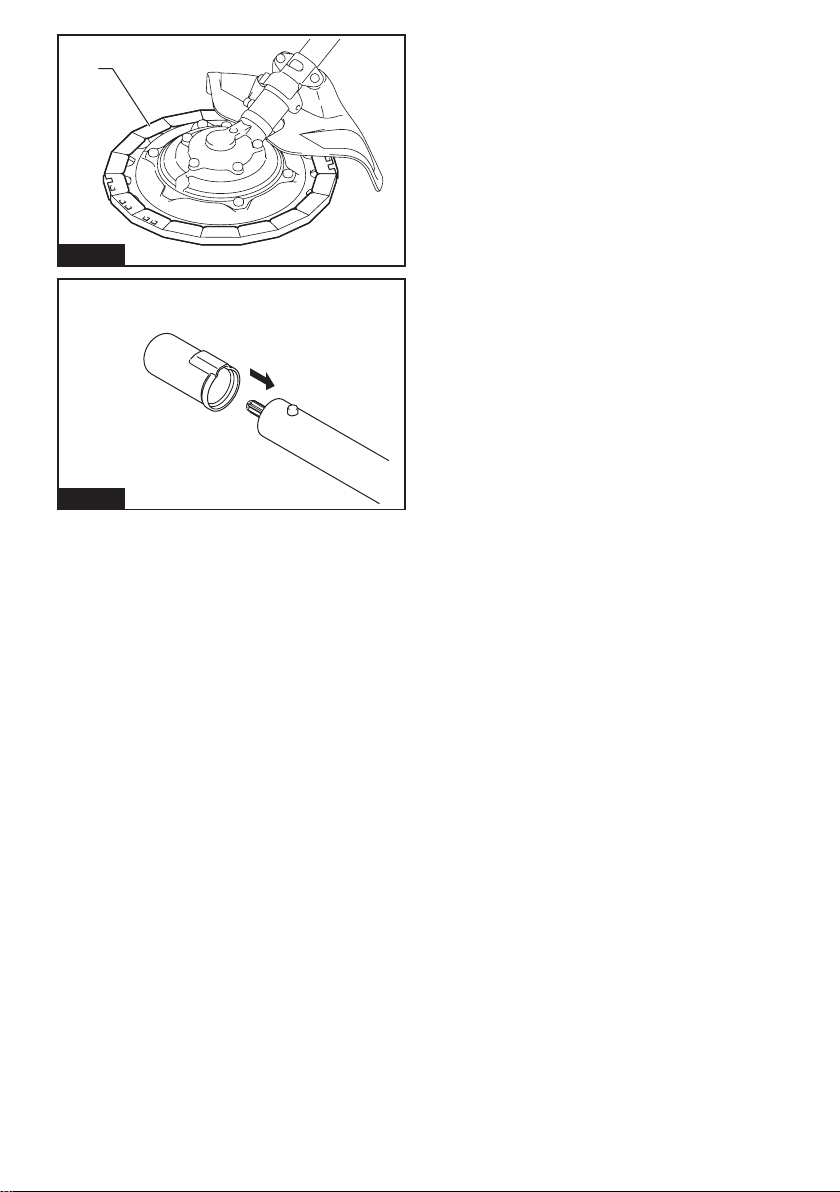
Designation: Rotary Scissors Attachment.
EM407MP.
S.I. 2008/1597 (as
amended)
of the following UK Regulations: S.I. 2001/1701 (as
amended) and are manufactured in accordance with
the following Designated Standards: EN ISO 11806-
.
Place and date of declaration:
01. 07. 2020
Responsible person:
Makita Europe N.V.
Importer: Makita (UK) Limited, Michigan Drive,
8JD, UK
SAFETY WARNINGS
WARNING:
Failure to follow all
-
tions for future reference.
(cordless) power tool.
Work area safety
1. Cluttered or
dark areas invite accidents.
2. -
Power tools create sparks
3.
Distractions can cause
Electrical safety
1.
tools.
reduce risk of electric shock.
2.
refrigerators. There is an increased risk of elec-
3. -
ditions. Water entering a power tool will increase
the risk of electric shock.
4. Do not abuse the cord. Never use the cord for
or moving parts. Damaged or entangled cords
increase the risk of electric shock.
5.
extension cord suitable for outdoor use. Use of
a cord suitable for outdoor use reduces the risk of
electric shock.
6.
(RCD) protected supply. Use of an RCD reduces
the risk of electric shock.
7.
However, users of pacemakers and other similar
medical devices should contact the maker of their
device and/or doctor for advice before operating
this power tool.
Personal safety
1.
-
ication. A moment of inattention while operating
2.
Protective equipment such
hearing protection used for appropriate conditions
3. Prevent unintentional starting. Ensure the
up or carrying the tool.
that have the switch on invites accidents.
4.
5. Do not overreach. Keep proper footing and
balance at all times. This enables better control
of the power tool in unexpected situations.
6.
from moving parts.
long hair can be caught in moving parts.
7. If devices are provided for the connection of
these are connected and properly used. Use of
dust collection can reduce dust-related hazards.
8. Do not let familiarity gained from frequent use
ignore tool safety principles. A careless action
second.