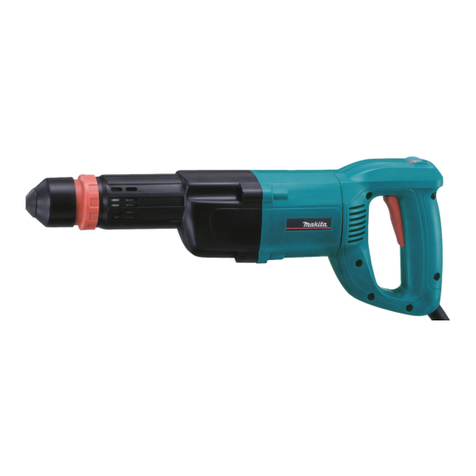
Makita DBN600 User manual

DBN600
EN Cordless Finish Nailer INSTRUCTION MANUAL 5
FR Cloueur Sans Fil De Finition MANUEL D’INSTRUCTIONS 11
DE Akku-Stauchkopfnagler BETRIEBSANLEITUNG 18
IT Chiodatrice di niture a
batteria ISTRUZIONI PER L’USO 25
NL Accuafbouwnagelpistool GEBRUIKSAANWIJZING 32
ES Clavadora de Acabado
Inalámbrica MANUAL DE
INSTRUCCIONES 39
PT Pinador a Bateria MANUAL DE INSTRUÇÕES 46
DA Ledningsfri dykkerpistol BRUGSANVISNING 53
EL Φορητό καρφωτικό
ακέφαλων καρφιών ΕΓΧΕΙΡΙΔΙΟ ΟΔΗΓΙΩΝ 60
TR Akülü Görünmez Çivi Çakma
Tabancası KULLANMA KILAVUZU 68

1
2
3
Fig.1
1
2
Fig.2
1
AB
2
Fig.3
12
3
Fig.4
1
B
A
Fig.5
2
13
Fig.6
1
Fig.7
1
Fig.8
2

1
2
Fig.9
1
Fig.10
1
2
Fig.11
12
Fig.12
Fig.13
1
3
2
Fig.14
13
4
5
2
Fig.15
1
2
Fig.16
3

Fig.17
4

5ENGLISH
ENGLISH (Original instructions)
SPECIFICATIONS
Model: DBN600
Nail size 16Ga x 25 / 30 / 32 / 35 / 38 / 40 / 45 / 50 / 57 / 60 / 64 mm
Magazine capacity 100 pcs.
Dimensions without hook (L x W x H)
(when using BL1840B battery) 296 x 108 x 318 mm
Rated voltage D.C. 18 V
Net weight 3.4 - 3.8 kg
• Duetoourcontinuingprogramofresearchanddevelopment,thespecicationshereinaresubjecttochange
without notice.
• Specicationsmaydifferfromcountrytocountry.
• Theweightmaydifferdependingontheattachment(s),includingthebatterycartridge.Thelightestandheavi-
estcombination,accordingtoEPTA-Procedure01/2014,areshowninthetable.
Applicable battery cartridge
BL1815 / BL1815N / BL1820 / BL1820B / BL1830 / BL1830B / BL1840 / BL1840B / BL1850 / BL1850B / BL1860B
• Someofthebatterycartridgeslistedabovemaynotbeavailabledependingonyourregionofresidence.
WARNING: Only use the battery cartridges listed above.Useofanyotherbatterycartridgesmaycause
injuryand/orre.
Symbols
Thefollowingshowthesymbolsusedfortheequip-
ment.Besurethatyouunderstandtheirmeaningbefore
use.
Read instruction manual.
Wearsafetyglasses.
Wear ear protection.
Donotuseonscaffoldings,ladders.
Keepngersawayfromtriggerwhennot
drivingfastenerstoavoidaccidentalring.
Ni-MH
Li-ion OnlyforEUcountries
Donotdisposeofelectricequipmentor
battery pack together with household waste
material!
InobservanceoftheEuropeanDirectives,
onWasteElectricandElectronic
EquipmentandBatteriesandAccumulators
andWasteBatteriesandAccumulators
and their implementation in accordance
withnationallaws,electricequipmentand
batteries and battery pack(s) that have
reachedtheendoftheirlifemustbecol-
lected separately and returned to an envi-
ronmentallycompatiblerecyclingfacility.
Intended use
Thetoolisintendedforfasteningoninteriorworkand
furniturework.
Noise
ThetypicalA-weightednoiseleveldeterminedaccord-
ingtoEN60745:
Soundpressurelevel(LpA):89dB(A)
Soundpowerlevel(LWA):100dB(A)
Uncertainty(K):3dB(A)
WARNING: Wear ear protection.
Vibration
Thevibrationtotalvaluedeterminedaccordingto
EN60745:
Vibration emission (ah):2.5m/s2or less
Uncertainty(K):1.5m/s2
NOTE:Thedeclaredvibrationemissionvaluehas
been measured in accordance with the standard test
methodandmaybeusedforcomparingonetoolwith
another.
NOTE:Thedeclaredvibrationemissionvalue
mayalsobeusedinapreliminaryassessmentof
exposure.

6ENGLISH
WARNING:Thevibrationemissionduringactual
useofthepowertoolcandifferfromthedeclared
emission value depending on the ways in which the
tool is used.
WARNING:Besuretoidentifysafetymeasures
to protect the operator that are based on an estima-
tionofexposureintheactualconditionsofuse(taking
accountofallpartsoftheoperatingcyclesuchas
thetimeswhenthetoolisswitchedoffandwhenitis
running idle in addition to the trigger time).
EC Declaration of Conformity
For European countries only
TheECdeclarationofconformityisincludedasAnnexA
to this instruction manual.
SAFETY WARNINGS
General power tool safety warnings
WARNING: Read all safety warnings, instruc-
tions, illustrations and specications provided
with this power tool.Failuretofollowallinstructions
listedbelowmayresultinelectricshock,reand/or
seriousinjury.
Save all warnings and instruc-
tions for future reference.
Theterm"powertool"inthewarningsreferstoyour
mains-operated (corded) power tool or battery-operated
(cordless) power tool.
Cordless nailer safety warnings
1. Always assume that the tool contains fasten-
ers.Carelesshandlingofthenailercanresultin
unexpectedringoffastenersandpersonalinjury.
2. Do not point the tool towards yourself or any-
one nearby. Unexpected triggering will discharge
thefastenercausinganinjury.
3. Do not actuate the tool unless the tool is
placed rmly against the workpiece.Ifthetool
isnotincontactwiththeworkpiece,thefastener
maybedeectedawayfromyourtarget.
4. Disconnect the tool from the power source
when the fastener jams in the tool. While
removingajammedfastener,thenailermaybe
accidentallyactivatedifitispluggedin.
5. Use caution while removing a jammed fas-
tener.Themechanismmaybeundercompression
andthefastenermaybeforcefullydischarged
whileattemptingtofreeajammedcondition.
6. Do not use this nailer for fastening electrical
cables. Itisnotdesignedforelectriccableinstal-
lationandmaydamagetheinsulationofelectric
cablestherebycausingelectricshockorre
hazards.
7. Always wear safety glasses to protect your
eyes from dust or fastener injury.
8. Keep hands and feet away from the ejection
port area.
9. Follow instruction for lubricating and chang-
ing accessories.
10. Always remove the battery cartridge before
loading the fasteners, adjustment, inspection,
maintenance or after operation is over.
11. Make sure no one is nearby before operation.
Never attempt to drive fasteners from both the
inside and outside of wall at the same time.
Fasteners may rip through and/or y off, pre-
senting a grave danger.
12. Watch your footing and maintain your balance
with the tool. Make sure there is no one below
when working in high locations.
13. Never use fastener driving tools marked with
the symbol "Do not use on scaffoldings, lad-
ders" for specic application for example:
• whenchangingonedrivinglocationto
anotherinvolvestheuseofscaffoldings,
stairs,ladders,orladderalikeconstructions,
e.g.rooflaths;
• closingboxesorcrates;
• ttingtransportationsafetysystemse.g.on
vehicles and wagons.
14. Check walls, ceilings, oors, roong and
the like carefully to avoid possible electrical
shock, gas leakage, explosions, etc. caused by
stapling into live wires, conduits or gas pipes.
15. Use only fasteners specied in this manual.
The use of any other fasteners may cause
malfunction of the tool.
16. Do not tamper with the tool or attempt to use it
for other than driving fasteners.
17. Do not operate the tool without fasteners. It
shortens the service life of the tool.
18. Stop driving operations immediately if you
notice something wrong or out of the ordinary
with the tool.
19. Never fasten into any materials which may
allow the fastener to puncture and y through
as a projectile.
20. Never actuate the switch trigger and contact
element at the same time until you are pre-
pared to fasten workpieces. Allow the work-
piece to depress the contact element. Never
defeat its purpose by securing the contact
element back or by depressing it by hand.
21. Never tamper with the contact element. Check
the contact element frequently for proper
operations.
22. Always remove fasteners from the tool when
not in use.
SAVE THESE INSTRUCTIONS.
WARNING: DO NOT let comfort or familiarity
with product (gained from repeated use) replace
strict adherence to safety rules for the subject
product. MISUSE or failure to follow the safety
rules stated in this instruction manual may cause
serious personal injury.

7ENGLISH
Important safety instructions for
battery cartridge
1. Before using battery cartridge, read all instruc-
tions and cautionary markings on (1) battery
charger, (2) battery, and (3) product using
battery.
2. Do not disassemble battery cartridge.
3. If operating time has become excessively
shorter, stop operating immediately. It may
result in a risk of overheating, possible burns
and even an explosion.
4. If electrolyte gets into your eyes, rinse them
out with clear water and seek medical atten-
tion right away. It may result in loss of your
eyesight.
5. Do not short the battery cartridge:
(1) Do not touch the terminals with any con-
ductive material.
(2) Avoid storing battery cartridge in a con-
tainer with other metal objects such as
nails, coins, etc.
(3) Do not expose battery cartridge to water
or rain.
A battery short can cause a large current
ow, overheating, possible burns and even a
breakdown.
6. Do not store the tool and battery cartridge in
locations where the temperature may reach or
exceed 50 °C (122 °F).
7. Do not incinerate the battery cartridge even if
it is severely damaged or is completely worn
out. The battery cartridge can explode in a re.
8. Be careful not to drop or strike battery.
9. Do not use a damaged battery.
10. The contained lithium-ion batteries are subject
to the Dangerous Goods Legislation require-
ments.
Forcommercialtransportse.g.bythirdparties,
forwardingagents,specialrequirementonpack-
aging and labeling must be observed.
Forpreparationoftheitembeingshipped,consult-
inganexpertforhazardousmaterialisrequired.
Pleasealsoobservepossiblymoredetailed
national regulations.
Tapeormaskoffopencontactsandpackupthe
battery in such a manner that it cannot move
around in the packaging.
11. Follow your local regulations relating to dis-
posal of battery.
12. Use the batteries only with the products
specied by Makita. Installing the batteries to
non-compliantproductsmayresultinare,exces-
siveheat,explosion,orleakofelectrolyte.
SAVE THESE INSTRUCTIONS.
CAUTION: Only use genuine Makita batteries.
Useofnon-genuineMakitabatteries,orbatteriesthat
havebeenaltered,mayresultinthebatterybursting
causingres,personalinjuryanddamage.Itwill
alsovoidtheMakitawarrantyfortheMakitatooland
charger.
Tips for maintaining maximum
battery life
1. Charge the battery cartridge before completely
discharged. Always stop tool operation and
charge the battery cartridge when you notice
less tool power.
2. Never recharge a fully charged battery car-
tridge. Overcharging shortens the battery
service life.
3. Charge the battery cartridge with room tem-
perature at 10 °C - 40 °C (50 °F - 104 °F). Let
a hot battery cartridge cool down before
charging it.
4. Charge the battery cartridge if you do not use
it for a long period (more than six months).
FUNCTIONAL
DESCRIPTION
CAUTION: Always be sure that the tool is
switched off and the battery cartridge is removed
before adjusting or checking function on the tool.
Installing or removing battery
cartridge
CAUTION: Always switch off the tool before
installing or removing of the battery cartridge.
CAUTION: Hold the tool and the battery car-
tridge rmly when installing or removing battery
cartridge. Failure to hold the tool and the battery
cartridgermlymaycausethemtoslipoffyourhands
and result in damage to the tool and battery cartridge
andapersonalinjury.
►Fig.1: 1. Red indicator 2. Button 3. Battery cartridge
Toremovethebatterycartridge,slideitfromthetool
whileslidingthebuttononthefrontofthecartridge.
Toinstallthebatterycartridge,alignthetongueonthe
battery cartridge with the groove in the housing and slip
it into place. Insert it all the way until it locks in place
withalittleclick.Ifyoucanseetheredindicatoronthe
uppersideofthebutton,itisnotlockedcompletely.
CAUTION: Always install the battery cartridge
fully until the red indicator cannot be seen.Ifnot,
itmayaccidentallyfalloutofthetool,causinginjuryto
you or someone around you.
CAUTION: Do not install the battery cartridge
forcibly.Ifthecartridgedoesnotslideineasily,itis
not being inserted correctly.
Tool / battery protection system
Thetoolisequippedwithatool/batteryprotectionsys-
tem.Thissystemautomaticallycutsoffpowertothe
motortoextendtoolandbatterylife.Thetoolwillauto-
maticallystopduringoperationifthetoolorbatteryis
placedunderoneofthefollowingconditions:

8ENGLISH
Overload protection
When the tool/battery is operated in a manner that
causesittodrawanabnormallyhighcurrent,thetool
automatically stops without any indication. In this sit-
uation,turnthetooloffandstoptheapplicationthat
causedthetooltobecomeoverloaded.Thenturnthe
tool on to restart.
Overheat protection
Whenthetool/batteryisoverheated,thetoolstops
automatically.Inthissituation,letthetool/batterycool
beforeturningthetoolonagain.
Overdischarge protection
Whenthebatterycapacityisnotenough,thetoolstops
automaticallyandthebatteryindicatorshowsfollowing
state.Inthiscase,removethebatteryfromthetooland
charge the battery.
On Off Blinking
Indicating the remaining battery
capacity
Only for battery cartridges with the indicator
►Fig.2: 1. Indicator lamps 2. Check button
Pressthecheckbuttononthebatterycartridgetoindi-
catetheremainingbatterycapacity.Theindicatorlamps
lightupforafewseconds.
Indicator lamps Remaining
capacity
Lighted Off Blinking
75% to 100%
50% to 75%
25% to 50%
0% to 25%
Charge the
battery.
Thebattery
may have
malfunctioned.
NOTE:Dependingontheconditionsofuseandthe
ambienttemperature,theindicationmaydifferslightly
fromtheactualcapacity.
Trigger-lock button
CAUTION: When not operating the tool,
depress the trigger-lock button from B side to
lock the switch trigger in the OFF position.
Topreventtheswitchtriggerfromaccidentallypulled,
the trigger-lock button is provided.
Topulltheswitchtrigger,depressthetrigger-lockbutton
fromAside.
Afteruse,alwayspressinthetrigger-lockbuttonfrom
B side.
►Fig.3: 1.Trigger-lockbutton2.Switchtrigger
Nailing mode selection
Thetoolemploystwonailingactions.Selectthedesired
nailing by the mode selecting switch.
►Fig.4: 1. Mode selecting switch 2.Sequentialmode
3. Continuous mode
Intermittent nailing (sequential mode)
Thismodesuitsfordrivinganailcarefullyand
accurately.
Continuous/ intermittent nailing (continuous mode)
Whenthetoolissettothismode,youcanchooseeither
continuousorintermittentnailingbysequencesofthe
trigger operation.
Adjusting the nailing depth
WARNING: Always make sure that your
ngers are not placed on the switch trigger or
the contact element and the battery cartridge is
removed before adjusting the depth of nailing.
Turntheadjustertoadjustthenailingdepth.Thenailing
depthgetsdeeperasyouturntheadjustertoAdirec-
tion,shallowertoBdirectioninthegure.Therangeof
thenailingdepthadjustmentis3mm.
►Fig.5: 1.Adjuster
NOTICE: Do not turn the adjuster too much, or
the adjuster may get stuck.
Adjustthenailingdepthasnecessary.
►Fig.6: 1.Toodeep2. Flush 3.Tooshallow
Lighting up the lamp
CAUTION: Do not look in the light or see the
source of light directly.
Pulltheswitchtriggeroractuatethecontactelementto
lightupthelamp.Thelampkeepsonlightingwhilepull-
ing the switch trigger or actuating the contact element.
Thelampgoesoutapproximately10secondsafter
releasing the switch trigger and the contact element.
►Fig.7: 1. Lamp

9ENGLISH
NOTE:Useadryclothtowipethedirtoffthelensof
thelamp.Becarefulnottoscratchthelensoflamp,or
it may lower the illumination.
NOTE:Thenailermaynotrenailsevenifthelamp
lights up because the remaining battery power is low.
Inthiscase,chargethebatterycartridge.
ASSEMBLY
CAUTION: Always make sure that your
ngers are not placed on the switch trigger or
the contact element and the battery cartridge is
removed before carrying out any work on the
nailer.
Loading or unloading the nails
CAUTION: Always make sure that the battery
cartridge is removed before loading the nails.
Unintentionalringmaycausepersonalinjuriesand
property damage.
CAUTION: Do not abruptly slide the pusher
lever on the magazine loaded with nails.
Accidentallydroppingnailsespeciallywhenworking
inhighplacesmaycausepersonalinjuries.
CAUTION: Load the nails in the correct direc-
tion. Loading in wrong direction may cause prema-
turewearandtearofthedriveranddamageofthe
other parts.
CAUTION: Do not use deformed connected
nails.Usenailsspeciedinthismanual.Usingnails
otherthanthosespeciedmaycausethenailjam-
mingandbreakageofthenailer.
1. Remove the battery cartridge.
2. Pullthepusherleverdownwarduntilitlockswith
a little click.
►Fig.8: 1.Pusherlever
3. Insert a connected nails into the slit on the bottom
ofthemagazine.
►Fig.9: 1.Slit2. Connected nail
4. Pressthepusherbutton.
Thepusherleverisunlockedanditholdsthenailsin
the magazine.
►Fig.10: 1.Pusherbutton
CAUTION: Be careful not to place your nger
on the rail of the pusher lever when pressing
the pusher button.Thepushermayhityournger
stronglyandcauseinjury.
NOTICE: If the inserted connected nails remain
in the bottom of the magazine, pusher lever does
not return even if you press the pusher button.
Bring the connected nails into the magazine so that
the entire connected nails can be seen.
Toremovenails,followtheinstallationproceduresin
reverse.
Nose adapter
CAUTION: Always make sure that your
ngers are not placed on the switch trigger or
the contact element and the battery cartridge is
removed before installing the nose adapter.
Whenringnailsonthematerialwitheasily-marred
surfaces,usethenoseadapter.Putthenoseadapter
onthefrontendofthecontactelement.
Make sure that the nose adapter completely covers the
frontendofthecontactelementasillustrated.
►Fig.11: 1. Nose adapter 2. Contact element
You can store the nose adapter on the holder on the
magazinetokeepitfrombeinglost.
►Fig.12: 1. Nose adapter 2. Holder
Hook
CAUTION: Do not hang the hook from the
waist belt.Droppingthenailer,whichiscausedby
thehookaccidentallycomingoutofplace,maycause
unintentionalringandresultinpersonalinjuries.
►Fig.13
Thehookisconvenientfortemporarilyhangingthetool.
Thiscanbeinstalledoneithersideofthetool.
Toinstallthehook,insertitintoagrooveinthetool
housing on either side and then secure it with a screw.
Toremove,loosenthescrewandthentakeitout.
►Fig.14: 1. Groove 2. Hook 3.Screw
OPERATION
Inspecting trigger function
CAUTION: Make sure that the trigger function
is in working order before each operation. The
tool must not operate only by pulling the trigger
or only by placing the contact element against the
workpiece. If you nd such issues, contact Makita
authorized service centers for repairs.
CAUTION: Before installing the battery car-
tridge into the tool, always check to see that the
switch trigger actuates properly and returns to
the "OFF" position when released.
Driving nails
WARNING: Continue to place the contact
element rmly on the material until the nail is
driven completely.Unintentionalringmaycause
personalinjuries.
CAUTION: Do not drive nails on hard mate-
rials such as metal or the like.Ifthenailcannot
penetratethematerial,thenailermaybekickedback
towardyouandcauseinjury.

10 ENGLISH
NOTE:Ifyoudrivenailscontinuouslyforalongtime,
theexhaustairwillgethotduetotheheatfromthe
motor.
Thetoolemploystwonailingactions:intermittentnailing
(sequentialmode)andcontinuous/intermittentnailing
(continuous mode).
►Fig.15: 1.Switchtrigger2. Contact element
3. Mode selecting switch 4.Sequential
mode 5. Continuous mode
Intermittent nailing (sequential mode)
1. Setthemodeselectingswitchtothesequential
mode.
2. Release the trigger lock.
3. Placeatthecontactelementonthematerial.
4. Pulltheswitchtriggerfullytodriveanail.
5. Todrivethenextnail,releasetheswitchtrigger
andcontactelementonce,andthenrepeatthestep3
and 4 above.
WARNING: Always be sure to rst place the
contact element against the workpiece before
pulling the trigger.
Continuous/intermittent nailing
(continuous mode)
1. Setthemodeselectingswitchtothecontinuous
mode.
2. Release the trigger lock.
3. Pulltheswitchtriggerrstandthenplacethe
contact element against the workpiece.
4. Todrivethenextnail,keepyourngerpullingthe
switch trigger and place the contact element against the
workpiece again.
NOTE:Thistoolstopsautomaticallyunderthefollow-
ingconditions:
• Whenyoureleasetheswitchtriggerorcontact
elementfromworkpiecebeforethetoolnishes
theoperationcompletely.Inthiscase,pullthe
trigger again until the tool turns into standby.
• Whenkeepingeitherpullingtheswitchtrigger
or placing the contact element about 5 seconds
withoutanotheraction.Inthiscase,releasethe
switchtriggerorthecontactelementfromwork-
piece to restart the operation.
Anti dry re mechanism
When the remaining nails in the magazine decrease to
6-9pieces,theswitchtriggercannolongerbepulled.
Atthistime,insertanewstripofnailsinthemagazine
and the switch trigger can be pulled again.
Removing jammed nails
WARNING: Always make sure that the battery
cartridge is removed before removing jammed
nails.
CAUTION: Be sure to lock the latch after
removing jammed nails.
Release the latch and open the door. Remove the
jammednailsandlockthelatch.
►Fig.16: 1. Latch 2. Door
Handling of the nails
Handlenailsandtheirboxcarefully.Ifthenailshave
beenhandledroughly,theymaybeoutofshapeortheir
connectorbreaks,causingpoornailfeed.
NOTICE: Avoid storing nails in a very humid or
hot place or place exposed to direct sunlight.
►Fig.17
MAINTENANCE
CAUTION: Always be sure that the tool is
switched off and the battery cartridge is removed
before attempting to perform inspection or
maintenance.
NOTICE: Never use gasoline, benzine, thinner,
alcohol or the like. Discoloration, deformation or
cracks may result.
TomaintainproductSAFETYandRELIABILITY,
repairs,anyothermaintenanceoradjustmentshould
beperformedbyMakitaAuthorizedorFactoryService
Centers,alwaysusingMakitareplacementparts.
OPTIONAL
ACCESSORIES
CAUTION: These accessories or attachments
are recommended for use with your Makita tool
specied in this manual.Theuseofanyother
accessoriesorattachmentsmightpresentariskof
injurytopersons.Onlyuseaccessoryorattachment
foritsstatedpurpose.
Ifyouneedanyassistanceformoredetailsregard-
ingtheseaccessories,askyourlocalMakitaService
Center.
• Nails
• Makitagenuinebatteryandcharger
• Safetygoggles
NOTE:Someitemsinthelistmaybeincludedinthe
toolpackageasstandardaccessories.Theymay
differfromcountrytocountry.

11 FRANÇAIS
FRANÇAIS (Instructions originales)
SPÉCIFICATIONS
Modèle : DBN600
Tailledesclous 16Ga x 25 / 30 / 32 / 35 / 38 / 40 / 45 / 50 / 57 / 60 / 64 mm
Capacité du magasin 100 pièces
Dimensions sans le crochet (L x l x H)
(si vous utilisez la batterie BL1840B) 296 x 108 x 318 mm
Tensionnominale 18 V c.c.
Poidsnet 3,4-3,8kg
• Étantdonnél’évolutionconstantedenotreprogrammederechercheetdedéveloppement,lesspécications
contenuesdanscemanuelsontsujettesàmodicationsanspréavis.
• Lesspécicationspeuventvariersuivantlespays.
• Lepoidspeutêtredifférentselonlesaccessoires,notammentlabatterie.Lesassociationslapluslégèreetla
pluslourde,conformémentàlaprocédureEPTA01/2014,sontindiquéesdansletableau.
Batterie applicable
BL1815 / BL1815N / BL1820 / BL1820B / BL1830 / BL1830B / BL1840 / BL1840B / BL1850 / BL1850B / BL1860B
• Certainesbatteriesrépertoriéesci-dessuspeuventnepasêtredisponiblesselonlarégionoùvousrésidez.
AVERTISSEMENT : N’utilisez que les batteries répertoriées ci-dessus.L’utilisationden’importequelle
autrebatteriepeutprovoquerdesblessureset/ouunincendie.
Symboles
Vous trouverez ci-dessous les symboles utilisés pour
l’appareil.Veillezàcomprendreleursignicationavant
toute utilisation.
Lirelemoded’emploi.
Portezdeslunettesdesécurité.
Portezundispositifdeprotectionauditive.
Nepasutilisersurunéchafaudageouune
échelle.
Éloignezlesdoigtsdelagâchettelorsque
vousn’enfoncezpasdexationspour
éviteruneéjectionaccidentelle.
Ni-MH
Li-ion Pourlespaysdel’Unioneuropéenne
uniquement
Nejetezpaslesappareilsélectriquesou
les batteries avec vos ordures ménagères !
Conformémentauxdirectiveseuropéennes
relativesauxdéchetsd’équipements
électriquesetélectroniquesetauxpiles
etaccumulateursainsiqu’auxdéchetsde
pilesetd’accumulateursetleurmiseen
œuvreconformémentauxloisnationales,
leséquipementsélectriques,lespilesetles
batteriesenndeviedoiventfairel’objet
d’unecollectesélectiveetêtreconésà
une usine de recyclage respectueuse de
l’environnement.
Utilisations
L’outilestconçupourlestravauxd’intérieuret
d’ameublement.
Bruit
NiveaudebruitpondéréAtypique,déterminéselon
EN60745:
Niveau de pression sonore (LpA):89dB(A)
Niveau de puissance sonore (LWA):100dB(A)
Incertitude(K):3dB(A)
AVERTISSEMENT : Portez un serre-tête
antibruit.
Vibrations
ValeurtotaledevibrationdéterminéeselonEN60745:
Émissiondevibrations(ah):2,5m/s2ou moins
Incertitude(K):1,5m/s2
NOTE :Lavaleurd’émissiondevibrationsdéclarée
aétémesuréeconformémentàlaméthodedetest
standardetpeutêtreutiliséepourcomparerlesoutils
entre eux.
NOTE :Lavaleurd’émissiondevibrationsdéclarée
peutaussiêtreutiliséepourl’évaluationpréliminaire
del’exposition.

12 FRANÇAIS
AVERTISSEMENT :L’émissiondevibrations
lorsdel’usageréeldel’outilélectriquepeutêtre
différentedelavaleurd’émissiondéclarée,suivantla
façondontl’outilestutilisé.
AVERTISSEMENT :Lesmesuresdesécuritéà
prendrepourprotégerl’utilisateurdoiventêtrebasées
suruneestimationdel’expositiondansdescondi-
tionsréellesd’utilisation(entenantcomptedetoutes
lescomposantesducycled’utilisation,commepar
exemplelemomentdesamisehorstension,lorsqu’il
tourneàvideetlemomentdesondéclenchement).
Déclaration de conformité CE
Pour les pays européens uniquement
LadéclarationdeconformitéCEestfournieenAnnexe
Aàcemoded’emploi.
CONSIGNES DE
SÉCURITÉ
Consignes de sécurité générales
pour outils électriques
AVERTISSEMENT : Veuillez lire les
consignes de sécurité, instructions, illustrations
et spécications qui accompagnent cet outil
électrique. Le non-respect de toutes les instructions
indiquéesci-dessouspeutentraîneruneélectrocu-
tion,unincendieet/oudegravesblessures.
Conservez toutes les mises en
garde et instructions pour réfé-
rence ultérieure.
Leterme«outilélectrique»danslesavertissements
faitréférenceàl’outilélectriquealimentéparlesecteur
(aveccordond’alimentation)ouàl’outilélectriquefonc-
tionnantsurbatterie(sanscordond’alimentation).
Consignes de sécurité pour cloueur
sans l
1. Prenez toujours pour acquis que l’outil
contient des éléments de xation. Une manipu-
lationimprudenteducloueurpeutprovoquerune
projectioninattenduedesélémentsdexationet
des blessures corporelles.
2. Ne dirigez pas l’outil vers vous-même ou vers
quiconque se trouvant à proximité. Un déclen-
chementinattendudelagâchetteexpulseraun
élémentdexationentraînantdesblessures.
3. N’enclenchez l’outil qu’après l’avoir appuyé
fermement contre la pièce.Sil’outiln’estpasen
contactaveclapièce,leélémentdexationpeut
êtredéviédesacible.
4. Débranchez toujours l’outil de sa source
d’alimentation lorsqu’un élément de xation
est coincé dans l’outil.Lorsquevousretirez
unélémentdexationcoincé,vousrisquezde
déclencher accidentellement le cloueur si celui-ci
est branché.
5. Prenez garde lorsque vous retirez un élément
de xation coincé.Lemécanismepeutêtrecom-
priméetleélémentdexationpeutêtrepropulsé
énergiquementpendantquevousessayezdele
décoincer.
6. N’utilisez pas ce cloueur pour xer des câbles
électriques. Iln’estpasconçupourlaposede
câblesélectriquesetpeutendommagerleurgaine
isolante,cequicomporteunrisqued’électrocution
etd’incendie.
7. Portez toujours des lunettes de sécurité pour
protéger vos yeux contre toute blessure au
contact de la poussière ou d’une vis.
8. Gardez les mains et les pieds à l’écart de la
zone de sortie d’éjection.
9. Suivez les instructions de lubrication et de
changement des accessoires.
10. Retirez toujours la batterie avant de charger
des éléments de xation, de procéder à un
réglage, une inspection ou l’entretien, ou
après utilisation.
11. Assurez-vous que personne ne se trouve à
proximité avant utilisation. N’essayez jamais
d’enfoncer des éléments de xation des côtés
intérieur et extérieur du mur en même temps.
Cela est très dangereux, puisque les éléments
de xation risquent alors de passer à travers
et/ou d’être projetés.
12. Regardez où vous posez les pieds et main-
tenez un bon équilibre pendant l’utilisation
de l’outil. Assurez-vous que personne ne se
trouve dessous lorsque vous utilisez l’outil en
hauteur.
13. N’utilisez jamais des outils destinés à enfon-
cer des éléments de xation portant la mention
« Ne pas utiliser sur un échafaudage ou une
échelle » dans les cas suivants :
• Lorsquelepassaged’unlieud’utilisation
àunautreimpliquel’utilisationd’échafau-
dages,d’escaliersoud’échellesoudestruc-
turessimilaires,parexempledeslattesde
toiture;
• Pourfermerdesboîtesoudescaisses;
• Pourinstallerdessystèmesassurantla
sécuritélorsdutransport,parexemplesur
des véhicules ou des wagons.
14. Vériez soigneusement le mur, plafond, plan-
cher, toit ou autre structure pour éviter les
risques d’électrocution, de fuite de gaz, d’ex-
plosion, etc., en agrafant des ls dénudés, des
conduites ou des tuyaux de gaz.
15. Utilisez exclusivement les éléments de xation
spéciés dans le présent manuel. L’utilisation
d’autres éléments de xation peut causer le
dysfonctionnement de l’outil.
16. Ne modiez pas l’outil ni n’essayez de l’utiliser
pour une autre tâche qu’enfoncer des élé-
ments de xation.
17. N’utilisez pas l’outil sans éléments de xation.
Cela réduit la durée de vie de l’outil.

13 FRANÇAIS
18. Cessez immédiatement l’utilisation si vous
constatez un dysfonctionnement ou une ano-
malie sur l’outil.
19. N’enfoncez jamais de éléments de xation
dans des matériaux qu’ils peuvent percer et
traverser comme des projectiles.
20. N’actionnez jamais simultanément la gâchette
et l’élément de contact avant d’être prêt à xer
les pièces. Le contact avec la pièce doit enfon-
cer l’élément de contact. N’ignorez pas le rôle
de l’élément de contact en le bloquant ou en
l’enfonçant manuellement.
21. Ne modiez jamais l’élément de contact.
Inspectez régulièrement le bon fonctionne-
ment de l’élément de contact.
22. Retirez toujours les éléments de xation de
l’outil lorsque vous ne l’utilisez pas.
CONSERVEZ CES
INSTRUCTIONS.
AVERTISSEMENT : NE vous laissez PAS
tromper (au l d’une utilisation répétée) par un
sentiment d’aisance et de familiarité avec le
produit, en négligeant le respect rigoureux des
consignes de sécurité qui accompagnent le pro-
duit en question. La MAUVAISE UTILISATION de
l’outil ou l’ignorance des consignes de sécurité
indiquées dans ce mode d’emploi peut entraîner
de graves blessures.
Consignes de sécurité importantes
pour la batterie
1. Avant d’utiliser la batterie, lisez toutes les
instructions et précautions relatives (1) au
chargeur de batterie, (2) à la batterie, et (3) au
produit utilisant la batterie.
2. Ne démontez pas la batterie.
3. Cessez immédiatement l’utilisation si le temps
de fonctionnement devient excessivement
court. Il y a risque de surchauffe, de brûlures,
voire d’explosion.
4. Si l’électrolyte pénètre dans vos yeux, rin-
cez-les à l’eau claire et consultez immédiate-
ment un médecin. Il y a risque de perte de la
vue.
5. Ne court-circuitez pas la batterie :
(1) Ne touchez les bornes avec aucun maté-
riau conducteur.
(2) Évitez de ranger la batterie dans un
conteneur avec d’autres objets métal-
liques, par exemple des clous, des pièces
de monnaie, etc.
(3) N’exposez pas la batterie à l’eau ou à la
pluie.
Un court-circuit de la batterie peut provoquer
une intensité de courant élevée, une sur-
chauffe, parfois des brûlures et même une
panne.
6. Ne rangez pas l’outil et la batterie dans un
endroit où la température risque d’atteindre ou
de dépasser 50 °C.
7. Ne jetez pas la batterie au feu même si elle est
sérieusement endommagée ou complètement
épuisée. La batterie peut exploser au contact
du feu.
8. Évitez de laisser tomber ou de cogner la
batterie.
9. N’utilisez pas la batterie si elle est
endommagée.
10. Les batteries au lithium-ion contenues sont
soumises aux exigences de la législation sur
les marchandises dangereuses.
Lors du transport commercial par des tierces
partiesoudestransitairesparexemple,desexi-
gencesspéciquesenmatièred’étiquetageet
d’emballagedoiventêtrerespectées.
Pourlapréparationdel’articleexpédié,ilest
nécessaire de consulter un expert en matériau
dangereux. Veuillez également respecter les
réglementationsnationalessusceptiblesd’être
plus détaillées.
Recouvrez les contacts exposés avec du ruban
adhésifoudurubandemasquageetemballezla
batteriedetellesortequ’ellenepuissepasbouger
dansl’emballage.
11. Suivez les réglementations locales en matière
de mise au rebut des batteries.
12. Utilisez les batteries uniquement avec les
produits spéciés par Makita.L’insertionde
batteriesdansdesproduitsnonconformespeut
provoquerunincendie,unechaleurexcessive,
uneexplosionouunefuitedel’électrolyte.
CONSERVEZ CES
INSTRUCTIONS.
ATTENTION : N’utilisez que des batteries
Makita d’origine.L’utilisationdebatteriesdemarque
autrequeMakitaoudebatteriesmodiéespeutpro-
voquerl’explosiondesbatteries,cequiprésenteun
risqued’incendie,dedommagesmatérielsetcorpo-
rels. Cela annulera également la garantie Makita pour
l’outiletlechargeurMakita.
Conseils pour assurer la durée
de vie optimale de la batterie
1. Chargez la batterie avant qu’elle ne soit com-
plètement déchargée. Arrêtez toujours l’outil
et rechargez la batterie quand vous remarquez
que la puissance de l’outil diminue.
2. Ne rechargez jamais une batterie complète-
ment chargée. La surcharge réduit la durée de
service de la batterie.
3. Chargez la batterie à une température
ambiante comprise entre 10 °C et 40 °C. Avant
de charger une batterie chaude, laissez-la
refroidir.
4. Rechargez la batterie si elle est restée inutili-
sée pendant une période prolongée (plus de
six mois).

14 FRANÇAIS
DESCRIPTION DU
FONCTIONNEMENT
ATTENTION : Assurez-vous toujours que
l’outil est hors tension et que sa batterie est
retirée avant de l’ajuster ou de vérier son
fonctionnement.
Insertion ou retrait de la batterie
ATTENTION : Éteignez toujours l’outil avant
de mettre en place ou de retirer la batterie.
ATTENTION : Tenez fermement l’outil et la
batterie lors de la mise en place ou du retrait de
la batterie.Sivousnetenezpasfermementl’outil
etlabatterie,ilspeuventvousglisserdesmains,et
s’abîmerouvousblesser.
►Fig.1: 1. Voyant rouge 2. Bouton 3. Batterie
Pourretirerlabatterie,faites-laglisserhorsdel’outil
toutenfaisantglisserleboutonàl’avantdelabatterie.
Pourmettreenplacelabatterie,alignezlalanguettesur
la batterie avec la rainure sur le compartiment et insé-
rez-la.Insérez-laàfondjusqu’àcequ’unlégerdéclic
sefasseentendre.Silevoyantrougesurledessusdu
boutonestvisible,celasigniequ’ellen’estpasbien
verrouillée.
ATTENTION : Insérez toujours complètement
la batterie jusqu’à ce que le voyant rouge ne soit
plus visible.Sinon,ellepourraittomberacciden-
tellementdel’outil,aurisquedevousblesseroude
blesserquelqu’unsetrouvantprèsdevous.
ATTENTION : N’insérez pas la batterie de
force.Sielleneglissepasfacilement,c’estquevous
nel’insérezpascorrectement.
Système de protection de l’outil/la
batterie
L’outilestéquipéd’unsystèmedeprotectiondel’outil/la
batterie.Cesystèmecoupeautomatiquementl’alimen-
tation vers le moteur pour prolonger la durée de vie de
l’outiletdelabatterie.Sil’outiloulabatteriesetrouve
dansl’unedessituationssuivantes,l’outilcessera
automatiquementdefonctionner.
Protection contre la surcharge
Lorsquel’outiloulabatterieestutiliséd’unemanière
provoquantunappeldecourantanormalementélevé,
l’outils’arrêteautomatiquementsansindication.Dans
cecas,éteignezl’outiletarrêtezlatâcheayantpro-
voquélasurchargedel’outil.Puisrallumezl’outilpour
reprendrelatâche.
Protection contre la surchauffe
Encasdesurchauffedel’outiloudelabatterie,l’outil
s’arrêteautomatiquement.Danscecas,laissezl’outil
oulabatterierefroidiravantderallumerl’outil.
Protection contre la décharge totale
de la batterie
Silachargedelabatterieestinsufsante,l’outils’arrête
automatiquementetletémoindelabatterieindique
l’étatsuivant.Danscecas,retirezlabatteriedel’outil
et chargez-la.
Allumé Éteint Clignotant
Indication de la charge restante de
la batterie
Uniquement pour les batteries avec voyant
lumineux
►Fig.2: 1.Témoins2.Boutondevérication
Appuyezsurleboutondevéricationsurlabatterie
pourindiquerlachargerestantedelabatterie.Les
témoinss’allumentpendantquelquessecondes.
Témoins Charge
restante
Allumé Éteint Clignotant
75%à100%
50%à75%
25%à50%
0%à25%
Chargez la
batterie.
Anomalie
possible
de la batterie.
NOTE :Selonlesconditionsd’utilisationetlatem-
pératureambiante,l’indicationpeutêtrelégèrement
différentedelacapacitéréelle.
Bouton de verrouillage de la
gâchette
ATTENTION : Lorsque vous n’utilisez pas
l’outil, appuyez sur le côté B du bouton de
verrouillage de la gâchette pour verrouiller la
gâchette en position d’arrêt.
Pourévitertoutdéclenchementaccidenteldela
gâchette,l’outilestmunid’unboutondeverrouillagede
lagâchette.
Pourenclencherlagâchette,appuyezsurlecôtéAdu
boutondeverrouillagedelagâchette.
Aprèsutilisation,appuyeztoujourssurlecôtéBdu
boutondeverrouillagedelagâchette.

15 FRANÇAIS
►Fig.3: 1.Boutondeverrouillagedelagâchette
2.Gâchette
Sélection du mode de clouage
L’outilemploiedeuxactionsdeclouage.Sélectionnezle
clouage souhaité avec le sélecteur de mode.
►Fig.4: 1.Sélecteurdemode2.Modeséquentiel
3. Mode continu
Clouage intermittent (mode séquentiel)
Cemodeconvientpourenfoncerunclousoigneuse-
ment et précisément.
Clouage continu/intermittent (mode continu)
Lorsquel’outilestréglésurcemode,vouspouvez
choisir le clouage continu ou intermittent en utilisant en
séquencelagâchette.
Réglage de la profondeur de
clouage
AVERTISSEMENT : Vériez toujours que vos
doigts ne se trouvent pas sur la gâchette ou sur
l’élément de contact et que la batterie a été retirée
avant d’ajuster la profondeur d’enfoncement des
clous.
Tournezledispositifderéglagepourréglerlaprofon-
deurduclouage.Laprofondeurdeclouageaugmente
lorsquevoustournezledispositifderéglagedansle
sensAetdiminuedanslesensBsurlagure.Laplage
deréglagedelaprofondeurdeclouageestd’environ
3 mm.
►Fig.5: 1.Dispositifderéglage
REMARQUE : Ne tournez pas trop le dispositif
de réglage sous peine de le coincer.
Réglezlaprofondeurdeclouageaubesoin.
►Fig.6: 1.Tropprofond2.Afeurant3.Pasassez
profond
Allumage de la lampe
ATTENTION : Évitez de regarder directement
le faisceau lumineux ou sa source.
Enclenchezlagâchetteouactionnezl’élémentde
contact pour allumer la lampe. La lampe reste allu-
méetantquelagâchetteestenclenchéeoul’élément
decontactactionné.Lalampes’éteintenviron10
secondesaprèsavoirrelâchélagâchetteetl’élément
de contact.
►Fig.7: 1. Lampe
NOTE : Retirez la saleté sur la lentille de la lampe
avecunchiffonsec.Prenezsoindenepaséraer
la lentille de la lampe sous peine de diminuer son
éclairage.
NOTE :Lecloueurpeutnepaséjecterdeclous
mêmesilalampeestalluméeenraisondelafaible
puissancerestantedelabatterie.Ilfautalorscharger
la batterie.
ASSEMBLAGE
ATTENTION : Vériez toujours que vos
doigts ne se trouvent pas sur la gâchette ou sur
l’élément de contact et que la batterie a été retirée
avant toute intervention sur le cloueur.
Chargement ou retrait des clous
ATTENTION : Vériez toujours que la batte-
rie a été retirée avant de charger des clous. Un
déclenchementaccidentelpeutentraînerdesdom-
mages corporels ou matériels.
ATTENTION : Ne faites pas glisser brus-
quement le levier-poussoir situé sur le magasin
lorsque celui-ci est chargé de clous. La chute
accidentelledeclouspeutentraînerdesblessures,
enparticulierlorsquevoustravaillezenhauteur.
ATTENTION : Chargez les clous dans le bon
sens.Unchargementdanslemauvaissensrisque
deprovoqueruneusurerapidedumécanismed’en-
traînementetd’endommagerlesautrescomposants.
ATTENTION : N’utilisez pas une bande de
clous déformés. Utilisez exclusivement les clous
spéciésdansleprésentmanuel.Sivousutilisez
d’autresclousqueceuxspéciés,vousrisquezde
coincerlesclousetd’endommagerlecloueur.
1. Retirez la batterie.
2. Tirezlelevier-poussoirverslebasjusqu’àcequ’il
se verrouille en place avec un léger déclic.
►Fig.8: 1. Levier-poussoir
3. Insérezunebandedeclousdanslafenteaubas
du magasin.
►Fig.9: 1. Fente 2. Bande de clous
4. Appuyezsurlebouton-poussoir.
Le levier-poussoir est déverrouillé et il retient les clous
dans le magasin.
►Fig.10: 1. Bouton-poussoir
ATTENTION : Prenez garde de ne pas placer
votre doigt sur le rail du levier-poussoir lorsque
vous enfoncez le bouton-poussoir. Le poussoir
pourraitfrapperviolemmentvotredoigtetvous
blesser.
REMARQUE : Si la bande de clous insérée
reste au fond du magasin, le levier-poussoir ne
revient pas en place même si vous appuyez sur
le bouton-poussoir.Amenezlabandedeclous
danslemagasindesortequ’ellesoitvisibledansson
intégralité.
Pourretirerlesclous,inversezlesétapesdelaprocé-
dured’installation.

16 FRANÇAIS
Adaptateur de bec
ATTENTION : Vériez toujours que vos
doigts ne se trouvent pas sur la gâchette ou sur
l’élément de contact et que la batterie a été retirée
avant d’installer l’adaptateur de bec.
Lorsquevousenfoncezdesclousdansdesmatériaux
dontlasurfacemarquefacilement,utilisezl’adaptateur
debec.Placezl’adaptateurdebecàl’avantdel’élé-
ment de contact.
Assurez-vousquel’adaptateurdebecrecouvrecomplè-
tementl’avantdel’élémentdecontactcommeillustré.
►Fig.11: 1.Adaptateurdebec2.Élémentdecontact
Vouspouvezrangerl’adaptateurdebecsurlesupport
situésurlemagasinpouréviterdel’égarer.
►Fig.12: 1.Adaptateurdebec2.Support
Crochet
ATTENTION : Ne suspendez pas le crochet
à votre ceinture.Sivouslâchezlecloueur,cequi
seproduitsilecrochetsedéplaceaccidentellement,
celapourraitprovoquerundéclenchementinvolon-
taireentraînantdesblessures.
►Fig.13
Lecrochetestpratiquepoursuspendreprovisoirement
l’outil.Ils’installed’uncôtécommedel’autredel’outil.
Pourinstallerlecrochet,insérez-ledansunerai-
nureducarterdel’outilsurl’undesdeuxcôtés,puis
xez-leavecunevis.Pourleretirer,desserrezlaviset
enlevez-le.
►Fig.14: 1. Rainure 2. Crochet 3. Vis
UTILISATION
Inspection du fonctionnement de la
gâchette
ATTENTION : Assurez-vous que la gâchette
est en état de fonctionner avant chaque utilisa-
tion. L’outil ne doit pas fonctionner uniquement
en enclenchant la gâchette ou uniquement en
plaçant l’élément de contact contre la pièce. Si
vous rencontrez ce genre de problèmes, conez
sa réparation à un centre de service après-vente
Makita agréé.
ATTENTION : Avant d’insérer la batterie dans
l’outil, vériez toujours que la gâchette fonc-
tionne bien et revient en position d’arrêt lorsque
relâchée.
Pour enfoncer les clous
AVERTISSEMENT : Maintenez fermement
l’élément de contact contre le matériau jusqu’à ce
que le clou soit complètement enfoncé. Un déclen-
chementaccidentelpeutentraînerdesblessures
corporelles.
ATTENTION : N’enfoncez pas les clous dans
des matériaux durs comme du métal ou similaire.
Sileclounepeutpaspénétrerlematériau,lecloueur
risqued’êtrerepousséversvousetdevousblesser.
NOTE :Sivousenfoncezcontinuellementdesclous
pendantlongtemps,l’airévacuédeviendrachauden
raison de la chaleur du moteur.
L’outilemploiedeuxactionsdeclouage:clouageinter-
mittent(modeséquentiel)etclouagecontinu/intermit-
tent (mode continu).
►Fig.15: 1.Gâchette2.Élémentdecontact
3.Sélecteurdemode4.Modeséquentiel
5. Mode continu
Clouage intermittent (mode
séquentiel)
1. Placezlesélecteurdemodesurlemode
séquentiel.
2. Déverrouillezlagâchette.
3. Posezàplatl’élémentdecontactsurlematériau.
4. Enclenchezcomplètementlagâchettepourenfon-
cer un clou.
5. Pourenfoncerleclousuivant,relâchezunefois
lagâchetteetl’élémentdecontact,puisrépétezles
étapes 3 et 4 ci-dessus.
AVERTISSEMENT : Veillez toujours à placer
d’abord l’élément de contact contre la pièce avant
d’enclencher la gâchette.
Clouage continu/intermittent (mode
continu)
1. Placezlesélecteurdemodesurlemodecontinu.
2. Déverrouillezlagâchette.
3. Enclenchezd’abordlagâchettepuisplacezl’élé-
ment de contact contre la pièce.
4. Pourenfoncerleclousuivant,maintenezvotre
doigtappuyersurlagâchetteetplacezànouveau
l’élémentdecontactcontrelapièce.

17 FRANÇAIS
NOTE :Cetoutils’arrêteautomatiquementdansles
conditionssuivantes:
• Lorsquevousrelâchezlagâchetteoul’élément
decontactdelapièceavantquel’outilneter-
minecomplètementl’opération.Danscecas,
enclenchezànouveaulagâchettejusqu’àce
quel’outilsemetteenveille.
• Lorsquevouscontinuezd’enclencherla
gâchetteoudeplacerl’élémentdecontactenvi-
ron5secondessansautreaction.Danscecas,
relâchezlagâchetteoul’élémentdecontactde
lapiècepourreprendrel’opération.
Mécanisme anti-démarrage à vide
Lorsquelenombredeclousrestantdanslemagasin
diminueentre6-9,vousnepouvezplusenclencherla
gâchette.Insérezalorsunenouvellebandedeclous
dans le magasin. Vous pourrez ensuite enclencher de
nouveaulagâchette.
Retrait des clous coincés
AVERTISSEMENT : Vériez toujours que
la batterie a été retirée avant de retirer les clous
coincés.
ATTENTION : Veillez à verrouiller le loquet
après avoir retiré les clous coincés.
Relâchezleloquetetouvrezlaporte.Retirezlesclous
coincésetverrouillezleloquet.
►Fig.16: 1.Loquet2.Porte
Manipulation des clous
Manipulezsoigneusementlesclousetleurboîte.Si
lesclousontétémanipulésbrutalement,ilspeuvent
êtredéformésouleurlienbrisé,cequiprovoqueraune
mauvaise alimentation.
REMARQUE : Évitez de ranger les clous dans
un endroit très humide, chaud ou exposé aux
rayons directs du soleil.
►Fig.17
ENTRETIEN
ATTENTION : Assurez-vous toujours que
l’outil est hors tension et que la batterie est reti-
rée avant d’y effectuer tout travail d’inspection ou
d’entretien.
REMARQUE : N’utilisez jamais d’essence, ben-
zine, diluant, alcool ou autre produit similaire.
Cela risquerait de provoquer la décoloration, la
déformation ou la ssuration de l’outil.
PourassurerlaSÉCURITÉetlaFIABILITÉduproduit,
touteréparation,touttravaild’entretienouderéglage
doiventêtreeffectuésparuncentred’entretienMakita
agréé,avecdespiècesderechangeMakita.
ACCESSOIRES EN
OPTION
ATTENTION : Ces accessoires ou pièces
complémentaires sont recommandés pour l’utili-
sation avec l’outil Makita spécié dans ce mode
d’emploi.L’utilisationdetoutautreaccessoireou
piècecomplémentairepeutcomporterunrisquede
blessure.N’utilisezlesaccessoiresoupiècescomplé-
mentairesqu’auxnsauxquellesilsontétéconçus.
Pourobtenirplusdedétailssurcesaccessoires,
contactezvotrecentred’entretienlocalMakita.
• Clous
• BatterieetchargeurMakitad’origine
• Lunettesdesécurité
NOTE :Ilsepeutquecertainsélémentsdelaliste
soientcomprisdansl’emballagedel’outilentant
qu’accessoiresstandard.Ilspeuventvarierd’unpays
àl’autre.

18 DEUTSCH
DEUTSCH (Original-Anleitung)
TECHNISCHE DATEN
Modell: DBN600
Nagelgröße 16Ga x 25 / 30 / 32 / 35 / 38 / 40 / 45 / 50 / 57 / 60 / 64 mm
Magazinkapazität 100Stück
AbmessungenohneAufhänger(LxBxH)
(beiVerwendungdesAkkusBL1840B) 296 x 108 x 318 mm
Nennspannung 18 V Gleichstrom
Nettogewicht 3,4-3,8kg
• Wirbehaltenunsvor,ÄnderungendertechnischenDatenimZugederEntwicklungunddestechnischen
FortschrittsohnevorherigeAnkündigungvorzunehmen.
• DietechnischenDatenkönnenvonLandzuLandunterschiedlichsein.
• DasGewichtkannabhängigvondemAufsatz(denAufsätzen),einschließlichdesAkkus,unterschiedlich
sein.DieleichtesteunddieschwersteKombination,gemäßdemEPTA-Verfahren01/2014,sindinderTabelle
angegeben.
Zutreffende Akkus
BL1815 / BL1815N / BL1820 / BL1820B / BL1830 / BL1830B / BL1840 / BL1840B / BL1850 / BL1850B / BL1860B
• EinigederobenaufgelistetenAkkussindjenachIhremWohngebieteventuellnichterhältlich.
WARNUNG: Verwenden Sie nur die oben aufgeführten Akkus. Bei Verwendung irgendwelcher anderer
AkkusbestehtVerletzungs-und/oderBrandgefahr.
Symbole
NachfolgendwerdendiefürdasGerätverwende-
tenSymbolebeschrieben.MachenSiesichvorder
Benutzung mit ihrer Bedeutung vertraut.
Betriebsanleitung lesen.
Schutzbrilletragen.
EinenGehörschutztragen.
WerkzeugnichtaufGerüstenoderLeitern
verwenden.
HaltenSieIhreFingervomAuslöserfern,
wennSiekeineBefestigungselemente
eintreiben,umversehentlichesAbschießen
zu vermeiden.
Ni-MH
Li-ion NurfürEU-Länder
WerfenSieElektrogeräteoderAkkusnicht
indenHausmüll!
UnterEinhaltungderEuropäischen
RichtlinieüberElektro-undElektronik-
Altgeräte,Batterien,Akkussowiever-
brauchteBatterienundAkkusundihre
Umsetzung gemäß den Landesgesetzen
müssenElektrogeräteundBatterienbzw.
Akkus,diedasEndeihrerLebensdauer
erreichthaben,getrenntgesammelt
und einer umweltgerechten Recycling-
Einrichtungzugeführtwerden.
Vorgesehene Verwendung
DasWerkzeugistfürBefestigunganInneneinrichtung
und Möbeln vorgesehen.
Geräusch
TypischerA-bewerteterGeräuschpegelermitteltgemäß
EN60745:
Schalldruckpegel(LpA):89dB(A)
Schallleistungspegel(LWA):100dB(A)
Messunsicherheit(K):3dB(A)
WARNUNG: Einen Gehörschutz tragen.
Schwingungen
DerSchwingungsgesamtwertwurdegemäßEN60745
ermittelt:
Schwingungsemission(ah):2,5m/s2oder weniger
Messunsicherheit(K):1,5m/s2
HINWEIS: Der angegebene
SchwingungsemissionswertwurdeimEinklangmit
derStandardprüfmethodegemessenundkannfür
den Vergleich zwischen Werkzeugen herangezogen
werden.
HINWEIS: Der angegebene
Schwingungsemissionswertkannauchfüreine
VorbewertungdesGefährdungsgradsverwendet
werden.

19 DEUTSCH
WARNUNG:DieSchwingungsemissionwährend
der tatsächlichen Benutzung des Werkzeugs kann
jenachderBenutzungsweisedesWerkzeugsvom
angegebenenEmissionswertabweichen.
WARNUNG:IdentizierenSie
SicherheitsmaßnahmenzumSchutzdesBenutzers
anhandeinerSchätzungdesGefährdungsgradsunter
den tatsächlichen Benutzungsbedingungen (unter
BerücksichtigungallerPhasendesArbeitszyklus,wie
z.B.Ausschalt-undLeerlaufzeitendesWerkzeugs
zusätzlich zur Betriebszeit).
EG-Konformitätserklärung
Nur für europäische Länder
DieEG-KonformitätserklärungistalsAnhangAindieser
Bedienungsanleitung enthalten.
SICHERHEITSWARNUNGEN
Allgemeine Sicherheitswarnungen
für Elektrowerkzeuge
WARNUNG: Lesen Sie alle mit die-
sem Elektrowerkzeug gelieferten
Sicherheitswarnungen, Anweisungen,
Abbildungen und technischen Daten durch.Eine
MissachtungderuntenaufgeführtenAnweisungen
kannzueinemelektrischenSchlag,Brandund/oder
schwerenVerletzungenführen.
Bewahren Sie alle Warnungen
und Anweisungen für spätere
Bezugnahme auf.
DerAusdruck„Elektrowerkzeug“indenWarnhinweisen
beziehtsichaufIhrmitNetzstrom(mitKabel)oderAkku
(ohneKabel)betriebenesElektrowerkzeug.
Sicherheitswarnungen für
Akku-Tacker
1.
Gehen Sie stets von der Annahme aus, dass
das Werkzeug Befestigungselemente enthält.
AchtloseHandhabungdesTackerskannzuuner-
wartetemAbschussvonBefestigungselementenund
darausresultierendenPersonenschädenführen.
2. Richten Sie das Werkzeug nicht auf sich oder
umstehende Personen.UnerwarteteAuslösung
bewirktAbschussdesBefestigungselementsund
verursacht eine Verletzung.
3. Betätigen Sie das Werkzeug nur, wenn es
fest auf das Werkstück aufgesetzt ist. Ist das
WerkzeugnichtmitdemWerkstückinKontakt,
kanndasBefestigungselementvonIhrembeab-
sichtigtenZielabgelenktwerden.
4. Trennen Sie das Werkzeug von der
Stromquelle, wenn ein Befestigungselement
im Werkzeug klemmt.IstderAkkueinge-
setzt,kannderTackerbeimEntferneneines
klemmendenBefestigungselementsversehentlich
betätigt werden.
5. Lassen Sie beim Entfernen eines klemmenden
Befestigungselements Vorsicht walten. Der
MechanismuskannunterDruckstehen,unddas
Befestigungselementkannabgeschossenwer-
den,währendversuchtwird,denKlemmzustand
aufzuheben.
6. Benutzen Sie diesen Tacker nicht zur
Befestigung von elektrischen Kabeln. Erist
nichtfürdieInstallationvonelektrischenKabeln
ausgelegt und kann deren Isolierung beschä-
digen,waszueinemelektrischenSchlagoder
Brandführenkann.
7. Tragen Sie stets eine Schutzbrille, um Ihre
Augen vor Staub und Verletzungen durch
Befestigungsmittel zu schützen.
8. Halten Sie Hände und Füße vom Bereich der
Auswurföffnung fern.
9. Befolgen Sie die Anweisungen für die
Schmierung und den Austausch von Zubehör.
10. Nehmen Sie stets den Akku ab, bevor Sie die
Befestigungselemente laden, Einstellungen,
Überprüfungen, Wartungsarbeiten durchfüh-
ren, oder nachdem die Arbeit abgeschlossen
ist.
11. Vergewissern Sie sich vor der Arbeit, dass
keine Personen in der Nähe sind. Versuchen
Sie niemals, Befestigungselemente gleichzei-
tig von der Innen- und Außenseite einer Wand
einzutreiben. Befestigungselemente können
durchschlagen und/oder herausiegen, was
eine große Gefahr darstellt.
12. Achten Sie beim Arbeiten mit dem Werkzeug
auf sicheren Stand und Gleichgewicht.
Vergewissern Sie sich bei Arbeiten an hohen
Orten, dass sich niemand unterhalb aufhält.
13. Benutzen Sie niemals mit der Aufschrift „Nicht
auf Gerüsten, Leitern verwenden“ versehene
Tacker für spezische Anwendungen, wie z. B.:
• wennfüreinenArbeitsplatzwechselGerüste,
Treppen,Leiternoderleiterähnliche
Konstruktionen,wiez.B.Dachlattenerfor-
derlichsind;
• zumVerschließenvonKistenoder
Verschlägen;
• zumAnbringenvon
Transportsicherheitssystemenz.B.an
Fahrzeugen und Wagen.
14. Überprüfen Sie Wände, Decken, Fußböden,
Dach und dergleichen sorgfältig, um durch
Kontakt mit Strom führenden Kabeln,
Isolierrohren oder Gasrohren verursachte
mögliche elektrische Schläge, Gaslecks,
Explosionen usw. zu vermeiden.
15. Verwenden Sie nur die in dieser Anleitung
angegebenen Befestigungselemente. Die
Verwendung anderer Befestigungselemente
kann eine Funktionsstörung des Werkzeugs
verursachen.
16. Nehmen Sie keine unerlaubten Änderungen
am Werkzeug vor, und versuchen Sie nicht,
es für andere Zwecke als Eintreiben von
Befestigungselementen zu verwenden.

20 DEUTSCH
17. Betreiben Sie das Werkzeug nicht ohne
Befestigungselemente. Dadurch wird die
Nutzungsdauer des Werkzeugs verkürzt.
18. Brechen Sie Eintreibarbeiten sofort ab, wenn
Sie einen Defekt oder etwas Ungewöhnliches
am Werkzeug feststellen.
19. Treiben Sie Befestigungselemente niemals in
Materialien ein, die das Befestigungselement
punktieren und wie ein Geschoss durchbohren
kann.
20. Betätigen Sie den Auslöseschalter und das
Kontaktelement niemals gleichzeitig, bevor
Sie bereit sind, Werkstücke zu befestigen.
Lassen Sie das Kontaktelement sich vom
Werkstück niederdrücken. Heben Sie den
Zweck des Kontaktelements keinesfalls durch
Zurückhalten oder Niederdrücken von Hand
auf.
21. Nehmen Sie keine unerlaubten Eingriffe am
Kontaktelement vor. Überprüfen Sie das
Kontaktelement häug auf ordnungsgemäßen
Betrieb.
22. Entfernen Sie stets die Befestigungselemente
vom Werkzeug, wenn es nicht benutzt wird.
DIESE ANWEISUNGEN
AUFBEWAHREN.
WARNUNG: Lassen Sie sich NICHT durch
Bequemlichkeit oder Vertrautheit mit dem Produkt
(durch wiederholten Gebrauch erworben) von
der strikten Einhaltung der Sicherheitsregeln für
das vorliegende Produkt abhalten. MISSBRAUCH
oder Missachtung der Sicherheitsvorschriften in
dieser Anleitung können schwere Verletzungen
verursachen.
Wichtige Sicherheitsanweisungen
für Akku
1. Lesen Sie vor der Benutzung des Akkus alle
Anweisungen und Warnhinweise, die an (1)
Ladegerät, (2) Akku und (3) Akkuwerkzeug
angebracht sind.
2. Unterlassen Sie ein Zerlegen des Akkus.
3. Falls die Betriebszeit beträchtlich kürzer
geworden ist, stellen Sie den Betrieb sofort
ein. Anderenfalls besteht die Gefahr von
Überhitzung, möglichen Verbrennungen und
sogar einer Explosion.
4. Falls Elektrolyt in Ihre Augen gelangt, waschen
Sie sie mit sauberem Wasser aus, und
begeben Sie sich unverzüglich in ärztliche
Behandlung. Anderenfalls können Sie Ihre
Sehkraft verlieren.
5. Der Akku darf nicht kurzgeschlossen werden:
(1) Die Kontakte dürfen nicht mit leitfähigem
Material berührt werden.
(2) Lagern Sie den Akku nicht in einem
Behälter zusammen mit anderen
Metallgegenständen, wie z. B. Nägel,
Münzen usw.
(3) Setzen Sie den Akku weder Wasser noch
Regen aus.
Ein Kurzschluss des Akkus verursacht star-
ken Stromuss, der Überhitzung, mögliche
Verbrennungen und einen Defekt zur Folge
haben kann.
6. Lagern Sie das Werkzeug und denAkku nicht
an Orten, an denen die Temperatur 50 °C errei-
chen oder überschreiten kann.
7. Versuchen Sie niemals, den Akku zu verbren-
nen, selbst wenn er stark beschädigt oder
vollkommen verbraucht ist. Der Akku kann im
Feuer explodieren.
8. Achten Sie darauf, dass der Akku nicht fallen
gelassen oder Stößen ausgesetzt wird.
9. Benutzen Sie keine beschädigten Akkus.
10. Die enthaltenen Lithium-Ionen-Akkus unter-
liegen den Anforderungen der Gefahrengut-
Gesetzgebung.
FürkommerzielleTransporte,z.B.durch
DritteoderSpediteure,müssenbesondere
AnforderungenzuVerpackungundEtikettierung
beachtet werden.
ZurVorbereitungdeszutransportierenden
ArtikelsisteineBeratungdurcheinenExpertenfür
Gefahrenguterforderlich.BittebeachtenSiemög-
licherweiseausführlicherenationaleVorschriften.
ÜberklebenoderverdeckenSieoffeneKontakte,
undverpackenSiedenAkkuso,dassersichin
der Verpackung nicht umher bewegen kann.
11. Befolgen Sie die örtlichen Bestimmungen
bezüglich der Entsorgung von Akkus.
12. Verwenden Sie die Akkus nur mit den von
Makita angegebenen Produkten.DasEinsetzen
derAkkusinnichtkonformeProduktekannzu
einemBrand,übermäßigerHitzebildung,einer
ExplosionoderAuslaufenvonElektrolytführen.
DIESE ANWEISUNGEN
AUFBEWAHREN.
VORSICHT: Verwenden Sie nur Original-
Makita-Akkus. Die Verwendung von Nicht-Original-
Makita-AkkusodervonAkkus,dieabgeändert
wordensind,kannzumBerstendesAkkusund
darausresultierendenBränden,Personenschäden
undBeschädigungführen.Außerdemwirddadurch
dieMakita-GarantiefürdasMakita-Werkzeugund
-Ladegerätungültig.
Hinweise zur Aufrechterhaltung
der maximalen
Akku-Nutzungsdauer
1. Laden Sie den Akku, bevor er vollkommen
erschöpft ist. Schalten Sie das Werkzeug stets
aus, und laden Sie den Akku, wenn Sie ein
Nachlassen der Werkzeugleistung feststellen.
2. Unterlassen Sie erneutes Laden eines voll
aufgeladenen Akkus. Überladen führt zu einer
Verkürzung der Nutzungsdauer des Akkus.
3. Laden Sie den Akku bei Raumtemperatur
zwischen 10 – 40 °C. Lassen Sie einen heißen
Akku abkühlen, bevor Sie ihn laden.
4. Der Akku muss geladen werden, wenn er lange
Zeit (länger als sechs Monate) nicht benutzt
wird.
Other manuals for DBN600
4
Table of contents
Languages:
Other Makita Power Tools manuals

Makita
Makita TM30DWYE User manual

Makita
Makita 1806B User manual

Makita
Makita XWT11 User manual

Makita
Makita 4341T User manual

Makita
Makita HM0810 Manual

Makita
Makita HG6530V User manual

Makita
Makita TM30D User manual

Makita
Makita DTM40 User manual

Makita
Makita HM1306 User manual

Makita
Makita HR4002 User manual

Makita
Makita JN1601 User manual

Makita
Makita HM001GZ02 User manual

Makita
Makita RP1800 User manual

Makita
Makita DST421 User manual

Makita
Makita BlW120 User manual

Makita
Makita DJN160 User manual

Makita
Makita DTW190 User manual

Makita
Makita DJS800 User manual

Makita
Makita DHR182 User manual

Makita
Makita 6271D User manual