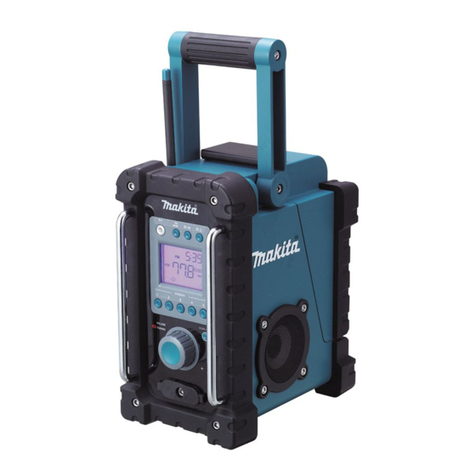
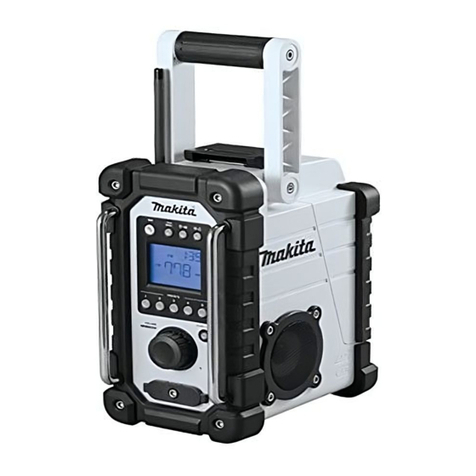
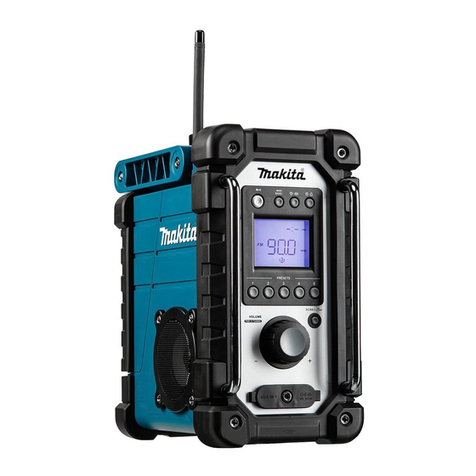
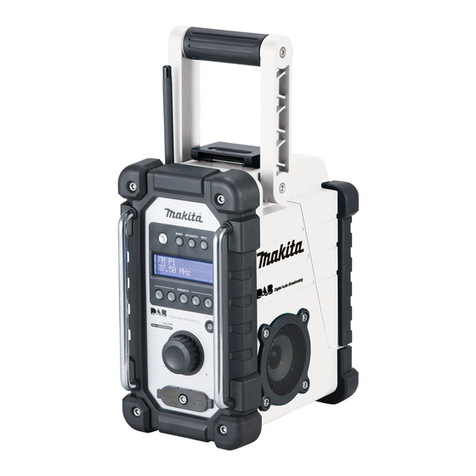
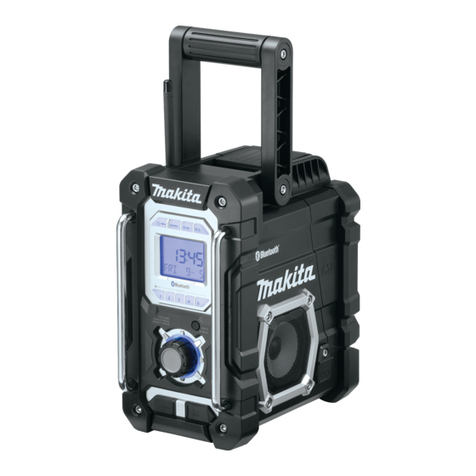
Makita BMR102 User manual

GB Radio Instruction manual
F Radio Manuel d’instructions
D Radio Betriebsanleitung
I Radio Istruzioni per l’uso
NL Radio Gebruiksaanwijzing
E Radio Manual de instrucciones
P Rádio Manual de instruções
DK Radio Brugsanvisning
S Radio Bruksanvisning
N Radio Bruksanvisning
FIN Työmaaradio Käyttöohje
GR Ραδιόφωνο Οδηγίες χρήσης
PO Odbiornik radiowy Instrukcja obsługi
RUS Радио Инструкция по эксплуатации
BMR102

2
1
PM
23
1
5
9
4
6
7
8
10 12
14
13
20
11
LK J
A
B
C
D
E
I
H
G
F

3
23
45
67
11
14
15
15
15
16
17
18 19
21
19
19

4
89
10 11
12
19
19
10
10
8
9

5
Symbols
The following show the symbols used for the equipment. Be sure that you understand their meaning before use.
Symboles
Les symboles utilisés pour l’appareil sont indiqués ci-dessous. Assurez-vous d’avoir bien compris leur signification avant
d’utiliser l’appareil.
Symbole
Im Folgenden sind die im Zusammenhang mit diesem Gerät verwendeten Symbole dargestellt. Machen Sie sich vor der
Benutzung des Geräts unbedingt mit diesen Symbolen vertraut!
Simboli
Di seguito sono riportati i simboli utilizzati per l’apparecchio. È importante comprenderne il significato prima dell’uso.
Symbolen
Hieronder staan de symbolen die voor het gereedschap worden gebruikt. Zorg ervoor dat u weet wat ze betekenen
alvorens de accu te gebruiken.
Símbolos
Se utilizan los siguientes símbolos para el equipo. Asegúrese de que comprende su significado antes del uso.
Símbolos
Descrição dos símbolos utilizados no equipamento. Certifique-se de que compreende o seu significado, antes da
utilização.
Symboler
Her vises de symboler, der benyttes til udstyret. Vær sikker på, at du forstår deres betydning, før du bruger udstyret.
Symboler
Följande symboler används för utrustningen. Se till att du förstår innebörden av dem innan du använder utrustningen.
Symboler
Nedenfor ser du symbolene som brukes for dette utstyret. Forsikre deg om at du forstår hva de betyr før bruk.
Merkkien selitykset
Laitteessa on käytetty seuraavia symboleja. Varmista ennen käyttöä, että ymmärrät niiden merkityksen.
Σύμβολα
Παρακάτω παρουσιάζονται τα σύμβολα που χρησιμοποιούνται για τον εξοπλισμό. Βεβαιωθείτε ότι κατανοείτε τη σημασία
τους πριν από τη χρήση.
Symbole
Poniżej przedstawiono symbole stosowane w przypadku omawianego urządzenia. Przed rozpoczęciem jego użytkowania
należy upewnićsię, że sąone zrozumiałe.
Символы
Ниже приведены символы, используемые для данного устройства. Перед использованием убедитесь, что вы
понимаете их значение.
Read instruction manual.
Référez-vous au manuel d’instructions.
Lesen Sie die vorliegende Betriebsanleitung.
Leggere il manuale di istruzioni.
Lees de gebruiksaanwijzing.
Lea el manual de instrucciones.
Leia o manual de instruções.
Læs brugsanvisningen.
Läs bruksanvisningen.
Les bruksanvisningen.
Lue käyttöohje.
Διαβάστε το εγχειρίδιο οδηγιών.
Przeczytaćinstrukcjęobsługi.
Прочтите руководство по эксплуатации.

6
❏
Only for EU countries
Do not dispose of electric equipment or battery pack together with household waste material!
In observance of European Directive 2002/96/EC on waste electric and electronic equipment, 2006/66/EC on batteries
and accumulators and waste batteries and accumulators and their implementation in accordance with national laws,
electric equipment and battery pack that have reached the end of their life must be collected separately and returned to an
environmentally compatible recycling facility.
Pour les pays européens uniquement
Ne pas jeter les appareils électriques et les batteries dans les ordures ménagères !
Conformément à la directive européenne 2002/96/CE relative aux déchets d’équipements électriques ou électroniques
(DEEE) et à la directive 2006/66/CE relative aux batteries, aux accumulateurs ainsi qu’aux batteries et accumulateurs
usagés et à leur transposition dans la législation nationale, les appareils électriques et les batteries doivent être collectés
à part et être soumis à un recyclage respectueux de l’environnement.
Nur für EU-Länder
Entsorgen Sie Elektrowerkzeuge, Batterien und Akkus nicht über den Hausmüll!
Gemäß Europäischer Richtlinie 2002/96/EG über Elektro- und Elektronik- Altgeräte, 2006/66/EG über Batterien und
Akkumulatoren sowie Altbatterien und Altakkumulatoren und Umsetzung in nationales Recht müssen verbrauchte
Elektrowerkzeuge, Altbatterien und Altakkumulatoren getrennt gesammelt und einer umweltgerechten Wiederverwertung
zugeführt werden.
Solo per i paesi UE
Non gettare le apparecchiature elettriche o le batterie tra i rifiuti domestici.
Secondo la Direttiva Europea 2002/96/CE sui rifiuti di apparecchiature elettriche ed elettroniche e la Direttiva Europea
2006/66/CE sulle batterie e gli accumulatori e sui rifiuti di batterie e di accumulatori, e la sua attuazione in conformità alle
norme nazionali, le apparecchiature elettriche e le batterie esauste devono essere raccolte separatamente, al fine di
essere riciclate in modo eco-compatibile.
Alleen voor EU-landen
Geef elektrisch gereedschap en accu’s niet met het huisvuil mee!
Volgens de Europese richtlijn 2002/96/EC inzake oude elektrische en elektronische apparaten, 2006/66/EC inzake
batterijen en accu’s en oude batterijen en accu’s en de toepassing daarvan binnen de nationale wetgeving, dienen
gebruikt elektrisch gereedschap en accu’s gescheiden te worden ingezameld en te worden afgevoerd naar een
recyclebedrijf dat voldoet aan de geldende milieu-eisen.
Sólo para países de la UE
¡No deseche el aparato eléctrico o la batería junto con los residuos domésticos!
De conformidad con la Directiva Europea 2002/96/CE sobre residuos de aparatos eléctricos y electrónicos, 2006/66/CE
sobre baterías y acumuladores y el desecho de baterías y acumuladores y su aplicación de acuerdo con la legislación
nacional, la herramienta eléctrica y la batería cuya vida útil hayan llegado a su fin se deberán recoger por separado y
trasladar a una planta de reciclaje que cumpla con las exigencias ecológicas.
Apenas para países da UE
Não deite equipamentos eléctricos ou a bateria no lixo doméstico!
De acordo com a directiva europeia 2002/96/EC sobre ferramentas eléctricas e electrónicas usadas, a directiva 2006/66/
EC sobre baterias, acumuladores e baterias usadas e a sua aplicação para as leis nacionais, as ferramentas eléctricas e
as baterias usadas devem ser recolhidas em separado e encaminhadas a uma instalação de reciclagem dos materiais
ecológicos.
Kun for EU-lande
Elektrisk udstyr eller batteripakke må ikke bortskaffes sammen med almindeligt affald!
I henhold til det europæiske direktiv 2002/96/EF om bortskaffelse af elektriske og elektroniske produkter, 2006/66/EF om
batterier og akkumulatorer og bortskaffelse af batterier og akkumulatorer og deres implementering under gældende
national lovgivning skal brugt elektrisk udstyr og batteripakker, der har udtjent deres levetid, indsamles separat og
returneres til miljøgodkendt genindvinding.

7
Gäller endast EU-länder
Elektrisk utrustning eller batteri får inte kastas i hushållssoporna!
Enligt direktivet 2002/96/EU som avser äldre elektrisk och elektronisk utrustning och direktivet 2006/66/EU som avser
batterier och ackumulatorer och förbrukade batterier och ackumulatorer samt dess tillämpning enligt nationell lagstiftning,
ska uttjänt elektrisk utrustning och batteri sorteras separat och lämnas till miljövänlig återvinning.
Gjelder bare for EU-land
Kast aldri elektriske produkter eller batterier i husholdningsavfallet!
I henhold til EU-direktiv 2002/96/EF om kasserte elektriske og elektroniske produkter og direktiv 2006/66/EF om batterier
og akkumulatorer og brukte batterier og akkumulatorer, og deres iverksetting i nasjonal rett, må elektriske produkter og
batterier som ikke lenger skal brukes, samles separat og returneres til et miljøvennlig gjenvinningsanlegg.
Koskee vain EU-maita
Älä hävitä sähkölaitteita tai akkuja kotitalousjätteen mukana!
Sähkö- ja elektroniikkalaiteromua koskevan eurooppalaisen direktiivin 2002/96/EY ja paristoja ja akkuja sekä käytettyjä
paristoja ja akkuja koskevan direktiivin 2006/66/EY ja näiden maakohtaisten sovellusten mukaisesti käytetyt sähkölaitteet
ja akut on toimitettava ongelmajätteen keräyspisteeseen ja ohjattava ympäristöystävälliseen kierrätykseen.
Μόνο για τις χώρες της ΕΕ
Μην απορρίπτετε τον ηλεκτρικό εξοπλισμό ήτην μπαταρία μαζί με τα οικιακά απορρίμματα!
Σύμφωνα με την Ευρωπαϊκή Οδηγία 2002/96/ΕΚ περί αποβλήτων ηλεκτρικού και ηλεκτρονικού εξοπλισμού, την 2006/66/
ΕΚ περί μπαταριών και συσσωρευτών και των αποβλήτων των μπαταριών και των συσσωρευτών και την ενσωμάτωσή
τους στην εθνική νομοθεσία, οηλεκτρικός εξοπλισμός και ημπαταρία που έχουν φτάσει στο τέλος της ζωής τους πρέπει
να συλλέγονται ξεχωριστά και να επιστρέφονται σε εγκαταστάσεις περιβαλλοντικής ανακύκλωσης.
Dotyczy tylko państw UE
Nie wyrzucaj urządzeńelektrycznych lub akumulatorów wraz z odpadami z gospodarstwa domowego!
Zgodnie z EuropejskąDyrektywą2002/96/WE w sprawie zużytego sprzętu elektrotechnicznego i elektronicznego oraz
2006/66/WE dotyczącąakumulatorów i baterii oraz zużytych akumulatorów i baterii oraz dostosowaniem ich do prawa
krajowego, zużyte urządzenia elektryczne należy posegregowaći zutylizowaćw sposób przyjazny dla środowiska.
Только для стран ЕС
Не выбрасывайте электрооборудование или аккумуляторы вместе сбытовым мусором!
Всоответствии севропейской директивой 2002/96/EC об утилизацияи электрического иэлектронного
оборудования, директивой 2006/66/EC обатареях иаккумуляторах, атакже использованных батареях и
аккумуляторах, иих применения всоответствии сместными законами электрооборудование иаккумуляторы, срок
эксплуатации которых истек, должны утилизовываться отдельно безопасным для окружающей среды способом.

8
ENGLISH (Original instructions)
IMPORTANT SAFETY
INSTRUCTIONS
WARNING:
When using electric tools, basic safety precautions should
always be followed to reduce the risk of fire, electric
shock, and personal injury, including the following:
1. Read this instruction manual and the charger
instruction manual carefully before use.
2. Clean only with dry cloth.
3. Do not block any ventilation opening. Install in
accordance with the manufacturer’s instruction.
4. Do not install near any heat sources such as radiators,
heat registers, stoves, or other apparatus (including
amplifiers) that produce heat.
5. Only use attachments/accessories specified by the
manufacturer.
6. Unplug this apparatus during lighting storms or when
unused for long periods of time.
7. A battery operated radio with integral batteries or a
separate battery pack must be recharged only with the
specified charger for the battery. A charger that may
be suitable for one type of battery may create a risk of
fire when used with another battery.
8. Use battery operated radio only with specifically
designated battery packs. Use of any other batteries
may create a risk of fire.
9. When battery pack is not in use, keep it away from
other metal objects like: paper clips, coins, keys, nails,
screws, or other small metal objects that can make a
connection from one terminal to another. Shorting the
battery terminals together may cause sparks, burns,
or a fire.
10. Avoid body contact with grounded surfaces such as
pipes, radiators, ranges and refrigerators. There is an
increased risk of electric shock if your body is
grounded.
11. Under abusive conditions, liquid may be ejected from
the battery; avoid contact. If contact accidentally
occurs, flush with water. If liquid contacts eyes,
additionally seek medical help. Liquid ejected from the
battery may cause irritation or burns.
SPECIFIC SAFETY RULES
SAVE THESE INSTRUCTIONS.
FOR BATTERY CARTRIDGE
1. Before using battery cartridge, read all instructions
and cautionary markings on (1) battery charger, (2)
battery, and (3) product using battery.
2. Do not disassemble battery cartridge.
3. If operating time has become excessively shorter, stop
operating immediately. It may result in a risk of
overheating, possible burns and even an explosion.
4. If electrolyte gets into your eyes, rinse them out with
clear water and seek medical attention right away. It
may result in loss of your eyesight.
5. Do not short the battery cartridge:
(1) Do not touch the terminals with any conductive
material.
(2) Avoid storing battery cartridge in a container with
other metal objects such as nails, coins, etc.
(3) Do not expose battery cartridge to water or rain. A
battery short can cause a large current flow,
overheating, possible burns and even a
breakdown.
6. Do not store the tool and battery cartridge in locations
where the temperature may reach or exceed 50°C
(122°F)
7. Do not incinerate the battery cartridge even if it is
severely damaged or is completely worn out. The
battery cartridge can explode in a fire.
8. Be careful not to drop or strike battery.
9. Do not use dropped or struck battery. (Do not use a
damaged battery.)
Features:
• AM/FM-stereo PLL Synthesized
• Large LCD display with illumination
• Manual/Preset/Scan tuning
• Rotary tuning and volume control
• 5 preset stations each band
• Time and 2 alarm timers (radio and HWS buzzer) with
Snooze
• Adjustable sleep (auto shut off) timer
• Stereo speaker for rich sound performance
• Ultra rugged design
• Water resistant to IPX 4
• Powered by both Makita battery pack and supplied
power adaptor
Explanation of general view
(Fig. 1)
Controls:
1. Power and Sleep timer
2. Band and Mono button
3. Radio alarm set
4. Buzzer alarm set
5. Preset stations
6. Scan tuning and Time set
7. Tuning/Volume control knob
8. DC IN socket
9. Input terminal (AUX IN1)
10. Soft bended rod antenna
11. Battery compartment (covering main battery pack and
back up batteries)
12. Handle
13. Speaker
14. Battery compartment locker
15. Main battery compartment
16. Back up battery compartment
17. Red indicator
18. Button
19. Battery cartridge
20. Input terminal (AUX IN2)
21. Supporting bar
9
LCD Display:
A. Radio alarm
B. HWS buzzer alarm
C. Scan tuning
D. Band Indicator
E. Low battery indicator
F. Preset stations
G. Sleep and Snooze status
H. Frequency
I. Stereo symbol and Volume
J. Clock
K. Time set
L. PM for clock
Battery Installation
Note:
Keeping back up batteries inside the compartment
prevent stored data in preset memories from being lost.
1. Pull out the battery compartment locker to release
battery compartment. There are main battery pack
compartment and back up battery compartment.
(Fig. 2 & 3)
2. Remove back up battery compartment cover and
insert 2 fresh UM-3 (AA sizes). Make sure the
batteries are with correct polarity as shown inside the
compartment. Replace the battery cover.
3. After back up batteries are inserted, insert the main
battery pack to power radio. The suitable battery
packs for this radio listed as the following table.
The following tables indicate the operating time on a single charge.
: Cluster Battery
: Slide Battery
3-1. Installing or removing Slide battery cartridge (Fig. 4)
• To install the battery cartridge, align the tongue on the
battery cartridge with the groove in the housing and slip
it into place. Always insert it all the way until it locks in
place with a little click.
• If you can see the red indicator on the upper side of the
button, it is not locked completely. Install it fully until the
red indicator cannot be seen. If not, it may accidentally
fall out of the tool, causing injury to you or someone
around you.
• Do not use force when installing the battery cartridge. If
the cartridge does not slide in easily, it is not being
inserted correctly.
• To remove the battery cartridge, slide it from the tool
while sliding the button on the front of the cartridge or
pressing the buttons on both sides of the cartridge.
Battery Cartridge Voltage AT SPEAKER OUTPUT=
50 mW + 50 mW
unit: Hour
7.2 V 9.6 V 10.8 V 12 V 14.4 V 18 V
BL7010 Approx. 7.0
PA09 PA12 PA14 PA18
Approx. 8.0
9050 1250 1450 1850
9100 1200 1420 BL1815
9120 BL1013 1220 BL1415
9100A 1200A
9102 1202 1422 1822
Approx. 12.5
9122 1222 BH1420
9102A 1202A
BH9020 BH1220
BH9020A BH1200C
9134 1234 1434 1834 Approx. 16.5
BH1427 Approx. 17.0
9135 1235 1435 1835
Approx. 19.01435F BL1830
1235F BL1430
BH9033 BH1233 BH1433 Approx. 21.0
BH9033A BH1233C
WARNING:
Do not use two main batteries at the same time.
WARNING:
Do not use two main batteries at the same time.

10
3-2. Installing or removing Cluster battery cartridge
(Fig. 5 - 9)
• Pull the supporting bar to allow the battery to insert to
the terminal.
• To insert the battery cartridge, align the tongue on the
battery cartridge with the groove in the housing and slip
it into place.
• Release the supporting bar.
• To remove the battery cartridge, pull the supporting bar
and take the battery out of the terminal.
4. Return the battery compartment locker to the original
position.
5. Reduced power, distortion and a “stuttering sound” or
low battery sign that appears on the display are
all the signs that the main battery pack needs to
replace.
Note:
The battery pack can’t be charged via the supplied AC
power adaptor.
6. When low battery sign appears and an “E” keeps
on flashing is the time to replace the back up batteries.
Installing the Soft bended rod
antenna (Fig. 10 & 11)
Install the Soft bended rod antenna as shown in the
figure.
Note:
There is a click in the battery compartment designed to
store the removed antenna.
Using Supplied AC power adaptor
(Fig. 12)
Remove the rubber protector and insert the adaptor plug
into the DC socket on the front side of the radio. Plug the
adaptor into a standard mains socket outlet. Whenever
the adaptor is used, the battery pack is automatically
disconnected. The AC adaptor should be disconnected
from the main supply when not in use.
Note:
When your radio has any interference in AM band by its
adaptor, please move your radio away from its AC
adaptor over 30 cm.
Setting the clock
1. Clock can be set either when the radio is power on or
off.
2. Display will show “-: - -” when the back up batteries
are installed.
3. Long press the time set button for more than
2 seconds, display will flash time set symbol and
also the hour digit, followed by a beep.
4. Rotate Tuning/Volume control knob to set the required
hour.
5. Press button to confirm hour setting, the minute
digit will flash.
6. Rotate Tuning/Volume control knob to set the required
minute.
7. Press the button again to complete clock setting.
Operating the radio
This radio equips with three tuning methods - Scan tuning,
Manual tuning and Memory presets recall.
Scan Tuning
1. Press the Power button to turn on the radio.
2. Select the required waveband by pressing the Band
button. Make sure the rubber bended rod antenna has
been well placed for best FM reception. For AM (MW)
band, rotate the radio to get best signal. Try to avoid to
operate the radio next to computer screen and other
equipment which will cause interference to the radio.
3. Press and release Scan button (long press Scan
button more than 2 seconds will activate time setting),
LCD display will flash Scan symbol and the radio will
search and stop automatically when it finds a radio
station. Press the Scan button again to pick up the
found station.
Note:
A stereo symbol will appear on the display, if the
station found is a stereo station.
Note:
The radio will continue to search next available
stations if you do not press Scan button again when it
finds a radio station.
4. Rotate the Tuning/Volume control knob to get required
sound level. LCD display will show sound level
changes.
Note:
During operating volume control, you can press in
Tuning/Volume control knob to change volume control
to tuning control status.
5. To turn off the radio, press the Power button. Display
will show OFF.
Manual Tuning
1. Press the Power button to turn on the radio.
2. Select the required waveband by pressing the Band
button. Adjust the antenna as described above.
3. A single rotary to the Tuning/Volume control knob will
change the frequency in the following increment:
FM: 50 or 100 kHz
AM (MW): 9 or 10 kHz
Note:
If the radio is in volume control status, press in the
tuning/volume control to become Tuning status.
4. Keep on rotating the Tuning/Volume control knob until
the required frequency shown on the display.
5. Rotate the Tuning/Volume control knob to get required
sound level.

11
6. To turn off the radio, press the Power button. Display
will show OFF.
Storing stations in preset
memories
There are 5 memory presets for each waveband.
1. Press the Power button to turn on the radio.
2. Tune to required station using one of the methods
previously described.
3. Press and hold down the required preset until radio
beeps. The preset number will appear in the display
and the station will be stored under chosen preset
button.
4. Repeat this procedure for the remaining presets.
5. Stations stored in preset memories can be overwritten
by following above procedures.
Recall stations from preset
memories
1. Press the Power button to turn on the radio.
2. Select the required waveband.
3. Momentarily press the required Preset button, the
preset number and station frequency will appear in the
display.
Setting the radio alarm
When the radio alarm is selected, the radio will turn on
and play the chosen radio station at the chosen alarm
time. The radio alarm will continue for one hour unless
turned off by pressing the Power button. Pressing the
Power button whilst the alarm is activated will cancel the
alarm for 24 hours.
Note:
When the radio is in low battery status, the radio alarm
can’t be activated.
a. Setting radio alarm time:
1. The radio alarm can be set either when radio is on or
off.
2. Press and release radio alarm button , the
radio alarm symbol will flash.
3. During radio alarm symbol flashing, press button
for more than 2 seconds followed by a beep.
4. Display Hour will flash, rotate Tuning/Volume control
knob to select the hour then press button again
to confirm hour setting.
5. Follow same procedures of setting hour to set
required minute. Press button to complete alarm
time setting.
b. Setting radio alarmed station
1. During setting radio alarm time and radio alarm
symbol is flashing, press Band button to activate the
radio to select required wake-up band and station by
manual tuning and recall the preset stations. Press
button to complete radio alarm setting.
Display will show .
2. When above radio alarm time and station are set,
press and hold down radio alarm button for
2 seconds followed by a beep to switch alarm on or
off. Display will show when radio alarm is set.
Note:
If new radio alarm station is not selected, it will select
the last alarm station.
Setting the HWS (Humane Wake
System) buzzer alarm
A beep tone will activate when selecting the HWS buzzer
alarm.
The alarm beep will become shorter every 15 seconds for
one minute followed by one minute silence before
repeating the cycle.
The HWS alarm will sound for one hour until turning off by
pressing the Power button. Press the Power button whilst
the alarm is activated will cancel the alarm for 24 hours.
1. The HWS buzzer alarm can be set either radio is on or
off.
2. Press and release the HWS buzzer alarm button
, the symbol will flash.
3. During the symbol flashes, long pressing the
button for more than 2 seconds followed by a beep
and display Hour digit will flash.
4. Rotate Tuning/Volume control knob to select required
alarm hour, then press time set button again.
The minute digit will then flash.
5. Rotate Tuning/Volume control knob to select required
alarm minute, the press time set button again to
complete HWS buzzer alarm setting.
6. Press and hold down buzzer alarm button for
more than 2 seconds followed by a beep to switch on
or off the HWS buzzer alarm.
Display will appear when buzzer alarm has
been set.
Snooze function
1. Whilst the alarm is activated, pressing any buttons
except the Power button will activate the snooze
function. The radio or HWS buzzer alarm will be
silenced with interval of 5 minutes.
2. The display will flash both the snooze symbol and
the alarm symbol. The snooze function can be
repeatedly during one hour that the alarms are active.
Sleep function
The sleep timer will automatically switched off the radio
after a preset time has elapsed.
1. Press and continue to hold down the Power button for
more than 2 seconds, followed by a beep tone, the
display will cycle through the available sleep times in
the order 60-45-30-15-120-90-60.
Release the Power button when the required sleep
time appears in the display. The symbol will
appear in the display and the radio will play the last
station selected.

12
2. To cancel the sleep function, press the Power button.
The Symbol will disappear and radio is off.
Display illumination
Press any buttons or rotate Tuning/Volume control knob
will illuminate the LCD display for approx. 15 seconds.
During scanning stations and alarm activated, will also
automatically illuminate the display.
Change Stereo to Mono
When the stereo FM station reception is weak, you can
improve it by pressing Mono button for 2 seconds. The
sound is no longer in stereo and stereo indicator
disappears.
How to play other audios
CAUTION:
Unplug this apparatus before connecting other
audios.
• There are 2 AUX in sockets. AUX 1 is located on the
front panel, and AUX 2 is located in the battery
compartment.
• Connect a stereo or mono source (i.e. iPod, MP3, or
CD player) to either AUX 1 or AUX 2 by audio cord.
• Repeatedly press and release the Band button until
“AU1” or “AU2” is displayed, then AUX function is
activated.
• AUX can’t be activated as alarm source.
MAINTENANCE
CAUTION:
• Never use gasoline, benzine, thinner, alcohol or the
like. Discoloration, deformation or cracks may result.
Specifications:
Power Requirements
AC power adaptor DC12 V 700 mA, center pin
positive
Battery UM-3 (AA size) x 2 for back up
Cluster battery: 7.2 V - 18 V
Slide battery: 9.6 V - 18 V
Frequency coverage FM 87.50 - 108 MHz
(0.05 MHz/step)
AM (MW) 522 - 1,629 kHz
(9 kHz/step)
Circuit feature
Loudspeaker 3 inches 8 ohm
Output Power 7.2 V: 0.5 W x 2, 9.6 V: 1 W x 2
10.8 V: 1.2 W x 2, 12 V: 1.5 W x 2
14.4 V: 2.2 W x 2, 18 V: 3.5 W x 2
Input terminal 3.5 mm dia. (AUX IN1/AUX IN2)
Antenna system FM: soft bended rod antenna
AM: bar antenna
Dimension (W x H x D) in mm
280 x 302 x 163
Weight (without battery)
4.0 kg

30
NEDERLANDS (Originele instructies)
BELANGRIJKE
VEILIGHEIDSINSTRUCTIES
WAARSCHUWING:
Tijdens het gebruik van elektrische gereedschappen
dienen altijd de basisveiligheidsvoorzorgen te worden
genomen om het risico van brand, elektrische schokken
en persoonlijk letsel te verkleinen, waaronder de
volgende:
1. Lees deze gebruiksaanwijzing en die van de
acculader voor gebruik aandachtig door.
2. Reinig uitsluitend met een droge doek.
3. Blokkeer de ventilatieopeningen niet. Plaats het
apparaat overeenkomstig de instructies van de
fabrikant.
4. Plaats het apparaat niet in de buurt van een
verwarmingsbron, zoals een radiator,
warmeluchtrooster, kookplaat of ander apparaat
(waaronder een versterker) dat warmte produceert.
5. Sluit uitsluitend andere apparaten of accessoires aan
die worden aanbevolen door de fabrikant.
6. Trek de stekker van het apparaat uit het stopcontact in
geval van onweer met bliksem en indien het apparaat
gedurende een lange tijd niet gaat worden gebruikt.
7. Een draagbare radio met inwendige batterijen of een
losse accu mag alleen worden opgeladen met de
aanbevolen batterij-/acculader. Een acculader die
geschikt is voor een bepaald type accu, kan
brandgevaar opleveren indien gebruikt met een ander
type accu.
8. Gebruik de draagbare radio uitsluitend met de
specifiek daarvoor bedoelde accu. Door een ander
soort accu te gebruiken, kan brandgevaar ontstaan.
9. Wanneer de accu niet in gebruik is, houdt u deze uit
de buurt van andere metalen voorwerpen, zoals:
paperclips, muntgeld, sleutels, spijkers, schroeven of
andere kleine, metalen voorwerpen die een
kortsluiting kunnen veroorzaken tussen de accupolen.
Kortsluiting tussen de accupolen kan vonken,
brandwonden of brand veroorzaken.
10. Voorkom lichamelijk contact met geaarde
oppervlakken, zoals pijpen, radiatoren, fornuizen en
koelkasten. De kans op een elektrische schok is
groter wanneer uw lichaam is geaard.
11. Onder zware gebruiksomstandigheden kan vloeistof
uit de accu komen. Voorkom aanraking! Als u deze
vloeistof per ongeluk aanraakt, wast u deze goed af
met water. Als de vloeistof in uw ogen komt,
raadpleegt u tevens een arts. Vloeistof uit de accu kan
irritatie en brandwonden veroorzaken.
AANVULLENDE
VEILIGHEIDSVOORSCHRIFTEN
BEWAAR DEZE INSTRUCTIES
VOOR ACCU’S
1. Alvorens de accu in gebruik te nemen, leest u eerst
alle instructies en waarschuwingsopschriften op (1) de
acculader, (2) de accu en (3) het apparaat waarin de
accu wordt aangebracht.
2. Haal de accu niet uit elkaar.
3. Als de gebruikstijd aanzienlijk korter is geworden,
stopt u onmiddellijk met het gebruik. Anders kan dit
leiden tot kans op oververhitting, mogelijke
brandwonden en zelfs een explosie.
4. Als de elektrolyt in uw ogen komt, wast u deze uit met
schoon water en raadpleegt u onmiddellijk een arts.
Dit kan leiden tot verlies van gezichtsvermogen.
5. Sluit de accu niet kort:
(1) Raak de accupolen niet aan met enig geleidend
materiaal.
(2) Bewaar de accu niet op een plaats waar deze in
aanraking kan komen met andere metalen
voorwerpen, zoals spijkers, munten, enz.
(3) Stel de accu niet bloot aan water of regen.
Kortsluiting van de accu kan leiden tot een hoge
stroomsterkte, oververhitting, mogelijke
brandwonden en zelfs een defect.
6. Bewaar het gereedschap en de accu niet op plaatsen
waar de temperatuur kan oplopen tot 50 °C of hoger.
7. Werp de accu niet in een vuur, zelfs niet als deze al
ernstig beschadigd of helemaal versleten is. De accu
kan in een vuur exploderen.
8. Wees voorzichtig dat u de accu niet laat vallen of
ergens tegenaan stoot.
9. Gebruik een accu die is gevallen of gestoten niet
meer. (Gebruik nooit een beschadigde accu.)
Kenmerken:
• AM/FM-stereo PLL-synthese
• Groot LCD-dispaly met verlichting
• Handmatig afstemmen/stationvoorkeuze/automatisch
afstemmen
• Draaiknop voor afstemmen en volumeregeling
• 5 voorkeuzestations per band
• Tijdweergave en 2 alarmtimers (radio en HWS-
zoemer) met sluimerfunctie
• Instelbare slaaptimer (automatisch uitschakelen)
• Stereoluidspreker voor hoogwaardige geluidsweergave
• Bijzonder duurzaam ontwerp
• Waterbestendig tot IPX 4
• Aangedreven door Makita-batterijpakket en
meegeleverde netadapter
Overzicht van de belangrijkste
onderdelen (zie afb. 1)
Bedieningselementen:
1. Aan-/uitknop en slaaptimer
2. Knop Band en Mono

31
3. Radioalarm instellen
4. Alarmzoemer instellen
5. Voorkeuzestations
6. Automatisch zoeken en tijd instellen
7. Afstem-/volumeknop
8. Gelijkstroom aansluitcontact
9. Ingang (AUX IN1)
10. Flexibele sprietantenne
11. Batterijvak (voor batterijpakket en back-upbatterijen)
12. Handgreep
13. Luidspreker
14. Vergrendelpal batterijvak
15. Hoofdbatterijvak
16. Reservebatterijvak
17. Rode deel
18. Knop
19. Batterijdoos
20. Ingang (AUX IN2)
21. Steunstaaf
LCD-display:
A. Radioalarm
B. HWS-alarmzoemer
C. Automatisch afstemmen
D. Band-indicator
E. Indicator batterijen leeg
F. Voorkeuzestations
G. Status slaap- en wektimer
H. Frequentie
I. Stereosymbool en volume
J. Klok
K. Tijdsinstelling
L. PM-symbool voor klok
De batterijen plaatsen
Opmerking:
Door back-upbatterijen in het batterijvak te laten zitten,
voorkomt u dat opgeslagen instellingen in het
voorkeurgeheugen verloren gaan.
1. Trek de vergrendelpal van het batterijvak uit om het
batterijvak vrij te geven. Er is een vak voor de
hoofdbatterij en een voor de back-upbatterij (zie afb. 2
en 3).
2. Verwijder de klep van het batterijvak en plaats 2
nieuwe UM-3 batterijen (AA-formaat). Plaats de
batterijen met de juiste polariteit zoals aangegeven
aan de binnenzijde van het vak. Plaats de klep terug.
3. Plaats nadat u de back-upbatterijen hebt
geïnstalleerd, het batterijpakket in de radio. In de
onderstaande tabel vindt u de geschikte accu’s voor
deze radio.
De onderstaande tabel geeft de gebruikstijd aan per acculading.
: blokaccu
: schuifaccu
Accuspanning BIJ LUIDSPREKERUITGANG=
50 mW + 50 mW
eenheid: uur
7,2 V 9,6 V 10,8 V 12 V 14,4 V 18 V
BL7010 Ong. 7,0
PA09 PA12 PA14 PA18
Ong. 8,0
9050 1250 1450 1850
9100 1200 1420 BL1815
9120 BL1013 1220 BL1415
9100A 1200A
9102 1202 1422 1822
Ong. 12,5
9122 1222 BH1420
9102A 1202A
BH9020 BH1220
BH9020A BH1200C
9134 1234 1434 1834 Ong. 16,5
BH1427 Ong. 17,0
9135 1235 1435 1835
Ong. 19,01435F BL1830
1235F BL1430
BH9033 BH1233 BH1433 Ong. 21,0
BH9033A BH1233C

32
3-1. De accu aanbrengen en verwijderen (zie afb. 4)
• Om de accu aan te brengen lijnt u de lip op de accu uit
met de groef in de behuizing en duwt u de accu op zijn
plaats. Steek de accu zo ver mogelijk in het
gereedschap tot u een klikgeluid hoort.
• Als u het rode deel aan de bovenkant van de knop kunt
zien, is de accuadapter niet goed aangebracht. Breng
de accuadapter zo ver mogelijk aan tot het rode deel
niet meer zichtbaar is. Als u dit niet doet, kan de accu
per ongeluk uit het gereedschap vallen en u of anderen
in uw omgeving verwonden.
• Oefen geen grote kracht uit bij het aanbrengen van de
accu. Als de accu niet gemakkelijk erin kan worden
geschoven, wordt deze niet goed aangebracht.
• Om de accu te verwijderen verschuift u de knop aan de
voorkant van de accu en schuift u tegelijkertijd de accu
van het gereedschap af of drukt u op de knoppen aan
beide zijden van de accu.
3-2. De blokaccu aanbrengen en verwijderen (zie afb. 5
t/m 9)
• Trek aan de steunstaaf zodat de batterij in de terminal
kan worden gestopt.
• Om de accu te plaatsen, lijnt u de lip op de accu uit met
de groef in de behuizing en duwt u de accu op zijn
plaats.
• Laat de steunstaaf los.
• Om de accu te verwijderen, trekt u aan de steunstaaf
en neemt u de batterij uit de terminal.
4. Plaats de vergrendelpal van het batterijvak terug op
zijn originele positie.
5. Minder vermogen, vervorming en een “stotterend
geluid” of een symbool voor laag batterijvermogen
op het display zijn tekenen dat de accu moet
worden vervangen of opgeladen.
Opmerking:
De accu kan niet worden opgeladen met de
meegeleverde netadapter.
6. Als het symbool voor een laag batterijvermogen
verschijnt en er een “E” blijft knipperen, moeten de
back-upbatterijen worden vervangen.
De flexibele sprietantenne
plaatsen (zie afb. 10 en 11)
Plaats de flexibele sprietantenne zoals aangegeven in de
afbeelding.
Opmerking:
Er is een pal in het batterijvak voor het vastzetten van de
verwijderde antenne.
De meegeleverde netadapter
gebruiken (zie afb. 12)
Verwijder de rubber beschermkap en sluit de
adapterstekker aan op het gelijkstroom aansluitcontact op
de voorzijde van de radio. Steek de adapter in een
standaard stopcontact. Bij gebruik van de adapter wordt
de accu automatisch uitgeschakeld. De netstroomadapter
moet losgekoppeld zijn van de netstroom wanneer u deze
niet gebruikt.
Opmerking:
Als de radio op de AM-frequentieband storing ondervindt
van zijn netspanningsadapter, plaatst u de radio meer dan
30 cm uit de buurt van de netspanningsadapter.
De klok instellen
1. De klok kan worden ingesteld met de radio in- of
uitgeschakeld.
2. Op het display verschijnt “-: - -” wanneer de back-
upbatterijen zijn geïnstalleerd.
3. Houd de knop langer dan 2 seconden ingedrukt.
Het symbool voor tijd instellen en de
urenweergave knipperen en de radio geeft een
geluidssignaal weer.
4. Draai aan de afstem-/volumeknop om het gewenste
uur in te stellen.
5. Druk op de knop om de ureninstelling te
bevestigen. Daarna knippert de minutenweergave.
6. Draai aan de afstem-/volumeknop om de gewenste
minuten in te stellen.
7. Druk opnieuw op de knop om de klokinstelling te
voltooien.
De radio bedienen
Deze radio biedt drie afstemmethodes - Automatisch
afstemmen, Handmatig afstemmen en Stationvoorkeuze.
Automatisch afstemmen
1. Druk op de aan-/uitknop om de radio in te schakelen.
2. Kies de gewenste golfband door op de Band-knop te
drukken. Zorg dat de flexibele sprietantenne in de
juiste richting is geplaatst voor de beste FM-
ontvangst. Voor een optimale AM (MW)-ontvangst kan
het nodig zijn om de radio te draaien. Vermijd het
gebruik van de radio naast een computerbeeldscherm
en andere apparatuur die storingen in de radio kan
veroorzaken.
3. Druk kort op de knop Automatisch afstellen (als u de
knop langer dan 2 seconden ingedrukt houdt, wordt
de tijdsinstelling geactiveerd). Het symbool
Automatisch afstellen begint te knipperen op het LCD-
display en de radio zoekt automatisch naar het
volgende zendstation. Druk opnieuw op de knop
WAARSCHUWING:
Gebruik geen twee hoofdaccu’s tegelijk.
WAARSCHUWING:
Gebruik geen twee hoofdaccu’s tegelijk.

33
Automatisch afstellen om op het gevonden station af
te stemmen.
Opmerking:
Als het gevonden station een stereostation is, wordt
het stereosymbool op het display weergegeven.
Opmerking:
Als u niet opnieuw op de knop Automatisch afstellen
drukt nadat de radio een station heeft gevonden, blijft
deze zoeken naar de volgende beschikbare stations.
4. Draai de afstem-/volumeknop om het gewenste
geluidsniveau in te stellen. Wijzigingen in het
weergavevolume worden op het LCD-display
weergegeven.
Opmerking:
Bij het instellen van het weergavevolume kunt u de
afstem-/volumeknop indrukken om van de
volumeregeling naar de afstemregeling te gaan.
5. Druk op de aan-/uitknop om de radio uit te schakelen.
Op het display verschijnt de melding OFF.
Handmatig afstemmen
1. Druk op de aan-/uitknop om de radio in te schakelen.
2. Kies de gewenste golfband door op de Band-knop te
drukken. Richt de antenne zoals hierboven
beschreven.
3. Bij elke draai aan de afstem-/volumeknop wordt de
frequentie gewijzigd met de volgende stap:
FM: 50 of 100 kHz
AM (MW): 9 of 10 kHz
Opmerking:
Als de volumeregeling is geactiveerd op de radio,
drukt u op de afstem-/volumeknop om de afstemstatus
te activeren.
4. Blijf aan de afstem-/volumeknop draaien tot de
gewenste frequentie op het display wordt weergeven.
5. Draai de afstem-/volumeknop om het gewenste
geluidsniveau in te stellen.
6. Druk op de aan-/uitknop om de radio uit te schakelen.
Op het display verschijnt de melding OFF.
Stations in het
voorkeuzegeheugen opslaan
U kunt vijf voorkeuzestations instellen voor elke golfband.
1. Druk op de aan-/uitknop om de radio in te schakelen.
2. Stem af op het gewenste station met één van de
hierboven beschreven methoden.
3. Houd de gewenste voorkeuzetoets ingedrukt tot de
radio een geluidssignaal weergeeft. Het
voorkeuzenummer verschijnt op het display en het
station wordt opgeslagen onder de gekozen
voorkeuzetoets.
4. Herhaal deze procedure voor de overige
voorkeuzetoetsen.
5. U kunt in het voorkeuzegeheugen opgeslagen
stations overschrijven door nogmaals de
bovenstaande procedures te volgen.
Stations uit het
voorkeuzegeheugen oproepen
1. Druk op de aan-/uitknop om de radio in te schakelen.
2. Selecteer de gewenste golfband.
3. Druk kort op de gewenste voorkeuzetoets. Het
voorkeuzenummer en de frequentie van het station
verschijnen op het display.
De alarmfunctie instellen
Als het radioalarm wordt geselecteerd, wordt de radio op
de ingesteld tijd ingeschakeld en wordt het gekozen
station weergegeven. Het radioalarm blijft een uur actief,
tenzij u het uitschakelt door op de aan-/uitknop te
drukken. Als u op de aan-/uitknop drukt terwijl het alarm is
geactiveerd, wordt het alarm voor 24 uur uitgeschakeld.
Opmerking:
Als het batterijvermogen van de radio laag is, kan het
radioalarm niet worden geactiveerd.
a. De tijd voor het radioalarm instellen:
1. Het radioalarm kan worden ingesteld met de radio in-
of uitgeschakeld.
2. Druk kort op de knop voor het radioalarm . Het
symbool voor het radioalarm begint te knipperen.
3. Houd terwijl het symbool voor het radioalarm knippert,
de knop langer dan 2 seconden ingedrukt. De
radio geeft een geluidssignaal weer.
4. De urenweergave knippert, draai aan de afstem-/
volumeknop om de uren in te stellen en druk
vervolgens nogmaals op de knop om de
ureninstelling te bevestigen.
5. Volg dezelfde procedures om de minuten in te stellen.
Druk op de knop om de alarmtijdinstelling te
voltooien.
b. Het station voor het radioalarm
instellen
1. Druk tijdens het instellen van de tijd voor het
radioalarm en terwijl het symbool voor het radioalarm
knippert op de Band-knop om de gewenste golfband
en het station voor het alarm handmatig te selecteren
en de voorkeuzestations op te roepen. Druk op de
knop om de instelling van het radioalarm te
voltooien. Op het display verschijnt de melding
.
2. Wanneer de tijd en het station voor het radioalarm zijn
ingesteld, houdt u de knop voor het radioalarm
gedurende 2 seconden ingedrukt om het
alarm in of uit te schakelen. De radio geeft een
geluidssignaal weer. Het display toont
wanneer het radioalarm is ingesteld.
Opmerking:
Als er geen nieuw station voor het radioalarm wordt
geselecteerd, geeft de radio het laatst gekozen
alarmstation weer.

34
De HWS-alarmzoemer (Humane
Wake System, weksysteem)
instellen
Als u de HWS-alarmzoemer selecteert, geeft de radio een
geluidssignaal weer.
De alarmzoemer wordt elke 15 seconden steeds korter
weergegeven gedurende 1 minuut, gevolgd door 1 minuut
stilte. Daarna wordt de cyclus herhaald.
Het HWS-alarm blijft een uur lang tenzij het wordt
uitgeschakeld door op de aan-/uitknop te drukken. Als u
op de aan-/uitknop drukt terwijl het alarm is geactiveerd,
wordt het alarm 24 uur uitgeschakeld.
1. Het HWS-zoemeralarm kan worden ingesteld met de
radio in- of uitgeschakeld.
2. Druk kort op de knop voor het HWS-zoemeralarm
. Het symbool begint te knipperen.
3. Houd terwijl het symbool knippert de knop langer
dan 2 seconden ingedrukt. De radio geeft een
geluidssignaal weer en de urenweergave begint te
knipperen.
4. Draai aan de afstem-/volumeknop om de uren voor
het alarm in te stellen en druk vervolgens nogmaals
op de knop . De minutenweergave begint te
knipperen.
5. Draai aan de afstem-/volumeknop om de minuten voor
het alarm in te stellen en druk vervolgens nogmaals
op de knop om de instelling van het HWS-
zoemeralarm te voltooien.
6. Houd de knop van het zoemeralarm langer dan
2 seconden ingedrukt om het HWS-zoemeralarm in of
uit te schakelen. De radio geeft een geluidssignaal
weer.
Als het zoemeralarm is ingesteld, wordt het symbool
weergegeven op het display.
Sluimerfunctie
1. Druk terwijl het alarm is geactiveerd op elke knop
behalve de aan-/uitknop om de sluimerfunctie te
activeren. Het radioalarm of HWS-zoemeralarm wordt
uitgeschakeld en om de 5 minuten herhaald.
2. Op het display knippert zowel het sluimersymbool
als het alarmsymbool. De sluimerfunctie kan
actief blijven gedurende het hele uur dat de alarmen
werkzaam zijn.
Slaapfunctie
De slaaptimer schakelt de radio automatisch uit nadat een
vooraf ingestelde tijd is verstreken.
1. Houd de aan-/uitknop langer dan 2 seconden
ingedrukt. De radio geeft een geluidssignaal weer en
op het display verschijnen de beschikbare
uitschakeltijden in de volgorde 60-45-30-15-120-90-
60.
Laat de aan-/uitknop los zodra de gewenste
uitschakeltijd op het display wordt weergegeven. Het
symbool verschijnt op het display en de radio
geeft het laatst geselecteerde station weer.
2. Druk om de slaapfunctie te annuleren op de aan-/
uitknop. Het symbool verdwijnt en de radio wordt
uitgeschakeld.
Displayverlichting
Druk op ongeacht welke knop of draai aan de afstem-/
volumeknop om het LCD-display gedurende ca.
15 seconden te verlichten. Tijdens het zoeken naar
stations en bij activering van een alarm wordt het display
automatisch verlicht.
Wisselen tussen stereo en mono
Als de stereo-ontvangst van een FM-station zwak is, kunt
u deze verbeteren door de Mono-knop 2 seconden lang
ingedrukt te houden. De geluidsweergave is nu niet meer
stereo en de stereo-indicator verdwijnt.
Andere audio-apparaten afspelen
LET OP:
Koppel dit apparaat los voordat u andere
audioapparaten aansluit.
• Er zijn 2 AUX in-aansluitpunten. AUX 1 bevindt zich op
het voorpaneel en AUX 2 in het batterijvak.
• Sluit een stereo of mono bron (bijv. iPod, MP3 of cd-
speler) aan via een audiokabel op AUX 1 of AUX 2.
• Druk herhaaldelijk op de BAND-knop tot “AU1” of
“AU2” wordt weergegeven. Op dat ogenblik is de AUX-
functie geactiveerd.
• AUX kan niet worden geactiveerd als alarmbron.
ONDERHOUD
LET OP:
• Gebruik nooit benzine, wasbenzine, thinner, alcohol,
enz. Dit kan leiden tot verkleuren, vervormen of
barsten.
Technische gegevens:
Voedingsvereisten
Netstroomadapter DC12 V 700 mA, middenpen
positief
Batterij UM-3 (AA-formaat) x 2 voor back
up
Blokaccu: 7,2 V - 18 V
Schuifaccu: 9,6 V - 18 V
Frequentiebereik FM 87,50 - 108 MHz
(0,05 MHz/stap)
AM (MW) 522 - 1.629 kHz
(9 kHz/stap)
Circuitfunctie
Luidspreker 3” 8 ohm
Uitgangsvermogen 7,2 V: 0,5 W x 2, 9,6 V: 1 W x 2
10,8 V: 1,2 W x 2, 12 V: 1,5 W x 2
14,4 V: 2,2 W x 2, 18 V: 3,5 W x 2
Ingang 3,5 mm dia. (AUX IN1/AUX IN2)

35
Antennesysteem FM: flexibele sprietantenne
AM: staafantenne
Afmetingen (B x H x D) in mm
280 x 302 x 163
Gewicht (zonder batterij)
4,0 kg

ALA
Makita Corporation
Anjo, Aichi, Japan
3A81VE5Z10000 www.makita.com
BMR102-14L-0812
Other manuals for BMR102
1
Table of contents
Languages:
Other Makita Radio manuals

Makita
Makita Outdoor Adventure ADRM06 User manual

Makita
Makita DMR055 User manual

Makita
Makita DMR114 User manual

Makita
Makita DMR108 User manual

Makita
Makita BMR104 User manual

Makita
Makita DMR116 User manual

Makita
Makita XRM12 User manual

Makita
Makita BMR100 User manual

Makita
Makita MR004G User manual

Makita
Makita DMR114 User manual

Makita
Makita DMR057 User manual

Makita
Makita DMR200 User manual

Makita
Makita DMR113 User manual

Makita
Makita XRM10 User manual

Makita
Makita XRM02 User manual

Makita
Makita DMR114 User manual

Makita
Makita DMR106 User manual

Makita
Makita DMR114 User manual

Makita
Makita DMR109 User manual

Makita
Makita DMR108AR User manual