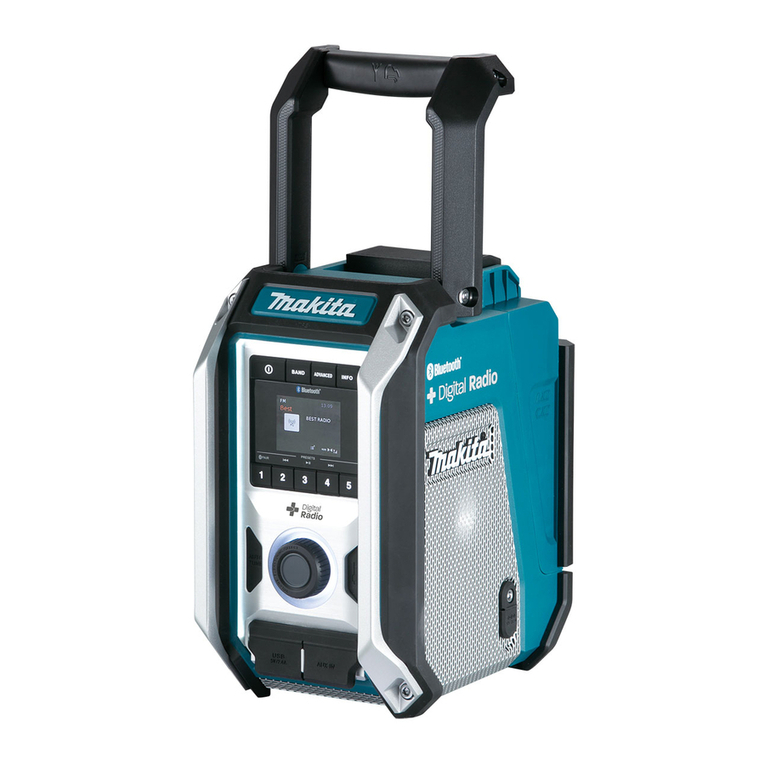
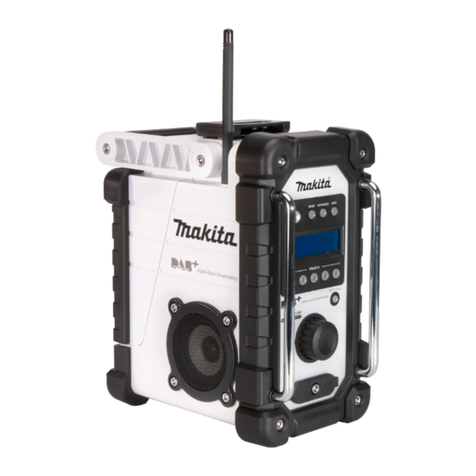
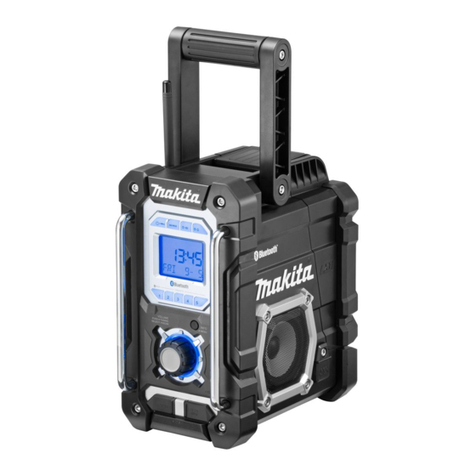
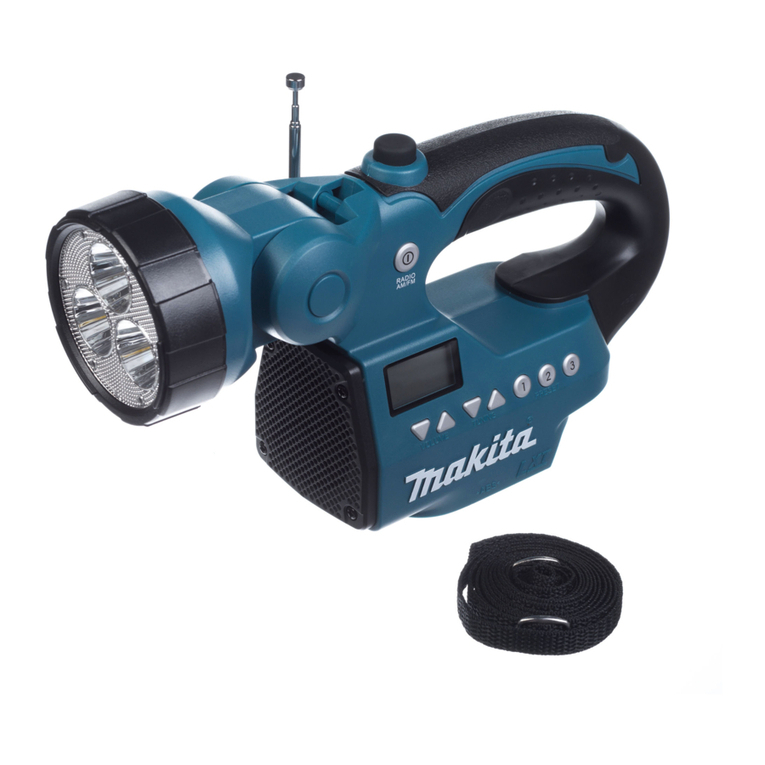
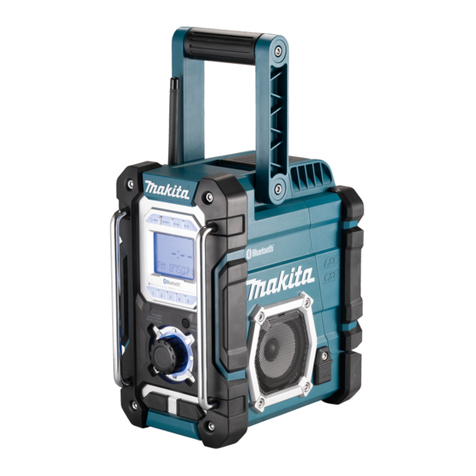
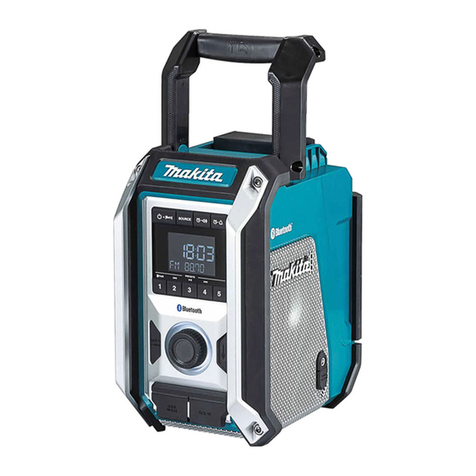
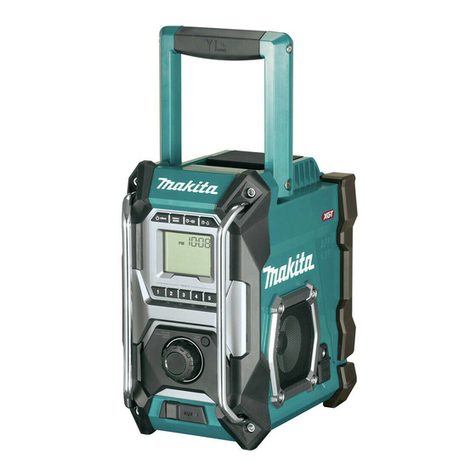
Makita XRM10 User manual

INSTRUCTION MANUAL
MANUAL DE INSTRUCCIONES
Job Site Charger Radio
Radio Cargador de Trabajo
XRM10
IMPORTANT: Read Before Using.
IMPORTANTE: Lea antes de usar.

2ENGLISH
ENGLISH (Original instructions)
SPECIFICATIONS
Model: XRM10
AC power adaptor DC 24 V / 5.0 A, inner sleeve positive
Battery UM-3 (AA size) x 2 for back up
CXT battery: DC 10.8 V - 12 V max
LXT battery: DC 14.4 V - 18 V
Band FM
AM
Frequency coverage FM 87.50 - 108 MHz
(0.1 MHz/step)
AM (MW) 520 - 1,710 kHz
(10 kHz/step)
Bluetooth®Bluetooth®
Bluetooth®QD ID
147189
(The Bluetooth®word mark and logos
are registered trademarks
owned by Bluetooth SIG, Inc.)
Bluetooth®version 5.0 Certied
Bluetooth® proles A2DP / AVRCP
Transmission power Power Class2
Operating Frequency 2,402 MHz - 2,480 MHz
Maximum radio-frequency
power
6.32 dBm
(Declaration for EU Compliance)
Transmission range Optimum: Max.10 meters (33 feet)
Possible: Max.30 meters (100 feet)
(varies according to usage conditions)
Supported codec SBC
Circuit feature
Loudspeaker
3.5 inches 8 ohm x 2
Output Power DC 10.8 V - 12 V max:1.2 W x 2
DC 18 V: 3.5 W x 2
USB output USB TYPE A x 2 (5 V / 2.4 A TOTAL)
Battery charge output CXT battery: DC 10.8 V - 12 V max, 3.5 A
LXT battery: DC 14.4 V - 18 V, 3.5 A
Input terminal 3.5 mm dia. (AUX IN1/AUX IN2)
Antenna system FM: soft bended rod antenna
AM: bar antenna
Dimension (L x W x H) 268 x 185 x 305 mm
(10-1/2″x 7-1/4″ x 12″)
Weight (without battery cartridge) 5.9 kg (13.1 lbs)
• Due to our continuing program of research and development, the specications herein are subject to change
without notice.
• Specications may dier from country to country.

3ENGLISH
The Bluetooth®word mark and logos are registered trademarks owned by the Bluetooth SIG, Inc. and any use of
such marks by Makita is under license. Other trademarks and trade names are those of their respective owners.
The following table indicates the operating time on a single charge in Radio mode.
Battery capacity Battery Cartridge
Voltage
Operating time (hour)
(at speaker output =
50 mW + 50 mW)
Charging
time
(min)
10.8 V -
12 V max
18 V In radio
or AUX
In
Bluetooth®
with USB
charging
1.5 Ah BL1016 -6.3 0.9 31
-BL1815N 6.1 1.4 27
2.0 Ah BL1021B -8.2 1.2 40
-BL1820B 8.2 1.8 38
3.0 Ah -BL1830B 11.3 2.5 48
4.0 Ah BL1041B -16.4 2.3 75
-BL1840B 16.0 3.6 67
5.0 Ah -BL1850B 20.5 4.6 84
6.0 Ah -BL1860B 24.7 5.5 100
WARNING: Only use the battery cartridges listed above. Use of any other battery cartridges may cause
injury and/or re.
NOTE: Some of the battery cartridges listed above may not be available depending on your region of residence.
NOTE: Table regarding to the battery operating time above is for reference. The actual operating time may dier
with the type of the battery, charging condition, or usage environment.
Symbols
The followings show the symbols used for tool.
volts
direct current
SAFETY WARNINGS
IMPORTANT SAFETY INSTRUCTIONS
SAVE THESE INSTRUCTIONS.
WARNING: When using electric tools, basic
safety precautions should always be followed to
reduce the risk of re, electric shock, and per-
sonal injury, including the following:
1. Read this instruction manual carefully before
use. If you use a Makita charger, also read the
charger instruction manual.
2. Clean only with dry cloth. Do not use water for
cleaning.
3. Do not install near any heat sources such as
radiators, heat registers, stoves, or other appa-
ratus (including ampliers) that produce heat.
4. Only use attachments/accessories specied
by the manufacturer.
5. Unplug this appliance during lightning storms
or when unused for long periods of time.
6. The battery pack must be recharged only with
this radio or the specied charger for the bat-
tery. A charger that may be suitable for one
type of battery may create a risk of re when
used with another battery.
7. Use battery operated radio only with specif-
ically designated battery packs. Use of any
other batteries may create a risk of re.
8.
When battery pack is not in use, keep it away
from other metal objects like: paper clips, coins,
keys, nails, screws, or other small metal objects
that can make a connection from one terminal to
another. Shorting the battery terminals together
may cause sparks, burns, or a re.
9. Avoid body contact with grounded surfaces
such as pipes, radiators, ranges and refrig-
erators. There is an increased risk of electric
shock if your body is grounded.
10. Under abusive conditions, liquid may be
ejected from the battery; avoid contact. If
contact accidentally occurs, ush with water.
If liquid contacts eyes,additionally seek med-
ical help. Liquid ejected from the battery may
cause irritation or burns.
11. Do not use a battery pack and radio that is
damaged or modied. Doing so may exhibit
unpredictable behaviour resulting in re, explosion
or risk of injury.

4ENGLISH
12. Do not expose a battery pack or tool to re
or excessive temperature. Exposure to re or
temperature above 130 °C(266°F) may cause
explosion.
13. Follow all charging instructions and do not
charge the battery pack or tool outside the
temperature range specied in the instruc-
tions. Charging improperly or at temperatures
outside the specied range may damage the
battery and increase the risk of re.
14. The MAINS plug is used as the disconnect
device. The MAINS plug shall remain readily
operable.
15. Do not use the product at a high volume for
any extended period. To avoid hearing damage,
use the product at moderate volume level.
16. LCD displays include liquid which may cause
irritation and poisoning. If the liquid enters the
eyes, mouth or skin, rinse it with water and call a
doctor.
17. Do not expose the product to rain or wet con-
ditions. Water entering the product will increase
the risk of electric shock.
18. This product is not intended for use by per-
sons (including children) with reduced phys-
ical, sensory or mental capabilities, or lack
of experience and knowledge, unless they
have been given supervision or instruction
concerning use of the product by a person
responsible for their safety. Children should be
supervised to ensure that they do not play with
the product. Store the product out of the reach
of children.
19. Be careful not to pinch your ngers when
opening and closing the battery cover.
20. Return the battery compartment locker to the
original position, after installing or removing
battery pack. If not, battery pack may accidentally
fall out of the radio, causing injury to you or some-
one around you.
21. Always close and lock the battery compart-
ment locker before moving the radio.
22. When the radio is powered from the battery,
switch o the radio before removing the bat-
tery pack.
23. Be careful not to drop or strike the radio.
Broken shell may slash your nger or stab
your body. Damaged radio may exhibit unpredict-
able behaviour resulting in re, explosion or risk of
injury.
24. Have servicing performed by a qualied repair
person using only identical replacement parts.
This will ensure that the safety of the product is
maintained.
25. Do not modify or attempt to repair the appli-
ance or the battery pack except as indicated in
the instructions for use and care.
FCC statement
This device complies with part 15 of the FCC Rules.
Operation is subject to the following two conditions: (1)
This device may not cause harmful interference, and
(2) this device must accept any interference received,
including interference that may cause undesired
operation.
NOTE: This equipment has been tested and found
to comply with the limits for a Class B digital device,
pursuant to part 15 of the FCC Rules. These limits are
designed to provide reasonable protection against
harmful interference in a residential installation. This
equipment generates, uses and can radiate radio
frequency energy and, if not installed and used in
accordance with the instructions, may cause harmful
interference to radio communications. However, there is
no guarantee that interference will not occur in a partic-
ular installation. If this equipment does cause harmful
interference to radio or television reception, which can
be determined by turning the equipment o and on, the
user is encouraged to try to correct the interference by
one or more of the following measures:
— Reorient or relocate the receiving antenna.
— Increase the separation between the equipment
and receiver.
— Connect the equipment into an outlet on a cir-
cuit dierent from that to which the receiver is
connected.
— Consult the dealer or an experienced radio/TV
technician for help.
FCC CAUTION
Changes or modications not expressly approved by
the party responsible for compliance could void the
user’s authority to operate the equipment.
Makita U.S.A. Inc.
14930 Northam Street, La Mirada, CA 90638-5753,
USA
+1-(714) 522-8088
CAN ICES-3 (B)/NMB-3(B)
ISED Regulatory Compliance
This device contains licence-exempt transmitter(s)
that comply with Innovation, Science and Economic
Development Canada’s licence-exempt RSS(s).
Operation is subject to the following two conditions:
1. This device may not cause interference.
2. This device must accept any interference, including
interference that may cause undesired operation of the
device.
RF Exposure Compliance
This equipment complies with FCC/IC radiation expo-
sure limits set forth for an uncontrolled environment.
This transmitter must not be co-located or operating in
conjunction with any other antenna or transmitter.

5ENGLISH
Important safety instructions for
battery cartridge
1. Before using battery cartridge, read all instruc-
tions and cautionary markings on (1) battery
charger, (2) battery, and (3) product using
battery.
2. Do not disassemble or tamper with the battery
cartridge. It may result in a re, excessive heat,
or explosion.
3. If operating time has become excessively
shorter, stop operating immediately. It may
result in a risk of overheating, possible burns
and even an explosion.
4. If electrolyte gets into your eyes, rinse them
out with clear water and seek medical atten-
tion right away. It may result in loss of your
eyesight.
5. Do not short the battery cartridge:
(1) Do not touch the terminals with any con-
ductive material.
(2) Avoid storing battery cartridge in a con-
tainer with other metal objects such as
nails, coins, etc.
(3) Do not expose battery cartridge to water
or rain.
A battery short can cause a large current
ow, overheating, possible burns and even a
breakdown.
6. Do not store and use the tool and battery car-
tridge in locations where the temperature may
reach or exceed 50 °C (122 °F).
7. Do not incinerate the battery cartridge even if
it is severely damaged or is completely worn
out. The battery cartridge can explode in a re.
8. Do not nail, cut, crush, throw, drop the battery
cartridge, or hit against a hard object to the
battery cartridge. Such conduct may result in a
re, excessive heat, or explosion.
9. Do not use a damaged battery.
10. The contained lithium-ion batteries are subject
to the Dangerous Goods Legislation require-
ments.
For commercial transports e.g. by third parties,
forwarding agents, special requirement on pack-
aging and labeling must be observed.
For preparation of the item being shipped, consult-
ing an expert for hazardous material is required.
Please also observe possibly more detailed
national regulations.
Tape or mask o open contacts and pack up the
battery in such a manner that it cannot move
around in the packaging.
11. When disposing the battery cartridge, remove
it from the tool and dispose of it in a safe
place. Follow your local regulations relating to
disposal of battery.
12. Use the batteries only with the products
specied by Makita. Installing the batteries to
non-compliant products may result in a re, exces-
sive heat, explosion, or leak of electrolyte.
13. If the tool is not used for a long period of time,
the battery must be removed from the tool.
14. During and after use, the battery cartridge may
take on heat which can cause burns or low
temperature burns. Pay attention to the han-
dling of hot battery cartridges.
15. Do not touch the terminal of the tool imme-
diately after use as it may get hot enough to
cause burns.
16. Do not allow chips, dust, or soil stuck into the
terminals, holes, and grooves of the battery
cartridge. It may result in poor performance or
breakdown of the tool or battery cartridge.
17. Unless the tool supports the use near
high-voltage electrical power lines, do not use
the battery cartridge near high-voltage electri-
cal power lines. It may result in a malfunction or
breakdown of the tool or battery cartridge.
18. Keep the battery away from children.
SAVE THESE INSTRUCTIONS.
CAUTION: Only use genuine Makita batteries.
Use of non-genuine Makita batteries, or batteries that
have been altered, may result in the battery bursting
causing res, personal injury and damage. It will
also void the Makita warranty for the Makita tool and
charger.
CAUTION: RISK OF EXPLOSION IF BATTERY
IS REPLACED BY AN INCORRECT TYPE. Disposal
of a battery into re or a hot oven, or mechanically
crushing or cutting of a battery, that can result in an
explosion. Leaving a battery in an extremely high
temperature surrounding environment that can result
in an explosion or the leakage of ammable liquid or
gas. A battery subjected to extremely low air pressure
that may result in an explosion or the leakage of
ammable liquid or gas.
Tips for maintaining maximum
battery life
1. Charge the battery cartridge before completely
discharged. Always stop tool operation and
charge the battery cartridge when you notice
less tool power.
2. Never recharge a fully charged battery car-
tridge. Overcharging shortens the battery
service life.
3. Charge the battery cartridge with room tem-
perature at 10 °C - 40 °C (50 °F - 104 °F). Let
a hot battery cartridge cool down before
charging it.
4. Charge the battery cartridge if you do not use
it for a long period (more than six months).
6ENGLISH
Important safety instructions for bat-
tery charging
CAUTION:
1. SAVE THESE INSTRUCTIONS
– This manual contains important safety and operating instructions for battery
charging.
2. Before charging, read all instructions and cautionary markings on this appli-
ance, AC power adaptor, and battery cartridge.
3. CAUTION – To reduce risk of injury, charge only Makita type rechargeable bat-
teries. Other types of batteries may burst causing personal injury and damage.
4. Non-rechargeable batteries cannot be charged with this appliance.
5. Use a power source with the voltage specied on the nameplate of the AC power
adaptor.
6. Do not charge the battery cartridge in presence of ammable liquids or gases.
7. Do not expose the AC power adaptor to rain, snow, or wet condition.
8. Never carry the AC power adaptor by cord or yank it to disconnect from
receptacle.
9. Before attempting any maintenance or cleaning, unplug the AC power adaptor
and remove battery cartridge. Pull by plug rather than cord whenever discon-
necting the appliance.
10. Do not leave the AC power adaptor disconnected from the appliance while the
power is supplied from the mains.
11. Make sure cord is located so that it will not be stepped on, tripped over, or other-
wise subjected to damage or stress.
12. Do not operate this appliance with damaged cord or plug. If the cord or plug is
damaged, ask Makita authorized service center to replace it in order to avoid a
hazard.
13. Do not operate or disassemble this appliance if it has received a sharp blow,
been dropped, or otherwise damaged in any way; take it to a qualied service-
man. Incorrect use or reassembly may result in a risk of electric shock or re.
14. Do not charge battery cartridge when room temperature is BELOW 10°C (50°F)
or ABOVE 40°C (104°F). At the cold temperature, charging may not start.
15. Do not attempt to use the AC power adaptor with a step-up transformer, an
engine generator or DC power receptacle.
16. Do not allow anything to cover or clog the vents on this appliance.
17. Do not plug or unplug the power cord and the AC power adaptor with wet hands.
18. Do not install or remove the battery cartridge with wet hands.

7ENGLISH
INTRODUCTION
Parts description
Body
(a) (b) (c)
(d) (e) (f)
1
2
3
4
5
678
9
10
11
12
13
14
15
16
17
18 19
3
► a) Left side b) Front c) Right side d) Back (battery cover closed) e) Back (battery cover opened) f) Top
1Handle 2Soft bended rod antenna 3Speaker 4Menu/Info button
5Volume/Tuning control/
Select knob
6Auxiliary input socket
(AUX IN 1)
7USB power supply port 8DC IN socket
9Hook for AC adaptor 10 Bottle cap opener 11 Battery cover 12 Slot for LXT battery
cartridge
13 Slot for CXT battery
cartridge
14 Auxiliary input socket
(AUX IN 2)
15 USB power supply port 16 Battery compartment
(covering back up
batteries)
17 Battery compartment
locker
18 Power cord 19 AC power adaptor - -

8ENGLISH
Buttons and LCD display
6
511
12
10
8
9
16
1 2 3 4
18
713
14
15
17
1Power/Sleep timer
button
2Source button 3Radio alarm button 4Buzzer alarm button
5"TIMER TO ALARM"
icon
6"TIMER TO SPEAKER"
icon
7Icon for delay charge 8Band
9Icon for sleep timer 10 PM indicator for clock 11 Stereo symbol 12 No power indicator
13 Error icon for charging
failure
14 Indicator for battery
status/capacity
15 Indicator for AC power
supply
16 Clock
17 Information area 18 Preset stations/Preset
1 button as Bluetooth®
pair button
- - - -

9ENGLISH
Installing back up batteries
NOTE: Keeping back up batteries inside the compart-
ment prevent stored data in preset memories from
being lost.
1. Pull up the battery compartment to unlock it and
then open the battery cover.
1
2
► 1. Battery compartment locker 2. Battery cover
2. Remove back up battery compartment cover and
install 2 fresh UM-3 (AA sizes) batteries. Make sure the
batteries are with correct polarity as shown inside the
compartment.
1
► 1. Back up battery compartment cover
3. Close the back up battery compartment cover.
FUNCTIONAL
DESCRIPTION
Installing or removing battery
cartridge
CAUTION: Hold the tool and the battery car-
tridge rmly when installing or removing battery
cartridge. Failure to hold the radio and the battery
cartridge rmly may cause them to slip o your hands
and result in damage to the radio and battery car-
tridge and a personal injury.
Pull up the battery compartment to unlock it and then
open the battery cover.
To install the battery cartridge, align the tongue on the
battery cartridge with the groove in the housing and slip
it into place. Insert it all the way until it locks in place
with a little click. If you can see the red indicator on the
upper side of the button, it is not locked completely.
12
3
3
4
4
► 1. LXT battery cartridge 2. CXT battery cartridge
3. Red indicator 4. Button
To remove the battery cartridge, slide it from the tool
while sliding the button on the front of the cartridge.
After installing/removing the battery cartridge, be sure
to close the battery cover.
CAUTION: Always install the battery cartridge
fully until the red indicator cannot be seen. If not,
it may accidentally fall out of the tool, causing injury to
you or someone around you.
CAUTION: Do not install the battery cartridge
forcibly. If the cartridge does not slide in easily, it is
not being inserted correctly.

10 ENGLISH
Indicating the remaining battery
capacity
Only for battery cartridges with the indicator
1
2
► 1. Indicator lamps 2. Check button
Press the check button on the battery cartridge to indi-
cate the remaining battery capacity. The indicator lamps
light up for a few seconds.
Indicator lamps Remaining
capacity
Lighted O Blinking
75% to 100%
50% to 75%
25% to 50%
0% to 25%
(For LXT battery only)
Charge the
battery.
(For LXT battery only)
The battery
may have
malfunctioned.
NOTE: Depending on the conditions of use and the
ambient temperature, the indication may dier slightly
from the actual capacity.
Using the soft bended rod antenna
When listening to FM radio stations, straight up the soft
bended rod antenna as shown in the gure.
1
► 1. Soft bended rod antenna
NOTICE: Always store the soft bended rod antenna
to the original position after use.
Using Supplied AC power adaptor
WARNING: Always disconnect the AC power
adaptor completely before moving the radio. If the
AC power adaptor is not removed, it may cause
an electric shock.
WARNING: Never pull and/or drag the cord
of the AC power adaptor. If not, the radio may
accidentally fall down, causing injury to you or
someone around you.
WARNING: The AC power adaptor is used as
the means of connecting the radio to the mains
supply. The mains socket used for the radio must
remain accessible during normal use.
WARNING: In order to disconnect the radio,
the AC power adaptor should be removed from
the mains outlet completely
WARNING: Use the AC power adaptor sup-
plied with the product or specied by Makita only.
WARNING: Do not hold the power supply
cable and plug by your mouth. Doing so might
cause an electric shock.
WARNING: Do not handle the plug with wet or
greasy hand.
WARNING: Damaged or entangled cords
increase the risk of electric shock. If the cord
is damaged, have it replaced by our authorized
service center in order to avoid a safety hazard.
Do not use it before repair.
WARNING: After use, always store AC power
adaptor out of the reach of children.

11 ENGLISH
Open the cover and insert the adaptor plug into the DC IN socket
on the side of the radio. Plug the adaptor into a standard mains
socket outlet. While the radio is powered from AC power adaptor,
the indicator for AC power supply ( ) will appear on the display.
2
1
3
► 1. Cover 2. DC IN socket 3. Adaptor plug
NOTE:
When the adaptor is used, the radio is powered
from the mains and the battery cartridge is charged.
NOTE: When the radio has any interference in AM
band by its AC adaptor, move the radio away from the
AC adaptor further than 30 cm (1 feet).
Auxiliary input socket
1
2
► 1. AUX IN 1 2. AUX IN 2
Two 3.5 mm stereo auxiliary input sockets are provided.
One is at the front of the radio (AUX IN 1); the other is
located in the battery compartment (AUX IN 2).
1. Connect an external audio source, such as a MP3
or CD player, to the auxiliary input socket.
2. Repeatedly press and release the Source but-
ton until AUX IN 1 or 2 is displayed.
3.
Adjust the volume setting on your external audio source to
ensure an adequate signal level. After that, use the Tuning con-
trol knob on the radio as needed for comfortable listening.
Charging with USB power supply port
CAUTION: Do not connect power source to
USB port. Otherwise there is risk of re. The USB
port is only intended for charging lower voltage
device. Always place the cover onto the USB port
when not charging the lower voltage device.
CAUTION: Do not insert a nail, wire, etc. into
USB power supply port. Otherwise a circuit short
may cause smoke and re.
NOTICE: Before connecting USB device to the
charger, always backup your data of USB device.
Otherwise your data may lose by any possibility.
NOTICE: When not using or after charging, remove
the USB cable and close the cover.
NOTICE: Do not connect this USB socket with your
PC USB port, as it is highly possible that it may cause
breakdown of the units.
NOTE: The charger may not supply power to some
USB devices.
There are USB power supply ports at the front and back
side of the radio. You can charge USB device through
the USB power supply port.
1
► 1. USB power supply port
1. Connect the USB device, such as a MP3 or CD
player, to the USB power supply port using a USB cable
available in the market.
2. Press the Power button to switch on the
radio.

12 ENGLISH
NOTE: No matter if the radio is AC powered or battery
powered, you can charge a USB device when the
radio is switched on and in FM radio mode, Bluetooth
mode, or AUX mode which is appeared when an
external audio source is connected.
NOTE: The maximum volume of the output power
speaker will decrease when your USB device is being
charged.
NOTE: The USB socket can provide max 2.4 A 5 V (2
port total) of electrical current.
Charging the battery cartridge
To charge the battery cartridge with this radio, insert
the adaptor plug into the DC IN socket and then plug it
to the mains. After that, insert the battery cartridge to
the slot.
1
2
3
► 1. LXT battery cartridge 2. CXT battery cartridge
3. Indicator for battery status/capacity
The indicator for battery status/capacity blinks when the
battery cartridge is being charged. The charging status
is as follows:
Indicator for battery status/
capacity
Charging status
(blinking)
Charging (less than 80%)
(blinking)
Charging (80% or more has
been charged)
(not blinking)
Charged (100%)
NOTICE: You cannot charge LXT and CXT bat-
tery cartridges at the same time.
NOTE: It will take several seconds until the indicator
for battery status/capacity appears after the AC power
adaptor is plugged into the mains.
NOTE:
If the AC power adaptor is disconnected from the radio
during battery charging, the radio turns o for a few seconds
and then automatically turns on with the battery power supply.
Hook for the AC power adaptor
The hook on the back of the radio is useful for carrying
the AC power adaptor. When carrying, bundle the cords
and tie them with AC power adaptor using the band.
1
2
3
► 1. Hook 2. AC power adaptor 3. Band
NOTICE: Do not store AC power adaptor in the
battery compartment. The cord may be pinched and
damaged when closing the battery cover.
NOTICE:
Always hold the handle when carrying the radio.
NOTICE: Be careful not to drop the AC power
adaptor hooked on the back of the radio.
Bottle cap opener
The bottle cap opener is provided on the back of the radio.
1
► 1. Bottle cap opener
NOTICE: Hold the radio rmly when using the
bottle cap opener. Failure to do so may cause the
radio tipped over and result in damage or malfunction.
NOTICE: Be careful not to spill the beverage
onto the radio when opening the cap.

13 ENGLISH
OPERATION
Switching on/o the radio
Press the Power button to switch on the radio.
Press the Power button again to switch o the
radio.
Adjusting the volume level
Turn the Tuning control knob clockwise to increase
the volume. Turn the Tuning control knob counter-
clockwise to decrease the volume.
NOTE: The volume adjustment is not available during
tuning and some settings.
Scan tuning AM/FM
1. Press the Power button to switch on your
radio.
2. Press the Source button to select AM or FM
radio mode.
3. Press and hold the Tuning control knob to carry
out an auto-tune.
Your radio will scan up the AM or FM band from the cur-
rently displayed frequency and will stop scanning auto-
matically when it nds a station of sucient strength.
NOTE: The stations to be found by scan tuning vary
depending on the receiving sensitivity at the location
where the scan tuning is performed. If you don't have
desired station, change the location and perform the
procedure above.
NOTE: When the end of the waveband is reached
your radio will recommence tuning from the opposite
end of the waveband.
Manual tuning – FM/AM
1.
Press the Power button to switch on your radio.
2. Press the Source button to select FM/AM radio
mode.
3. Press the Tuning control knob .
4. Rotate the Tuning control knob to tune to a
station.
5. Press the Tuning control knob to set the
tuning.
NOTE: Manual tuning is available while "MANUAL
TUNING" is displayed on the display. If "MANUAL
TUNING" is not displayed, start the manual tuning
from the beginning.
NOTE: The stations to be found by manual tuning
vary depending on the receiving sensitivity at the
location where the manual tuning is performed. If you
don't have desired station, change the location and
perform the procedure above.
NOTE: When the end of the waveband is reached
your radio will recommence tuning from the opposite
end of the waveband.
Presetting stations in FM/AM
There are 5 preset stations each for FM/AM radio. They
are used in the same way for each waveband.
1. Press the Power button to switch on your
radio.
2. Press the Source button to select the desired
waveband. Tune to the required radio station.
3. Press and hold the required Preset button (1 to
5) until the display shows “PRESET X
STORED” (X indicates the number of the Preset button
that you pressed). The station will be stored using the
preset number (P1-P5). Repeat this procedure for the
remaining presets as you wish.
NOTE: Preset stations which have already been
stored may be overwritten by following the above
procedure.
Recalling a preset station in AM/FM
1. Press the Power button to switch on your
radio.
2. Press the Source button to select AM or FM
radio mode.
3. Press the desired Preset button that
you stored in the preset memory.
Display modes – FM
Your radio has a range of display options for FM radio
mode.
Station name Displays the name of the sta-
tion being listened to, together
with the band and frequency.
Program type Displays the type of station
being listened to such as Pop,
Classic, News, etc, together
with the band and frequency.
Radio text Displays radio text message
such as new items etc,
together with the band and
frequency.
Time/Date Displays the time and date
according to the date setting
of your radio.
Setting the clock
Setting the time and date format
NOTE: The selected time and date format is also
used when setting the alarms.
1. Press and hold the Menu/Info button
INFO
MENU
to enter
the menu setting.
2. Rotate the Tuning control knob until <TIME>
appears on the display and press the Tuning control
knob to enter the setting.
3. Rotate the Tuning control knob until <SET
12/24 HOUR> appears on the display and press the
control knob to enter the setting.

14 ENGLISH
4. Rotate the Tuning control knob to select either
<12 HOUR> or <24 HOUR> format. Press the Tuning
control knob to conrm your choice.
NOTE: If the 12 hour clock format is chosen, the radio
will then use the 12 hour clock for the setting.
5. Press and hold the Menu/Info button
INFO
MENU
to enter
the menu setting.
6. Rotate the Tuning control knob until <TIME>
appears on the display and press the Tuning control
knob to enter the setting.
7. Rotate the Tuning control knob until <DATE
FORMAT> appears on the display and press the control
knob to enter the setting.
8. Rotate the Tuning control knob to select the
desired date format (<DD/MM/YYYY> or <MM/DD/
YYYY>). Press the Tuning control knob to conrm
your choice.
Setting the time
1. Press and hold the Menu/Info button
INFO
MENU
.
2. Rotate the Tuning control knob until <TIME>
appears on the display. Press the Tuning control
knob to enter the setting.
3. Press the Tuning control knob while <SET
TIME> appears on the display to enter the setting.
4. The hour setting on the display will begin ashing.
Rotate the Tuning control knob to select the desired
hour, and press the Tuning control knob to conrm
the setting. Then rotate the Tuning control knob to
select the desired minute, and press the Tuning control
knob to conrm the setting.
Setting the date
1. Press and hold the Menu/Info button
INFO
MENU
.
2. Rotate the Tuning control knob until <TIME>
appears on the display. Press the Tuning control
knob to enter the setting.
3. Rotate the Tuning control knob until <SET
DATE> appears on the display. Press the Tuning control
knob to enter the setting.
4. Rotate the Tuning control knob to select the
desired year and press the Tuning control knob to
conrm the setting. Then rotate the Tuning control
knob to select the desired month, and press the
Tuning control knob to conrm the setting. Then
rotate the Tuning control knob to select the desired
date and press the Tuning control knob to conrm
the setting.
Setting the alarm clock
Your radio has two alarms which can each be set to wake
you to AM/FM radio or buzzer alarm. The alarms may be
set while the unit is in standby mode or while playing.
Setting radio alarm time
1.
Press and hold the radio alarm button , the radio
alarm symbol and the display hour will ash along with a beep.
2.
While the radio alarm symbol is ashing,
rotate Tuning control knob to select the hour and press
Tuning control knob again to conrm hour setting. Then
rotate the Tuning control knob to select the minute and
press Tuning control knob to conrm minute setting.
3. Rotate the Tuning control knob and the display will
show the frequency options for the alarm.
The alarm options are as follows:
ONCE The alarm will sound
once
DAILY The alarm will sound
everyday
WEEKDAYS The alarm will sound only
on weekdays
WEEKENDS The alarm will sound only
at weekends
Press the Tuning control knob to conrm the setting.
4. Rotate Tuning control knob to select the band
(FM/AM) and press Tuning control knob again to
conrm the setting.
5. Rotate Tuning control knob to select <LAST
LISTENED> or <PRESET NO.> and press Tuning
control knob again to conrm the setting.
6. Rotate Tuning control knob to select the
desired volume and press Tuning control knob to con-
rm the volume. Radio alarm setting is now completed.
NOTE: If new radio alarm station is not selected, the
radio will select the last alarm station.
Setting HWS (Humane Wake System)
buzzer alarm
A beep tone will activate when selecting the HWS buzzer alarm.
The alarm beep starts to ring and it becomes quicker
as the time elapses. The alarm beep continues to ring
for one minute and stops. After one minute silence, the
alarm beep resume ringing. The alarm beep repeats
this cycle until you press the Power button .
NOTE: The buzzer alarm can be set when the radio
is turned o.
1.
Press and hold the buzzer alarm button , the
symbol and the display hour will ash along with a beep.
2.
While the buzzer alarm symbol is ashing,
rotate Tuning control knob to select the hour and press
Tuning control knob again to conrm hour setting. Then
rotate the Tuning control knob to select the minute and
press Tuning control knob to conrm minute setting.

15 ENGLISH
3. Rotate the Tuning control knob and the display
will show the frequency options for the alarm.
The alarm options are as follows:
ONCE The alarm will sound
once
DAILY The alarm will sound
everyday
WEEKDAYS The alarm will sound only
on weekdays
WEEKENDS The alarm will sound only
at weekends
4. Press the Tuning control knob to conrm the
setting.
NOTE: There is no volume adjustment for buzzer
alarm.
When the alarm sounds
To cancel a sounding alarm, press the Power button .
Disabling/cancelling alarms
To disable an active alarm, press and hold the corre-
sponding alarm button to cancel the alarm.
Snooze
When the alarm sounds, press any button other than
the Power button to stop the alarm for 5 minutes.
"SNOOZE" will appear on the display.
To adjust the silence time, follow the procedures below:
1. Press and hold the Menu/Info button
INFO
MENU
to enter
the menu setting.
2. Rotate the Tuning control knob until "SNOOZE"
appears on the display. Press the Tuning control
knob to enter the setting. Rotate the Tuning control
knob to adjust the silence time from 5, 10, 15 and 20
minutes.
NOTE: To cancel the snooze timer while the alarm is
suspended, press the Power button .
Sleep timer
Your radio can be set to turn o automatically after a
preset time has elapsed. The Sleep Timer setting can
be adjusted for 15, 30, 45, 60, 90, or 120 minutes.
1. Press and hold the Power button to enter
the Sleep Timer setting. “SLEEP 60 MINUTES” will be
shown on the display.
2.
Keep holding the Power button . The sleep timer
options will start switching on the display. Release the
Power button when the desired Sleep Timer setting
appears on the display. The setting will be saved and the
icon for sleep timer ( ) will appear on the display.
NOTE: Your radio will switch o automatically after
the preset Sleep Timer has elapsed.
NOTE: To cancel the sleep timer before the preset
time has elapsed, simply press the Power but-
ton to turn the radio o.
Loudness
You can get compensation on lower and higher
frequency for your radio by adjusting the loudness
function.
1. Press and hold the Menu/Info button
INFO
MENU
to enter
the menu setting.
2. Rotate the Tuning control knob until
<LOUDNESS> appears on the display. Press the
Tuning control knob to enter the setting.
3. Rotate the Tuning control knob to choose
<ON> or <OFF> to turn on or turn o the loudness func-
tion, then press the Tuning control knob to conrm
the setting.
NOTE: To turn o the loudness function, select
<OFF> and press the Tuning control knob to con-
rm the setting.
Listening to Bluetooth®music
You need to pair your Bluetooth®device with your radio
before you can auto-link to play/stream Bluetooth®
music through your radio. Paring creates a permanent
“bond” so two devices can always recognize each other.
Pairing your Bluetooth®device
1. Press the Source button to select Bluetooth®
function. "READY BLUETOOTH" will be shown on the
display and "READY" will ash.
2. Activate Bluetooth® on your device according to
the device’s user manual to allow the paring procedure.
3. Press and release the Pair button . "PAIR
BLUETOOTH" will be shown on the display and it will
ash. You can start the search of your radio on your
Bluetooth®device. Once the name of your radio is
appeared on your Bluetooth®device, press the item in
your Bluetooth®list.
NOTE: With some mobiles (versions earlier than
BT2.1 Bluetooth®device), you may need to input the
pass code “0000”.
4. Your Bluetooth®device will be linked with the
radio. Once connected, “CONNECTED BLUETOOTH”
will appear on the display.
You can now play the music in your Bluetooth® device
via your radio.
Playing Bluetooth®device which has
already paired
1. Press the Source button to select Bluetooth®
function. "READY BLUETOOTH" will be shown on the
display and "READY" will ash.
2. Search and link the radio on your Bluetooth®
device. Some device may link with the radio
automatically.
You can now play the music in your Bluetooth® device
via your radio.

16 ENGLISH
NOTE: The radio can pair with 8 Bluetooth®devices
at most. When you pair Bluetooth®devices more than
this number, pairing history will be overwritten from
the oldest pairing history.
NOTE: If there are 2 Bluetooth®devices searching for
your radio, it will show its availability on both devices.
NOTE: If your Bluetooth®device is temporarily dis-
connected to your radio, then you need to manually
reconnect your device again to the radio.
NOTE: If the name of your radio is appeared on your
Bluetooth®device list but your device cannot connect
with it, delete the item name of your radio from your
list and pair the device with your radio again following
the steps described previously.
NOTE: The optimum operation range between the
radio and the paired device is approximately 10
meters (30 feet).
NOTE: Any obstacle between the radio and the
device can reduce the operational range.
Disconnecting your Bluetooth®
device
1. Press and hold the Pair button for a few
seconds to disconnect with your Bluetooth® device.
“ CONNECTED BLUETOOTH” will turn to be "PAIR
BLUETOOTH".
2. Press the Power button .
MAINTENANCE
CAUTION: Always be sure that the appli-
ance is switched o and the battery cartridge is
removed before attempting to perform inspection
or maintenance.
NOTICE: Never use gasoline, benzine, thinner,
alcohol or the like. Discoloration, deformation or
cracks may result.
To maintain product SAFETY and RELIABILITY,
repairs, any other maintenance or adjustment should
be performed by Makita Authorized or Factory Service
Centers, always using Makita replacement parts.
OPTIONAL
ACCESSORIES
CAUTION: These accessories or attachments
are recommended for use with your Makita tool
specied in this manual. The use of any other
accessories or attachments might present a risk of
injury to persons. Only use accessory or attachment
for its stated purpose.
If you need any assistance for more details regard-
ing these accessories, ask your local Makita Service
Center.
• Makita genuine battery and charger
NOTE: Some items in the list may be included in the
tool package as standard accessories. They may
dier from country to country.
MAKITA LIMITED WARRANTY
Please refer to the annexed warranty sheet for the
most current warranty terms applicable to this product.
If annexed warranty sheet is not available, refer to the
warranty details set forth at below website for your
respective country.
United States of America: www.makitatools.com
Canada: www.makita.ca
Other countries: www.makita.com

17 ESPAÑOL
ESPAÑOL (Instrucciones originales)
ESPECIFICACIONES
Modelo: XRM10
Adaptador de energía de C.A. 24 V c.c., 5,0 A, manguito interior positivo
Batería UM-3 (tamaño AA) x 2 de respaldo
Batería CXT: 10,8 V c.c. - 12 V c.c. máx.
Batería LXT: 14,4 V c.c. - 18 V c.c.
Banda FM
AM
Cobertura de frecuencia FM 87,50 MHz - 108 MHz
(0,1 MHz/fase)
AM (MW) 520 kHz - 1 710 kHz
(10 kHz/fase)
Bluetooth®Bluetooth®
Bluetooth®QD ID (Ident. de diseño)
147189
(El término Bluetooth® así como su marca y logos son marcas
registradas propiedad de Bluetooth SIG, Inc.).
Versión de Bluetooth®5,0 certicado
Perles de Bluetooth®A2DP / AVRCP
Potencia de transmisión Potencia clase 2
Frecuencia de operación 2 402 MHz - 2 480 MHz
Potencia máxima de
radiofrecuencia
6,32 dBm
(Declaración de cumplimiento con normas de la Unión Europea)
Rango de transmisión Óptimo: Máximo 10 metros (33 pies)
Posible: Máximo 30 metros (100 pies)
(varía conforme a las condiciones de uso)
Codicación/decodicación
compatible
SBC
Característica de los circuitos
Altavoz
3,5 pulgadas 8 ohmios x 2
Potencia de salida 10,8 V c.c. - 12 V c.c. máx.:1,2 W x 2
18 V c.c. : 3,5 W x 2
Salida USB USB tipo A x 2 (5 V / 2,4 A TOTAL)
Salida de la carga de batería Batería CXT: 10,8 V c.c. - 12 V c.c. máx., 3,5 A
Batería LXT: 14,4 V c.c. - 18 V c.c., 3,5 A
Terminal de entrada Diámetro 3,5 mm (AUX IN1/AUX IN2)
Sistema de antena FM: antena de varilla exible
AM: antena de barra
Dimensiones (La x An x Al) 268 mm x 185 mm x 305 mm
(10-1/2″ x 7-1/4″ x 12″)
Peso (sin cartucho de la batería) 5,9 kg (13,1 lbs)
• Debido a nuestro continuo programa de investigación y desarrollo, las especicaciones aquí incluidas están
sujetas a cambio sin previo aviso.
• Las especicaciones pueden variar de país a país.

18 ESPAÑOL
El término Bluetooth®así como su marca y logo son marcas registradas propiedad de Bluetooth SIG, Inc. y su uso
por parte de Makita está autorizado bajo licencia. Las demás marcas registradas y nombres comerciales pertenecen
a sus respectivos propietarios.
La tabla a continuación indica el tiempo de funcionamiento con una sola carga en el modo de radio.
Capacidad de la batería Voltaje del cartucho de
batería
Tiempo de funciona-
miento (hora)
(a la salida del altavoz =
50 mW + 50 mW)
Tiempo
de carga
(min)
10,8 V -
12 V máx.
18 V En modo
radio
o AUX
En modo
Bluetooth®
con
carga USB
1,5 Ah BL1016 -6,3 0,9 31
-BL1815N 6,1 1,4 27
2,0 Ah BL1021B -8,2 1,2 40
-BL1820B 8,2 1,8 38
3,0 Ah -BL1830B 11,3 2,5 48
4,0 Ah BL1041B -16,4 2,3 75
-BL1840B 16,0 3,6 67
5,0 Ah -BL1850B 20,5 4,6 84
6,0 Ah -BL1860B 24,7 5,5 100
ADVERTENCIA: Utilice solo los cartuchos de batería mencionados anteriormente. El uso de cualquier
otro cartucho de batería podría ocasionar una lesión y/o un incendio.
NOTA: Algunos de los cartuchos de batería enumerados arriba podrían no estar disponibles dependiendo de su
área de residencia.
NOTA: La tabla sobre el tiempo de funcionamiento de la batería anterior es para referencia. El tiempo de funcio-
namiento real puede variar según el tipo de batería, la condición de carga o el entorno de uso.
Símbolos
A continuación se muestran los símbolos utilizados
para la herramienta.
volts o voltios
corriente directa o continua
ADVERTENCIAS DE
SEGURIDAD
INSTRUCCIONES IMPORTANTES
DE SEGURIDAD
GUARDE ESTAS INSTRUCCIONES.
ADVERTENCIA: Al utilizar herramientas
eléctricas, siempre deben tomarse en cuenta
las precauciones básicas de seguridad a n de
reducir el riesgo de incendio, descarga eléctrica y
lesiones personales, incluyendo lo siguiente:
1.
Lea cuidadosamente este manual de instrucciones
antes del uso. Si utiliza un cargador Makita, lea
también el manual de instrucciones del cargador.
2. Limpie solamente con un paño seco. No utilice
agua para la limpieza.
3. No lo instale cerca de fuentes de calor tales
como radiadores, registros de calor, estufas u
otros aparatos (incluidos amplicadores) que
produzcan calor.
4. Utilice solo aditamentos/accesorios especi-
cados por el fabricante.
5.
Desenchufe este aparato durante tormentas eléctri-
cas o cuando no se utilice durante largos períodos.
6. La batería debe recargarse solamente con este
radio o con el cargador especicado para la
batería. Un cargador que sea adecuado para
un tipo de batería puede generar un riesgo de
incendio al usarse con una batería distinta.
7.
Utilice una radio a batería solamente con los
paquetes de baterías designados especíca-
mente para ello. El uso de cualquier otro tipo de
baterías podría generar un riesgo de incendio.
8. Cuando no se esté usando el paquete de bate-
ría, manténgalo alejado de otros objetos metá-
licos, como sujetapapeles (clips), monedas,
llaves, clavos, tornillos u otros objetos peque-
ños de metal que puedan crear una conexión
entre una terminal y otra. Causar un cortocir-
cuito en las terminales de la batería podría
causar chispas, quemaduras o un incendio.

19 ESPAÑOL
9.
Evite el contacto del cuerpo con supercies conecta-
das a tierra tales como tubos, radiadores, cocinas y
refrigeradores. Si su cuerpo es puesto a tierra existirá
un mayor riesgo de que sufra una descarga eléctrica.
10.
En condiciones de abuso, podría expulsarse
líquido de la batería; evite el contacto. En caso de
contacto accidental, enjuague con agua. Si hay
contacto del líquido con los ojos, solicite atención
médica adicionalmente. Puede que el líquido expul-
sado de la batería cause irritación o quemaduras.
11. No utilice el radio ni una batería que estén
dañadas o hayan sido modicadas. El hacerlo
podría ocasionar una situación inesperada provo-
cando un incendio, explosión o riesgo de lesiones.
12. No exponga la herramienta ni la batería al
fuego ni a una temperatura excesiva. La expo-
sición al fuego a una temperatura superior a 130
°C (266°F) podría causar una explosión.
13.
Siga todas las instrucciones para la carga y
evite cargar la herramienta o la batería fuera del
rango de temperatura especicado en las ins-
trucciones. Una carga inadecuada o a una tempe-
ratura fuera del rango especicado podría dañar la
batería e incrementar el riesgo de incendio.
14. El enchufe MAINS (red eléctrica) se utiliza
como dispositivo de desconexión. El enchufe
MAINS deberá permanecer fácilmente accesi-
ble para su operación.
15. No utilice el producto a un volumen alto
durante un período prolongado. Para evitar
daños auditivos, use el producto a un nivel de
volumen moderado.
16. Las pantallas LCD incluyen líquidos que pue-
den causar irritación y envenenamiento. Si el
líquido entra en los ojos, la boca o la piel, enjuá-
guelo con agua y llame a un médico.
17. No exponga el producto a la lluvia ni a la
humedad. El agua que ingrese al producto incre-
mentará el riesgo de descarga eléctrica.
18.
Este producto no está diseñado para ser utilizado
por personas (incluidos niños) con capacidades
físicas, sensoriales o mentales reducidas o con falta
de experiencia y conocimientos, a no ser que una
persona responsable de su seguridad les supervise
o les enseñe el uso seguro del producto. Hay que ase-
gurarse de que los niños no jueguen con el producto.
Almacene el producto fuera del alcance de los niños.
19. Tenga cuidado de no pellizcar sus dedos al
abrir y cerrar la cubierta de la batería.
20. Regrese el cierre del compartimento de la
batería a la posición original después de
instalar o extraer el cartucho de batería. De
no hacerlo, el cartucho de batería podría caerse
accidentalmente de la radio, ocasionándole lesio-
nes a usted o a alguien cerca de usted.
21. Siempre cierre y asegure el cierre del compar-
timento de la batería antes de mover la radio.
22. Cuando la radio se alimenta desde el cartucho
de batería, apague la radio antes de retirar el
cartucho de batería.
23. Tenga cuidado de no dejar caer ni golpear la
radio. El armazón roto podría cortarle el dedo
o atravesar su cuerpo. La radio dañada podría
ocasionar una situación inesperada provocando
un incendio, explosión o riesgo de lesiones.
24.
Pida que el servicio lo realice un técnico en repa-
raciones calicado y que utilice únicamente piezas
de repuesto idénticas a las originales. Esto garanti-
zará que se mantenga la seguridad del producto.
25. No modique ni intente reparar el aparato ni el
paquete de baterías salvo como se indique en
las instrucciones para el uso y cuidado.
Declaración de la FCC
Este dispositivo cumple con lo dispuesto en la Parte 15
de las Normas de la FCC. La operación está sujeta a las
siguientes dos condiciones: (1) Este dispositivo no debe
causar una interferencia dañina, y (2) este dispositivo debe
aceptar cualquier interferencia recibida, incluida la interfe-
rencia que pueda ocasionar una operación no deseada.
NOTA: Este equipo fue sometido a pruebas y se ha com-
probado que cumple con los límites para un dispositivo
digital Clase B, conforme a lo dispuesto en la Parte 15 de las
Normas de la FCC. Estos límites están diseñados para pro-
porcionar una protección razonable contra una interferencia
dañina en una instalación residencial. Este equipo genera,
usa y puede irradiar energía de radiofrecuencia y, si no se
instala y se usa de acuerdo con las instrucciones, puede cau-
sar una interferencia dañina a las radiocomunicaciones. Sin
embargo, no hay ninguna garantía de que la interferencia no
ocurrirá en una instalación en particular. Si este equipo llega
a causar una interferencia dañina a la recepción de radio o
televisión, lo cual puede determinarse encendiendo y apa-
gando el equipo, el usuario deberá intentar corregir la interfe-
rencia tomando una o varias de las siguientes medidas:
— Reorientar o reubicar la antena receptora.
—
Aumentar la separación entre el equipo y el receptor.
— Conectar el equipo a una toma de corriente en un
circuito distinto al cual esté conectado el receptor.
— Consultar al distribuidor o a un técnico experto en
radio/TV para solicitar asistencia.
PRECAUCIÓN DE LA FCC
Cualquier cambio o modicación que no haya sido
expresamente aprobada por la parte responsable del
cumplimiento podría anular la autoridad del usuario
para operar el equipo.
Makita U.S.A. Inc.
14930 Northam Street, La Mirada, CA 90638-5753, EUA
+1-(714) 522-8088
CAN ICES-3 (B)/NMB-3(B)
Cumplimiento normativo del Departamento de Innovación,
Ciencia y Desarrollo Económico de Canadá (ISED)
Este dispositivo contiene transmisores exentos de licen-
cia que cumplen con las especicaciones de estándares
para radio (RSS) exentos de licencia del Departamento de
Innovación, Ciencia y Desarrollo Económico de Canadá. El
funcionamiento está sujeto a las siguientes dos condiciones:
1. Este dispositivo no debe causar una interferencia.
2. Este dispositivo debe aceptar cualquier interferencia,
incluyendo la interferencia que pueda ocasionar una
operación no deseada del dispositivo.
Cumplimiento sobre la exposición a la RF
Este equipo cumple con los límites de exposición a la
radiación de la Comisión Federal de Comunicaciones
(FCC)/Industria Canadá (IC) establecidos para un
entorno no controlado. Este transmisor no debe ubi-
carse ni funcionar junto con ninguna otra antena o
transmisor.

20 ESPAÑOL
Instrucciones importantes de
seguridad para el cartucho de batería
1. Antes de utilizar el cartucho de batería, lea
todas las instrucciones e indicaciones de
precaución en el (1) el cargador de batería, (2)
la batería, y (3) el producto con el que se utiliza
la batería.
2. No desarme ni modique el cartucho de bate-
ría. Podría ocurrir un incendio, calor excesivo o
una explosión.
3. Si el tiempo de operación se ha acortado en
exceso, deje de operar de inmediato. Podría
correrse el riesgo de sobrecalentamiento,
posibles quemaduras e incluso explosión.
4. En caso de que ingresen electrolitos en sus
ojos, enjuáguelos bien con agua limpia y con-
sulte de inmediato a un médico. Esto podría
ocasionar pérdida de visión.
5. Evite cortocircuitar el cartucho de batería:
(1) No toque las terminales con ningún mate-
rial conductor.
(2) Evite guardar el cartucho de batería en un
cajón junto con otros objetos metálicos,
tales como clavos, monedas, etc.
(3) No exponga el cartucho de batería al
agua o la lluvia.
Un cortocircuito en la batería puede causar un ujo
grande de corriente, sobrecalentamiento, posibles
quemaduras e incluso una descompostura.
6.
No guarde ni utilice la herramienta y el cartu-
cho de batería en lugares donde la temperatura
pueda alcanzar o exceder los 50 °C (122 °F).
7. Nunca incinere el cartucho de batería incluso
en el caso de que esté dañado seriamente o
ya no sirva en absoluto. El cartucho de batería
puede explotar si se tira al fuego.
8.
No clave, corte, aplaste, lance o deje caer el cartu-
cho de batería, ni golpee un objeto sólido contra
el cartucho de batería. Dicha acción podría resultar
en un incendio, calor excesivo o en una explosión.
9. No use una batería dañada.
10.
Las baterías de ión de litio están sujetas a los requisi-
tos reglamentarios en materia de bienes peligrosos.
Para el trasporte comercial, por ej., mediante
terceros o agentes de transporte, se deben tomar
en cuenta los requisitos especiales relativos al
empaque y el etiquetado.
Para efectuar los preparativos del artículo que se
va a enviar, se requiere consultar a un experto en
materiales peligrosos. Si es posible, consulte ade-
más otras regulaciones nacionales más detalladas.
Pegue o cubra con cinta adhesiva los contactos
abiertos y empaque la batería de manera que ésta
no pueda moverse dentro del paquete.
11. Para deshacerse del cartucho de batería,
sáquelo de la herramienta y deséchelo en un
lugar seguro. Siga las regulaciones locales
relacionadas al desecho de las baterías.
12.
Utilice las baterías únicamente con los produc-
tos especicados por Makita. Instalar las baterías
en productos que no cumplan con los requisitos
podría ocasionar un incendio, un calentamiento
excesivo, una explosión o una fuga de electrolito.
13. Si no se utiliza la herramienta por un
período largo, debe extraerse la batería de la
herramienta.
14. El cartucho de batería podría absorber calor
durante y después de su uso, lo que ocasiona-
ría quemaduras o quemaduras a baja tempe-
ratura. Tenga cuidado con la manipulación de
los cartuchos de batería que estén calientes.
15. No toque el terminal de la herramienta inme-
diatamente después de su uso, ya que el
mismo podría estar lo sucientemente caliente
como para provocarle quemaduras.
16. No permita que las rebabas, el polvo o la tierra
queden atrapados en los terminales, oricios
y ranuras del cartucho de batería. Esto podría
ocasionar un desempeño deciente o descompos-
tura de la herramienta o del cartucho de batería.
17. No utilice el cartucho de batería cerca de
cables eléctricos de alto voltaje, a menos que
la herramienta sea compatible con el uso cer-
cano a estos cables eléctricos de alto voltaje.
Esto podría ocasionar una avería o descompos-
tura de la herramienta o del cartucho de batería.
18. Mantenga la batería alejada de los niños.
GUARDE ESTAS
INSTRUCCIONES.
PRECAUCIÓN: Utilice únicamente baterías
originales de Makita. El uso de baterías no origina-
les de Makita, o de baterías alteradas, puede ocasio-
nar que las baterías exploten causando un incendio,
lesiones personales y daños. Asimismo, esto inva-
lidará la garantía de Makita para la herramienta y el
cargador Makita.
PRECAUCIÓN: RIESGO DE EXPLOSIÓN SI
SE REEMPLAZA LA BATERÍA CON UNA DEL TIPO
INCORRECTO. Desechar una batería en el fuego o
en un horno caliente o aplastar o cortar mecánica-
mente una batería puede provocar una explosión.
Dejar una batería en un entorno circundante con tem-
peratura extremadamente alta puede provocar una
explosión o la fuga de líquidos o gases inamables.
Una batería sometida a una presión de aire extrema-
damente baja puede provocar una explosión o la fuga
de líquidos o gases inamables.
Consejos para alargar al máximo
la vida útil de la batería
1. Cargue el cartucho de batería antes de que
se descargue completamente. Pare siem-
pre la operación y cargue el cartucho de
batería cuando note menos potencia en la
herramienta.
2. No cargue nunca un cartucho de batería que
esté completamente cargado. La sobrecarga
acortará la vida de servicio de la batería.
3. Cargue el cartucho de batería a una tempera-
tura ambiente de 10 °C - 40 °C (50 °F - 104 °F).
Si un cartucho de batería está caliente, déjelo
enfriar antes de cargarlo.
4. Cargue el cartucho de batería si no va a utili-
zarlo durante un período prolongado (más de
seis meses).
Other manuals for XRM10
1
Table of contents
Languages:
Other Makita Radio manuals

Makita
Makita DMR050 User manual

Makita
Makita MR002G User manual

Makita
Makita DMR112W User manual

Makita
Makita ADRM13 User manual

Makita
Makita DMR115B User manual

Makita
Makita MR007G User manual

Makita
Makita BMR103 User manual

Makita
Makita XRM02W User manual

Makita
Makita DMR115 User manual

Makita
Makita MR002GZ User manual

Makita
Makita BMR104 User manual

Makita
Makita MR004G User manual

Makita
Makita MR051 User manual

Makita
Makita DMR300 User manual

Makita
Makita DMR108 User manual

Makita
Makita DMR116 User manual

Makita
Makita BMR100 Quick start guide

Makita
Makita BMR103 User manual

Makita
Makita XRM02 User manual

Makita
Makita BMR100 User manual