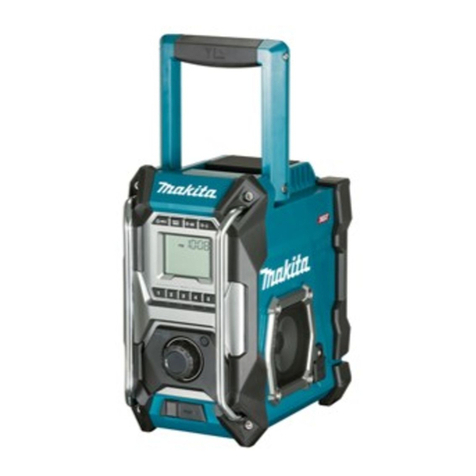
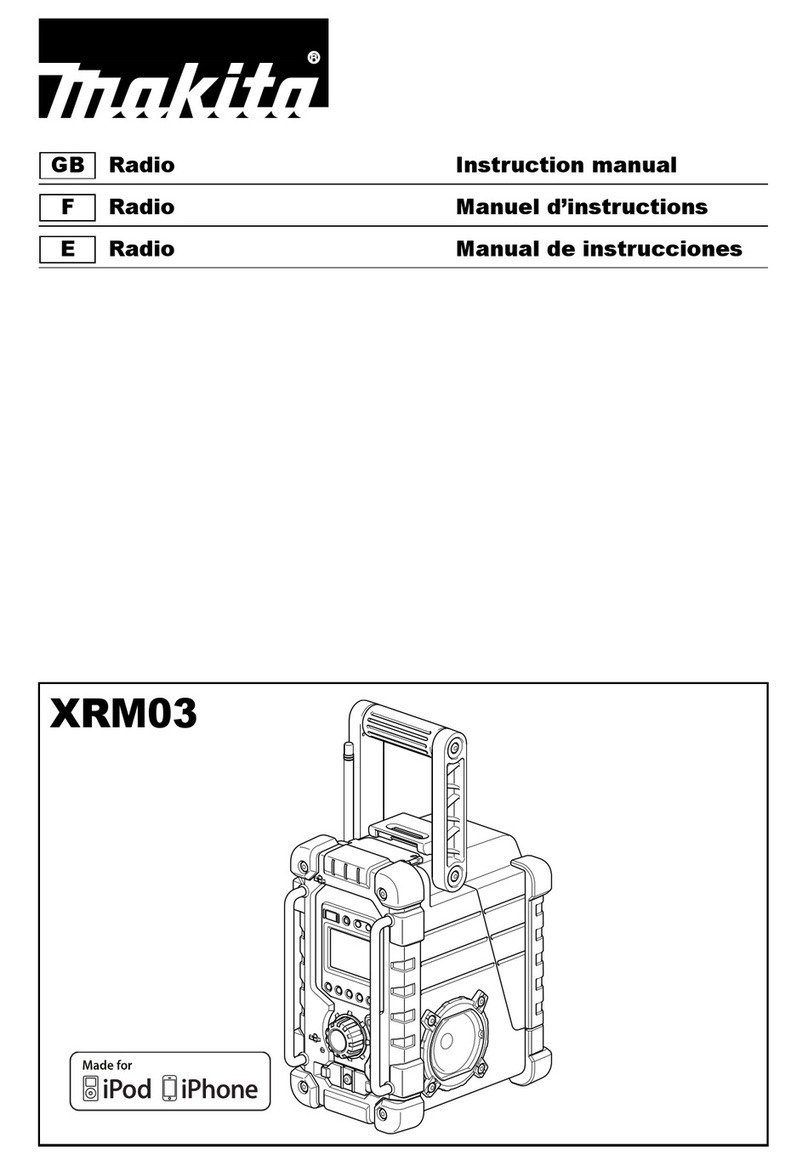
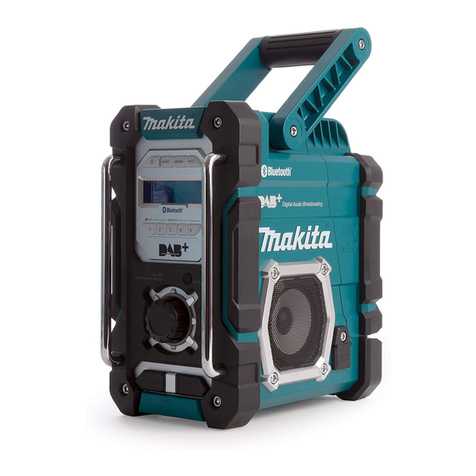
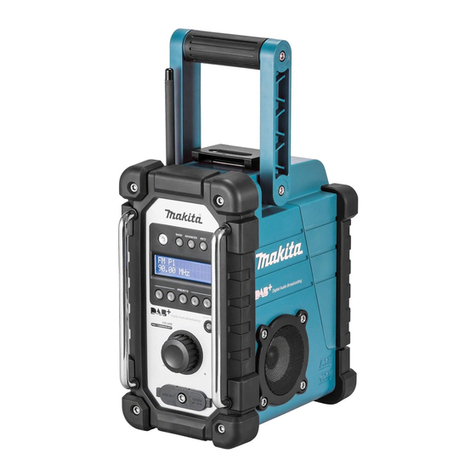
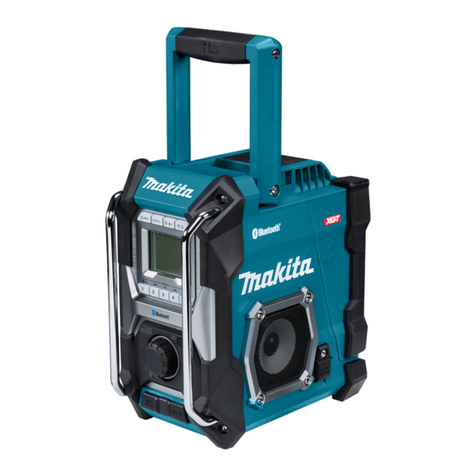
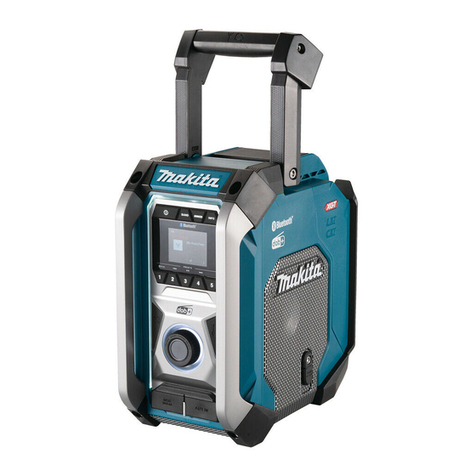
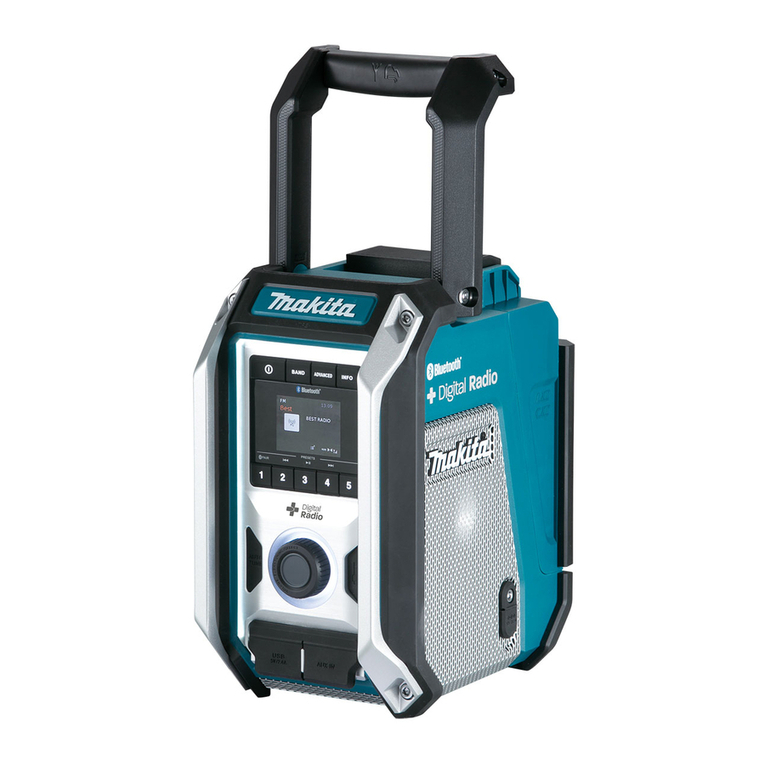
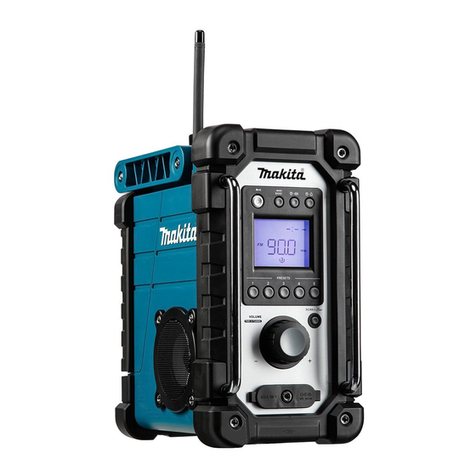
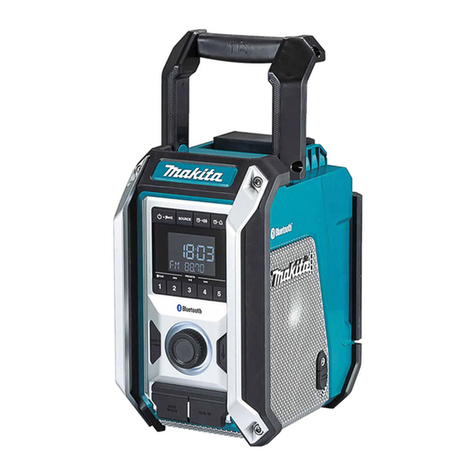
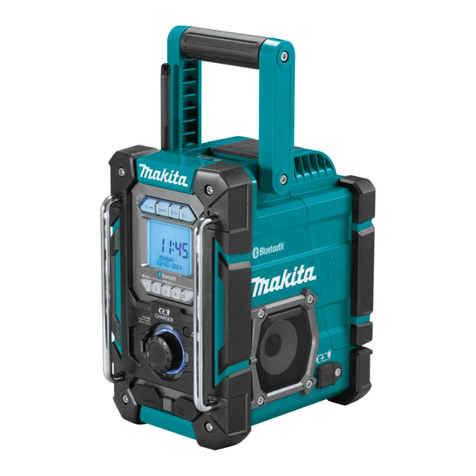
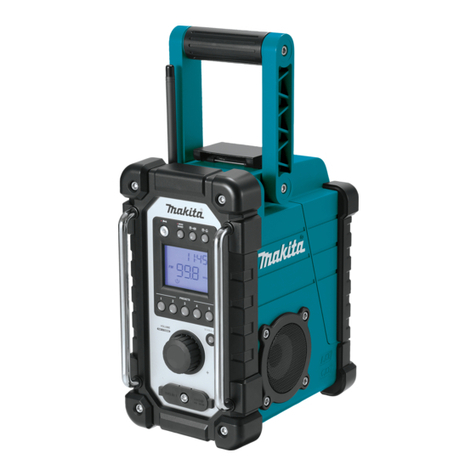
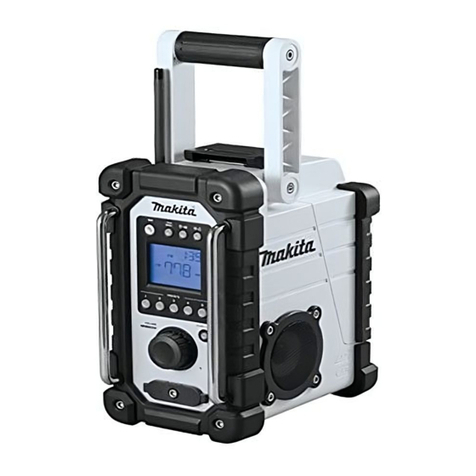
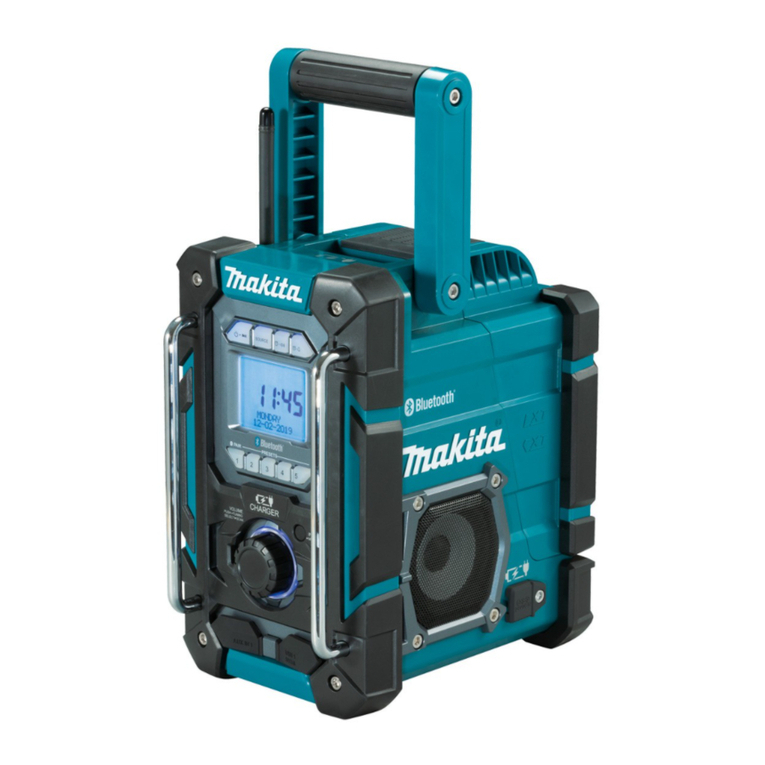
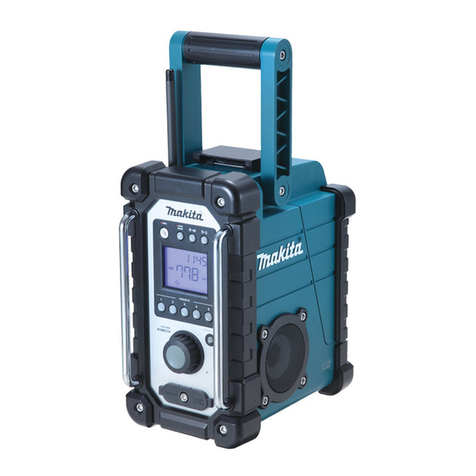
Makita DMR114 User manual

DMR114
EN Job Site Radio Instruction manual 4
SV Arbetsplatsradio Bruksanvisning 14
NO Radio for arbeidssted Instruksjonsmanual 24
FI Työmaaradio Käyttöopas 34
LV Darba vietas radio Instrukciju rokasgrāmata 44
LT Darbo vietos radijas Vartotojo instrukcija 55
ET Töökoha raadio Kasutusjuhend 65
RU Радиоприемник Руководство по
использованию
75
KK Аккумуляторлық радио Пайдалану нұсқаулығы 87

2
1
G
H
I
ABCDE
F
4
6
7
5
2
16
17
12
13
15
3
14
22
20
19
18
21
23
891011
24
24
25
1

3
4
2
3
5
4
2
3
5

4 ENGLISH
ENGLISH
(Original instructions)
EXPLANATION OF GENERAL
VIEW (Fig. 1)
1. Built-in antenna(AM)
2. Handle/Built-in antenna(FM)
3. Battery compartment locker
4. Battery compartment cover (covering battery
cartridge)
5. Speaker
6. DC IN socket
7. Subwoofer
8. Power/Sleep timer button
9. Source button
10. Radio alarm button
11. Buzzer alarm button
12. Preset 3/Play/Pause button
13. Preset 5 button
14. Preset 4/Next track button
15. Volume/Tuning control/Select knob
16. EQ control button
17. AUX IN socket
18. USB power supply port
19. Menu/Info button
20. EQ mode LED indicator
21. Preset 2/Previous track button
22. Preset 1/Bluetooth pairing button
23. LCD display
24. Battery compartment
25. Back up batteries compartment
LCD DISPLAY
A. Radio alarm
B. Buzzer alarm
B. Stereo symbol
D. Low battery indicator
E. Clock
F. Frequency
G. RDS (Radio data system)
H. Sleep timer icon
I. PM for clock
SYMBOLS
The following show the symbols used for the equipment.
Be sure that you understand their meaning before use.
Read instruction manual.
Only for EU countries.
Do not dispose of electric equipment or
battery pack together with household
waste material! In observance of
the European Directives, on Waste
Electric and Electronic Equipment
and Batteries and Accumulators and
Waste Batteries and Accumulators and
their implementation in accordance
with national laws, electric equipment
and batteries and battery pack(s) that
have reached the end their life must be
collected separately and returned to an
environmentally compatible recycling
facility.
IMPORTANT SAFETY
INSTRUCTIONS
WARNING:
When using electric tools, basic safety precautions should
always be followed to reduce the risk of re, electric
shock, and personal injury, including the following:
1. Read this instruction manual and the charger
instruction manual carefully before use.
2. Clean only with dry cloth.
3. Do not install near any heat sources such as
radiators, heat registers, stoves, or other apparatus
(including ampliers) that produce heat.
4. Only use attachments/accessories specied by the
manufacturer.
5. Unplug this apparatus during lighting storms or when
unused for long periods of time.
6. A battery operated radio with integral batteries or a
separate battery pack must be recharged only with
the specied charger for the battery. A charger that
may be suitable for one type of battery may create a
risk of re when used with another battery.
7. Use battery operated radio only with specically
designated battery packs. Use of any other batteries
may create a risk of re.
8. When battery pack is not in use, keep it away from
other metal objects like: paper clips, coins, keys, nails,
screws, or other small metal objects that can make a
connection from one terminal to another. Shorting the
battery terminals together may cause sparks, burns, or
a re.
9. Avoid body contact with grounded surfaces such as
pipes, radiators, ranges and refrigerators. There is an
increased risk of electric shock if your body is grounded.
10. Under abusive conditions, liquid may be ejected from
the battery; avoid contact. If contact accidentally
occurs, ush with water. If liquid contacts eyes,
additionally seek medical help. Liquid ejected from the
battery may cause irritation or burns.

5 ENGLISH
11. Do not use a battery pack or tool that is damaged or
modied. Damaged or modied batteries may exhibit
unpredictable behaviour resulting in re, explosion or
risk of injury.
12. Do not expose a battery pack or tool to re or
excessive temperature. Exposure to re or temperature
above 130 °C(266°F) may cause explosion.
13. Follow all charging instructions and do not charge the
battery pack or tool outside the temperature range
specied in the instructions. Charging improperly
or at temperatures outside the specied range may
damage the battery and increase the risk of re.
14. The MAINS plug is used as the disconnect device,
and it shall remain readily operable.
15. Do not use the product at a high volume for any
extended period. To avoid hearing damage, use the
product at moderate volume level.
16. (For products with LCD display only) LCD displays
include liquid which may cause irritation and
poisoning. If the liquid enters the eyes, mouth or skin,
rinse it with water and call a doctor.
17. Do not expose the product to rain or wet conditions.
Water entering the product will increase the risk of
electric shock.
18. This product is not intended for use by persons
(including children) with reduced physical, sensory
or mental capabilities, or lack of experience and
knowledge, unless they have been given supervision
or instruction concerning use of the product by a
person responsible for their safety. Children should
be supervised to ensure that they do not play with the
product. Store the product out of the reach of children.
SAVE THESE INSTRUCTIONS
SPECIFIC SAFETY RULES
FOR BATTERY CARTRIDGE
1. Before using battery cartridge, read all instructions
and cautionary markings on (1) battery charger, (2)
battery, and (3) product using battery.
2. Do not disassemble battery cartridge.
3. If operating time has become excessively shorter,
stop operating immediately. It may result in a risk of
overheating, possible burns and even an explosion.
4. If electrolyte gets into your eyes, rinse them out with
clear water and seek medical attention right away. It
may result in loss of your eyesight.
5. Do not short the battery cartridge:
(1) Do not touch the terminals with any conductive
material.
(2) Avoid storing battery cartridge in a container with
other metal objects such as nails, coins, etc.
(3) Do not expose battery cartridge to water or
rain. A battery short can cause a large current
ow, overheating, possible burns and even a
breakdown.
6. Do not store the tool and battery cartridge in locations
where the temperature may reach or exceed 50°C
(122°F).
7. Do not incinerate the battery cartridge even if it is
severely damaged or is completely worn out. The
battery cartridge can explode in a re.
8. Be careful not to drop or strike battery.
9. Do not use a damaged battery.
10. To avoid risk, the manual of replaceable the battery should
be read before use. And the max discharging current of the
battery should be greater than or equal to 8A.
11. The contained lithium-ion-batteries are subject to
the Dangerous Goods Legislation requirements. For
commercial transports e.g. by third parties, forwarding
agents, special requirement on packaging and
labeling must be observed.
For preparation of the item being shipped, consulting
an expert for hazardous material is required. Please
also observe possibly more detailed national
regulations.
Tape or mask off open contacts and pack up the
battery in such a manner that it cannot move around
in the packaging.
12. Follow your local regulations relating to disposal of
battery.
13. Use the batteries only with the products specied
by Makita. Installing the batteries to non-compliant
products may result in a re, excessive heat,
explosion, or leak of electrolyte.
CAUTION:
●Danger of explosion if battery is incorrectly
replaced.
●Replace only with the same or equivalent type.
●Only use genuine Makita batteries. Use of non-
genuine Makita batteries, or batteries that have
been altered, may result in the battery bursting
causing res, personal injury and damage. It will
also void the Makita warranty for the Makita tool
and charger.
Tips for maintaining maximum battery life
1. Charge the battery cartridge before completely
discharged. Always stop tool operation and charge
the battery cartridge when you notice less tool power.
2. Never recharge a fully charged battery cartridge.
Overcharging shortens the battery service life.
3. Charge the battery cartridge with room temperature at
10°C - 40°C (50°F - 104°F). Let a hot battery cartridge
cool down before charging it.
4. Charge the battery cartridge if you do not use it for a
long period (more than six months).

6 ENGLISH
OPERATING TIME
* The suitable battery packs for this radio listed as the following table.
* The following table indicates the operating time on a single charge.
Battery capacity
Battery cartridge voltage AT SPEAKERS OUTPUT = 100mW
Unit: Hour (Approximately)
10.8V –
12Vmax 14.4V 18V In Radio or AUX In Bluetooth +USB Charging
1.3 Ah BL1415 3.5 0.7
BL1815 4.0 1.0
1.5 Ah
BL1015
BL1016 6.0 0.8
BL1415N
BL1415NA 4.5 0.9
BL1815N 5.0 1.2
2.0 Ah
BL1020B
BL1021B 8.0 1.0
BL1820
BL1820B 6.5 1.6
3.0 Ah
BL1430
BL1430B
BL1430A
8.0 1.6
BL1830
BL1830B 9.5 2.3
4.0 Ah
BL1040B
BL1041B 16 2.1
BL1440 13 2.5
BL1840
BL1840B 13 3.2
5.0 Ah
BL1450 15 3.0
BL1850
BL1850B 17 4.2
6.0 Ah
BL1460B
BL1460A 17 3.3
BL1860B 21 5.0
WARNING:
Only use the battery cartridges listed above. Use of any other battery cartridges may cause injury and/or re.
NOTE:
●Table regarding to the battery operating time above is for reference.
●The actual operating time may differ with the type of the battery, charging condition, or usage environment.

7 ENGLISH
INSTALLATION AND POWER
SUPPLY
CAUTION:
● Be careful not to pinch your ngers when opening
and closing the battery cover.
●Return the battery compartment locker to the
original position, after installing or removing battery
cartridge. If not, battery cartridge may accidentally
fall out of the radio, causing injury to you or
someone around you.
●Always close and lock the battery compartment
locker before moving the radio.
●Always switch off the radio before installing or
removing the battery cartridge.
●Be careful not to drop or strike the radio. Broken
shell may slash your nger or stab your body.
Damaged radio may exhibit unpredictable behaviour
resulting in re, explosion or risk of injury.
IMPORTANT:
● Reduced power, distortion, “stuttering sound” or when
both low battery indicator and “POWERFAIL” appear
on the display are all the signs that the main battery
pack needs to be replaced.
● When low battery indicator appears and an “EMPTY”
keeps on ashing is the time to replace the back up
batteries.
● The battery cartridge can’t be charged via the supplied
AC power adaptor.
● The battery cartridge is not included as standard
accessories.
Installing or removing slide battery
cartridge (Fig. 4 & 5)
● To install the battery cartridge, align the tongue on the
battery cartridge with the groove in the housing and slip
it into place. Always insert it all the way until it locks in
place with a little click.
● If you can see the red indicator on the upper side of the
button, it is not locked completely. Install it fully until the
red indicator cannot be seen. If not, it may accidentally
fall out of the radio, causing injury to you or someone
around you.
● Do not use force when installing the battery cartridge.
If the cartridge does not slide in easily, it is not being
inserted correctly.
● To remove the battery cartridge, slide it from the radio
while sliding the button on the front of the cartridge.
Indicating the remaining battery capacity
* Only for battery cartridges with “B” at the end of the
model number.
2
1
1. Indicator lamps 2. Check button
Press the check button on the battery cartridge to indicate
the remaining battery capacity. The indicator lamps light
up for few seconds.
●14.4V/18V batteries
Indicator or lamps
Remaining Capacity
Lighted Off Blinking
75% ~ 100%
50% ~ 75%
25% ~ 50%
0% ~ 25%
Charge the battery
The battery may
have malfunctioned
● 10.8V-12V max batteries
Indicator or lamps
Remaining Capacity
Lighted Off Blinking
75% ~ 100%
50% ~ 75%
25% ~ 50%
0% ~ 25%

8 ENGLISH
NOTE:
Depending on the conditions of use and the ambient
temperature, the indication may differ slightly from the
actual capacity.
Back up battery Installation (Fig. 2 & 3)
Keeping back up batteries inside the compartment prevent
stored data in preset memories from being lost.
1. Pull out the battery compartment locker to release
battery compartment. There are main battery pack
compartment and back up battery compartment.
2. Remove back up battery compartment cover and insert
2 fresh UM-3 (AA sizes). Make sure the batteries are
with correct polarity as shown inside the compartment.
Replace the battery cover.
3. After back up batteries are inserted, insert the main
battery pack to power radio.
Using supplied AC power adaptor
Remove the rubber protector and insert the adaptor
plug into the DC socket on the right hand side of the
radio. Plug the adaptor into a standard mains socket
outlet. Whenever the adaptor is used, the battery pack is
automatically disconnected.
CAUTION:
● Always disconnected the AC power adapter
completely before moving the radio. If the AC adapter
is not removed, it may cause an electric shock.
● Never pull and/or drag the cord of the adapter. If
not, the radio may accidentally fall down, causing
injury to you or someone around you.
IMPORTANT:
● The mains adaptor is used as the means of connecting
the radio to the mains supply. The mains socket used
for the radio must remain accessible during normal
use.
● In order to disconnect the radio, the mains adaptor
should be removed from the mains outlet completely.
● Use the AC power adaptor supplied with the product or
specied by Makita only.
● Do not hold the power supply cable and plug by your
mouth. Doing so might cause an electric shock.
● Do not touch the power plug with wet or greasy hands.
● Damaged or entangled cords increase the risk of
electric shock. If the cord is damaged, have it replaced
by our authorized service center in order to avoid a
safety hazard. Do not use it before repair.
● After use, always store AC power adaptor out of the
reach of children. If Children play with the cord, they
may suffer injury.
Note:
When your radio has any interference in AM band by its
adaptor, please move your radio away from its AC power
adaptor over 30 cm.
Charging with USB power supply port
There is the USB port at the front side of the radio. You
can charge USB device trough the USB port.
1. Connect the USB device, such as a MP3, or CD player,
with USB cable available in the market.
2. Press the Power button to switch on your radio.
3. No matter if the radio is AC powered or battery
powered, the radio can charge the USB device when
the radio is switched on and in FM radio mode, or
BT mode, or AUX mode, which is appeared when an
external audio source is connected.
Note:
● You cannot charge USB devices during AM mode
because radio signal reception becomes extremely
poor when charging USB device.
● The maximum volume of the output power speaker will
decrease when your USB is charging.
● The USB socket can provide max 5V/2.4A of electrical
current.
IMPORTANT:
● Before connecting USB device to the charger, always
backup your data of USB device. Otherwise your data
may lose by any possibility.
● The charger may not supply power to some USB
devices.
● When not using or after charging, remove the USB
cable and close the cover.
● Do not connect power source to USB port. Otherwise
there is risk of re. The USB port is only intended for
charging lower voltage device. Always place the cover
onto the USB port when not charging the lower voltage
device.
● Do not insert a nail, wire, etc. into USB power supply
port. Otherwise a circuit short may cause smoke and
re.
● Do not connect this USB socket with your PC USB port,
as it is highly possible that it may cause breakdown of
the units.
LISTENING TO THE RADIO
Scan tuning AM/ FM
Note:
The FM antenna is built into the handle. When operating the
radio, please straighten the handle properly above the radio
to get better reception. For the AM band, rotate the radio to
get best signal as the AM antenna is built into the radio.
1. Press the Power button to switch on your radio.
2. Press the Source button to select AM or FM radio mode.
3. Press and hold the Tuning control knob to carry out an
auto-tune. Your radio will scan up the AM/FM band from
the currently displayed frequency and will stop scanning
automatically when it nds a station of sufcient strength.

9 ENGLISH
4. After a few seconds the display will update. The display
will show the frequency of the signal found.
5. To nd other station, press and hold the Tuning control
knob as before.
6. When the end of the waveband is reached your radio
will recommence tuning from the opposite end of the
waveband.
7. Rotate the Tuning control knob to adjust the sound
level as required.
Note:
● While adjusting the volume, make sure the FM/AM is
NOT ashing on the screen.
● If AM/FM is ashing on the screen, it allows you to
tune the stations manually (see the section of “Manual
tuning – AM/FM” for more detail).
● The volume should not be too large. To prevent
possible hearing damage, do not listen at high
volume levels for long periods.
8. To switch off your radio press the Power button.
Manual tuning – AM/FM
1. Press the Power button to switch on your radio.
2. Press the Source button to select AM or FM radio
mode.
3. Press the Tuning control knob and you will see the FM
or AM is ashing on the display.
Note:
● FM/AM will ash approx. 10 seconds. Within this
period, only manual tuning is allowed.
● If volume adjustment is desired while FM/AM is
ashing, press the Tuning control knob to stop the
ash and you can rotate the Tuning control knob to
adjust sound level.
4. Rotate the Tuning control knob to tune to a station.
5. When the end of the waveband is reached your radio
will recommence tuning from the opposite end of the
waveband.
6. Rotate the Tuning control knob to adjust the sound
level as required.
Presetting stations in AM/FM mode
There are 5 preset stations each for AM and FM radio.
They are used in the same way for each waveband.
1. Press the Power button to switch on your radio.
2. Press the Source button to select the desired
waveband. Tune to the required radio station as
previously described.
3. Press and hold the required Preset button (1 to 5) until
the display shows “P4” for example after the frequency.
The station will be stored using the preset number.
Repeat this procedure for the remaining presets as you
wish.
4. Preset stations which have already been stored may be
overwritten by following the above procedure if required.
Display modes – FM
Your radio has a range of display options for FM radio
mode.
Repeatedly press the Menu/Info button to view the RDS
information of the station you are listening to.
a. Station name Displays the name of the station being
listened to.
b. Program type Displays the type of station being
listened to such as Pop, Classic,
News, etc.
c. Radio text Displays radio text message such as
new items etc.
d. Year/Day Displays the year and day of the week
according to the date setting of your
radio.
e. Date/Day Displays the date and day of the week
according to the date setting of your
radio.
f. EQ mode Displays the EQ mode of the FM for
the station listened to.
g. Frequency Displays the frequency of the FM for
the station listened to.
FM stereo (auto)/mono
If the FM radio station being listened to has a weak signal
some hiss may be audible. It is possible to reduce this
hiss by forcing the radio to play the station in mono rather
than stereo.
1. Press the Source button as needed to select the FM
band and tune to the desired FM station as previously
stated.
2. Press and hold Menu/Info button to enter the menu
setting.
3. Rotate the Tuning control knob until the “FM AUTO (or
MONO)” setting shows on the display. If the setting is
Auto, press the Tuning control knob and then rotate the
Tuning control knob to switch to Mono mode to reduce
the hiss. Press the Tuning control knob to select the
option.
Recalling a preset in AM/FM mode
1. Press the Power button to switch on your radio.
2. Press the Source button to select AM or FM radio
mode
3. Momentarily press the required Preset button to tune
to your radio to one of the stations stored in the preset
memory.

10 ENGLISH
MISCELLANEOUS SETTINGS
Setting the time and date format
The clock display used in stand-by mode and on the
playing mode screens can be set to different format. The
selected format is then also used when setting the alarms.
1. Press and hold the Menu/Info button to enter the menu
setting.
2. Rotate the Tuning control knob until “CLOCK xxH”
appears on the display and press the Tuning control
knob to enter the setting. You will see the time format
begins to ash.
3. Rotate the Tuning control knob to select either 12 or 24
hour format. Press the Tuning control knob to conrm
your choice of clock format.
Note:
If the 12 hour clock format is chosen, the radio will
then use the 12 hour clock for the setting.
4. Press and hold the Menu/Info button to enter the menu
setting.
5. Rotate the Tuning control knob until a date (e.g. THU
APR 3) appears on the display and press the Tuning
control knob to enter the setting. You will see the date
format begins to ash.
6. Rotate the Tuning control knob to select the desired
date format. Press the Tuning control knob to conrm
your choice.
Setting the clock time and date
1. Press and hold the Menu/Info button.
2. Rotate the Tuning control knob until “CLOCK ADJ”
appears on the display. Press the Tuning control knob
to enter the setting.
3. The hour setting on the display will begin ashing.
Rotate the Tuning control knob to select the desired
hour, and press the Tuning control knob to conrm the
setting. Then rotate the Tuning control knob to select
the desired minute, and press the Tuning control knob
to conrm the setting.
4. Rotate the Tuning control knob until “DATE ADJ”
appears on the display. Press the Tuning control knob
to enter the setting.
5. Rotate the Tuning control knob to select the desired
year and press the Tuning control knob to conrm the
setting. Then rotate the Tuning control knob to select
the desired month, and press the Tuning control knob
to conrm the setting. Then rotate the Tuning control
knob to select the desired day and press the Tuning
control knob to conrm the setting.
Radio Data System (RDS)
When you set the clock time using the RDS function, your
radio will synchronize its clock time whenever it tunes to a
radio station using RDS with CT signals.
1. When tuning to a station transmitting RDS data, the
RDS symbol will be shown on the display. Press and
hold the Menu/Info button.
2. Rotate the Tuning control knob until “RDS CT” and a
clock symbol appear on the display. Press the Tuning
control knob to enter the setting.
3. Rotate the Tuning control knob until “RDS CT” appears
on the display. Press the Tuning control knob to conrm
the setting. The clock time of the radio will set up
automatically according to the RDS data received.
Note:
● The radio clock time will be valid for 5 days each time
the radio time is synchronized with RDS CT.
● To disable the RDS CT function, go back to step 1 to
2 and then rotate the Tuning control knob to select
“MANUAL” option. Press the Tuning control knob to
conrm the setting.
Setting the alarm clock
Your radio has two alarms which can each be set to wake
you to AM/FM radio or buzzer alarm. The alarms may be
set while the unit is in standby mode or while playing.
Note:
Ensure that the time is set correctly before setting the
alarms. If no buttons are pressed for 10 seconds, the
radio will exit the alarm setup.
a. Setting radio alarm time:
1. The radio can be set either when radio is on or off.
2. Press and hold the radio alarm button, the radio alarm
symbol and the display hour will ash along with a beep.
3. During radio alarm symbol ashes, rotate Tuning
control knob to select the hour and press Tuning
control knob again to conrm hour setting. Then rotate
the Tuning control knob to select the minute and press
Tuning control knob to conrm minute setting.
4. Rotate the Tuning control knob and the display will
show the frequency options for the alarm.
The alarm options are as follows:
ONCE – the alarm will sound once
DAILY – the alarm will sound everyday
WEEKDAY – the alarm will sound only on weekdays
WEEKEND – the alarm will sound only at weekends
Press the Tuning control knob to conrm the setting.
5. During radio alarm symbol is ashing, rotate Tuning
control knob to select desired wake-up band and station,
then press Tuning control knob to conrm the selection.
6. Rotate Tuning control knob to select the desired
volume and press Tuning control knob to conrm the
volume. Radio alarm setting is now completed.

11 ENGLISH
Note:
● If new radio alarm station is not selected, it will select
the last alarm station.
● If the selected AM/FM alarm station is not available
when the alarm is sounding, the buzzer alarm will be
used instead.
b. Setting HWS (Humane Wake System) buzzer alarm:
A beep tone will activate when selecting the HWS buzzer
alarm.
The alarm beep will sound shorter every 15 seconds
for one minute followed by one minute silence before
repeating the cycle.
1. The buzzer alarm can be set either when the radio is
on or off.
2. Press and hold the buzzer alarm button, the symbol
and the display hour will ash along with a beep.
3. During buzzer alarm symbol ashes, rotate the Tuning
control knob to select the hour and press the Tuning
control knob again to conrm hour setting. Then rotate
the Tuning control knob to select the minute and press
Tuning control knob to conrm minute setting.
4. Rotate the Tuning control knob and the display will
show the frequency options for the alarm.
The alarm options are as follows:
ONCE – the alarm will sound once
DAILY – the alarm will sound everyday
WEEKDAY – the alarm will sound only on weekdays
WEEKEND – the alarm will sound only at weekends.
Press the Tuning control knob to conrm the setting.
Note:
There is no volume adjustment for buzzer alarm.
Stopping the alarm sound
To cancel a sounding alarm, press the Power button.
Disable the alarm setting
To disable the alarm setting before the alarm sounds,
press and hold the corresponding alarm button until alarm
symbol disappears on the display.
Snooze
1. When the alarm sounds, press any button other than
the Power button will silence the alarm for 5 minutes.
“SNOOZE” will appear on the display.
2. To adjust the silence time for the snooze timer, press
and hold the Menu/Info button to enter the menu
setting.
3. Rotate the Tuning control knob until “SNOOZE X”
appears on the display, then press the Tuning control
knob to enter the setting. Rotate the Tuning control
knob to adjust the silence time from 5, 10, 15 and 20
minutes for the snooze timer.
4. To cancel the snooze timer while the alarm is
suspended, press the Power button.
Sleep timer
Your radio can be set to turn off automatically after a
preset time has elapsed. The Sleep Timer setting can be
adjusted between 60, 45, 30, 15, 120 and 90 minutes.
1. Press and hold the Power button to enter the Sleep
Timer setting. “SLEEP XX” will show on the display.
2. Keep holding the Power button and the Sleep Timer
options will start switching on the display. Stop until the
desired Sleep Timer setting appears on the display.
The setting will be saved and the LCD will return to
normal display.
3. Your radio will switch off automatically after the preset
Sleep Timer has elapsed. The Sleep Timer icon will be
shown on the display indicating an active Sleep Timer.
4. To cancel the Sleep Timer function before the preset
time has elapsed, simply press the Power button to
turn the unit off manually.
Loudness
You can get compensation on lower and higher frequency
for your radio by adjusting the loudness function.
1. Press and hold the Menu/Info button to enter the menu
setting.
2. Rotate the Tuning control knob until “LOUD ON” or
“LOUD OFF” appears on the display. Press the Tuning
control knob to enter the setting.
3. Rotate the Tuning control knob to choose ON to turn
on the loudness function, then press the Tuning control
knob to conrm the setting.
4. To turn off the loudness function, select OFF and press
the Tuning control knob to conrm the setting.
Equalizer function
There are 7 kinds of color LED indicators around the
Tuning control knob to indicate different EQ modes.
1. Press the Power button to switch on your radio.
2. Press the EQ control button to enter the EQ setting
menu.
3. Rotate the Tuning control knob to select your required
mode. Then press the Tuning control knob to conrm
the selection.
EQ mode LED indicator
FLAT White
JAZZ Blue
ROCK Red
CLASSIC Brown
POP Pink
NEWS Yellow
MY EQ Green

12 ENGLISH
Set up My EQ prole
1. Press the EQ control button to enter the EQ setting menu.
2. Rotate the Tuning control knob to select "MY EQ".
Then press the Tuning control knob to enter the “BASS”
setting.
3. Rotate the Tuning control knob to select your required
bass level. Press the Tuning control knob to enter the
“MIDDLE” setting.
4. Rotate the Tuning control knob to select your required
middle level. Press the Tuning control knob to enter the
“TREBLE” setting.
5. Rotate the Tuning control knob to select your required
treble level. Press the Tuning control knob to conrm
the setting.
Note:
● When using the equalizer to emphasize the bass and
listening at high volume levels, it may cause sound
cracking and distortion. In this case, adjust the radio
volume appropriately.
LISTENING TO MUSIC VIA
BLUETOOTH STREAMING
You need to pair your Bluetooth device with the radio
before you can auto-link to play/stream Bluetooth music
through the radio. Pairing creates a ‘bond' so two devices
can recognize each other.
Note:
● To have the better sound quality, we recommend
setting the volume to more than two-thirds level on your
Bluetooth device and then adjust the volume on the
radio as required.
● The radio can memorize up to 8 sets of paired device,
when the memory exceed this amount, the oldest
pairing history will be over written.
Pairing your Bluetooth device for
the rst time
1. Press the Power button to turn on the radio. Press the
Source button to select Bluetooth mode. The display
will appear “BT PAIR” and “PAIR” will ash on the
display.
2. Activate Bluetooth on your device according to the
device's user manual to link to the radio. Locate the
Bluetooth device list and select the device named
‘DMR114’ (With some mobiles which are equipped with
earlier versions than BT2.1 Bluetooth device, you may
need to input the pass code “0000”).
3. Once connected, there will be a conrmation tone
sound. “BLUETOOTH” will remain on the display and
the backlight will be dim-out in10 seconds. You can
simply select and play any music from your source
device. Volume control can be adjusted from your
source device, or directly from the radio.
4. Use the controls on your Bluetooth-enabled device or
on the radio to play/pause and navigate tracks.
Note:
● If 2 Bluetooth devices, pairing for the rst time, both
search for the radio, it will show its availability on both
devices. However, if one device links with this unit rst,
then the other Bluetooth device won't nd it on the list.
● If your Bluetooth device is temporarily disconnected to
the radio, then you need to manually reconnect your
device again to the radio.
● If ‘DMR114’ shows in your Bluetooth device list but your
device cannot connect with it, please delete the item
from your list and pair the device with the radio again
following the steps described previously.
● Optimum Bluetooth streaming range is roughly 10
meters (30 feet) (line of sight) to the radio but distance
up to 30 meters (100 feet) are possible.
● If Bluetooth connection is lost due to exceeding time of
separation, exceeding the optimum distance, obstacles
or otherwise, reconnecting your device with the radio
may be necessary.
● Physical obstacles, other wireless devices or
electromagnetic devices may affect the connection
quality.
● Bluetooth connectivity performance may vary
depending on the connected Bluetooth devices.
Please refer to the Bluetooth capabilities of your device
before connecting to the radio. All features may not be
supported on some paired Bluetooth devices.
Playing audio les in Bluetooth mode
When you have successfully connected the radio with the
chosen Bluetooth device you can start to play your music
using the controls on your connected Bluetooth device.
1. Once playing has started adjust the volume to the
required setting using the Volume knob on the radio or
on your enabled Bluetooth device.
2. Use the controls on your Bluetooth source device to
play/pause and navigate tracks. Alternatively, control
the playback using Play/Pause, Next track, Previous
track buttons on your radio.
3. Press and hold the Next track or Previous track button
to move through the current track. Release the button
when the desired point is reached.
Note:
● Some player applications or devices may not respond
to all of these controls.
● Some mobile phones may temporarily disconnect
from the radio when you make or receive calls. Some
devices may temporarily mute their Bluetooth audio
streaming when they receive text messages, emails or
for other reasons unrelated to audio streaming. Such
behaviour is a function of the connected device and
does not indicate a fault with the radio.

13 ENGLISH
Playing a previously-paired Bluetooth
source device
If your Bluetooth device already paired with the radio
previously, the unit will memorize your Bluetooth device
and it attempts to reconnect with a device in memory
which is last connected. If the last connected device is not
available, the radio will be discoverable.
Disconnecting your Bluetooth device
Press and hold the Bluetooth pairing button for 2-3
seconds until “BT PAIR” is shown on the display or turn
off Bluetooth on your Bluetooth device to disable the
connection.
You can also press the Source button to select any mode
other than Bluetooth mode to disable the connection.
Deleting Bluetooth paired device memory
To clear the memory of all paired devices, press and hold
the Bluetooth pairing button more than 5 seconds until
“CLEARING” shows on the display.
AUXILIARY INPUT SOCKET
A 3.5mm Auxiliary input socket is provided at the front
of your radio to permit an audio signal to be fed into the
unit from an external audio device such as a MP3 or CD
player.
1. Connect an external audio source (for example, MP3
or CD player) to the AUX IN socket.
2. Press the Power button to switch on your radio.
3. Repeatedly press and release the Source button until
“AUX IN” is displayed.
4. To have the better sound quality, we recommend
setting the volume to more than two-thirds level on your
audio device and then adjust the volume on the radio
as required.
Note:
Audio cord is not included as standard accessories.
MAINTENANCE
CAUTION:
●Never use gasoline, benzine, thinner, alcohol or the
like. Discoloration, deformation or cracks may result.
●Do not wash the radio with water.
SPECIFICATIONS
Power requirements
AC power adaptor DC 12V 2.5A, center pin
positive
Battery UM-3 (AA size) x2 for back up
Slide battery: 10.8V - 18V
Frequency coverage
FM 87.50 - 108 MHz
(0.05MHz/step)
AM(MW)522-1,710 kHz
(9 kHz/step)
Bluetooth®
(The Bluetooth®word mark and logos are registered
trademarks owned by Bluetooth SIG, Inc.)
Bluetooth version 5.0 Certied
Bluetooth Proles A2DP / SCMS-T / AVRCP
Transmission Power Power Class2
Transmisson Range
Optimum:
Max.10 meters (33 feet)
Possible:
Max.30 meters (100 feet)
(varies according to usage
conditions)
Supported codec SBC
Compatible Bluetooth
prole A2DP / AVRCP
Maximum radio-
frequency power BT EDR: 3.91dBm
Operating Frequency 2402MHz~2480MHz
Circuit feature
Loudspeaker 2.5 inches 8 ohm x2
4 inches 6 ohm x1
Output power
10.8V-12V max: 2W X2 +10W
14.4V: 3W X2 +15W
18V: 5W X2 + 25W
Input terminal 3.5 mm dia. (AUX IN)
Antenna system FM: Built-in antenna
AM: bar antenna
Dimensions(L x W x H) 268 x 164 x 295 mm
Weight 4.9 KG (without battery)

14 SVENSKA
SVENSKA
(Originalanvisningar)
Beskrivning av översiktsbild
(Fig. 1)
1. Inbyggd antenn (AM)
2. Handtag/Inbyggd antenn (FM)
3. Batterifack
4. Batterifackets lock (täcker batterikassetten)
5. Högtalare
6. DC IN-uttag
7. Subwoofer
8. Ström/Vilolägestimer knappen
9. Källknapp
10. Radio alarm knapp
11. Buzzer alarm knapp
12. Förinställning 3/Spela upp/Paus-knapp
13. Förinställning 5 knapp
14. Förinställning 4/ Nästa låt knapp
15. Volym/Tuning kontroll/Välj vred
16. EQ-kontrollknapp
17. AUX IN-uttag
18. USB-strömförsörjningsport
19. Meny/Info knapp
20. EQ-läge LED-indikator
21. Förinställning 2/Föregående låt knapp
22. Förinställning 1/Bluetooth parningsknapp
23. LCD skärm
24. Batterifack
25. Backup batterifack
LCD SKÄRM
A. Radio alarm
B. Buzzer alarm
C. Stereo symbol
D. Indikator för låg batterinivå
E. Klocka
F. Frekvens
G. RDS (Radio data system)
H. Vilolägestimer ikon
I. FM för klocka
SYMBOLER
Följande symboler används på utrustningen. Se till att du
förstår innebörden av dem innan du använder apparaten.
Läs bruksanvisningen.
Gäller endast EU-länder.
Elektrisk utrustning eller batteripaket får
inte kastas i hushållssoporna! Enligt EU-
direktiven som avser förbrukad elektrisk
och elektronisk utrustning, batterier,
ackumulatorer, förbrukade batterier och
ackumulatorer, samt direktivens tillämpning
enligt nationell lagstiftning, ska uttjänt
elektrisk utrustning, batterier och batteripaket
sorteras separat och lämnas till miljövänlig
återvinning.lly compatible recycling facility.
VIKTIGA
SÄKERHETSANVISNINGAR
VARNING:
Vid användning av elektriska apparater ska grundläggande
säkerhetsåtgärder alltid följas för att minska risken för
brand, elektriska stötar och personskador, inklusive
följande.
1. Läs denna bruksanvisning och laddarens bruksanvisning
noggrant före användning.
2. Rengör endast med torr trasa.
3. Installera inte nära värmekällor såsom värmeelement,
värmespjäll, spisar eller andra apparater (inklusive
förstärkare) som alstrar värme.
4. Använd endast tillsatser/tillbehör specicerade av
tillverkaren.
5. Dra ur apparatens sladd vid åska eller när apparaten
inte används under en längre tid.
6. En batteridriven radion med integrerade batterier eller
ett separat batteri får endast laddas med angiven
laddare för batteriet. En laddare som lämpar sig för
en typ av batteri kan orsaka brand om den används
tillsammans med en annan typ av batteri.
7. Använd endast särskilt avsedda batterier i den
batteridrivna radion. Om andra batterier används kan
risk för brand uppstå.
8. När batteripaketet inte används, håll det borta från
andra metallföremål såsom: pappersklämmor, mynt,
nycklar, spikar, skruvar, eller andra små metallföremål
som kan skapa kontakt från den ena polen till den
andra. Kortslutning av batteripoolerna kan orsaka
gnistor, brännskador eller brand.
9. Undvik kroppskontakt med jordade ytor som till
exempel rör, element, spisar och kylskåp. Det nns en
ökad risk för elektriska stötar om din kropp är jordad.
10. Under hårda förhållande kan det komma vätska
ur batteriet. Undvik kontakt. Spola med vatten om
kontakt ändå råkar uppstå. Om du får vätska i ögonen
ska läkare uppsökas omedelbart. Vätska från batteriet
kan orsaka hudirritation eller ge brännskador.
11. Använd inte ett batteripaket eller verktyg som är
skadat eller modierat. Skadade eller modierade
batterier kan uppvisa oförutsägbart beteende som
leder till brand, explosion eller risk för skada.

15 SVENSKA
12. Utsätt inte ett batteri eller ett verktyg för eld eller hög
temperatur. Exponering för brand eller temperatur
över 130 °C(266°F) kan orsaka explosion.
13. Följ alla laddningsanvisningar och ladda inte batteriet
eller verktyget utanför det temperaturområde som
anges i anvisningarna. Om du laddar felaktigt eller
vid temperaturer utanför det angivna området kan det
skada batteriet och öka risken för brand.
14. Stickproppen används som frånkopplingsanordning
och den skall vara lätt åtkomlig
15. Använd inte produkten vid hög volym under längre
perioder. För att undvika hörselskador, använd
produkten vid måttlig volymnivå
16. (Endast för produkter med LCD-skärm) LCD-
skärmarna innehåller vätska som kan orsaka irritation
och förgiftning. Om vätskan kommer in i ögonen,
munnen eller på huden, skölj med vatten och kontakta
läkare
17. Utsätt inte produkten för regn eller väta. Vatten som
kommer in i produkten ökar risken för elektriska stötar
18. Denna produkt är inte avsedd att användas av
personer (inklusive barn) med nedsatt fysisk,
sensorisk eller mental förmåga, eller brist på
erfarenhet och kunskap, såvida de inte har fått tillsyn
eller instruktioner om användningen av produkten
av en person som ansvarar för deras säkerhet. Barn
bör övervakas för att säkerställa att de inte leker med
produkten. Förvara produkten utom räckhåll för barn.
SPARA DESSA ANVISNINGAR.
SPECIFIKA
SÄKERHETSANVISNINGAR
FÖR BATTERIKASSETT
1. Läs anvisningarna och varningarna noga på (1)
batteriladdaren, (2) batteriet och (3) produkten som
använder batteriet innan användning av batterikassetten.
2. Ta inte isär batterikassetten.
3. Om drifttiden blir ovanligt kort, upphör då med
användningen. Det kan annars resultera i
överhettning, eventuella brännskador och explosion.
4. Om du får elektrolyt i ögonen skölj då noga med rent
vatten och uppsök omedelbart läkare. Det kan annars
resultera i förlorad syn.
5. Kortslut inte batterikassetten:
(1) Rör inte plintarna med något ledande material.
(2) Undvik att förvara batterikasseten i en behållare
med andra metallföremål så som spikar, mynt etc.
(3) Utsätt inte batteriet för vatten eller regn. En
batterikortslutning kan orsaka ett stort strömöde,
överhettning, eventuella brännskador och
maskinhaveri.
6. Förvara inte redskapet eller batterikassetten på en
plats där temperaturen kan nå eller överstiger 50°C
(122°F).
7. Elda inte upp batterikassetten även om den är
väldigt skadad eller helt utsliten. Batterikassetten kan
explodera vid brand.
8. Var försiktig så att du inte råkar tappa eller slå till
batteriet.
9. Använd inte ett skadat batteri.
10. För att undvika risker ska man i förväg läsa
handboken för det utbytbara batteriet. Och batteriets
maximala urladdningsström ska vara minst 8 A.
11. De inbyggda litiumjonbatterierna omfattas av
kraven på farligt godslagstiftning. För kommersiella
transporter, t.ex. av tredje part, speditörer, så måste
särskilda krav på förpackning och märkning följas.
För att förbereda produkten som skickas, krävs en
expert på farligt material. Observera också eventuellt
mer detaljerade nationella bestämmelser. Tejpa eller
täck över öppna kontakter och packa batteriet på ett
sådant sätt att det inte kan röra sig i förpackningen.
12. Följ de lokala föreskrifterna om bortskaffande av
batterier.
13. Använd endast batterierna med de produkter som
anges av Makita. Installation av batterierna till
produkter som inte uppfyller kraven kan leda till brand,
överhettning, explosion eller elektrolytläckage..
FÖRSIKTIGHET:
●Batteriet kan explodera om det är felaktigt isatt.
●Byt endast ut det mot ett nytt av motsvarande typ.
●Använd endast äkta Makita-batterier. Användning
av icke-äkta Makita-batterier eller batterier som har
modieras kan leda till att batteriet spricker, vilket
kan orsakar bränder, personskador och andra
skador. Det kommer också att upphäva Makita-
garantin för Makita-verktyget och laddaren.
Tips för att upprätthålla maximal batteritid
1. Ladda batterikassetten innan den är helt urladdad.
Stoppa alltid verktygsdrift och ladda batterikassetten
när du märker mindre verktygström.
2. Ladda aldrig en fulladdad batterikassett. Överladdning
förkortar batteriets livslängd.
3. Ladda batteripatronen vid rumstemperatur 10 ° C - 40
° C (50 ° F - 104 ° F). Låt en varm batterikassett svalna
innan du laddar den.
4. Ladda batterikassetten om du inte tänker använda den
under en längre period (mer än sex månader).

16 SVENSKA
DRIFTSTID
* De lämpliga batterierna för denna radio listas i följande tabell.
* Nedanstående tabell visar drifttid från en uppladdning.
Batterikapacitet
Batterikassettens spänning AT HÖGTALAREFFEKT = 100mW
Enhet: Timmar (Cirka)
10.8V – Max.
12V 14.4V 18V I radion eller AUX Bluetooth +USB laddning
1.3 Ah BL1415 3.5 0.7
BL1815 4.0 1.0
1.5 Ah
BL1015
BL1016 6.0 0.8
BL1415N
BL1415NA 4.5 0.9
BL1815N 5.0 1.2
2.0 Ah
BL1020B
BL1021B 8.0 1.0
BL1820
BL1820B 6.5 1.6
3.0 Ah
BL1430
BL1430B
BL1430A
8.0 1.6
BL1830
BL1830B 9.5 2.3
4.0 Ah
BL1040B
BL1041B 16 2.1
BL1440 13 2.5
BL1840
BL1840B 13 3.2
5.0 Ah
BL1450 15 3.0
BL1850
BL1850B 17 4.2
6.0 Ah
BL1460B
BL1460A 17 3.3
BL1860B 21 5.0
VARNING:
Använd endast batterierna som anges ovan. Användning av andra batterikassetter kan orsaka skada och/eller
brand
Obs!
●Tabellen angående batteridriftstiden ovan är som referens.
●Den verkliga driftstiden kan skilja sig från batterityp, laddningstillstånd eller användarmiljö.

17 SVENSKA
INSTALLATION OCH
STRÖMFÖRSÖRJNING
VARNING:
● Var försiktig så att du inte klämmer ngrarna när du
öppnar och stänger batteriluckan.
● Sätt tillbaka batterifacket till originalpositionen,
efter att du har installerat eller tagit bort
batterikassetten. Om inte, kan batterikassetten av
misstag falla ut ur radion och orsaka skada på dig
eller någon omkring dig.
● Stäng alltid och lås batterifacket innan du yttar
radion.
● Stäng alltid av radion innan du installerar eller tar
bort batteripaketet.
● Var noga med att inte tappa eller slå på radion. En
skadad kåpa kan skära upp ngret eller sticka in i
din kropp. Skadad radio kan uppvisa oförutsägbart
beteende som kan leda till brand, explosion eller risk
för andra skador.
VIKTIGT:
● Minskad effekt, förvrängning, stammandeljud eller
när både batterinivåindikatorerna och "POWERFAIL"
visas på displayen är alla tecken på att huvudbatteriet
behöver bytas ut.
● När indikatorn för låg batterinivå visas och "EMPTY"
blinkar, är det dags att byta ut backup batterierna.
● Batterikassetten kan inte laddas via den medföljande
nätadaptern.
● Batterikassetten ingår inte som standardtillbehör.
Installation och avlägsnande av
glidbatterikassett (Fig. 4 & 5)
● Installera batterikassetten genom att rikta in tungan på
batterikassetten mot spåret i höljet och skjut den på
plats. Tryck alltid in batterikassetten ordentligt tills den
låser fast med ett klick.
● Om du kan se den röda indikatorn på knappens
ovansida är den inte ordentligt låst. För in den helt tills
den röda indikatorn inte längre syns. I annat fall kan
den oväntat falla ur radion och skada dig eller någon
annan.
● Ta inte i för hårt när du sätter i batterikassetten. Om
kassetten inte lätt glider på plats är den felaktigt införd.
● För att ta bort batterikassetten, skjut den från radion
medan du trycker på knappen på kassettens framsida.
Indikerar återstående batterikapacitet
* Endast för batterikassetter med “B” i slutet av
modellnumret.
2
1
1. Indikatorlampor 2. Kontrollera knapp
Tryck på kontrollknappen på batterikassetten för att
indikera återstående batterikapacitet. Indikatorlamporna
lyser upp några sekunder.
● 14.4V/18V batterier
Indikatorlampor
Återstående
kapacitet
Tänd Av Blinkar
75% ~ 100%
50% ~ 75%
25% ~ 50%
0% ~ 25%
Ladda batteriet
Batteriet kan ha
skadats
● ●10.8V-12V max batterier
Indikatorlampor
Återstående
kapacitet
Tänd Av Blinkar
75% ~ 100%
50% ~ 75%
25% ~ 50%
0% ~ 25%

18 SVENSKA
NOTERA:
Beroende på användningsförhållanden och
omgivningstemperaturen, kan indikationen skilja sig något
från den faktiska kapaciteten.
Backup batteri installation (Fig. 2 & 3)
Förvara backup batterierna i facket förhindrar att data som
lagras i förinställningsminnet från att gå förlorad.
1. Dra ut batterifacklåset för att lossa batterifacket. Det
nns ett huvudbatterifack och ett backup batterifack.
2. Ta bort backup batteriluckans lock och sätt i 2 färska
UM-3 (AA-storlekar). Se till att batterierna har rätt
polaritet, som visas i facket. Sätt tillbaka batteriluckan.
3. När du har satt tillbaka backup batterierna sätter du in
huvudbatteriet för att driva radion.
Användning av medföljande AC – adapter
Ta bort gummiskyddet och sätt in adapterkontakten i DC-
uttaget på höger sida av radio. Anslut adaptern till ett
vanligt vägguttag. När adaptern används, frånkopplas
batteriet automatiskt.
VIKTIGT:
● Koppla alltid ur nätadaptern helt innan du yttar
radion. Om nätadaptern inte är borttagen kan den
orsaka en elektrisk chock.
● Dra aldrig eller släpa radion med adaptorsladden.
Om inte, kan radion av misstag ramla ner och
orsaka skada på dig eller någon omkring dig.
VIKTIGT:
● Nätadaptorn används för att ansluta radion till elnätet.
Stickkontakten som används för radion måste förbli
tillgänglig under normal användning.
● För att koppla ur radion ska nätadaptern tas bort helt
från vägguttaget.
● Använd endast nätadaptern som medföljer produkten
eller speciceras av Makita.
● Håll inte i strömkabeln och sätt den i din mun. Om du
gör det kan det orsaka elektriska stötar.
● Rör inte strömkontakten med våta eller oljiga händer.
● Skadade eller tilltrasslade sladdar ökar risken för
elektrisk stötat. Om sladden är skadad måste den bytas
ut av vår auktoriserade servicecenter för att undvika en
säkerhetsrisk. Använd den inte innan den är reparerad.
● Efter användning ska du alltid förvara nätadaptern
utom räckhåll för barn. Om barn leker med sladden kan
de drabbas av skador.
Obs:
När din radio har någon störning i AM-bandet via
adaptern, vänligen ytta din radio bort från nätadaptern till
över 30 cm.
Laddning med USB –
strömförsörjningsport
Det nns en USB-port på radions framsida. Du kan ladda
en USB-enhet via USB-porten.
1. Anslut USB-enheten, t.ex. en MP3- eller CD- spelare
med en USB-kabel som nns i handeln.
2. Tryck på strömbrytaren för att slå på din radio.
3. Oavsett om radion drivs med nätström eller batteri kan
radion ladda USB-enheten när radion slås på och i FM
-radioläge, BT-läge eller AUX-läge, vilket visas när en
extern ljudkälla ansluts.
Obs:
● Du kan inte ladda USB-enheter under AM-läge
eftersom mottagningen av radiosignaler blir extremt
dåliga när du laddar USB-enheten.
● Maximal volym för högtalarens uteffekt minskar under
USB-laddning.
● USB-kontakten kan ge maximalt 2.4A, 5 V med
elektrisk ström.
Viktigt!
● Innan du ansluter USB-enheten till USB-porten ska du
alltid säkerhetskopiera dina data på USB-enheten. Du
riskerar i annat fall att förlora dina data.
● Radion strömmatar eventuellt inte vissa USB- enheter.
● Ta bort USB-kabeln och stäng locket om du inte
använder enheten eller efter laddning.
● Anslut inte en strömkälla till en USB-port. Det nns i
annat fall risk för brand. USB-porten är endast avsedd
för laddning av enheter med lägre spänning. Placera
alltid locket på USB-porten när du inte laddar en enhet
med lägre spänning.
● För inte in en spik, vajer etc. i USB-
strömförsörjningsporten. Om så sker kan det orsaka
kortslutning och ge upphov till rök och brand.
● Anslut inte denna USB-kontakt till USB-porten på en
dator eftersom det är troligt att enheterna går sönder.
LYSSNA PÅ RADION
Skanna tuning AM/ FM
Obs!
FM-antennen är inbyggd i handtaget. När du använder
radion, vänligen rikta handtaget över radion för att få
bättre mottagning. För AM-bandet, Vrid radion för den
bästa signalen då AM-antennen är inbyggd i radion.
1. Tryck på strömbrytaren för att slå på din radio.
2. Tryck på Source-knappen för att välja AM- eller FM-
radionäge.
3. Tryck och håll ned Tuningsknappen för att utföra en
automatisk inställning. Din radio kommer att skanna
AM/FM-frekvensen och stoppar skanningen när den
hittar en station med tillräcklig styrka.
4. Efter några sekunder uppdateras displayen. Displayen

19 SVENSKA
visar frekvensen för den hittade signalen.
5. För att hitta andra stationer, tryck och håll in
Tuningsknappen som tidigare.
6. När slutet av frekvensbandet är nådd på radion
återupptas tuningen från motsatta änden av
frekvensbandet.
7. Vrid på Tuningsknappen för att justera ljudnivån efter
behov.
Obs!
● Se till att FM/AM inte blinkar på displayen när du
justerar volymen.
● Om AM/FM blinkar på skärmen kan du ställa in
stationerna manuellt (se avsnittet "Manuell inställning
- AM/FM" för mer information).
● Volymen bör inte vara för hög. För att förhindra
eventuella hörselskador, lyssna inte på för höga
volymer under långa perioder.
8. För att stänga av din radio trycker du på strömbrytaren.
Manuell inställning – AM/FM
1. Tryck på strömbrytaren för att slå på din radio.
2. Tryck på Source-knappen för att välja AM- eller FM-
radioläge.
3. Tryck på Tuningsknappen och du kommer att se FM
eller AM blinkar på displayen.
Obs!
● FM/AM blinkar ca. 10 sekunder. Inom denna period
är endast manuell inställning tillåten.
● Om volymjustering önskas medan FM/AM blinkar,
tryck på Tuningsknappen och vrid den för att justera
ljudnivån.
4. Vrid på Tuningsknappen för att ställa in en station.
5. När slutet av frekvensband är nådd på radion
återupptas tuningen från den motsatta änden av
frekvensbandet.
6. Vrid på Tuningsknappen för att justera ljudnivån efter
behov.
Förinställning av stationer i AM/FM-läge
Det nns 5 förinställda stationer vardera för AM och FM-
radio. De används på samma sätt för varje vågband.
1. Tryck på strömbrytaren för att slå på din radio.
2. Tryck på Source-knappen för att välja önskat vågband.
Ställ in den önskade radiostationen som tidigare
beskrivits
3. Tryck och håll ned önskad förinställningsknapp (1 till 5)
tills displayen visar "P4" till exempel efter frekvensen.
Stationen lagras på det förinställda numret. Upprepa
proceduren för de återstående förinställningarna som
du önskar.
4. Förinställda stationer som redan har lagrats kan skrivas
över genom att följa ovanstående procedur om så
önskas.
Display lägen – FM
Din radio har en rad visningsalternativ för FM-radioläge.
Tryck upprepade gånger på meny/info-knappen för att
visa RDS-informationen för den station du lyssnar på.
a. Stationsnamn Visar namnet på den station som
lyssnas på.
b. Program typ Visar vilken typ av station som lyssnas
på, t.ex. Pop, Klasiskt, Nyheter, etc.
c. Radio text Visar radio textmeddelande såsom
nya nyheter etc.
d. År/Dag Visar år och dag i veckan enligt
datuminställningen för din radio.
e. Datum/Dag Visar datum och dag för veckan enligt
datuminställningen för din radio.
f. EQ-läge Visar EQ-läget för FM-enheten för
den station som lyssnas på.
g. Frekvens Visar frekvensen för FM-enheten för
den station som lyssnar på.
FM stereo (auto)/mono
Om den FM-radiostation som lyssnar på har en svag
signal kan det höra ett väsande ljud. Det är möjligt att
minska detta väsande genom att tvinga radion att spela
stationen i mono istället för stereo.
1. Tryck på Source-knappen för att välja FM-bandet
och ställa in den önskade FM-stationen som tidigare
beskrivits.
2. Tryck och håll ner Meny/Info-knappen för att öppna
menyinställningen.
3. Vrid Tuningsknappen tills "FM AUTO (eller MONO)"
inställningen visas på displayen. Om inställningen är
på Auto trycker du på Tuningsknappen och vrid sedan
Tuningsknappen för att växla till Mono-läge för att
minska det väsande ljuet. Tryck på Tuningsknappen för
att välja det önskade alternativet.
Ta bort en förinställning för AM/FM-läge
1. Tryck på strömbrytaren för att slå på din radio.
2. Tryck på Source-knappen för att välja AM- eller FM-
radioläge.
3. Tryck kort på önskad förinställningsknapp för att ställa
in din radio till en av de stationer som lagrats i det
förinställda minnet.

20 SVENSKA
MISCELLANEOUS SETTINGS
Ställa in tid och datumformat
Klockdisplayen som används i viloläge och på
skärmmenyn för uppspelning kan ställas in i olika format.
Det valda formatet används då också när du ställer in
alarmet.
1. Håll Meny/Info knappen intryckt för att öppna
menyinställningen.
2. Vrid Tuningsknappen tills "CLOCK xxH" visas på
displayen och tryck på Tuningsknappen för att gå in i
inställningen. Du ser att tidsformatet börjar blinka.
3. Vrid på tuningsknappen för att välja antingen 12 eller
24-timmarsformat. Tryck på Tuningsknappen för att
bekräfta ditt val av klockformat.
Obs!
Om 12-timmars klockformat väljs väljer radion 12
timmars klocka som inställning.
4. Håll Meny/Info knappen intryckt för att öppna
menyinställningen.
5. Vrid Tuningsknappen tills ett datum (t.ex. THU APR 3)
visas på displayen och tryck på Tuningsknappen för
att gå in i inställningen. Du får se datumformatet börjar
blinka.
6. Vrid Tuningsknappen för att välja önskat datumformat.
Tryck på Tuningsknappen för att bekräfta ditt val.
Ställa in klocktid och datum
1. Håll Meny/Info knappen intryckt.
2. Vrid Tuningsknappen tills "CLOCK ADJ" visas på
displayen. Tryck på Tuningsknappen för att gå till
inställningen.
3. Tim-inställningen på displayen börjar blinka. Vrid
Tuningsknappen för att välja önskad timme och tryck
på Tuningsknappen för att bekräfta inställningen. Vrid
sedan Tuningsknappen för att välja önskad minut och
tryck på Tuningsknappen för att bekräfta inställningen.
4. Vrid Tuningsknappen tills "DATE ADJ" visas på
displayen. Tryck på Tuningsknappen för att gå till
inställningen.
5. Vrid Tuningsknappen för att välja önskat år och tryck
på Tuningsknappen för att bekräfta inställningen. Vrid
sedan Tuningsknappen för att välja önskad månad och
tryck på Tuningsknappen för att bekräfta inställningen.
Vrid sedan Tuningsknappen för att välja önskat
datum och tryck på Tuningsknappen för att bekräfta
inställningen.
Radio Data System (RDS)
När du ställer in klocktiden med RDS-funktionen
synkroniserar din radio sin klocktid så den stämmer
överens med en radiostation med RDS med CT-signaler.
1. När du ställer in en station som överför RDS-data
visas RDS-symbolen i teckenfönstret. Håll Meny/Info
knappen intryckt.
2. Vrid Tuningsknappen tills "RDS CT" och en klocksymbol
visas på displayen. Tryck på Tuningsknappen för att gå
till inställningen.
3. Vrid Tuningsknappen tills "RDS CT" visas på displayen.
Tryck på Tuningsknappen för att bekräfta inställningen.
Radionens klocktid ställs in automatiskt enligt den
mottagna RDS-data.
Obs!
● Radion klockan är giltig i 5 dagar varje gång radiotiden
är synkroniserad med RDS CT.
● För att inaktivera RDS CT-funktionen, gå tillbaka till
steg 1 till 2 och vrid sedan Tuningsknappen för att välja
"MANUAL" -alternativet. Tryck på Tuningsknappen för
att bekräfta inställningen.
Ställa in väckarklockan
Din radio har två alarm som kan ställas in för att väcka dig
till AM/FM-radio eller buzzer alarm. Alarmet kan ställas in
när enheten är i vänteläge eller under spelning.
Obs!
Kontrollera att tiden är korrekt inställd innan du ställer in
alarmet. Om inga knappar trycks in under 10 sekunder,
stänger radion av alarminställningen.
a. Ställa in radioalarmtid:
1. Radion kan ställas in antingen när radio är på eller av.
2. Tryck och håll ned radioalarmknappen,
radioalarmsymbolen och displaytiden blinkar
tillsammans samt ett pip hörs.
3. När radioalarm symbolen blinkar, vrid Tuningsnappen
för att välja timme och tryck på Tuningsknappen
igen för att bekräfta tim-inställningen. Vrid sedan
Tuningsknappen för att välja minut och tryck på
Tuningsknappen för att bekräfta minutinställningen.
Vrid på tuningsknappen och displayen visar
frekvensalternativen för alarmet.
Alarmalternativen är som följer:
EN GÅNG - alarmet ljuder en gång
DAGLIGEN - alarmet ljuder varje dag
VARDAGAR - alarmet kommer bara att ljuda på
vardagar
HELG - laarmet ljuder endast på helgerna
Tryck på Tuningsknappen för att bekräfta inställningen.
4. När radioalarmsymbolen blinkar, vrid Tuningsknappen
för att välja önskat vakna upp-band och station, tryck
sedan på Tuningsknappen för att bekräfta valet.
5. Vrid på Tuningsknappen för att välja önskad volym
Other manuals for DMR114
4
Table of contents
Languages:
Other Makita Radio manuals

Makita
Makita DMR116 User manual

Makita
Makita MR002G User manual

Makita
Makita DMR114 User manual

Makita
Makita MR003GZ User manual

Makita
Makita DMR056 User manual

Makita
Makita XRM02W User manual

Makita
Makita MR007GZ User manual

Makita
Makita MR001G User manual

Makita
Makita DMR109 User manual

Makita
Makita MR051 User manual

Makita
Makita MR052 User manual

Makita
Makita DMR108 User manual

Makita
Makita XRM06 User manual

Makita
Makita RM02 User manual

Makita
Makita MR005G User manual

Makita
Makita BMR102 User manual

Makita
Makita DMR115 User manual

Makita
Makita MR002GZ User manual

Makita
Makita DMR107 User manual

Makita
Makita DMR300 User manual