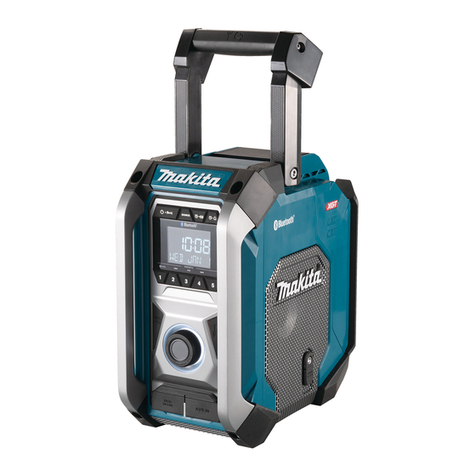
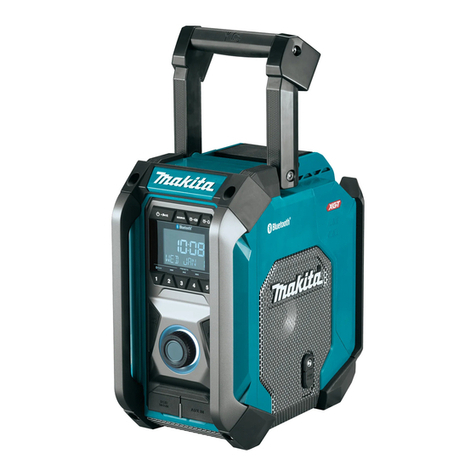
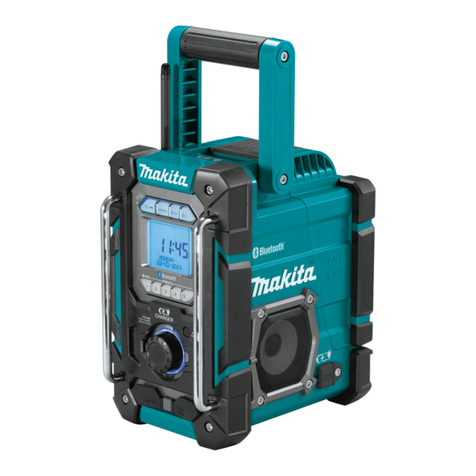
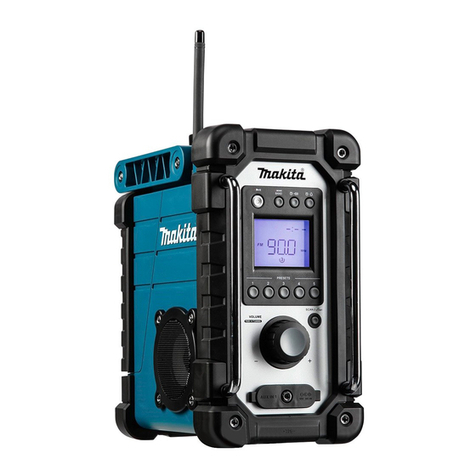
Makita DMR114 User manual

DMR114
EN Job Site Radio Instruction manual 4
ID Radio Job Site Manual Petunjuk 14
VI Đài radio công trường Hướng dẫn sử dụng 25
TH วิทยุไซต์งาน คู่มือการใช้งาน 35

2
1
G
H
I
ABCDE
F
4
6
7
5
2
16
17
12
13
15
3
14
22
20
19
18
21
23
891011
24
24
25
1

3
4
2
3
5
4
2
3
5

4 ENGLISH
ENGLISH
(Original Instruction)
EXPLANATION OF GENERAL
VIEW (Fig. 1)
1. Built-in antenna(AM)
2. Handle/Built-in antenna(FM)
3. Battery compartment locker
4. Battery compartment cover (covering battery
cartridge)
5. Speaker
6. DC IN socket
7. Subwoofer
8. Power/Sleep timer button
9. Source button
10. Radio alarm button
11. Buzzer alarm button
12. Preset 3/Play/Pause button
13. Preset 5 button
14. Preset 4/Next track button
15. Volume/Tuning control/Select knob
16. EQ control button
17. AUX IN socket
18. USB power supply port
19. Menu/Info button
20. EQ mode LED indicator
21. Preset 2/Previous track button
22. Preset 1/Bluetooth pairing button
23. LCD display
24. Battery compartment
25. Back up batteries compartment
LCD DISPLAY
A. Radio alarm
B. Buzzer alarm
B. Stereo symbol
D. Low battery indicator
E. Clock
F. Frequency
G. RDS (Radio data system)
H. Sleep timer icon
I. PM for clock
SYMBOLS
The following show the symbols used for the equipment.
Be sure that you understand their meaning before use.
Read instruction manual.
Only for EU countries.
Do not dispose of electric equipment or
battery pack together with household
waste material! In observance of
the European Directives, on Waste
Electric and Electronic Equipment
and Batteries and Accumulators and
Waste Batteries and Accumulators and
their implementation in accordance
with national laws, electric equipment
and batteries and battery pack(s) that
have reached the end their life must be
collected separately and returned to an
environmentally compatible recycling
facility.
IMPORTANT SAFETY
INSTRUCTIONS
WARNING:
When using electric tools, basic safety precautions should
always be followed to reduce the risk of re, electric
shock, and personal injury, including the following:
1. Read this instruction manual and the charger
instruction manual carefully before use.
2. Clean only with dry cloth.
3. Do not install near any heat sources such as
radiators, heat registers, stoves, or other apparatus
(including ampliers) that produce heat.
4. Only use attachments/accessories specied by the
manufacturer.
5. Unplug this apparatus during lighting storms or when
unused for long periods of time.
6. A battery operated radio with integral batteries or a
separate battery pack must be recharged only with
the specied charger for the battery. A charger that
may be suitable for one type of battery may create a
risk of re when used with another battery.
7. Use battery operated radio only with specically
designated battery packs. Use of any other batteries
may create a risk of re.
8. When battery pack is not in use, keep it away from
other metal objects like: paper clips, coins, keys, nails,
screws, or other small metal objects that can make a
connection from one terminal to another. Shorting the
battery terminals together may cause sparks, burns,
or a re.
9. Avoid body contact with grounded surfaces such as
pipes, radiators, ranges and refrigerators. There is an
increased risk of electric shock if your body is grounded.
10. Under abusive conditions, liquid may be ejected from
the battery; avoid contact. If contact accidentally
occurs, ush with water. If liquid contacts eyes,
additionally seek medical help. Liquid ejected from the
battery may cause irritation or burns.

5 ENGLISH
11. Do not use a battery pack or tool that is damaged or
modied. Damaged or modied batteries may exhibit
unpredictable behaviour resulting in re, explosion or
risk of injury.
12. Do not expose a battery pack or tool to re or
excessive temperature. Exposure to re or temperature
above 130 °C(266°F) may cause explosion.
13. Follow all charging instructions and do not charge the
battery pack or tool outside the temperature range
specied in the instructions. Charging improperly
or at temperatures outside the specied range may
damage the battery and increase the risk of re.
14. The MAINS plug is used as the disconnect device,
and it shall remain readily operable.
15. Do not use the product at a high volume for any
extended period. To avoid hearing damage, use the
product at moderate volume level.
16. (For products with LCD display only) LCD displays
include liquid which may cause irritation and
poisoning. If the liquid enters the eyes, mouth or skin,
rinse it with water and call a doctor.
17. Do not expose the product to rain or wet conditions.
Water entering the product will increase the risk of
electric shock.
18. This product is not intended for use by persons
(including children) with reduced physical, sensory
or mental capabilities, or lack of experience and
knowledge, unless they have been given supervision
or instruction concerning use of the product by a
person responsible for their safety. Children should
be supervised to ensure that they do not play with the
product. Store the product out of the reach of children.
SAVE THESE INSTRUCTIONS
SPECIFIC SAFETY RULES
FOR BATTERY CARTRIDGE
1. Before using battery cartridge, read all instructions
and cautionary markings on (1) battery charger, (2)
battery, and (3) product using battery.
2. Do not disassemble battery cartridge.
3. If operating time has become excessively shorter,
stop operating immediately. It may result in a risk of
overheating, possible burns and even an explosion.
4. If electrolyte gets into your eyes, rinse them out with
clear water and seek medical attention right away. It
may result in loss of your eyesight.
5. Do not short the battery cartridge:
(1) Do not touch the terminals with any conductive
material.
(2) Avoid storing battery cartridge in a container with
other metal objects such as nails, coins, etc.
(3) Do not expose battery cartridge to water or
rain. A battery short can cause a large current
ow, overheating, possible burns and even a
breakdown.
6. Do not store the tool and battery cartridge in locations
where the temperature may reach or exceed 50°C
(122°F).
7. Do not incinerate the battery cartridge even if it is
severely damaged or is completely worn out. The
battery cartridge can explode in a re.
8. Be careful not to drop or strike battery.
9. Do not use a damaged battery.
10. To avoid risk, the manual of replaceable the battery should
be read before use. And the max discharging current of the
battery should be greater than or equal to 8A.
11. The contained lithium-ion-batteries are subject to
the Dangerous Goods Legislation requirements. For
commercial transports e.g. by third parties, forwarding
agents, special requirement on packaging and
labeling must be observed.
For preparation of the item being shipped, consulting
an expert for hazardous material is required. Please
also observe possibly more detailed national
regulations.
Tape or mask off open contacts and pack up the
battery in such a manner that it cannot move around
in the packaging.
12. Follow your local regulations relating to disposal of
battery.
13. Use the batteries only with the products specied
by Makita. Installing the batteries to non-compliant
products may result in a re, excessive heat,
explosion, or leak of electrolyte.
CAUTION:
● Danger of explosion if battery is incorrectly
replaced.
●Replace only with the same or equivalent type.
● Only use genuine Makita batteries. Use of non-
genuine Makita batteries, or batteries that have
been altered, may result in the battery bursting
causing res, personal injury and damage. It will
also void the Makita warranty for the Makita tool
and charger.
Tips for maintaining maximum battery life
1. Charge the battery cartridge before completely
discharged. Always stop tool operation and charge
the battery cartridge when you notice less tool power.
2. Never recharge a fully charged battery cartridge.
Overcharging shortens the battery service life.
3. Charge the battery cartridge with room temperature at
10°C - 40°C (50°F - 104°F). Let a hot battery cartridge
cool down before charging it.
4. Charge the battery cartridge if you do not use it for a
long period (more than six months).
6 ENGLISH
OPERATING TIME
* The suitable battery packs for this radio listed as the following table.
* The following table indicates the operating time on a single charge.
Battery capacity
Battery cartridge voltage AT SPEAKERS OUTPUT = 100mW
Unit: Hour (Approximately)
10.8V –
12Vmax 14.4V 18V In Radio or AUX In Bluetooth +USB Charging
1.3 Ah BL1415 3.5 0.7
BL1815 4.0 1.0
1.5 Ah
BL1015
BL1016 6.0 0.8
BL1415N
BL1415NA 4.5 0.9
BL1815N 5.0 1.2
2.0 Ah
BL1020B
BL1021B 8.0 1.0
BL1820
BL1820B 6.5 1.6
3.0 Ah
BL1430
BL1430B
BL1430A
8.0 1.6
BL1830
BL1830B 9.5 2.3
4.0 Ah
BL1040B
BL1041B 16 2.1
BL1440 13 2.5
BL1840
BL1840B 13 3.2
5.0 Ah
BL1450 15 3.0
BL1850
BL1850B 17 4.2
6.0 Ah
BL1460B
BL1460A 17 3.3
BL1860B 21 5.0
WARNING:
Only use the battery cartridges listed above. Use of any other battery cartridges may cause injury and/or re.
NOTE:
●Table regarding to the battery operating time above is for reference.
●The actual operating time may differ with the type of the battery, charging condition, or usage environment.

7 ENGLISH
INSTALLATION AND POWER
SUPPLY
CAUTION:
● Be careful not to pinch your ngers when opening
and closing the battery cover.
● Return the battery compartment locker to the
original position, after installing or removing battery
cartridge. If not, battery cartridge may accidentally
fall out of the radio, causing injury to you or
someone around you.
● Always close and lock the battery compartment
locker before moving the radio.
● Always switch off the radio before installing or
removing the battery cartridge.
● Be careful not to drop or strike the radio. Broken
shell may slash your nger or stab your body.
Damaged radio may exhibit unpredictable behaviour
resulting in re, explosion or risk of injury.
IMPORTANT:
●Reduced power, distortion, “stuttering sound” or when
both low battery indicator and “POWERFAIL” appear
on the display are all the signs that the main battery
pack needs to be replaced.
●When low battery indicator appears and an “EMPTY”
keeps on ashing is the time to replace the back up
batteries.
●The battery cartridge can’t be charged via the supplied
AC power adaptor.
●The battery cartridge is not included as standard
accessories.
Installing or removing slide battery
cartridge (Fig. 4 & 5)
●To install the battery cartridge, align the tongue on the
battery cartridge with the groove in the housing and slip
it into place. Always insert it all the way until it locks in
place with a little click.
●If you can see the red indicator on the upper side of the
button, it is not locked completely. Install it fully until the
red indicator cannot be seen. If not, it may accidentally
fall out of the radio, causing injury to you or someone
around you.
●Do not use force when installing the battery cartridge.
If the cartridge does not slide in easily, it is not being
inserted correctly.
●To remove the battery cartridge, slide it from the radio
while sliding the button on the front of the cartridge.
Indicating the remaining battery capacity
* Only for battery cartridges with “B” at the end of the
model number.
2
1
1. Indicator lamps 2. Check button
Press the check button on the battery cartridge to indicate
the remaining battery capacity. The indicator lamps light
up for few seconds.
●14.4V/18V batteries
Indicator or lamps
Remaining Capacity
Lighted Off Blinking
75% ~ 100%
50% ~ 75%
25% ~ 50%
0% ~ 25%
Charge the battery
The battery may
have malfunctioned
● 10.8V-12V max batteries
Indicator or lamps
Remaining Capacity
Lighted Off Blinking
75% ~ 100%
50% ~ 75%
25% ~ 50%
0% ~ 25%
NOTE:
Depending on the conditions of use and the ambient
temperature, the indication may differ slightly from the
actual capacity.

8 ENGLISH
Back up battery Installation (Fig. 2 & 3)
Keeping back up batteries inside the compartment prevent
stored data in preset memories from being lost.
1. Pull out the battery compartment locker to release
battery compartment. There are main battery pack
compartment and back up battery compartment.
2. Remove back up battery compartment cover and insert
2 fresh UM-3 (AA sizes). Make sure the batteries are
with correct polarity as shown inside the compartment.
Replace the battery cover.
3. After back up batteries are inserted, insert the main
battery pack to power radio.
Using supplied AC power adaptor
Remove the rubber protector and insert the adaptor
plug into the DC socket on the right hand side of the
radio. Plug the adaptor into a standard mains socket
outlet. Whenever the adaptor is used, the battery pack is
automatically disconnected.
CAUTION:
● Always disconnected the AC power adapter
completely before moving the radio. If the AC adapter
is not removed, it may cause an electric shock.
● Never pull and/or drag the cord of the adapter. If
not, the radio may accidentally fall down, causing
injury to you or someone around you.
IMPORTANT:
●The mains adaptor is used as the means of connecting
the radio to the mains supply. The mains socket used
for the radio must remain accessible during normal
use.
●In order to disconnect the radio, the mains adaptor
should be removed from the mains outlet completely.
●Use the AC power adaptor supplied with the product or
specied by Makita only.
●Do not hold the power supply cable and plug by your
mouth. Doing so might cause an electric shock.
●Do not touch the power plug with wet or greasy hands.
●Damaged or entangled cords increase the risk of
electric shock. If the cord is damaged, have it replaced
by our authorized service center in order to avoid a
safety hazard. Do not use it before repair.
●After use, always store AC power adaptor out of the
reach of children. If Children play with the cord, they
may suffer injury.
Note:
When your radio has any interference in AM band by its
adaptor, please move your radio away from its AC power
adaptor over 30 cm.
Charging with USB power supply port
There is the USB port at the front side of the radio. You
can charge USB device trough the USB port.
1. Connect the USB device, such as a MP3, or CD player,
with USB cable available in the market.
2. Press the Power button to switch on your radio.
3. No matter if the radio is AC powered or battery
powered, the radio can charge the USB device when
the radio is switched on and in FM radio mode, or
BT mode, or AUX mode, which is appeared when an
external audio source is connected.
Note:
●You cannot charge USB devices during AM mode
because radio signal reception becomes extremely
poor when charging USB device.
●The maximum volume of the output power speaker will
decrease when your USB is charging.
●The USB socket can provide max 5V/2.4A of electrical
current.
IMPORTANT:
●Before connecting USB device to the charger, always
backup your data of USB device. Otherwise your data
may lose by any possibility.
●The charger may not supply power to some USB
devices.
●When not using or after charging, remove the USB
cable and close the cover.
●Do not connect power source to USB port. Otherwise
there is risk of re. The USB port is only intended for
charging lower voltage device. Always place the cover
onto the USB port when not charging the lower voltage
device.
●Do not insert a nail, wire, etc. into USB power supply
port. Otherwise a circuit short may cause smoke and
re.
●Do not connect this USB socket with your PC USB port,
as it is highly possible that it may cause breakdown of
the units.
LISTENING TO THE RADIO
Scan tuning AM/ FM
Note:
The FM antenna is built into the handle. When operating the
radio, please straighten the handle properly above the radio
to get better reception. For the AM band, rotate the radio to
get best signal as the AM antenna is built into the radio.
1. Press the Power button to switch on your radio.
2. Press the Source button to select AM or FM radio mode.
3. Press and hold the Tuning control knob to carry out an
auto-tune. Your radio will scan up the AM/FM band from
the currently displayed frequency and will stop scanning
automatically when it nds a station of sufcient strength.
4. After a few seconds the display will update. The display
will show the frequency of the signal found.
5. To nd other station, press and hold the Tuning control
knob as before.

9 ENGLISH
6. When the end of the waveband is reached your radio
will recommence tuning from the opposite end of the
waveband.
7. Rotate the Tuning control knob to adjust the sound
level as required.
Note:
●While adjusting the volume, make sure the FM/AM is
NOT ashing on the screen.
● If AM/FM is ashing on the screen, it allows you to
tune the stations manually (see the section of “Manual
tuning – AM/FM” for more detail).
●The volume should not be too large. To prevent
possible hearing damage, do not listen at high
volume levels for long periods.
8. To switch off your radio press the Power button.
Manual tuning – AM/FM
1. Press the Power button to switch on your radio.
2. Press the Source button to select AM or FM radio
mode.
3. Press the Tuning control knob and you will see the FM
or AM is ashing on the display.
Note:
● FM/AM will ash approx. 10 seconds. Within this
period, only manual tuning is allowed.
●If volume adjustment is desired while FM/AM is
ashing, press the Tuning control knob to stop the
ash and you can rotate the Tuning control knob to
adjust sound level.
4. Rotate the Tuning control knob to tune to a station.
5. When the end of the waveband is reached your radio
will recommence tuning from the opposite end of the
waveband.
6. Rotate the Tuning control knob to adjust the sound
level as required.
Presetting stations in AM/FM mode
There are 5 preset stations each for AM and FM radio.
They are used in the same way for each waveband.
1. Press the Power button to switch on your radio.
2. Press the Source button to select the desired
waveband. Tune to the required radio station as
previously described.
3. Press and hold the required Preset button (1 to 5) until
the display shows “P4” for example after the frequency.
The station will be stored using the preset number.
Repeat this procedure for the remaining presets as you
wish.
4. Preset stations which have already been stored may be
overwritten by following the above procedure if required.
Display modes – FM
Your radio has a range of display options for FM radio mode.
Repeatedly press the Menu/Info button to view the RDS
information of the station you are listening to.
a. Station name Displays the name of the station being
listened to.
b. Program type Displays the type of station being
listened to such as Pop, Classic,
News, etc.
c. Radio text Displays radio text message such as
new items etc.
d. Year/Day Displays the year and day of the week
according to the date setting of your
radio.
e. Date/Day Displays the date and day of the week
according to the date setting of your
radio.
f. EQ mode Displays the EQ mode of the FM for
the station listened to.
g. Frequency Displays the frequency of the FM for
the station listened to.
FM stereo (auto)/mono
If the FM radio station being listened to has a weak signal
some hiss may be audible. It is possible to reduce this
hiss by forcing the radio to play the station in mono rather
than stereo.
1. Press the Source button as needed to select the FM
band and tune to the desired FM station as previously
stated.
2. Press and hold Menu/Info button to enter the menu
setting.
3. Rotate the Tuning control knob until the “FM AUTO (or
MONO)” setting shows on the display. If the setting is
Auto, press the Tuning control knob and then rotate the
Tuning control knob to switch to Mono mode to reduce
the hiss. Press the Tuning control knob to select the
option.
Recalling a preset in AM/FM mode
1. Press the Power button to switch on your radio.
2. Press the Source button to select AM or FM radio
mode
3. Momentarily press the required Preset button to tune
to your radio to one of the stations stored in the preset
memory.
MISCELLANEOUS SETTINGS
Setting the time and date format
The clock display used in stand-by mode and on the
playing mode screens can be set to different format. The
selected format is then also used when setting the alarms.
1. Press and hold the Menu/Info button to enter the menu
setting.

10 ENGLISH
2. Rotate the Tuning control knob until “CLOCK xxH”
appears on the display and press the Tuning control
knob to enter the setting. You will see the time format
begins to ash.
3. Rotate the Tuning control knob to select either 12 or 24
hour format. Press the Tuning control knob to conrm
your choice of clock format.
Note:
If the 12 hour clock format is chosen, the radio will
then use the 12 hour clock for the setting.
4. Press and hold the Menu/Info button to enter the menu
setting.
5. Rotate the Tuning control knob until a date (e.g. THU
APR 3) appears on the display and press the Tuning
control knob to enter the setting. You will see the date
format begins to ash.
6. Rotate the Tuning control knob to select the desired
date format. Press the Tuning control knob to conrm
your choice.
Setting the clock time and date
1. Press and hold the Menu/Info button.
2. Rotate the Tuning control knob until “CLOCK ADJ”
appears on the display. Press the Tuning control knob
to enter the setting.
3. The hour setting on the display will begin ashing.
Rotate the Tuning control knob to select the desired
hour, and press the Tuning control knob to conrm the
setting. Then rotate the Tuning control knob to select
the desired minute, and press the Tuning control knob
to conrm the setting.
4. Rotate the Tuning control knob until “DATE ADJ”
appears on the display. Press the Tuning control knob
to enter the setting.
5. Rotate the Tuning control knob to select the desired
year and press the Tuning control knob to conrm the
setting. Then rotate the Tuning control knob to select
the desired month, and press the Tuning control knob
to conrm the setting. Then rotate the Tuning control
knob to select the desired day and press the Tuning
control knob to conrm the setting.
Radio Data System (RDS)
When you set the clock time using the RDS function, your
radio will synchronize its clock time whenever it tunes to a
radio station using RDS with CT signals.
1. When tuning to a station transmitting RDS data, the
RDS symbol will be shown on the display. Press and
hold the Menu/Info button.
2. Rotate the Tuning control knob until “RDS CT” and a
clock symbol appear on the display. Press the Tuning
control knob to enter the setting.
3. Rotate the Tuning control knob until “RDS CT” appears
on the display. Press the Tuning control knob to conrm
the setting. The clock time of the radio will set up
automatically according to the RDS data received.
Note:
●The radio clock time will be valid for 5 days each time
the radio time is synchronized with RDS CT.
●To disable the RDS CT function, go back to step 1 to
2 and then rotate the Tuning control knob to select
“MANUAL” option. Press the Tuning control knob to
conrm the setting.
Setting the alarm clock
Your radio has two alarms which can each be set to wake
you to AM/FM radio or buzzer alarm. The alarms may be
set while the unit is in standby mode or while playing.
Note:
Ensure that the time is set correctly before setting the
alarms. If no buttons are pressed for 10 seconds, the
radio will exit the alarm setup.
a. Setting radio alarm time:
1. The radio can be set either when radio is on or off.
2. Press and hold the radio alarm button, the radio alarm
symbol and the display hour will ash along with a beep.
3. During radio alarm symbol ashes, rotate Tuning
control knob to select the hour and press Tuning
control knob again to conrm hour setting. Then rotate
the Tuning control knob to select the minute and press
Tuning control knob to conrm minute setting.
4. Rotate the Tuning control knob and the display will
show the frequency options for the alarm.
The alarm options are as follows:
ONCE – the alarm will sound once
DAILY – the alarm will sound everyday
WEEKDAY – the alarm will sound only on weekdays
WEEKEND – the alarm will sound only at weekends
Press the Tuning control knob to conrm the setting.
5. During radio alarm symbol is ashing, rotate Tuning
control knob to select desired wake-up band and station,
then press Tuning control knob to conrm the selection.
6. Rotate Tuning control knob to select the desired
volume and press Tuning control knob to conrm the
volume. Radio alarm setting is now completed.
Note:
●If new radio alarm station is not selected, it will select
the last alarm station.
●If the selected AM/FM alarm station is not available
when the alarm is sounding, the buzzer alarm will be
used instead.
b. Setting HWS (Humane Wake System) buzzer alarm:
A beep tone will activate when selecting the HWS buzzer
alarm.
The alarm beep will sound shorter every 15 seconds
for one minute followed by one minute silence before
repeating the cycle.
1. The buzzer alarm can be set either when the radio is
on or off.

11 ENGLISH
2. Press and hold the buzzer alarm button, the symbol
and the display hour will ash along with a beep.
3. During buzzer alarm symbol ashes, rotate the Tuning
control knob to select the hour and press the Tuning
control knob again to conrm hour setting. Then rotate
the Tuning control knob to select the minute and press
Tuning control knob to conrm minute setting.
4. Rotate the Tuning control knob and the display will
show the frequency options for the alarm.
The alarm options are as follows:
ONCE – the alarm will sound once
DAILY – the alarm will sound everyday
WEEKDAY – the alarm will sound only on weekdays
WEEKEND – the alarm will sound only at weekends.
Press the Tuning control knob to conrm the setting.
Note:
There is no volume adjustment for buzzer alarm.
Stopping the alarm sound
To cancel a sounding alarm, press the Power button.
Disable the alarm setting
To disable the alarm setting before the alarm sounds,
press and hold the corresponding alarm button until alarm
symbol disappears on the display.
Snooze
1. When the alarm sounds, press any button other than
the Power button will silence the alarm for 5 minutes.
“SNOOZE” will appear on the display.
2. To adjust the silence time for the snooze timer, press
and hold the Menu/Info button to enter the menu
setting.
3. Rotate the Tuning control knob until “SNOOZE X”
appears on the display, then press the Tuning control
knob to enter the setting. Rotate the Tuning control
knob to adjust the silence time from 5, 10, 15 and 20
minutes for the snooze timer.
4. To cancel the snooze timer while the alarm is
suspended, press the Power button.
Sleep timer
Your radio can be set to turn off automatically after a
preset time has elapsed. The Sleep Timer setting can be
adjusted between 60, 45, 30, 15, 120 and 90 minutes.
1. Press and hold the Power button to enter the Sleep
Timer setting. “SLEEP XX” will show on the display.
2. Keep holding the Power button and the Sleep Timer
options will start switching on the display. Stop until the
desired Sleep Timer setting appears on the display.
The setting will be saved and the LCD will return to
normal display.
3. Your radio will switch off automatically after the preset
Sleep Timer has elapsed. The Sleep Timer icon will be
shown on the display indicating an active Sleep Timer.
4. To cancel the Sleep Timer function before the preset
time has elapsed, simply press the Power button to
turn the unit off manually.
Loudness
You can get compensation on lower and higher frequency
for your radio by adjusting the loudness function.
1. Press and hold the Menu/Info button to enter the menu
setting.
2. Rotate the Tuning control knob until “LOUD ON” or
“LOUD OFF” appears on the display. Press the Tuning
control knob to enter the setting.
3. Rotate the Tuning control knob to choose ON to turn
on the loudness function, then press the Tuning control
knob to conrm the setting.
4. To turn off the loudness function, select OFF and press
the Tuning control knob to conrm the setting.
Equalizer function
There are 7 kinds of color LED indicators around the
Tuning control knob to indicate different EQ modes.
1. Press the Power button to switch on your radio.
2. Press the EQ control button to enter the EQ setting
menu.
3. Rotate the Tuning control knob to select your required
mode. Then press the Tuning control knob to conrm
the selection.
EQ mode LED indicator
FLAT White
JAZZ Blue
ROCK Red
CLASSIC Brown
POP Pink
NEWS Yellow
MY EQ Green
Set up My EQ prole
1. Press the EQ control button to enter the EQ setting menu.
2. Rotate the Tuning control knob to select "MY EQ".
Then press the Tuning control knob to enter the “BASS”
setting.
3. Rotate the Tuning control knob to select your required
bass level. Press the Tuning control knob to enter the
“MIDDLE” setting.
4. Rotate the Tuning control knob to select your required
middle level. Press the Tuning control knob to enter the
“TREBLE” setting.
5. Rotate the Tuning control knob to select your required
treble level. Press the Tuning control knob to conrm
the setting.
Note:
●When using the equalizer to emphasize the bass and
listening at high volume levels, it may cause sound
cracking and distortion. In this case, adjust the radio
volume appropriately.

12 ENGLISH
LISTENING TO MUSIC VIA
BLUETOOTH STREAMING
You need to pair your Bluetooth device with the radio
before you can auto-link to play/stream Bluetooth music
through the radio. Pairing creates a ‘bond' so two devices
can recognize each other.
Note:
●To have the better sound quality, we recommend
setting the volume to more than two-thirds level on your
Bluetooth device and then adjust the volume on the
radio as required.
●The radio can memorize up to 8 sets of paired device,
when the memory exceed this amount, the oldest
pairing history will be over written.
Pairing your Bluetooth device for
the rst time
1. Press the Power button to turn on the radio. Press the
Source button to select Bluetooth mode. The display
will appear “BT PAIR” and “PAIR” will ash on the
display.
2. Activate Bluetooth on your device according to the
device's user manual to link to the radio. Locate the
Bluetooth device list and select the device named
‘DMR114’ (With some mobiles which are equipped with
earlier versions than BT2.1 Bluetooth device, you may
need to input the pass code “0000”).
3. Once connected, there will be a conrmation tone
sound. “BLUETOOTH” will remain on the display and
the backlight will be dim-out in10 seconds. You can
simply select and play any music from your source
device. Volume control can be adjusted from your
source device, or directly from the radio.
4. Use the controls on your Bluetooth-enabled device or
on the radio to play/pause and navigate tracks.
Note:
● If 2 Bluetooth devices, pairing for the rst time, both
search for the radio, it will show its availability on both
devices. However, if one device links with this unit rst,
then the other Bluetooth device won't nd it on the list.
●If your Bluetooth device is temporarily disconnected to
the radio, then you need to manually reconnect your
device again to the radio.
●If ‘DMR114’ shows in your Bluetooth device list but your
device cannot connect with it, please delete the item
from your list and pair the device with the radio again
following the steps described previously.
●Optimum Bluetooth streaming range is roughly 10
meters (30 feet) (line of sight) to the radio but distance
up to 30 meters (100 feet) are possible.
●If Bluetooth connection is lost due to exceeding time of
separation, exceeding the optimum distance, obstacles
or otherwise, reconnecting your device with the radio
may be necessary.
●Physical obstacles, other wireless devices or
electromagnetic devices may affect the connection
quality.
●Bluetooth connectivity performance may vary
depending on the connected Bluetooth devices.
Please refer to the Bluetooth capabilities of your device
before connecting to the radio. All features may not be
supported on some paired Bluetooth devices.
Playing audio les in Bluetooth mode
When you have successfully connected the radio with the
chosen Bluetooth device you can start to play your music
using the controls on your connected Bluetooth device.
1. Once playing has started adjust the volume to the
required setting using the Volume knob on the radio or
on your enabled Bluetooth device.
2. Use the controls on your Bluetooth source device to
play/pause and navigate tracks. Alternatively, control
the playback using Play/Pause, Next track, Previous
track buttons on your radio.
3. Press and hold the Next track or Previous track button
to move through the current track. Release the button
when the desired point is reached.
Note:
● Some player applications or devices may not respond
to all of these controls.
● Some mobile phones may temporarily disconnect
from the radio when you make or receive calls. Some
devices may temporarily mute their Bluetooth audio
streaming when they receive text messages, emails or
for other reasons unrelated to audio streaming. Such
behaviour is a function of the connected device and
does not indicate a fault with the radio.
Playing a previously-paired Bluetooth
source device
If your Bluetooth device already paired with the radio
previously, the unit will memorize your Bluetooth device
and it attempts to reconnect with a device in memory
which is last connected. If the last connected device is not
available, the radio will be discoverable.
Disconnecting your Bluetooth device
Press and hold the Bluetooth pairing button for 2-3
seconds until “BT PAIR” is shown on the display or turn
off Bluetooth on your Bluetooth device to disable the
connection.
You can also press the Source button to select any mode
other than Bluetooth mode to disable the connection.
Deleting Bluetooth paired device memory
To clear the memory of all paired devices, press and hold
the Bluetooth pairing button more than 5 seconds until
“CLEARING” shows on the display.

13 ENGLISH
AUXILIARY INPUT SOCKET
A 3.5mm Auxiliary input socket is provided at the front
of your radio to permit an audio signal to be fed into the
unit from an external audio device such as a MP3 or CD
player.
1. Connect an external audio source (for example, MP3
or CD player) to the AUX IN socket.
2. Press the Power button to switch on your radio.
3. Repeatedly press and release the Source button until
“AUX IN” is displayed.
4. To have the better sound quality, we recommend
setting the volume to more than two-thirds level on your
audio device and then adjust the volume on the radio
as required.
Note:
Audio cord is not included as standard accessories.
MAINTENANCE
CAUTION:
● Never use gasoline, benzine, thinner, alcohol or the
like. Discoloration, deformation or cracks may result.
●Do not wash the radio with water.
SPECIFICATIONS
Power requirements
AC power adaptor DC 12V 2.5A, center pin
positive
Battery UM-3 (AA size) x2 for back up
Slide battery: 10.8V - 18V
Frequency coverage
FM 87.50 - 108 MHz
(0.1MHz/step)
AM(MW) 522 - 1,710 kHz
(10 kHz/step)
Bluetooth®
(The Bluetooth®word mark and logos are registered
trademarks owned by Bluetooth SIG, Inc.)
Bluetooth version 5.0 Certied
Bluetooth Proles A2DP / SCMS-T / AVRCP
Transmission Power Power Class2
Transmisson Range
Optimum:
Max.10 meters (33 feet)
Possible:
Max.30 meters (100 feet)
(varies according to usage
conditions)
Supported codec SBC
Compatible Bluetooth
prole A2DP / AVRCP
Maximum radio-
frequency power BT EDR: 3.91dBm
Operating Frequency 2402MHz~2480MHz
Circuit feature
Loudspeaker 2.5 inches 8 ohm x2
4 inches 6 ohm x1
Output power
10.8V-12V max: 2W X2 +10W
14.4V: 3W X2 +15W
18V: 5W X2 + 25W
Input terminal 3.5 mm dia. (AUX IN)
Antenna system FM: Built-in antenna
AM: bar antenna
Dimensions(L x W x H) 268 x 164 x 295 mm
Weight 4.9 KG (without battery)

14 BAHASA INDONESIA
BAHASA INDONESIA
(Petunjuk asli)
PENJELASAN TAMPILAN
UMUM (Gbr. 1)
1. Antena built-in (AM)
2. Gagang/Antena built-in (FM)
3. Loker kompartemen baterai
4. Penutup kompartemen baterai (menutup kartrid
baterai)
5. Speaker
6. Soket DC IN
7. Subwoofer
8. Tombol Daya/Waktu nonaktif
9. Tombol Sumber
10. Tombol Alam radio
11. Tombol Alarm dering
12. Tombol Preset 3/Putar/Jeda
13. Tombol Preset 5
14. Tombol Preset 4/Trek selanjutnya
15. Kenop Volume/Kontrol tuning/Pilih
16. Tombol Kontrol EQ
17. Soket AUX IN
18. Port catu daya USB
19. Tombol Menu/Info
20. Indikator LED mode EQ
21. Tombol Preset 2/Trek sebelumnya
22. Tombol Preset 1/Sambungan Bluetooth
23. Layar LCD
24. Kompartemen baterai
25. Kompartemen baterai cadangan
LAYAR LCD
A. Alarm radio
B. Alarm dering
C. Simbol stereo
D. Indikator baterai lemah
E. Jam
F. Frekuensi
G. RDS (Radio data system/Sistem data radio)
H. Ikon pengatur waktu mati
I. PM untuk jam
SIMBOL
Informasi berikut menampilkan simbol yang digunakan
pada perangkat ini. Pastikan Anda memahami maksudnya
sebelum menggunakan.
Baca manual petunjuk.
Hanya untuk negara Uni Eropa.
Jangan buang perangkat listrik atau paket
baterai ke tempat yang sama dengan tempat
pembuangan sampah rumah tangga! Menurut
European Directives perihal Limbah Listrik dan
Peralatan Elektronik, Baterai dan Akumulator,
dan Limbah Baterai dan Akumulator, serta
penerapannya berdasarkan undang-undang
negara, perangkat listrik, baterai, dan paket
baterai yang tidak lagi dapat digunakan, harus
dikumpulkan secara terpisah dan dikembalikan
ke instalasi daur ulang ramah lingkungan.
PETUNJUK KEAMANAN
PENTING
PERINGATAN:
Saat menggunakan peralatan listrik, langkah-langkah
pencegahan dan keamanan dasar harus selalu ditempuh
guna memperkecil risiko terjadinya kebakaran, sengatan
listrik, dan luka sik, yang mencakup hal-hal berikut:
1. Baca manual petunjuk ini dan manual petunjuk pengisi
daya dengan saksama sebelum menggunakan.
2. Bersihkan hanya dengan kain kering.
3. Jangan memasang di dekat sumber panas seperti
radiator, ventilasi udara panas, kompor, atau alat-alat
lain (termasuk amplier) yang dapat menghasilkan
panas.
4. Jangan menggunakan alat tambahan/aksesori selain
buatan pabrik.
5. Cabut alat ini selama terjadi badai petir atau saat
tidak digunakan dalam waktu yang lama.
6. Radio yang dioperasikan dengan baterai integral atau
paket baterai yang terpisah harus diisi ulang dengan
pengisi daya yang memang ditentukan untuk baterai
tersebut. Pengisi daya yang mungkin cocok untuk
salah satu jenis baterai mungkin dapat menimbulkan
risiko kebakaran saat digunakan untuk baterai lain.
7. Jangan mengoperasikan radio menggunakan
kemasan paket baterai selain yang ditentukan.
Penggunaan jenis baterai lain dapat menimbulkan
risiko kebakaran.
8. Ketika paket baterai tidak sedang digunakan, jauhkan
dari benda-benda berbahan logam seperti: klip kertas,
koin, kunci, paku, sekrup, atau benda-benda logam
berukuran kecil lainnya yang dapat terhubung dari
satu terminal ke terminal yang lain. Hubungan singkat
antara dua terminal baterai dapat menimbulkan
percikan api atau kebakaran.
9. Hindari menyentuh permukaan benda yang diardekan
seperti pipa, radiator, kompor elektrik, dan lemari es.
Risiko terjadinya sengatan listrik menjadi semakin
tinggi jika tubuh Anda menginjak tanah.
10. Dalam kondisi pemakaian di luar ambang batas, akan
ada cairan yang keluar dari baterai; hindari kontak
dengan cairan tersebut. Jika cairan tersebut terkena
kulit, segera bilas dengan air. Jika cairan tersebut
terkena mata, segera ke dokter untuk meminta
bantuan medis. Cairan yang keluar dari baterai dapat
menyebabkan iritasi atau luka bakar.

15 BAHASA INDONESIA
11. Jangan menggunakan paket baterai atau alat yang
rusak maupun yang telah termodikasi. Baterai yang
rusak atau telah termodikasi dapat menunjukkan
tanda-tanda kinerja yang tidak wajar dan dapat
mengakibatkan kebakaran, ledakan, atau risiko
cedera.
12. Jangan memaparkan paket baterai atau alat ke api
atau suhu berlebih. Paparan api atau suhu yang
melampaui 130°C (266°F) dapat menimbulkan
ledakan.
13. Patuhi semua petunjuk pengisian daya dan jangan
mengisi daya paket baterai atau alat melampaui
kisaran suhu yang ditentukan di dalam instruksi.
Pengisian daya yang tidak tepat atau dilakukan pada
suhu di luar kisaran yang ditentukan dapat merusak
baterai dan meningkatkan risiko kebakaran.
14. Steker MAINS digunakan sebagai perangkat
pemutus arus, dan steker tersebut akan tetap siap
dioperasikan.
15. Jangan gunakan produk ini dengan volume tinggi
dalam jangka waktu melebihi batas wajar. Untuk
menghindari cedera pada pendengaran, gunakan
produk dengan level volume sedang.
16. (Untuk produk dengan layar LCD saja) terdapat cairan
di dalam layar LCD yang dapat menyebabkan iritasi
dan keracunan. Jika cairan tersebut mengenai mata,
mulut, atau terkena kulit, segera bilas dengan air dan
hubungi dokter.
17. Jangan sampai produk terkena hujan atau terkena air.
Air yang memasuki produk akan meningkatkan risiko
terjadinya sengatan listrik.
18. Produk ini tidak dimaksudkan untuk digunakan oleh
orang (termasuk anak-anak) dengan keterbatasan
sik, indra, atau mental, atau orang yang tidak
memiliki pengalaman dan pengetahuan yang
memadai, kecuali ada orang lain yang mengawasi,
memberi petunjuk tentang cara penggunaan produk,
atau bertanggung jawab atas keselamatan orang
yang bersangkutan. Anak-anak harus diawasi guna
memastikan bahwa mereka tidak bermain-main
dengan produk. Simpan produk di tempat yang tidak
dapat dijangkau anak-anak.
SIMPAN PETUNJUK INI
ATURAN KESELAMATAN
KHUSUS UNTUK KARTRID
BATERAI
1. Sebelum menggunakan kartrid baterai, baca semua
petunjuk dan peringatan yang terdapat di (1) pengisi
daya baterai, (2) baterai, dan (3) produk yang
menggunakan baterai.
2. Jangan membongkar kartrid baterai.
3. Jika masa pengoperasian menjadi semakin pendek,
segera hentikan pengoperasiannya. Kondisi ini dapat
menimbulkan risiko panas berlebih, potensi luka
bakar, dan bahkan ledakan.
4. Jika elektrolit mengenai mata, segera bilas dengan air
bersih dan segera cari pertolongan medis. Elektrolit
tersebut dapat merusak fungsi mata Anda.
5. Jangan sampai terjadi arus pendek listrik pada kartrid
baterai:
(1) Jangan sentuh terminal dengan bahan pengantar
listrik.
(2) Jangan menyimpan kartrid baterai di dalam wadah
yang berisi benda logam lainnya, seperti paku,
koin, dll.
(3) Hindarkan kartrid baterai dari benda cair atau
terkena hujan. Arus pendek pada baterai dapat
menyebabkan aliran arus listrik yang besar, panas
berlebih, potensi terjadinya luka bakar, dan bahkan
kerusakan.
6. Jangan simpan alat dan kartrid baterai di lokasi yang
suhunya dapat mencapai atau melampaui 50°C
(122°F).
7. Jangan membakar kartrid baterai, meskipun kartrid
baterai tersebut sudah rusak parah atau aus. Kartrid
baterai dapat meledak saat terkena api.
8. Hindarkan baterai dari terkena hantaman atau
terjatuh.
9. Jangan gunakan baterai yang rusak.
10. Guna mencegah timbulnya risiko, manual pergantian
baterai harus dibaca terlebih dahulu sebelum
digunakan. Besar arus lucutan maksimal baterai
harus di atas atau sama dengan 8A.
11. Kandungan ion lithium pada baterai harus sesuai
dengan persyaratan di Perundang-undangan Barang
Berbahaya. Untuk transportasi komersial, mis. yang
dilakukan oleh pihak ketiga, perusahaan ekspedisi,
maka persyaratan khusus yang terdapat di kemasan
dan label harus diperiksa dengan saksama.
Diwajibkan untuk berkonsultasi dengan seorang
pakar bahan berbahaya pada saat mempersiapkan
pengiriman barang. Perhatikan juga detail perundang-
undangan yang terdapat di setiap negara.
Rekatkan atau tutup bagian yang terbuka dan kemas
baterai sedemikian rupa sehingga baterai tidak dapat
bergerak di dalam kemasan.
12. Patuhi peraturan setempat terkait pembuangan
baterai.
13. Gunakan baterai hanya dengan produk yang
ditentukan oleh Makita. Pemasangan baterai ke
produk yang tidak sesuai dapat menimbulkan
kebakaran, panas berlebih, ledakan, atau kebocoran
elektrolit.
PERINGATAN:
● Bahaya ledakan jika baterai dipasang secara tidak
benar.
● Ganti hanya dengan jenis yang sama atau setara.

16 BAHASA INDONESIA
● Hanya gunakan baterai Makita asli. Penggunaan
baterai Makita yang tidak asli, atau baterai yang
telah diubah, dapat menimbulkan ledakan pada
baterai yang menyebabkan kebakaran dan luka
sik. Kejadian tersebut juga dapat membatalkan
garansi Makita untuk alat dan pengisi daya Makita.
Tips untuk mempertahankan masa pakai baterai
maksimal
1. Isi daya baterai sebelum benar-benar habis. Selalu
hentikan pengoperasian alat dan isi daya kartrid baterai
saat kekuatan alat melemah.
2. Jangan pernah mengisi ulang daya kartrid baterai yang
dayanya telah terisi penuh. Pengisian berlebih dapat
mempersingkat masa pakai baterai.
3. Isi daya kartrid baterai dengan suhu ruangan 10°C -
40°C (50°F - 104°F). Dinginkan kartrid baterai yang
panas terlebih dahulu sebelum mengisi dayanya.
4. Isi daya kartrid baterai apabila Anda tidak
menggunakannya dalam waktu lama (lebih dari enam
bulan).
WAKTU OPERASI
* Paket baterai yang sesuai untuk radio ini tercantum di dalam tabel berikut.
* Tabel berikut menunjukkan waktu pengoperasian dalam sekali pengisian daya.
Kapasitas baterai
Tegangan kartrid baterai OUTPUT SPEAKER = 100mW
Satuan: Jam (Kira-kira)
10,8V –12V
maks 14,4V 18V Di Radio atau AUX Di Bluetooth + Pengisian
Daya USB
1,3 Ah BL1415 3,5 0,7
BL1815 4,0 1,0
1,5 Ah
BL1015 BL1016 6,0 0,8
BL1415N
BL1415NA 4,5 0,9
BL1815N 5,0 1,2
2,0 Ah
BL1020B
BL1021B 8,0 1,0
BL1820
BL1820B 6,5 1,6
3,0 Ah
BL1430
BL1430B
BL1430A
8,0 1,6
BL1830
BL1830B 9,5 2,3
4,0 Ah
BL1040B
BL1041B 16 2,1
BL1440 13 2,5
BL1840
BL1840B 13 3,2
5,0 Ah
BL1450 15 3,0
BL1850
BL1850B 17 4,2
6,0 Ah
BL1460B
BL1460A 17 3,3
BL1860B 21 5,0
PERINGATAN:
Hanya gunakan kartrid baterai yang tercantum di atas. Penggunaan kartrid baterai lain dapat menyebabkan
cedera dan/atau kebakaran.
CATATAN:
● Tabel tentang waktu operasi baterai di atas hanya sekadar sebagai referensi.
● Waktu pengoperasian yang sebenarnya bisa berbeda, tergantung jenis baterai, kondisi pengisian daya, atau
lingkungan penggunaannya.

17 BAHASA INDONESIA
PEMASANGAN DAN CATU
DAYA
PERINGATAN:
●
Berhati-hatilah agar jari Anda tidak terjepit saat
membuka dan menutup penutup baterai.
● Kembalikan loker kompartemen baterai ke
posisi semula setelah selesai memasang atau
mengeluarkan kartrid baterai. Jika tidak, maka
kartrid baterai bisa terjatuh secara tidak sengaja
dari radio dan menyebabkan cedera pada diri Anda
maupun orang-orang di sekitar Anda.
● Selalu tutup dan kunci loker kompartemen baterai
sebelum memindahkan radio.
● Selalu matikan radio terlebih dahulu sebelum
memasang atau mengeluarkan kartrid baterai.
● Hindarkan radio dari terkena hantaman atau
terjatuh. Bagian luar radio yang rusak dapat
melukai jari Anda atau tubuh Anda. Baterai yang
rusak dapat menunjukkan tanda-tanda kinerja yang
tidak wajar dan dapat mengakibatkan kebakaran,
ledakan, atau risiko cedera.
PENTING:
● Daya yang berkurang, distorsi, “suara yang tersendat”,
atau terlihatnya indikator baterai lemah dan
“POWERFAIL” di layar merupakan pertanda bahwa
paket baterai utama perlu diganti.
● Munculnya indikator baterai lemah dan keterangan
"EMPTY" yang terus berkedip merupakan pertanda
untuk mengganti baterai cadangan.
● Kartrid baterai tidak dapat diisi dayanya melalui adaptor
daya AC yang disediakan.
● Kartrid baterai tidak termasuk dalam aksesori standar.
Memasang atau melepaskan kartrid
baterai slide (Gbr. 4 & 5)
● Untuk memasang kartrid baterai, sejajarkan lidah
pada kartrid baterai dengan alur pada wadahnya dan
selipkan pada tempatnya. Selalu masukkan lidah pada
kartrid baterai tersebut hingga terkunci di tempatnya.
● Jika Anda dapat melihat indikator merah di sisi
atas tombol, artinya kartrid baterai belum terkunci
sepenuhnya. Pasang kartrid baterai hingga indikator
merah tidak terlihat. Jika tidak, maka kartrid baterai
bisa terjatuh secara tidak sengaja dari radio dan
menyebabkan cedera pada diri Anda maupun orang-
orang di sekitar Anda.
● Jangan gunakan tenaga pada saat memasang kartrid
baterai. Jika kartrid tidak dapat masuk dengan mudah,
berarti kartrid tidak dimasukkan dengan benar.
● Untuk melepas kartrid baterai, geser dari radio sambil
menggeser tombol di bagian depan kartrid.
Menunjukkan sisa kapasitas baterai
* Hanya untuk kartrid baterai dengan huruf “B” di
akhir nomor modelnya.
2
1
1. Lampu indikator 2. Tombol periksa
Tekan tombol periksa di kartrid baterai untuk melihat
sisa kapasitas baterai. Lampu indikator menyala selama
beberapa detik.
● Baterai 14,4V/18V
Indikator atau lampu
Sisa kapasitas
Menyala Mati Berkedip
75% ~ 100%
50% ~ 75%
25% ~ 50%
0% ~ 25%
Isi baterai
Baterai mungkin
tidak berfungsi
● Baterai maksimal 10,8V-12V
Indikator atau lampu
Sisa kapasitas
Menyala Mati Berkedip
75% ~ 100%
50% ~ 75%
25% ~ 50%
0% ~ 25%

18 BAHASA INDONESIA
CATATAN:
Informasi pada indikator mungkin sedikit berbeda dengan
informasi kapasitas yang sebenarnya, tergantung kondisi
penggunaan dan suhu sekitarnya.
Pemasangan baterai cadangan
(Gbr. 2 & 3)
Menyimpan baterai cadangan di dalam kompartemen
dapat mencegah hilangnya data yang tersimpan dalam
memori preset.
1. Tarik keluar loker kompartemen baterai untuk
melepaskan kompartemen baterai. Terdapat
kompartemen paket baterai dan kompartemen baterai
cadangan.
2. Lepaskan penutup kompartemen baterai dan
masukkan 2 UM-3 baru (ukuran AA). Pastikan baterai
dipasang dengan polaritas yang sama seperti yang
ditunjukkan di dalam kompartemen. Pasang kembali
penutup baterai.
3. Setelah baterai cadangan dimasukkan, masukkan
paket baterai utama ke radio daya.
Menggunakan adaptor daya AC yang
disediakan
Lepaskan pelindung karet dan masukkan steker adaptor
ke soket DC di sisi kanan radio. Colokkan adaptor ke
stopkontak listrik standar. Setiap kali adaptor digunakan,
paket baterai akan terputus secara otomatis.
PERINGATAN:
● Selalu lepaskan colokan adaptor daya AC sebelum
memindahkan radio. Adaptor AC yang tidak dilepas
sebelum memindahkan radio dapat menyebabkan
sengatan listrik.
● Jangan pernah menarik dan/atau menyeret kabel
adaptor. Jika tidak, maka radio dapat jatuh secara
tidak sengaja dan menyebabkan cedera pada diri
Anda maupun orang-orang di sekitar Anda.
PENTING:
● Adaptor listrik digunakan sebagai sarana untuk
menghubungkan radio ke pasokan listrik. Soket listrik
yang digunakan untuk radio harus tetap dapat diakses
selama penggunaan normal.
● Untuk memutuskan sambungan radio, adaptor listrik
harus dilepas dari stopkontak listrik.
● Hanya gunakan adaptor daya AC yang disertakan
dengan produk atau yang ditentukan oleh Makita.
● Jangan memegang kabel catu daya dan
menyambungkannya menggunakan mulut Anda.
Melakukan tindakan tersebut dapat menyebabkan
sengatan listrik.
● Jangan menyentuh steker listrik dengan tangan yang
basah atau berminyak.
● Kabel yang rusak atau terbelit dapat meningkatkan
risiko sengatan listrik. Jika kabelnya rusak, maka
mintalah kabel pengganti di pusat layanan resmi kami
demi mencegah terjadinya bahaya pada keselamatan.
Jangan menggunakannya sebelum selesai diperbaiki.
● Setelah digunakan, selalu simpan adaptor daya AC
di luar jangkauan anak-anak. Jika kabel tersebut
dimainkan oleh anak-anak, maka mereka dapat
mengalami cedera.
Catatan:
Ketika adaptor membuat radio Anda mengalami gangguan
pada gelombang AM, harap jauhkan radio Anda dari
adaptor daya AC-nya sejauh lebih dari 30 cm.
Mengisi daya dengan port catu daya
USB
Terdapat port USB di sisi depan radio. Anda dapat
mengisi daya perangkat USB melalui port USB.
1. Sambungkan perangkat USB, seperti pemutar MP3
atau pemutar CD, dengan kabel USB yang tersedia di
pasar.
2. Tekan tombol Daya untuk menyalakan radio Anda.
3. Terlepas dari daya radio berasal dari AC maupun
baterai, radio dapat mengisi daya perangkat USB ketika
radio dinyalakan dan berada di dalam mode radio FM,
atau mode BT, atau mode AUX, yang nantinya muncul
ketika terhubung ke sumber audio eksternal.
Catatan:
● Anda tidak dapat mengisi daya perangkat USB ketika
radio berada di dalam mode AM, karena pengisian
daya perangkat USB membuat penerimaan sinyal radio
menjadi sangat buruk.
● Volume maksimal speaker daya output akan berkurang
ketika USB Anda sedang melakukan pengisian ulang.
● Soket USB dapat memberikan arus listrik sebesar
maks 5V/2,4A.
Penting:
● Sebelum menghubungkan perangkat USB ke pengisi
daya, selalu cadangkan data perangkat USB Anda.
Jika tidak, maka data Anda dapat berpotensi hilang.
● Pengisi daya bisa jadi tidak dapat memasok daya ke
sebagian perangkat USB.
● Saat tidak digunakan atau setelah selesai mengisi
daya, lepaskan kabel USB dan pasang penutupnya.
● Jangan hubungkan sumber daya ke port USB. Jika
Anda menghubungkannya, maka akan timbul risiko
kebakaran. Port USB hanya ditujukan untuk mengisi
daya perangkat dengan tegangan yang lebih rendah.
Selalu tutup port USB saat tidak mengisi daya
perangkat dengan tegangan yang lebih rendah.
● Jangan memasukkan paku, kawat, dll. ke port catu
daya USB. Kalau tidak, maka akan terjadi arus pendek
yang dapat menyebabkan asap dan api.
● Jangan hubungkan soket USB ini dengan port USB
PC Anda, karena hubungan tersebut berisiko tinggi
menyebabkan kerusakan pada unit radio.

19 BAHASA INDONESIA
MENDENGARKAN RADIO
Pemindaian tuning AM/FM
Catatan:
Antena FM terdapar di gagang radio. Saat
mengoperasikan radio, luruskan gagang dengan benar
di atas radio guna memperoleh sinyal yang lebih baik.
Guna memperoleh gelombang AM, putar radio untuk
mendapatkan sinyal terbaik karena antena AM sudah
terdapat di dalam radio.
1. Tekan tombol Daya untuk menyalakan radio Anda.
2. Tekan tombol Sumber untuk memilih mode radio AM
atau FM.
3. Tekan dan tahan kenop kontrol Tuning untuk
mengaktifkan penyetelan otomatis. Radio Anda akan
memindai gelombang AM/FM dari frekuensi yang
sedang ditampilkan dan akan berhenti memindai
secara otomatis ketika menemukan stasiun dengan
kekuatan sinyal yang memadai.
4. Informasi pada tampilan akan diperbarui setelah
beberapa detik. Layar akan menampilkan frekuensi
sinyal yang ditemukan.
5. Untuk mencari stasiun lainnya, tekan dan tahan kenop
kontrol Tuning seperti sebelumnya.
6. Ketika sampai pada ujung akhir gelombang sinyal,
radio Anda akan memulai tuning kembali dari ujung
awal gelombang sinyal.
7. Putar kenop kontrol Tuning untuk mengatur level suara.
Catatan:
● Pada saat mengatur volume, pastikan bahwa
keterangan FM/AM di layar TIDAK berkedip.
● Ketika keterangan AM/FM berkedip, Anda dapat
memilih stasiun secara manual (lihat bagian “Tuning
manual – AM/FM” untuk informasi selengkapnya).
● Volume disarankan jangan sampai terlalu
keras. Demi mencegah potensi gangguan pada
pendengaran, jangan mendengarkan radio dengan
level volume yang keras dalam kurun waktu yang
lama.
8. Untuk mematikan radio Anda, tekan tombol Daya.
Tuning manual – AM/FM
1. Tekan tombol Daya untuk menyalakan radio Anda.
2. Tekan tombol Sumber untuk memilih mode radio AM
atau FM.
3. Tekan kenop kontrol Tuning, dan Anda akan melihat
tanda FM atau AM yang berkedip di layar.
Catatan:
● FM/AM akan berkedip selama kurang lebih 10 detik.
Dalam periode ini, Anda hanya dapat melakukan
tuning manual.
● Jika Anda ingin menyesuaikan volume saat tanda
FM/AM berkedip, tekan kenop kontrol Tuning untuk
menghentikan kedip tanda tersebut, dan Anda dapat
memutar kenop kontrol Tuning untuk menyesuaikan
level suara.
4. Putar kenop kontrol Tuning untuk mencari stasiun.
5. Ketika sampai pada ujung akhir gelombang sinyal,
radio Anda akan memulai tuning kembali dari ujung
awal gelombang sinyal.
6. Putar kenop kontrol Tuning untuk mengatur level suara.
Menetapkan stasiun preset dalam mode
AM/FM
Terdapat 5 stasiun preset untuk masing-masing radio AM
dan FM. Stasiun preset tersebut digunakan melalui cara
yang sama untuk setiap gelombang sinyal.
1. Tekan tombol Daya untuk menyalakan radio Anda.
2. Tekan tombol Sumber untuk memilih gelombang
sinyal yang diinginkan. Lakukan tuning untuk stasiun
radio yang diinginkan sebagaimana yang dijelaskan
sebelumnya.
3. Tekan dan tahan tombol Preset yang diperlukan (1
hingga 5) hingga layar menampilkan, misalnya, simbol
"P4" di samping keterangan frekuensi. Stasiun radio
tersebut akan disimpan menggunakan nomor preset.
Ulangi prosedur ini untuk mengatur sisa preset sesuai
keinginan Anda.
4. Jika Anda menginginkannya, stasiun preset yang telah
disimpan dapat diubah dengan stasiun yang baru
melalui prosedur yang dijelaskan di atas.
Mode tampilan – FM
Radio Anda memiliki berbagai opsi tampilan untuk mode
radio FM.
Tekan tombol Menu/Info berulang kali untuk menampilkan
informasi RDS milik stasiun yang tengah Anda dengarkan.
a. Nama stasiun Menampilkan nama stasiun yang
sedang didengarkan.
b. Jenis program Menampilkan jenis stasiun yang
sedang didengarkan, seperti misalnya
Pop, Klasik, Berita, dsb.
c. Teks radio Menampilkan pesan teks radio,
seperti misalnya barang baru dll.
d. Tahun/Hari Menampilkan tahun dan hari menurut
pengaturan tanggal radio Anda.
e. Tanggal/Hari Menampilkan tanggal dan hari
menurut pengaturan tanggal radio
Anda.
f. Mode EQ Menampilkan mode EQ FM untuk
stasiun yang sedang didengarkan.
g. Frekuensi Menampilkan frekuensi FM untuk
stasiun yang sedang didengarkan.

20 BAHASA INDONESIA
Stereo FM (otomatis)/mono
Jika stasiun radio FM yang sedang didengarkan memiliki
sinyal lemah, maka Anda dapat mendengar suara
berisik. Suara berisik tersebut dapat dihilangkan dengan
memaksa radio untuk memutar stasiun dalam suara mono
alih-alih stereo.
1. Tekan tombol Sumber untuk memilih gelombang FM
dan dengarkan stasiun FM sebagaimana dijelaskan
sebelumnya.
2. Tekan dan tahan tombol Menu/Info untuk memasuki
pengaturan menu.
3. Putar kenop kontrol Tuning hingga pengaturan
“FM AUTO (atau MONO)” tampil di layar. Jika
pengaturannya adalah Otomatis, tekan kenop kontrol
Tuning dan kemudian putar kenop kontrol Tuning
untuk beralih ke mode Mono untuk mengurangi suara
berisiknya. Tekan kenop kontrol Tuning untuk memilih
opsi.
Mengingat preset dalam mode AM/FM
1. Tekan tombol Daya untuk menyalakan radio Anda.
2. Tekan tombol Sumber untuk memilih mode radio AM
atau FM
3. Tekan sebentar tombol Preset untuk menyetel radio
Anda ke salah satu stasiun yang tersimpan dalam
memori preset.
PENGATURAN LAINNYA
Mengatur format waktu dan tanggal
Tampilan jam yang digunakan dalam mode siaga dan
di layar mode putar dapat ditetapkan ke format yang
berbeda. Format yang dipilih kemudian juga digunakan
saat mengatur alarm.
1. Tekan dan tahan tombol Menu/Info untuk memasuki
pengaturan menu.
2. Putar kenop kontrol Tuning hingga “CLOCK xxH”
muncul, lalu tekan kenop kontrol Tuning untuk
memasukkan pengaturannya. Anda akan melihat
format waktu yang mulai berkedip.
3. Putar kenop kontrol Tuning untuk memilih format 12
jam atau 24 jam. Tekan kenop kontrol Tuning untuk
mengonrmasikan pilihan format jam Anda.
Catatan:
Jika Anda memilih format 12 jam, maka radio akan
menggunakan pengaturan waktu dengan format 12
jam.
4. Tekan dan tahan tombol Menu/Info untuk memasuki
pengaturan menu.
5. Putar kenop kontrol Tuning hingga tanggal (mis. THU
APR 3) muncul di layar dan tekan kenop kontrol Tuning
untuk memasukkan pengaturannya. Anda akan melihat
format tanggal mulai berkedip.
6. Putar kenop kontrol Tuning untuk memilih format
tanggal yang Anda inginkan. Tekan kenop kontrol
Tuning untuk mengonrmasikan pilihan Anda.
Mengatur waktu dan tanggal jam
1. Tekan dan tahan tombol Menu/Info.
2. Putar kenop kontrol Tuning hingga “CLOCK ADJ”
muncul di layar. Tekan kenop kontrol Tuning untuk
memasukkan pengaturannya.
3. Pengaturan jam di layar akan mulai berkedip.
Putar kenop kontrol Tuning untuk memilih jam yang
diinginkan, lalu tekan kenop kontrol Tuning lagi untuk
mengonrmasikan pengaturannya. Selanjutnya,
putar kenop kontrol Tuning untuk memilih menit yang
diinginkan, dan tekan kenop kontrol Tuning untuk
mengonrmasikan pengaturannya.
4. Putar kenop kontrol Tuning hingga “DATE ADJ”
muncul di layar. Tekan kenop kontrol Tuning untuk
memasukkan pengaturannya.
5. Putar kenop kontrol Tuning untuk memilih tahun yang
diinginkan, lalu tekan kenop kontrol Tuning untuk
mengonrmasikan pengaturannya. Selanjutnya,
putar kenop kontrol Tuning untuk memilih bulan yang
diinginkan, lalu tekan kenop kontrol Tuning untuk
mengonrmasikan pengaturannya. Selanjutnya, putar
kenop kontrol Tuning untuk memilih Tahun > Bulan
> Tanggal yang diinginkan dan tekan kenop kontrol
Tuning untuk mengonrmasikan pengaturannya.
Radio Data System/Sistem Data
Radio (RDS)
Ketika Anda mengatur waktu jam dengan menggunakan
fungsi RDS, radio akan menyelaraskan waktu jamnya
setiap kali Anda mendengarkan stasiun radio yang
menggunakan RDS dengan sinyal CT.
1. Saat Anda mencari stasiun radio yang memancarkan
data RDS, simbol RDS akan muncul di layar Anda.
Tekan dan tahan tombol Menu/Info.
2. Putar kenop kontrol Tuning hingga tanda “RDS CT”
dan simbol jam muncul di layar. Tekan kenop kontrol
Tuning untuk memasukkan pengaturannya.
3. Putar kenop kontrol Tuning hingga “RDS CT”
muncul di layar. Tekan kenop kontrol Tuning untuk
mengonrmasikan pengaturannya. Waktu jam radio
akan diatur secara otomatis menurut data RDS yang
diterima.
Catatan:
● Waktu jam radio akan valid selama 5 hari setiap kali
waktu radio diselaraskan dengan CT RDS.
● Untuk menonaktifkan fungsi CT RDS, kembali ke
langkah 1 dan 2, lalu putar kenop kontrol Tuning untuk
memilih opsi “MANUAL”. Tekan kenop kontrol Tuning
untuk mengonrmasikan pengaturannya.
Other manuals for DMR114
4
Table of contents
Languages:
Other Makita Radio manuals

Makita
Makita DMR050 User manual

Makita
Makita BMR103 User manual

Makita
Makita DMR112W User manual

Makita
Makita BMR103 User manual

Makita
Makita DMR108N User manual

Makita
Makita MR001G User manual

Makita
Makita MR004G User manual

Makita
Makita MR005G User manual

Makita
Makita DMR113 User manual

Makita
Makita DMR057 User manual

Makita
Makita DMR106 User manual

Makita
Makita XRM04B User manual

Makita
Makita MR002G User manual

Makita
Makita DMR109 User manual

Makita
Makita DMR110 User manual

Makita
Makita LXRM03 User manual

Makita
Makita DMR114 User manual

Makita
Makita RM02 User manual

Makita
Makita DMR110W User manual

Makita
Makita DMR112 User manual