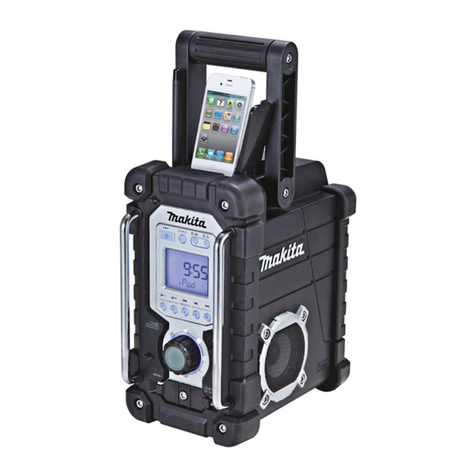
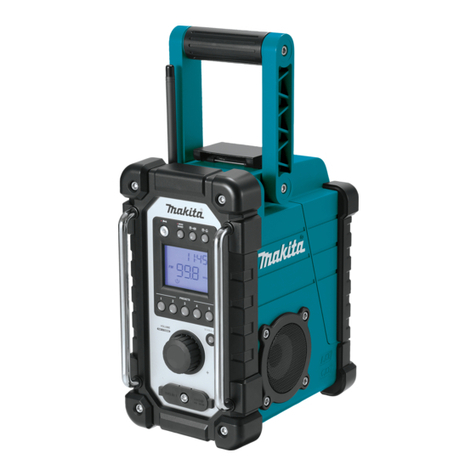
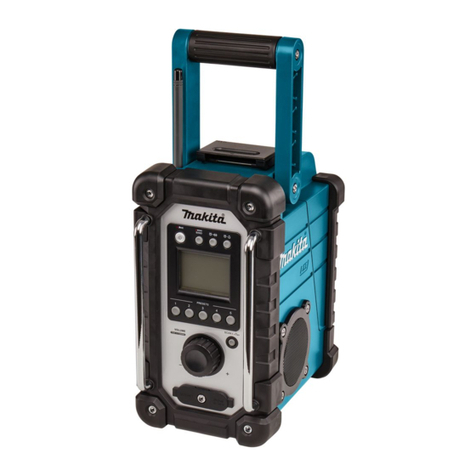
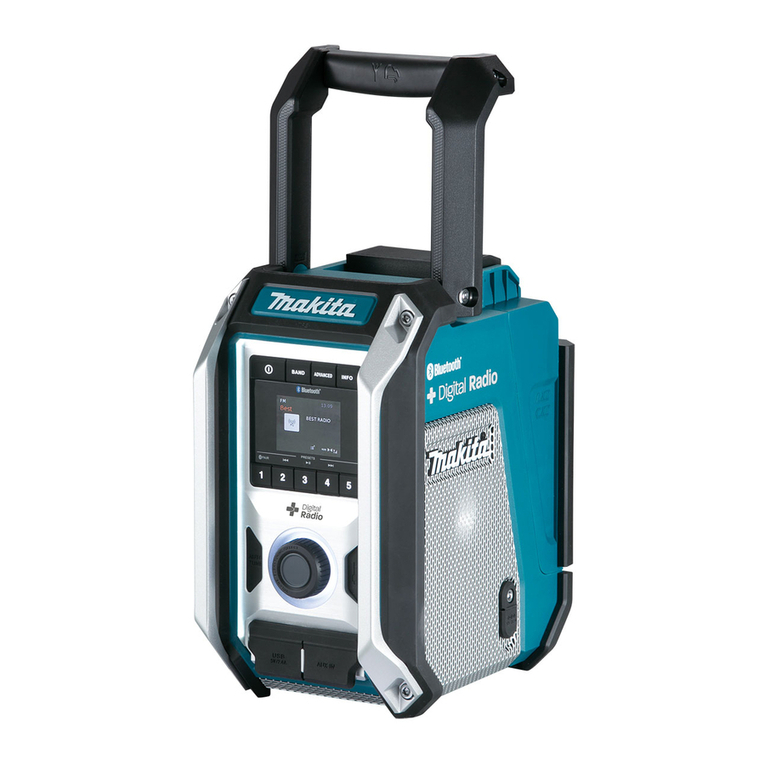
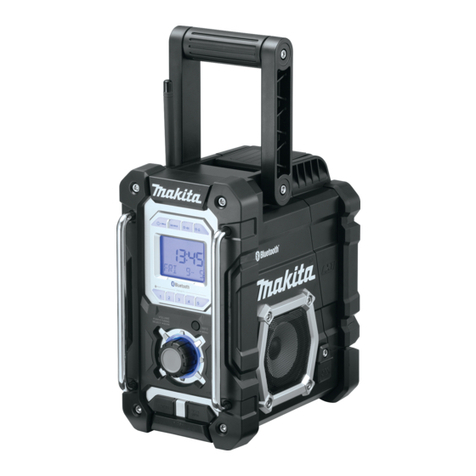
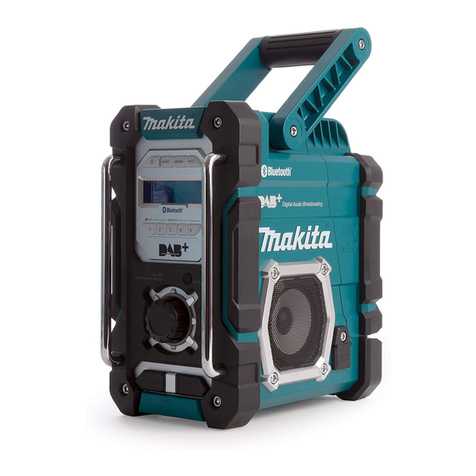
Makita XRM10 User manual

INSTRUCTION MANUAL
Job Site Charger Radio
XRM10
ENGLISH: Original instructions
IMPORTANT: Read Before Using.

2 ENGLISH
SPECIFICATIONS
Model: XRM10
AC power adaptor DC 24 V / 5.0 A, inner sleeve positive
Battery UM-3 (AA size) x 2 for back up
CXT battery: 10.8 V - 12 V max
LXT battery: 14.4 V - 18 V
Band FM
AM
Frequency coverage FM 87.50 - 108 MHz
(0.1 MHz/step)
AM (MW) 520 - 1,710 kHz
(10 kHz/step)
Bluetooth®Bluetooth®
Bluetooth® QD ID
D049499
(The Bluetooth® word mark and logos
are registered trademarks
owned by Bluetooth SIG, Inc.)
Bluetooth® version &HUWL¿HG
Bluetooth®SUR¿OHV A2DP / AVRCP
Transmission power Power Class2
Operating Frequency 2,402 MHz - 2,480 MHz
Maximum radio-frequency power 6.32 dBm
(Declaration for EU Compliance)
Transmission range Optimum: Max.10 meters (33 feet)
Possible: Max.30 meters (100 feet)
(varies according to usage conditions)
Supported codec SBC
Circuit feature
Loudspeaker
3.5 inches 8 ohm x 2
Output Power 10.8 V - 12 V max:1.2 W x 2
18 V: 3.5 W x 2
USB output USB TYPE A x 2 (5 V / 2.4 A TOTAL)
Battery charge output CXT battery: 10.8 V - 12 V max, 4 A
LXT battery: 14.4 V - 18 V, 6 A
Input terminal 3.5 mm dia. (AUX IN1/AUX IN2)
Antenna system FM: soft bended rod antenna
AM: bar antenna
Dimension (L x W x H) 270 x 185 x 305 mm
Ǝ[Ǝ[Ǝ
Weight (without battery cartridge) 6.4 kg (14.1 lbs)
'XHWRRXUFRQWLQXLQJSURJUDPRIUHVHDUFKDQGGHYHORSPHQWWKHVSHFL¿FDWLRQVKHUHLQDUHVXEMHFWWRFKDQJH
without notice.
6SHFL¿FDWLRQVPD\GLIIHUIURPFRXQWU\WRFRXQWU\
The Bluetooth® word mark and logos are registered trademarks owned by the Bluetooth SIG, Inc. and any use of
such marks by Makita is under license. Other trademarks and trade names are those of their respective owners.
The following table indicates the operating time on a single charge in Radio mode.
Battery capacity Battery Cartridge Voltage Operating time (hour)
(at speaker output = 50 mW + 50 mW)
Charging time
(hour)
10.8 V - 12 V max 18 V In radio or AUX In Bluetooth® with
USB charging
1.5 Ah BL1016 - *** *** ***
- BL1815N *** *** ***
2.0 Ah BL1021B - *** *** ***
- BL1820B *** *** ***
3.0 Ah - BL1830B *** *** ***
14.4 V - 18 V
D
0
4
9
4
99
®
O
peratin
g
Frequenc
y
2,402 MHz - 2,480 MH
z
, 4 A

3 ENGLISH
Battery capacity Battery Cartridge Voltage Operating time (hour)
(at speaker output = 50 mW + 50 mW)
Charging time
(hour)
10.8 V - 12 V max 18 V In radio or AUX In Bluetooth® with
USB charging
4.0 Ah BL1041B - *** *** ***
- BL1840B *** *** ***
5.0 Ah - BL1850B *** *** ***
6.0 Ah - BL1860B *** *** ***
WARNING: Only use the battery cartridges listed above. Use of any other battery cartridges may cause
LQMXU\DQGRU¿UH
NOTE: Some of the battery cartridges listed above may not be available depending on your region of residence.
NOTE: Table regarding to the battery operating time above is for reference. The actual operating time may differ
with the type of the battery, charging condition, or usage environment.
Symbols
The followings show the symbols used for tool.
volts
direct current
SAFETY WARNINGS
IMPORTANT SAFETY
INSTRUCTIONS
SAVE THESE INSTRUCTIONS.
WARNING: When using electric tools, basic
safety precautions should always be followed to
UHGXFHWKHULVNRI¿UHHOHFWULFVKRFNDQGSHU-
sonal injury, including the following:
1. Read this instruction manual carefully before
use. If you use a Makita charger, also read the
charger instruction manual.
2. Clean only with dry cloth. Do not use water for
cleaning.
3. Do not install near any heat sources such as
radiators, heat registers, stoves, or other appa-
UDWXVLQFOXGLQJDPSOL¿HUVWKDWSURGXFHKHDW
4. 2QO\XVHDWWDFKPHQWVDFFHVVRULHVVSHFL¿HG
by the manufacturer.
5. Unplug this appliance during lightning storms
or when unused for long periods of time.
6. The battery pack must be recharged only with
WKLVUDGLRRUWKHVSHFL¿HGFKDUJHUIRUWKHEDW-
tery. A charger that may be suitable for one
W\SHRIEDWWHU\PD\FUHDWHDULVNRI¿UHZKHQ
used with another battery.
7. Use battery operated radio only with specif-
ically designated battery packs. Use of any
RWKHUEDWWHULHVPD\FUHDWHDULVNRI¿UH
8. When battery pack is not in use, keep it away
from other metal objects like: paper clips,
coins, keys, nails, screws, or other small metal
objects that can make a connection from one
terminal to another. Shorting the battery ter-
minals together may cause sparks, burns, or a
¿UH
9. Avoid body contact with grounded surfaces
such as pipes, radiators, ranges and refrig-
erators. There is an increased risk of electric
shock if your body is grounded.
10. Under abusive conditions, liquid may be
ejected from the battery; avoid contact. If
FRQWDFWDFFLGHQWDOO\RFFXUVÀXVKZLWKZDWHU
If liquid contacts eyes,additionally seek med-
ical help. Liquid ejected from the battery may
cause irritation or burns.
11. Do not use a battery pack and radio that is
GDPDJHGRUPRGL¿HGDoing so may exhibit
XQSUHGLFWDEOHEHKDYLRXUUHVXOWLQJLQ¿UHH[SORVLRQ
RUULVNRILQMXU\
12. 'RQRWH[SRVHDEDWWHU\SDFNRUWRROWR¿UH
or excessive temperature.([SRVXUHWR¿UHRU
temperature above 130 °C(266°F) may cause
explosion.
13. Follow all charging instructions and do not
charge the battery pack or tool outside the
WHPSHUDWXUHUDQJHVSHFL¿HGLQWKHLQVWUXF-
tions. Charging improperly or at temperatures
RXWVLGHWKHVSHFL¿HGUDQJHPD\GDPDJHWKH
EDWWHU\DQGLQFUHDVHWKHULVNRI¿UH
14. The MAINS plug is used as the disconnect
device. The MAINS plug shall remain readily
operable.
15. Do not use the product at a high volume for
any extended period. To avoid hearing damage,
use the product at moderate volume level.
16. LCD displays include liquid which may cause
irritation and poisoning. If the liquid enters the
eyes, mouth or skin, rinse it with water and call a
doctor.
17. Do not expose the product to rain or wet con-
ditions. Water entering the product will increase
the risk of electric shock.
18. This product is not intended for use by per-
sons (including children) with reduced phys-
ical, sensory or mental capabilities, or lack
of experience and knowledge, unless they
have been given supervision or instruction
concerning use of the product by a person

4 ENGLISH
responsible for their safety. Children should be
supervised to ensure that they do not play with
the product. Store the product out of the reach
of children.
19. %HFDUHIXOQRWWRSLQFK\RXU¿QJHUVZKHQ
opening and closing the battery cover.
20. Return the battery compartment locker to the
original position, after installing or removing
battery pack. If not, battery pack may accidentally
IDOORXWRIWKHUDGLRFDXVLQJLQMXU\WR\RXRUVRPH-
one around you.
21. Always close and lock the battery compart-
ment locker before moving the radio.
22. When the radio is powered from the battery,
switch off the radio before removing the bat-
tery pack.
23. Be careful not to drop or strike the radio.
%URNHQVKHOOPD\VODVK\RXU¿QJHURUVWDE
your body. Damaged radio may exhibit unpredict-
DEOHEHKDYLRXUUHVXOWLQJLQ¿UHH[SORVLRQRUULVNRI
LQMXU\
24. +DYHVHUYLFLQJSHUIRUPHGE\DTXDOL¿HGUHSDLU
person using only identical replacement parts.
This will ensure that the safety of the product is
maintained.
25. Do not modify or attempt to repair the appli-
ance or the battery pack except as indicated in
the instructions for use and care.
FCC statement
This device complies with part 15 of the FCC Rules.
2SHUDWLRQLVVXEMHFWWRWKHIROORZLQJWZRFRQGLWLRQV
This device may not cause harmful interference, and
(2) this device must accept any interference received,
including interference that may cause undesired
operation.
NOTE: This equipment has been tested and found
to comply with the limits for a Class B digital device,
pursuant to part 15 of the FCC Rules. These limits are
designed to provide reasonable protection against
harmful interference in a residential installation. This
equipment generates, uses and can radiate radio
frequency energy and, if not installed and used in
accordance with the instructions, may cause harmful
interference to radio communications. However, there is
no guarantee that interference will not occur in a partic-
ular installation. If this equipment does cause harmful
interference to radio or television reception, which can
be determined by turning the equipment off and on, the
user is encouraged to try to correct the interference by
one or more of the following measures:
— Reorient or relocate the receiving antenna.
— Increase the separation between the equipment
and receiver.
— Connect the equipment into an outlet on a cir-
cuit different from that to which the receiver is
connected.
— Consult the dealer or an experienced radio/TV
technician for help.
FCC CAUTION
&KDQJHVRUPRGL¿FDWLRQVQRWH[SUHVVO\DSSURYHGE\
the party responsible for compliance could void the
user’s authority to operate the equipment.
Makita U.S.A. Inc.
14930 Northam Street, La Mirada, CA 90638-5753,
USA
+1-(714) 522-8088
CAN ICES-3 (B)/NMB-3(B)
ISED Regulatory Compliance
This device contains licence-exempt transmitter(s)
that comply with Innovation, Science and Economic
Development Canada’s licence-exempt RSS(s).
2SHUDWLRQLVVXEMHFWWRWKHIROORZLQJWZRFRQGLWLRQV
1. This device may not cause interference.
2. This device must accept any interference, including
interference that may cause undesired operation of the
device.
RF Exposure Compliance
This equipment complies with FCC/IC radiation expo-
sure limits set forth for an uncontrolled environment.
This transmitter must not be co-located or operating in
FRQMXQFWLRQZLWKDQ\RWKHUDQWHQQDRUWUDQVPLWWHU
Important safety instructions for
battery cartridge
1. Before using battery cartridge, read all instruc-
tions and cautionary markings on (1) battery
charger, (2) battery, and (3) product using
battery.
2. Do not disassemble or tamper the battery
cartridge.,WPD\UHVXOWLQD¿UHH[FHVVLYHKHDW
or explosion.
3. If operating time has become excessively
shorter, stop operating immediately. It may
result in a risk of overheating, possible burns
and even an explosion.
4. If electrolyte gets into your eyes, rinse them
out with clear water and seek medical atten-
tion right away. It may result in loss of your
eyesight.
5. Do not short the battery cartridge:
(1) Do not touch the terminals with any con-
ductive material.
(2) Avoid storing battery cartridge in a con-
tainer with other metal objects such as
nails, coins, etc.
(3) Do not expose battery cartridge to water
or rain.
A battery short can cause a large current
ÀRZRYHUKHDWLQJSRVVLEOHEXUQVDQGHYHQD
breakdown.
6. Do not store and use the tool and battery car-
tridge in locations where the temperature may
reach or exceed 50 °C (122 °F).
7. Do not incinerate the battery cartridge even if
it is severely damaged or is completely worn
RXW7KHEDWWHU\FDUWULGJHFDQH[SORGHLQD¿UH
8. Do not nail, cut, crush, throw, drop the battery
cartridge, or hit against a hard object to the
battery cartridge. Such conduct may result in a
¿UHH[FHVVLYHKHDWRUH[SORVLRQ
9. Do not use a damaged battery.
10. The contained lithium-ion batteries are subject
to the Dangerous Goods Legislation require-
ments.
For commercial transports e.g. by third parties,
5 ENGLISH
forwarding agents, special requirement on pack-
aging and labeling must be observed.
For preparation of the item being shipped, consult-
ing an expert for hazardous material is required.
Please also observe possibly more detailed
national regulations.
Tape or mask off open contacts and pack up the
battery in such a manner that it cannot move
around in the packaging.
11. When disposing the battery cartridge, remove
it from the tool and dispose of it in a safe
place. Follow your local regulations relating to
disposal of battery.
12. Use the batteries only with the products
VSHFL¿HGE\0DNLWD Installing the batteries to
QRQFRPSOLDQWSURGXFWVPD\UHVXOWLQD¿UHH[FHV-
sive heat, explosion, or leak of electrolyte.
13. If the tool is not used for a long period of time,
the battery must be removed from the tool.
14. During and after use, the battery cartridge may
take on heat which can cause burns or low
temperature burns. Pay attention to the han-
dling of hot battery cartridges.
15. Do not touch the terminal of the tool imme-
diately after use as it may get hot enough to
cause burns.
16. Do not allow chips, dust, or soil stuck into the
terminals, holes, and grooves of the battery
cartridge. It may result in poor performance or
breakdown of the tool or battery cartridge.
17. Unless the tool supports the use near
high-voltage electrical power lines, do not use
the battery cartridge near a high-voltage elec-
trical power lines. It may result in a malfunction
or breakdown of the tool or battery cartridge.
18. Keep the battery away from children.
SAVE THESE INSTRUCTIONS.
CAUTION: Only use genuine Makita batteries.
Use of non-genuine Makita batteries, or batteries that
have been altered, may result in the battery bursting
FDXVLQJ¿UHVSHUVRQDOLQMXU\DQGGDPDJH,WZLOO
also void the Makita warranty for the Makita tool and
charger.
CAUTION: RISK OF EXPLOSION IF BATTERY
IS REPLACED BY AN INCORRECT TYPE. Disposal
RIDEDWWHU\LQWR¿UHRUDKRWRYHQRUPHFKDQLFDOO\
crushing or cutting of a battery, that can result in an
explosion. Leaving a battery in an extremely high
temperature surrounding environment that can result
LQDQH[SORVLRQRUWKHOHDNDJHRIÀDPPDEOHOLTXLGRU
JDV$EDWWHU\VXEMHFWHGWRH[WUHPHO\ORZDLUSUHVVXUH
that may result in an explosion or the leakage of
ÀDPPDEOHOLTXLGRUJDV
Tips for maintaining maximum
battery life
1. Charge the battery cartridge before completely
discharged. Always stop tool operation and
charge the battery cartridge when you notice
less tool power.
2. Never recharge a fully charged battery car-
tridge. Overcharging shortens the battery
service life.
3. Charge the battery cartridge with room tem-
perature at 10 °C - 40 °C (50 °F - 104 °F). Let
a hot battery cartridge cool down before
charging it.
4. Charge the battery cartridge if you do not use
it for a long period (more than six months).
Important safety instructions for bat-
tery charging
CAUTION:
1. SAVE THESE INSTRUCTIONS
– This manual contains important safety and operating instructions for battery
charging.
2. Before charging, read all instructions and cautionary markings on this appli-
ance, AC power adaptor, and battery cartridge.
3. CAUTION – To reduce risk of injury, charge only Makita type rechargeable bat-
teries. Other types of batteries may burst causing personal injury and damage.
4. Non-rechargeable batteries cannot be charged with this appliance.
5. 8VHDSRZHUVRXUFHZLWKWKHYROWDJHVSHFL¿HGRQWKHQDPHSODWHRIWKH$&SRZHU
adaptor.
6. 'RQRWFKDUJHWKHEDWWHU\FDUWULGJHLQSUHVHQFHRIÀDPPDEOHOLTXLGVRUJDVHV
7. Do not expose the AC power adaptor to rain, snow, or wet condition.
8. Never carry the AC power adaptor by cord or yank it to disconnect from
receptacle.
9. Before attempting any maintenance or cleaning, unplug the AC power adaptor

6 ENGLISH
and remove battery cartridge. Pull by plug rather than cord whenever discon-
necting the appliance.
10. Do not leave the AC power adaptor disconnected from the appliance while the
power is supplied from the mains.
11. Make sure cord is located so that it will not be stepped on, tripped over, or other-
wise subjected to damage or stress.
12. Do not operate this appliance with damaged cord or plug. If the cord or plug is
damaged, ask Makita authorized service center to replace it in order to avoid a
hazard.
13. Do not operate or disassemble this appliance if it has received a sharp blow,
EHHQGURSSHGRURWKHUZLVHGDPDJHGLQDQ\ZD\WDNHLWWRDTXDOL¿HGVHUYLFH-
PDQ,QFRUUHFWXVHRUUHDVVHPEO\PD\UHVXOWLQDULVNRIHOHFWULFVKRFNRU¿UH
14. Do not charge battery cartridge when room temperature is BELOW 10°C (50°F)
or ABOVE 40°C (104°F). At the cold temperature, charging may not start.
15. Do not attempt to use the AC power adaptor with a step-up transformer, an
engine generator or DC power receptacle.
16. Do not allow anything to cover or clog the vents on this appliance.
17. Do not plug or unplug the power cord and the AC power adaptor with wet hands.
18. Do not install or remove the battery cartridge with wet hands.

7 ENGLISH
INTRODUCTION
Parts description
Body
(a) (b) (c)
(d) (e) (f)
1
2
3
4
5
678
9
10
11
12
13
14
15
16
17
18 19
3
Fig.1
ŹD/HIWVLGHE)URQWF5LJKWVLGHG%DFNEDWWHU\FRYHUFORVHGH%DFNEDWWHU\FRYHURSHQHGI7RS
1 Handle 2 Soft bended rod antenna 3 Speaker 4 Menu/Info button
5 Volume/Tuning control/
Select knob
6 Auxiliary input socket
(AUX IN 1)
7 USB power supply port 8 DC IN socket
9 Hook for AC adaptor 10 Bottle cap opener 11 Battery cover 12 Slot for LXT battery
cartridge
13 Slot for CXT battery
cartridge
14 Auxiliary input socket
(AUX IN 2)
15 USB power supply port 16 Battery compartment
(covering back up
batteries)
17 Battery compartment
locker
18 Power cord 19 AC power adaptor - -

8 ENGLISH
Buttons and LCD display
6
511
12
10
8
9
16
1 2 3 4
18
713
14
15
17
Fig.2
1 Power/Sleep timer
button
2 Source button 3 Radio alarm button 4 Buzzer alarm button
5 Buzzer alarm 6 Radio alarm 7 Icon for delay charge 8 Band
9 Icon for sleep timer 10 PM indicator for clock 11 Stereo symbol 12 No power indicator
13 Error icon for charging
failure
14 Indicator for battery
status/capacity
15 Indicator for AC power
supply
16 Clock
17 Information area 18 Preset stations/Preset
1 button as Bluetooth®
pair button
-- --
Installing back up batteries
NOTE: Keeping back up batteries inside the compart-
ment prevent stored data in preset memories from
being lost.
1. Pull up the battery compartment to unlock it and
then open the battery cover.
1
2
Fig.3
Ź1. Battery compartment locker 2. Battery cover

9 ENGLISH
2. Remove back up battery compartment cover and
install 2 fresh UM-3 (AA sizes) batteries. Make sure the
batteries are with correct polarity as shown inside the
compartment.
1
Fig.4
Ź1. Back up battery compartment cover
3. Close the back up battery compartment cover.
FUNCTIONAL
DESCRIPTION
Installing or removing battery
cartridge
CAUTION: Hold the tool and the battery car-
WULGJH¿UPO\ZKHQLQVWDOOLQJRUUHPRYLQJEDWWHU\
cartridge. Failure to hold the radio and the battery
FDUWULGJH¿UPO\PD\FDXVHWKHPWRVOLSRII\RXUKDQGV
and result in damage to the radio and battery car-
WULGJHDQGDSHUVRQDOLQMXU\
Pull up the battery compartment to unlock it and then
open the battery cover.
To install the battery cartridge, align the tongue on the
battery cartridge with the groove in the housing and slip
it into place. Insert it all the way until it locks in place
with a little click. If you can see the red indicator on the
upper side of the button, it is not locked completely.
12
3
3
4
4
Fig.5
Ź1. LXT battery cartridge 2. CXT battery cartridge
3. Red indicator 4. Button
To remove the battery cartridge, slide it from the tool
while sliding the button on the front of the cartridge.
After installing/removing the battery cartridge, be sure
to close the battery cover.
CAUTION: Always install the battery cartridge
fully until the red indicator cannot be seen. If not,
LWPD\DFFLGHQWDOO\IDOORXWRIWKHWRROFDXVLQJLQMXU\WR
you or someone around you.
CAUTION: Do not install the battery cartridge
forcibly. If the cartridge does not slide in easily, it is
not being inserted correctly.
Indicating the remaining battery
capacity
Only for battery cartridges with the indicator
1
2
Fig.6
Ź1. Indicator lamps 2. Check button
Press the check button on the battery cartridge to indi-
cate the remaining battery capacity. The indicator lamps
light up for a few seconds.
Indicator lamps Remaining
capacity
Lighted Off Blinking
75% to 100%
50% to 75%
25% to 50%
0% to 25%
(For LXT battery only)
Charge the
battery.
(For LXT battery only)
The battery
may have
malfunctioned.
NOTE: Depending on the conditions of use and the
ambient temperature, the indication may differ slightly
from the actual capacity.

10 ENGLISH
Using the soft bended rod antenna
When listening to FM radio stations, straight up the soft
EHQGHGURGDQWHQQDDVVKRZQLQWKH¿JXUH
1
Fig.7
Ź1. Soft bended rod antenna
NOTICE: Always store the soft bended rod antenna
to the original position after use.
Using Supplied AC power adaptor
WARNING: Always disconnect the AC power
adaptor completely before moving the radio. If the
AC power adaptor is not removed, it may cause
an electric shock.
WARNING: Never pull and/or drag the cord
of the AC power adaptor. If not, the radio may
accidentally fall down, causing injury to you or
someone around you.
WARNING: The AC power adaptor is used as
the means of connecting the radio to the mains
supply. The mains socket used for the radio must
remain accessible during normal use.
WARNING: In order to disconnect the radio,
the AC power adaptor should be removed from
the mains outlet completely
WARNING: Use the AC power adaptor sup-
SOLHGZLWKWKHSURGXFWRUVSHFL¿HGE\0DNLWDRQO\
WARNING: Do not hold the power supply
cable and plug by your mouth. Doing so might
cause an electric shock.
WARNING: Do not handle the plug with wet or
greasy hand.
WARNING: Damaged or entangled cords
increase the risk of electric shock. If the cord
is damaged, have it replaced by our authorized
service center in order to avoid a safety hazard.
Do not use it before repair.
WARNING: After use, always store AC power
adaptor out of the reach of children.
Open the cover and insert the adaptor plug into the DC
IN socket on the side of the radio. Plug the adaptor into
a standard mains socket outlet. While the radio is pow-
ered from AC power adaptor, the indicator for AC power
supply ( ) will appear on the display.
2
1
3
Fig.8
Ź1. Cover 2. DC IN socket 3. Adaptor plug
NOTE: When the adaptor is used, the radio is pow-
ered from the mains and the battery cartridge is
charged.
NOTE: When the radio has any interference in AM
band by its AC adaptor, move the radio away from the
AC adaptor further than 30 cm (1 feet).
Auxiliary input socket
1
2
Fig.9
Ź1. AUX IN 1 2. AUX IN 2
Two 3.5 mm stereo auxiliary input sockets are provided.
One is at the front of the radio (AUX IN 1); the other is
located in the battery compartment (AUX IN 2).
1. Connect an external audio source, such as a MP3
or CD player, to the auxiliary input socket.
2. Repeatedly press and release the Source but-
ton until AUX IN 1 or 2 is displayed.
3. $GMXVWWKHYROXPHVHWWLQJRQ\RXUH[WHUQDODXGLR
source to ensure an adequate signal level. After that,
use the Tuning control knob on the radio as needed

11 ENGLISH
for comfortable listening.
Charging with USB power supply
port
CAUTION: Do not connect power source to
86%SRUW2WKHUZLVHWKHUHLVULVNRI¿UH7KH86%
port is only intended for charging lower voltage
device. Always place the cover onto the USB port
when not charging the lower voltage device.
CAUTION: Do not insert a nail, wire, etc. into
USB power supply port. Otherwise a circuit short
PD\FDXVHVPRNHDQG¿UH
NOTICE: Before connecting USB device to the
charger, always backup your data of USB device.
Otherwise your data may lose by any possibility.
NOTICE: When not using or after charging, remove
the USB cable and close the cover.
NOTICE: Do not connect this USB socket with your
PC USB port, as it is highly possible that it may cause
breakdown of the units.
NOTE: The charger may not supply power to some
USB devices.
There are USB power supply ports at the front and back
side of the radio. You can charge USB device through
the USB power supply port.
1
Fig.10
Ź1. USB power supply port
1. Connect the USB device, such as a MP3 or CD
player, to the USB power supply port using a USB cable
available in the market.
2. Press the Power button to switch on the
radio.
NOTE: No matter if the radio is AC powered or battery
powered, you can charge a USB device when the
radio is switched on and in FM radio mode, Bluetooth
mode, or AUX mode which is appeared when an
external audio source is connected.
NOTE: The maximum volume of the output power
speaker will decrease when your USB device is being
charged.
NOTE: The USB socket can provide max 2.4 A 5 V (2
port total) of electrical current.
Charging the battery cartridge
To charge the battery cartridge with this radio, insert
the adaptor plug into the DC IN socket and then plug it
to the mains. After that, insert the battery cartridge to
the slot.
1
2
3
Fig.11
Ź1. LXT battery cartridge 2. CXT battery cartridge
3. Indicator for battery status/capacity
The indicator for battery status/capacity blinks when the
battery cartridge is being charged. The charging status
is as follows:
Indicator for battery status/
capacity
Charging status
(blinking)
Charging (less than 80%)
(blinking)
Charging (80% or more has
been charged)
(not blinking)
Charged (100%)
NOTICE: You cannot charge LXT and CXT bat-
tery cartridges at the same time.

12 ENGLISH
NOTE: It will take several seconds until the indicator
for battery status/capacity appears after the AC power
adaptor is plugged into the mains.
NOTE: If the AC power adaptor is disconnected from
the radio during battery charging, the radio turns off
for a few seconds and then automatically turns on
with the battery power supply.
Storing the AC power adaptor /
external device
Hook for the AC power adaptor
The hook on the back of the radio is useful for carrying
the AC power adaptor. When carrying, bundle the cords
and tie them with AC power adaptor using the band.
1
2
3
Fig.12
Ź1. Hook 2. AC power adaptor 3. Band
NOTICE: Do not store AC power adaptor in the
battery compartment. The cord may be pinched and
damaged when closing the battery cover.
NOTICE: Always hold the handle when carrying
the radio.
NOTICE: Be careful not to drop the AC power
adaptor hooked on the back of the radio.
Storing the external device
You can store your mobile device into the pocket inside
the battery cover. While storing the mobile device, you
can charge it by connecting to the USB power supply
port.
2
3
1
Fig.13
Ź1. Pocket 2. Mobile device 3. Battery cover
Bottle cap opener
The bottle cap opener is provided on the back of the
radio.
1
Fig.14
Ź1. Bottle cap opener
NOTICE: +ROGWKHUDGLR¿UPO\ZKHQXVLQJWKH
bottle cap opener. Failure to do so may cause the
radio tipped over and result in damage or malfunction.
NOTICE: Be careful not to spill the beverage
onto the radio when opening the cap.
OPERATION
Switching on/off the radio
Press the Power button to switch on the radio.
Press the Power button again to switch off the
radio.
Adjusting the volume level
Turn the Tuning control knob clockwise to increase
the volume. Turn the Tuning control knob counter-
clockwise to decrease the volume.
NOTE:7KHYROXPHDGMXVWPHQWLVQRWDYDLODEOHGXULQJ
tuning and some settings.

13 ENGLISH
Scan tuning AM/FM
1. Press the Power button to switch on your
radio.
2. Press the Source button to select AM or FM
radio mode.
3. Press and hold the Tuning control knob to carry
out an auto-tune.
Your radio will scan up the AM or FM band from the cur-
rently displayed frequency and will stop scanning auto-
PDWLFDOO\ZKHQLW¿QGVDVWDWLRQRIVXI¿FLHQWVWUHQJWK
NOTE: The stations to be found by scan tuning vary
depending on the receiving sensitivity at the location
where the scan tuning is performed. If you don't have
desired station, change the location and perform the
procedure above.
NOTE: When the end of the waveband is reached
your radio will recommence tuning from the opposite
end of the waveband.
Manual tuning – FM/AM
1. Press the Power button to switch on your
radio.
2. Press the Source button to select FM/AM radio
mode.
3. Press the Tuning control knob .
4. Rotate the Tuning control knob to tune to a
station.
5. Press the Tuning control knob to set the
tuning.
NOTE: Manual tuning is available while "MANUAL
TUNING" is displayed on the display. If "MANUAL
TUNING" is not displayed, start the manual tuning
from the beginning.
NOTE: The stations to be found by manual tuning
vary depending on the receiving sensitivity at the
location where the manual tuning is performed. If you
don't have desired station, change the location and
perform the procedure above.
NOTE: When the end of the waveband is reached
your radio will recommence tuning from the opposite
end of the waveband.
Presetting stations in FM/AM
There are 5 preset stations each for FM/AM radio. They
are used in the same way for each waveband.
1. Press the Power button to switch on your
radio.
2. Press the Source button to select the desired
waveband. Tune to the required radio station.
3. Press and hold the required Preset button (1 to
5) until the display shows “PRESET X
STORED” (X indicates the number of the Preset button
that you pressed). The station will be stored using the
preset number (P1-P5). Repeat this procedure for the
remaining presets as you wish.
NOTE: Preset stations which have already been
stored may be overwritten by following the above
procedure.
Recalling a preset station in AM/FM
1. Press the Power button to switch on your
radio.
2. Press the Source button to select AM or FM
radio mode.
3. Press the desired Preset button that
you stored in the preset memory.
Display modes – FM
Your radio has a range of display options for FM radio
mode.
Station name Displays the name of the sta-
tion being listened to, together
with the band and frequency.
Program type Displays the type of station
being listened to such as Pop,
Classic, News, etc, together
with the band and frequency.
Radio text Displays radio text message
such as new items etc,
together with the band and
frequency.
Year/Day/Week Displays the year, day and
day of the week according to
the date setting of your radio.
Setting the clock
Setting the time and date format
NOTE: The selected time and date format is also
used when setting the alarms.
1. Press and hold the Menu/Info button INFO
MENU to enter
the menu setting.
2. Rotate the Tuning control knob until <TIME>
appears on the display and press the Tuning control
knob to enter the <SET TIME>.
3. Rotate the Tuning control knob until <SET
12/24 HOUR> appears on the display and press the
control knob to enter the setting.
4. Rotate the Tuning control knob to select either
<12 HOUR> or <24 HOUR> format. Press the Tuning
control NQREWRFRQ¿UP\RXUFKRLFH
NOTE: If the 12 hour clock format is chosen, the radio
will then use the 12 hour clock for the setting.
5. Press and hold the Menu/Info button INFO
MENU to enter
the menu setting.
6. Rotate the Tuning control knob until <TIME>
appears on the display and press the Tuning control
knob to enter the <SET TIME>.
7. Rotate the Tuning control knob until <DATE
FORMAT> appears on the display and press the control
knob to enter the setting.

14 ENGLISH
8. Rotate the Tuning control knob to select the
desired date format (<DD/MM/YYYY> or <MM/DD/
YYYY>). Press the Tuning control knob WRFRQ¿UP
your choice.
Setting the clock time and date
1. Press and hold the Menu/Info button INFO
MENU.
2. Rotate the Tuning control knob until <TIME>
appears on the display. Press the Tuning control
knob to enter the <SET TIME>.
3. 7KHKRXUVHWWLQJRQWKHGLVSOD\ZLOOEHJLQÀDVKLQJ
Rotate the Tuning control knob to select the desired
hour, and press the Tuning control knob WRFRQ¿UP
the setting. Then rotate the Tuning control knob to
select the desired minute, and press the Tuning control
knob WRFRQ¿UPWKHVHWWLQJ
4. Rotate the Tuning control knob to select the
desired year and press the Tuning control knob to
FRQ¿UPWKHVHWWLQJ7KHQURWDWHWKH7XQLQJFRQWURO
knob to select the desired month, and press the
Tuning control knob WRFRQ¿UPWKHVHWWLQJ7KHQ
rotate the Tuning control knob to select the desired
date and press the Tuning control knob WRFRQ¿UP
the setting.
Setting the alarm clock
Your radio has two alarms which can each be set to
wake you to AM/FM radio or buzzer alarm. The alarms
may be set while the unit is in standby mode or while
playing.
Setting radio alarm time
1. Press and hold the radio alarm button , the
UDGLRDODUPV\PERODQGWKHGLVSOD\KRXUZLOOÀDVKDORQJ
with a beep.
2. While the radio alarm symbol LVÀDVKLQJ
rotate Tuning control knob to select the hour and
press Tuning control knob DJDLQWRFRQ¿UPKRXU
setting. Then rotate the Tuning control knob to select
the minute and press Tuning control knob WRFRQ¿UP
minute setting.
3. Rotate the Tuning control knob and the display will
show the frequency options for the alarm.
The alarm options are as follows:
ONCE The alarm will sound
once
DAILY The alarm will sound
everyday
WEEKDAYS The alarm will sound only
on weekdays
WEEKENDS The alarm will sound only
at weekends
Press the Tuning control knob WRFRQ¿UPWKHVHWWLQJ
4. Rotate Tuning control knob to select the band
(FM/AM) and press Tuning control knob again to
FRQ¿UPWKHVHWWLQJ
5. Rotate Tuning control knob to select <LAST
LISTENED> or <PRESET NO.> and press Tuning
control knob DJDLQWRFRQ¿UPWKHVHWWLQJ
6. Rotate Tuning control knob to select the
desired volume and press Tuning control knob to con-
¿UPWKHYROXPH5DGLRDODUPVHWWLQJLVQRZFRPSOHWHG
NOTE: If new radio alarm station is not selected, the
radio will select the last alarm station.
NOTE: If the selected AM/FM alarm station is not
available when the alarm is sounding, the buzzer
alarm will be used instead.
Setting HWS (Humane Wake System)
buzzer alarm
A beep tone will activate when selecting the HWS
buzzer alarm.
The alarm beep will sound shorter every 15 seconds
for one minute followed by one minute silence before
repeating the cycle.
NOTE: The buzzer alarm can be set when the radio
is turned off.
1. Press and hold the buzzer alarm button ,
WKHV\PERODQGWKHGLVSOD\KRXUZLOOÀDVKDORQJZLWKD
beep.
2. While the buzzer alarm symbol LVÀDVKLQJ
rotate Tuning control knob to select the hour and
press Tuning control knob DJDLQWRFRQ¿UPKRXU
setting. Then rotate the Tuning control knob to select
the minute and press Tuning control knob WRFRQ¿UP
minute setting.
3. Rotate the Tuning control knob and the display
will show the frequency options for the alarm.
The alarm options are as follows:
ONCE The alarm will sound
once
DAILY The alarm will sound
everyday
WEEKDAYS The alarm will sound only
on weekdays
WEEKENDS The alarm will sound only
at weekends
4. Press the Tuning control knob WRFRQ¿UPWKH
setting.
NOTE:7KHUHLVQRYROXPHDGMXVWPHQWIRUEX]]HU
alarm.
When the alarm sounds
To cancel a sounding alarm, press the Power but-
ton .
Disabling/cancelling alarms
To disable an active alarm, either press the Power
button or press and hold the corresponding alarm
button to cancel the alarm.

15 ENGLISH
Snooze
When the alarm sounds, press any button other than
the Power button to stop the alarm for 5 minutes.
"SNOOZE" will appear on the display.
7RDGMXVWWKHVLOHQFHWLPHIROORZWKHSURFHGXUHVEHORZ
1. Press and hold the Menu/Info button INFO
MENU to enter
the menu setting.
2. Rotate the Tuning control knob until "SNOOZE"
appears on the display. Press the Tuning control
knob to enter the setting. Rotate the Tuning control
knob WRDGMXVWWKHVLOHQFHWLPHIURPDQG
minutes.
NOTE: To cancel the snooze timer while the alarm is
suspended, press the Power button .
Sleep timer
Your radio can be set to turn off automatically after a
preset time has elapsed. The Sleep Timer setting can
EHDGMXVWHGIRURUPLQXWHV
1. Press and hold the Power button to enter
the Sleep Timer setting. “SLEEP 60 MINUTES” will be
shown on the display.
2. Keep holding the Power button . The sleep
timer options will start switching on the display. Release
the Power button when the desired Sleep Timer
setting appears on the display. The setting will be saved
and the icon for sleep timer ( ) will appear on the
display.
NOTE: Your radio will switch off automatically after
the preset Sleep Timer has elapsed.
NOTE: To cancel the sleep timer before the preset
time has elapsed, simply press the Power but-
ton to turn the radio off.
Loudness
You can get compensation on lower and higher
IUHTXHQF\IRU\RXUUDGLRE\DGMXVWLQJWKHORXGQHVV
function.
1. Press and hold the Menu/Info button INFO
MENU to enter
the menu setting.
2. Rotate the Tuning control knob until
<LOUDNESS> appears on the display. Press the
Tuning control knob to enter the setting.
3. Rotate the Tuning control knob to choose
<ON> or <OFF> to turn on or turn off the loudness func-
tion, then press the Tuning control knob WRFRQ¿UP
the setting.
NOTE: To turn off the loudness function, select
<OFF> and press the Tuning control knob to con-
¿UPWKHVHWWLQJ
Listening to Bluetooth® music
You need to pair your Bluetooth® device with your radio
before you can auto-link to play/stream Bluetooth®
music through your radio. Paring creates a permanent
“bond” so two devices can always recognize each other.
Pairing your Bluetooth® device
1. Press the Source button to select Bluetooth®
function. "READY BLUETOOTH" will be shown on the
GLVSOD\DQG5($'<ZLOOÀDVK
2. Activate Bluetooth® on your device according to
the device’s user manual to allow the paring procedure.
3. Press and release the Pair button . "PAIR
BLUETOOTH" will be shown on the display and it will
ÀDVK<RXFDQVWDUWWKHVHDUFKRI\RXUUDGLRRQ\RXU
Bluetooth® device. Once the name of your radio is
appeared on your Bluetooth® device, press the item in
your Bluetooth® list.
NOTE: With some mobiles (versions earlier than
BT2.1 Bluetooth® device), you may need to input the
pass code “0000”.
4. Your Bluetooth® device will be linked with the
radio. Once connected, “CONNECTED BLUETOOTH”
will appear on the display.
You can now play the music in your Bluetooth® device
via your radio.
Playing Bluetooth® device which has
already paired
1. Press the Source button to select Bluetooth®
function. "READY BLUETOOTH" will be shown on the
GLVSOD\DQG5($'<ZLOOÀDVK
2. Search and link the radio on your Bluetooth®
device. Some device may link with the radio
automatically.
You can now play the music in your Bluetooth® device
via your radio.
NOTE: The radio can pair with 8 Bluetooth® devices
at most. When you pair Bluetooth® devices more than
this number, pairing history will be overwritten from
the oldest pairing history.
NOTE: If there are 2 Bluetooth® devices searching for
your radio, it will show its availability on both devices.
NOTE: If your Bluetooth® device is temporarily dis-
connected to your radio, then you need to manually
reconnect your device again to the radio.
NOTE: If the name of your radio is appeared on your
Bluetooth® device list but your device cannot connect
with it, delete the item name of your radio from your
list and pair the device with your radio again following
the steps described previously.
NOTE: The optimum operation range between the
radio and the paired device is approximately 10
meters (30 feet).
NOTE: Any obstacle between the radio and the
device can reduce the operational range.
Disconnecting your Bluetooth®
device
1. Press and hold the Pair button for a few
seconds to disconnect with your Bluetooth® device.
“ CONNECTED BLUETOOTH” will turn to be "PAIR
BLUETOOTH".
2. Press the Power button .

16 ENGLISH
MAINTENANCE
CAUTION: Always be sure that the appli-
ance is switched off and the battery cartridge is
removed before attempting to perform inspection
or maintenance.
NOTICE: Never use gasoline, benzine, thinner,
alcohol or the like. Discoloration, deformation or
cracks may result.
To maintain product SAFETY and RELIABILITY,
UHSDLUVDQ\RWKHUPDLQWHQDQFHRUDGMXVWPHQWVKRXOG
be performed by Makita Authorized or Factory Service
Centers, always using Makita replacement parts.
OPTIONAL
ACCESSORIES
CAUTION: These accessories or attachments
are recommended for use with your Makita tool
VSHFL¿HGLQWKLVPDQXDO The use of any other
accessories or attachments might present a risk of
LQMXU\WRSHUVRQV2QO\XVHDFFHVVRU\RUDWWDFKPHQW
for its stated purpose.
If you need any assistance for more details regard-
ing these accessories, ask your local Makita Service
Center.
• Makita genuine battery and charger
NOTE: Some items in the list may be included in the
tool package as standard accessories. They may
differ from country to country.
MAKITA LIMITED WARRANTY
Please refer to the annexed warranty sheet for the
most current warranty terms applicable to this product.
If annexed warranty sheet is not available, refer to the
warranty details set forth at below website for your
respective country.
United States of America: www.makitatools.com
Canada: www.makita.ca
Other countries: www.makita.com

17

Makita Corporation
3-11-8, Sumiyoshi-cho,
Anjo, Aichi 446-8502 Japan
www.makita.com
XRM10-NA2-1911
XRM10-1
EN
20200323
Other manuals for XRM10
1
Table of contents
Other Makita Radio manuals

Makita
Makita XRM06X User manual

Makita
Makita DMR056 User manual

Makita
Makita BMR100 Quick start guide

Makita
Makita LXRM02 User manual

Makita
Makita DMR108N User manual

Makita
Makita MR004G User manual

Makita
Makita DMR108N User manual

Makita
Makita XRM05 User manual

Makita
Makita XRM10 User manual

Makita
Makita DMR103 User manual

Makita
Makita DMR102 User manual

Makita
Makita DMR107 User manual

Makita
Makita DMR115B User manual

Makita
Makita BMR104 User manual

Makita
Makita DMR106 User manual

Makita
Makita MR001G User manual

Makita
Makita MR051 User manual

Makita
Makita DMR106 User manual

Makita
Makita BMR103 User manual

Makita
Makita MR002GZ User manual