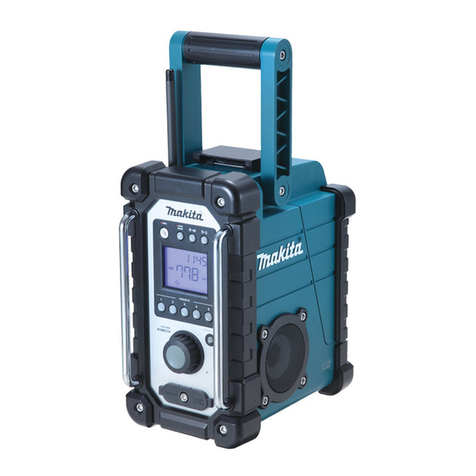
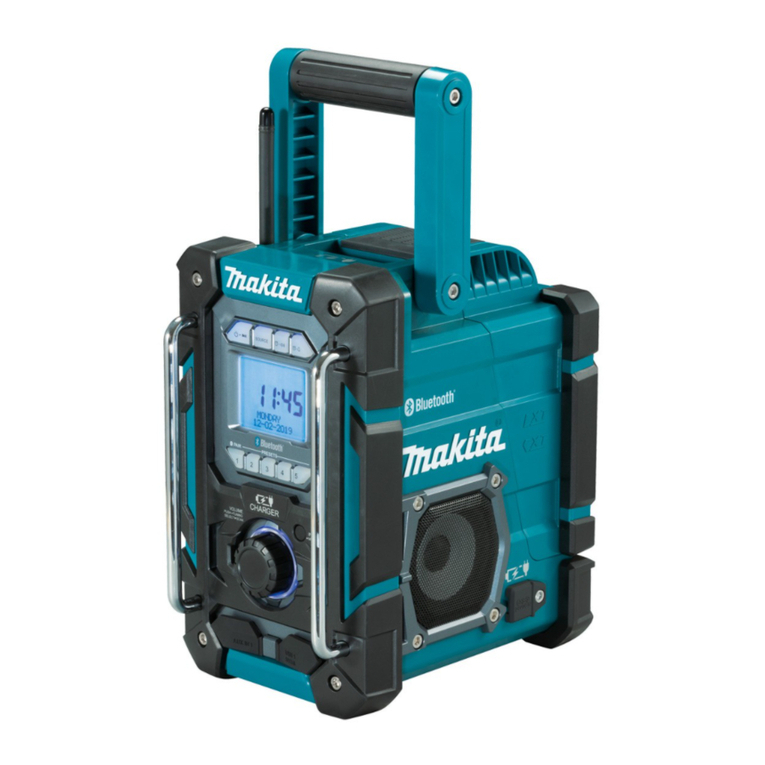
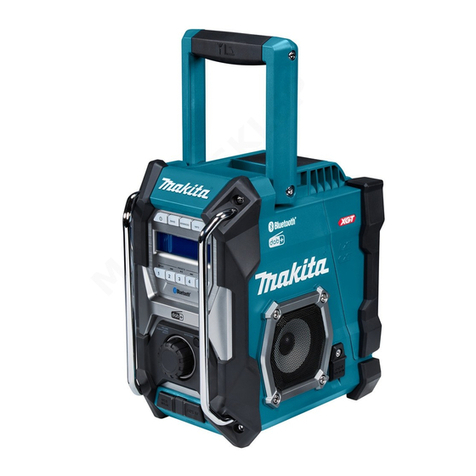
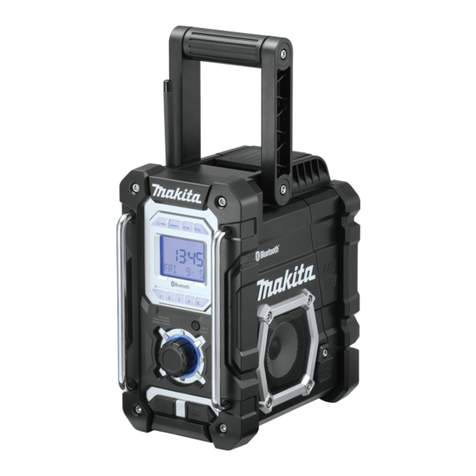
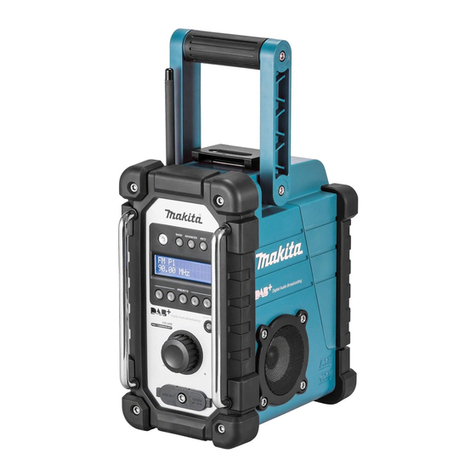
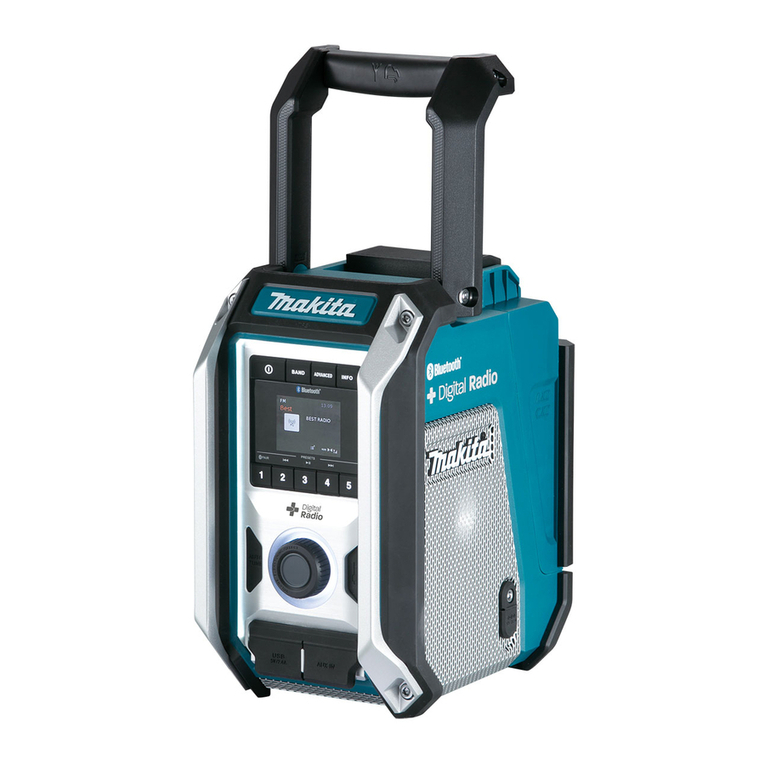
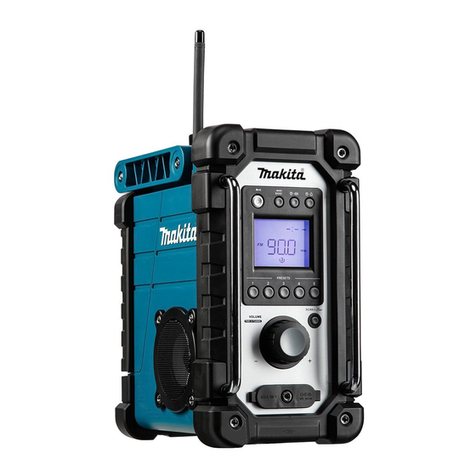
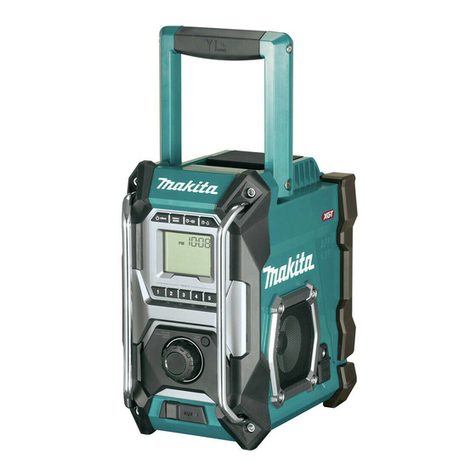
Makita MR002G User manual

MR002G
EN Job Site Radio Instruction manual 5
PL Akumulatorowy odbiornik radiowy Instrukcja obsługi 16
HU Munkarádió Használati útmutató 27
SK Pracovné rádio Návod na obsluhu 38
CS Pracovní rádio Návod k obsluze 49
UK Радіоприймач для використання
на робочому місці Інструкція з експлуатації 60
RO Radio pentru locul de lucru Manual de instrucţiuni 72
DE Baustellenradio Betriebsanleitung 83
SL Radio za delovno mesto Navodila za uporabo 95
SQ Radio për në vendin e punës Manuali i përdorimit 106
BG Радио за работен обект Инструкция за работа 118
HR Radioprijemnik za gradilište Priručnik s uputama za
uporabu 130
MK Радио за работно место Упатство за употреба 141
SR Радио за радилиште Приручник са упутствима 153
RU Радиоприемник Инструкция по
эксплуатации 164

2
1
6
5
4
2
16
17
12
13
15
3
1
14
20
18
19
78910
11
G
H
I
ABCDE
F
21
22
23
24

3
1
2
1
2
2
4
6 7
3
XGT
LXT
LXT
CXT
XGT
5

4 ENGLISH
1
2
8 9
CXT

5 ENGLISH
ENGLISH
(Original Instruction)
EXPLANATION OF
GENERAL VIEW (Fig. 1)
1. Built-in antenna (AM)
2. Handle/Built-in antenna (FM)
3. Battery compartment locker
4. Battery compartment cover
(covering battery cartridge)
5. Speaker
6. DC IN socket
7. Power/Sleep timer button
8. Band/Mono button
9. Radio alarm button
10. Buzzer alarm button
11. LCD display
12. Preset 3/Play/Pause button
13. Preset 5 button
14. Preset 4/Next track button
15. Menu/Info button
16. Volume/Tuning control/Select knob
17. AUX IN socket
18. USB power supply port
19. Preset 2/Previous track button
20. Preset 1/Bluetooth pairing button
21. XGT Battery Terminal
22. CXT Battery Terminal
23. LXT Battery Terminal
24. Back up batteries compartment
LCD DISPLAY
A. Radio alarm
B. Buzzer alarm
C. Stereo symbol
D. Low battery indicator
E. Clock
F. Frequency
G. RDS (Radio data system)
H. Sleep timer icon
I. PM for clock
SYMBOLS
The following show the symbols used for the equipment.
Be sure that you understand their meaning before use.
Read instruction manual.
Only for EU countries.
Do not dispose of electric equipment or
battery pack together with household
waste material! In observance of
the European Directives, on Waste
Electric and Electronic Equipment
and Batteries and Accumulators and
Waste Batteries and Accumulators and
their implementation in accordance
with national laws, electric equipment
and batteries and battery pack (s) that
have reached the end their life must be
collected separately and returned to an
environmentally compatible recycling
facility.
IMPORTANT SAFETY
INSTRUCTIONS
WARNING:
When using electric tools, basic safety precautions
should always be followed to reduce the risk of re,
electric shock, and personal injury, including the
following:
1. Read this instruction manual and the charger
instruction manual carefully before use.
2. Clean only with dry cloth.
3. Do not install near any heat sources such as
radiators, heat registers, stoves, or other apparatus
(including ampliers) that produce heat.
4. Only use attachments/accessories specied by the
manufacturer.
5. Unplug this apparatus during lighting storms or
when unused for long periods of time.
6. A battery operated radio with integral batteries or a
separate battery pack must be recharged only with
the specied charger for the battery. A charger that
may be suitable for one type of battery may create a
risk of re when used with another battery.
7. Use battery operated radio only with specically
designated battery packs. Use of any other batteries
may create a risk of re.
8. When battery pack is not in use, keep it away from
other metal objects like: paper clips, coins, keys,
nails, screws, or other small metal objects that can
make a connection from one terminal to another.
Shorting the battery terminals together may cause
sparks, burns, or a re.
9. Avoid body contact with grounded surfaces such
as pipes, radiators, ranges and refrigerators. There
is an increased risk of electric shock if your body is
grounded.

6 ENGLISH
10. Under abusive conditions, liquid may be ejected
from the battery; avoid contact. If contact
accidentally occurs, ush with water. If liquid
contacts eyes, additionally seek medical help.
Liquid ejected from the battery may cause irritation
or burns.
11. Do not use a battery pack or tool that is damaged
or modied. Damaged or modied batteries may
exhibit unpredictable behaviour resulting in re,
explosion or risk of injury.
12. Do not expose a battery pack or tool to re
or excessive temperature. Exposure to re or
temperature above 130°C (266°F) may cause
explosion.
13. Follow all charging instructions and do not charge
the battery pack or tool outside the temperature
range specied in the instructions. Charging
improperly or at temperatures outside the specied
range may damage the battery and increase the risk
of re.
14. If the tool is not used for a long period of time, the
battery must be removed from the tool.
15. Keep the battery away from children.
16. The MAINS plug is used as the disconnect device,
and it shall remain readily operable.
17. Do not use the product at a high volume for any
extended period. To avoid hearing damage, use the
product at moderate volume level.
18. (For products with LCD display only) LCD displays
include liquid which may cause irritation and
poisoning. If the liquid enters the eyes, mouth or
skin, rinse it with water and call a doctor.
19. Do not expose the product to rain or wet conditions.
Water entering the product will increase the risk of
electric shock.
20. This product is not intended for use by persons
(including children) with reduced physical, sensory
or mental capabilities, or lack of experience
and knowledge, unless they have been given
supervision or instruction concerning use of the
product by a person responsible for their safety.
Children should be supervised to ensure that they
do not play with the product. Store the product out
of the reach of children.
21. Do not heat or expose the radio to re or leave it in
a hot location such as near a heat source, exposed
to direct sunlight, or inside a vehicle under the
blazing sun. Doing so may cause a re or explosion
and result in personal injury.
SAVE THESE INSTRUCTIONS
SPECIFIC SAFETY RULES
FOR BATTERY CARTRIDGE
1. Before using battery cartridge, read all instructions
and cautionary markings on (1) battery charger, (2)
battery, and (3) product using battery.
2. Do not disassemble or tamper the battery cartridge.
It may result in a re, excessive heat, or explosion.
3. If operating time has become excessively shorter,
stop operating immediately. It may result in a risk of
overheating, possible burns and even an explosion.
4. If electrolyte gets into your eyes, rinse them out with
clear water and seek medical attention right away. It
may result in loss of your eyesight.
5. Do not short the battery cartridge:
(1) Do not touch the terminals with any conductive
material.
(2) Avoid storing battery cartridge in a container
with other metal objects such as nails, coins,
etc.
(3) Do not expose battery cartridge to water or
rain. A battery short can cause a large current
ow, overheating, possible burns and even a
breakdown.
6. Do not store the tool and battery cartridge in
locations where the temperature may reach or
exceed 50°C (122°F).
7. Do not incinerate the battery cartridge even if it is
severely damaged or is completely worn out. The
battery cartridge can explode in a re.
8. Do not nail, cut, crush, throw, drop the battery
cartridge, or hit against a hard object to the battery
cartridge. Such conduct may result in a re,
excessive heat, or explosion.
9. Do not use a damaged battery.
10. To avoid risk, the manual of replaceable the battery
should be read before use. And the max discharging
current of the battery should be greater than or
equal to 8A.
11. The contained lithium-ion-batteries are subject to
the Dangerous Goods Legislation requirements.
For commercial transports e.g. by third parties,
forwarding agents, special requirement on
packaging and labeling must be observed.
For preparation of the item being shipped,
consulting an expert for hazardous material is
required. Please also observe possibly more
detailed national regulations.
Tape or mask off open contacts and pack up the
battery in such a manner that it cannot move around
in the packaging.
12. Follow your local regulations relating to disposal of
battery.
7 ENGLISH
13. Use the batteries only with the products specied
by Makita. Installing the batteries to non-compliant
products may result in a re, excessive heat,
explosion, or leak of electrolyte.
14. During and after use, the battery cartridge may take
on heat which can cause burns or low temperature
burns. Pay attention to the handling of hot battery
cartridges.
15. Do not touch the terminal of the tool immediately
after use as it may get hot enough to cause burns.
16. Do not allow chips, dust, or soil stuck into the
terminals, holes, and grooves of the battery
cartridge. It may result in poor performance or
breakdown of the tool or battery cartridge.
17. Unless the tool supports the use near a high-
voltage electrical power lines, do not use the battery
cartridge near a high-voltage electrical power lines.
It may result in a malfunction or breakdown of the
tool or battery cartridge.
CAUTION:
● Danger of explosion if battery is incorrectly
replaced.
●Replace only with the same or equivalent type.
● Only use genuine Makita batteries. Use of non-
genuine Makita batteries, or batteries that have
been altered, may result in the battery bursting
causing res, personal injury and damage. It will
also void the Makita warranty for the Makita tool
and charger.
Tips for maintaining maximum battery
life
1. Charge the battery cartridge before completely
discharged. Always stop tool operation and charge
the battery cartridge when you notice less tool power.
2. Never recharge a fully charged battery cartridge.
Overcharging shortens the battery service life.
3. Charge the battery cartridge with room temperature
at 10°C - 40°C (50°F - 104°F). Let a hot battery
cartridge cool down before charging it.
4. When not using the battery cartridge, remove it from
the tool or the charger.
5. Charge the battery cartridge if you do not use it for a
long period (more than six months).

8 ENGLISH
OPERATING TIME
* The suitable battery packs for this radio listed as the following table.
* The following table indicates the operating time on a single charge.
Battery capacity
Battery cartridge voltage
AT SPEAKERS OUTPUT
= 100mW Unit: Hour
(Approximately)
CXT
(10.8V - 12V max)
LXT
(14.4V) LXT (18V) XGT
(36V - 40V max) Radio/AUX Bluetooth
play
1.5 Ah
BL1015
BL1016 7.5 7.0
BL1415N 6.5 6.0
BL1815N 6.5 6.0
2.0 Ah
BL1020B
BL1021B 9.5 9.0
BL1820B 9.0 9.0
BL4020 13.5 13.0
2.5 Ah BL4025 17.0 16.0
3.0 Ah
BL1430B 10.5 10.0
BL1830B 12.5 12.0
4.0 Ah
BL1040B
BL1041B 17.0 18.5
BL1440 17.0 16.0
BL1840B 17.5 17.0
BL4040 27.5 26.0
5.0 Ah
BL1450 20.5 19.5
BL1850B 23.0 22.0
6.0 Ah
BL1460B 22.0 21.0
BL1860B 27.5 26.0
Some of the battery cartridges and chargers listed above may not be available depending on your region of
residence.
WARNING:
Only use the battery cartridges listed above. Use of any other battery cartridges may cause injury and/or re.
NOTE:
●Table regarding to the battery operating time above is for reference.
●The actual operating time may differ with the type of the battery, charging condition, or usage environment.

9 ENGLISH
INSTALLATION AND POWER
SUPPLY
CAUTION:
●Be careful not to pinch your ngers when
opening and closing the battery cover.
●Return the battery compartment locker to the
original position, after installing or removing
battery cartridge. If not, battery cartridge may
accidentally fall out of the radio, causing injury to
you or someone around you.
●Always close and lock the battery compartment
locker before moving the radio.
● Always switch off the radio before installing or
removing the battery cartridge.
● Be careful not to drop or strike the radio. Broken
shell may slash your nger or stab your body.
Damaged radio may exhibit unpredictable
behaviour resulting in re, explosion or risk of
injury.
● Hold the tool and the battery cartridge rmly
when installing or removing battery cartridge.
IMPORTANT:
●Reduced power, distortion, “stuttering sound” or when
both low battery indicator and “POWERFAIL” appear
on the display are all the signs that the main battery
pack needs to be replaced.
●When low battery indicator appears and an “EMPTY”
keeps on ashing is the time to replace the backup
batteries.
●The battery cartridge can’t be charged via the
supplied AC power adaptor.
●The battery cartridge is not included as standard
accessories.
Installing or removing slide battery
cartridge (Fig. 2-5)
●To install the battery cartridge, align the tongue on
the battery cartridge with the groove in the housing
and slip it into place. Always insert it all the way until
it locks in place with a little click.
●If you can see the red indicator on the upper side of
the button, it is not locked completely. Install it fully
until the red indicator cannot be seen. If not, it may
accidentally fall out of the radio, causing injury to you
or someone around you.
●Do not use force when installing the battery cartridge.
If the cartridge does not slide in easily, it is not being
inserted correctly.
●To remove the battery cartridge, slide it from the radio
while sliding the button on the front of the cartridge.
Indicating the remaining battery
capacity (Fig. 6-8)
1. Indicator lamps 2. Check button
Press the check button on the battery cartridge to
indicate the remaining battery capacity. The indicator
lamps light up for few seconds.
Indicator or lamps
Remaining
capacity
Lighted Off Blinking
75% ~ 100%
50% ~ 75%
25% ~ 50%
0% ~ 25%
(For XGT and LXT battery
cartridges only)
Charge the
battery.
(For XGT and LXT battery
cartridges only)
The battery
may have
malfunctioned.
NOTE:
●Depending on the conditions of use and the ambient
temperature, the indication may differ slightly from
the actual capacity.
● The rst (far left) indicator lamp will blink when the
battery protection system works.
Back up battery Installation (Fig. 9)
Keeping back up batteries inside the compartment
prevent stored data in preset memories from being lost.
1. Pull out the battery compartment locker to release
battery compartment. There are main battery pack
compartment and back up battery compartment.
2. Remove back up battery compartment cover and
insert 2 fresh UM-3 (AA sizes). Make sure the
batteries are with correct polarity as shown inside the
compartment. Replace the battery cover.
3. After back up batteries are inserted, insert the main
battery pack to power radio.
Using supplied AC power adaptor
Remove the rubber protector and insert the adaptor
plug into the DC socket on the right hand side of the
radio. Plug the adaptor into a standard mains socket

10 ENGLISH
outlet. Whenever the adaptor is used, the battery pack
is automatically disconnected.
CAUTION:
●Always disconnected the AC power adapter
completely before moving the radio. If the AC
adapter is not removed, it may cause an electric
shock.
● Never pull and/or drag the cord of the adapter. If
not, the radio may accidentally fall down, causing
injury to you or someone around you.
IMPORTANT:
●The mains adaptor is used as the means of
connecting the radio to the mains supply. The mains
socket used for the radio must remain accessible
during normal use.
●In order to disconnect the radio, the mains adaptor
should be removed from the mains outlet completely.
●Use the AC power adaptor supplied with the product
or specied by Makita only.
●Do not hold the power supply cable and plug by your
mouth. Doing so might cause an electric shock.
●Do not touch the power plug with wet or greasy
hands.
●Damaged or entangled cords increase the risk
of electric shock. If the cord is damaged, have it
replaced by our authorized service center in order to
avoid a safety hazard. Do not use it before repair.
●After use, always store AC power adaptor out of the
reach of children. If Children play with the cord, they
may suffer injury.
Note:
When your radio has any interference in AM band by
its adaptor, please move your radio away from its AC
power adaptor over 30cm.
Charging with USB power supply port
There is the USB port at the front side of the radio. You
can charge USB device through the USB port.
1. Press the Power button to switch on your radio.
2. Connect the USB device, such as a mobile phone,
with USB cable available in the market.
3. No matter if the radio is AC powered or battery
powered, the radio can charge the USB device when
the radio is switched on and in FM radio mode, or
BT mode, or AUX mode, which is appeared when an
external audio source is connected.
Note:
●You cannot charge USB devices during AM mode
because radio signal reception becomes extremely
poor when charging USB device.
●The maximum volume of the output power speaker
will decrease when your USB is charging.
●The USB socket can provide max 5V/2.4A of
electrical current.
Important:
●Before connecting USB device to the charger, always
backup your data of USB device. Otherwise your data
may lose by any possibility.
●The charger may not supply power to some USB
devices.
●When not using or after charging, remove the USB
cable and close the cover.
●Do not connect power source to USB port. Otherwise
there is risk of re. The USB port is only intended
for charging lower voltage device. Always place the
cover onto the USB port when not charging the lower
voltage device.
●Do not insert a nail, wire, etc. into USB power supply
port. Otherwise a circuit short may cause smoke and
re.
●Do not connect this USB socket with your PC
USB port, as it is highly possible that it may cause
breakdown of the units.
LISTENING TO THE RADIO
Scan tuning AM/FM
Note:
The FM antenna is built into the handle. When operating
the radio, please straighten the handle properly above
the radio to get better reception. For the AM band, rotate
the radio to get best signal as the AM antenna is built
into the radio.
1. Press the Power button to switch on your radio.
2. Press the Band button to select AM or FM radio
mode.
3. Press and hold the Tuning control knob to carry out
an auto-tune. Your radio will scan up the AM/FM
band from the currently displayed frequency and will
stop scanning automatically when it nds a station of
sufcient strength.
4. After a few seconds the display will update. The
display will show the frequency of the signal found.
5. To nd other station, press and hold the Tuning
control knob as before.
6. When the end of the waveband is reached your radio
will recommence tuning from the opposite end of the
waveband.
7. Rotate the Tuning control knob to adjust the sound
level as required.
Note:
● While adjusting the volume, make sure the FM/AM
is NOT ashing on the screen.
● If AM/FM is ashing on the screen, it allows you
to tune the stations manually (see the section of
“Manual tuning – AM/FM” for more detail).

11 ENGLISH
● The volume should not be too large. To prevent
possible hearing damage, do not listen at high
volume levels for long periods.
8. To switch off your radio press the Power button.
Manual tuning – AM/FM
1. Press the Power button to switch on your radio.
2. Press the Band button to select AM or FM radio
mode.
3. Press the Tuning control knob and you will see the
FM or AM is ashing on the display.
Note:
● FM/AM will ash approx. 10 seconds. Within this
period, only manual tuning is allowed.
● If volume adjustment is desired while FM/AM is
ashing, press the Tuning control knob to stop the
ash and you can rotate the Tuning control knob to
adjust sound level.
4. Rotate the Tuning control knob to tune to a station.
5. When the end of the waveband is reached your radio
will recommence tuning from the opposite end of the
waveband.
6. Rotate the Tuning control knob to adjust the sound
level as required.
Presetting stations in AM/FM mode
There are 5 preset stations each for AM and FM radio.
They are used in the same way for each waveband.
1. Press the Power button to switch on your radio.
2. Press the Band button to select the desired
waveband. Tune to the required radio station as
previously described.
3. Press and hold the required Preset button (1 to 5)
until the display shows “P4” for example after the
frequency. The station will be stored using the preset
number. Repeat this procedure for the remaining
presets as you wish.
4. Preset stations which have already been stored may
be overwritten by following the above procedure if
required.
Display modes – FM
Your radio has a range of display options for FM radio
mode.
Repeatedly press the Menu/Info button to view the RDS
information of the station you are listening to.
a. Station name Displays the name of the station
being listened to.
b. Program type Displays the type of station being
listened to such as Pop, Classic,
News, etc.
c. Radio text Displays radio text message
such as new items etc.
d. Year/Day Displays the year and day of
the week according to the date
setting of your radio.
e. Date/Day Displays the date and day of
the week according to the date
setting of your radio.
f. Frequency Displays the frequency of the FM
for the station listened to.
FM stereo (auto)/mono
If the FM radio station being listened to has a weak
signal some hiss may be audible. It is possible to reduce
this hiss by forcing the radio to play the station in mono
rather than stereo.
1. Press the Band button as needed to select the FM
band and tune to the desired FM station as previously
stated.
2. Press and hold Menu/Info button to enter the menu
setting.
3. Rotate the Tuning control knob until the “FM AUTO (or
MONO)” setting shows on the display. If the setting is
Auto, press the Tuning control knob and then rotate
the Tuning control knob to switch to Mono mode to
reduce the hiss. Press the Tuning control knob to
select the option.
Recalling a preset in AM/FM mode
1. Press the Power button to switch on your radio.
2. Press the Band button to select AM or FM radio
mode
3. Momentarily press the required Preset button to
tune to your radio to one of the stations stored in the
preset memory.
MISCELLANEOUS SETTINGS
Setting the time and date format
The clock display used in stand-by mode and on the
playing mode screens can be set to different format.
The selected format is then also used when setting the
alarms.
1. Press and hold the Menu/Info button to enter the
menu setting.
2. Rotate the Tuning control knob until “CLOCK xxH”
appears on the display and press the Tuning control
knob to enter the setting. You will see the time format
begins to ash.
3. Rotate the Tuning control knob to select either 12
or 24 hour format. Press the Tuning control knob to
conrm your choice of clock format.
Note:
If the 12 hour clock format is chosen, the radio will
then use the 12 hour clock for the setting.
4. Press and hold the Menu/Info button to enter the
menu setting.

12 ENGLISH
5. Rotate the Tuning control knob until a date (e.g. THU
APR 3) appears on the display and press the Tuning
control knob to enter the setting. You will see the date
format begins to ash.
6. Rotate the Tuning control knob to select the desired
date format. Press the Tuning control knob to conrm
your choice.
Setting the clock time and date
1. Press and hold the Menu/Info button.
2. Rotate the Tuning control knob until “CLOCK ADJ”
appears on the display. Press the Tuning control knob
to enter the setting.
3. The hour setting on the display will begin ashing.
Rotate the Tuning control knob to select the desired
hour, and press the Tuning control knob to conrm
the setting. Then rotate the Tuning control knob to
select the desired minute, and press the Tuning
control knob to conrm the setting.
4. Rotate the Tuning control knob until “DATE ADJ”
appears on the display. Press the Tuning control knob
to enter the setting.
5. Rotate the Tuning control knob to select the desired
year and press the Tuning control knob to conrm the
setting. Then rotate the Tuning control knob to select
the desired month, and press the Tuning control knob
to conrm the setting. Then rotate the Tuning control
knob to select the desired date and press the Tuning
control knob to conrm the setting.
Radio Data System (RDS)
When you set the clock time using the RDS function,
your radio will synchronize its clock time whenever it
tunes to a radio station using RDS with CT signals.
1. When tuning to a station transmitting RDS data, the
RDS symbol will be shown on the display. Press and
hold the Menu/Info button.
2. Rotate the Tuning control knob until “RDS CT” and a
clock symbol appear on the display. Press the Tuning
control knob to enter the setting.
3. Rotate the Tuning control knob until “RDS CT”
appears on the display. Press the Tuning control knob
to conrm the setting. The clock time of the radio
will set up automatically according to the RDS data
received.
Note:
●The radio clock time will be valid for 5 days each time
the radio time is synchronized with RDS CT.
●To disable the RDS CT function, go back to step 1 to
2 and then rotate the Tuning control knob to select
“MANUAL” option. Press the Tuning control knob to
conrm the setting.
Setting the alarm clock
Your radio has two alarms which can each be set to
wake you to AM/FM radio or buzzer alarm. The alarms
may be set while the unit is in standby mode or while
playing.
Note:
Ensure that the time is set correctly before setting the
alarms. If no buttons are pressed for 10 seconds, the
radio will exit the alarm setup.
a. Setting radio alarm time:
1. The radio alarm can be set either when radio is on or
off.
2. Press and hold the radio alarm button, the radio
alarm symbol and the display hour will ash along
with a beep.
3. During radio alarm symbol ashes, rotate the Tuning
control knob to select the hour and press the Tuning
control knob again to conrm the hour setting. Then
rotate the Tuning control knob to select the minute
and press the Tuning control knob to conrm the
minute setting.
4. Rotate the Tuning control knob and the display will
show the frequency options for the alarm.
The alarm options are as follows:
ONCE – the alarm will sound once.
DAILY – the alarm will sound everyday.
WEEKDAY – the alarm will sound only on weekdays.
WEEKEND – the alarm will sound only at weekends.
Press the Tuning control knob to conrm the setting.
5. During radio alarm symbol is ashing, rotate the
Tuning control knob to select desired wake-up band
and station, then press the Tuning control knob to
conrm the selection.
6. Rotate the Tuning control knob to select the desired
volume and press the Tuning control knob to conrm
the volume. Radio alarm setting is now completed.
Note:
●If new radio alarm station is not selected, it will select
the last alarm station.
●If the selected AM/FM alarm station is not available
when the alarm is sounding, the buzzer alarm will be
used instead.
b. Setting HWS (Humane Wake System) buzzer
alarm:
A beep tone will activate when selecting the HWS
buzzer alarm.
The alarm beep will sound shorter every 15 seconds
for one minute followed by one minute silence before
repeating the cycle.
1. The buzzer alarm can be set either when the radio is
on or off.

13 ENGLISH
2. Press and hold the buzzer alarm button, the symbol
and the display hour will ash along with a beep.
3. During buzzer alarm symbol ashes, rotate the
Tuning control knob to select the hour and press the
Tuning control knob again to conrm the hour setting.
Then rotate the Tuning control knob to select the
minute and press the Tuning control knob to conrm
the minute setting.
4. Rotate the Tuning control knob and the display will
show the frequency options for the alarm.
The alarm options are as follows:
ONCE – the alarm will sound once
DAILY – the alarm will sound everyday
WEEKDAY – the alarm will sound only on weekdays
WEEKEND – the alarm will sound only at weekends.
Press the Tuning control knob to conrm the setting.
Note:
There is no volume adjustment for buzzer alarm.
Stopping the alarm sound
To cancel a sounding alarm, press the Power button.
Disable the alarm setting
To disable the alarm setting before the alarm sounds,
press and hold the corresponding alarm button until
alarm symbol disappears on the display.
Snooze
1. When the alarm sounds, press any button other than
the Power button will silence the alarm for 5 minutes.
“SNOOZE” will appear on the display.
2. To adjust the silence time for the snooze timer, press
and hold the Menu/Info button to enter the menu
setting.
3. Rotate the Tuning control knob until “SNOOZE X”
appears on the display, then press the Tuning control
knob to enter the setting. Rotate the Tuning control
knob to adjust the silence time from 5, 10, 15 and 20
minutes for the snooze timer.
4. To cancel the snooze timer while the alarm is
suspended, press the Power button.
Sleep timer
Your radio can be set to turn off automatically after a
preset time has elapsed. The Sleep Timer setting can be
adjusted between 60, 45, 30, 15, 120 and 90 minutes.
1. Press and hold the Power button to enter the Sleep
Timer setting. “SLEEP XX” will show on the display.
2. Keep holding the Power button and the Sleep Timer
options will start switching on the display. Stop until
the desired Sleep Timer setting appears on the
display. The setting will be saved and the LCD will
return to normal display.
3. Your radio will switch off automatically after the preset
Sleep Timer has elapsed. The Sleep Timer icon will
be shown on the display indicating an active Sleep
Timer.
4. To cancel the Sleep Timer function before the preset
time has elapsed, simply press the Power button to
turn the unit off manually.
Loudness
You can get compensation on lower and higher
frequency for your radio by adjusting the loudness
function.
1. Press and hold the Menu/Info button to enter the
menu setting.
2. Rotate the Tuning control knob until “LOUD ON”
or “LOUD OFF” appears on the display. Press the
Tuning control knob to enter the setting.
3. Rotate the Tuning control knob to choose ON to
turn on the loudness function, then press the Tuning
control knob to conrm the setting.
4. To turn off the loudness function, select OFF and
press the Tuning control knob to conrm the setting.
LISTENING TO MUSIC VIA
BLUETOOTH STREAMING
You need to pair your Bluetooth device with the radio
before you can auto-link to play/stream Bluetooth
music through the radio. Pairing creates a ‘bond’ so two
devices can recognize each other.
Note:
●To have the better sound quality, we recommend
setting the volume to more than two-thirds level on
your Bluetooth device and then adjust the volume on
the radio as required.
●The radio can memorize up to 8 sets of paired
device, when the memory exceed this amount, the
oldest pairing history will be over written.
Pairing your Bluetooth device for the
rst time
1. Press the Power button to turn on the radio. Press
the Band button to select Bluetooth mode. The
display will appear “BT PAIR” and “PAIR” will ash on
the display.
2. Activate Bluetooth on your device according to the
device’s user manual to link to the radio. Locate the
Bluetooth device list and select the device named
‘MR002G’ (With some mobiles which are equipped
with earlier versions than BT2.1 Bluetooth device,
you may need to input the pass code “0000”).
3. Once connected, there will be a conrmation tone
sound. “BLUETOOTH” will remain on the display and
the backlight will be dim-out in10 seconds. You can
simply select and play any music from your source

14 ENGLISH
device. Volume control can be adjusted from your
source device, or directly from the radio.
4. Use the controls on your Bluetooth-enabled device or
on the radio to play/pause and navigate tracks.
Note:
● If 2 Bluetooth devices, pairing for the rst time, both
search for the radio, it will show its availability on both
devices. However, if one device links with this unit
rst, then the other Bluetooth device won’t nd it on
the list.
●If your Bluetooth device is temporarily disconnected
to the radio, then you need to manually reconnect
your device again to the radio.
●If ‘MR002G’ shows in your Bluetooth device list but
your device cannot connect with it, please delete the
item from your list and pair the device with the radio
again following the steps described previously.
●Optimum Bluetooth streaming range is roughly
10 meters (33 feet) (line of sight) to the radio but
distance up to 30 meters (100 feet) are possible.
●If Bluetooth connection is lost due to exceeding time
of separation, exceeding the optimum distance,
obstacles or otherwise, reconnecting your device with
the radio may be necessary.
●Physical obstacles, other wireless devices or
electromagnetic devices may affect the connection
quality.
●Bluetooth connectivity performance may vary
depending on the connected Bluetooth devices.
Please refer to the Bluetooth capabilities of your
device before connecting to the radio. All features
may not be supported on some paired Bluetooth
devices.
Playing audio les in Bluetooth mode
When you have successfully connected the radio with
the chosen Bluetooth device you can start to play your
music using the controls on your connected Bluetooth
device.
1. Once playing has started adjust the volume to the
required setting using the Volume knob on the radio
or on your enabled Bluetooth device.
2. Use the controls on your Bluetooth source device to
play/pause and navigate tracks. Alternatively, control
the playback using Play/Pause, Next track, Previous
track buttons on your radio.
3. Press and hold the Next track or Previous track
button to move through the current track. Release the
button when the desired point is reached.
Note:
●Some player applications or devices may not respond
to all of these controls.
●Some mobile phones may temporarily disconnect
from the radio when you make or receive calls. Some
devices may temporarily mute their Bluetooth audio
streaming when they receive text messages, emails
or for other reasons unrelated to audio streaming.
Such behaviour is a function of the connected device
and does not indicate a fault with the radio.
Playing a previously-paired Bluetooth
source device
If your Bluetooth device already paired with the radio
previously, the unit will memorize your Bluetooth device
and it attempts to reconnect with a device in memory
which is last connected. If the last connected device is
not available, the radio will be discoverable.
Disconnecting your Bluetooth device
Press and hold the Bluetooth pairing button for 2-3
seconds until “BT PAIR” is shown on the display or turn
off Bluetooth on your Bluetooth device to disable the
connection.
You can also press the Band button to select any mode
other than Bluetooth mode to disable the connection.
Deleting Bluetooth paired device
memory
To clear the memory of all paired devices, press and
hold the Bluetooth pairing button more than 5 seconds
until “CLEARING” shows on the display.
AUXILIARY INPUT SOCKET
A 3.5mm Auxiliary input socket is provided at the front
of your radio to permit an audio signal to be fed into the
unit from an external audio device such as a MP3 or CD
player.
1. Connect an external audio source (for example, MP3
or CD player) to the AUX IN socket.
2. Press the Power button to switch on your radio.
3. Repeatedly press and release the Band button until
“AUX IN” is displayed.
4. To have the better sound quality, we recommend
setting the volume to more than two-thirds level on
your audio device and then adjust the volume on the
radio as required.
Note:
Audio cord is not included as standard accessories.
MAINTENANCE
CAUTION:
●Never use gasoline, benzine, thinner, alcohol or the
like. Discoloration, deformation or cracks may result.
●Do not wash the radio with water.

15 ENGLISH
SPECIFICATIONS
Power requirements
AC power adaptor DC 12V 2.5A, center pin
positive
Battery
UM-3 (AA size) x 2 for
back up
Slide battery:
10.8V - 36V
Frequency coverage
FM 87.50-108 MHz
(0.05MHz/step)
AM (MW) 522-1,710 kHz
(9kHz/step)
Bluetooth®
(The Bluetooth®word mark and logos are registered
trademarks owned by Bluetooth SIG, Inc.)
Bluetooth version 5.0 Certied
Bluetooth Proles A2DP/SCMS-T/AVRCP
Transmission Power Power Class2
Transmisson Range
Optimum:
Max. 10 meters (33 feet)
Possible:
Max. 30 meters
(100 feet)
(varies according to
usage conditions)
Supported codec SBC
Compatible Bluetooth
prole A2DP/AVRCP
Maximum radio-frequency
power BT EDR: 3.98dBm
Operating Frequency 2402MHz~2480MHz
Circuit feature
Loudspeaker 3.5inches 8ohm x 2
Output power
10.8V-12V max:
1.2W x 2
14.4V: 2.2W x 2
18V: 3.5W x 2
36V: 5W x 2
Input terminal 3.5mm dia. (AUX IN)
Antenna system FM: Built-in antenna
AM: bar antenna
Dimensions (L x W x H) 278 x 170 x 298mm
Weight 4.3Kg (without battery)

16 POLSKI
POLSKI
(oryginalna instrukcja)
OBJAŚNIENIA DO WIDOKU
OGÓLNEGO (Rys. 1)
1. Wbudowana antena (AM)
2. Uchwyt/Wbudowana antena (FM)
3. Blokada komory baterii
4. Osłona komory baterii (przykrywający kasetę
baterii)
5. Głośnik
6. Gniazdo DC
7. Przycisk zasilania/wyłącznika czasowego
8. Przycisk Band/Mono
9. Przycisk alarmu radiowego
10. Przycisk alarmu dźwiękowego
11. Wyświetlacz LCD
12. Przycisk ustawień wstępnych 3/Odtwarzania/
Pauzy
13. Przycisk ustawień wstępnych 5
14. Przycisk ustawień wstępnych 4/Następny
utwór
15. Przycisk Menu/Info
16. Pokrętło Głośności/Kontroli strojenia/Wyboru
17. Gniazdo AUX
18. Port zasilania USB
19. Przycisk ustawień wstępnych 2/Poprzedni
utwór
20. Przycisk ustawień wstępnych 1/Parowanie
Bluetooth
21. Terminal akumulatora XGT
22. Terminal akumulatora CXT
23. Terminal akumulatora LXT
24. Komora baterii zapasowych
WYŚWIETLACZ LCD
A. Alarm radiowy
B. Alarm dźwiękowy
C. Symbol stereo
D. Wskaźnik niskiego poziomu baterii
E. Zegar
F. Częstotliwość
G. RDS (System danych radiowych)
H. Ikona wyłącznika czasowego
I. Tryb zegara AM/PM
SYMBOLE
Poniżej przedstawiono symbole stosowane w przypadku
omawianego urządzenia. Przed rozpoczęciem jego
użytkowania należy upewnić się, że są one zrozumiałe.
Przeczytać instrukcję obsługi.
Tylko dla krajów UE.
Nie wyrzucaj urządzeń elektrycznych
lub baterii razem z odpadami
domowymi! Mając na uwadze
Dyrektywy europejskie dot. Odpadów
elektrycznych, sprzętu elektronicznego,
baterii, akumulatorów oraz zużytych
baterii i akumulatorów oraz sposobów
ich zastosowania, zgodnie z prawami
krajowymi, sprzęt elektryczny oraz
baterie, które zostały zużyte, muszą
być wyrzucane oddzielnie i oddawane
do zgodnych z przepisami o ochronie
środowiska punktów recyklingowych.
WAŻNE ZASADY
BEZPIECZEŃSTWA
OSTRZEŻENIE:
Używając elektronarzędzi, należy zawsze przestrzegać
podstawowych środków ostrożności w celu zmniejszenia
ryzyka wystąpienia pożaru, porażenia prądem oraz
uszkodzenia ciała, włączając poniższe:
1. Przed korzystaniem z urządzenia należy dokładnie
zapoznać się z niniejszą instrukcją obsługi oraz
instrukcją obsługi ładowarki.
2. Czyścić wyłącznie suchą szmatką.
3. Nie montować przy jakimkolwiek źródle ciepła, takim
jak grzejniki, kratki wylotowe ciepłego powietrza,
piece lub inne urządzenia (również wzmacniacze)
wytwarzające ciepło.
4. Stosować wyłącznie przyrządy/akcesoria zalecane
przez producenta.
5. Wyłączyć niniejsze urządzenie podczas burzy oraz
w przypadku nieużywania przez dłuższy czas.
6. Akumulatorowy odbiornik radiowy z akumulatorem
wbudowanym lub oddzielnym musi być ładowany
wyłącznie za pomocą określonej ładowarki do
akumulatora. Ładowarka przeznaczona do jednego
typu akumulatora może stwarzać zagrożenie
wystąpienia pożaru w przypadku stosowania jej do
ładowania innego akumulatora.
7. Do zasilania akumulatorowego odbiornika
radiowego należy używać tylko przeznaczonych
do niego akumulatorów. Używanie innych
akumulatorów może stwarzać ryzyko wystąpienia
pożaru.
8. Gdy akumulator nie jest używany, należy
zabezpieczyć go przed kontaktem z innymi
metalowymi przedmiotami, takimi jak spinacze,
monety, klucze, gwoździe, wkręty bądź inne małe
przedmioty metalowe, które mogą powodować

17 POLSKI
zwarcie styków akumulatora. Zwarcie styków
akumulatora grozi pojawieniem się iskier,
poparzeniami lub pożarem.
9. Należy unikać kontaktu ciała z przedmiotami
uziemionymi, takimi jak rury, grzejniki, kuchenki
czy lodówki. Gdy ciało człowieka jest uziemione,
wzrasta ryzyko porażenia prądem elektrycznym.
10. W razie niewłaściwych warunków użytkowania
może dojść do wycieku elektrolitu z akumulatora.
Unikać kontaktu. W razie przypadkowego kontaktu,
należy przemyć skażoną skórę wodą. W przypadku
kontaktu elektrolitu z oczami należy dodatkowo
zasięgnąć porady lekarza. Płyn z akumulatora może
powodować podrażnienia lub poparzenia.
11. Nie używaj baterii lub narzędzia, gdy zostały
uszkodzone bądź zmodykowane. Uszkodzone
lub zmodykowane baterie mogą wykazywać
nieprzewidywalne zachowanie skutkujące pożarem,
wybuchem lub wystąpieniem ryzyka obrażeń.
12. Nie wystawiaj baterii lub narzędzia na działanie
ognia lub wysokiej temperatury. Narażenie na
działanie ognia lub temperatury powyżej 130°C
(266°F) może spowodować wybuch.
13. Postępuj zgodnie z wszystkimi instrukcjami dot.
ładowania i nie ładuj baterii lub narzędzia poza
wyznaczonym w instrukcji zakresem temperatur.
Nieprawidłowe ładowanie lub ładowanie w
temperaturze przekraczającej określony zakres
może uszkodzić baterię i spowodować ryzyko
wystąpienia pożaru.
14. Jeśli urządzenie nie jest używane przez dłuższy
czas, należy wyjąć akumulator z urządzenia.
15. Trzymaj akumulator z dala od dzieci.
16. Wtyczka ZASILANIA jest używana do odłączania
urządzenia od zasilania i powinna pozostać zawsze
gotowa do użycia.
17. Nie używaj produktu na najgłośniejszym
ustawieniu przez dłuższy okres czasu. Aby
uniknąć uszkodzenia słuchu, używaj produktu na
umiarkowanej głośności.
18. (Dla produktów wyposażonych tylko w wyświetlacz
LCD) wyświetlacze LCD zawierają ciecz, która
może powodować podrażnienia i zatrucie. Jeżeli
ciecz dostanie się do oczu, ust lub na skórę spłucz
wodą i skontaktuj się z lekarzem.
19. Nie wystawiaj produktu na deszcz i wilgotne
warunki. Gdy woda dostanie się do produktu,
zwiększy to ryzyko porażenia prądem.
20. Ten produkt nie jest przeznaczony do używania
przez osoby (oraz dzieci) z ograniczoną
poczytalnością lub ograniczeniami umysłowymi
lub brakiem wiedzy i doświadczenia, chyba że
pod nadzorem lub wskazówkami, dotyczącymi
użytkowania produktu, osób odpowiedzialnych
za ich bezpieczeństwo. Dzieci powinny być
nadzorowane tak, aby nie mogły bawić się
produktem. Przechowuj ten produkt poza zasięgiem
dzieci.
21. Nie należy podgrzewać ani wystawiać radia na
działanie ognia oraz nie pozostawiać go w gorącym
miejscu, np. w pobliżu źródła ciepła, wystawionym
na bezpośrednie działanie promieni słonecznych
lub wewnątrz pojazdu w palącym słońcu. Może to
spowodować pożar lub wybuch i doprowadzić do
obrażenia ciała.
ZACHOWAĆ INSTRUKCJĘ
OBSŁUGI.
SZCZEGÓŁOWE ZASADY
BEZPIECZEŃSTWA
DOTYCZY AKUMULATORA
1. Przed użyciem baterii, przeczytaj wszystkie
instrukcje oraz oznaczenia dot. uwag na (1)
ładowarce do baterii, (2) bateriach oraz (3)
produkcie korzystającym z baterii.
2. Nie demontować ani nie modykować wkładu
akumulatora. Może to spowodować pożar,
nadmierne ciepło lub wybuch.
3. Jeżeli czas używania znacząco się zmniejszył,
natychmiast przestań korzystać z urządzenia. Może
to skutkować przegrzaniem, powodować oparzenia,
a nawet prowadzić do wybuchu.
4. Gdy elektrolit dostanie się do twoich oczu, przepłucz
je czystą wodą i natychmiast skonsultuj się z
lekarzem. Może to skutkować utratą wzroku.
5. Nie powoduj zwarcia baterii:
(1) Nie dotykaj styków przy pomocy przewodzących
materiałów.
(2) Unikaj przechowywania baterii w pojemniku
z innymi metalowymi przedmiotami, np.
gwoździami, monetami itp.
(3) Nie narażaj baterii na oddziaływanie wody
lub deszczu. Zwarcie baterii może skutkować
dużym przepływem napięcia, przegrzaniem,
możliwymi oparzeniami i uszkodzeniem.
6. Nie przechowuj narzędzia i baterii w miejscach,
gdzie temperatura może osiągać lub przekraczać
50°C (122°F).
7. Nie spalaj baterii nawet, jeżeli są bardzo zniszczone
lub kompletnie zużyte. Bateria może wybuchnąć w
ogniu.
8. Nie nakłuwać, ciąć, zgniatać, rzucać, upuszczać
wkładu akumulatora ani uderzać twardym
przedmiotem. Takie postępowanie może
spowodować pożar, nadmierne ciepło lub wybuch.

18 POLSKI
9. Nie używaj uszkodzonych baterii.
10. Aby uniknąć ryzyka, należy zapoznać się z
instrukcją obsługi baterii. Maksymalne natężenie
wyładowania baterii powinno być większe lub równe
8A.
11. Bateria litowo-jonowa podlega wymogom
Prawodawstwa dot. towarów niebezpiecznych.
Podczas transportu komercyjnego, np. za
pośrednictwem zewnętrznej rmy, spedytora, należy
przestrzegać specjalnych wymogów dot. pakowania
oraz etykiet.
Podczas przygotowywania produktu do transportu
wymagana jest konsultacja z ekspertem w sprawie
niebezpiecznych materiałów. Zwróć także uwagę na
możliwe bardziej szczegółowe wytyczne regulacji
krajowych.
Zaizoluj lub zamaskuj otwarte styki i spakuj baterie
w taki sposób, aby nie mogły się przemieszczać w
opakowaniu.
12. Postępuj zgodnie z miejscowymi regulacjami
dotyczącymi wyrzucania baterii.
13. Używaj baterii wyłącznie z produktami określonymi
przez rmę Makita. Instalacja baterii w produktach
niezgodnych może skutkować pożarem,
nadmiernym przegrzewaniem się lub wyciekiem
elektrolitu.
14. Podczas i po użyciu akumulator może się
nagrzewać, co może powodować poparzenia
lub oparzenia niskotemperaturowe. Zwróć
uwagę na obchodzenie się z gorącymi wkładami
akumulatorowymi.
15. Nie dotykać końcówki terminala bezpośrednio po
użyciu, ponieważ może być nagrzany na tyle, aby
spowodować oparzenia.
16. Nie pozwól, aby wióry, kurz lub brud dostały się do
styków, otworów i rowków we wkładzie akumulatora.
Może to spowodować słabą wydajność lub
uszkodzenie urządzenia lub akumulatora.
17. O ile urządzenie pozwala na użytkowanie w
pobliżu linii wysokiego napięcia, nie należy używać
akumulatora w pobliżu linii wysokiego napięcia.
Może to spowodować nieprawidłowe działanie lub
uszkodzenie urządzenia lub akumulatora.
OSTRZEŻENIE:
●Niebezpieczeństwo wybuchu, gdy bateria jest
nieprawidłowo wymieniona.
● Wymieniaj tylko na ten sam typ lub jego
ekwiwalent.
● Używaj wyłącznie oryginalnych baterii Makita.
Używanie nieoryginalnych baterii Makita lub
baterii, które zostały zmodykowane, może
skutkować wybuchem baterii, a w rezultacie
pożarem, obrażeniami ciała i uszkodzeniami.
Spowoduje to także unieważnienie gwarancji
Makity na narzędzie oraz ładowarkę.
Wskazówki dot. maksymalnej
żywotności baterii
1. Ładuj baterię przed jej całkowitym rozładowaniem
się. Zawsze zatrzymaj urządzenie i naładuj baterię,
gdy zauważysz spadek mocy w narzędziu.
2. Nigdy nie ładuj w pełni naładowanych baterii.
Nadmierne ładowanie skraca żywotność baterii.
3. Ładuj baterię w temperaturze pokojowej 10°C - 40°C
(50°F - 104°F). Pozwól, aby gorąca bateria ostygła
zanim rozpoczniesz jej ładowanie.
4. Jeśli akumulator nie jest używany, należy wyjąć go z
urządzenia lub ładowarki.
5. Naładuj baterię, jeżeli nie będziesz jej używać przez
dłuższy okres czasu (więcej niż sześć miesięcy).

19 POLSKI
CZAS PRACY
* Odpowiednie zestawy baterii dla tego radia są wymienione w poniższej tabeli.
* Poniższa tabela przedstawia czas pracy na pojedynczym ładowaniu.
Pojemność
baterii
Napięcie akumulatora
NA WYJŚCIU Z
GŁOŚNIKA = 100 mW
Jednostka: Godzina
(około)
CXT
(10.8V - 12V maks)
LXT
(14.4V) LXT (18V) XGT
(36V - 40V maks)
W trybie
Radio lub
AUX
Bluetooth
1.5 Ah
BL1015
BL1016 7.5 7.0
BL1415N 6.5 6.0
BL1815N 6.5 6.0
2.0 Ah
BL1020B
BL1021B 9.5 9.0
BL1820B 9.0 9.0
BL4020 13.5 13.0
2.5 Ah BL4025 17.0 16.0
3.0 Ah
BL1430B 10.5 10.0
BL1830B 12.5 12.0
4.0 Ah
BL1040B
BL1041B 17.0 18.5
BL1440 17.0 16.0
BL1840B 17.5 17.0
BL4040 27.5 26.0
5.0 Ah
BL1450 20.5 19.5
BL1850B 23.0 22.0
6.0 Ah
BL1460B 22.0 21.0
BL1860B 27.5 26.0
Niektóre wymienione powyżej wkłady akumulatorowe i ładowarki mogą nie być dostępne w zależności od regionu
zamieszkania.
OSTRZEŻENIE:
Używaj wyłącznie baterii wymienionych powyżej. Korzystanie z jakichkolwiek innych baterii może
powodować obrażenia lub pożar.
Uwaga:
● Tabela dotycząca czasu pracy na baterii powyżej jest tylko poglądowa.
●
Faktyczny czas pracy baterii może się różnić w zależności od typu baterii, warunków ładowania oraz środowiska
użytkowania.

20 POLSKI
INSTALACJA I ZASILANIE
UWAGA:
● Uważaj, aby nie przygnieść palców podczas
otwierania i zamykania osłony na baterię.
● Po zainstalowaniu lub wyjęciu baterii, przesuń
blokadę miejsca na baterie do oryginalnej pozycji.
W przeciwnym razie bateria może przypadkowo
wypaść z radia, spowodować obrażenia u Ciebie
lub osób w Twoim otoczeniu.
● Zawsze zamykaj i blokuj miejsce na baterie zanim
przeniesiesz radio.
● Zawsze wyłączaj radio przed instalowaniem lub
wyjęciem baterii.
● Uważaj, aby nie upuścić lub uderzyć radia.
Odłamek może rozciąć palce lub wbić się w
ciało. Uszkodzone radio może wykazywać
nieprzewidywalne zachowanie skutkujące
pożarem, wybuchem lub wystąpieniem ryzyka
obrażeń.
●Podczas instalowania lub wyjmowania
akumulatora mocno trzymaj urządzenie i
akumulator.
WAŻNE:
● Zmniejszona moc, zniekształcenie, czy „jąkający
dźwięk” lub gdy na wyświetlaczu pojawią się oba
wskaźniki niskiego poziomu naładowania baterii i
„AWARIA ZASILANIA”, wskazują na to, że główny
zestaw baterii musi zostać wymieniony.
● Gdy pojawia się wskaźnik niskiego poziomu
naładowania baterii i miga napis „PUSTY”, to należy
wymienić baterie zapasowe.
● Bateria nie może być naładowana przez dostarczony
zasilacz AC.
● Bateria nie jest dołączona jako standardowe
wyposażenie.
MONTAŻ LUB DEMONTAŻ
AKUMULATORA WSUWANEGO
(RYS. 2-5)
●
Aby zamontować akumulator, należy wyrównać
występ na akumulatorze z rowkiem w obudowie i
wsunąć go na swoje miejsce. Akumulator należy
zawsze wsunąć do oporu, do momentu jego
zablokowania na miejscu, co jest sygnalizowane
delikatnym kliknięciem.
●
Jeśli czerwony wskaźnik w górnej części przycisku
jest nadal widoczny, oznacza to, że nie został on
całkowicie zablokowany. Należy go zamontować
całkowicie, tak aby czerwony wskaźnik nie był
widoczny. W przeciwnym razie akumulator może
przypadkowo wysunąć się z odbiornika radiowego,
raniąc operatora lub osoby postronne.
●
Podczas montażu akumulatora nie używać
nadmiernej siły. Jeśli nie można go swobodnie
wsunąć, prawdopodobnie został on nieprawidłowo
włożony.
●
Aby wyjąć baterię, wysuń ją z radia przesuwając
przycisk z przodu.
WSKAZUJE STAN NAŁADOWANIA
AKUMULATORA (RYS. 6-8)
1. Lampki wskaźnikowe 2. Przycisk kontrolny
Nacisnąć przycisk Check (Sprawdź) na akumulatorze,
aby sprawdzić stan naładowania akumulatora. Na kilka
sekund zaświecą się kontrolki.
Lampki wskaźnikowe
Pozostało baterii
Zapalony Wyłączony Mruga
75% ~ 100%
50% ~ 75%
25% ~ 50%
0% ~ 25%
(Tylko dla wkładów
akumulatorowych XGT LXT)
Naładuj baterię
(Tylko dla wkładów
akumulatorowych XGT LXT)
Bateria może
nie działać
prawidłowo
UWAGA:
● W zależności od warunków używania oraz
temperatury zewnętrznej, wskaźnik może się
nieznacznie różnić od faktycznej pozostałej ilości
zasilania.
●Pierwsza (najdalej po lewej) lampka kontrolna
będzie migać, gdy aktywny jest system ochrony
akumulatora.
Instalowanie baterii zapasowych
(Rys. 9)
Trzymanie zapasowych baterii wewnątrz komory
zapobiega utracie przechowywanych w pamięci danych.
1. Pociągnij blokadę komory baterii, aby uwolnić baterie.
Wbudowana jest komora baterii głównych i komora
baterii zapasowych.
2. Usuń pokrywę komory baterii zapasowych i włóż
2 nowe baterie UM-3 (rozmiar AA). Upewnij
się, że baterie włożone są zgodnie z biegunami
Other manuals for MR002G
1
Table of contents
Languages:
Other Makita Radio manuals

Makita
Makita MR009G User manual

Makita
Makita DMR057 User manual

Makita
Makita MR004G User manual

Makita
Makita DMR115 User manual

Makita
Makita DMR300 User manual

Makita
Makita DMR108B User manual

Makita
Makita DMR108AR User manual

Makita
Makita DMR300 User manual

Makita
Makita MR002G User manual

Makita
Makita MR003GZ User manual

Makita
Makita DMR108N User manual

Makita
Makita DMR050 User manual

Makita
Makita DMR113 User manual

Makita
Makita DMR112 User manual

Makita
Makita MR004G User manual

Makita
Makita GRM02 User manual

Makita
Makita DMR115 User manual

Makita
Makita DMR112W User manual

Makita
Makita MR002GZ User manual

Makita
Makita XRM10 User manual