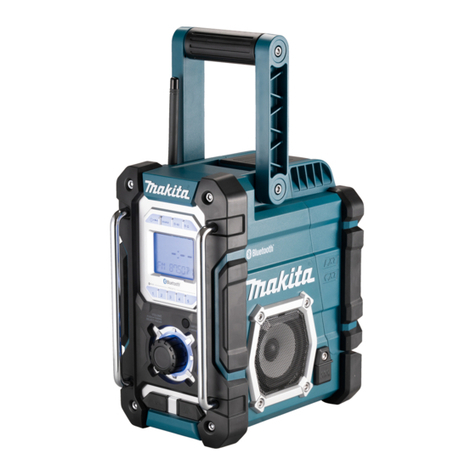
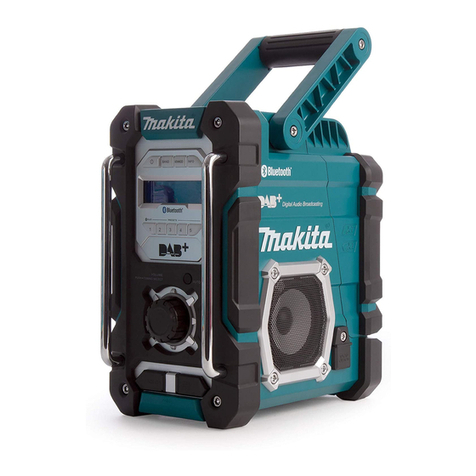
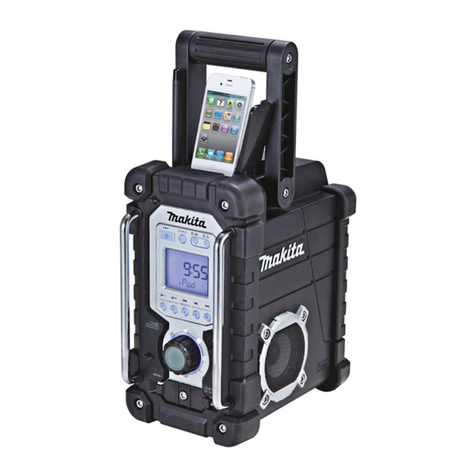
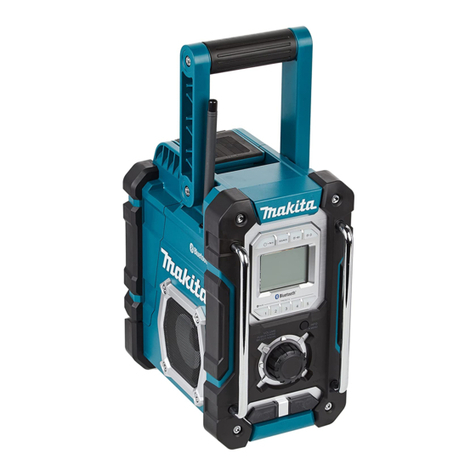
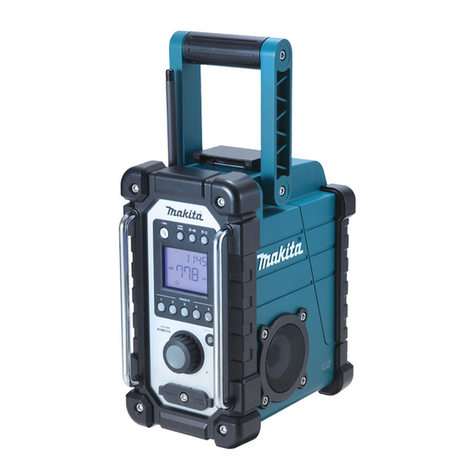
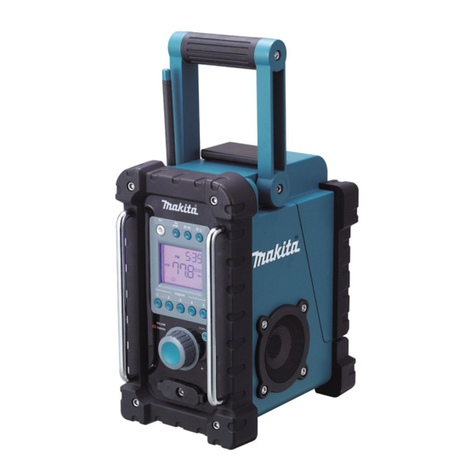
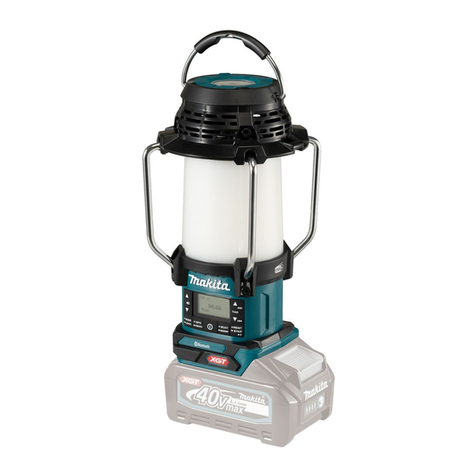
Makita DMR103 User manual

GB Radio Instruction manual
F Radio Manuel d’instructions
D Radio Betriebsanleitung
I Radio Istruzioni per l’uso
NL Radio Gebruiksaanwijzing
E Radio Manual de instrucciones
P Rádio Manual de instruções
DK Radio Brugsanvisning
GR Ραδιόφωνο Οδηγίες χρήσης
S Radio Bruksanvisning
N Radio Bruksanvisning
FIN Työmaaradio Käyttöohje
RUS Радио Инструкция по эксплуатации
PL Odbiornik radiowy Instrukcja obsługi
DMR103

2
1
1
11
10
2345
6
7
8
9
12
13
14
15
16
17
18
18
18
H
G
ABCD
E
F
I
18

3
23
45
67
11
14
18
18
18
18
20 19
21
22
21
21

4
89
10 11
12 13
21
21
23
24
13
13
9
10

5
ENGLISH (Original instructions)
Symbols
The following show the symbols used for the equipment.
Be sure that you understand their meaning before use.
Explanation of general view
Controls:
1. iPod/iPhone docking
2. Power/Sleep timer
3. Source button
4. Radio alarm
5. Buzzer alarm
6. Preset stations/Playback buttons
7. Menu/Info button
8. Volume/Tuning control/Select knob
9. DC IN socket
10. AUX IN 1
11. LCD display
12. Handle
13. Soft bended rod antenna
14. Battery compartment locker
15. Speaker
16. Battery compartment (covering main battery pack and
back up batteries)
17. Input terminal (AUX IN 2)
18. Battery compartment (covering main battery pack and
back up batteries)
19. Red indication
20. Button
21. Battery cartridge
22. Supporting bar
23. Indicator lamps
24. Check button
LCD display:
A. Radio alarm
B. Buzzer alarm
C. Stereo symbol
D. Low battery indicator
E. Clock
F. Frequency
G. RDS (Radio data system)
H. Sleep status
I. AM/PM for clock
IMPORTANT SAFETY
INSTRUCTIONS
WARNING:
When using electric tools, basic safety precautions should
always be followed to reduce the risk of fire, electric
shock, and personal injury, including the following:
1. Read this instruction manual and the charger
instruction manual carefully before use.
2. Clean only with dry cloth.
3. Do not install near any heat sources such as radiators,
heat registers, stoves, or other apparatus (including
amplifiers) that produce heat.
4. Only use attachments/accessories specified by the
manufacturer.
5. Unplug this apparatus during lighting storms or when
unused for long periods of time.
6. A battery operated radio with integral batteries or a
separate battery pack must be recharged only with the
specified charger for the battery. A charger that may
be suitable for one type of battery may create a risk of
fire when used with another battery.
7. Use battery operated radio only with specifically
designated battery packs. Use of any other batteries
may create a risk of fire.
8. When battery pack is not in use, keep it away from
other metal objects like: paper clips, coins, keys, nails,
screws, or other small metal objects that can make a
connection from one terminal to another. Shorting the
battery terminals together may cause sparks, burns,
or a fire.
9. Avoid body contact with grounded surfaces such as
pipes, radiators, ranges and refrigerators. There is an
increased risk of electric shock if your body is
grounded.
10. Under abusive conditions, liquid may be ejected from
the battery; avoid contact. If contact accidentally
occurs, flush with water. If liquid contacts eyes,
additionally seek medical help. Liquid ejected from the
battery may cause irritation or burns.
11. The MAINS plug is used as the disconnect device,
and it shall remain readily operable.
SPECIFIC SAFETY RULES
SAVE THESE INSTRUCTIONS
FOR BATTERY CARTRIDGE
1. Before using battery cartridge, read all
instructions and cautionary markings on (1)
battery charger, (2) battery, and (3) product using
battery.
2. Do not disassemble battery cartridge.
3. If operating time has become excessively shorter,
stop operating immediately. It may result in a risk
of overheating, possible burns and even an
explosion.
Read instruction manual.
Only for EU countries
Do not dispose of electric equipment or
battery pack together with household waste
material!
In observance of the European Directives, on
Waste Electric and Electronic Equipment and
Batteries and Accumulators and Waste
Batteries and Accumulators and their
implementation in accordance with national
laws, electric equipment and batteries and
battery pack(s) that have reached the end of
their life must be collected separately and
returned to an environmentally compatible
recycling facility.

6
4. If electrolyte gets into your eyes, rinse them out
with clear water and seek medical attention right
away. It may result in loss of your eyesight.
5. Do not short the battery cartridge:
(1) Do not touch the terminals with any
conductive material.
(2) Avoid storing battery cartridge in a container
with other metal objects such as nails, coins,
etc.
(3) Do not expose battery cartridge to water or
rain.
A battery short can cause a large current flow,
overheating, possible burns and even a
breakdown.
6. Do not store the tool and battery cartridge in
locations where the temperature may reach or
exceed 50°C (122°F).
7. Do not incinerate the battery cartridge even if it is
severely damaged or is completely worn out. The
battery cartridge can explode in a fire.
8. Be careful not to drop or strike battery.
9. Do not use a damaged battery.
10. The contained lithium-ion-batteries are subject to
the Dangerous Goods Legislation requirements.
For commercial transports e.g. by third parties,
forwarding agents, special requirement on packaging
and labeling must be observed.
For preparation of the item being shipped, consulting
an expert for hazardous material is required. Please
also observe possibly more detailed national
regulations.
Tape or mask off open contacts and pack up the
battery in such a manner that it cannot move around in
the packaging.
11. Follow your local regulations relating to disposal
of battery.
SAVE THESE INSTRUCTIONS.
CAUTION: Only use genuine Makita batteries.
Use of non-genuine Makita batteries, or batteries that
have been altered, may result in the battery bursting
causing fires, personal injury and damage. It will also void
the Makita warranty for the Makita tool and charger.
Tips for maintaining maximum battery life
1. Charge the battery cartridge before completely
discharged.
Always stop tool operation and charge the battery
cartridge when you notice less tool power.
2. Never recharge a fully charged battery cartridge.
Overcharging shortens the battery service life.
3. Charge the battery cartridge with room
temperature at 10°C - 40°C (50°F - 104°F). Let a hot
battery cartridge cool down before charging it.
4. Charge the battery cartridge if you do not use it for
a long period (more than six months).
iPhone, iPod, iPod classic, iPod shuffle, and iPod touch
are trademarks of Apple Inc., registered in the U.S. and
other countries.
“Made for iPod” and “Made for iPhone” mean that an
electronic accessory has been designed to connect
specifically to iPod or iPhone, respectively, and has been
certified by the developer to meet Apple performance
standards. Apple is not responsible for the operation of
this device or its compliance with safety and regulatory
standards. Please note that the use of this accessory with
iPod or iPhone may affect wireless performance.
Battery Installation
Note:
Keeping back up batteries inside the compartment
prevent stored data in preset memories from being lost.
1. Pull out the battery compartment locker to release
battery compartment. There are main battery pack
compartment and back up battery compartment.
(Fig. 2 & 3)
2. Remove back up battery compartment cover and
insert 2 fresh UM-3 (AA sizes). Make sure the
batteries are with correct polarity as shown inside the
compartment. Replace the battery cover.
3. After back up batteries are inserted, insert the main
battery pack to power radio. The suitable battery
packs for this radio listed as the following table.

7
The following tables indicate the operating time on a single charge in Radio mode/iPod iPhone mode.
Note: Table regarding to the battery operating time above is for reference. The actual operating time may differ with the
type of the battery and the model of iPod/iPhone in use.
: Cluster Battery
: Slide Battery
3-1. Installing or removing Slide battery cartridge (Fig. 4)
• To install the battery cartridge, align the tongue on the
battery cartridge with the groove in the housing and slip
it into place. Always insert it all the way until it locks in
place with a little click.
• If you can see the red indicator on the upper side of the
button, it is not locked completely. Install it fully until the
red indicator cannot be seen. If not, it may accidentally
fall out of the tool, causing injury to you or someone
around you.
• Do not use force when inserting the battery cartridge. If
the cartridge does not slide in easily, it is not being
inserted correctly.
• To remove the battery cartridge, withdraw it from the
tool while sliding the button on the front of the cartridge
or pressing the buttons on both sides of the cartridge.
3-2. Installing or removing Cluster battery cartridge
(Fig. 5 - 9)
• Pull the supporting bar to allow the battery to insert to
the terminal.
Battery Cartridge Voltage
AT SPEAKER OUTPUT =
50 mW + 50 mW
unit: Hour
7.2 V 9.6 V 10.8 V 12 V 14.4 V 18 V In Radio or
AUX
In iPod
mode
In iPhone
mode
BL7010 APPROX.
5.5
APPROX.
4.0
APPROX.
2.0
PA09 PA12 PA14 PA18
APPROX.
7.0
APPROX.
6.0
APPROX.
3.0
9050 1250 1450 1850
9051 1251 1452 1852
9100 1200 1420 BL1815
9120 BL1013 1220 BL1415
9100A 1200A
BL1415N BL1815N APPROX.
9.0
APPROX.
8.0
APPROX.
4.5
9102 1202 1422 1822
APPROX.
11.0
APPROX.
10.0
APPROX.
6.0
9122 1222 BH1420 BL1820,
BL1820B
9102A 1202A
BH9020 BH1220
BH9020A BH1200C
9134 1234 1434 1834 APPROX.
14.0
APPROX.
13.0
APPROX.
9.0
BH1427 APPROX.
15.0
APPROX.
13.5
APPROX.
10.0
9135 1235 1435 1835 APPROX.
16.5
APPROX.
15.0
APPROX.
11.0
1435F BL1830
1235F BL1430
BH9033 BH1233 BH1433 APPROX.
18.0
APPROX.
16.5
APPROX.
12.0
BH9033A BH1233C
BL1440 BL1840,
BL1840B
APPROX.
24.0
APPROX.
21.0
APPROX.
17.0
BL1450 BL1850,
BL1850B
APPROX.
32.0
APPROX.
27.0
APPROX.
24.0
BL1860B APPROX.
38.0
APPROX.
32.0
APPROX.
28.0
WARNING:
Do not use two main batteries at the same time.
WARNING:
Do not use two main batteries at the same time.

8
• To insert the battery cartridge, align the tongue on the
battery cartridge with the grove in the housing and slip
it into place.
• Release the supporting bar.
• To remove the battery cartridge, pull the supporting bar
and take the battery out of the terminal.
4. Return the battery compartment locker to the original
position.
5. Reduced power, distortion and a “stuttering sound” or
low battery sign that appears on the display are
all the signs that the main battery pack needs to
replace.
Note:
The battery pack can’t be charged via the supplied AC
power adaptor.
6. When low battery sign appears and an “E” keeps
on flashing is the time to replace the back up batteries.
Indicating the remaining battery capacity
(Only for battery cartridges with “B” at the end of the
model number.) (Fig. 10)
Press the check button on the battery cartridge to indicate
the remaining battery capacity. The indicator lamps light
up for few seconds.
015658
NOTE:
• Depending on the conditions of use and the ambient
temperature, the indication may differ slightly from the
actual capacity.
Installing the Soft bended rod
antenna (Fig. 11 & 12)
Install the Soft bended rod antenna as show in the figure.
Note:
There is a click in the battery compartment designed to
store the removed antenna.
Using Supplied AC power adaptor
(Fig. 13)
Remove the rubber protector and insert the adaptor plug
into the DC socket on the front side of the radio. Plug the
adaptor into a standard mains socket outlet. Whenever
the adaptor is used, the battery pack is automatically
disconnected. The AC adaptor should be disconnected
from the main supply when not in use.
Note:
When your radio has any interference in AM band by its
adaptor, please move your radio away from its AC adaptor
over 30 cm.
Operating your radio — Scan
tuning AM/FM
1. Press the Power button to switch on your radio.
2. Press the Source button to select AM or FM radio
mode.
3. Press and hold the Tuning control to carry out an
auto-tune. Your radio will scan up the AM/FM band
from the currently displayed frequency and will stop
scanning automatically when it finds a station of
sufficient strength.
4. After a few seconds the display will update. The
display will show the frequency of the signal found.
5. To find other station, press and hold the Tuning control
as before.
6. When the end of the waveband is reached your radio
will recommence tuning from the opposite end of the
waveband.
7. Rotate the Tuning control to adjust the sound
level as required.
• While adjusting the volume, make sure the FM/AM
is NOT flashing on the screen.
• If AM/FM is flashing on the screen, it allows you to
tune the stations manually (see the section of
“Manual tuning-AM/FM” for more detail).
8. To switch off your radio press the Power button .
Manual tuning — AM/FM
1. Press the Power button to switch on your radio.
2. Press the Source button to select AM or FM radio
mode.
3. Press the Tuning control and you will see the FM
or AM is flashing on the display.
• FM/AM will flash approx. 10 seconds. Within this
period, only manual tuning is allowed.
• If volume adjustment is desired while FM/AM is
flashing, press the Tuning control to stop the flash
and you can rotate the Tuning control to adjust
sound level.
Indicator lamps
Remaining
capacity
Lighted Off Blinking
75% to 100%
50% to 75%
25% to 50%
0% to 25%
Charge the
battery.
The battery may
have
malfunctioned.

9
4. Rotate the Tuning control to tune to a station. The
FM frequency will change in steps of 100 kHz/50 kHz
and AM frequency will change in steps of 9 kHz.
5. When the end of the waveband is reached your radio
will recommence tuning from the opposite end of the
waveband.
6. Use the Tuning control to adjust the sound level
as required.
Presetting stations in AM/FM
mode
There are 5 preset stations each for AM and FM radio.
They are used in the same way for each waveband.
1. Press the Power button to switch on your radio.
2. Press the Source button to select the desired
waveband. Tune to the required radio station as
previously described.
3. Press and hold the required Preset button (1 to 5)
until the display shows “P4” for
example after the frequency. The station will be stored
using the preset number. Repeat this procedure for
the remaining presets as you wish.
4. Preset stations which have already been stored may
be overwritten by following the above procedure if
required.
Display modes — FM
Your radio has a range of display options for FM radio
mode.
1. Repeatedly press the Menu/Info button to view
the RDS information of the station you are listening to.
a. Station name Displays the name if the station being
listened to.
b. Program type Displays the type of station being
listened to such as Pop, Classic, News,
etc.
c. Radio text Displays radio text message such as
new items etc.
d. Year/Day Displays the year and day of the week
according to the date setting of your
radio.
e. Date/Day Displays the date and day of the week
according to the date setting of your
radio.
f. Frequency Displays the frequency of the FM for
the station listened to.
FM stereo (auto)/mono
If the FM radio station being listened to has a weak signal
some hiss may be audible. It is possible to reduce this
hiss by forcing the radio to play the station in mono rather
than stereo.
1. Press the Source button as needed to select the
FM band and tune to the desired FM station as
previously stated.
2. Press and hold Menu/Info button to enter the
menu setting.
3. Rotate the Tuning control until the FM Auto/mono
setting shows on the display. If the setting is Auto
press the Tuning control to switch to Mono mode to
reduce the hiss. Press the Tuning control to select the
option.
Recalling a preset in AM/FM mode
1. Press the Power button to switch on your radio.
2. Press the Source button to select AM or FM radio
mode.
3. Momentarily press the required Preset button
to cause your radio to tune to one of
the stations stored in the preset memory.
iPod docking
Your radio has an iPod docking facility which allows you to
play digital audio files and soundtracks held on your iPod/
iPhone directly.
Your radio uses the iPod Universal Dock adjustor
developed for use with iPods and iPhone. Recent models
of iPod/iPhone are supplied with Universal Dock Adapter
inserts which ensure correct alignment of the iPod/iPhone
with the electrical connector.
Important:
The radio does not support iPod 3rd generation (build
2003-2004). To avoid possible damage to your iPod,
do not use your iPod with the product without the
correct adapter fitted to the radio.
Note:
1) All the model listed in the following can be connected
to your radio, but not for iPod shuffle: (1) iPhone 4S
(2) iPhone 4 (3) iPhone 3GS (4) iPod touch 4G
(5) iPod touch 3G (6) iPod nano 6G (7) iPod nano 5G
(8) iPod classic
2) Models listed above have been certified by the
developer to meet Apple performance standards. The
models which are not listed above can also operate
with your DMR103; however, there is no certification
to meet Apple performance standards.
Charging your iPod/iPhone
1. Place the iPod/iPhone onto the Universal Dock
Adjuster into the iPod docking compartment. Press the
Power button to switch on your radio.
2. Press Source button until “iPod” shows on the
display. If you see (battery with thunder) on your iPod
screen, it indicates your radio is charging your iPod’s/
iPhone’s internal battery.

10
Note:
1) AM does not operate while charging your iPod/iPhone.
2) When the radio is plugged with AC adapter, your iPod/
iPhone can be charged regardless of power on/off of
the iPod/iPhone itself or the radio.
3) When the battery is used as power supply, your iPod/
iPhone can only be charged when the radio is power
on.
Navigating your iPod/iPhone
To navigate your iPod/iPhone menus to make selections
or to change settings, you should use your iPod/iPhone
controls. The radio controls can be used for Menu/Select,
Previous/Next, Fast Rewind/Fast Forward and Play/
Pause functions.
1. Use the Menu/Info button to navigate to higher
level menus on your iPod/iPhone.
2. Rotate the Tuning control as required to move up
or down a menu screen on your iPod/iPhone.
3. Press the Tuning control to select the highlighted
option on your screen menu.
Note:
If this item is a lower level menu item, you may then
navigate further by pressing the Tuning control.
Playing an audio file on your iPod/
iPhone
1. When you have found the desired item, press the
Tuning control on the radio to start the iPod
playing.
2. Adjust the volume to the required setting using the
Tuning control on your radio.
• To adjust the volume, you need to make sure the
word “iPod” on the screen is not flashing.
• Press the preset button (1-5) at any point If you
want to cease the word “iPod” from flashing.
3. To pause playback press the Play/Pause button
. To resume playback press the Play/Pause
button again.
4. iPods do not have a Stop button (they use the Pause
function). To play an alternative selection, use the
iPod menus to make the selection using the Play/
Pause button to stop playing the current
item if needed.
5. If it was previously playing, your iPod/iPhone will
switch on and continue playing from where it was
previously stopped.
Note:
Your DMR103 does not support video file but only music
file.
Note:
When Video File List was selected, please press Select
button.
Search function
1. Press either the Fast-Forward or Back-
forward button to start playing the next or
previous track.
2. While the iPod/iPhone is playing, press and hold the
Fast-Forward or Back-forward buttons
to move through the current file or track,
and then release the button when the desired point in
the file or track is reached.
3. To select a desired track among folders, press the
Folder Up/Down button , to
select a desired track in different folder.
Clock and Alarms
Setting the time format
The clock display used in stand-by mode and on the
playing mode screens can be set to 12 or 24 hour format.
The selected format is then also used when setting the
alarms.
1. Press and hold the Menu/Info button to enter the
menu setting.
2. Rotate the Tuning control until “CLOCK xxH”
appears on the display and press the Tuning control
to enter the setting. You will see the time format
begins to flash.
3. Rotate the Tuning control to select either 12 or 24
hour format. Press the Tuning control to confirm
your choice of clock format.
Note:
If the 12 hour clock format is chosen, the radio will then
use the 12 hour clock for the setting.
Setting the clock time and date
1. Press and hold the Menu/Info button .
2. Rotate the Tuning control until “CLOCK ADJ”
appears on the display. Press the Tuning control
to enter the setting.
3. The hour setting on the display will begin flashing.
Rotate the Tuning control to select the desired
hour, and press the Tuning control to confirm the
setting. Then rotate the Tuning control to select
the desired minute, and press the Tuning control
to confirm the setting.
4. Rotate the Tuning control until “DATE ADJ”
appears on the display. Press the Tuning control
to enter the setting.
5. Rotate the Tuning control to select the desired
year and press the Tuning control to confirm the
setting. Then rotate the Tuning control to select
the desired month, and press the Tuning control
to confirm the setting. Then rotate the Tuning control
to select the desired date and press the Tuning
control to confirm the setting.

11
Radio Data System (RDS)
When you set the clock time using the RDS function, your
radio will synchronize its clock time whenever it tunes to a
radio station using RDS with CT signals.
1. When tuning to a station transmitting RDS data, press
and hold the Menu/Info button .
2. Rotate the Tuning control until “RDS CT” and a
clock symbol appear on the display. Press the Tuning
control to enter the setting.
3. Rotate the Tuning control until “RDS CT” appears
on the display. Press the Tuning control to confirm
the setting. The clock time of the radio will set up
automatically according to the RDS data received.
4. When the action is completed, the RDS icon will
appear on the LCD display indicating the radio time is
RDS clock time. The radio clock time will be valid for
5 days each time the radio time is synchronized with
RDS CT.
Setting the alarm clock
Your DMR103 has two alarms which can each be set to
wake you to AM/FM radio or buzzer alarm. The alarms
may be set while the unit is in standby mode or while
playing.
a. Setting radio alarm time:
1. The radio alarm can be set either when radio is on or
off.
2. Press and hold the radio alarm button , the
radio alarm symbol and the display hour will flash
along with a beep.
3. During radio alarm symbol flashes, rotate
Tuning control knob to select the hour and press
Tuning control knob again to confirm hour setting.
Then rotate the Tuning control knob to select the
minute and press Tuning control knob to confirm
minute setting.
4. Rotate the Tuning control knob and the display will
show the frequency options for the alarm.
The alarm options are as follows:
ONCE - the alarm will sound once
DAILY - the alarm will sound everyday
WEEKDAY - the alarm will sound only on weekdays
WEEKEND - the alarm will sound only at weekends
Press the Tuning control to confirm the setting.
5. During radio alarm symbol is flashing, rotate Tuning
control knob to select desired wake-up band and
station, then press Tuning control knob to confirm the
selection.
6. Rotate Tuning control knob to select the desired
volume and press Tuning control knob to confirm the
volume. Radio alarm setting is now completed.
Note:
If new radio alarm station is not selected, it will select
the last alarm station.
Note:
If the selected AM/FM alarm station is not available
when the alarm is sounding, the buzzer alarm will be
used instead.
b. Setting HWS (Humane Wake System) buzzer alarm:
A beep tone will activate when selecting the HWS buzzer
alarm.
The alarm beep will sound shorter every 15 seconds for
one minute followed by one minute silence before
repeating the cycle.
1. The buzzer alarm can be set either when the radio is
on or off.
2. Press and hold the buzzer alarm button , the
symbol and the display hour will flash along with a
beep.
3. During buzzer alarm symbol flashes, rotate
Tuning control knob to select the hour and press
Tuning control knob again to confirm hour setting.
Then rotate the Tuning control knob to select the
minute and press Tuning control knob to confirm
minute setting.
4. Rotate the Tuning control knob and the display will
show the frequency options for the alarm.
The alarm options are as follows:
ONCE - the alarm will sound once
DAILY - the alarm will sound everyday
WEEKDAY - the alarm will sound only on weekdays
WEEKEND - the alarm will sound only at weekends
Press the Tuning control to confirm the setting.
Note:
There is no volume adjustment for buzzer alarm.
When the alarm sounds
To cancel a sounding alarm, press the Power button .
Disabling/cancelling alarms
To disable an active alarm, either press the Power button
, or press and hold the corresponding alarm button to
cancel the alarm.
Snooze
1. When the alarm sounds, press any button other than
the Power button will silence the alarm for 5 minutes.
“SNOOZE” will appear on the display.
2. To adjust the silence time for the snooze timer, press
and hold the Menu/Info button to enter the menu
setting.
3. Rotate the Tuning control until “SNOOZE X”
appears on the display, then press the Tuning control
to enter the setting. Rotate the Tuning control

12
to adjust the silence time from 5, 10, 15 and
20 minutes for the snooze timer.
4. To cancel the snooze timer while the alarm is
suspended, press the Power button .
Sleep timer
Your radio can be set to turn off automatically after a
preset time has elapsed. The Sleep Timer setting can be
adjusted between 60, 45, 30, 15, 120 and 90 minutes.
1. Press and hold the Power button to enter the
Sleep Timer setting. “SLEEP XX” will show on the
display.
2. Keep holding the Power button and the Sleep
Timer options will start switching on the display. Stop
until the desired Sleep Timer setting appears on the
display. The setting will be saved and the LCD will
return to normal display.
3. Your radio will switch off automatically after the preset
Sleep Timer has elapsed. The Sleep Timer icon
will show on the display indicating an active Sleep
Timer.
4. To cancel the Sleep Timer function before the preset
time has elapsed, simply press the Power button
to turn the unit off manually.
Loudness
You can get compensation on lower and higher frequency
for your DMR103 by adjusting the loudness function.
1. Press and hold the Menu/Info button to enter the
menu setting.
2. Rotate the Tuning control until “LOUD ON” or
“LOUD OFF” appears on the display. Press the Tuning
control to enter the setting.
3. Rotate the Tuning control to choose ON to turn on
the loudness function, then press the Tuning control
to confirm the setting.
4. To turn off the loudness function, select OFF and
press the Tuning control to confirm the setting.
Auxiliary input socket
Two 3.5 mm stereo Auxiliary Input sockets are provided.
One is at the front of your radio (AUX IN 1); the other is
located in the battery compartment (AUX IN 2).
1. Connect an external audio source (for example, iPod,
MP3 or CD player) to the Auxiliary Input socket.
2. Repeatedly press and release the Source button
until AUX IN is displayed.
3. Adjust the volume setting on your iPod, MP3 or CD
player to ensure an adequate signal level from the
player, and then use the Tuning control on the
radio as needed for comfortable listening.
MAINTENANCE
CAUTION:
• Never use gasoline, benzine, thinner, alcohol or the
like. Discoloration, deformation or cracks may result.
Specifications:
Power Requirements
AC power adaptor DC12 V/1200 mA, center pin
positive
Battery UM-3 (AA size) x 2 for back up
Cluster battery: 7.2 V - 18 V
Slide battery: 9.6 - 18 V
Frequency coverage FM 87.50 - 108 MHz
(0.05 MHz/step)
AM (MW) 522 - 1629 kHz
(9 kHz/step)
Circuit feature
Loudspeaker 3 inches 8 ohm
Output Power 7.2 V: 0.5 W x 2, 9.6 V: 1 W x 2,
10.8 V:1.2 W x 2, 12 V: 1.5 W x 2,
14.4 V: 2.2 W x 2, 18 V: 3.5 W x 2
Input terminal 3.5 mm dia. (AUX IN1/AUX IN2)
Antenna system FM: soft bended rod antenna
AM: bar antenna
Dimension (W x H x D) in mm
280 x 302 x 163
Weight 4.2 kg (without battery)

13
FRANÇAIS (Instructions d’origine)
Symboles
Les symboles utilisés pour l’appareil sont indiqués ci-
dessous. Assurez-vous d’avoir bien compris leur
signification avant d’utiliser l’appareil.
Descriptif
Commandes :
1. Station d’accueil iPod/iPhone
2. Marche/arrêt/minuterie de veille
3. Bouton Source
4. Alarme radio
5. Alarme du vibreur
6. Stations préréglées/boutons de lecture
7. Bouton Menu/Info
8. Bouton de sélection/commande de syntonisation/
volume
9. Prise d’entrée secteur
10. AUX IN 1
11. Écran LCD
12. Poignée
13. Antenne tige souple courbée
14. Casier du compartiment des batteries
15. Haut-parleur
16. Compartiment des batteries (couvrant le bloc-batterie
principal et les batteries de secours)
17. Borne d’entrée (AUX IN 2)
18. Compartiment des batteries (couvrant le bloc-batterie
principal et les batteries de secours)
19. Voyant rouge
20. Bouton
21. Batterie
22. Barre de soutien
23. Voyants
24. Bouton de vérification
Écran LCD :
A. Alarme radio
B. Alarme du vibreur
C. Symbole de stéréo
D. Indicateur de batterie faible
E. Horloge
F. Fréquence
G. Système radioélectrique de diffusion de données
(RDS)
H. État de veille
I. AM/PM pour l’horloge
CONSIGNES DE SÉCURITÉ
IMPORTANTES
AVERTISSEMENT :
Lors de l’utilisation des outils électriques, vous devez
toujours prendre des précautions élémentaires en matière
de sécurité pour réduire les risques d’incendie, de choc
électrique et de blessure. Ces précautions sont
notamment les suivantes :
1. Avant d’utiliser l’appareil, lisez attentivement son
manuel d’instructions et celui du chargeur.
2. Nettoyez avec un chiffon doux uniquement.
3. N’installez pas l’appareil près de sources de chaleur,
telles que des radiateurs, des bouches de chaleur,
des poêles ou d’autres dispositifs (notamment des
amplificateurs) émetteurs de chaleur.
4. Utilisez uniquement des pièces complémentaires/
accessoires spécifiés par le fabricant.
5. Débranchez cet appareil en cas d’orage ou lorsque
vous ne l’utilisez pas pendant une période prolongée.
6. Les batteries utilisées pour les radios, qu’elles soient
intégrées ou séparées, doivent être rechargées
uniquement à l’aide du chargeur de batterie spécifié.
Un chargeur qui convient à un type de batterie peut
créer un risque d’incendie s’il est utilisé avec une
autre batterie.
7. Les radios fonctionnant à l’aide de batteries doivent
être utilisées uniquement avec les batteries
désignées. L’utilisation d’autres batteries peut créer
un risque d’incendie.
8. Lorsque vous n’utilisez pas le bloc-batterie,
conservez-le à l’écart d’autres objets métalliques, tels
que : des trombones, pièces de monnaie, clés, clous,
vis ou autres petits objets métalliques susceptibles
d’établir une connexion d’une borne à l’autre. Court-
circuiter les bornes de la batterie peut provoquer des
étincelles, des brûlures ou un incendie.
9. Évitez tout contact corporel avec les surfaces mises à
la terre, telles que les tuyaux, radiateurs, cuisinières et
réfrigérateurs. Le risque de choc électrique augmente
si votre corps est mis à la terre.
10. En cas de mauvaise utilisation, du liquide peut fuir de
la batterie ; évitez tout contact. En cas de contact
accidentel, nettoyez la surface en question à l’eau. Si
le liquide entre en contact avec les yeux, consultez un
médecin. Le liquide émis par la batterie peut
provoquer une irritation ou des brûlures.
11. La fiche secteur est utilisée comme dispositif de
déconnexion et doit rester facilement accessible.
Référez-vous au manuel d’instructions.
Pour les pays européens uniquement
Ne pas jeter les appareils électriques et les
bloc-batteries dans les ordures ménagères !
Conformément aux directives européennes
relatives aux déchets d’équipements
électriques ou électroniques (DEEE) ainsi
qu’aux batteries, aux accumulateurs et aux
batteries et accumulateurs usagés et à leur
transposition dans la législation nationale, les
appareils électriques, les batteries et les bloc-
batteries doivent être collectés à part et être
soumis à un recyclage respectueux de
l’environnement.

14
CONSIGNES DE SÉCURITÉ
PARTICULIÈRES
CONSERVEZ CES
INSTRUCTIONS
POUR LA BATTERIE
1. Avant d’utiliser la batterie, veuillez lire toutes les
instructions et tous les avertissements inscrits
sur (1) le chargeur, (2) la batterie et (3) l’appareil
alimenté par la batterie.
2. Ne démontez pas la batterie.
3. Cessez immédiatement d’utiliser l’outil si le temps
de fonctionnement devient excessivement court. Il
y a risque de surchauffe, de brûlures, voire
d’explosion.
4. Si l’électrolyte pénètre dans vos yeux, rincez-les à
l’eau claire et consultez immédiatement un
médecin. Il y a risque de perte de la vue.
5. Évitez de court-circuiter la batterie :
(1) Ne touchez les bornes avec aucun matériau
conducteur.
(2) Évitez de ranger la batterie dans un
contenant où se trouvent d’autres objets
métalliques tels que des clous, pièces de
monnaie, etc.
(3) N’exposez pas la batterie à l’eau ou à la pluie.
Un court-circuit de la batterie risque de provoquer
un fort courant, une surchauffe, parfois des
brûlures et même une panne.
6. Ne rangez pas l’outil ou la batterie dans des
endroits où la température risque d’atteindre ou
de dépasser 50 °C (122 °F).
7. Ne jetez pas la batterie au feu même si elle est
sérieusement endommagée ou complètement
épuisée. La batterie peut exploser au contact du
feu.
8. Veillez à ne pas laisser tomber ou heurter la
batterie.
9. N’utilisez pas de batterie endommagée.
10. Les batteries au lithium-ion contenues dans
l’appareil sont soumises à la législation sur les
marchandises dangereuses.
Pour les transports commerciaux réalisés par des
transitaires tiers par exemple, les conditions spéciales
figurant sur les emballages et les étiquettes doivent
être respectées.
Lors de la préparation de l’article à expédier, il est
obligatoire de consulter un spécialiste en matières
dangereuses. Respectez également les éventuelles
réglementations nationales plus détaillées.
Collez du ruban adhésif sur les contacts ouverts ou
masquez-les et emballez la batterie de sorte qu’elle
ne bouge pas dans le coffret.
11. Respectez les réglementations locales relatives à
la mise au rebut des batteries.
CONSERVEZ CES
INSTRUCTIONS.
ATTENTION : Utilisez uniquement des batteries
Makita d’origine.
L’utilisation de batteries qui ne sont pas Makita d’origine
ou de batteries qui ont été modifiées peut provoquer des
explosions et entraîner des incendies, des blessures
corporelles et des dégâts. Cela peut également invalider
la garantie Makita pour l’outil et le chargeur Makita.
Conseils pour assurer la durée de vie
optimale de la batterie
1. Rechargez la batterie avant qu’elle ne soit
complètement épuisée.
Arrêtez toujours l’outil et rechargez la batterie
quand vous constatez que la puissance de l’outil
diminue.
2. Ne rechargez jamais une batterie complètement
chargée.
La surcharge réduit la durée de service de la
batterie.
3. Chargez la batterie alors que la température de la
pièce se trouve entre 10 °C et 40 °C (50 °F et
104 °F). Si une batterie est chaude, laissez-la
refroidir avant de la charger.
4. Chargez la batterie si vous ne l’avez pas utilisée
pendant une période prolongée (plus de six mois).
iPhone, iPod, iPod classic, iPod shuffle et iPod touch sont
des marques d’Apple Inc., déposées aux États-Unis et
dans d’autres pays.
Les mentions « Made for iPod » et « Made for iPhone »
signifient qu’un accessoire électronique a été conçu pour
se connecter spécifiquement à un iPod ou un iPhone,
respectivement, et a été certifié par le développeur pour
satisfaire aux normes de performances d’Apple. Apple
n’est pas responsable du fonctionnement de cet appareil
ou de sa conformité aux normes réglementaires et de
sécurité. Veuillez noter que l’utilisation de cet accessoire
avec un iPod ou un iPhone peut affecter les performances
sans fil.
Installation de la batterie
Remarque :
Conservez les batteries de secours à l’intérieur du
compartiment pour éviter de perdre les données
enregistrées dans les mémoires préréglées.
1. Tirez sur le casier du compartiment des batteries pour
dégager le compartiment des batteries. La radio
comporte un compartiment de bloc-batterie principal
et un compartiment des batteries de secours. (Fig. 2
et 3)
2. Retirez le couvercle du compartiment des batteries de
secours et insérez 2 batteries UM-3 (AA) neuves.
Assurez-vous que la polarité des batteries est
correcte, comme illustré à l’intérieur du compartiment.
Remettez le couvercle des batteries en place.
3. Après avoir inséré les batteries de secours, insérez le
bloc-batterie principal pour alimenter la radio. Les

15
blocs-batterie adaptés à cette radio sont répertoriés
dans le tableau suivant.
Les tableaux suivants indiquent la durée de fonctionnement en mode Radio/iPod iPhone avec une seule charge.
Note : le tableau ci-dessus répertoriant les durées de fonctionnement des batteries est présenté pour référence. Les
durées de fonctionnement réelles peuvent varier selon le type de batterie et le modèle d’iPod/iPhone utilisé.
: batterie à faisceau
: batterie coulissante
3-1. Installation ou retrait de la batterie coulissante
(Fig. 4)
• Pour installer la batterie, alignez sa languette sur la
rainure qui se trouve à l’intérieur du logement, puis
glissez la batterie pour la mettre en place. Insérez-la
toujours bien à fond, jusqu’à ce qu’elle se verrouille en
émettant un léger clic.
• Si vous pouvez voir le voyant rouge sur la face
supérieure du bouton, la batterie n’est pas parfaitement
verrouillée. Installez-la à fond, jusqu’à ce que le voyant
rouge ne soit plus visible. Sinon, elle risque de tomber
accidentellement de l’outil, en vous blessant ou en
blessant une personne située près de vous.
• N’appliquez pas une force excessive lors de l’insertion
de la batterie. Si la batterie ne glisse pas aisément,
c’est qu’elle n’est pas insérée correctement.
• Pour retirer la batterie, sortez-la de l’outil en faisant
coulisser le bouton à l’avant de la batterie. Vous
Tension de la batterie
AU NIVEAU DE LA SORTIE DU
HAUT-PARLEUR =
50 mW + 50 mW
unité : heure
7,2V 9,6V 10,8V 12V 14,4V 18V
En mode
radio ou
AUX
En mode
iPod
En mode
iPhone
BL7010 5,5 environ 4,0 environ 2,0 environ
PA09 PA12 PA14 PA18
7,0 environ 6,0 environ 3,0 environ
9050 1250 1450 1850
9051 1251 1452 1852
9100 1200 1420 BL1815
9120 BL1013 1220 BL1415
9100A 1200A
BL1415N BL1815N 9,0 environ 8,0 environ 4,5 environ
9102 1202 1422 1822
11,0
environ
10,0
environ 6,0 environ
9122 1222 BH1420 BL1820,
BL1820B
9102A 1202A
BH9020 BH1220
BH9020A BH1200C
9134 1234 1434 1834 14,0
environ
13,0
environ 9,0 environ
BH1427 15,0
environ
13,5
environ
10,0
environ
9135 1235 1435 1835 16,5
environ
15,0
environ
11,0
environ
1435F BL1830
1235F BL1430
BH9033 BH1233 BH1433 18,0
environ
16,5
environ
12,0
environ
BH9033A BH1233C
BL1440 BL1840,
BL1840B
24,0
environ
21,0
environ
17,0
environ
BL1450 BL1850,
BL1850B
32,0
environ
27,0
environ
24,0
environ
BL1860B 38,0
environ
32,0
environ
28,0
environ
AVERTISSEMENT :
Ne pas utiliser deux batteries principales à la fois.

16
pouvez également appuyer sur les boutons situés de
chaque côté de la batterie.
3-2. Installation ou retrait de la batterie à faisceau (Fig. 5
à 9)
• Tirez sur la barre de soutien pour pouvoir insérer la
batterie dans la borne.
• Pour insérer la batterie, alignez sa languette sur la
rainure qui se trouve à l’intérieur du logement, puis
glissez la batterie pour la mettre en place.
• Dégagez la barre de soutien.
• Pour retirer la batterie, tirez sur la barre de soutien et
dégagez la batterie de la borne.
4. Remettez le casier du compartiment des batteries en
position d’origine.
5. Une puissance réduite, une déformation et un « bruit
saccadé » ou un signe de batterie faible qui
apparaît sur l’afficheur indiquent qu’il est nécessaire
de remplacer le bloc-batterie principal.
Remarque :
Les batteries ne peuvent pas être rechargées à l’aide
de l’adaptateur secteur fourni.
6. Lorsque le signe de batterie faible apparaît et
qu’un « E » clignote sans discontinuer, il est temps de
remplacer les batteries de secours.
Indication de l’autonomie restante de la
batterie
(uniquement pour les batteries dont le numéro de modèle
se termine par la lettre « B ».) (Fig. 10)
Appuyez sur le bouton de vérification pour indiquer
l’autonomie restante de la batterie. Les voyants s’allument
alors pendant quelques secondes.
015658
REMARQUE :
• Selon les conditions d’utilisation et la température
ambiante, les indications peuvent différer légèrement
de l’autonomie réelle restante.
Installation de l’antenne tige
souple courbée (Fig. 11 et 12)
Installez l’antenne tige souple courbée comme illustré sur
la figure.
Remarque :
Le compartiment des batteries comporte un déclic destiné
à ranger l’antenne qui a été déposée.
Utilisation de l’adaptateur secteur
fourni (Fig. 13)
Retirez le capuchon en caoutchouc et insérez la fiche de
l’adaptateur dans la prise secteur sur la façade de la
radio. Branchez l’adaptateur dans une prise de courant
standard. En cas d’utilisation de l’adaptateur, le bloc-
batterie est automatiquement déconnecté. Débranchez
l’adaptateur secteur de l’alimentation lorsque vous ne
l’utilisez pas.
Remarque :
En cas d’interférences de votre radio avec son adaptateur
en mode AM, éloignez-la de plus de 30 cm de son
adaptateur secteur.
Fonctionnement de votre radio :
syntonisation AM/FM
1. Appuyez sur le bouton d’alimentation pour
allumer votre radio.
2. Appuyez sur le bouton Source pour sélectionner
le mode radio AM ou FM.
3. Appuyez sur la commande de syntonisation et
maintenez-la enfoncée pour procéder à la
syntonisation automatique. Votre radio syntonise la
bande AM/FM à partir de la fréquence affichée et
interrompt automatiquement la syntonisation
lorsqu’elle trouve une station suffisamment puissante.
4. L’afficheur se met à jour au bout de quelques
secondes. Il indique la fréquence du signal trouvé.
5. Pour trouver une autre station, appuyez sur la
commande de syntonisation et maintenez-la
enfoncée comme précédemment.
6. Une fois que votre radio a atteint la fin de la bande de
longueurs d’ondes, elle reprend la syntonisation à
partir de l’extrémité opposée de la bande de
longueurs d’ondes.
7. Au besoin, tournez la commande de syntonisation
pour régler le niveau sonore.
• Pendant le réglage du volume, assurez-vous que
l’indication FM/AM ne clignote PAS sur l’écran.
AVERTISSEMENT :
Ne pas utiliser deux batteries principales à la fois.
Voyants
Autonomie
restante
Allumé Éteint Clignotant
75 % à 100 %
50 % à 75 %
25 % à 50 %
0%à25%
Recharger la
batterie.
Il est possible que
la batterie ait mal
fonctionné.

17
• Si AM/FM clignote sur l’écran, vous avez la
possibilité de syntoniser les stations manuellement
(pour plus de détails, voir la section « Syntonisation
manuelle : AM/FM »).
8. Pour éteindre votre radio, appuyez sur le bouton
d’alimentation .
Syntonisation manuelle : AM/FM
1. Appuyez sur le bouton d’alimentation pour
allumer votre radio.
2. Appuyez sur le bouton Source pour sélectionner
le mode radio AM ou FM.
3. Si vous appuyez sur la commande de syntonisation
, FM ou AM clignote sur l’afficheur.
• FM/AM clignote pendant 10 secondes environ.
Pendant ce temps, seule la syntonisation manuelle
est autorisée.
• Si vous souhaitez régler le volume alors que FM/
AM clignote, appuyez sur la commande de
syntonisation pour que l’afficheur cesse de
clignoter et pour pouvoir tourner la commande de
syntonisation afin de régler le niveau sonore.
4. Pour syntoniser une station, tournez la commande de
syntonisation . La fréquence FM change par
incréments de 100 kHz/50 kHz et la fréquence AM par
incréments de 9 kHz.
5. Une fois que votre radio a atteint la fin de la bande de
longueurs d’ondes, elle reprend la syntonisation à
partir de l’extrémité opposée de la bande de
longueurs d’ondes.
6. Au besoin, utilisez la commande de syntonisation
pour régler le niveau sonore.
Préréglage de stations en mode
AM/FM
Il existe 5 stations préréglées pour chaque radio AM et
FM. Elles sont utilisées de la même manière pour chaque
bande de longueurs d’ondes.
1. Appuyez sur le bouton d’alimentation pour
allumer votre radio.
2. Appuyez sur le bouton Source pour sélectionner
la bande de longueurs d’ondes souhaitée. Syntonisez
la station radio requise comme décrit précédemment.
3. Appuyez sur le bouton de préréglage requis (1 à 5)
et maintenez-le enfoncé jusqu’à ce
que l’afficheur indique « P4 », par exemple après la
fréquence. La station est enregistrée à l’aide du
numéro prédéfini. Répétez cette procédure pour les
préréglages restants comme vous le souhaitez.
4. Au besoin, vous pouvez écraser les stations
préréglées déjà enregistrées en procédant comme
indiqué ci-dessus.
Modes d’affichage : FM
Votre radio possède plusieurs options d’affichage pour le
mode radio FM.
1. Appuyez plusieurs fois sur le bouton Menu/Info
pour afficher les informations RDS de la station que
vous écoutez.
a. Nom de la station Affiche le nom de la station
écoutée.
b. Type de programme
Affiche le type de station écoutée,
par exemple Pop, Classique,
Informations, etc.
c. Texte radio Affiche le message textuel radio,
tel que de nouveaux éléments, etc.
d. Année/jour Affiche l’année et le jour de la
semaine selon le réglage de la
date de votre radio.
e. Date/jour Affiche la date et le jour de la
semaine selon le réglage de la
date de votre radio.
f. Fréquence Affiche la fréquence de la station
FM écoutée.
FM stéréo (auto)/mono
Si le signal de la station radio FM écoutée est faible, vous
risquez d’entendre un souffle. Il est possible de réduire ce
souffle en forçant la radio à diffuser la station en mode
mono plutôt qu’en mode stéréo.
1. Au besoin, appuyez sur le bouton Source pour
sélectionner la bande FM et syntoniser la station FM
souhaitée, comme indiqué précédemment.
2. Appuyez sur le bouton Menu/Info et maintenez-
le enfoncé pour accéder aux réglages du menu.
3. Tournez la commande de syntonisation jusqu’à ce
que le réglage FM auto/mono s’affiche. Si le réglage
Auto est sélectionné, appuyez sur la commande de
syntonisation pour basculer en mode Mono afin de
réduire le souffle. Pour sélectionner l’option en
question, appuyez sur la commande de syntonisation.
Rappel d’un préréglage en mode
AM/FM
1. Appuyez sur le bouton d’alimentation pour
allumer votre radio.
2. Appuyez sur le bouton Source pour sélectionner
le mode radio AM ou FM.
3. Appuyez brièvement sur le bouton de préréglage
souhaité pour que votre radio
syntonise l’une des stations enregistrées dans la
mémoire prédéfinie.

18
Accueil de l’iPod
Votre radio est équipée d’une station d’accueil pour iPod
qui vous permet de lire directement sur votre iPod/iPhone
les fichiers audio numériques et les pistes sonores.
Votre radio utilise l’ajusteur d’accueil universel pour IPod
prévu pour être utilisé avec les iPod et les iPhone. Les
modèles récents d’iPod/iPhone sont fournis avec des
pièces à insérer dans l’adaptateur de la station d’accueil
universelle qui garantissent l’alignement correct de l’iPod/
iPhone avec le connecteur électrique.
Important :
La radio ne prend pas en charge la 3e génération
d’iPod (version 2003-2004). Pour éviter
d’endommager votre iPod, n’utilisez pas votre iPod
avec le produit sans avoir installé l’adaptateur correct
sur la radio.
Remarque :
1) Tous les modèles répertoriés ci-après peuvent être
connectés à votre radio, à l’exception de l’iPod
shuffle : (1) iPhone 4S (2) iPhone 4 (3) iPhone 3GS
(4) iPod touch 4G (5) iPod touch 3G (6) iPod nano 6G
(7) iPod nano 5G (8) iPod classic
2) Les modèles répertoriés ci-dessus ont été certifiés
conformes aux normes de performance d’Apple par le
développeur. Les modèles qui ne sont pas répertoriés
ci-dessus peuvent également fonctionner avec votre
DMR103. Toutefois, il n’existe aucune certification de
conformité aux normes de performance d’Apple.
Chargement de votre iPod/iPhone
1. Placez l’iPod/iPhone sur l’adaptateur d’accueil
universel dans le compartiment d’accueil de l’iPod.
Appuyez sur le bouton d’alimentation pour
allumer votre radio.
2. Appuyez sur le bouton Source jusqu’à ce que
« iPod » apparaisse sur l’afficheur. Si vous voyez le
symbole d’une batterie avec un éclair sur l’écran de
votre iPod, cela indique que votre radio procède au
chargement de la batterie interne de votre iPod/
iPhone.
Remarque :
1) Le mode AM est inopérant lors du chargement de
votre iPod/iPhone.
2) Lorsque la radio est branchée à l’adaptateur secteur,
vous pouvez charger l’iPod/iPhone, que celui-ci ou la
radio soit sous tension ou non.
3) Si vous utilisez la batterie comme source
d’alimentation, vous ne pouvez charger votre iPod/
iPhone que lorsque la radio est sous tension.
Navigation de votre iPod/iPhone
Pour naviguer dans les menus de votre iPod/iPhone afin
d’effectuer des sélections ou de modifier les paramètres,
vous devez utiliser les commandes de votre iPod/iPhone.
Les commandes de la radio peuvent être utilisées pour
les fonctions Menu/Sélection, Précédent/Suivant, Retour/
avance rapide et Lecture/Pause.
1. Utilisez le bouton Menu/Info pour naviguer dans
les menus de niveau supérieur sur votre iPod/iPhone.
2. Au besoin, tournez la commande de syntonisation
pour vous déplacer vers le haut/bas d’un menu
d’écran de votre iPod/iPhone.
3. Appuyez sur la commande de syntonisation pour
sélectionner l’option mise en surbrillance sur le menu
de votre écran.
Remarque :
Si cette option se trouve dans un menu de niveau
inférieur, vous pouvez alors poursuivre la navigation en
appuyant sur la commande de syntonisation.
Lecture d’un fichier audio sur
votre iPod/iPhone
1. Lorsque vous avez trouvé l’option souhaitée, appuyez
sur la commande de syntonisation sur la radio
pour démarrer la lecture de l’iPod.
2. Réglez le volume selon le réglage souhaité à l’aide de
la commande de syntonisation sur votre radio.
• Avant de régler le volume, vous devez vous assurer
que le mot « iPod » ne clignote pas à l’écran.
• Appuyez à tout moment sur le bouton de préréglage
(1 à 5) si vous souhaitez interrompre le
clignotement du mot « iPod ».
3. Pour mettre la lecture en pause, appuyez sur le
bouton Lecture/Pause . Pour reprendre la
lecture, appuyez à nouveau sur le bouton Lecture/
Pause .
4. Les iPod ne possèdent pas de bouton Stop (ils
utilisent la fonction Pause). Pour lire une autre
sélection, utilisez les menus de l’iPod afin d’effectuer
votre sélection à l’aide du bouton Lecture/Pause
et interrompre la lecture de l’option en cours
au besoin.
5. Si elle était lue précédemment, votre iPod/iPhone
s’allume et poursuit la lecture à partir du point auquel il
s’était arrêté précédemment.
Remarque :
Votre DMR103 prend en charge uniquement les fichiers
musicaux et non les fichiers vidéo.
Remarque :
Après avoir sélectionné la liste des fichiers vidéo,
appuyez sur le bouton de sélection.
Fonction de recherche
1. Appuyez sur le bouton d’avance rapide ou
de retour rapide pour commencer la lecture
de la piste suivante ou précédente.
2. Lors de l’écoute de l’iPod/iPhone, appuyez sur le
bouton d’avance rapide ou de retour rapide

19
et maintenez-le enfoncé pour vous
déplacer dans le fichier ou la piste en cours, puis
relâchez le bouton lorsque vous avez atteint le point
souhaité dans le fichier ou la piste.
3. Pour sélectionner une piste située dans des dossiers,
appuyez sur le bouton Haut/Bas des dossiers
, afin de sélectionner une
piste souhaitée dans un autre dossier.
Horloge et alarmes
Réglage du format de l’heure
L’affichage de l’horloge utilisé en mode veille et sur les
écrans du mode de lecture peut être défini sur le format
12 ou 24 heures. Le format sélectionné est alors
également utilisé lors du réglage des alarmes.
1. Appuyez sur le bouton Menu/Info et maintenez-le
enfoncé pour accéder aux réglages du menu.
2. Tournez la commande de syntonisation jusqu’à ce
que « HORLOGE xxH » apparaisse sur l’afficheur et
appuyez sur la commande de syntonisation pour
accéder aux réglages. Le format de l’heure
commence alors à clignoter.
3. Tournez la commande de syntonisation pour
sélectionner le format 12 ou 24 heures. Appuyez sur
la commande de syntonisation pour confirmer le
format d’horloge choisi.
Remarque :
Si vous choisissez le format d’horloge 12 heures, la radio
utilise alors l’horloge 12 heures comme réglage.
Réglage de l’heure et la date de l’horloge
1. Appuyez sur le bouton Menu/Info et maintenez-
le enfoncé.
2. Tournez la commande de syntonisation jusqu’à ce
que « RGL HORLOGE » apparaisse sur l’afficheur.
Pour accéder aux réglages, appuyez sur la
commande de syntonisation .
3. Le réglage de l’heure sur l’afficheur commence à
clignoter. Tournez la commande de syntonisation
pour sélectionner l’heure souhaitée, et appuyez sur la
commande de syntonisation pour confirmer le
réglage. Ensuite, tournez la commande de
syntonisation pour sélectionner les minutes
souhaitées, et appuyez sur la commande de
syntonisation pour confirmer le réglage.
4. Tournez la commande de syntonisation jusqu’à ce
que « RGL DATE » apparaisse sur l’afficheur. Pour
accéder aux réglages, appuyez sur la commande de
syntonisation .
5. Tournez la commande de syntonisation pour
sélectionner l’année souhaitée, et appuyez sur la
commande de syntonisation pour confirmer le
réglage. Ensuite, tournez la commande de
syntonisation pour sélectionner le mois souhaité,
et appuyez sur la commande de syntonisation
pour confirmer le réglage. Ensuite, tournez la
commande de syntonisation pour sélectionner la
date souhaitée, et appuyez sur la commande de
syntonisation pour confirmer le réglage.
Système radioélectrique de diffusion de
données (RDS)
Lorsque vous réglez l’heure de l’horloge à l’aide de la
fonction RDS, votre radio synchronise l’heure de son
horloge lorsqu’elle syntonise une station radio à l’aide du
système RDS et de signaux CT.
1. Lors de la syntonisation d’une station diffusant des
données RDS, appuyez sur le bouton Menu/Info
et maintenez-le enfoncé.
2. Tournez la commande de syntonisation jusqu’à ce
que « RDS CT » et un symbole d’horloge
apparaissent sur l’afficheur. Pour accéder aux
réglages, appuyez sur la commande de syntonisation
.
3. Tournez la commande de syntonisation jusqu’à ce
que « RDS CT » apparaisse sur l’afficheur. Pour
confirmer le réglage, appuyez sur la commande de
syntonisation . L’heure de l’horloge de la radio est
réglée automatiquement en fonction des données
RDS reçues.
4. Lorsque l’action est terminée, l’icône RDS apparaît
sur l’écran LCD, indiquant que l’heure de la radio est
l’heure de l’horloge RDS. L’heure de l’horloge de la
radio est valable pendant 5 jours à chaque fois que
l’heure de la radio est synchronisée avec RDS CT.
Réglage de l’horloge de l’alarme
Votre DMR103 possède deux alarmes qui peuvent
chacune être réglées pour vous réveiller à l’aide de la
radio AM/FM ou de l’alarme vibreur. Vous pouvez régler
les alarmes lorsque l’appareil est en mode veille ou en
cours de lecture.
a. Réglage de l’heure de l’alarme de la radio :
1. L’alarme de la radio peut être réglée lorsqu’elle est
allumée ou éteinte.
2. Appuyez sur le bouton d’alarme de la radio et
maintenez-le enfoncé, le symbole d’alarme de la radio
et l’heure d’affichage clignotent et un bip retentit.
3. Lorsque le symbole d’alarme de la radio
clignote, tournez le bouton de commande de
syntonisation pour sélectionner l’heure et
appuyez à nouveau sur le bouton de commande de
syntonisation pour confirmer le réglage de
l’heure. Ensuite, tournez le bouton de commande de
syntonisation pour sélectionner les minutes et

20
appuyez sur le bouton de commande de syntonisation
pour confirmer le réglage des minutes.
4. Tournez le bouton de commande de syntonisation afin
que l’afficheur indique les options de fréquence de
l’alarme.
Les options de l’alarme sont les suivantes :
UNE FOIS : l’alarme retentit une fois.
TOUS LES JOURS : l’alarme retentit chaque jour.
JOUR DE SEMAINE : l’alarme retentit uniquement les
jours de semaine.
WEEK-END : l’alarme retentit uniquement les week-
ends.
Pour confirmer le réglage, appuyez sur la commande
de syntonisation .
5. Lorsque le symbole d’alarme de la radio clignote,
tournez le bouton de commande de syntonisation pour
sélectionner la station et la bande de réveil, puis
appuyez sur le bouton de commande de syntonisation
pour confirmer la sélection.
6. Tournez le bouton de commande de syntonisation
pour sélectionner le volume souhaité et appuyez sur
le bouton de commande de syntonisation pour
confirmer le volume. Le réglage de l’alarme radio est
alors terminé.
Remarque :
Si la nouvelle station d’alarme de la radio n’est pas
sélectionnée, la dernière station d’alarme est
sélectionnée.
Remarque :
Si la station de l’alarme AM/FM sélectionnée n’est pas
disponible lorsque l’alarme retentit, l’alarme vibreur
sera utilisée à la place.
b. Réglage de l’alarme du vibreur HWS (Humane Wake
System) :
Un bip retentit lorsque vous sélectionnez l’alarme du
vibreur HWS.
La durée du bip d’alarme diminue toutes les 15 secondes
pendant une minute, suivi par une minute de silence
avant de répéter le cycle.
1. L’alarme du vibreur peut être réglée lorsque la radio
est allumée ou éteinte.
2. Appuyez sur le bouton d’alarme du vibreur et
maintenez-le enfoncé, le symbole et l’heure
d’affichage clignotent et un bip retentit.
3. Lorsque le symbole d’alarme du vibreur
clignote, tournez le bouton de commande de
syntonisation pour sélectionner l’heure et
appuyez à nouveau sur le bouton de commande de
syntonisation pour confirmer le réglage de
l’heure. Ensuite, tournez le bouton de commande de
syntonisation pour sélectionner les minutes et
appuyez sur le bouton de commande de syntonisation
pour confirmer le réglage des minutes.
4. Tournez le bouton de commande de syntonisation afin
que l’afficheur indique les options de fréquence de
l’alarme.
Les options de l’alarme sont les suivantes :
UNE FOIS : l’alarme retentit une fois.
TOUS LES JOURS : l’alarme retentit chaque jour.
JOUR DE SEMAINE : l’alarme retentit uniquement les
jours de semaine.
WEEK-END : l’alarme retentit uniquement les week-
ends.
Pour confirmer le réglage, appuyez sur la commande
de syntonisation .
Remarque :
Il n’est pas possible de régler le volume de l’alarme de
l’avertisseur-vibreur.
Lorsque l’alarme retentit
Pour annuler une alarme qui retentit, appuyez sur le
bouton d’alimentation .
Désactivation/annulation
d’alarmes
Pour désactiver une alarme active, appuyez sur le bouton
d’alimentation ou appuyez sur le bouton d’alarme
correspondant et maintenez-le enfoncé pour annuler
l’alarme.
Répétition
1. Lorsque l’alarme retentit, appuyez sur n’importe quel
bouton autre que le bouton d’alimentation pour
éteindre l’alarme pendant 5 minutes.
« RÉPÉTITION » apparaît sur l’afficheur.
2. Pour régler la durée d’interruption de la minuterie de
répétition, appuyez sur le bouton Menu/Info et
maintenez-le enfoncé pour accéder aux réglages du
menu.
3. Tournez la commande de syntonisation jusqu’à ce
que « RÉPÉTITION X » apparaisse sur l’afficheur,
puis appuyez sur la commande de syntonisation
pour accéder aux réglages. Tournez la commande de
syntonisation pour choisir la durée d’interruption
parmi 5, 10, 15 et 20 minutes pour la minuterie de
répétition.
4. Pour annuler la minuterie de répétition alors que
l’alarme est suspendue, appuyez sur le bouton
d’alimentation .
Minuterie de veille
Vous pouvez régler votre radio de sorte qu’elle s’éteigne
automatiquement après une durée prédéfinie. La
minuterie de veille peut être réglée sur 60, 45, 30, 15, 120
et 90 minutes.
Table of contents
Languages:
Other Makita Radio manuals

Makita
Makita RM01 User manual

Makita
Makita MR003G User manual

Makita
Makita DMR057 User manual

Makita
Makita DMR110W User manual

Makita
Makita DMR110 User manual

Makita
Makita DMR300 User manual

Makita
Makita MR002G User manual

Makita
Makita DMR116 User manual

Makita
Makita DMR056 User manual

Makita
Makita DMR115B User manual

Makita
Makita MR001G User manual

Makita
Makita DMR106 User manual

Makita
Makita DMR055 User manual

Makita
Makita GRM01 User manual

Makita
Makita DMR115 User manual

Makita
Makita MR004GZ User manual

Makita
Makita GRM02 User manual

Makita
Makita LXRM02 User manual

Makita
Makita XRM12 User manual

Makita
Makita RM02 User manual