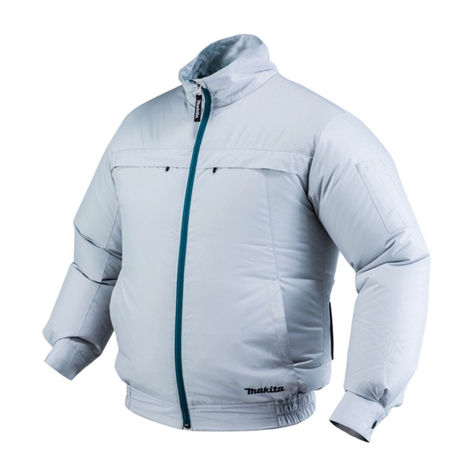
Makita DFJ212A User manual

DFJ212A /
DFJ213A /
DFJ214A /
DFJ216A /
DFJ312A /
DFJ416A
DFV210A /
DFV214A
EN Cordless Fan Jacket
Cordless Fan Vest INSTRUCTION MANUAL 8
ZHCN 充电式风扇夹克
充电式冷风马甲 使用说明书 17
ID Jaket Kipas Nirkabel
Rompi Kipas Nirkabel PETUNJUK PENGGUNAAN 26
MS Jaket Berkipas Tanpa Kord
Ves Berkipas Tanpa Kord MANUAL ARAHAN 36
VI
Áo Khoác Dài Tay Làm Mát
Dùng Pin
Áo Khoác Không Tay Làm
Mát Dùng Pin
TÀI LIỆU HƯỚNG DẪN 46
TH
55

1
2
345
7
6
Fig.1
3
2
4
5
7
8
9
1
6
1
10
Fig.2
2

1
34
2
Fig.3
1
2
3
4
Fig.4
1
Fig.5
1
Fig.6
1
Fig.7
1
2
Fig.8
2
1
Fig.9
1
2
Fig.10
3

1
2
3
4
5
Fig.11
2 1
Fig.12
1
2
3
Fig.13
1
2
Fig.14
1
2
Fig.15
1
2
Fig.16
4

12
3
45
6
7
Fig.17
1
Fig.18
1
Fig.19
1
2
1
2
Fig.20
1
Fig.21
Fig.22
Fig.23
Fig.24
5

1
Fig.25
1
2
Fig.26
1
2
Fig.27
12
Fig.28
21
Fig.29
2
1
Fig.30
2
6
3
5
1
4
Fig.31
6

1
2
Fig.32
7

8ENGLISH
ENGLISH (Original instructions)
SPECIFICATIONS
Specications of the jacket / vest
Type Jacket Vest
Model DFJ212A DFJ213A DFJ214A DFJ216A DFJ312A DFJ416A DFV210A DFV214A
Material Outer Polyester 100% Cotton
100%
Polyester 100%
Lining Polyester 100% -Cotton
100%
Polyester 100%
Pocket Polyester 100% Cotton
100%
Polyester 100%
Shoulder pad -Nylon
100%
-
Feature Battery pocket -
Hole for direct access
to the pocket
(under the lining)
-------
Mesh pocket for ice
pack
--- ----
Hood -------
Shoulder pad ----- - -
Detachable sleeve ---- - -
Light reector - - -----
Front buckle -------
Specications of the battery holder (optional accessory)
Model Battery holder for LXT battery cartridge Battery holder for CXT battery cartridge
Rated voltage D.C. 14.4 V
D.C. 18 V
D.C. 10.8 V - 12 V max
Battery cartridge BL1415N / BL1430B / BL1440 / BL1460B
BL1815N / BL1820B / BL1830B / BL1840B /
BL1850B / BL1860B
BL1016 / BL1021B / BL1041B
USB power supply port D.C. 5 V, 2.4 A, Type A
Specications of the Battery BL1055B (optional accessory)
Rated voltage D.C. 10.8 V
USB power supply port D.C. 5 V, 1.5 A, Type C
• Due to our continuing program of research and development, the specications herein are subject to change
without notice.
• Specications and battery cartridge may dier from country to country.
• Some of the battery cartridges listed above may not be available depending on your region of residence.
WARNING: Only use the battery cartridges listed above. Use of any other battery cartridges may cause
injury and/or re.

9ENGLISH
Operating time
Unit: Hour
Air speed Battery
BL1055B BL1041B BL1430B BL1860B
46.5 4.0 4.5 10.0
310.0 6.5 7.0 16.0
218.5 12.0 13.5 29.5
140.5 27.5 31.0 68.0
• The operating times in the above table are a rough guideline. They may dier from actual operating times.
• Operating times may dier depending on battery type, charging status, and usage condition.
Symbols
Some of the following symbols are used for the product.
Be sure to understand their meaning before use.
Read the instruction manual.
Machine wash at below 30°C on the gentle
cycle.
Machine wash at below 40°C on the gentle
cycle.
Machine wash in domestic or commercial
machines on the gentle cycle.
Do not bleach.
Line dry in the shade.
Do not wring.
Iron at low temperatures (not exceeding
110°C).
Iron at medium temperatures (not exceed-
ing 150°C).
Do not iron.
Do not dry clean.
Do not tumble dry.
Ni-MH
Li-ion
Only for EU countries
Due to the presence of hazardous com-
ponents in the equipment, waste electrical
and electronic equipment, accumulators
and batteries may have a negative impact
on the environment and human health.
Do not dispose of electrical and electronic
appliances or batteries with household
waste!
In accordance with the European Directive
on waste electrical and electronic equip-
ment and on accumulators and batteries
and waste accumulators and batteries,
as well as their adaptation to national law,
waste electrical equipment, batteries and
accumulators should be stored separately
and delivered to a separate collection point
for municipal waste, operating in accor-
dance with the regulations on environmen-
tal protection.
This is indicated by the symbol of the
crossed-out wheeled bin placed on the
equipment.
Intended use
The fan jacket/vest is intended for cooling your body
temperature.
SAFETY WARNINGS
WARNING: Read all safety warnings and
all instructions. Failure to follow the warnings and
instructions may result in electric shock, re and/or
serious injury.
Save all warnings and instruc-
tions for future reference.
1. Never use the fan jacket when temperature
reach more than 50°C (122°F). Also avoid use
in high humidity. Doing so may cause burns.
2. Do not wear the jacket over bare skin.
3. Do not use the jacket while you are under the
inuence of drugs, alcohol or medication.
4. Do not sleep while wearing the fan jacket. A
steep decline of body temperature may harm your
health.

10 ENGLISH
5. Children, handicapped persons, or anyone
who is insensitive to temperature, for example,
someone with poor blood circulation, should
refrain from using the jacket.
6. This appliance is not intended for medical use
in hospitals.
7. Do not use the jacket other than for its
intended purpose.
8. If you sense anything unusual, switch o
the jacket and remove the battery holder
immediately.
9. If any abnormality is found, contact your local
service center for repair.
10. Do not stamp on, throw or otherwise abuse the
fan jacket.
11. Do not put your nger or a foreign object into
the fan unit.
12. Do not blow compressed air toward the fan. Do
not put small sticks into the fan unit. Doing so
may damage the fan and motor.
13. Do not turn on the fan jacket unless you are
wearing it.
14. Do not use the fan jacket in places where a re
or spark could be generated. The fan unit may
catch re or spark and cause a re or burns.
15. Choose the appropriate fan speed in accor-
dance with the usage environment for continu-
ous use.
16. Do not wear any clothing over the fan jacket.
17. Keep the nameplate on the fan unit. If it
becomes unreadable or goes missing, contact
your local service center for repair.
18. Before washing, detach the fan unit and bat-
tery holder, remove the battery cartridge. Wash
the jacket part only.
19. Do not leave the fan jacket in a place subject
to high heat, such as a car sitting in the sun.
Doing so may cause plastic parts to melt and
become damaged.
20. For long time storage, remove the battery
holder and battery cartridge from the jacket,
and remove the battery cartridge from the
battery holder.
21. When storing, keep the fan jacket, fan units,
battery holder, and battery cartridge out of
reach of children.
22. Do not use the fan jacket when performing
welding operation or operations using a
grinder. Spark entering the fan unit may cause
re.
23. Keep your hair and clothing away from the fan
unit. They can be caught in moving parts of the
fan unit.
Electrical safety
1. Do not expose the jacket to rain or wet condi-
tions. Keep water away from electrical parts.
Water entering the jacket may increase the risk of
an electric shock.
2. Do not handle the cord and battery with wet or
greasy hands.
3. Do not use the fan jacket when the cord or
plug is damaged.
4. Do not abuse the cord. Do not use the cord
for carrying, pulling or unplugging the jacket.
Keep the cord away from heat, oil, and sharp
edges.
5. Do not leave any cord disconnected while the
battery power is supplied. Small children may
put the live plug in their mouth and cause injury.
6. Do not use the supplied cord with appliances
other than the fan unit.
7. Do not insert nails, wires, or other items into
the USB power supply port. Doing so may cause
short circuit, which can cause smoke or a re.
8. Do not connect the power source to the
USB port. The USB port is only intended for
charging lower voltage devices. Always place
the cover over the USB port when not charging
a lower voltage device. Otherwise there is risk of
re.
9. Prevent unintentional starting. Ensure the
switch is in the o-position before connecting
to battery cartridge, picking up or carrying the
appliance. Carrying the appliance with your nger
on the switch or energizing appliance that have
the switch on invites accidents.
10. Disconnect battery cartridge from the appli-
ance or place the switch in the locked or o
position before making any adjustments,
changing accessories, or storing the appli-
ance. Such preventive safety measures reduce
the risk of starting the appliance accidentally.
11. Recharge only with the charger specied by
the manufacturer. A charger that is suitable for
one type of battery pack may create a risk of
re when used with another battery pack.
12. Only use with specically designated batter-
ies. Use of any other battery may create a risk
of injury and re.
13. When battery pack is not in use, keep it away
from other metal objects, like paper clips,
coins, keys, nails, screws or other small metal
objects, that can make a connection from one
terminal to another. Shorting the battery termi-
nals together may cause burns or a re.
14. Under abusive conditions, liquid may be
ejected from the battery; avoid contact. If con-
tact accidentally occurs, ush with water. If
liquid contacts eyes, additionally seek medical
help. Liquid ejected from the battery may cause
irritation or burns.
15. Do not use a battery pack or the fan unit that
is damaged or modied. Damaged or modied
batteries may exhibit unpredictable behaviour
resulting in re, explosion or risk of injury.
16. Do not expose a battery pack or the fan unit
to re or excessive temperature. Exposure
to re or temperature above 130 °C may cause
explosion.
17. Follow all charging instructions and do not
charge the battery pack or the fan unit outside
the temperature range specied in the instruc-
tions. Charging improperly or at temperatures
outside the specied range may damage the
battery and increase the risk of re.

11 ENGLISH
18. Have servicing performed by a qualied repair
person using only identical replacement parts.
This will ensure that the safety of the product is
maintained.
19. Do not modify or attempt to repair the appli-
ance or the battery pack except as indicated in
the instructions for use and care.
Important safety instructions for
battery cartridge
1. Before using battery cartridge, read all instruc-
tions and cautionary markings on (1) battery
charger, (2) battery, and (3) product using
battery.
2. Do not disassemble or tamper with the battery
cartridge. It may result in a re, excessive heat,
or explosion.
3. If operating time has become excessively
shorter, stop operating immediately. It may
result in a risk of overheating, possible burns
and even an explosion.
4. If electrolyte gets into your eyes, rinse them
out with clear water and seek medical atten-
tion right away. It may result in loss of your
eyesight.
5. Do not short the battery cartridge:
(1) Do not touch the terminals with any con-
ductive material.
(2) Avoid storing battery cartridge in a con-
tainer with other metal objects such as
nails, coins, etc.
(3) Do not expose battery cartridge to water
or rain.
A battery short can cause a large current
ow, overheating, possible burns and even a
breakdown.
6. Do not store and use the tool and battery car-
tridge in locations where the temperature may
reach or exceed 50 °C (122 °F).
7. Do not incinerate the battery cartridge even if
it is severely damaged or is completely worn
out. The battery cartridge can explode in a re.
8. Do not nail, cut, crush, throw, drop the battery
cartridge, or hit against a hard object to the
battery cartridge. Such conduct may result in a
re, excessive heat, or explosion.
9. Do not use a damaged battery.
10. The contained lithium-ion batteries are subject
to the Dangerous Goods Legislation require-
ments.
For commercial transports e.g. by third parties,
forwarding agents, special requirement on pack-
aging and labeling must be observed.
For preparation of the item being shipped, consult-
ing an expert for hazardous material is required.
Please also observe possibly more detailed
national regulations.
Tape or mask o open contacts and pack up the
battery in such a manner that it cannot move
around in the packaging.
11. When disposing the battery cartridge, remove
it from the tool and dispose of it in a safe
place. Follow your local regulations relating to
disposal of battery.
12. Use the batteries only with the products
specied by Makita. Installing the batteries to
non-compliant products may result in a re, exces-
sive heat, explosion, or leak of electrolyte.
13. If the tool is not used for a long period of time,
the battery must be removed from the tool.
14. During and after use, the battery cartridge may
take on heat which can cause burns or low
temperature burns. Pay attention to the han-
dling of hot battery cartridges.
15. Do not touch the terminal of the tool imme-
diately after use as it may get hot enough to
cause burns.
16. Do not allow chips, dust, or soil stuck into the
terminals, holes, and grooves of the battery
cartridge. It may result in poor performance or
breakdown of the tool or battery cartridge.
17. Unless the tool supports the use near
high-voltage electrical power lines, do not use
the battery cartridge near high-voltage electri-
cal power lines. It may result in a malfunction or
breakdown of the tool or battery cartridge.
18. Keep the battery away from children.
SAVE THESE INSTRUCTIONS.
CAUTION: Only use genuine Makita batteries.
Use of non-genuine Makita batteries, or batteries that
have been altered, may result in the battery bursting
causing res, personal injury and damage. It will
also void the Makita warranty for the Makita tool and
charger.
Tips for maintaining maximum
battery life
1. Charge the battery cartridge before completely
discharged. Always stop tool operation and
charge the battery cartridge when you notice
less tool power.
2. Never recharge a fully charged battery car-
tridge. Overcharging shortens the battery
service life.
3. Charge the battery cartridge with room tem-
perature at 10 °C - 40 °C (50 °F - 104 °F). Let
a hot battery cartridge cool down before
charging it.
4. When not using the battery cartridge, remove
it from the tool or the charger.
5. Charge the battery cartridge if you do not use
it for a long period (more than six months).

12 ENGLISH
PARTS DESCRIPTION
► Fig.1
1Fan unit 2Power cable 3Battery holder for CXT
battery cartridge *
4Battery holder for LXT
battery cartridge *
5Battery BL1055B *
(Country specic)
6CXT battery cartridge *
(10.8 V - 12 V max)
7LXT battery cartridge *
(14.4 V / 18 V max)
- -
* Optional accessory
► Fig.2
1Battery pocket 2Light reector 3Hood 4Shoulder pad
5Mesh pocket for ice pack 6Cable hole in the pocket
(under the lining)
7Cable holder 8Cable hole in the lining
9Zip fastener (for fan unit
access)
10 Front buckle - - - -
NOTE: The features of the jacket/vest vary depending on the model. Refer to the section for the specications for
the features of your jacket/vest.
INSTALLATION
Charging the battery
Battery cartridges used with battery holder
Refer to the instruction manual of the charger for how to
charge the battery.
Battery BL1055B
Open the cover on the USB port. Connect the USB port
and AC Power Adapter ADP07 (not included) using the
USB cable supplied with the battery. After that, plug
the AC Power Adapter ADP07 to the mains. When the
charging is nished, all battery capacity indicator will
light up and then turns o after a certain period. Unplug
the AC Power Adapter and disconnect the USB cable,
and then close the cover.
► Fig.3: 1. AC Power Adapter ADP07 2. Battery
BL1055B 3. Cover 4. USB cable
Meaning of the indicator lamp
Indicator lamps Remaining
capacity
Lighted O Blinking
(The lamps go o after a certain period.)
100%
51% to 99%
26% to 50%
0% to 25%
Installing or removing the battery
cartridge
Only when using the battery cartridge used with
battery holder
CAUTION: Always switch o the device
before installing or removing the battery
cartridge.
CAUTION: Hold the battery holder and the
battery cartridge rmly when installing or remov-
ing the battery cartridge. Failure to hold the battery
holder and the battery cartridge rmly may cause
them to slip out of your hands and result in damage
to the battery holder and battery cartridge and/or a
personal injury.
► Fig.4: 1. Red indicator 2. Button 3. Battery cartridge
4. Battery holder
To install the battery cartridge, align the tongue on the
battery cartridge with the groove in the housing and slip
it into place. Insert the battery cartridge all the way until
it locks in place with a small click. If you can see the red
indicator on the upper side of the button, it is not locked
completely.
To remove the battery cartridge, slide it from the battery
holder while pressing the button on the front of the
cartridge.
CAUTION: Always install the battery car-
tridge fully until the red indicator cannot be seen.
Otherwise the battery cartridge may accidentally
fall out of the battery holder, causing injury to you or
someone around you.
CAUTION: Do not forcibly install the battery
cartridge. If the battery cartridge does not slide in
easily, it is not being inserted correctly.

13 ENGLISH
Attaching the battery holder
Only when using the battery cartridge used with
battery holder
You can hang the battery holder on your waist belt.
To prevent the battery holder from dropping acciden-
tally, attach a strap using the strap hole and secure it.
► Fig.5: 1. Strap hole
The battery holder has an anti-drop function. When
removing the battery holder from the belt, pull up the
battery holder while pressing the unlock button.
► Fig.6: 1. Unlock button
Installing or removing the fan unit
1. Open the zip fastener inside the jacket. (Skip this
step if your jacket/vest does not have the lining)
► Fig.7: 1. Zip fastener
2. Turn the ring counterclockwise and remove it from
the fan unit.
► Fig.8: 1. Fan unit 2. Ring
3. From the outside of the jacket/vest, insert the
head of the fan unit into the hole in the jacket/vest.
► Fig.9: 1. Fan unit 2. Hole
4. From the inside of the jacket/vest, place the fan
unit so that the loop on the fan unit comes closest to the
strip on the jacket/vest.
(Do not fasten the snap button on the strip at this step.)
► Fig.10: 1. Strip 2. Loop
5. From the inside of the jacket/vest, place the ring
onto the fan unit and turn it clockwise until the triangle
marking is aligned with “ II ” marking.
► Fig.11: 1. Ring 2. Fan unit 3. “ II ” marking
4. Triangle marking 5. “ I ” marking
NOTE: When turning the ring, be careful not to move
the fan unit position. Keep the position of the loop on
the fan unit closest to the strip.
NOTE: Put the ring parallel to the fan unit. If not, you
may not be able to turn the ring smoothly.
NOTE: When you use lter set (optional accessory),
turn the ring until the triangle marking is aligned with
“ I ” marking. (the ring cannot be turned up to “ II ”
marking)
6. Pass the strip through the loop on the fan unit and
fasten the snap button.
► Fig.12: 1. Strip 2. Snap button
CAUTION: Always use the strip and snap
button to secure the fan unit to the jacket/vest. If
the fan unit falls, it may cause an injury, or damage to
the fan unit.
7. Attach the other fan unit to the jacket/vest in the
same way.
8. Connect the power cable to the fan units.
► Fig.13: 1. Power cable 2. Cable holder 3. Zip
fastener
NOTE: The zip fastener is not provided with the
jacket/vest without lining.
NOTICE: Always connect the power cable to
both of the fan units. The fan does not operate if the
power cable is connected to one fan unit only.
9. Follow either instructions below depending on how
to store the battery when using the fan jacket/vest:
When storing the battery in the battery pocket or on
your belt
Pass the end of the power cable out through the hole
in the jacket's/vest's lining as shown in the gure (skip
this step if your jacket/vest does not have the lining).
Support the cable using the cable holder.
► Fig.14: 1. Hole in the lining 2. Power cable
When storing the battery in the jacket's/vest's
pocket
(Only for the jackets/vests with the hole for direct
access to the pocket)
From the inside of the jacket/vest, pass the end of the
power cable out through the hole in the jacket's/vest's
pocket as shown in the gure.
► Fig.15: 1. Hole in the pocket 2. Power cable
10. Connect the power cable to the battery holder /
Battery BL1055B.
► Fig.16: 1. Battery holder 2. Battery BL1055B
11. Close the zip fastener.
(Skip this step if your jacket/vest does not have the
lining)
CAUTION: When using the fan jacket/vest,
securely store the battery in the pocket or hook it
on your belt to prevent it from falling.
Follow the installation procedure in reverse when
removing it.
Attaching the lter set
Optional accessory
The lter set protects the fan unit from dust and powder.
We recommend that you use the lter set in a dusty or
powdery work place.
Install the lter attachment between the fan unit and the
ring. Turn the ring clockwise until the triangle marking is
aligned with “ I ” marking. After that, attach the lter onto
the lter attachment.
► Fig.17: 1. Ring 2. Hole in the jacket/vest 3. Filter
attachment 4. Fan unit 5. Filter 6. “ I ” mark-
ing 7. Triangle marking
NOTICE: Make sure that the lter fully covers
the lter attachment. For better protection against
dust and powder, tuck the skirt of the lter
between the jacket/vest and lter attachment.

14 ENGLISH
FUNCTIONAL
DESCRIPTION
NOTICE: The fan jacket/vest is eective when
the humidity and temperature of intake air are
lower than those of the body surface. The fan
jacket/vest may not be eective if the air tempera-
ture and/or humidity are higher than those inside
the jacket/vest.
Power level indicator
Current power level is displayed in the power level
indicator.
Battery holder
► Fig.18: 1. Power level indicator
Battery BL1055B
► Fig.19: 1. Power level indicator
NOTICE: For Battery BL1055B, the lamp No.1
and No.4 will blink alternately if there is abnor-
mality in the connection between the battery and
fan unit.
Indicating the remaining battery
capacity
NOTE: Depending on the conditions of use and the
ambient temperature, the indication may dier slightly
from the actual capacity.
Only when using the battery cartridge (with the
indicator) used with battery holder
Press the check button. The indicator lamps light up for
a few seconds.
► Fig.20: 1. Indicator lamp 2. Check button
Meaning of the indicator lamp
Indicator lamps Remaining
capacity
Lighted O Blinking
75% to 100%
51% to 75%
25% to 50%
Less than
25%
(For LXT batteries only)
Charge the
battery.
(For LXT batteries only)
The battery
may have
malfunctioned.
NOTE: For LXT batteries only:
The rst (far left) indicator lamp will blink when the
battery protection system works.
Battery BL1055B
While the battery BL1055B is unplugged, press the
power button. The battery capacity indicator light up for
a few seconds.
► Fig.21: 1. Battery capacity indicator
Meaning of the indicator lamp
Indicator lamps Remaining
capacity
Lighted O Blinking
51% to 100%
26% to 50%
11% to 25%
Less than
11%
Battery
abnormality
Battery protection system
The device is equipped with a battery protection sys-
tem. This system automatically cuts o power to the
motor to extend battery life.
If the remaining battery capacity is too low, the device
will not operate. When you turn the device on, the motor
will run again, but stops soon. In this situation, remove
and recharge the battery cartridge.
Air ow
Air ow inside the jacket is shown below.
► Fig.22
For the jacket with the hood, wear the hood over your
helmet. The air from the fan goes through the helmet
and cools your head.
► Fig.23
Battery pocket
NOTE: Some jacket/vest does not have the battery
pocket. Refer to the section for the specications for
the features of your jacket/vest.
Use the battery pocket for storing the battery or the
holder (with battery) inside the jacket/vest.
► Fig.24
CAUTION: Always fasten the snap buttons
when the battery is stored in the pocket.

15 ENGLISH
Mesh pocket
NOTE: Some jacket/vest does not have the mesh
pocket. Refer to the section for the specications for
the features of your jacket/vest.
Use mesh pockets on the back of the jacket/vest for
storing ice packs.
► Fig.25: 1. Mesh pocket
Front buckle
NOTE: Some jacket/vest does not have the front
buckle. Refer to the section for the specications for
the features of your jacket/vest.
Adjust the belt length according to your size. If the belt
droops down, pass it through the belt loop(s) as shown
in the gure.
► Fig.26: 1. Belt 2. Belt loop
Connecting USB devices
CAUTION: Connect only devices that are
compatible with the USB power supply port. Not
doing so may cause a malfunction of the battery
holder.
NOTICE: Before connecting a USB device,
always back up the data on the USB device. Not
doing so may cause a loss of your data.
NOTICE: The battery holder and Battery
BL1055B may not supply power to some USB
devices.
NOTICE: When not using or after charging,
remove the USB cable and close the cover.
NOTE: The actual output current varies depending on
the USB device to be connected.
NOTE: Battery power is consumed while the power
button is turned on. Always turn o the switch when
not in use.
NOTE: When charging multiple USB devices in suc-
cession, wait about 10 seconds after charging of the
previous device has completed before beginning to
charge the next device.
The battery holder (with the battery) and Battery
BL1055B can work as an external power supply for
USB devices.
1. Open the cover and connect a USB cable (not
included) to the USB port. Then connect the other end
of the cable to the device.
2. Start charging:
— When using battery holder (with the battery), press
and hold the power button until the power level
indicator lights up. The battery supplies DC 5 V,
2.4 A.
Battery holder (with battery)
► Fig.27: 1. Cover 2. USB port
— When using Battery BL1055B, press the power
button. The battery supplies DC 5 V, 1.5 A.
Battery BL1055B
► Fig.28: 1. Power button 2. USB port
OPERATION
To turn on the fan, press and hold the power button. The
fan starts at the maximum power level 4. Each time you
press the power button, the power level changes from 4
to 1, and returns to 4. The power level indicator shows
the current setting.
To turn o, press and hold the power button again.
Battery holder
► Fig.29: 1. Power level indicator 2. Power button
Battery BL1055B
► Fig.30: 1. Power level indicator 2. Power button
MAINTENANCE
CAUTION: Always be sure that the jacket is
switched o and the battery cartridge or Battery
BL1055B is removed before attempting to perform
inspections or maintenance.
CAUTION: If the jacket/vest does not switch
on or any fault is found with a fully charged bat-
tery cartridge, clean the terminals of the battery
holder and the battery cartridge. If the jacket still
does not work properly, stop using the jacket/vest
and contact our authorized service center.
NOTICE: Never use gasoline, benzine, thinner,
alcohol or the like. Discoloration, deformation or
cracks may result.
To maintain product SAFETY and RELIABILITY,
repairs, any other maintenance or adjustment should
be performed by Makita Authorized or Factory Service
Centers, always using Makita replacement parts.

16 ENGLISH
Cleaning the fan unit
Wipe o dirt, dust, oil, grease .etc, with clean dry cloth.
To clean the fan blade, remove the ring and unhook
the housing from the cover using slotted screwdriver or
similar. There are three hooks on the housing. Unhook
them little by little in rotation so as not to break the
hooks.
► Fig.31: 1. Slotted screwdriver 2. Housing 3. Cover
4. Hole 5. Fan blade 6. Hook
NOTICE: Do not remove the fan blade from the
housing.
NOTICE: Do not wash the fan unit with water.
Be sure to attach the cover after cleaning the fan blade.
Place the cover onto the housing as shown in the gure
(note the direction of the logo on the cover and the loop
on the housing). Align the hooks with the holes and then
snap it on.
► Fig.32: 1. Logo on the cover 2. Loop on the housing
Cleaning the jacket/vest
• Detach the fan unit(s) and battery or battery holder
from the jacket/vest before washing.
• Follow the instructions on the tag.
• Cotton products may shrink when washed.
• Do not wash the jacket/vest with other clothes.
Doing so may cause color fading or color transfer.
• Use a laundry net when using a washing machine.
• Do not use the fabric softener.
• Use only neutral detergent.
• After washing, take out the jacket/vest from wash-
ing machine at once.
• Be sure to close the zip fastener before washing.
For the jacket with light reector
• The performance of light reector parts may be
weakened by washing.
• Machine wash in gentle cycle (The number of
times for washing is up to 5 times.)
• The number of times for washing is not the only
the factor to decide the lifetime of the jacket.
• The life of the jacket changes by how to use, how
to care and store state.
• If the light reector parts or clothes have been
deteriorated, replace to a new jacket.
NOTE: The features of the jacket/vest vary depending
on the model. Refer to the section for the specica-
tions for the features of your jacket/vest.
OPTIONAL
ACCESSORIES
CAUTION: These accessories or attachments
are recommended for use with your Makita tool
specied in this manual. The use of any other
accessories or attachments might present a risk of
injury to persons. Only use accessory or attachment
for its stated purpose.
If you need any assistance for more details regard-
ing these accessories, ask your local Makita Service
Center.
• Filter set
• Battery BL1055B
• Battery holder
• Adapter cable for fan jacket/vest
• Adapter cable for heated jacket/vest/blanket
• Makita genuine battery and charger
NOTE: Some items in the list may be included in the
tool package as standard accessories. They may
dier from country to country.

17
中文简体
中文简体 (原本)
规格
夹克/马甲规格
类型 夹克 马甲
型号
DFJ212A DFJ213A DFJ214A DFJ216A DFJ312A DFJ416A DFV210A DFV214A
材料 外层 聚酯纤维100% 棉
100%
聚酯纤维100%
衬里 聚酯纤维100% -棉
100%
聚酯纤维100%
口袋 聚酯纤维100% 棉
100%
聚酯纤维100%
肩垫 -尼龙
100%
-
特点 电池袋 -
直接通向口袋
的小孔
(在内衬下)
-------
冰袋用网袋 --- ----
风帽 -------
肩垫 ----- - -
可拆卸式衣袖 ---- - -
反光条 - - -----
前扣 -------
电池座规格(选购附件)
型号 LXT电池组的电池座 CXT电池组的电池座
额定电压 D.C. 14.4 V
D.C. 18 V
D.C. 10.8 V - 12 V 最大
电池组 BL1415N / BL1430B / BL1440 /
BL1460B
BL1815N / BL1820B / BL1830B /
BL1840B / BL1850B / BL1860B
BL1016 / BL1021B / BL1041B
USB供电端口 D.C. 5 V,2.4 A,A型

18
中文简体
电池BL1055B规格(选购附件)
额定电压 D.C. 10.8 V
USB供电端口 D.C. 5 V,1.5 A,C型
•生产者保留变更规格不另行通知之权利。
•规格和电池组可能因销往国家之不同而异。
•部分以上所列电池组和充电器是否适用视用户所在地区而异。
警告: 请仅使用以上所列电池组。使用其他类型的电池组可能会导致人身伤害和/或
失火。
工作时间
单位:小时
风速 电池
BL1055B BL1041B BL1430B BL1860B
46.5 4.0 4.5 10.0
310.0 6.5 7.0 16.0
218.5 12.0 13.5 29.5
140.5 27.5 31.0 68.0
•上表中的工作时间仅为粗略指南。实际工作时间可能有所不同。
•工作时间可能因电池类型、充电状态和使用情况不同而异。
符号
本产品使用以下符号。在使用前请务必理解
其含义。
阅读使用说明书。
使用轻柔模式在不到30℃条
件下机洗。
使用轻柔模式在不到40°C条
件下机洗。
使用轻柔模式在家中机洗或在
洗衣店中机洗。
不得漂白。
在阴凉处晾干。
不得拧干。
低温熨烫(不超过110℃)。
中温熨烫(不超过150°C)。
不得熨烫。
不得干洗。
不得烘干。
Ni-MH
Li-ion 仅限于欧盟国家
由于本设备中包含有害成分,
因此废弃的电气和电子设备、
蓄电池和普通电池可能会对环
境和人体健康产生负面影响。
请勿将电气和电子工具或电池
与家庭普通废弃物放在一起处
置!
根据欧洲关于废弃电气电子设
备、蓄电池和普通电池、废弃
的蓄电池和普通电池的指令及
其国家层面的修订法案,废弃
的电气设备、普通电池和蓄电
池应当单独存放并递送至城市
垃圾收集点,根据环保法规进
行处置。
此规定由标有叉形标志的带轮
垃圾桶符号表示。
用途
风扇夹克/背心的预期用途为降体温。

19
中文简体
安全警告
警告: 阅读所有警告和所有说明。不
遵照以下警告和说明会导致电击、着火
和/或严重伤害。
保存所有警告和说明书以备查
阅。
1. 如果温度超过50℃(122°F),请勿使
用风扇夹克。同时避免在高湿度环境下
使用。否则可能引起灼伤。
2. 请勿直接贴身穿着夹克。
3. 请勿在服用麻醉品、饮酒之后或在其他
药物作用影响下使用夹克。
4. 请勿穿着风扇夹克睡觉。身体温度的剧
烈下降可能会损害您的健康。
5. 儿童、残障人士或对温度敏感的人士
(如血液循环不畅者)不得使用此夹克。
6. 本工具不得在医院中用作医疗用途。
7. 请勿超出既定用途使用本夹克。
8. 如果您感觉到任何异常,请立即关闭夹
克开关并移除电池座。
9. 如果发现任何异常,请联系当地的服务
中心进行维修。
10. 请勿踩踏、抛掷或以其他方式滥用此风
扇夹克。
11. 请勿将手指或者异物放入风扇装置内。
12. 请勿向风扇喷射压缩空气。请勿将小的
棒状物插入风扇装置中。这样做可能会
损坏风扇与电机。
13. 除非在穿着状态下,请勿打开风扇夹克。
14. 请勿在可能产生火苗或火星的场所使用
风扇夹克。风扇装置可能会吸入火苗或
火星,进而导致起火或灼伤。
15. 请依照使用环境选择恰当的风扇速度,
以实现连续使用。
16. 请勿在风扇夹克外穿着任何衣物。
17. 请保留风扇装置上的铭牌。如果铭牌不
可辨认或者丢失,请联系当地的服务中
心进行维修。
18. 洗涤之前,请先卸下风扇装置与电池座,
并移除电池组。仅洗涤夹克部分。
19. 请勿将风扇夹克置于可能出现高温的场
所,如在阳光下停放的车辆。否则,塑
料部件可能会熔化并受损。
20. 如果需要长时间存放,请从夹克上移除
电池座与电池组。
21. 存放时,请将风扇夹克、风扇装置、电池
座与电池组放在儿童无法接触的位置。
22. 在进行焊接操作或者使用磨光机进行操
作时,请勿穿着风扇夹克。否则,火花
进入风扇单元内可能会导致起火。
23. 确保您的头发和衣服远离风扇单元。避
免其卷入风扇单元的运动部件中。
电气安全
1. 请勿将本夹克暴露在雨水或潮湿的环境
中。请避免电气部件与水接触。夹克受
潮将增加触电的危险。
2. 如果手上潮湿或者有油脂,请勿操作导
线与电池。
3. 如果导线或插头受损,请勿使用带电池
夹克。
4. 请勿不当使用导线。切勿用导线拖拽夹
克或握住导线拔下夹克的插头。避免使
导线受热、沾染油脂和碰到尖锐的边缘。
5. 使用电池供电时,请勿将任何导线断开。
婴童可能将带电插头放入嘴中,并导致
受伤。
6. 请勿将电源线用于除风扇装置之外的其
他电器。
7. 请勿将钉子、电线或其他物品插入USB
电源端口中。此举会导致短路,进而产
生烟雾或起火。
8. 请勿将电源与USB端口连结。USB端口
仅可用于对低压设备进行充电。如果不
对低压设备进行充电,则需对USB端口
加盖。否则,可能有起火的风险。
9. 防止意外启动。在连接至电池组、拿起
或搬运工具之前,请确保开关处于关闭
位置。搬运工具时手指放在开关上或者
在开关打开的情况下给工具通电会导致
意外情况发生。
10. 进行任何调整、更换配件或存放工具前,
请将电池组从工具上断开连接或将开关拨
到锁定或关闭的位置。这些安全防卫措施
可降低工具意外启动的风险。
11. 请仅使用制造商指定的充电器进行充电。
将适用于某一种类型电池组的充电器用于
其他类型的电池组时,可能会导致起火。
12. 仅使用特别指定的电池。使用其他电池
可能会导致人身伤害或起火。
13. 不使用电池组时请将其远离纸夹、硬币、
钥匙、钉子、螺丝或其他小型金属物体放
置。这些物体可能会使电池端子短路。这
些物体可能会使电池端子短路,引起燃烧
或起火。

20
中文简体
14. 使用过度时,电池中可能溢出液体。请
避免接触。如果意外接触到电池漏液,
请用水冲洗。如果液体接触到眼睛,请
就医。电池漏液可能会导致过敏发炎或
灼伤。
15. 不要使用损坏或改装过的电池组或风扇单
元。损坏或改装过的电池组可能呈现无法
预测的结果,导致着火、爆炸或伤害。
16. 不要将电池组或风扇单元暴露于火或高
温中。暴露于火或高于130°C的高温中
可能导致爆炸。
17. 遵循所有充电说明。不要在说明书中指
定的温度范围之外给电池组或风扇单元
充电。不正确或在指定的温度范围外充
电可能会损坏电池和增加着火的风险。
18. 由具备必要资质的专业维修人员进行维
修并只使用与原部件相同的更换部件。
这样可确保产品的安全性。
19. 除非在使用和维护说明中另有指示,否
则请勿改装或尝试维修工具或电池组。
电池组的重要安全注意事项
1. 在使用电池组之前,请仔细通读所有的
说明以及(1)电池充电器,(2)电
池,以及(3)使用电池的产品上的警告
标记。
2. 切勿拆卸或改装电池组。否则可能引起
火灾、过热或爆炸。
3. 如果机器运行时间变得过短,请立即停
止使用。否则可能会导致过热、起火甚
至爆炸。
4. 如果电解液进入您的眼睛,请用清水将
其冲洗干净并立即就医。否则可能会导
致视力受损。
5. 请勿使电池组短路:
(1) 请勿使任何导电材料碰触到端子。
(2) 避免将电池组与其他金属物品如钉
子、硬币等放置在同一容器内。
(3) 请勿将电池组置于水中或使其淋雨。
电池短路将产生大的电流,导致过热,
并可能导致起火甚至击穿。
6. 请勿在温度可能达到或超过50°C
(122°F)的场所存放以及使用工具和
电池组。
7. 即使电池组已经严重损坏或完全磨损,也
请勿焚烧电池组。电池组会在火中爆炸。
8. 请勿对电池组射钉,或者切削、挤压、抛
掷、掉落电池组,又或者用硬物撞击电池
组。否则可能引起火灾、过热或爆炸。
9. 请勿使用损坏的电池。
10. 本工具附带的锂离子电池需符合危险品
法规要求。
第三方或转运代理等进行商业运输时,
应遵循包装和标识方面的特殊要求。
有关运输项目的准备作业,咨询危险品
方面的专业人士。同时,请遵守可能更
为详尽的国家法规。
请使用胶带保护且勿遮掩表面的联络信
息,并牢固封装电池,使电池在包装内
不可动。
11. 丢弃电池组时,需将其从工具上卸下并
在安全地带进行处理。关于如何处理废
弃的电池,请遵循当地法规。
12. 仅将电池用于Makita(牧田)指定的产
品。将电池安装至不兼容的产品会导致
起火、过热、爆炸或电解液泄漏。
13. 如长时间未使用工具,必须将电池从工
具内取出。
14. 使用工具期间以及使用工具之后,电池组
温度可能较高易引起灼伤或低温烫伤。处
理高温电池组时请小心操作。
15. 在使用工具后请勿立即触碰工具的端子,
否则可能引起灼伤。
16. 避免锯屑、灰尘或泥土卡入电池组的端
子、孔口和凹槽内。否则可能导致工具
或电池组性能下降或故障。
17. 除非工具支持在高压电源线路附近使用,
否则请勿在高压电源线路附近使用电池
组。否则可能导致工具或电池组故障或
失常。
18. 确保电池远离儿童。
请保留此说明书。
小心: 请仅使用Makita(牧田)原装
电池。使用非Makita(牧田)原装电池或
经过改装的电池可能会导致电池爆炸,从
而造成火灾、人身伤害或物品受损。同时
也会导致牧田工具和充电器的牧田保修服
务失效。
保持电池最大使用寿命的提示
1. 在电池组电量完全耗尽前及时充电。发
现工具电量低时,请停止工具操作,并
给电池组充电。
2. 请勿对已充满电的电池组重新充电。过
度充电将缩短电池的使用寿命。
3. 请在10 °C - 40 °C(50 °F - 104 °F)的
室温条件下给电池组充电。请在灼热的
电池组冷却后再充电。
Other manuals for DFJ212A
4
This manual suits for next models
7
Table of contents
Languages:
Other Makita Safety Equipment manuals
Popular Safety Equipment manuals by other brands

Philips
Philips EM120B Series manual

Innotech
Innotech SAND-13 Series instruction manual

Omron
Omron Sti F3SJ-A 01TS Series Quick installation manual

TEUFELBERGER
TEUFELBERGER VBM SEIL 14MM Manufacturer's information and instructions for use

Assa Abloy
Assa Abloy PDU8500 Series manual

MSA
MSA fieldserver FS-8700-144 Driver manual