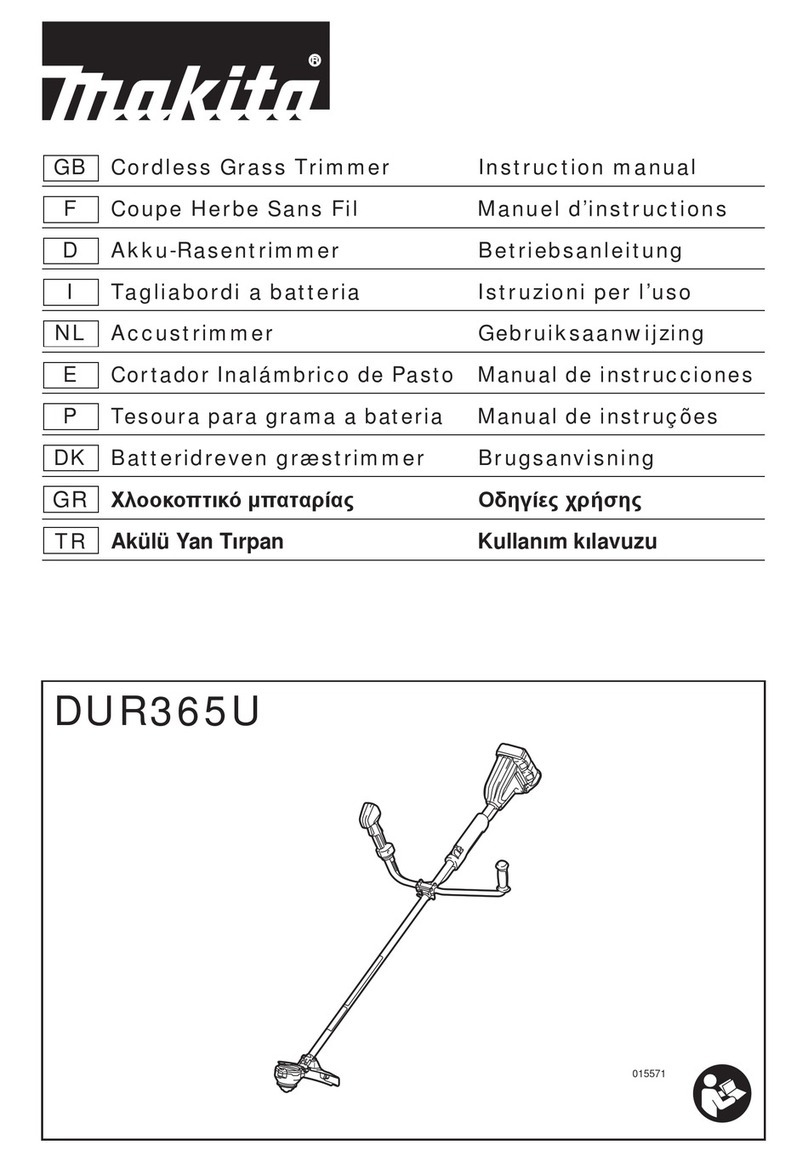
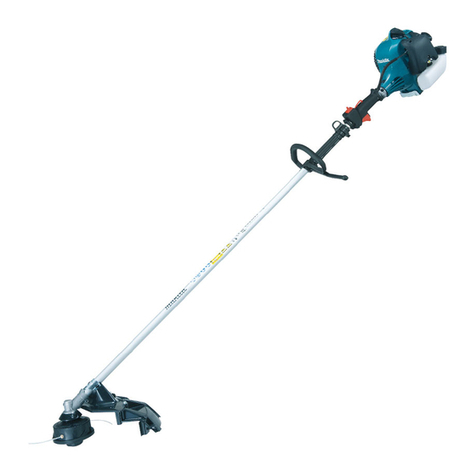
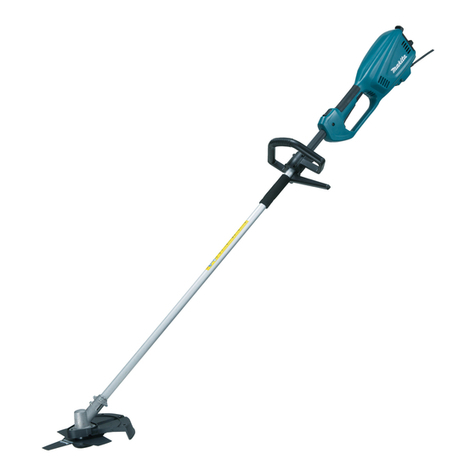
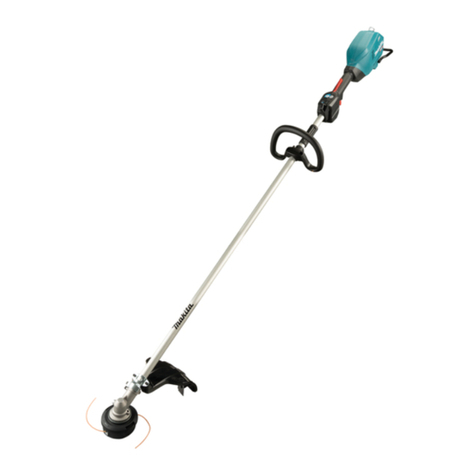
Makita DUR366L User manual

GB Cordless Grass Trimmer Instruction manual
ID Mesin Pemangkas Rumput Petunjuk penggunaan
Nirkabel
VI Maùy caét coû chaïy pin Taøi lieäu höôùng daãn
TH
DUR366L
015384

2
1010820 2010821
3012858

3
40993931
5015386 6015659
1
2
3
4
56
8
7
9
10
11
12
1
13
14

4
7015387 8015790
9015388 10 015791
11 015788 12 015390
13 015792 14 0993915-2
14
15
5
2
3
6
16
17
8
7
18
19
20
21
19
22
23
24
25 26

5
15 0993913 16 015399
17 015394 18 UR366D-18_20161220
19 UR366D-19_20161220 20 UR366D-20_20161220
21 0993950 22 0993951
27
25
26
24
23
25
29
28
28
17
30
30
18
31
32

6
23 0993952 24 0993953
25 0993954 26 013822
27 013823 28 013824
29 013825 30 013826
33
34
31
35
36

7
31 013827-1 32 0993906
33 0993908
37
38

8
ENGLISH (Original instructions)
Explanation of general view
SPECIFICATIONS
• Due to our continuing program of research and development, the specifications herein are subject to change without
notice.
• Specifications and battery cartridge may differ from country to country.
• Weight, with battery cartridge, according to EPTA-Procedure 01/2003
Symbols END229-1
The following show the symbols used for the equipment.
Be sure that you understand their meaning before use.
....................... Take particular care and attention.
............ Read instruction manual.
...................... Danger; be aware of thrown objects.
...................... The distance between the tool and
bystanders must be at least 15 m.
............... Keep bystanders away.
.............. Keep distance at least 15 m.
...................... Wear a helmet, goggles and ear
protection.
...................... Wear protective gloves.
...................... Wear sturdy boots with nonslip soles.
Steeltoed safety boots are
recommended.
...................... Do not expose to moisture.
...................... Top permissible tool speed.
...........Never use metal blade.
IMPORTANT SAFETY
INSTRUCTIONS GEB109-5
WARNING! Read all safety warnings and all
instructions. Failure to follow the warnings and
instructions may result in electric shock, fire and/or
serious injury.
1. Battery cartridge
2. Lock-off lever
3. Switch trigger
4. Power lamp
5. Main power button
6. Reverse button
7. Hanger
8. Grip
9. Protector (cutting tool guard)
10. Shoulder harness
11. Red indicator
12. Button
13. Indicator lamps
14. Check button
15. Battery indicator
16. Most effective cutting area
17. Hex bolt
18. Cover
19. Clamp
20. Cutter
21. Bolt
22. Nylon cutting head
23. Metal guard
24. Receive washer
25. Hex wrench
26. Tighten
27. Plastic blade
28. Buckle
29. Hook
30. Latch
31. Spool
32. 80 mm (3-1/8”)
33. 100 mm (3-15/16”)
34. Housing
35. Eyelet
36. 80-100 mm
37. Arrow on the protector
38. Arrow on the blade
Model DUR366L
Type of handle Loop handle
No load speed 5,000/6,500 min-1
Overall length 1,754 mm
Nylon cord diameter 2.0 – 2.4 mm
Applicable cutting tool
Nylon cutting head
(P/N 197296-3/
198892-0/198893-8)
Plastic blade
(P/N 198383-1)
Nylon cutting head
(P/N 197296-3/
198892-0/198893-8)
Plastic blade
(P/N 198383-1)
Cutting blade diameter 350 mm 255 mm 350 mm 255 mm
Rated voltage D.C. 36 V
Net weight 4.0 kg 4.0 kg 4.5 kg 4.5 kg
Standard battery cartridge BL1815N/BL1820/BL1820B BL1830/BL1830B/BL1840/BL1840B/
BL1850/BL1850B/BL1860B
15m(50
FT
)

9
Save all warnings and instructions for
future reference.
1. Be familiar with the controls and proper use of the
equipment.
2. Cutting elements continue to rotate after the
motor is switched off.
3. Never allow children or people unfamiliar with the
instructions to use the machine.
4. Stop using the machine while people, especially
children, or pets are nearby.
5. Only use the machine in daylight or good artificial
light.
6. Before using the machine and after any impact,
check for signs of wear or damage and repair as
necessary.
7. Take care against injury from any device fitted for
trimming the filament line length. After extending
new cutter line always return the machine to its
normal operating position before switching on.
8. Never fit metal cutting elements.
9. This appliance is not intended for use by persons
(including children) with reduced physical,
sensory or mental capabilities, or lack of
experience and knowledge, unless they have been
given supervision or instruction concerning use
of the appliance by a person responsible for their
safety. Children should be supervised to ensure
that they do not play with the appliance.
10. Use the tool with the utmost care and attention.
11. Operate the tool only if you are in good physical
condition. Perform all work calmly and carefully.
Use common sense and keep in mind that the
operator or user is responsible for accidents or
hazards occurring to other people or their
property.
12. Never operate the tool when tired, feeling ill or
under the influence of alcohol or drugs.
13. The tool should be switched off immediately if it
shows any signs of unusual operation.
Intended use of the tool
1. Use right tool. The cordless grass trimmer is only
intended for cutting grass, light weeds. It should
not be used for any other purpose such as hedge
cutting as this may cause injury.
Personal protective equipment (Fig. 1 & 2)
1. Dress properly. The clothing worn should be
functional and appropriate, i.e. it should be tight-
fitting but not cause hindrance. Do not wear either
jewelry or clothing which could become entangled
with high grass. Wear protective hair covering to
contain long hair.
2. When using the tool, always wear sturdy shoes
with a non-slip sole. This protects against injuries
and ensures a good footing.
3. Wear protective glasses or goggles.
Electrical and battery safety
1. Avoid dangerous environment. Don’t use the tool
in damp or wet locations or expose it to rain.
Water entering the tool will increase the risk of
electric shock.
2. Recharge only with the charger specified by the
manufacturer. A charger that is suitable for one
type of battery pack may create a risk of fire when
used with another battery pack.
3. Use power tools only with specifically designated
battery packs. Use of any other battery packs may
create a risk of injury and fire.
4. When battery pack is not in use, keep it away from
other metal objects, like paper clips, coins, keys,
nails, screws or other small metal objects, that
can make a connection from one terminal to
another. Shorting the battery terminals together
may cause burns or a fire.
5. Under abusive conditions, liquid may be ejected from
the battery; avoid contact. If contact accidentally
occurs, flush with water. If liquid contacts eyes, seek
medical help. Liquid ejected from the battery may
cause irritation or burns.
6. Do not dispose of the battery(ies) in a fire. The cell
may explode. Check with local codes for possible
special disposal instructions.
7. Do not open or mutilate the battery(ies). Released
electrolyte is corrosive and may cause damage to
the eyes or skin. It may be toxic if swallowed.
Starting up the tool (Fig. 3)
1. Make sure that there are no children or other
people within a working range of 15 meters (50 ft),
also pay attention to any animals in the working
vicinity. Otherwise stop using the tool.
2. Before use always check that the tool is safe for
operation. Check the security of the cutting tool
and the guard and the switch trigger/lever for easy
and proper action. Check for clean and dry
handles and test the on/off function of the switch.
3. Check damaged parts before further use of the
tool. A guard or other part that is damaged should
be carefully checked to determine that it will
operate properly and perform its intended
function. Check for alignment of moving parts,
binding of moving parts, breakage of parts,
mounting, and any other condition that may affect
its operation. A guard or other part that is
damaged should be properly repaired or replaced
by our authorized service center unless indicated
elsewhere in this manual.
4. Switch on the motor only when hands and feet are
away from the cutting tool.
5. Before starting make sure that the cutting tool has
no contact with hard objects such as branches,
stones etc. as the cutting tool will revolve when
starting.
Method of operation
1. Never operate the machine with damaged guards
or without the guards in place.
2. Only use the tool in good light and visibility.
During the winter season beware of slippery or
wet areas, ice and snow (risk of slipping). Always
ensure a safe footing.
3. Take care against injury to feet and hands from
the cutting tool.
4. Keep hands and feet away from the cutting means
at all times and especially when switching on the
motor.
5. Never cut above waist height.
6. Never stand on a ladder and run the tool.

10
7. Never work on unstable surfaces.
8. Don’t overreach. Keep proper footing and balance
at all times.
9. Always be sure of your footing on slopes.
10. Walk, never run.
11. Remove sand, stones, nails etc. found within the
working range. Foreign particles may damage the
cutting tool and can cause to be thrown away,
resulting in a serious injury.
12. Never touch moving hazardous parts before the
machine is disconnected from the mains and the
moving hazardous parts have come to a complete
stop.
13. Should the cutting tool hit stones or other hard
objects, immediately switch off the motor and
inspect the cutting tool.
14. Before commencing cutting, the cutting tool must
have reached full working speed.
15. During operation always hold the tool with both
hands. Never hold the tool with one hand during
use. Always ensure a safe footing.
16. All protective equipment such as guards supplied
with the tool must be used during operation.
17. Except in case of emergency, never drop or cast
the tool to the ground or this may severely
damage the tool.
18. Never drag the tool on the ground when moving
from place to place, the tool may become
damaged if moved in this manner.
19. Always remove the battery cartridge from the tool:
-whenever leaving the tool unattended;
-before clearing a blockage;
-before checking, cleaning or working on the
tool;
-before making any adjustments, changing
accessories or storing;
-whenever the tool starts vibrating unusually;
-whenever transporting the tool.
20. Don’t force the tool. It will do the job better and
with less likelihood of a risk of injury at the rate for
which it was designed.
21. Do not operate power tools in explosive
atmospheres, such as in the presence of
flammable liquids, gases or dust. Power tools
create sparks which may ignite the dust or fumes.
22. Take a rest to prevent loss of control caused by
fatigue. We recommend to take a 10 to 20-minute rest
every hour.
Maintenance instructions
1. The condition of the cutting tool, protective
devices and shoulder strap must be checked
before commencing work.
2. Turn off the motor and remove the battery
cartridge before carrying out maintenance,
replacing the cutting tool and cleaning the tool.
3. After use, disconnect the battery cartridge from
the tool and check for damage.
4. Check for loose fasteners and damaged parts
such as nearly halfway cut-off state in the cutting
tool.
5. When not in use store the equipment in a dry
location that is locked up or out of children’s
reach.
6. Use only the manufacturer’s recommended
replacement parts and accessories.
7. Always ensure that ventilation openings are kept
clear of debris.
8. Inspect and maintain the tool regularly, especially
before/after use. Have the tool repaired only by
our authorized service center.
9. Keep handles dry, clean and free from oil and
grease.
SAVE THESE INSTRUCTIONS.
WARNING:
DO NOT let comfort or familiarity with product (gained
from repeated use) replace strict adherence to safety
rules for the subject product. MISUSE or failure to
follow the safety rules stated in this instruction
manual may cause serious personal injury.
IMPORTANT SAFETY
INSTRUCTIONS FOR BATTERY
CARTRIDGE ENC007-12
1. Before using battery cartridge, read all
instructions and cautionary markings on (1)
battery charger, (2) battery, and (3) product using
battery.
2. Do not disassemble battery cartridge.
3. If operating time has become excessively shorter,
stop operating immediately. It may result in a risk
of overheating, possible burns and even an
explosion.
4. If electrolyte gets into your eyes, rinse them out
with clear water and seek medical attention right
away. It may result in loss of your eyesight.
5. Do not short the battery cartridge:
(1) Do not touch the terminals with any
conductive material.
(2) Avoid storing battery cartridge in a container
with other metal objects such as nails, coins,
etc.
(3) Do not expose battery cartridge to water or
rain.
A battery short can cause a large current flow,
overheating, possible burns and even a
breakdown.
6. Do not store the tool and battery cartridge in
locations where the temperature may reach or
exceed 50°C (122°F).
7. Do not incinerate the battery cartridge even if it is
severely damaged or is completely worn out. The
battery cartridge can explode in a fire.
8. Be careful not to drop or strike battery.
9. Do not use a damaged battery.
10. The contained lithium-ion batteries are subject to
the Dangerous Goods Legislation requirements.
For commercial transports e.g. by third parties,
forwarding agents, special requirement on packaging
and labeling must be observed.
For preparation of the item being shipped, consulting
an expert for hazardous material is required. Please
also observe possibly more detailed national
regulations.
Tape or mask off open contacts and pack up the

11
battery in such a manner that it cannot move around in
the packaging.
11. Follow your local regulations relating to disposal
of battery.
12. Use the batteries only with the products specified
by Makita. Installing the batteries to non-compliant
products may result in a fire, excessive heat,
explosion, or leak of electrolyte.
SAVE THESE INSTRUCTIONS.
CAUTION: Only use genuine Makita batteries.
Use of non-genuine Makita batteries, or batteries that
have been altered, may result in the battery bursting
causing fires, personal injury and damage. It will also void
the Makita warranty for the Makita tool and charger.
Tips for maintaining maximum battery life
1. Charge the battery cartridge before completely
discharged.
Always stop tool operation and charge the battery
cartridge when you notice less tool power.
2. Never recharge a fully charged battery cartridge.
Overcharging shortens the battery service life.
3. Charge the battery cartridge with room
temperature at 10°C - 40°C (50°F - 104°F). Let a hot
battery cartridge cool down before charging it.
4. Charge the battery cartridge if you do not use it for
a long period (more than six months).
PARTS DESCRIPTION (Fig. 4)
* The shape of the protector varies depending on the
country.
FUNCTIONAL DESCRIPTION
WARNING:
•Always be sure that the tool is switched off and the
battery cartridge is removed before adjusting or
checking function on the tool. Failure to switch off
and remove the battery cartridge may result in serious
personal injury from accidental start-up.
Installing or removing battery cartridge
(Fig. 5)
CAUTION:
• Always switch off the tool before installing or removing
of the battery cartridge.
•Hold the tool and the battery cartridge firmly when
installing or removing battery cartridge. Failure to
hold the tool and the battery cartridge firmly may cause
them to slip off your hands and result in damage to the
tool and battery cartridge and a personal injury.
To remove the battery cartridge, slide it from the tool while
sliding the button on the front of the cartridge.
To install the battery cartridge, align the tongue on the
battery cartridge with the groove in the housing and slip it
into place. Insert it all the way until it locks in place with a
little click. If you can see the red indicator on the upper
side of the button, it is not locked completely.
CAUTION:
• Always install the battery cartridge fully until the red
indicator cannot be seen. If not, it may accidentally fall
out of the tool, causing injury to you or someone
around you.
• Do not install the battery cartridge forcibly. If the
cartridge does not slide in easily, it is not being inserted
correctly.
NOTE:
• The tool does not work with only one battery cartridge.
Tool/battery protection system
The tool is equipped with a tool/battery protection system.
This system automatically cuts off power to the motor to
extend tool and battery life.
The tool will automatically stop during operation if the tool
or battery is placed under one of the following conditions.
In some conditions, the indicators light up.
Overload protection
015451
If the tool is overloaded by entangled weeds or other
debris, the tool stops automatically, and indicators
blink. In this situation, turn the tool off and stop the
application that caused the tool to become overloaded.
Then turn the tool on to restart.
Overheat protection for tool
015401
When the tool is overheated, the tool stops automatically,
and , , and the battery indicator blink about
60 seconds. In this situation, let the tool cool down before
turning the tool on again.
Overdischarge protection
When the battery capacity becomes low, the tool stops
automatically. If the product does not operate even when
the switches are operated, remove the batteries from the
tool and charge the batteries.
Indicating the remaining battery capacity
Only for battery cartridges with the indicator (Fig. 6)
Press the check button on the battery cartridge to indicate
the remaining battery capacity. The indicator lamps light
up for a few seconds.
: On : Off : Blinking

12
015658
NOTE:
• Depending on the conditions of use and the ambient
temperature, the indication may differ slightly from the
actual capacity.
Remaining battery capacity indication
(Country specific) (Fig. 7)
Press the check button to make the battery indicators
show the remaining battery capacities. The battery
indicators correspond to each battery.
Remaining battery capacity indication
015452
Power switch action
WARNING:
•Before inserting the battery cartridge into the tool,
always check to see that the switch trigger
actuates properly and returns to the “OFF”
position when released. Operating a tool with a
switch that does not actuate properly can lead to loss
of control and serious personal injury.
Press and hold the main power button for some seconds
to turn on the tool.
To turn off the tool, press and hold the main power button
again. (Fig. 8)
To prevent the switch trigger from being accidentally
pulled, a lock-off lever is provided.
To start the tool, grasp the rear handle (the lock-off lever is
released by the grasp) and then pull the switch trigger. To
stop the tool, release the switch trigger. (Fig. 9)
NOTE:
• The tool is automatically turned off after the tool is left
one minute without any operations.
Speed adjusting (Fig. 8)
You can adjust the tool speed by tapping the main power
button.
Each time you tap the main power button, indicator or
indicator lights up. is for high speed and for low
speed.
Reverse button for debris removal
WARNING:
•Switch off the tool and remove the battery cartridge
before you remove entangled weeds or debris
which the reverse rotation function can not
remove. Failure to switch off and remove the battery
cartridge may result in serious personal injury from
accidental start-up.
This tool has a reverse button to change the direction of
rotation. It is only for removing weeds and debris
entangled in the tool. (Fig. 10)
To reverse the rotation, tap the reverse button and pull the
trigger when the tool’s head is stopped. The power lamp
starts blinking, and the tool’s head rotates in reverse
direction when you pull the switch trigger.
To return to regular rotation, release the trigger and wait
until the tool’s head stops.
NOTE:
• During the reverse rotation, the tool operates only for a
short period of time and then automatically stops.
• Once the tool is stopped, the rotation returns to regular
direction when you start the tool again.
• If you tap the reverse button while the tool’s head is still
rotating, the tool comes to stop and to be ready for
reverse rotation.
Nylon cutting head (optional accessory)
NOTICE:
• The bump feed will not operate properly if the head is
not rotating. (Fig. 11)
The nylon cutting head is a dual string trimmer head
provided with a bump & feed mechanism.
To cause the nylon cord to feed out, the cutting head
should be bumped against the ground while rotating.
NOTE:
If the nylon cord does not feed out while bumping the
head, rewind/replace the nylon cord by following the
procedures described under “Maintenance”.
Indicator lamps
Remaining
capacity
Lighted Off Blinking
75% to 100%
50% to 75%
25% to 50%
0% to 25%
Charge the
battery.
The battery may
have
malfunctioned.
Battery indicator status Remaining
battery
capacity
: On : Off : Blinking
50% - 100%
20% - 50%
0% - 20%
Charge the
battery

13
ASSEMBLY
WARNING:
•Always be sure that the tool is switched off and
battery cartridge is removed before carrying out
any work on the tool. Failure to switch off and remove
the battery cartridge may result in serious personal
injury from accidental start-up.
•Never start the tool unless it is completely
assembled. Operation of the tool in a partially
assembled state may result in serious personal injury
from accidental start-up.
Installing the grip (Fig. 12)
Fit the grip onto the pipe and tighten it with two hex bolts.
Make sure that the grip is located further than the hanger.
Installing the guard
WARNING:
•Never use the tool without the guard illustrated in
place. Failure to do so can cause serious personal
injury.
CAUTION:
• Take care not to injure yourself on the cutter for cutting
the nylon cord.
Align the clamp on the pipe with the protector. And tighten
them with bolts. (Fig. 13)
Installing nylon cutting head or plastic
blade (optional accessory)
CAUTION:
•If the nylon cutting head/plastic blade accidentally
impacts a rock or hard object during operation,
stop the tool and inspect for any damage. If the
nylon cutting head/plastic blade is damaged,
replace it immediately. Use of a damaged cutting tool
could result in serious personal injury.
NOTICE:
• Be sure to use genuine Makita nylon cutting head/
plastic blade.
Turn the tool upside down so that you can replace the
nylon cutting head easily.
Insert the hex wrench through the hole on the motor
housing and rotate the receive washer until it is locked
with the hex wrench. Place the nylon cutting head/plastic
blade onto the threaded spindle directly and tighten it by
turning it counterclockwise. Remove the hex wrench.
(Fig. 14 & 15)
To remove the nylon cutting head/plastic blade, turn it
clockwise while holding the receive washer with the hex
wrench.
Hex wrench storage (Fig. 16)
When not in use, store the hex wrench as shown in the
figure to keep it from being lost.
OPERATION
Correct handling of tool
Correct posture (Fig. 17)
WARNING:
•Always position the tool on your right-hand side.
Correct positioning of the tool allows for maximum
control and will reduce the risk of serious personal
injury caused by kickback.
•Be extremely careful to maintain control of the tool
at all times. Do not allow the tool to be deflected
toward you or anyone in the work vicinity. Failure to
keep control of the tool could result in serious injury to
the bystander and the operator.
Shoulder harness
Optional accessory
Attachment of shoulder harness (Fig. 18)
Put the shoulder harness on. Then connect the buckles
on both the hook and the harness. Be sure that the
buckles click and lock completely in place.
Detachment (Fig. 19)
The buckle is provided with a means of quick release.
Simply squeeze the sides and the buckle to release the
tool.
Adjustment of the hanger position and shoulder
harness (Fig. 20)
To change the hanger position, loosen the hex bolt on the
hanger with the supplied wrench. Then move the hanger.
After adjusting the hanger position, tighten the hex bolt
with the wrench securely.
MAINTENANCE
WARNING:
•Always be sure that the tool is switched off and
battery cartridge is removed before attempting to
perform inspection or maintenance on the tool.
Failure to switch off and remove the battery cartridge
may result in serious personal injury from accidental
start-up.
NOTICE:
Never use gasoline, benzine, thinner, alcohol or the
like. Discoloration, deformation or cracks may result.
Replacing the nylon cord
WARNING:
•Use nylon cord with diameter specified in
“SPECIFICATIONS” only. Never use heavier line,
metal wire, rope or the like. Use recommended nylon
cord only, otherwise it may cause damage to the tool
and result in serious personal injury.
•Make sure that the cover of the nylon cutting head
is secured to the housing properly as described
below. Failure to properly secure the cover may cause
the nylon cutting head to fly apart resulting in serious
personal injury.

14
For 95-M10L
1. Press on the housing latches inward to lift off the
cover, then remove the spool. (Fig. 21)
2. Prepare approximately 3 m (9 ft) of new nylon cord.
Fold the new nylon cord with one end become
approximately 80 mm (3-1/8”) longer than the other
end. Then hook the new nylon cord into the notch in
the center of the spool.
Wind both ends firmly around the spool in the direction
of the head rotation (left-hand direction indicated by
LH on the side of the spool). (Fig. 22)
3. Wind all but about 100 mm (3-15/16”) of the cords,
leaving the ends temporarily hooked through a notch
on the side of the spool. (Fig. 23)
4. Mount the spool in the housing so that the grooves
and protrusions on the spool match up with those in
the housing. Keep the side with letters on the spool
visible on the top. Now, unhook the ends of the cord
from their temporary position and feed the cords
through the eyelets to come out of the housing.
(Fig. 24)
5. Align the protrusion on the underside of the cover with
the slots of the eyelets. Then push the cover firmly
onto the housing to secure it. (Fig. 25)
For B&F ECO4L
Take off cover from housing, pressing two latches which
are slotted section oppositely on side of housing. (Fig. 26)
Cut a nylon line in 3 m. Fold the cutting line in two halves,
leave one of half longer 80-100 mm than another.
(Fig. 27)
Hook the middle of the new nylon cord to the notch
located at the center of the spool between the 2 channels
provided for the nylon cord.
Wind both ends firmly around the spool in the direction
marked on the head for left hand direction indicated by
LH. (Fig. 28)
Wind all but about 100 mm of the cords, leaving the ends
temporarily hooked through a notch on the side of the
spool. (Fig. 29)
Mount the spool on the cover so that the grooves and
protrusions on the spool match up with those on the
cover. Now, unhook the ends of the cord from their
temporary position and feed the cords through the eyelets
to come out of the cover. (Fig. 30)
Align the protrusion on the underside of the cover with the
slots of the eyelets. Then push the cover firmly onto the
housing to secure it. Make sure the latches fully spread in
the cover. (Fig. 31)
Replacing the plastic blade
Replace the blade if it is worn out or broken.
When installing the plastic blade, align the direction of the
arrow on the blade with that of the protector. (Fig. 32 &
33)
To maintain product SAFETY and RELIABILITY, repairs,
any other maintenance or adjustment should be
performed by Makita Authorized or Factory Service
Centers, always using Makita replacement parts.
TROUBLE SHOOTING
Before asking for repairs, conduct your own inspection
first. If you find a problem that is not explained in the
manual, do not attempt to dismantle the tool. Instead, ask
Makita Authorized Service Centers, always using Makita
replacement parts for repairs.

15
010856
OPTIONAL ACCESSORIES
WARNING:
•Do not mount a blade on this tool and only use the
recommended accessories or attachments
indicated in this manual. The use of a blade or any
other accessory or attachment may result in serious
personal injury.
CAUTION:
• These accessories or attachments are recommended
for use with your Makita tool specified in this manual.
The use of any other accessories or attachments might
present a risk of injury to persons. Only use accessory
or attachment for its stated purpose.
If you need any assistance for more details regarding
these accessories, ask your local Makita Service Center.
• Nylon cutting head
• Nylon cord (cutting line)
• Plastic blade
• Shoulder harness
• Makita genuine battery and charger
NOTE:
• Some items in the list may be included in the tool
package as standard accessories. They may differ
from country to country.
Malfunction status Cause Action
Motor does not run.
Battery cartridge is not installed. Install the battery cartridge.
Battery problem (under voltage) Recharge the battery. If recharging is not effective,
replace battery.
The drive system does not work
correctly. Ask your local authorized service center for repair.
Motor stops running after a
little use.
Rotation is in reverse. Change the direction of ratation with the reversing
switch.
Battery’s charge level is low. Recharge the battery. If recharging is not effective,
replace battery.
Overheating. Stop using of tool to allow it to cool down.
It does not reach maximum
RPM.
Battery is installed improperly. Install the battery cartridge as described in this
manual.
Battery power is dropping. Recharge the battery. If recharging is not effective,
replace battery.
The drive system does not work
correctly. Ask your local authorized service center for repair.
Cutting tool does not rotate:
Stop the machine
immediately!
Foreign object such as a branch is
jammed between the guard and the
nylon cutting head.
Remove the foreign object.
The drive system does not work
correctly. Ask your local authorized service center for repair.
Abnormal vibration:
Stop the machine
immediately!
One end of the nylon cord has been
broken.
Bump the nylon cutting head against the ground
while it is rotating to cause the cord to feed.
The drive system does not work
correctly. Ask your local authorized service center for repair.
Cutting tool and motor
cannot stop:
Remove the battery
immediately!
Electric or electronic malfunction. Remove the battery and ask your local authorized
service center for repair.

16
BAHASA INDONESIA (Petunjuk Asli)
Penjelasan tampilan keseluruhan
SPESIFIKASI
• Karena kesinambungan program penelitian dan pengembangan kami, spesifikasi yang disebutkan di sini dapat
berubah tanpa pemberitahuan.
• Spesifikasi dan kartrid baterai dapat berbeda dari satu negara ke negara lainnya.
• Berat, dengan kartrid baterai, menurut Prosedur EPTA 01/2003
Simbol-simbol END229-1
Berikut ini adalah simbol-simbol yang digunakan pada
mesin ini. Pastikan Anda mengerti makna masing-masing
simbol sebelum menggunakan mesin ini.
....................... Perhatikan dan berhati-hatilah.
............ Baca petunjuk penggunaan.
...................... Bahaya; waspadalah terhadap benda
yang terlempar.
...................... Jarak antara mesin dan orang
terdekat harus paling sedikit 15 m.
............... Jauhkan orang yang tak
berkepentingan.
.............. Jaga jarak sedikitnya 15 m.
...................... Kenakan helm, kacamata, dan
pelindung telinga.
...................... Kenakan sarung tangan pelindung.
...................... Kenakan sepatu yang kuat dengan
sol antiselip. Sepatu pengaman
dengan pelindung ujung dari baja
adalah yang dianjurkan.
...................... Jangan biarkan terkena kelengasan
(kondisi basah).
...................... Kecepatan tertinggi mesin yang
diperbolehkan.
...........Jangan sekali-kali menggunakan
bilah logam.
PETUNJUK KESELAMATAN
PENTING GEB109-5
PERINGATAN! Bacalah semua peringatan
keselamatan dan semua petunjuk. Kelalaian mematuhi
peringatan dan petunjuk dapat menyebabkan sengatan
listrik, kebakaran, dan/atau cedera serius.
1. Kartrid baterai
2. Tuas kunci-mati
3. Picu sakelar
4. Lampu daya
5. Tombol daya utama
6. Tombol balik
7. Penggantung
8. Pegangan
9. Pelindung (pelindung alat
pemotong)
10. Tali bahu
11. Indikator merah
12. Tombol
13. Lampu indikator
14. Tombol cek
15. Indikator baterai
16. Bagian pemotongan paling efektif
17. Baut hex
18. Penutup
19. Klem
20. Alat Pemotong
21. Baut
22. Head pemotongan nilon
23. Pelindung logam
24. Cincin penerima
25. Kunci hex
26. Kencangkan
27. Bilah plastik
28. Gesper
29. Kait
30. Pengunci
31. Gulungan
32. 80 mm (3-1/8”)
33. 100 mm (3-15/16”)
34. Rumahan
35. Lubang tali
36. 80-100 mm
37. Arah pada pelindung
38. Arah pada bilah pisau
Model DUR366L
Jenis gagang Gagang bundar
Kecepatan tanpa beban 5.000/6.500 men-1
Panjang keseluruhan 1.754 mm
Diameter benang nilon 2,0 – 2,4 mm
Alat pemotong yang sesuai
Head pemotongan
nilon
(P/N 197296-3/
198892-0/198893-8)
Bilah plastik
(P/N 198383-1)
Head pemotongan
nilon
(P/N 197296-3/
198892-0/198893-8)
Bilah plastik
(P/N 198383-1)
Diameter bilah pemotong 350 mm 255 mm 350 mm 255 mm
Tegangan yang sesuai D.C. 36 V
Berat bersih 4,0 kg 4,0 kg 4,5 kg 4,5 kg
Kartrid baterai standar BL1815N/BL1820/BL1820B BL1830/BL1830B/BL1840/BL1840B/
BL1850/BL1850B/BL1860B
15m(50
FT
)

17
Simpanlah semua peringatan dan
petunjuk untuk acuan di masa
mendatang.
1. Kenali dengan baik semua alat pengendali dan
penggunaan alat yang benar.
2. Elemen pemotong masih akan terus berputar
setelah motor dimatikan.
3. Jangan biarkan anak-anak atau orang yang tidak
memahami petunjuk ini dengan baik
menggunakan mesin ini.
4. Hentikan penggunaan mesin pada saat orang lain,
terutama anak-anak, atau hewan peliharaan
berada di dekat Anda.
5. Gunakan mesin hanya pada siang hari atau dalam
kondisi penerangan yang baik.
6. Sebelum menggunakan mesin dan setelah mesin
mengalami benturan, periksa mesin dari tanda-
tanda keausan atau kerusakan dan perbaiki bila
perlu.
7. Berhati-hatilah agar tidak mendapat cedera dari
perangkat yang dipasang untuk memangkas
panjang senar filamen. Setelah mengulur senar
pemotong baru, selalu kembalikan mesin ke
posisi pengoperasian normalnya sebelum
menghidupkan mesin.
8. Jangan sekali-kali memasang elemen pemotong
logam.
9. Perkakas ini tidak dimaksudkan untuk digunakan
oleh orang (termasuk anak-anak) dengan
kemampuan fisik, indera, atau mental kurang, atau
yang kurang pengalaman dan pengetahuan,
kecuali jika mereka mendapat pengawasan atau
pelatihan mengenai penggunaan perkakas ini oleh
orang yang bertanggung jawab atas keselamatan
mereka. Anak-anak harus diawasi demi
memastikan bahwa mereka tidak bermain-main
dengan perkakas ini.
10. Gunakan mesin dengan kehati-hatian dan
perhatian maksimal.
11. Operasikan mesin hanya jika Anda berada dalam
kondisi fisik yang baik. Lakukan semua pekerjaan
dengan tenang dan hati-hati. Gunakan akal sehat
dan selalu ingat bahwa operator atau pengguna
bertanggung jawab atas kecelakaan atau bahaya
yang terjadi pada orang lain atau harta benda
mereka.
12. Jangan sekali-kali menjalankan mesin saat lelah,
tidak enak badan, atau dalam pengaruh alkohol
atau obat-obatan.
13. Mesin ini harus segera dimatikan jika
menunjukkan tanda-tanda pengoperasian yang
tidak biasa.
Maksud penggunaan mesin
1. Gunakan mesin yang tepat. Mesin pemangkas
rumput nirkabel ini hanya dimaksudkan untuk
memotong rumput dan gulma kecil. Mesin ini
sebaiknya tidak digunakan untuk tujuan lain
seperti memotong tanaman pagar karena dapat
menimbulkan cedera.
Alat pelindung diri (Gb. 1 & 2)
1. Kenakan pakaian yang sesuai. Pakaian yang
dikenakan haruslah fungsional dan sesuai, yaitu
harus terpasang pas tetapi tidak menghambat.
Jangan mengenakan perhiasan atau pakaian yang
dapat tersangkut pada rumput tinggi. Pakailah
penutup rambut untuk menahan rambut panjang.
2. Saat menggunakan mesin, selalu kenakan sepatu
yang kuat dengan sol antiselip. Ini akan
melindungi Anda dari cedera dan memastikan
tercapainya pijakan yang baik.
3. Kenakan kacamata pelindung.
Keamanan kelistrikan dan baterai
1. Hindari lingkungan yang berbahaya. Jangan
gunakan mesin di lokasi yang lembap atau basah
atau membiarkannya terkena air hujan. Air yang
masuk ke dalam mesin akan meningkatkan risiko
sengatan listrik.
2. Isi ulang baterai hanya dengan pengisi baterai
(charger) yang ditentukan oleh pabrik pembuat
mesin. Pengisi baterai yang cocok untuk suatu
jenis baterai dapat menimbulkan risiko kebakaran
bila digunakan dengan baterai yang lain.
3. Gunakan mesin listrik hanya dengan baterai yang
khusus ditentukan untuknya. Penggunaan baterai
yang lain dapat menimbulkan risiko cedera dan
kebakaran.
4. Bila baterai tidak sedang digunakan, jauhkanlah
dari benda logam lain, seperti klip kertas, koin,
kunci, paku, sekrup, atau benda logam kecil
lainnya, yang dapat menjadi penghubung antara
terminal-terminalnya. Menghubungsingkatkan
(mengkorsletkan) terminal-terminal baterai dapat
menyebabkan luka bakar atau kebakaran.
5. Bila disalahgunakan, baterai dapat mengeluarkan
cairan; hindari terkena cairan ini. Jika terkena cairan
ini secara tidak sengaja, bilaslah dengan air. Jika
cairan mengenai mata, mintalah bantuan medis.
Cairan yang keluar dari baterai dapat menyebabkan
iritasi atau luka bakar.
6. Jangan membuang baterai ke dalam api. Sel
(baterai) tersebut dapat meledak. Rujuklah
peraturan setempat mengenai kemungkinan
adanya petunjuk pembuangan khusus.
7. Jangan membuka atau memotong baterai.
Elektrolit yang terlepas bersifat korosif dan dapat
menyebabkan kerusakan mata atau kulit. Elektrolit
mungkin beracun jika tertelan.
Menghidupkan mesin (Gb. 3)
1. Pastikan tidak ada anak-anak atau orang lain
dalam radius tempat kerja sejauh 15 meter
(50 kaki), juga perhatikan binatang yang ada di
dekat tempat kerja. Bila ada, hentikan penggunaan
mesin.
2. Sebelum menggunakan, selalu pastikan bahwa
mesin aman untuk dioperasikan. Periksa
keamanan alat pemotong dan pelindung serta
picu/tuas sakelar, apakah mudah dioperasikan
dan bekerja dengan baik. Pastikan gagang bersih
dan kering dan uji fungsi mati/hidup sakelar.
3. Periksa bagian yang rusak sebelum menggunakan
mesin lebih lanjut. Pelindung atau bagian lain
yang rusak harus diperiksa dengan teliti untuk
menentukan apakah mesin dapat bekerja normal
dan menjalankan fungsinya dengan baik. Periksa
kelurusan bagian bergerak, kemacetan bagian
bergerak, adanya bagian yang pecah,

18
pemasangan, dan kondisi lain yang mungkin
dapat mempengaruhi pengoperasian. Pelindung
atau bagian lain yang rusak harus diperbaiki atau
diganti oleh pusat servis resmi kami kecuali jika
dinyatakan boleh diperbaiki di tempat lain dalam
petunjuk penggunaan ini.
4. Hidupkan motor hanya bila tangan dan kaki jauh
dari alat pemotong.
5. Sebelum menghidupkan, pastikan bahwa alat
pemotong tidak bersentuhan dengan benda keras
seperti cabang, batu, dll. karena alat pemotong
akan berputar saat dihidupkan.
Metode pengoperasian
1. Jangan sekali-kali mengoperasikan mesin dengan
pelindung yang rusak atau tanpa dipasangi
pelindung.
2. Gunakan mesin hanya dalam kondisi penerangan
dan pandangan yang baik. Dalam musim dingin,
awaslah terhadap tempat-tempat yang licin atau
basah, es dan salju (risiko terpeleset). Selalu
pastikan pijakan yang aman.
3. Hati-hatilah terhadap cedera pada kaki dan tangan
akibat alat pemotong.
4. Jauhkan tangan dan kaki dari alat pemotong
setiap saat dan terutama saat menghidupkan
motornya.
5. Jangan sekali-kali memotong pada ketinggian di
atas pinggang.
6. Jangan sekali-kali berdiri di tangga sambil
menjalankan mesin.
7. Jangan sekali-kali bekerja di atas permukaan yang
tidak stabil.
8. Jangan meraih terlalu jauh. Pertahankan pijakan
dan keseimbangan yang baik setiap saat.
9. Selalu pastikan keamanan pijakan Anda di atas
permukaan yang miring.
10. Berjalanlah, jangan berlari.
11. Bersihkan pasir, batu, paku, dll. yang ditemukan di
lingkup tempat kerja. Benda asing dapat merusak
alat pemotong dan dapat membuatnya terlempar,
yang mengakibatkan cedera serius.
12. Jangan sekali-kali menyentuh bagian berbahaya
yang bergerak sebelum mesin diputuskan dari
sumber listrik dan bagian berbahaya yang
bergerak itu telah benar-benar berhenti.
13. Jika alat pemotong mengenai batu atau benda
keras lainnya, segera matikan motornya dan
periksa alat pemotong.
14. Sebelum memulai pemotongan, alat pemotong
harus sudah mencapai kecepatan kerja penuh.
15. Selama mengoperasikan mesin, selalu pegang
mesin dengan kedua tangan. Jangan sekali-kali
memegang mesin dengan satu tangan saat
menggunakannya. Selalu pastikan pijakan yang
aman.
16. Seluruh alat pengaman seperti pelindung yang
dipasok bersama mesin harus digunakan selama
pengoperasian.
17. Kecuali dalam keadaan darurat, jangan sekali-kali
menjatuhkan atau melemparkan mesin ke atas
tanah karena tindakan itu dapat membuat mesin
rusak parah.
18. Jangan sekali-kali menyeret mesin di atas tanah
saat memindahkannya ke tempat lain; mesin
dapat menjadi rusak jika dipindahkan dengan cara
demikian.
19. Selalu lepaskan kartrid baterai dari mesin:
-setiap kali meninggalkan mesin tanpa
pengawasan;
-sebelum membersihkan kemacetan;
-sebelum memeriksa, membersihkan, atau
mengerjakan sesuatu pada mesin;
-sebelum melakukan penyetelan apa pun,
mengganti aksesori, atau menyimpannya;
-setiap kali mesin mulai bergetar secara tidak
biasa;
-setiap kali mengangkut mesin.
20. Jangan memaksa mesin. Mesin akan berfungsi
lebih baik dan dengan risiko menimbulkan cedera
yang lebih kecil pada kecepatan sesuai
rancangannya.
21. Jangan mengoperasikan mesin listrik dalam
atmosfer yang mudah meledak, seperti bila ada
cairan, gas, atau debu mudah menyala. Mesin listrik
menimbulkan percikan api yang dapat menyulut debu
atau uap tersebut.
22. Beristirahatlah untuk mencegah kehilangan
kendali akibat kelelahan. Kami menganjurkan
istirahat selama 10 sampai 20 menit setiap satu jam
bekerja.
Petunjuk perawatan
1. Kondisi alat pemotong, peranti pelindung, dan tali
bahu harus diperiksa sebelum memulai pekerjaan.
2. Matikan motor dan lepaskan kartrid baterai
sebelum melakukan pekerjaan pemeliharaan,
mengganti alat pemotong, dan membersihkan alat
pemotong.
3. Setelah digunakan, lepas kartrid baterai dari
mesin dan periksa dari kerusakan.
4. Periksa adanya pengencang yang kendur dan
bagian yang rusak seperti senar yang hampir
setengah putus di dalam alat pemotong.
5. Bila tidak digunakan, simpan alat di tempat kering
yang terkunci atau jauh dari jangkauan anak-anak.
6. Gunakan hanya komponen pengganti dan
aksesori yang dianjurkan oleh pabrik pembuat
mesin.
7. Selalu pastikan bahwa lubang-lubang ventilasi
terjaga kebersihannya.
8. Periksa dan peliharalah mesin secara rutin,
terutama sebelum/setelah digunakan. Serahkan
perbaikan mesin ini hanya kepada pusat servis
resmi kami.
9. Jagalah agar gagang selalu kering, bersih, dan
bebas dari minyak dan gemuk.
SIMPAN PETUNJUK INI.
PERINGATAN:
JANGAN biarkan kenyamanan atau terbiasanya Anda
dengan produk (karena penggunaan berulang)
menggantikan kepatuhan yang ketat terhadap aturan
keselamatan untuk produk yang terkait.
PENYALAHGUNAAN atau kelalaian mematuhi kaidah
keselamatan yang tertera dalam petunjuk
penggunaan ini dapat menyebabkan cedera badan
serius.

19
PETUNJUK KESELAMATAN PENTING
UNTUK KARTRID BATERAI ENC007-12
1. Sebelum menggunakan kartrid baterai, bacalah
semua petunjuk dan tanda peringatan pada (1)
pengisi baterai, (2) baterai, dan (3) produk yang
menggunakan baterai.
2. Jangan membongkar kartrid baterai.
3. Jika waktu pengoperasian telah menjadi terlalu
singkat, segera hentikan pengoperasian. Keadaan
tersebut dapat mengakibatkan risiko timbulnya
panas berlebihan, kemungkinan luka bakar, dan
bahkan ledakan.
4. Jika ada elektrolit yang masuk ke mata, bilaslah
bersih-bersih dengan air bersih dan segera cari
bantuan medis. Hal itu dapat mengakibatkan
hilangnya penglihatan.
5. Jangan menghubungsingkatkan kartrid baterai:
(1) Jangan menyentuh terminal-terminalnya
dengan bahan konduktif.
(2) Hindari menyimpan kartrid baterai dalam
wadah bersama dengan benda logam lainnya
seperti paku, koin, dll.
(3) Jangan biarkan kartrid baterai terkena air
atau hujan.
Hubungan singkat baterai dapat menyebabkan
aliran arus yang besar, panas berlebihan,
kemungkinan luka bakar, dan bahkan kerusakan
permanen.
6. Jangan menyimpan alat ini dan kartrid baterai di
tempat yang suhunya dapat mencapai atau
melebihi 50°C (122°F).
7. Jangan membakar kartrid baterai bahkan
meskipun kartrid sudah rusak parah atau benar-
benar rusak. Kartrid baterai dapat meledak di
dalam api.
8. Berhati-hatilah agar baterai tidak sampai terjatuh
atau terpukul.
9. Jangan menggunakan baterai yang rusak.
10. Baterai litium-ion yang disertakan sesuai dengan
persyaratan Perundangan Makanan Berbahaya.
Harus ada pengawasan untuk pengangkutan
komersial misalnya oleh pihak ketiga, ekspeditor,
persyaratan khusus terhadap pengemasan dan
pelabelan.
Diperlukan adanya konsultasi dengan ahli mengenai
material berbahaya untuk persiapan barang yang
akan dikirimkan. Perhatikan pula peraturan nasional
yang lebih terperinci yang mungkin ada.
Beri perekat atau tutupi bagian yang terbuka dan
kemasi baterai dengan cara yang tidak akan
menimbulkan pergeseran dalam pengemasan.
11. Ikutilah peraturan setempat terkait pembuangan
baterai.
12. Gunakan baterai hanya dengan produk yang
ditentukan oleh Makita. Memasang baterai pada
produk yang tidak sesuai dapat mengakibatkan
kebakaran, panas berlebihan, ledakan, atau
kebocoran elektrolit.
SIMPAN PETUNJUK INI.
PERHATIAN: Gunakan baterai asli Makita.
Penggunaan baterai Makita yang tidak asli, atau baterai
yang sudah diubah, akan mengakibatkan baterai mudah
terbakar, cedera dan kerusakan. Akan menghilangkan
garansi Makita pada pengisi daya dan alat Makita.
Kiat untuk mempertahankan usia pakai
baterai maksimum
1. Isilah kembali kartrid baterai sebelum baterai
sepenuhnya habis.
Selalu hentikan pengoperasian alat dan isi kartrid
baterai saat Anda merasakan bahwa tenaga alat
telah berkurang.
2. Jangan sekali-kali mengisi ulang kartrid baterai
yang telah terisi penuh.
Mengisi baterai terlalu banyak akan
memperpendek usia pakai baterai.
3. Isilah kartrid baterai dalam ruangan bersuhu
antara 10°C - 40°C (50°F - 104°F). Biarkan kartrid
baterai yang panas mendingin lebih dahulu
sebelum mengisinya.
4. Ganti kartrid baterai jika Anda akan tidak
menggunakannya untuk waktu yang lama (lebih
dari enam bulan).
DESKRIPSI KOMPONEN (Gb. 4)
* Bentuk pelindung berbeda-beda tergantung negara.
DESKRIPSI FUNGSI
PERINGATAN:
•Selalu pastikan bahwa mesin dalam keadaan mati
dan kartrid baterainya telah dilepas sebelum
menyetel atau memeriksa fungsi mesin. Kelalaian
untuk mematikan sakelar dan melepas kartrid baterai
dapat mengakibatkan cedera serius akibat
terhidupkannya mesin secara tidak disengaja.
Memasang atau melepas kartrid baterai
(Gb. 5)
PERHATIAN:
• Selalu matikan mesin sebelum memasang atau
melepas kartrid baterainya.
•Pegang mesin dan kartrid baterai kuat-kuat saat
memasang atau melepaskan kartrid baterai. Bila
tidak dipegang dengan kuat, mesin dan kartrid baterai
dapat terlepas dari tangan Anda dan menyebabkan
kerusakan pada mesin dan kartrid baterai serta cedera.
Untuk mengeluarkan kartrid baterai, geser kartrid dari
mesin sambil menggeser tombol pada bagian depan
kartrid.
Untuk memasang kartrid baterai, luruskan lidah pada
kartrid baterai dengan alur pada rumah mesin dan dorong
masuk kartrid ke tempatnya. Masukkan kartrid
sepenuhnya sampai terkunci di tempatnya yang ditandai
dengan suara klik pelan. Jika Anda dapat melihat
indikator merah di sisi atas tombol, berarti baterai belum
terkunci sepenuhnya.
PERHATIAN:
• Selalu pasang kartrid baterai sepenuhnya sampai
indikator merah tidak terlihat. Jika tidak, komponen ini
dapat terlepas dan jatuh dari mesin, sehingga

20
menyebabkan cedera pada Anda atau orang lain di
sekitar Anda.
• Jangan memasang kartrid baterai secara paksa. Jika
kartrid tidak dapat meluncur masuk dengan mudah,
berarti posisi memasukkannya belum tepat.
CATATAN:
• Mesin tidak dapat bekerja dengan hanya satu kartrid
baterai.
Sistem perlindungan mesin/baterai
Mesin ini dilengkapi dengan sistem perlindungan mesin/
baterai. Sistem ini secara otomatis memutus aliran daya
ke motor untuk memperpanjang usia pakai mesin dan
baterai.
Mesin akan secara otomatis berhenti beroperasi jika
mesin atau baterainya berada dalam salah satu keadaan
berikut ini. Dalam beberapa kondisi, indikator menyala.
Perlindungan dari kelebihan beban
015451
Jika mesin mengalami kelebihan beban akibat adanya
gulma atau kotoran lain yang tersangkut, mesin akan
berhenti secara otomatis, dan indikator berkedip-
kedip. Dalam keadaan ini, matikan mesin dan hentikan
pemakaian yang menyebabkan mesin kelebihan beban.
Kemudian hidupkan mesin untuk menjalankannya
kembali.
Perlindungan dari panas berlebihan untuk mesin
015401
Bila mesin mengalami panas berlebihan, mesin akan
berhenti secara otomatis, dan , , serta indikator
baterainya berkedip selama sekitar 60 detik. Dalam
keadaan ini, biarkan mesin menjadi dingin lebih dulu
sebelum menghidupkannya lagi.
Perlindungan dari pengeluaran daya berlebihan
Bila kapasitas baterai tinggal sedikit, mesin akan berhenti
secara otomatis. Jika produk tidak bekerja meskipun
sakelarnya diaktifkan, lepaskan baterai dari mesin dan isi
baterai.
Menunjukkan kapasitas baterai yang
tersisa
Hanya untuk kartrid baterai dengan indikator (Gb. 6)
Tekan tombol pemeriksaan pada kartrid baterai untuk
melihat kapasitas baterai yang tersisa. Lampu indikator
menyala selama beberapa detik.
015658
CATATAN:
• Tergantung pada kondisi penggunaan dan suhu udara
sekitar, tampilan indikasi dapat sedikit berbeda dengan
kapasitas sesungguhnya.
Indikasi kapasitas baterai yang tersisa
(Spesifik negara) (Gb. 7)
Tekan tombol cek untuk membuat indikator baterai
memperlihatkan kapasitas baterai yang tersisa. Indikator
baterai menunjukkan masing-masing baterai.
Indikasi kapasitas baterai yang tersisa
015452
: Hidup : Mati : Berkedip
Lampu indikator
Kapasitas tersisa
Menyala Mati Berkedip
75% sampai
100%
50% sampai 75%
25% sampai 50%
0% sampai 25%
Isilah baterai.
Baterai mungkin
telah rusak/
malfungsi.
Status indikator baterai Kapasitas
baterai tersisa
: Hidup : Mati : Berkedip
50% - 100%
20% - 50%
0% - 20%
Isi baterai
Other manuals for DUR366L
3
Table of contents
Languages:
Other Makita Trimmer manuals

Makita
Makita XRU01 User manual

Makita
Makita DUR192L User manual

Makita
Makita DUH523 User manual

Makita
Makita UR002G User manual

Makita
Makita DUH506 User manual

Makita
Makita DUR181 User manual

Makita
Makita UM600DWAEX User manual

Makita
Makita BBC231U User manual

Makita
Makita UR012G User manual

Makita
Makita DUR361U User manual

Makita
Makita 3708F User manual

Makita
Makita UH6300 Manual

Makita
Makita DUR188L User manual

Makita
Makita DUH481 User manual

Makita
Makita rt0700c User manual

Makita
Makita UR002G User manual

Makita
Makita BUH481 User manual

Makita
Makita DUR190U User manual

Makita
Makita BUH550 User manual

Makita
Makita 3709 User manual