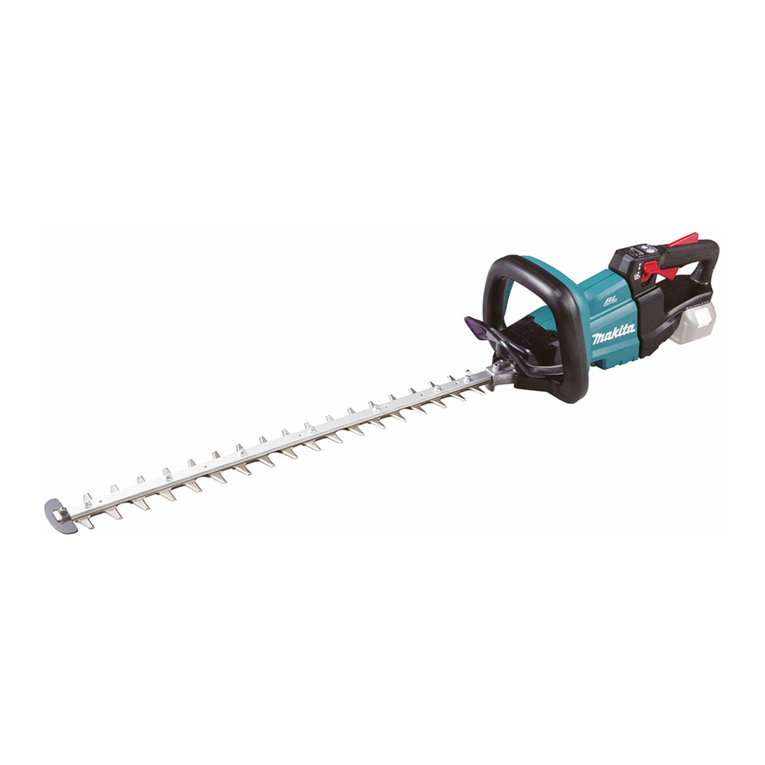
Makita EN422MP User manual

INSTRUCTION MANUAL
MANUEL D'INSTRUCTION
MANUAL DE INSTRUCCIONES
Ground Trimmer Attachment
Tête Faucheuse
Accesorio de Corte a Ras de Piso
EN422MP
IMPORTANT: Read Before Using.
IMPORTANT : Lire avant usage.
IMPORTANTE: Lea antes de usar.

2ENGLISH
ENGLISH (Original instructions)
SPECIFICATIONS
Model: EN422MP
Blade length 250 mm (9-7/8")
Overall length 1208 mm (47-1/2")
Net weight 2.2 kg (4.9 lbs)
• Duetoourcontinuingprogramofresearchanddevelopment,thespecicationshereinaresubjecttochange
without notice.
• Specicationsmaydierfromcountrytocountry.
Approved power unit
Thisattachmentisapprovedtouseonlywiththefollow-
ing power unit(s):
• DUX60 Cordless multi function power head
• XUX01 Cordless multi function power head
• DUX18 Cordless multi function power head
• XUX02 Cordless multi function power head
• UX01G Cordless multi function power head
• GUX01 Cordless multi function power head
WARNING: Never use the attachment with
non-approved power unit. Non-approved combi-
nation may cause serious injury.
Symbols
Thefollowingsshowthesymbolswhichmaybeused
fortheequipment.Besurethatyouunderstandtheir
meaning before use.
Read and follow the instruction manual.
DANGER-Keephandsawayfromblade.
Beware of electrical lines. Risk of electrical
shock.
Wearprotectivehelmet,eyeandear
protection.
Wear protective gloves.
Wearsturdybootswithnon-slipsoles.
Keepbystandersandanimalsatleast15m
(50ft)awayfromthepowertool.
Keep the area of operation clear of all
persons and pets.
Guaranteed sound power level according
to EU Outdoor Noise Directive.
Sound power level according to Australia
NSW Noise Control Regulation.
SAFETY WARNINGS
Cordless Pole Hedge Trimmer
Safety Warnings
1. Keep all parts of the body away from the blade.
Do not remove cut material or hold material
to be cut when blades are moving. Blades
continuetomoveaftertheswitchisturnedo.A
moment of inattention while operating the hedge
trimmermayresultinseriouspersonalinjury.
2. Carry the hedge trimmer by the handle with the
blade stopped and taking care not to operate
any power switch.Propercarryingofthehedge
trimmer will decrease the risk of inadvertent start-
ingandresultantpersonalinjuryfromtheblades.
3. When transporting or storing the hedge trim-
mer, always t the blade cover. Proper handling
of the hedge trimmer will decrease the risk of
personalinjuryfromtheblades.
4. When clearing jammed material or servicing
the unit, make sure all power switches are o
and the battery pack is removed or discon-
nected. Unexpected actuation of the hedge trim-
merwhileclearingjammedmaterialorservicing
mayresultinseriouspersonalinjury.
5.
Hold the hedge trimmer by insulated gripping
surfaces only, because the blade may contact
hidden wiring.Bladescontactinga"live"wiremay
make exposed metal parts of the hedge trimmer
"live" and could give the operator an electric shock.
6. Keep all power cords and cables away from
cutting area.Powercordsorcablesmaybehid-
deninhedgesorbushesandcanbeaccidentally
cutbytheblade.

3ENGLISH
7. Do not use the hedge trimmer in bad weather
conditions, especially when there is a risk of
lightning. This decreases the risk of being struck
bylightning.
8. To reduce the risk of electrocution, never use
the pole hedge trimmer near any electrical
power lines. Contact with or use near power lines
maycauseseriousinjuryorelectricshockresult-
ing in death.
9. Always use two hands when operating the pole
hedge trimmer. Hold the pole hedge trimmer with
both hands to avoid loss of control.
10. Always use head protection when operating
the pole hedge trimmer overhead. Falling debris
canresultinseriouspersonalinjury.
Additional Safety Instructions
Preparation
1. THIS HEDGE TRIMMER CAN CAUSE SERIOUS
INJURIES. Read the instructions carefully
for the correct handling, preparation, main-
tenance, starting and stopping of the tool.
Become familiar with all controls and the
proper use of the tool.
2. Check the hedges and bushes for foreign
objects, such as wire fences or hidden wiring
before operating the tool.
3. The tool must not be used by children or
young persons under 18 years of age. Young
personsover16yearsofagemaybeexempted
fromthisrestrictioniftheyareundergoingtraining
under the supervision of an expert.
4. In the event of an emergency, switch o
the tool and remove the battery cartridge
immediately.
5. DANGER - Keep hands away from blade.
Contact with blade will result in serious personal
injury.
6. First-time users should have an experienced
user show them how to use the tool.
7. Before operation, examine the work area for
wire fences, stones, or other solid objects.
They can damage the blades.
8. Use the tool only if you are in good physical
condition.Ifyouaretired,yourattentionwillbe
reduced.Beespeciallycarefulattheendofa
workingday.Performallworkcalmlyandcarefully.
The user is responsible for all damages to third
parties.
9. Before starting work, check to make sure that
the tool is in good and safe working order.
Ensure guards are tted properly. The tool
must not be used unless fully assembled.
10. Avoid dangerous environment. Don't use the
tool in damp or wet locations or expose it to
rain. Water entering the tool will increase the
risk of electric shock.
Personal protective equipment
1. Work gloves of stout leather are part of the
basic equipment of the tool and must always
be worn when working with it. Also wear
sturdy shoes with anti-skid soles.
2. Wear ear protection such as ear mus to pre-
vent hearing loss.
3. Wear protective goggles, safety helmet and
protective gloves to protect yourself from
ying debris or falling objects.
4. When touching blades or adjusting the blade
angle, wear protective gloves. Blades can cut
barehandsseverely.
Operation
1. Always use two hands to operate the tool.
Using one hand could cause loss of control and
resultinseriouspersonalinjury.
2. While operating the tool, always ensure that
the operating position is safe and secure.
Overreaching with the tool, particularly from
a ladder, is extremely dangerous. Do not work
from anything wobbly or inrm.
3. Do not simultaneously wear multiple belt har-
nesses and/or shoulder harnesses when oper-
ating the tool.
4. During operation, keep bystanders or animals
at least 15 m (50 ft.) away from the tool. Stop
the tool as soon as someone approaches.
5. If cutting tool strikes any object or the tool
starts making unusual noise or vibration,
switch o the tool and remove the battery car-
tridge immediately and allow the tool to stop.
And then take the following steps:
• inspect for damage
• check for, and tighten, any loose parts
• have any damaged parts replaced or
repaired with genuine spare parts.
6. Only use the tool for its intended purpose. Do
not use the tool for any other purpose.
7. Switch o the tool and remove the battery
cartridge before:
• cleaning or when clearing a blockage,
• checking, carrying out maintenance or
working on the tool,
• adjusting the working position of the
shear blades,
• leaving the tool unattended.
8.
Ensure that the tool is correctly located in a desig-
nated working position before starting the tool.
9. Do not operate the tool with a damaged or
excessively worn shear blades.
10. Always be aware of your surroundings and
stay alert for possible hazards of which you
may not be aware due to the noise of the tool.
11. Be careful not to accidentally contact a metal
fence or other hard objects during operation.
Thebladewillbreakandmaycauseseriousinjury.
12. Avoid unintentional starting. Do not carry the
tool when the battery cartridge is installed
and with nger on the switch. Make sure that
the switch is o when installing the battery
cartridge.
13.
Do not grasp the exposed cutting blades or cut-
ting edges when picking up or holding the tool.
14. Do not force the tool.Itwilldothejobbetterand
withlesslikelihoodofariskofinjuryattheratefor
which it was designed.
15. Do not use the tool in the rain or in wet or
very damp conditions. The electric motor is not
waterproof.
4ENGLISH
16. Hold the tool rmly when using the tool.
17. Do not operate the tool at no-load
unnecessarily.
18. Before checking the shear blades, taking care
of faults, or removing foreign objects caught
in the shear blades, always switch o the tool
and remove the battery cartridge.
19. Never point the shear blades to yourself or
others.
20. If the blades stop moving due to the stuck of
foreign objects between the blades during
operation, switch o the tool and remove the
battery cartridge, and then remove the foreign
objects using tools such as pliers. Removing
theforeignobjectsbyhandmaycauseaninjury
forthereasonthatthebladesmaymoveinreac-
tiontoremovingtheforeignobjects.
21. When attaching or removing the blade cover,
be careful not to injure your hands.
Electrical and battery safety
1. Avoid dangerous environment. Don't use the
tool in damp or wet locations or expose it to
rain. Water entering the tool will increase the risk
of electric shock.
2. Do not dispose of the battery(ies) in a re.
Thecellmayexplode.Checkwithlocalcodesfor
possible special disposal instructions.
3. Do not open or mutilate the battery(ies).
Releasedelectrolyteiscorrosiveandmaycause
damagetotheeyesorskin.Itmaybetoxicif
swallowed.
4. Do not charge battery in rain, or in wet
locations.
5. Do not charge the battery outdoors.
6. Do not handle charger, including charger plug,
and charger terminals with wet hands.
Maintenance and storage
1. When the tool is stopped for servicing, inspec-
tion or storage, switch o the tool and remove
the battery cartridge, and make sure all mov-
ing parts have come to a stop. Allow the tool
to cool before making any inspections, adjust-
ment, etc.
2. Always allow the tool to cool down before
storing.
3. When not in use, attach the blade cover to the
tool and store the tool indoors in dry, and high
locked-up place, out of reach of children.
4. Maintain the tool with care. Keep cutting edge
sharp and clean for best performance and to
reduce the risk of injury. Follow instructions
for lubricating and changing accessories.
Keep grips dry, clean, and free from oil and
grease.
5. Check damaged parts. Before further use of
the tool, any part which is damaged should be
carefully checked to determine that it will oper-
ate properly and perform its intended function.
Check for alignment of moving parts, binding
of moving parts, breakage of parts, mounting
and any other condition that may aect its
operation. A guard or other part that is damaged
shouldbeproperlyrepairedorreplacedbyyour
authorized service center.
6. Use genuine spare parts only.
7. When moving the tool to another location,
including during work, always remove the
battery cartridge and put the blade cover on
the shear blades. Never carry or transport the
tool with the blades running. Never grasp the
blades with your hands.
8. Clean the tool and especially the shear blades
after use, and before putting the tool into stor-
age for extended periods. Lightly oil the shear
blades and put on the blade cover.
9. Do not dispose of the battery(ies) in a re. The
cell may explode. Check with local codes for
possible special disposal instructions.
10. Do not open or mutilate the battery(ies).
Released electrolyte is corrosive and may
cause damage to the eyes or skin. It may be
toxic if swallowed.
11. Do not charge battery in rain, or in wet
locations.
SAVE THESE INSTRUCTIONS.
WARNING: DO NOT let comfort or familiarity
with product (gained from repeated use) replace
strict adherence to safety rules for the subject
product. MISUSE or failure to follow the safety
rules stated in this instruction manual may cause
serious personal injury.
WARNING: Use of this product can create
dust containing chemicals which may cause
respiratory or other illnesses. Some examples of
these chemicals are compounds found in pesti-
cides, insecticides, fertilizers and herbicides.
Your risk from these exposures varies, depend-
ing on how often you do this type of work. To
reduce your exposure to these chemicals: work
in a well ventilated area, and work with approved
safety equipment, such as those dust masks that
are specially designed to lter out microscopic
particles.
PARTS DESCRIPTION
3
4
5
1
2
6
Fig.1
►1. Blade cover 2.Angleadjustmenthandle3. Cap
4. Shear blades 5. Slide lever 6. Front grip

5ENGLISH
ASSEMBLY
WARNING: Before assembling or adjusting
the equipment, switch o the motor and remove
the battery cartridge.Otherwise,themachinemay
startunintentionallyandresultinaninjury.
WARNING: When assembling or adjusting
the equipment, always put it down. Assembling or
adjustingtheequipmentinanuprightpositionmay
resultinseriousinjury.
WARNING: Follow the warnings and precau-
tions in the chapter “SAFETY WARNINGS” and
the instruction manual of the power unit.
Assembling the attachment
1. Remove the cap from the attachment.
1
Fig.2
►1. Cap
2. Insert the pipe into the attachment so that the hole
on the pipe is aligned with the hole on the attachment.
Securelytightentheshortboltrst,andthentightenthe
longbolttoxthepipe.
1
2
3
4
Fig.3
►1. Hole 2. Pipe 3. Bolt (short) 4. Bolt (long)
NOTE:Whentighteningthebolts,apply4.0-6.0N•m
as tightening torque.
Mounting the attachment pipe
CAUTION: Always check that the attachment
pipe is secured after installation. Improper instal-
lationmaycausetheattachmentfallingofromthe
powerunitandcausepersonalinjury.
Mount the attachment pipe to the power unit.
1. Remove the cap from the end of the pipe.
2
1
Fig.4
►1. Pipe 2. Cap
NOTICE: Do not dispose of the cap since the cap
is necessary for storing the attachment.
2. Turn the lever toward the attachment.
1
Fig.5
►1. Lever

6ENGLISH
3. Align the pin with the arrow mark on the power
unit. Insert the pipe until the release button pops up.
Make sure that the position line is on the tip of the arrow
mark on the power unit, and the arrow mark on the
power unit and the arrow mark on the pipe are facing
each other.
1
2
3
4
5
Fig.6
►1. Release button 2. Arrow mark on the power unit
3. Pin 4. Position line 5. Arrow mark on the pipe
4. Turn the lever toward the power unit.
1
Fig.7
►1. Lever
Make sure that the surface of the lever is parallel to the pipe.
NOTICE: Do not tighten the lever without the
attachment pipe inserted.Otherwisethelevermay
tighten the entrance of the drive shaft too much and
damage it.
To remove the pipe, turn the lever toward the attach-
ment and pull the pipe out while pressing down the
release button.
Fig.12
3
1
2
Fig.8
►1. Release button 2. Lever 3. Pipe
Installing or removing the shear
blades
CAUTION: When replacing the shear blades,
always wear gloves so that your hands do not
directly contact the blades.
CAUTION: Attach the blade cover before
removing or installing the shear blades.
NOTICE: When replacing the shear blades, do
not wipe o grease from the crank.
NOTE: Before installing or removing the shear
blades, unfold the attachment so that the attachment
is straight to the pipe.
1. Attach the blade cover to the shear blades.
1
Fig.9
►1. Blade cover
2. Place the attachment upside down.
3. Remove 4 bolts with the hex wrench, and remove
the under cover, cover and plate (large).
1
3
2
4
Fig.10
►1. Bolt 2. Under cover 3. Cover 4. Plate (large)

7ENGLISH
4. Turn the crank with the slotted screwdriver so that
the crank is positioned in the direction as shown in the
gure.
1
Fig.11
►1. Crank
5. Remove 2 bolts.
1
Fig.12
►1. Bolt
6. Remove the felt pad (short), felt pad (long), plate
(small), and sleeves.
3
1
2
4
Fig.13
►1. Felt pad (short) 2. Felt pad (long) 3. Plate (small)
4. Sleeve
7. Remove the shear blades from the attachment.
Fig.14
8. Remove the blade cover, and then attach it to the
new shear blades.

8ENGLISH
9. Remove the dust guard from the shear blades,
andthenattachitinthepositionshowninthegureon
the new shear blades.
1
1
Fig.15
►1. Dust guard
10. Insert the bolt removed in step 5 into the hole on
the shear blades through the hole on the blade cover.
1
2
Fig.16
►1. Hole 2. Bolt
11. Applyasmallamountofgreasetotheperipheryof
the crank. Attach the shear blades to the attachment.
Fig.17
12. Attach the sleeves, plate (small) to the shear
blades, and then tighten the bolt.
2
3
1
Fig.18
►1. Bolt 2. Plate (small) 3. Sleeve
13. Remove the bolt inserted into the hole on the
shearbladesinstep10,andthentightenittoxthe
shear blades.

9ENGLISH
14. Attach the felt pad (short) and felt pad (long).
1
2
Fig.19
►1. Felt pad (short) 2. Felt pad (long)
15. Attach the plate (large), cover, and under cover,
and then tighten 4 bolts.
1
3
2
4
Fig.20
►1. Bolt 2. Under cover 3. Cover 4. Plate (large)
NOTICE: If the shear blades do not operate prop-
erly, the blades are not engaging the crank prop-
erly. Remove the blades and install them again.
NOTICE: If the parts other than the shear blades
such as the crank are worn out, ask Makita
Authorized Service Centers for parts replacement
or repairs.
FUNCTIONAL
DESCRIPTION
CAUTION: Always be sure that the tool is
switched o and the battery cartridge is removed
before adjusting or checking function on the tool.
Adjusting the cutting angle
CAUTION: Always be sure that the tool is
switched o before adjusting the cutting angle.
Theangleoftheheadcanbeadjustedin13steps.To
change the angle of the head, follow the steps below.
1. Holdtheangleadjustmenthandle,andthenadjust
the angle of the head while pulling the slide lever, and
then release the slide lever.
2
1
Fig.21
►1. Slide lever 2.Angleadjustmenthandle
2. Movetheheadslightlyuntilitislockedwithaclick.
NOTE:Makesurethattheheadissecurelylocked
before operating the tool.

10 ENGLISH
OPERATION
WARNING: Follow the warnings and precau-
tions in the chapter “SAFETY WARNINGS” and
the instruction manual of the power unit.
Operating the tool
WARNING: Do not use the tool near any
electrical power lines. Contacting with power lines
orusingthetoolnearpowerlinesmaycauseserious
injuryorelectricshockresultingindeath.
WARNING: Keep hands away from shear
blades.
WARNING: Be extremely careful to maintain
control of the tool at all times. Do not allow the
tool to be deected toward you or anyone in the
work vicinity. Failure to keep control of the tool
couldresultinseriousinjurytothebystanderandthe
operator.
CAUTION: Avoid operating the tool in very
hot weather as much as practicable. When operat-
ing the tool, be careful of your physical condition.
CAUTION: Be careful not to accidentally
contact a metal fence or other hard objects while
trimming.Theshearbladesmaybreakandcause
aninjury.
CAUTION: Be careful not to allow the shear
blades to contact the ground.Thetoolmayrecoil
andcauseaninjury.
CAUTION: Overreaching with a hedge trim-
mer, particularly from a ladder, is extremely
dangerous.Donotworkwhilestandingonanything
wobblyorinrm.
NOTICE: Do not attempt to cut branches thicker
than 10 mm (3/8") in diameter with the tool. Cut
branches to 10 cm (4") lower than the cutting height
using branch cutters before using the tool.
(1)
(2)
Fig.22
►(1) Cutting height (2) 10 cm (4")
NOTICE: Do not cut down dead trees or similar
hard objects.Doingsomaydamagethetool.
Holdthetoolwithbothhandsbyholdingthefronthan-
dle of the power unit or the front grip of the attachment
and the rear grip of the power unit.
1
2
Fig.23
►1. Front handle 2. Rear grip
Pulltheswitchtriggerwhilepressingthelock-olever,
and then move the tool forward.
Fig.24
For basic operation, tilt the shear blades toward the
trimmingdirectionandmoveitcalmlyandslowlyatthe
speed rate of 3 to 4 seconds per meter.
Fig.25

11 ENGLISH
Tocutahedgesideevenly,cutfromthebottomtotop.
Fig.26
When trimming to make a round shape (trimming box-
wood or rhododendron, etc.), trim from the root to the
topforabeautifulnish.
Fig.27
Whenshearingthegrass,applytheshearbladestothe
grass parallel to the ground, and shear the grass with a
right to left swinging movement.
Fig.28
MAINTENANCE
WARNING: Before inspecting or maintaining
the equipment, switch o the motor and remove
the battery cartridge.Otherwise,themachinemay
startunintentionallyandresultinseriousinjury.
WARNING: When inspecting or maintaining
the equipment, always put it down. Assembling or
adjustingtheequipmentinanuprightpositionmay
resultinseriousinjury.
WARNING: Follow the warnings and precau-
tions in the chapter “SAFETY WARNINGS” and
the instruction manual of the power unit.
CAUTION: Wear gloves when performing the
inspection or maintenance.
NOTICE: Never use gasoline, benzine, thinner,
alcohol or the like. Discoloration, deformation or
cracks may result.
To maintain product SAFETY and RELIABILITY,
repairs,anyothermaintenanceoradjustmentshould
beperformedbyMakitaAuthorizedorFactoryService
Centers,alwaysusingMakitareplacementparts.
Cleaning the tool
Cleanthetoolbywipingodustwithadryclothorone
dippedinsoapywaterandwrungout.
NOTICE: Never use gasoline, benzine, thinner,
alcohol or the like. Discoloration, deformation or
cracks may result.
Shear blade maintenance
Before the operation or once per hour during operation,
applylow-viscosityoil(machineoil,orspray-typelubri-
cating oil) to the shear blades.
Fig.29

12 ENGLISH
After operation, remove dust from both sides of the
shearbladeswithawiredbrush,wipeitowithacloth
andthenapplylow-viscosityoil(machineoil,orspray-
typelubricatingoil)totheshearblades.
Fig.30
NOTICE: Do not wash the shear blades in water.
Doingsomaycauserustordamagetothetool.
NOTICE: Dirt and corrosion cause excessive
blade friction and shorten the operating time per
battery charge.
Storage
Attach the blade cover to the shear blades so that the
blades are not exposed. Store the tool out of the reach
of children. Store the tool in a place not exposed to
moisture or rain.
When storing the attachment separated from the power
unit, put the cap onto the end of the pipe.
Fig.31
Lubricating moving parts
NOTICE: Follow the instruction of the frequency
and amount of grease supplied.Otherwiseinsu-
cientlubricationmaydamagemovingparts.
Drive axle:
Applygrease(MakitagreaseNNo.2orequivalent)
every30hoursofoperation.
Fig.32
NOTE:GenuineMakitagreasemaybepurchased
fromyourlocalMakitadealer.
Grease lubrication
Interval of lubrication:Every25operatinghours
1. Remove the bolt from the hole for lubrication.
1
Fig.33
►1. Bolt

13 ENGLISH
2. Remove the cap from the grease vessel. Align the
outlet of the grease vessel with the hole on the cover,
and then turn the grease vessel to attach the outlet of
the grease vessel into the hole.
2
1
Fig.34
►1. Grease vessel 2. Hole
3. Applythegreasetothetool(Approximately3g
(0.1 oz) as a guide).
4. Remove the grease vessel.
5. Tighten the bolt.
Grinding the shear blades
NOTICE: If the shear blades have considerably
deformed by grinding, replace the shear blades
with new ones.
1. Installthebatterycartridgetothetool.
2. Turn on and start the tool so that the upper blade
andlowerbladearepositionedalternately.
Fig.35
3. Turnothetoolandremovethebatterycartridge
from the tool.
4. Remove the screws and nut, and then remove the
tip guard from the shear blades.
1 2
3
1
Fig.36
►1. Screw 2. Nut 3. Tip guard
5. Settheangleofaleto45°,andgrindtheupper
bladefrom3directionswiththele.
2
1
Fig.37
►(1) File (2)45°
CAUTION: Before grinding the shear blades,
make sure that the tool is switched o and the
battery cartridge is removed from the tool.
6. Place the tool upside down, and then remove the
burrs from the shear blades with the dressing stone.
1
Fig.38
►1. Dressing stone
7. Settheangleoftheleto45°,andgrindthelower
bladefrom3directionswiththele.

14 ENGLISH
8. Return the tool to normal position, and then
remove the burrs from the shear blades with the dress-
ing stone.
9. Attachthetipguardbytighteningthescrewsand
nut.
TROUBLESHOOTING
Beforeaskingforrepairs,conductyourowninspectionrst.Ifyoundaproblemthatisnotexplainedinthemanual,
donotattempttodismantlethetool.Instead,askMakitaAuthorizedServiceCenters,alwaysusingMakitareplace-
ment parts for repairs.
State of abnormality Probable cause (malfunction) Remedy
Motor does not start. -Refer to the instruction manual of the power unit.
Motor stops soon. -Refer to the instruction manual of the power unit.
Motor speed does not increase. -Refer to the instruction manual of the power unit.
Shear blades do not move:
stopthemachineimmediately!
Foreignobjectsarecaughtbetweenthe
shear blades.
Switchothetoolandremovethebatterycartridge,
andthenremovetheforeignobjectsusingtools
such as pliers.
Thedrivesystemdoesnotwork
correctly.
Askyourlocalauthorizedservicecenterforrepair.
Abnormal vibration:
stopthemachineimmediately!
Shear blades are broken, bent or worn. Replace the shear blades.
Thedrivesystemdoesnotwork
correctly.
Askyourlocalauthorizedservicecenterforrepair.
Shear blades and motor cannot stop:
Removethebatteryimmediately!
Electric malfunction. Removethebatteryandaskyourlocalauthorized
service center for repair.
OPTIONAL
ACCESSORIES
CAUTION: These accessories or attachments
are recommended for use with your Makita
machine specied in this manual.Theuseofany
other accessories or attachments might present a risk
ofinjurytopersons.Onlyuseaccessoryorattach-
ment for its stated purpose.
Ifyouneedanyassistanceformoredetailsregard-
ingtheseaccessories,askyourlocalMakitaService
Center.
• Shearbladeassembly
• Grease vessel
• Makitagenuinebatteryandcharger
NOTE:Someitemsinthelistmaybeincludedinthe
productpackageasstandardaccessories.Theymay
dierfromcountrytocountry.

15 FRANÇAIS
FRANÇAIS (Mode d’emploi original)
SPÉCIFICATIONS
Modèle : EN422MP
Longueur de lame 250mm(9-7/8″)
Longueur totale 1208mm(47-1/2″)
Poids net 2,2 kg (4,9 lbs)
• Étantdonnél’évolutionconstantedenotreprogrammederechercheetdedéveloppement,lesspécications
contenuesdanscemanuelsontsujettesàmodicationsanspréavis.
• Lesspécicationspeuventvariersuivantlespays.
Unité d’alimentation approuvée
Cettexationestapprouvéeuniquementpourl’utilisa-
tion avec les unités d’alimentation suivantes :
• Moteurmulti-fonctionssanslDUX60
• Moteurmulti-fonctionssanslXUX01
• Moteurmulti-fonctionssanslDUX18
• Moteurmulti-fonctionssanslXUX02
• Moteurmulti-fonctionssanslUX01G
• Moteurmulti-fonctionssanslGUX01
MISE EN GARDE : N’utilisez jamais la xa-
tion avec une unité d’alimentation non approuvée.
Une combinaison non approuvée peut entraîner
une grave blessure.
Symboles
Lessymbolesquipeuventêtreutiliséspourl’équipe-
ment sont indiqués ci-dessous. Vous devez avoir com-
prisleursignicationavantl’utilisation.
Veuillez lire le mode d’emploi et en respec-
ter les instructions.
DANGER-Gardezlesmainsàl’écartde
la lame.
Prenezgardeauxlignesélectriques.Ilya
risque de décharge électrique.
Portez un casque de sécurité et des pro-
tecteurspourlesyeuxetlesoreilles.
Portez des gants de protection.
Portezdesbottesrobustesàsemelles
antidérapantes.
Ne laissez pas les curieux et les animaux
approcheràmoinsde15m(50ft)del’outil
électrique.
Ne laissez pénétrer personne, ni aucun
animal domestique, dans la zone de travail.
Niveau de puissance acoustique garanti
conformémentàladirectivesurlebruit
extérieur de l’UE.
Niveau de puissance acoustique confor-
mément au règlement de contrôle du bruit
NSW de l’Australie.
CONSIGNES DE
SÉCURITÉ
Consignes de sécurité pour taille
haie sur perche sans l
1. Gardez toutes les parties de votre corps à
l’écart de la lame. Pendant que les lames sont
en mouvement, évitez de retirer le matériau
coupé ou de tenir le matériau à couper. Les
lames continuent de bouger une fois l’interrupteur
enpositiond’arrêt.Toutmomentd’inattention
pendant l’utilisation du taille-haie peut entraîner
une grave blessure.
2. Transportez le taille-haie par la poignée alors
que la lame est arrêtée et prenez soin de ne
pas actionner l’interrupteur. Si vous transpor-
tez correctement le taille-haie, cela diminuera le
risque d’un démarrage inopportun et les blessures
corporellesconséquentespouvantêtrecausées
par les lames.
3. Avant de transporter ou de ranger le taille-haie,
mettez toujours en place le couvre-lames. La
manipulation adéquate du taille-haie réduira le
risque de blessure au contact des lames.
4. Lorsque vous retirez une matière coincée ou
procédez à un entretien, assurez-vous que
tous les interrupteurs sont en position d’arrêt
et que la batterie est retirée ou déconnectée.
L’actionnement inopportun du taille-haie lors du
retrait d’une matière coincée ou de l’entretien peut
entraîner des blessures corporelles graves.

16 FRANÇAIS
5. Ne tenez le taille-haie que par ses surfaces
de prises isolées, car la lame peut toucher un
câblage dissimulé.Aucontactd’unlsousten-
sion, les lames peuvent mettre sous tension les
pièces métalliques découvertes du taille-haie et
transmettreunedéchargeélectriqueàl’utilisateur.
6. Gardez tous les cordons d’alimentation et
câbles à l’écart de la zone de coupe. Les cor-
donsd’alimentationoulescâblespourraientêtre
cachés dans les haies ou les buissons et pour-
raientêtreaccidentellementcoupésparlalame.
7. N’utilisez pas le taille-haie sous de mauvaises
conditions météo, et tout spécialement lors-
qu’il y a risque de foudre. Cela réduit le risque
d’êtrefrappéparlafoudre.
8. Pour réduire le risque d’électrocution, n’utili-
sez jamais de taille-haie sur perche près des
lignes électriques. Le contact avec des lignes
électriques ou l’utilisation près de celles-ci peut
causer des blessures graves ou une décharge
électrique pouvant entraîner la mort.
9. Utilisez toujours vos deux mains pour faire
fonctionner le taille-haie sur perche. Tenez le
taille-haiesurpercheàdeuxmainspouréviter
d’en perdre le contrôle.
10. Portez toujours un casque de sécurité lorsque
vous utilisez le taille-haie sur perche au-des-
sus de votre tête. La chute de débris peut entraî-
ner de graves blessures.
Consignes de sécurité additionnelles
Préparation
1. CE TAILLE-HAIE PEUT CAUSER DES
BLESSURES GRAVES. Lisez les instructions
avec soin pour la manipulation, la préparation,
l’entretien, le démarrage et l’arrêt adéquats de
l’outil. Familiarisez-vous avec toutes les com-
mandes et l’usage adéquat de l’outil.
2.
Avant d’utiliser l’outil, assurez-vous qu’il n’y a pas
de corps étrangers tels que clôtures grillagées ou
câblage dissimulé dans les haies et buissons.
3. Le taille-haie ne doit pas être utilisé par les
enfants ou par les jeunes de moins de 18 ans.
Lesjeunesde16ansetpluspeuventfaireexcep-
tionàcetterestrictions’ilsreçoiventuneformation
sous la supervision d’un expert.
4. Dans l’éventualité d’une urgence, débranchez
l’outil et retirez la batterie immédiatement.
5.
DANGER - Gardez les mains à l’écart de la lame. Le
contact avec la lame entraînera une grave blessure.
6. Les nouveaux utilisateurs doivent se faire
expliquer l’utilisation de l’outil par un utilisa-
teur expérimenté.
7. Avant l’exécution du travail, vériez l’absence
de clôtures grillagées et de pierres ou autres
objets solides dans la zone de travail. Ils
peuvent endommager les lames.
8. Utilisez le taille-haie seulement si vous êtes
en bon état physique.Sivousêtesfatigué,votre
concentrationseramoindre.Soyeztoutspécia-
lementprudentàlandelajournéedetravail.
Eectuezletravailcalmementetprudemment.
L’utilisateur est responsable de tout dommage
encouru par des tiers.
9. Avant de commencer le travail, assurez-vous
que le taille-haie est sécuritaire et en bon état
de marche. Assurez-vous que les gardes sont
bien installés. Le taille-haie ne doit être utilisé
qu’une fois complètement assemblé.
10. Évitez les environnements dangereux.
N’utilisez pas l’outil dans les endroits humides
ou mouillés, et ne l’exposez pas à la pluie.
L’inltration d’eau dans l’outil accroît le risque
de décharge électrique.
Équipement de protection individuelle
1. Les gants de travail en cuir résistant font
partie de l’équipement de base du taille-haie
et doivent toujours être portés pendant son
utilisation. Portez également des chaussures
robustes à semelle antidérapante.
2. Portez une protection d’oreilles telle qu’un
protège-oreilles pour prévenir les lésions de
l’ouïe.
3. Portez des lunettes à coques, un casque de
sécurité et des gants protecteurs pour vous
protéger contre les projections de débris ou la
chute d’objets.
4. Pour toucher les lames ou pour ajuster l’angle
d’une lame, portez des gants de protection.
Les lames peuvent couper sévèrement les mains
nues.
Utilisation
1. Utilisez toujours deux mains pour opérer l’ou-
til. Si vous utilisez une main, cela pourrait causer
une perte de contrôle et entraîner des blessures
corporelles graves.
2. Lorsque vous utilisez l’outil, assurez-vous
toujours que la position d’opération est sécu-
ritaire. Il est extrêmement dangereux de trop
tendre les bras avec l’outil, et ce tout particu-
lièrement sur une échelle. Ne travaillez pas à
partir d’un endroit branlant ou instable.
3. Ne portez pas simultanément plusieurs
bretelles de ceinture et/ou sangles d’épaule
lorsque vous utilisez l’outil.
4. Pendant l’exécution du travail, ne laissez pas
les curieux ou les animaux approcher à moins
de 15 m (50 pi) de l’outil. Arrêtez l’outil dès que
quelqu’un approche.
5. Si un outil tranchant frappe tout objet ou si
l’outil commence à produite un bruit ou une
vibration inhabituelle, arrêtez l’outil et retirez
la batterie immédiatement, puis laissez-le s’im-
mobiliser. Puis, faites les étapes suivantes :
• assurez-vous qu’il n’y a pas de
dommages
• s’il y a des pièces mal serrées,
resserrez-les
• faites remplacer ou réparer toute pièce
endommagée par des pièces de rechange
d’origine.
6. Utilisez l’outil uniquement aux ns pour les-
quelles il est conçu. N’utilisez l’outil à aucune
autre n.
7. Éteignez l’outil et retirez la batterie avant de :
• nettoyer ou retirer un blocage;
• vérier, réaliser un entretien ou travailler
sur l’outil;

17 FRANÇAIS
• régler la position de travail des lames de
cisaillement;
• laisser l’outil sans surveillance.
8. Avant de démarrer l’outil, assurez-vous
qu’il est dans la position de travail adéquate
désignée.
9. N’utilisez pas l’outil avec des lames de cisaille-
ment endommagées ou trop usées.
10. Soyez toujours conscient de votre entourage
et soyez à l’aût des dangers potentiels dont
vous pourriez ne pas être conscient grâce au
bruit de l’outil.
11. Prenez garde de toucher accidentellement une
clôture métallique ou autre objet dur pendant
l’exécution du travail. En cassant, la lame peut
causer une grave blessure.
12. Évitez le démarrage accidentel. Ne transportez
pas l’outil avec la batterie installée et le doigt
sur l’interrupteur. Avant d’installer la batterie,
assurez-vous que l’interrupteur est en position
d’arrêt.
13. Lorsque vous prenez ou tenez l’outil, ne le sai-
sissez pas par les lames de coupe dénudées
ou par les bords tranchants.
14. Ne forcez pas l’outil. Il fonctionnera mieux et
présentera moins de risques de blessure si vous
respectez la vitesse de travail pour laquelle il a été
conçu.
15. N’utilisez pas l’outil sous la pluie ou dans
des conditions mouillées ou très humides. Le
moteurélectriquen’estpasimperméableàl’eau.
16. Tenez l’outil fermement pendant l’utilisation.
17. Ne faites pas inutilement tourner l’outil à vide.
18. Avant de vérier les lames de cisaillement,
d’en faire l’entretien ou d’enlever des corps
étrangers coincés, éteignez toujours l’outil et
retirez la batterie.
19. Ne pointez jamais les lames de cisaillement
vers vous-même ou d’autres personnes.
20. Si les lames cessent de bouger en raison de la
présence de corps étrangers entre les lames
pendant l’utilisation, éteignez l’outil et retirez
la batterie, puis enlevez les corps étrangers
à l’aide d’une pince ou autre outil. En retirant
les corps étrangers avec la main, vous risquez de
vous blesser car les lames peuvent bouger lors du
retrait des corps étrangers.
21. Lors de la pose ou du retrait du couvre-lames,
prenez soin de ne pas vous blesser les mains.
Consignes de sécurité concernant l’électricité et la
batterie
1. Évitez les environnements dangereux.
N’utilisez pas l’outil dans les endroits humides
ou mouillés et ne l’exposez pas à la pluie.
L’inltrationd’eaudansl’outilaccroîtlerisquede
décharge électrique.
2. Ne jetez pas la/les batterie(s) au feu. L’élément
pourraitexploser.Vériezlaréglementationlocale
pour savoir s’il existe des directives particulières
sur l’élimination.
3. N’ouvrez pas et n’endommagez pas la/les
batterie(s).L’électrolytequis’échappeestcorrosif
etpeutprovoquerdesdommagesauxyeuxouà
lapeau.Ilpeutêtretoxiques’ilestingéré.
4. Ne chargez pas la batterie sous la pluie ou
dans les emplacements humides.
5. Ne chargez pas la batterie à l’extérieur.
6. Ne manipulez pas le chargeur, y compris sa
che et ses bornes, avec les mains mouillées.
Entretien et remisage
1. Lorsque l’outil est arrêté pour un entretien,
une inspection ou le remisage, mettez-le à
l’arrêt et retirez la batterie, puis assurez-vous
que toutes les pièces mobiles se sont arrêtées.
Laissez l’outil se refroidir avant de procéder à
toute inspection, tout réglage, etc.
2.
Laissez toujours refroidir l’outil avant de le remiser.
3. Lorsque vous n’utilisez pas l’outil, xez-y le
couvre-lames et rangez l’outil à l’intérieur,
dans un emplacement sec, élevé, verrouillé et
hors de portée des enfants.
4.
Entretenez soigneusement l’outil. Gardez les
bords tranchants aûtés et propres pour un
rendement optimal et pour réduire les risques
de blessure. Suivez les instructions concernant
le graissage et le remplacement des acces-
soires. Gardez les poignées de l’outil sèches,
propres et sans traces d’huile ou de graisse.
5.
Vériez s’il y a des pièces endommagées.
Avant de réutiliser l’outil, vériez soigneuse-
ment toute pièce endommagée an de vous
assurer qu’elle fonctionne correctement et
qu’elle remplit sa fonction prévue. Vériez
que les pièces mobiles sont bien alignées et
qu’elles ne sont pas coincées, qu’il n’y a pas de
pièces cassées ou mal montées, et toute autre
condition pouvant aecter le bon fonctionne-
ment. Toute pièce endommagée (protecteur, etc.)
doitêtrecorrectementréparéeouremplacéepar
un centre de service après-vente agréé.
6. Utilisez toujours exclusivement des pièces de
rechange d’origine.
7. Lorsque vous déplacez l’outil vers un autre
emplacement, y compris pendant l’exécution
du travail, retirez toujours la batterie et mettez
le couvre-lames sur les lames de cisaillement.
Ne transportez ou déplacez jamais l’outil
pendant que les lames tournent. Ne saisissez
jamais les lames avec les mains.
8. Nettoyez l’outil et tout spécialement les
lames de cisaillement après l’utilisation, ainsi
qu’avant de ranger l’outil pour une période
prolongée. Huilez légèrement les lames de
cisaillement et mettez le couvre-lames.
9. Ne jetez pas la/les batterie(s) au feu. L’élément
pourrait exploser. Vériez la réglementation
locale pour savoir s’il existe des directives
particulières sur l’élimination.
10. N’ouvrez pas et n’endommagez pas la/les
batterie(s). L’électrolyte qui s’échappe est
corrosif et peut provoquer des dommages aux
yeux ou à la peau. Il peut être toxique s’il est
ingéré.
11. Ne chargez pas la batterie sous la pluie ou
dans les emplacements humides.
CONSERVEZ CES
INSTRUCTIONS.

18 FRANÇAIS
MISE EN GARDE : NE vous laissez PAS
tromper (au l d’une utilisation répétée) par un
sentiment d’aisance ou de familiarité avec le
produit en négligeant les consignes de sécurité
qui accompagnent le produit. UNE UTILISATION
INCORRECTE ou le non-respect des règles de
sécurité énoncées dans le présent manuel d’ins-
tructions peut provoquer des blessures graves.
MISE EN GARDE : L’utilisation de ce pro-
duit peut générer des poussières contenant des
substances chimiques, lesquelles peuvent causer
des problèmes respiratoires ou autres maladies.
Parmi ces substances chimiques gurent les
composés que l’on retrouve dans les pesticides,
insecticides, fertilisants et herbicides.
Les risques liés à l’exposition varient suivant la
fréquence d’exécution du type de travail en ques-
tion. Pour réduire votre exposition à ces subs-
tances chimiques : travaillez dans un emplace-
ment bien aéré et avec des dispositifs de sécurité
approuvés, tels que les masques antipoussières
spécialement conçus pour ltrer les particules
microscopiques.
DESCRIPTION DES
PIÈCES
3
4
5
1
2
6
Fig.1
►1. Couvre-lames 2. Poignée de réglage de l'angle
3. Capuchon 4. Lames de cisaillement 5. Levier
coulissant 6. Poignée avant
ASSEMBLAGE
MISE EN GARDE :
Avant d’assembler ou de
régler l’équipement, coupez le moteur et retirez la
batterie. Dans le cas contraire, la machine pourrait
démarrer accidentellement et entraîner des blessures.
MISE EN GARDE : Déposez toujours l’équi-
pement avant de l’assembler ou de le régler.
Assembler ou régler l’équipement en le laissant
debout peut entraîner une grave blessure.
MISE EN GARDE : Respectez les mises en
garde et prenez les précautions du chapitre «
CONSIGNES DE SÉCURITÉ » et du manuel d’ins-
tructions de l’unité d’alimentation.
Assemblage de la tête
1. Retirezlecapuchondelatête.
1
Fig.2
►1. Capuchon
2.
Insérezletubedanslatêtedefaçonàcequeletroudansle
tubesoitalignéavecceluisurlatête.Commencezpasserrersolide-
mentlebouloncourt,puisserrezleboulonlongpourxerletube.
1
2
3
4
Fig.3
►1. Trou 2. Tube 3. Boulon (court) 4. Boulon (long)
NOTE : Lorsque vous serrez les boulons, appliquez
4,0 - 6,0 N•m de couple de serrage.

19 FRANÇAIS
Montage du tube de xation
ATTENTION : Après la pose, assurez-vous
toujours que le tube de xation est bien xé.
Encasdeposeincorrecte,laxationrisquedese
détacher de l’unité d’alimentation et d’entraîner une
blessure.
Montezletubedexationsurlegroupemoteur.
1. Retirezlecapuchon,àl’extrémitédutube.
2
1
Fig.4
►1. Tube 2. Capuchon
AVIS : Ne jetez pas le capuchon, car il est néces-
saire pour remiser l’accessoire.
2. Tournezlelevierverslaxation.
1
Fig.5
►1. Levier
3. Alignezlabrochesurlamarquedeèchede
l’unitéd’alimentation.Insérezletubejusqu’àcequele
bouton de libération surgisse.
Assurez-vousquelalignedepositionnementestàl’ex-
trémitédelamarquedeèchedel’unitéd’alimentation,
etquelamarquedeèchedel’unitéd’alimentationetla
marquedeèchedutubesontfaceàface.
1
2
3
4
5
Fig.6
►1. Bouton de libération 2.Marquedeèchede
l’unité d’alimentation 3. Broche 4. Ligne de position-
nement 5.Marquedeèchedutube
4. Tournez le levier vers l’unité d’alimentation.
1
Fig.7
►1. Levier
Assurez-vous que la surface du levier est parallèle au tube.
AVIS :
Ne serrez pas le levier sans avoir inséré le
tube de xation. Autrement, le levier risque de trop ser-
rer l’entrée de l’arbre d’entraînement et de l’endommager.
Pourretirerletube,tournezlelevierverslaxationettirez
surletubetoutenenfonçantleboutondelibération.
Fig.12
3
1
2
Fig.8
►1. Bouton de libération 2. Levier 3. Tube

20 FRANÇAIS
Pose ou retrait des lames de
cisaillement
ATTENTION : Lorsque vous remplacez les
lames de cisaillement, portez toujours des gants
de sorte que vos mains ne touchent pas directe-
ment les lames.
ATTENTION : Fixez le couvre-lames avant de
retirer ou de poser les lames de cisaillement.
AVIS :
Lorsque vous remplacez les lames de cisail-
lement, n’essuyez pas la graisse de la manivelle.
NOTE : Avant d’installer ou de retirer les lames de
cisaillement,dépliezlatêtedesortequ’ellesoitbien
droite par rapport au tube.
1. Fixez le couvre-lames aux lames de cisaillement.
1
Fig.9
►1. Couvre-lames
2. Placezlatêteàl’envers.
3.
Retirezles4boulonsàl’aidedelacléhexagonaleet
retirez le sous-couvercle, le couvercle et la plaque (grande).
1
3
2
4
Fig.10
►
1. Boulon 2. Sous-couvercle 3. Couvercle 4. Plaque (grande)
4. Tournez la manivelle avec un tournevis pour
écrousàfentedemanièreàcequelamanivellesoit
positionnée dans la direction adéquate, comme indiqué
danslagure.
1
Fig.11
►1. Manivelle
5. Retirez les 2 boulons.
1
Fig.12
►1. Boulon
Other manuals for EN422MP
2
Table of contents
Languages:
Other Makita Trimmer manuals

Makita
Makita UM600D User manual

Makita
Makita DUR187URF User manual

Makita
Makita dur365 User manual

Makita
Makita DUR181Z User manual

Makita
Makita DUX60 User manual

Makita
Makita UH7580 Manual

Makita
Makita DUH501 User manual

Makita
Makita UR012G User manual

Makita
Makita DUR368A User manual

Makita
Makita DBC260U User guide

Makita
Makita UH 4540, UH 5540, UH 6540 User manual

Makita
Makita DUR194 User manual

Makita
Makita EM3400U User manual

Makita
Makita UR101C User manual

Makita
Makita DUR141 User manual

Makita
Makita UR180D User manual

Makita
Makita XRU01 User manual

Makita
Makita DUH501 User manual

Makita
Makita DUR369N User manual

Makita
Makita RBC225 User guide