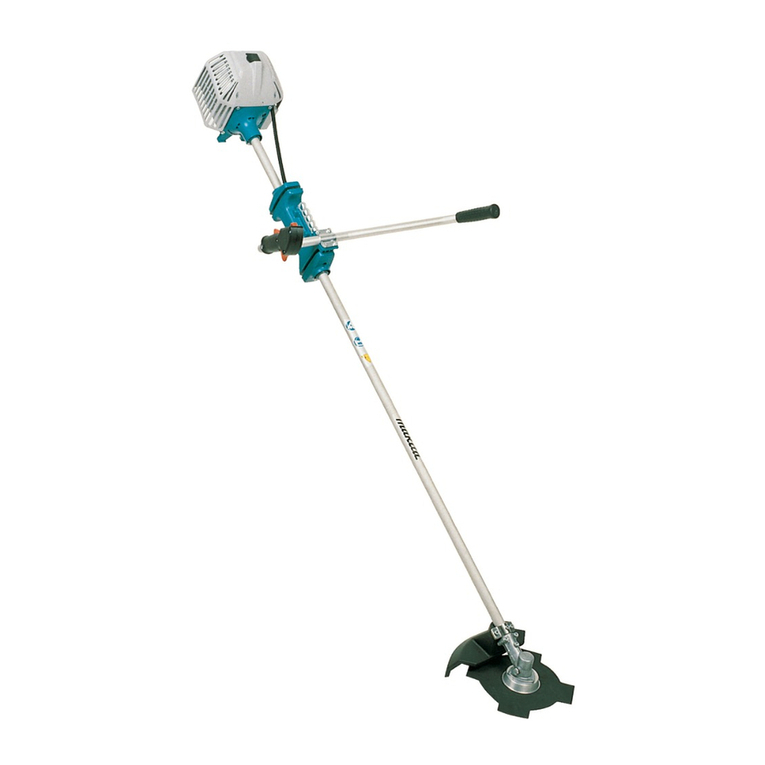
Makita EN424MP User manual

INSTRUCTION MANUAL
MANUEL D'INSTRUCTION
MANUAL DE INSTRUCCIONES
Ground Trimmer Attachment
Tête Faucheuse
Accesorio de Corte a Ras de Piso
EN424MP
IMPORTANT: Read Before Using.
IMPORTANT : Lire avant usage.
IMPORTANTE: Lea antes de usar.

2ENGLISH
ENGLISH (Original instructions)
SPECIFICATIONS
Model: EN424MP
Cutting width 330 mm (13")
Dimensions
(L x W x H)
820 mm x 350 mm x 191 mm (32-1/4" x 13-3/4" x 7-1/2")
Net weight 2.3 kg (5.1 lbs)
• Duetoourcontinuingprogramofresearchanddevelopment,thespecicationshereinaresubjecttochange
without notice.
• Specicationsmaydierfromcountrytocountry.
Approved power unit
Thisattachmentisapprovedtouseonlywiththefollow-
ing power unit(s):
• DUX60 Cordless multi function power head
• XUX01 Cordless multi function power head
• DUX18 Cordless multi function power head
• XUX02 Cordless multi function power head
• UX01G Cordless multi function power head
• GUX01 Cordless multi function power head
WARNING: Never use the attachment with
non-approved power unit. Non-approved combi-
nation may cause serious injury.
Intended use
Thisattachmentisdesignedforonlythepurposeoftrimming
grassesandweedsonthegroundinconjunctionwithan
approved power unit. Never use the attachment for the other
purpose.Abusingtheattachmentmaycauseseriousinjury.
SAFETY WARNINGS
Important safety instructions for
Cordless Grass Shear
WARNING: When using electric gardening
appliances, basic safety precautions should
always be followed to reduce the risk of re,
electric shock, and personal injury, including the
following:
READ ALL INSTRUCTIONS.
1. Avoid dangerous environment - Do not use
appliances in damp or wet locations.
2. Don’t Use In Rain.
3. Keep children away - All visitors should be kept
at a distance from work area.
4. Dress properly - Do not wear loose clothing or
jewelry.Theycanbecaughtinmovingparts.Use
of rubber gloves and substantial footwear is rec-
ommended when working outdoors. Wear protec-
tive hair covering to contain long hair.
5. Use Safety Glasses–Alwaysusefaceordust
maskifoperationisdusty.
6. Use Right Appliance - Do not use appliance for
anyjobexceptthatforwhichitisintended.
7. Avoid Unintentional Starting-Donotcarry
appliancewithngeronswitch.Besureswitchis
obeforeinsertingbatterypack.
8. Do not grasp the exposed cutting blades or
cutting edges when picking up or holding the
appliance.
9. Do not Force Appliance-Itwilldothejobbetter
andwithlesslikelihoodofariskofinjuryatthe
rate for which it was designed.
10. Do not Overreach - Keep proper footing and
balance at all times.
11.
Stay Alert-Watchwhatyouaredoing.Usecommon
sense.Donotoperateappliancewhenyouaretired.
12. Store Idle Appliances Indoors - When not in use,
appliancesshouldbestoredindoorsindry,and
high or locked-up place out of reach of children.
13. Maintain Appliance With Care - Keep cutting
edge sharp and clean for best performance and
toreducetheriskofinjury.Followinstructionsfor
lubricating and changing accessories. Keep han-
dlesdry,clean,andfreefromoilandgrease.
14. Check Damaged Parts - Before further use of the
appliance, a guard or other part that is damaged
shouldbecarefullycheckedtodeterminethat
itwilloperateproperlyandperformitsintended
function. Check for alignment of moving parts,
binding of moving parts, breakage of parts, mount-
ing,andanyotherconditionthatmayaectits
operation. A guard or other part that is damaged
shouldbeproperlyrepairedorreplacedbyan
authorized service center unless indicated else-
where in this manual.
15. Keep hands away from blades.
16. Do not use or charge appliance in rain, or in
wet locations.
17. Do not use battery-operated appliance in rain.
18.
Remove or disconnect battery before servicing,
cleaning or removing material from the appli-
ance.Suchpreventivesafetymeasuresreducethe
riskofstartingtheapplianceaccidentally.
19. Exercise care in handling batteries in order not
to short the battery with conducting materials
such as rings, bracelets, and keys.Thebattery
orconductormayoverheatandcauseburns.

3ENGLISH
20. Use safety equipment. Always wear eye pro-
tection.Dustmask,non-skidsafetyshoes,hard
hat, or hearing protection must be used for appro-
priate conditions.
21. Be aware that this appliance is always in an
operating condition, because it does not have
to be plugged into an electrical outlet.
22. Do not operate appliances in explosive atmo-
spheres, such as in the presence of ammable
liquids, gases, or dust. Appliances create sparks
whichmayignitethedustorfumes.
23. A battery operated appliance with integral
batteries or a separate battery pack must be
recharged only with the specied charger for
the battery.Achargerthatmaybesuitableforone
typeofbatterymaycreateariskofrewhenused
withanotherbattery.
24. Use battery operated appliance only with spe-
cically designated battery pack.Useofany
otherbatteriesmaycreateariskofre.
25. Remove adjusting keys or wrenches before
turning the appliance on.Awrenchorakeythat
is left attached to a rotating part of the appliance
mayresultinpersonalinjury.
26.
Do not use appliance if switch does not turn it
on or o. An appliance that cannot be controlled
with the switch is dangerous and must be repaired.
27.
Use only accessories that are recommended by
the manufacturer for your model. Accessories
thatmaybesuitableforoneappliancemaycreatea
riskofinjurywhenusedonanotherappliance.
28. Appliance service must be performed only by
qualied repair personnel. Service or mainte-
nanceperformedbyunqualiedpersonnelmay
resultinariskofinjury.
29. When servicing an appliance, use only identi-
cal replacement parts. Follow instructions in
the Maintenance section of this manual. Use of
unauthorized parts or failure to follow Maintenance
instructionsmaycreateariskofshockorinjury.
30. Before cutting grass, remove foreign matter
such as rocks and large sticks from the work
area. Be careful not to catch foreign matter
between blades, otherwise blades may be
jammed.Ifthishappens,switchtheapplianceo.
Then remove the obstruction from the blades.
31. When not in use, be sure to cover the blades
with blade cover.
32. If the blades stop moving due to the stuck of
foreign objects between the blades during
operation, switch o the tool and remove the
battery cartridge, and then remove the foreign
objects using tools such as pliers. Removing
theforeignobjectsbyhandmaycauseaninjury
forthereasonthatthebladesmaymoveinreac-
tiontoremovingtheforeignobjects.
33. During operation, keep bystanders or animals
at least 15 m (50 ft.) away from the tool. Stop
the tool as soon as someone approaches.
34. Hold the tool rmly when using the tool.
35. Avoid unintentional starting. Do not carry the
tool when the battery cartridge is installed
and with nger on the switch. Make sure that
the switch is o when installing the battery
cartridge.
36. When not in use, attach the blade cover to the
tool and store the tool indoors in dry, and high
locked-up place, out of reach of children.
37. When attaching or removing the blade cover,
be careful not to injure your hands.
38. Before operation, examine the work area for
wire fences, stones, or other solid objects.
They can damage the blades.
39. Check the hedges and bushes for foreign
objects, such as wire fences or hidden wiring
before operating the tool.
Battery tool use and care
1. Prevent unintentional starting. Ensure the
switch is in the o-position before connecting
to battery pack, picking up or carrying the
machine.Carryingthemachinewithyournger
on the switch or energizing machine that have the
switch on invites accidents.
2. Disconnect the battery pack from the machine
before making any adjustments, changing
accessories, or storing machine. Such preven-
tivesafetymeasuresreducetheriskofstartingthe
machineaccidentally.
3. Recharge only with the charger specied by
the manufacturer. A charger that is suitable for
onetypeofbatterypackmaycreateariskofre
whenusedwithanotherbatterypack.
4. Use machines only with specically desig-
nated battery packs.Useofanyotherbattery
packsmaycreateariskofinjuryandre.
5. When battery pack is not in use, keep it away
from other metal objects, like paper clips,
coins, keys, nails, screws or other small metal
objects, that can make a connection from one
terminal to another.Shortingthebatterytermi-
nalstogethermaycauseburnsorare.
6. Under abusive conditions, liquid may be
ejected from the battery; avoid contact. If con-
tact accidentally occurs, ush with water. If
liquid contacts eyes, seek medical help.Liquid
ejectedfromthebatterymaycauseirritationor
burns.
7. Do not use a battery pack or machine that is
damaged or modied. Damaged or modied
batteries may exhibit unpredictable behaviour
resulting in re, explosion or risk of injury.
8. Do not expose a battery pack or machine to
re or excessive temperature. Exposure to re
or temperature above 130°C (265°F) may cause
explosion.
9. Follow all charging instructions and do not
charge the battery pack or machine outside of
the temperature range specied in the instruc-
tions.Chargingimproperlyorattemperatures
outsideofthespeciedrangemaydamagethe
batteryandincreasetheriskofre.
10. Have servicing performed by a qualied repair
person using only identical replacement parts.
Thiswillensurethatthesafetyoftheproductis
maintained.
11. Do not modify or attempt to repair the machine
or the battery pack except as indicated in the
instructions for use and care.


4ENGLISH
Electrical and battery safety
1. Do not dispose of the battery(ies) in a re.
Thecellmayexplode.Checkwithlocalcodesfor
possible special disposal instructions.
2. Do not open or mutilate the battery(ies).
Releasedelectrolyteiscorrosiveandmaycause
damagetotheeyesorskin.Itmaybetoxicif
swallowed.
3. Do not charge battery in rain, or in wet
locations.
4. Do not charge the battery outdoors.
5. Do not handle charger, including charger plug,
and charger terminals with wet hands.
6. Avoid dangerous environment. Don't use the
machine in damp or wet locations or expose it
to rain. Water entering the machine will increase
the risk of electric shock.
WARNING: DO NOT let comfort or familiarity
with product (gained from repeated use) replace
strict adherence to safety rules for the subject
product. MISUSE or failure to follow the safety
rules stated in this instruction manual may cause
serious personal injury.
WARNING: Use of this product can create
dust containing chemicals which may cause
respiratory or other illnesses. Some examples of
these chemicals are compounds found in pesti-
cides, insecticides, fertilizers and herbicides.
Your risk from these exposures varies, depend-
ing on how often you do this type of work. To
reduce your exposure to these chemicals: work
in a well ventilated area, and work with approved
safety equipment, such as those dust masks that
are specially designed to lter out microscopic
particles.
PARTS DESCRIPTION
2
3
4
1
Fig.1
►1. Blade cover 2. Cap 3. Shear blades 4. Wheel
ASSEMBLY
WARNING: Before assembling or adjusting
the equipment, switch o the motor and remove
the battery cartridge.Otherwise,themachinemay
startunintentionallyandresultinaninjury.
WARNING: When assembling or adjusting
the equipment, always put it down. Assembling or
adjustingtheequipmentinanuprightpositionmay
resultinseriousinjury.
WARNING: Follow the warnings and precau-
tions in the chapter “SAFETY WARNINGS” and
the instruction manual of the power unit.
Assembling the attachment
1. Remove the cap from one end of the pipe on the
side with the plate.
2
1
Fig.2
►1. Cap 2. Plate
2. Loosen the bolt of the wheels with the hex wrench.
1
Fig.3
►1. Hex wrench

5ENGLISH
3. Align the plate on the pipe with the groove in
the wheels, and then attach the wheels to the pipe as
showninthegure.Securelytightenthebolttoxthe
wheels.
3
2
1
4
Fig.4
►1. Pipe 2. Wheel 3. Plate 4. Bolt
NOTICE: Be sure to attach the wheels so that the
plate is engaged with the wheels.
4. Remove the cap from the attachment.
1
Fig.5
►1. Cap
5. Attach the attachment to the pipe so that the hole
on the pipe is aligned with the hole on the attachment.
Securelytightentheshortboltrst,andthentightenthe
longbolttoxthepipe.
1
2
3
Fig.6
►1. Pipe 2. Bolt (short) 3. Bolt (long)
NOTE:Whentighteningthebolts,apply4.0-6.0N•m
astighteningtorque.
Mounting the attachment pipe
CAUTION: Always check that the attachment
pipe is secured after installation. Improper instal-
lationmaycausetheattachmentfallingofromthe
powerunitandcausepersonalinjury.
Mount the attachment pipe to the power unit.
1. Remove the cap from the end of the pipe.
2
1
Fig.7
►1. Pipe 2. Cap
NOTICE: Do not dispose of the cap since the cap
is necessary for storing the attachment.

6ENGLISH
2. Turn the lever toward the attachment.
1
Fig.8
►1. Lever
3. Align the pin with the arrow mark on the power
unit. Insert the pipe until the release button pops up.
Make sure that the position line is on the tip of the arrow
mark on the power unit, and the arrow mark on the
power unit and the arrow mark on the pipe are facing
each other.
1
2
3
4
5
Fig.9
►1. Release button 2. Arrow mark on the power unit
3. Pin 4. Position line 5. Arrow mark on the pipe
4. Turn the lever toward the power unit.
1
Fig.10
►1. Lever
Make sure that the surface of the lever is parallel to the
pipe.
NOTICE: Do not tighten the lever without the
attachment pipe inserted.Otherwisethelevermay
tighten the entrance of the drive shaft too much and
damage it.
To remove the pipe, turn the lever toward the attach-
ment and pull the pipe out while pressing down the
release button.
Fig.12
3
1
2
Fig.11
►1. Release button 2. Lever 3. Pipe
Removing or attaching the blade
cover
Releasethelatchesofthebladecoverbypullingthem,
and then open the blade cover.
1
Fig.12
►1. Latch
When attaching the blade cover to the shear blades,
make sure that the blade cover is closed and both
latchesarexedsecurely.

7ENGLISH
Installing or removing the shear
blades
CAUTION: When replacing the shear blades,
always wear gloves so that your hands do not
directly contact the blades.
CAUTION: Attach the blade cover before
removing or installing the shear blades.
NOTICE: When replacing the shear blades, do
not wipe o grease from the crank.
1. Place the shear blades on the blade cover.
1
Fig.13
►1. Blade cover
2. Turn the shaft so that the upper blade and lower
bladearepositionedalternately.
1
Fig.14
►1. Shaft
3. Close the blade cover, and then place the attach-
ment upside down.
4. Remove 4 bolts with the hex wrench and remove
the cover.
1
2
Fig.15
►1. Bolt 2. Cover
5. Remove the shear blades.
Fig.16

8ENGLISH
6. Turn the crank with the slotted screwdriver so that
the crank is positioned in the direction as shown in the
gure.
1
Fig.17
►1. Crank
7. Remove the blade cover from the shear blades,
and then place the new shear blades on the blade
cover.
8. Align the holes of the upper shear blade and lower
shearbladeasshowninthegure.
1
Fig.18
►1. Hole
9. Close the blade cover, and then insert the bolt
removed in step 4 into the hole of the blade cover to
temporarilyxtheshearblades.
1
Fig.19
►1. Bolt
10. Applyasmallamountofgreasetotheperipheryof
the crank.
11. Attach the shear blades to the attachment.
Fig.20

9ENGLISH
12. Attach the cover, and then tighten 3 bolts. Remove
the bolt inserted into the blade cover in step 9, and then
tighten the bolt.
1
2
Fig.21
►1. Bolt 2. Cover
NOTICE: If the shear blades do not operate prop-
erly, the blades are not engaging the crank prop-
erly. Remove the blades and install them again.
NOTICE: If the parts other than the shear blades
such as the crank are worn out, ask Makita
Authorized Service Centers for parts replacement
or repairs.
FUNCTIONAL
DESCRIPTION
CAUTION: Always be sure that the tool is
switched o and the battery cartridge is removed
before adjusting or checking function on the tool.
Adjusting the cutting angle
CAUTION: Always be sure that the tool is
switched o before adjusting the cutting angle.
Theangleoftheattachmentcanbeadjustedbychang-
ing the position of the wheels. Loosen the bolt on the
wheels, then move the wheels to the desired position,
andthensecurelytightenthebolttoxthewheels.
1
Fig.22
►1. Wheel
NOTICE: Make sure that the plate on the pipe is
engaged with the wheels.

10 ENGLISH
OPERATION
WARNING: Follow the warnings and precau-
tions in the chapter “SAFETY WARNINGS” and
the instruction manual of the power unit.
Operating the tool
WARNING: Keep hands away from shear
blades.
WARNING: Be extremely careful to maintain
control of the tool at all times. Do not allow the
tool to be deected toward you or anyone in the
work vicinity.Failuretokeepcontrolofthetool
couldresultinseriousinjurytothebystanderandthe
operator.
WARNING: Before shearing, clear away sticks
and stones from the shearing area.
Fig.23
CAUTION: Avoid operating the tool in very
hot weather as much as practicable. When operat-
ing the tool, be careful of your physical condition.
CAUTION: Be careful not to accidentally
contact a metal fence or other hard objects while
trimming.Theshearbladesmaybreakandcause
aninjury.
CAUTION: Overreaching with the tool, partic-
ularly from a ladder, is extremely dangerous. Do
notworkwhilestandingonanythingwobblyorinrm.
NOTICE: Do not cut down dead trees or similar
hard objects.Doingsomaydamagethetool.
NOTICE: Do not use the tool in a way that causes
the motor to stop or to rotate extremely slowly.
NOTICE: Do not attempt to cut thick branches.
NOTICE: Do not allow the shear blades to con-
tact the ground during operation. The blades will
be dulled, causing poor performance.
NOTICE: Do not trim the wet grass or foliage of
small trees.
Holdthetoolwithbothhandsbyholdingthefronthan-
dle and the rear grip of the power unit.
1
2
Fig.24
►1.Fronthandle2. Rear grip
With the wheels in contact with the ground, pull the
switchtriggerwhilepressingthelock-olever,andthen
move the tool forward.
Fig.25
When trimming around curbs, fences or trees, move the
tool along them. Be careful that the blades do not come
into contact with them.
MAINTENANCE
WARNING: Before inspecting or maintaining
the equipment, switch o the motor and remove
the battery cartridge.Otherwise,themachinemay
startunintentionallyandresultinseriousinjury.
WARNING: When inspecting or maintaining
the equipment, always put it down. Assembling or
adjustingtheequipmentinanuprightpositionmay
resultinseriousinjury.
WARNING: Follow the warnings and precau-
tions in the chapter “SAFETY WARNINGS” and
the instruction manual of the power unit.
CAUTION: Wear gloves when performing the
inspection or maintenance.

11 ENGLISH
NOTICE: Never use gasoline, benzine, thinner,
alcohol or the like. Discoloration, deformation or
cracks may result.
TomaintainproductSAFETYandRELIABILITY,
repairs,anyothermaintenanceoradjustmentshould
beperformedbyMakitaAuthorizedorFactoryService
Centers,alwaysusingMakitareplacementparts.
Cleaning the tool
Cleanthetoolbywipingodustwithadryclothorone
dippedinsoapywaterandwrungout.
NOTICE: Never use gasoline, benzine, thinner,
alcohol or the like. Discoloration, deformation or
cracks may result.
Shear blade maintenance
Before the operation or once per hour during operation,
applylow-viscosityoil(machineoil,orspray-typelubri-
cating oil) to the shear blades.
Fig.26
After operation, remove dust from both sides of the
shearbladeswithawiredbrush,wipeitowithacloth
andthenapplylow-viscosityoil(machineoil,orspray-
typelubricatingoil)totheshearblades.
Fig.27
NOTICE: Do not wash the shear blades in water.
Doingsomaycauserustordamagetothetool.
NOTICE: Dirt and corrosion cause excessive
blade friction and shorten the operating time per
battery charge.
Storage
Attach the blade cover to the shear blades so that the
blades are not exposed. Store the tool out of the reach
of children. Store the tool in a place not exposed to
moisture or rain.
When storing the attachment separated from the power
unit, put the cap onto the end of the pipe.
Fig.28
Lubricating moving parts
NOTICE: Follow the instruction of the frequency
and amount of grease supplied.Otherwiseinsu-
cientlubricationmaydamagemovingparts.
Drive axle:
Applygrease(MakitagreaseNNo.2orequivalent)
every30hoursofoperation.
Fig.29
NOTE:GenuineMakitagreasemaybepurchased
fromyourlocalMakitadealer.

12 ENGLISH
Grease lubrication
Interval of lubrication:Every50operatinghours
1. Remove the shear blades from the attachment.
2. Applygreasetotheinnerperipheryoftheholes
ontheshearblades(Approximately1.5g(0.05oz)asa
guide).
1
Fig.30
►1. Hole
3. Install the shear blades to the attachment.
Grinding the shear blades
NOTICE: If the shear blades have considerably
deformed by grinding, replace the shear blades
with new ones.
1. Installthebatterycartridgetothetool.
2. Turn on and start the tool so that the upper blade
andlowerbladearepositionedalternately.
Fig.31
3. Turnothetoolandremovethebatterycartridge
from the tool.
4. Settheangleofaleto45°,andgrindtheupper
bladefrom3directionswiththele.
2
1
Fig.32
►(1)File(2)45°
CAUTION: Before grinding the shear blades,
make sure that the tool is switched o and the
battery cartridge is removed from the tool.
5. Place the tool upside down, and then remove the
burrs from the shear blades with the dressing stone.
1
Fig.33
►1. Dressing stone
6. Settheangleoftheleto45°,andgrindthelower
bladefrom3directionswiththele.
7. Return the tool to normal position, and then
remove the burrs from the shear blades with the dress-
ing stone.

13
TROUBLESHOOTING
Beforeaskingforrepairs,conductyourowninspectionrst.Ifyoundaproblemthatisnotexplainedinthemanual,
donotattempttodismantlethetool.Instead,askMakitaAuthorizedServiceCenters,alwaysusingMakitareplace-
ment parts for repairs.
State of abnormality Probable cause (malfunction) Remedy
Motor does not start. -Refer to the instruction manual of the power unit.
Motor stops soon. -Refer to the instruction manual of the power unit.
Motor speed does not increase. -Refer to the instruction manual of the power unit.
Shear blades do not move:
stopthemachineimmediately!
Foreignobjectsarecaughtbetweenthe
shear blades.
Switchothetoolandremovethebatterycartridge,
andthenremovetheforeignobjectsusingtools
such as pliers.
Thedrivesystemdoesnotwork
correctly.
Askyourlocalauthorizedservicecenterforrepair.
Abnormal vibration:
stopthemachineimmediately!
Shear blades are broken, bent or worn. Replace the shear blades.
Thedrivesystemdoesnotwork
correctly.
Askyourlocalauthorizedservicecenterforrepair.
Shear blades and motor cannot stop:
Removethebatteryimmediately!
Electricmalfunction. Removethebatteryandaskyourlocalauthorized
service center for repair.
OPTIONAL
ACCESSORIES
CAUTION: These accessories or attachments
are recommended for use with your Makita
machine specied in this manual.Theuseofany
other accessories or attachments might present a risk
ofinjurytopersons.Onlyuseaccessoryorattach-
ment for its stated purpose.
Ifyouneedanyassistanceformoredetailsregard-
ingtheseaccessories,askyourlocalMakitaService
Center.
• Shearbladeassembly
• Makitagenuinebatteryandcharger
NOTE:Someitemsinthelistmaybeincludedinthe
productpackageasstandardaccessories.Theymay
dierfromcountrytocountry.
ENGLISH

14 FRANÇAIS
FRANÇAIS (Mode d’emploi original)
SPÉCIFICATIONS
Modèle : EN424MP
Largeur de coupe 330mm(13″)
Dimensions
(L x P x H)
820mmx350mmx191mm(32-1/4″x13-3/4″x7-1/2″)
Poids net 2,3 kg (5,1 lbs)
• Étantdonnél’évolutionconstantedenotreprogrammederechercheetdedéveloppement,lesspécications
contenuesdanscemanuelsontsujettesàmodicationsanspréavis.
• Lesspécicationspeuventvariersuivantlespays.
Unité d’alimentation approuvée
Cettexationestapprouvéeuniquementpourl’utilisa-
tion avec les unités d’alimentation suivantes :
• Moteurmulti-fonctionssanslDUX60
• Moteurmulti-fonctionssanslXUX01
• Moteurmulti-fonctionssanslDUX18
• Moteurmulti-fonctionssanslXUX02
• Moteurmulti-fonctionssanslUX01G
• Moteurmulti-fonctionssanslGUX01
MISE EN GARDE : N’utilisez jamais la xa-
tion avec une unité d’alimentation non approuvée.
Une combinaison non approuvée peut entraîner
une grave blessure.
Usage prévu
Cettexationestconçueuniquementpourcouper
l’herbe et les adventices du sol, en combinaison avec
uneunitéd’alimentationapprouvée.N’utilisezjamaisla
xationàd’autresns.Malmenerlaxationpeutentraî-
ner des graves blessures.
CONSIGNES DE
SÉCURITÉ
Consignes de sécurité importantes
pour le Taille-Herbes sans Fil
MISE EN GARDE : Pour réduire les risques
d’incendie, de choc électrique et de blessure lors
de l’utilisation des appareils électriques de jardi-
nage, il importe de toujours prendre des mesures
de sécurité élémentaires, dont les suivantes :
VEUILLEZ LIRE TOUTES LES
INSTRUCTIONS.
1. Évitez les environnements dangereux. -
N’utilisez pas les appareils dans les endroits
humides ou mouillés.
2. Évitez l’utilisation sous la pluie.
3. Gardez les enfants à l’écart. - Tous les visiteurs
doiventêtregardésàunebonnedistancedela
zone de travail.
4. Portez des vêtements adéquats. - Ne portez ni
vêtementsamplesnibijoux.Ilspeuventêtrehap-
pés par les pièces en mouvement. L’utilisation de
gants en caoutchouc et de chaussures robustes
estrecommandéelorsdestravauxàl’extérieur.Si
voscheveuxsontlongs,recouvrez-lesd’unletde
protection.
5. Portez des lunettes de sécurité - Si le travail
génèredelapoussière,porteztoujoursunécran
facialouunmasqueanti-poussières.
6. Utilisez le bon appareil - N’utilisez pas l’appareil
poureectueruntravailpourlequeliln’apasété
conçu.
7. Évitez le démarrage accidentel - Ne transpor-
tez pas l’appareil avec le doigt sur l’interrupteur.
Pensezàcouperlecontactavantd’insérerla
batterie.
8. Lorsque vous prenez ou tenez l’appareil, ne
le saisissez pas par les lames de coupe dénu-
dées ou par les bords tranchants.
9. Ne forcez pas l’appareil-Ileectuerauntravail
demeilleurequalitéetavecmoinsderisquesde
blessures’ilestutiliséaurégimepourlequelila
étéconçu.
10. Ne vous étirez pas trop - Assurez-vous d’une
bonnepriseausoletd’unebonnepositiond’équi-
libre en tout temps.
11. Restez vigilant-Soyezattentifàvosgestes.
Faitespreuvedebonsens.N’utilisezpasl’appa-
reillorsquevousêtesfatigué.
12. Après l’utilisation, rangez les appareils à l’inté-
rieur-Lorsqu’ilsnesontpasutilisés,lesappareils
doiventêtrerangésàl’intérieurdansunemplace-
ment sec et élevé ou verrouillé, hors de la portée
des enfants.
13. Prenez bien soin de l’appareil - Gardez le tran-
chantaûtéetproprepourassurerunrendement
optimaletréduirelesrisquesdeblessure.Suivez
les instructions concernant le graissage et le
remplacement des accessoires. Maintenez les
poignées sèches, propres et exemptes d’huile ou
de graisse.

15 FRANÇAIS
14. Vériez les pièces endommagées - Avant de
poursuivre l’utilisation de l’appareil, il est impé-
ratifdevériersoigneusementsiunprotecteur
ou autre pièce endommagé fonctionne bien et
remplitlafonctionpourlequelilaétéconçu.
Assurez-vousquelespiècesmobilesnesontpas
désalignéesoucoincées,etqu’aucunepiècen’est
cassée, mal montée ou n’a subi des dommages
pouvantaectersonfonctionnement.Unprotec-
teur ou toute autre pièce endommagé doit être
adéquatementréparéouremplacéparuncentre
de service après-vente agréé, sauf indication
contraire dans le présent manuel.
15. Gardez les mains à l’écart des lames.
16. Éviter d’utiliser ou de charger l’appareil sous
la pluie et dans les endroits humides.
17.
N’utilisez pas d’appareil à batterie sous la pluie.
18. Retirez ou déconnectez la batterie avant de
réparer l’appareil, de le nettoyer ou d’en retirer
un matériau. Ces mesures préventives de sécu-
ritéréduisentlesrisquesdedémarrageaccidentel
de l’appareil.
19. Manipulez les batteries soigneusement, pour
ne pas les court-circuiter avec des matériaux
conducteurs tels que les anneaux/bagues,
bracelets et clés. La batterie ou le conducteur ris-
queraitdesurchaueretdecauserdesbrûlures.
20. Utilisez des dispositifs de sécurité. Portez
toujours une protection oculaire. Selon les
conditions de travail, vous devez également porter
unmasqueantipoussières,deschaussuresde
travailantidérapantes,uncasqueouuneprotec-
tion auditive.
21. N’oubliez pas que cet appareil est toujours en
état de marche, car il n’a pas à être branché
sur une prise de courant.
22. N’utilisez pas les appareils dans des atmos-
phères explosives, telles que celles contenant
des liquides, gaz ou poussières inam-
mables. Les appareils produisent des étincelles
quipeuventmettrefeuauxpoussièresouaux
émanations.
23.
Les appareils alimentés par des batteries inté-
grées ou des batteries séparées ne doivent être
rechargés qu’avec le chargeur spécié pour
lesdites batteries.Unchargeuradéquatpourun
certaintypedebatteriepeutprésenterunrisque
d’incendie s’il est utilisé avec une autre batterie.
24. N’utilisez les appareils alimentés par batterie
qu’avec les batteries spéciquement dési-
gnées. L’utilisation de toutes autres batteries peut
présenterunrisqued’incendie.
25. Avant de mettre l’appareil en marche, retirez
les clés de réglage et autres clés. Une clé lais-
sée en place sur une pièce rotative de l’appareil
peutentraîneruneblessure.
26. N’utilisez pas l’appareil si son interrupteur ne
l’allume pas ou ne l’éteint pas.Toutappareilqui
nepeutêtrecommandéàl’aidedesoninterrup-
teur est dangereux et doit être réparé.
27. Utilisez uniquement les accessoires recom-
mandés par le fabricant pour votre modèle.
Lesaccessoiresadéquatspouruncertainappareil
peuventprésenterunrisquedeblessures’ilssont
utilisés sur un autre appareil.
28. La réparation de l’appareil ne doit être eec-
tuée que par le personnel de réparation quali-
é. L’exécution des réparations ou de l’entretien
parunpersonnelnonqualiépeutentraînerun
risquedeblessure.
29. Pour réparer un appareil, utilisez uniquement
des pièces de rechange identiques aux pièces
originales. Suivez les instructions de la sec-
tion Entretien du présent manuel. L’utilisation
de pièces non autorisées ou le non-respect des
instructionsd’entretienpeutprésenterunrisque
dedéchargeélectriqueoudeblessure.
30. Avant de couper l’herbe, enlevez de la zone de
travail les corps étrangers tels que pierres et
gros bâtons. Évitez que des corps étrangers
ne pénètrent entre les lames, autrement ils
risquent de bloquer les lames. Le cas échéant,
éteignezl’appareil.Retirezensuitel’objetqui
bloqueleslames.
31. Après l’utilisation, veillez à recouvrir les lames
du couvre-lames.
32. Si les lames cessent de bouger en raison de la
présence de corps étrangers entre les lames
pendant l’utilisation, éteignez l’outil et retirez
la batterie, puis enlevez les corps étrangers
à l’aide d’une pince ou autre outil.Enretirant
lescorpsétrangersaveclamain,vousrisquezde
vous blesser car les lames peuvent bouger lors du
retrait des corps étrangers.
33. Pendant l’exécution du travail, ne laissez pas
les curieux ou les animaux approcher à moins
de 15 m (50 pi) de l’outil. Arrêtez l’outil dès que
quelqu’un approche.
34. Tenez l’outil fermement pendant l’utilisation.
35. Évitez le démarrage accidentel. Ne transportez
pas l’outil avec la batterie installée et le doigt
sur l’interrupteur. Avant d’installer la batterie,
assurez-vous que l’interrupteur est en position
d’arrêt.
36. Lorsque vous n’utilisez pas l’outil, xez-y le
couvre-lames et rangez l’outil à l’intérieur,
dans un emplacement sec, élevé, verrouillé et
hors de portée des enfants.
37. Lors de la pose ou du retrait du couvre-lames,
prenez soin de ne pas vous blesser les mains.
38. Avant l’exécution du travail, vériez l’absence
de clôtures grillagées et de pierres ou autres
objets solides dans la zone de travail. Ils
peuvent endommager les lames.
39. Avant d’utiliser l’outil, assurez-vous qu’il n’y a
pas de corps étrangers tels que clôtures gril-
lagées ou câblage dissimulé dans les haies et
buissons.
Utilisation et entretien de l’outil à batterie
1. Prévenez le démarrage accidentel. Assurez-
vous que l’interrupteur est en position d’arrêt
avant de connecter la machine à la batterie,
de la saisir ou de la transporter. Transporter
la machine avec le doigt sur l’interrupteur ou la
mettresoustensionalorsquesoninterrupteur
est en position de marche ouvre la porte aux
accidents.

16 FRANÇAIS
2. Retirez la batterie de la machine avant de pro-
céder à des réglages, au remplacement d’ac-
cessoires ou au rangement de la machine. De
telles mesures de sécurité préventives réduisent
lerisquededémarrageaccidenteldelamachine.
3. Ne la rechargez qu’avec le chargeur spécié
par le fabricant.Unchargeurconçupourun
certaintypedebatterierisquededéclencherun
incendie s’il est utilisé avec une autre batterie.
4. N’utilisez les machines qu’avec leurs batteries
spéciques.Lesautresbatteriesrisqueraientde
vousblesseroudeprovoquerunincendie.
5. Lorsque la batterie n’est pas utilisée, tenez-la à
distance des objets métalliques tels que trom-
bones, pièces de monnaie, clés, clous, vis ou
autres petits objets métalliques, conducteurs
potentiels entre une borne et une autre. Un
court-circuit entre les bornes de la batterie peut
provoquerdesbrûluresouunincendie.
6. Dans des conditions d’utilisation inadéquates
de la batterie, il peut y avoir fuite d’électrolyte;
évitez tout contact. En cas de contact acciden-
tel, rincez avec beaucoup d’eau. Si du liquide
entre en contact avec les yeux, consultez un
médecin.Leliquidequigicledelabatteriepeut
provoquerdesirritationsoudesbrûlures.
7. N’utilisez pas une batterie ou une machine
endommagée ou modiée. Les batteries
endommagées ou modiées peuvent se com-
porter de manière imprévisible et entraîner
un incendie, une explosion ou un risque de
blessure.
8. N’exposez pas une batterie ou une machine
au feu ou à une température excessive.
L’exposition au feu ou à une température
supérieure à 130 °C (265 °F) peut provoquer
une explosion.
9. Suivez toutes les instructions de charge et ne
chargez pas la batterie ou la machine à l’exté-
rieur de la plage de température spéciée dans
les instructions.Eectuerlachargedemanière
inadéquateouàunetempératurehorsdelaplage
spéciéepeutendommagerlabatterieetfaire
augmenterlerisqued’incendie.
10. L’entretien doit être coné à un réparateur qua-
lié et n’utilisant que des pièces de rechange
identiques aux pièces d’origine. Cela assurera
le maintien du produit dans un état sécuritaire.
11. Ne modiez pas et n’essayez pas de réparer
la machine ou la batterie autrement que tel
qu’indiqué dans les instructions d’utilisation
et d’entretien.
Consignes de sécurité sur l’alimentation électrique
et la batterie
1. Ne jetez pas la/les batterie(s) au feu. L’élément
pourraitexploser.Vériezlaréglementationde
votre région pour savoir s’il existe des directives
particulières sur l’élimination.
2. N’ouvrez pas et n’endommagez pas la/les
batterie(s).L’électrolytequis’échappeestcorrosif
etpeutprovoquerdesdommagesauxyeuxouà
lapeau.Ilpeutêtretoxiques’ilestingéré.
3. Ne chargez pas la batterie sous la pluie ou
dans les emplacements humides.
4. Ne chargez pas la batterie à l’extérieur.
5. Ne manipulez pas le chargeur, y compris sa
che et ses bornes, avec les mains mouillées.
6. Évitez les environnements dangereux.
N’utilisez pas la machine dans les endroits
humides ou mouillés, et ne l’exposez pas à la
pluie.L’inltrationd’eaudanslamachineaccroît
lerisquededéchargeélectrique.
MISE EN GARDE : NE vous laissez PAS
tromper (au l d’une utilisation répétée) par un
sentiment d’aisance ou de familiarité avec le
produit en négligeant les consignes de sécurité
qui accompagnent le produit. UNE UTILISATION
INCORRECTE ou le non-respect des règles de
sécurité énoncées dans le présent manuel d’ins-
tructions peut provoquer des blessures graves.
MISE EN GARDE : L’utilisation de ce pro-
duit peut générer des poussières contenant des
substances chimiques, lesquelles peuvent causer
des problèmes respiratoires ou autres maladies.
Parmi ces substances chimiques gurent les
composés que l’on retrouve dans les pesticides,
insecticides, fertilisants et herbicides.
Les risques liés à l’exposition varient suivant la
fréquence d’exécution du type de travail en ques-
tion. Pour réduire votre exposition à ces subs-
tances chimiques : travaillez dans un emplace-
ment bien aéré et avec des dispositifs de sécurité
approuvés, tels que les masques antipoussières
spécialement conçus pour ltrer les particules
microscopiques.
DESCRIPTION DES
PIÈCES
2
3
4
1
Fig.1
►1. Couvre-lames 2. Capuchon 3. Lames de cisaille-
ment 4. Roue

17 FRANÇAIS
ASSEMBLAGE
MISE EN GARDE : Avant d’assembler ou
de régler l’équipement, coupez le moteur et reti-
rez la batterie. Dans le cas contraire, la machine
pourraitdémarreraccidentellementetentraînerdes
blessures.
MISE EN GARDE : Déposez toujours l’équi-
pement avant de l’assembler ou de le régler.
Assemblerouréglerl’équipementenlelaissant
deboutpeutentraînerunegraveblessure.
MISE EN GARDE : Respectez les mises en
garde et prenez les précautions du chapitre «
CONSIGNES DE SÉCURITÉ » et du manuel d’ins-
tructions de l’unité d’alimentation.
Assemblage de l’accessoire
1. Retirez le capuchon d’une extrémité du tube sur le
côtéaveclaplaque.
2
1
Fig.2
►1. Capuchon 2.Plaque
2. Desserrezleboulondesrouesàl’aided’uneclé
hexagonale.
1
Fig.3
►1. Clé hexagonale
3. Alignezlaplaquesurletuyauaveclarainuredans
lesrouesetxezlesrouesautube,commeillustré
danslagure.Serrezsolidementleboulonpourxer
les roues.
3
2
1
4
Fig.4
►1. Tube 2. Roue 3.Plaque4. Boulon
AVIS : Assurez-vous de xer les roues de
manière à ce que la plaque soit engagée avec les
roues.
4. Retirez le capuchon de l’accessoire.
1
Fig.5
►1. Capuchon

18 FRANÇAIS
5. Fixezl’accessoireautubedemanièreàcequele
tuyausoitalignéavecletrousurl’accessoire.Serrez
solidement le boulon court d’abord, puis le boulon long
pourxerletube.
1
2
3
Fig.6
►1. Tube 2. Boulon (court) 3. Boulon (long)
NOTE :Lorsquevousserrezlesboulons,appliquez
4,0 - 6,0 N•m de couple de serrage.
Montage du tube de xation
ATTENTION : Après la pose, assurez-vous
toujours que le tube de xation est bien xé.
Encasdeposeincorrecte,laxationrisquedese
détacherdel’unitéd’alimentationetd’entraînerune
blessure.
Montezletubedexationsurlegroupemoteur.
1. Retirezlecapuchon,àl’extrémitédutube.
2
1
Fig.7
►1. Tube 2. Capuchon
AVIS : Ne jetez pas le capuchon, car il est néces-
saire pour remiser l’accessoire.
2. Tournezlelevierverslaxation.
1
Fig.8
►1. Levier
3. Alignezlabrochesurlamarquedeèchede
l’unitéd’alimentation.Insérezletubejusqu’àcequele
bouton de libération surgisse.
Assurez-vousquelalignedepositionnementestàl’ex-
trémitédelamarquedeèchedel’unitéd’alimentation,
etquelamarquedeèchedel’unitéd’alimentationetla
marquedeèchedutubesontfaceàface.
1
2
3
4
5
Fig.9
►1. Bouton de libération 2.Marquedeèchede
l’unité d’alimentation 3. Broche 4. Ligne de position-
nement 5.Marquedeèchedutube
4. Tournez le levier vers l’unité d’alimentation.
1
Fig.10
►1. Levier

19 FRANÇAIS
Assurez-vousquelasurfacedulevierestparallèleau
tube.
AVIS : Ne serrez pas le levier sans avoir inséré
le tube de xation.Autrement,lelevierrisquede
tropserrerl’entréedel’arbred’entraînementetde
l’endommager.
Pourretirerletube,tournezlelevierverslaxation
ettirezsurletubetoutenenfonçantleboutonde
libération.
Fig.12
3
1
2
Fig.11
►1. Bouton de libération 2. Levier 3. Tube
Retrait ou pose du couvre-lames
Libérezlesloquetsducouvre-lamesenlestirant,puis
ouvrez le couvre-lames.
1
Fig.12
►1.Loquet
Lorsdelaxationducouvre-lamesauxlamesdecisail-
lement,assurez-vousquelecouvre-lamesestferméet
quelesdeuxloquetssontsolidementxés.
Pose ou retrait des lames de
cisaillement
ATTENTION : Lorsque vous remplacez les
lames de cisaillement, portez toujours des gants
de sorte que vos mains ne touchent pas directe-
ment les lames.
ATTENTION : Fixez le couvre-lames avant de
retirer ou de poser les lames de cisaillement.
AVIS : Lorsque vous remplacez les lames de
cisaillement, n’essuyez pas la graisse de la
manivelle.
1. Placez les lames de cisaillement sur le
couvre-lames.
1
Fig.13
►1. Couvre-lames
2. Tournezl’arbredesortequelalamesupérieureet
la lame inférieure soient disposées en alternance.
1
Fig.14
►1. Arbre

20 FRANÇAIS
3. Fermezlecouvre-lames,puisplacezl’accessoire
àl’envers.
4. Retirez les 4 boulons avec la clé hexagonale et
enlevez le couvercle.
1
2
Fig.15
►1. Boulon 2. Couvercle
5. Retirez les lames de cisaillement.
Fig.16
6. Tournezlamanivelleàl’aided’untournevispour
écrousàfentedemanièreàcequelamanivellesoit
positionnéedansladirectionillustréedanslagure.
1
Fig.17
►1. Manivelle
7. Retirez le couvre-lames des lames de cisaille-
ment, puis placez les nouvelles lames de cisaillement
sur le couvre-lames.
8. Alignez les trous dans la lame de cisaillement
supérieure et la lame de cisaillement inférieure, comme
illustrédanslagure.
1
Fig.18
►1. Trou
Other manuals for EN424MP
2
Table of contents
Languages:
Other Makita Trimmer manuals

Makita
Makita 3711 User manual

Makita
Makita DUR189 User manual

Makita
Makita UH4570 User manual

Makita
Makita UH3000DW User manual

Makita
Makita DUH523 User manual

Makita
Makita UH200D User manual

Makita
Makita DUR194 User manual

Makita
Makita RT0700C User manual

Makita
Makita DUN500W User manual

Makita
Makita DRT50 User manual

Makita
Makita DUH604S User manual

Makita
Makita LXT XRU16 Series User manual

Makita
Makita RBC220 User manual

Makita
Makita UR014G User manual

Makita
Makita DUH483 User manual

Makita
Makita UR100D User manual

Makita
Makita DRT50ZJX9 User manual

Makita
Makita UN460WD User manual

Makita
Makita RT0700C User manual

Makita
Makita EM408MP User guide