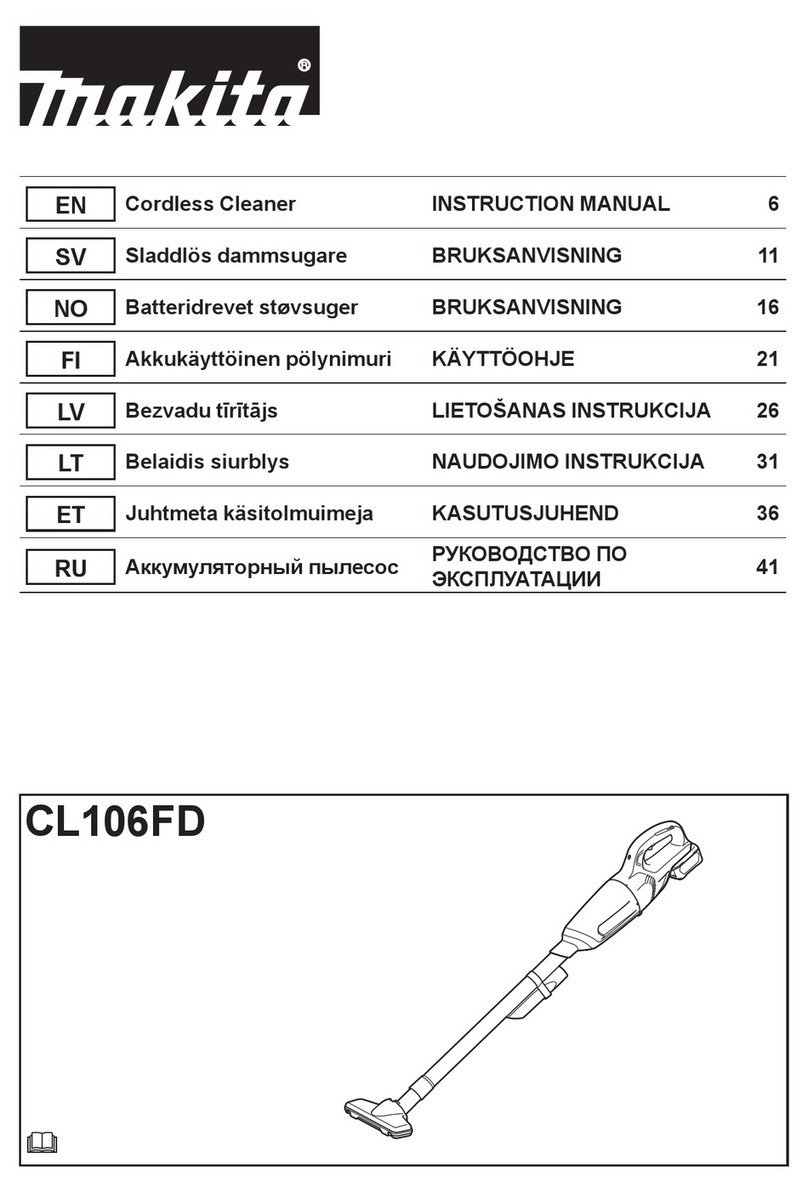
Makita CL108FD User manual

CL108FD
EN Cordless Cleaner INSTRUCTION MANUAL 8
FR Aspirateur sans Fil MANUEL D’INSTRUCTIONS 14
DE Akku-Staubsauger BETRIEBSANLEITUNG 21
IT Aspiratore a batteria ISTRUZIONI PER L’USO 28
NL Accustofzuiger GEBRUIKSAANWIJZING 35
ES Aspiradora Inalámbrica MANUAL DE
INSTRUCCIONES 42
PT Aspirador de pó a bateria MANUAL DE INSTRUÇÕES 49
DA Akku støvsuger BRUGSANVISNING 56
EL Φορητή σκούπα ΕΓΧΕΙΡΙΔΙΟ ΟΔΗΓΙΩΝ 62
TR Akülü Süpürge KULLANMA KILAVUZU 69

Fig.1
1
2
3
Fig.2
1
2
Fig.3
1
2
Fig.4
1
2
3
Fig.5
1 2 3
Fig.6
1 2
Fig.7
1
2
Fig.8
2

2
1
Fig.9
1
2
Fig.10
2
1
Fig.11
1
2
Fig.12
2
1
Fig.13
1
2
Fig.14
1
Fig.15
1
Fig.16
3

1
Fig.17
2
1
Fig.18
Fig.19
1
Fig.20
1
2
3
Fig.21
1
Fig.22
1
Fig.23
1
Fig.24
4

1
2
3
Fig.25
21
Fig.26
1
Fig.27
1
Fig.28
1
2
3
Fig.29
12
Fig.30
1
Fig.31
1
Fig.32
5

1
2 3
Fig.33
1 2
Fig.34
1 2 3
Fig.35
Fig.36
Fig.37
Fig.38
Fig.39
6

1
2
Fig.40
7

8ENGLISH
ENGLISH (Original instructions)
WARNING
This appliance can be used by children aged from 8 years and
above and persons with reduced physical, sensory or mental capa-
bilities or lack of experience and knowledge if they have been given
supervision or instruction concerning use of the appliance in a safe
way and understand the hazards involved. Children shall not play
with the appliance. Cleaning and user maintenance shall not be
made by children without supervision.
SPECIFICATIONS
Model: CL108FD
Capacity 600 mL
Continuous use
(with battery BL1016)
1 (Normal speed mode) Approx. 25 min
2 (High speed mode) Approx. 12 min
3 (Max speed mode) Approx. 10 min
Overall length 956 mm
Rated voltage D.C. 10.8 V - 12 V max
Net weight 1.0 - 1.2 kg
• Duetoourcontinuingprogramofresearchanddevelopment,thespecicationshereinaresubjecttochange
without notice.
• Specicationsmaydifferfromcountrytocountry.
• The weight does not include accessories but battery cartridge(s). The lightest and heaviest combination weight
of the appliance and battery cartridge(s) are shown in the table.
Applicable battery cartridge and charger
Battery cartridge BL1015 / BL1016 / BL1020B / BL1021B / BL1040B / BL1041B
Charger DC10SA / DC10SB / DC10WC / DC10WD / DC18RE
• Some of the battery cartridges and chargers listed above may not be available depending on your region of
residence.
WARNING: Only use the battery cartridges and chargers listed above. Use of any other battery cartridges
andchargersmaycauseinjuryand/orre.
Symbols
The following show the symbols used for the equip-
ment. Be sure that you understand their meaning before
use.
Read instruction manual.
Ni-MH
Li-ion
Only for EU countries
Do not dispose of electric equipment or
battery pack together with household waste
material! In observance of the European
Directives, on Waste Electric and Electronic
Equipment and Batteries and Accumulators
and Waste Batteries and Accumulators
and their implementation in accordance
with national laws, electric equipment and
batteries and battery pack(s) that have
reached the end of their life must be col-
lected separately and returned to an envi-
ronmentally compatible recycling facility.
Intended use
The tool is intended for collecting dry dust.

9ENGLISH
SAFETY WARNINGS
Cordless cleaner safety warnings
WARNING: IMPORTANT! READ CAREFULLY
all safety warnings and all instructions BEFORE
USE . Failure to follow the warnings and instructions
mayresultinelectricshock,reand/orseriousinjury.
1. Do not expose to rain. Store indoors.
2.
Do not allow to be used as a toy. Close attention
is necessary when used by or near children.
3. Use only as described in this manual. Use only
manufacturer's recommended attachments.
4. Do not use with damaged battery. If appliance
is not working as it should, has been dropped,
damaged, left outdoors, or dropped into water,
return it to a service center.
5. Do not handle appliance with wet hands.
6.
Do not put any object into openings. Do not use
with any opening blocked; keep free of dust,
lint, hair, and anything that may reduce air ow.
7. Keep hair, loose clothing, ngers, and all parts
of body away from openings and moving parts.
8.
Turn off all controls before removing the battery.
9. Use extra care when cleaning on stairs.
10. Do not use to pick up ammable or combusti-
ble liquids, such as gasoline, or use in areas
where they may be present.
11. Use only the charger supplied by the manufac-
turer to recharge.
12.
Do not pick up anything that is burning or smok-
ing, such as cigarettes, matches, or hot ashes.
13.
Do not use without dust bag and/or lters in place.
14. Do not charge the battery outdoors.
15. Recharge only with the charger specied by
the manufacturer. A charger that is suitable for
onetypeofbatterypackmaycreateariskofre
when used with another battery pack.
16. Use power tools only with specically desig-
nated battery packs. Use of any other battery
packsmaycreateariskofinjuryandre.
17.
When (the) battery pack is not in use, keep it away
from other metal objects, like paper clips, coins,
keys, nails, screws or other small metal objects, that
can make a connection from one terminal to another.
18. Under abusive conditions, liquid may be
ejected from the battery; avoid contact. If con-
tact accidentally occurs, ush with water.
SAVE THESE INSTRUCTIONS.
ADDITIONAL SAFETY RULES
This appliance is intended for household use.
1. Read this instruction manual and the charger
instruction manual carefully before use.
2. Do not pick up the following materials:
—
Hot materials such as lit cigarettes or spark/
metal dust generated by grinding/cutting metal
— Flammable materials such as gasoline,
thinner, benzine, kerosene or paint
— Explosive materials like nitroglycerin
—
Ignitable materials such as Aluminum, zinc,
magnesium, titanium, phosphorus or celluloid
— Wet dirt, water, oil or the like
— Hard pieces with sharp edges, such as
wood chips, metals, stones, glasses,
nails, pins or razors
— Powder to clot such as cement or toner
— Conductive dust such as metal or carbon
— Fine particle like concrete dust
Such action may cause re, injury and/or prop-
erty damage.
3. Stop operation immediately if you notice any-
thing abnormal.
4. If you drop or strike the cleaner, check it care-
fully for cracks or damage before operation.
5.
Do not bring close to stoves or other heat sources.
6. Do not block the intake hole or vent holes.
SAVE THESE INSTRUCTIONS.
Important safety instructions for
battery cartridge
1.
Before using battery cartridge, read all instruc-
tions and cautionary markings on (1) battery
charger, (2) battery, and (3) product using battery.
2. Do not disassemble battery cartridge.
3. If operating time has become excessively
shorter, stop operating immediately. It may
result in a risk of overheating, possible burns
and even an explosion.
4.
If electrolyte gets into your eyes, rinse them out
with clear water and seek medical attention right
away. It may result in loss of your eyesight.
5. Do not short the battery cartridge:
(1) Do not touch the terminals with any con-
ductive material.
(2) Avoid storing battery cartridge in a con-
tainer with other metal objects such as
nails, coins, etc.
(3) Do not expose battery cartridge to water
or rain.
A battery short can cause a large current ow, over-
heating, possible burns and even a breakdown.
6. Do not store the tool and battery cartridge in
locations where the temperature may reach or
exceed 50 °C (122 °F).
7. Do not incinerate the battery cartridge even if
it is severely damaged or is completely worn
out. The battery cartridge can explode in a re.
8. Be careful not to drop or strike battery.
9. Do not use a damaged battery.
10.
The contained lithium-ion batteries are subject to
the Dangerous Goods Legislation requirements.
For commercial transports e.g. by third parties,
forwarding agents, special requirement on pack-
aging and labeling must be observed.
For preparation of the item being shipped, consulting an
expert for hazardous material is required. Please also
observe possibly more detailed national regulations.
Tape or mask off open contacts and pack up the
battery in such a manner that it cannot move
around in the packaging.

10 ENGLISH
11. Follow your local regulations relating to dis-
posal of battery.
12. Use the batteries only with the products
specied by Makita. Installing the batteries to
non-compliantproductsmayresultinare,exces-
sive heat, explosion, or leak of electrolyte.
SAVE THESE INSTRUCTIONS.
CAUTION:
Only use genuine Makita batteries.
Use of non-genuine Makita batteries, or batteries that
have been altered, may result in the battery bursting
causingres,personalinjuryanddamage.Itwillalso
void the Makita warranty for the Makita tool and charger.
Tips for maintaining maximum
battery life
1. Charge the battery cartridge before completely
discharged. Always stop tool operation and
charge the battery cartridge when you notice
less tool power.
2.
Never recharge a fully charged battery cartridge.
Overcharging shortens the battery service life.
3.
Charge the battery cartridge with room tempera-
ture at 10 °C - 40 °C (50 °F - 104 °F). Let a hot
battery cartridge cool down before charging it.
FUNCTIONAL
DESCRIPTION
CAUTION: Always be sure that the tool is
switched off and the battery cartridge is removed
before adjusting or checking function on the tool.
CAUTION: Take care not to trap nger(s)
between cleaner and battery as shown in diagram
when loading battery. Trappingnger(s)maycause
injury.
►Fig.1
Installing or removing battery
cartridge
CAUTION: Always switch off the tool before
installing or removing of the battery cartridge.
CAUTION: Hold the tool and the battery car-
tridge rmly when installing or removing battery
cartridge. Failure to hold the tool and the battery
cartridgermlymaycausethemtoslipoffyourhands
and result in damage to the tool and battery cartridge
andapersonalinjury.
►Fig.2: 1. Red indicator 2. Button 3. Battery cartridge
To remove the battery cartridge, slide it from the tool
while sliding the button on the front of the cartridge.
To install the battery cartridge, align the tongue on the
battery cartridge with the groove in the housing and slip
it into place. Insert it all the way until it locks in place
with a little click. If you can see the red indicator on the
upper side of the button, it is not locked completely.
CAUTION: Always install the battery cartridge
fully until the red indicator cannot be seen. If not,
itmayaccidentallyfalloutofthetool,causinginjuryto
you or someone around you.
CAUTION: Do not install the battery cartridge
forcibly. If the cartridge does not slide in easily, it is
not being inserted correctly.
Battery protection system
The tool is equipped with a battery protection system.
This system automatically cuts off power to the motor to
extend battery life.
The tool will automatically stop during operation if the tool and/
or battery are placed under one of the following conditions:
Overloaded:
The tool is operated in a manner that causes it to draw
an abnormally high current.
In this situation, turn the tool off and stop the application
that caused the tool to become overloaded. Then turn
the tool on to restart.
Low battery voltage:
The remaining battery capacity is too low and the tool will not
operate. If you turn the tool on, the motor runs again but stops
soon. In this situation, remove and recharge the battery.
Indicating the remaining battery
capacity
Only for battery cartridges with the indicator
►Fig.3: 1. Indicator lamps 2. Check button
Press the check button on the battery cartridge to indi-
cate the remaining battery capacity. The indicator lamps
light up for a few seconds.
Indicator lamps Remaining
capacity
Lighted Off
75% to 100%
50% to 75%
25% to 50%
0% to 25%
NOTE: Depending on the conditions of use and the
ambient temperature, the indication may differ slightly
from the actual capacity.
Switch action
►Fig.4: 1. ON/speed change button 2. OFF button
To start the cleaner, simply push the ON/speed change
button. To switch off, push the OFF button.
You can change the cleaner speed in three steps by
pushing the ON/speed change button.
Therstpushonthisbuttonisforhighspeedmode,the
second push for max speed mode and the third push for
normal speed mode. Each push on this button repeats
the high/max/normal speed cycle alternatively.

11 ENGLISH
Lighting up the lamp
CAUTION: Do not look in the light or see the
source of light directly.
►Fig.5:
1. ON/speed change button 2. OFF button 3. Lamp
To turn on the lamp, push the ON/speed change button.
Push the OFF button to turn off the lamp. During the
tool actuating, the lamp turns on.
When the remaining battery capacity gets low, the lamp
starts blinking.
NOTE: The timing, at which the lamp starts blinking,
depends on the temperature at work place and the
battery cartridge conditions.
ASSEMBLY
CAUTION: Always be sure that the tool is
switched off and the battery cartridge is removed
before carrying out any work on the tool.
Type of lter
Normal lter
►Fig.6: 1. Capsule 2.Prelter3. Filter
High performance lter
►Fig.7: 1. Capsule 2.Highperformancelter
Disposing of dust
CAUTION: Empty the cleaner before it
becomes too full, or the suction force weakens.
CAUTION: Be sure to empty the inside of the
cleaner itself of dust. Failure to do so may cause the
ltertobecloggedorthemotortobedamaged.
Disposing of dust for normal lter
Inordertodropduststickingonthelterinthecapsule,
tap the capsule 4 or 5 times with your hand.
►Fig.8: 1. Capsule 2. Suction inlet
Point the suction inlet downwards, turn the capsule in direction of the
arrow as illustrated, and disconnect the capsule slowly and straight.
►Fig.9: 1. Capsule 2. Suction inlet
NOTE:
Be sure to set a garbage bag beneath the cap-
sule, as dust may spill out when the capsule is opened.
Remove accumulated dust from inside of the capsule
andoffoftheprelter.
►Fig.10: 1.Prelter2. Capsule
Twisttheprelterindirectionofthearrowtounfastenthe
securinglipfromthecleanerunitandthenpullofftheprelter.
►Fig.11: 1.Prelter2. Securing lip
Cleanoutnedustfromtheprelter.Andthen,pulloff
thelterandlightlytapittoremovedust.
►Fig.12: 1. Filter 2.Prelter
Disposing of dust for high
performance lter
Inordertodropduststickingonthelterinthecapsule,
tap the capsule 4 or 5 times with your hand.
Now point suction inlet downwards, turn capsule in
direction of arrow in diagram, and disconnect capsule
slowly and straight.
►Fig.13: 1. Capsule 2. Suction inlet
NOTE: Dust may spill out when capsule is opened, so
be sure to set a garbage bag beneath capsule.
Remove accumulated dust from inside of capsule and
offofhighperformancelter.
►Fig.14: 1. Capsule 2.Highperformancelter
Twisthighperformancelterindirectionofarrowto
unfasten securing lip from cleaner unit and then pull off
thelter.
►Fig.15: 1. Securing lip
Cleanoutthenedustandlightlytaptodislodgedust
fromhighperformancelter.
Reassembly
Reassembly for normal lter
Putonthelterfullyinpositiononthecleanerunit.
►Fig.16: 1. Filter
NOTICE: Make sure the lter is put on straight
without being peeled back.Ifthelterisputon
incorrectly as illustrated, dust will get into the motor
housing, and cause a motor failure.
►Fig.17: 1. Filter
Installtheprelter.Atthistime,makesuretotwistthe
preltersothatthesecuringlipisrmlylockedinthe
cleaner unit.
►Fig.18: 1.Prelter2. Securing lip
►Fig.19
Install the capsule. Align the mark on the capsule with
themarknearthehandleandthenrmlytwistthecap-
sule in direction of the arrow until it is secured.
►Fig.20: 1. Mark
►Fig.21: 1. Capsule 2. Handle 3. Mark
NOTE: Always remove dust ahead of time, as the
suction power will be reduced if there is too much
dust in the cleaner.
NOTICE: Always be sure to check that both the
lter and prelter are loaded correctly prior to
using the cleaner. If they are not loaded correctly,
dust will get into the motor housing, and cause a
motorfailure.Ifthefollowingexamplesoccur,thelter
andprelterarenotloadedcorrectly.Reloadthem
correctly to rectify problem.

12 ENGLISH
Problem Examples
Example1:Onlytheprelterhasbeenloaded(nolter)
►Fig.22: 1.Prelter
Example2:Onlythelterhasbeenloaded(noprelter)
►Fig.23: 1. Filter
Example3:Thelterhasbeenloadedinapeeledback
state
►Fig.24: 1. Filter
Example4:Thesecuringlipontheprelterisnotrmly
locked in the groove of cleaner housing
►Fig.25: 1. Securing lip 2.Prelter3. Groove of
cleaner housing
Reassembly for high performance
lter
Connecthighperformancelter.Atthistime,makesure
totwisthighperformanceltersothatsecuringlipis
rmlylockedintocleanerunit.
►Fig.26: 1.Highperformancelter2. Securing lip
►Fig.27: 1. Securing lip
Install the capsule. Align the mark on the capsule with
themarknearthehandleandthenrmlytwistthecap-
sule in direction of the arrow until it is secured.
►Fig.28: 1. Mark
►Fig.29: 1. Capsule 2. Handle 3. Mark
NOTE: Always remove dust ahead of time, as suction
power will be reduced if there is too much dust in
cleaner.
NOTE: Always be sure to check that high perfor-
mancelterisloadedcorrectlypriortousingcleaner.
If they are not loaded correctly, dust will get into the
motor housing, and cause motor failure.
If the following examples occur, high performance
lterisnotloadedcorrectly.Reloadthemcorrectlyto
rectify problem.
Problem Examples
Securinglipofhighperformancelterisnotrmly
locked into groove of cleaner housing.
►Fig.30: 1. Securing lip 2. Groove of cleaner housing
OPERATION
CAUTION: To connect attachments, such
as nozzle, twist and insert the attachment in
direction of the arrow to secure the connection
during use. To disconnect the attachments, twist
and extract it also in direction of the arrow. If an
attachment is twisted in the opposite direction when
being connected or disconnected, the capsule may
become loose.
►Fig.31: 1. Capsule
Cleaning (Suction)
Nozzle
Attach the nozzle to clean off tables, desks, furniture,
etc. The nozzle slips on easily.
►Fig.32: 1. Nozzle
Nozzle + Extension wand (Straight pipe)
Theextensionwandtsinbetweenthenozzleandthe
cleaner itself. This arrangement is convenient for clean-
ingaoorinastandingposition.
►Fig.33: 1. Cleaner body 2. Extension wand
3. Nozzle
Corner nozzle
Fit on the corner nozzle for cleaning corners and crev-
ices of a car or furniture.
►Fig.34: 1. Corner nozzle 2. Cleaner body
Corner nozzle +Extension wand
(Straight pipe)
In tight quarters where the cleaner itself cannot
squeeze in, or in high places hard to reach, use this
arrangement.
►Fig.35: 1. Corner nozzle 2. Extension wand
3. Cleaner body
Cleaning without nozzle
You can pick up powder and dust without nozzle.
►Fig.36
MAINTENANCE
CAUTION: Always be sure that the tool is
switched off and the battery cartridge is removed
before attempting to perform inspection or
maintenance.
After use
NOTICE: Putting the cleaner against the wall
without any other support cause the cleaner to
fall down and be damaged.
►Fig.37

13 ENGLISH
Cleaning
NOTICE: Never use gasoline, benzine, thinner,
alcohol or the like. Discoloration, deformation or
cracks may result.
NOTICE: Do not blow dust sticking on the
cleaner and lters by air duster. It brings dust into
the housing and causes failure.
NOTICE: After washing lters, dry them thor-
oughly before use.Insufcientlydriedltersmay
cause poor suction and shorten the service life of the
motor.
NOTICE: After cleaning lters and sponge lter,
be sure to re-install them before use. If you use the
cleanerwithoutltersandspongelter,dustcomes
into the motor housing and cause malfunction.
Cleaner body
From time to time wipe off the outside (cleaner body) of
the cleaner using a cloth dampened in soapy water.
Cleanoutalsothesuctionopeningandltermountingarea.
►Fig.38
Filter
Washthelterinsoapywaterwhenitiscloggedwith
dust and the cleaner power becomes weak. Dry it out
thoroughly before use.
►Fig.39
Sponge lter
Whenthespongelterbecomesdirty,cleanitas
follows.
1. Removethelter.
2. Pulloutthespongelterfrombetweenthepillars.
3. Cleanthespongelterbytappingorwashing.If
you wash it, dry it out thoroughly before use.
4. Insertthespongelterfrombetweenthepillars
and set it in the original position. Make sure that each
bottomedgeofthepillarholdsdownthespongelter,
andthereisnogapbetweenthespongelterandsuc-
tion opening.
►Fig.40: 1.Spongelter2. Bottom edge of pillar
Troubleshooting
Before asking for repairs, check the following points.
Symptom Area to be investigated Fixing method
Weak suction power Is the capsule full of dust? Empty the capsule of dust.
Isthelterclogged? Cleanorwashthelter.
Is the battery cartridge exhausted ? Charge the battery cartridge.
Not working Is the battery cartridge exhausted ? Charge the battery cartridge.
CAUTION: Do not attempt to repair the cleaner by yourself.
TomaintainproductSAFETYandRELIABILITY,repairs,anyothermaintenanceoradjustmentshouldbeperformed
by Makita Authorized or Factory Service Centers, always using Makita replacement parts.
OPTIONAL
ACCESSORIES
CAUTION: These accessories or attachments
are recommended for use with your Makita tool
specied in this manual. The use of any other
accessories or attachments might present a risk of
injurytopersons.Onlyuseaccessoryorattachment
for its stated purpose.
If you need any assistance for more details regard-
ing these accessories, ask your local Makita Service
Center.
• Extension wand (Straight pipe)
• Nozzle
• Nozzle for carpet
• Shelf brush
• Corner nozzle
• Seat nozzle
• Free nozzle
• Crevice nozzle
• Round brush
• Flexible hose
• Filter
• Prelter
• Highperformancelter
• Makita genuine battery and charger
NOTE: Some items in the list may be included in the
tool package as standard accessories. They may
differ from country to country.

35 NEDERLANDS
NEDERLANDS (Originele instructies)
WAARSCHUWING
Ditapparaatmagwordengebruiktdoorkinderenvan8jaaren
ouderofdoorpersonenmetbeperktefysieke,zintuiglijkeofver-
standelijkevermogensofgebrekaanervaringofkennisvanzaken,
maar alleen onder toezicht of na instructie in veilig gebruik van het
apparaat, met begrip van de eventuele risico’s. Kinderen mogen
niet met het apparaat spelen. Reinigen en onderhoud van het appa-
raatmagnietdoorkinderenwordenverricht,tenzijondertoezicht.
TECHNISCHE GEGEVENS
Model: CL108FD
Inhoud 600 ml
Continu gebruik
(met accu BL1016)
1 (stand voor normale snelheid) Ong. 25 min
2 (stand voor hoge snelheid) Ong. 12 min
3 (stand voor maximale snelheid)
Ong. 10 min
Totale lengte 956 mm
Nominale spanning Maximaal10,8V-12Vgelijkspanning
Nettogewicht 1,0 - 1,2 kg
• Inverbandmetononderbrokenresearchenontwikkeling,behoudenwijonshetrechtvoordebovenstaande
technischegegevenszondervoorafgaandekennisgevingtewijzigen.
• De technische gegevens kunnen van land tot land verschillen.
• Hetgewichtisexclusiefbijgeleverdeaccessoires,maarinclusiefdeaccu(’s).Hetlaagsteenhoogstegecombi-
neerde gewicht van het apparaat en de accu(’s) wordt vermeld in de tabel.
Toepasselijke accu’s en laders
Accu BL1015 / BL1016 / BL1020B / BL1021B / BL1040B / BL1041B
Lader DC10SA / DC10SB / DC10WC / DC10WD / DC18RE
• Sommigevandehierbovenvermeldeaccu’senladerszijnmogelijknietleverbaarafhankelijkvanwaaru
woont.
WAARSCHUWING: Gebruik uitsluitend de accu’s en laders die hierboven worden genoemd. Gebruik
van enige andere accu of lader kan leiden tot letsel en/of brand.
Symbolen
Hieronder staan de symbolen die voor het gereedschap
worden gebruikt. Zorg ervoor dat u weet wat ze beteke-
nen alvorens het gereedschap te gebruiken.
Leesdegebruiksaanwijzing.
Ni-MH
Li-ion
Alleen voor EU-landen
Geef elektrisch gereedschap en accu’s niet
met het huisvuil mee! Volgens de Europese
richtlijninzakeoudeelektrischeenelektro-
nischeapparaten,eninzakebatterijenen
accu’senoudebatterijenenaccu’s,ende
toepassing daarvan binnen de nationale
wetgeving, dienen elektrisch gereedschap,
accu(’s)enbatterijendieheteindevanhun
levensduur hebben bereikt, gescheiden
te worden ingezameld en te worden afge-
voerdnaareenrecyclebedrijfdatvoldoet
aan de geldende milieu-eisen.
Gebruiksdoeleinden
Het gereedschap is bedoeld om droog stof te verzamelen.

36 NEDERLANDS
VEILIGHEIDSWAAR-
SCHUWINGEN
Veiligheidswaarschuwingen voor
accustofzuigers
WAARSCHUWING:
BELANGRIJK! LEES
VÓÓR GEBRUIK alle veiligheidswaarschuwingen
en alle instructies ZORGVULDIG DOOR. Het niet vol-
gen van de waarschuwingen en instructies kan leiden
tot elektrische schokken, brand en/of ernstig letsel.
1. Stel niet bloot aan regen. Bewaar binnenshuis.
2.
Sta niet toe dat ermee gespeeld wordt. Let goed
op bij gebruik door of in de buurt van kinderen.
3. Gebruik uitsluitend zoals beschreven in deze
gebruiksaanwijzing. Gebruik uitsluitend hulp-
stukken aanbevolen door de fabrikant.
4. Gebruik nooit met een beschadigde accu. Als
het apparaat niet werkt zoals het zou moeten
werken, is gevallen, is beschadigd, buiten
heeft gelegen of in het water is gevallen, stuurt
u het terug naar een servicecentrum.
5. Hanteer het apparaat niet met natte handen.
6. Steek geen voorwerpen in de openingen.
Gebruik het apparaat niet wanneer een ope-
ning verstopt zit, houd het apparaat vrij van
stof, pluizen, haar en alles wat de luchtdoor-
stroming kan hinderen.
7. Houd haar, loshangende kleding, vingers en
alle lichaamsdelen uit de buurt van de ope-
ningen en bewegende delen.
8. Schakel alle bedieningselementen uit alvorens
de accu eraf te halen.
9. Wees extra voorzichtig bij het stofzuigen op
een trap.
10.
Zuig geen ontvlambare of brandbare vloeistoffen,
zoals benzine, op en gebruik het apparaat niet op
plaatsen waar deze aanwezig kunnen zijn.
11. Gebruik voor het opladen uitsluitend de accu-
lader die door de fabrikant werd geleverd.
12. Zuig niets op dat brandt of rookt, zoals sigaret-
ten, lucifers of hete as.
13. Gebruik het apparaat niet zonder dat de stof-
zak en/of lters zijn aangebracht.
14. Laad de accu niet buitenshuis op.
15. Laad uitsluitend op met de acculader die wordt
gespeciceerd door de fabrikant. Een accula-
der die geschikt is voor een bepaald type accu,
kan brandgevaar opleveren indien gebruikt met
een ander type accu.
16. Gebruik elektrisch gereedschap uitsluitend
met de daarvoor bestemde accu. Gebruik van
andere accu’s kan gevaar voor letsel of brandge-
vaar opleveren.
17. Als de accu niet wordt gebruikt, houdt u deze
uit de buurt van metalen voorwerpen zoals
paperclips, muntgeld, sleutels, spijkers,
schroeven en andere kleine metalen voorwer-
pen die een kortsluiting kunnen veroorzaken
tussen de accupolen.
18. Onder zware gebruiksomstandigheden kan
vloeistof uit de accu komen. Voorkom aanra-
king. Als aanraking per ongeluk zich voordoet,
spoelt u met water.
BEWAAR DEZE INSTRUCTIES.
AANVULLENDE
VEILIGHEIDSVOORSCHRIFTEN
Dit apparaat is bedoeld voor huishoudelijk gebruik.
1. Lees deze gebruiksaanwijzing en die van de
acculader voor gebruik aandachtig door.
2. Zuig de volgende stoffen niet op:
— Hete stoffen, zoals brandende sigaretten
of gloeiend hete metaaldeeltjes veroor-
zaakt door het schuren/slijpen van metaal
— Brandbare stoffen, zoals benzine, thinner,
wasbenzine, kerosine of verf
— Explosieve stoffen, zoals nitroglycerine
—
Ontvlambare stoffen, zoals aluminium, zink,
magnesium, titanium, fosfor of celluloid
— Nat vuil, water, olie en dergelijk
— Harde stukjes met scherpe randen, zoals
houtsnippers, metaaldeeltjes, steen-
tjes, glasstukjes, spijkers, punaises of
scheermesjes
— Poeder dat klontert, zoals cement of toner
— Geleidend stof, zoals metaalvijlsel of
koolstofpoeder
— Zeer jn stof, zoals cementpoeder
Een dergelijk gebruik kan leiden tot brand,
persoonlijk letsel en/of materiële schade.
3. Stop onmiddellijk met het gebruik als u iets
abnormaals opmerkt.
4. Als u de stofzuiger laat vallen of ergens tegen-
aan stoot, controleert u zorgvuldig op bar-
sten of beschadigingen voordat u deze weer
gebruikt.
5. Houd uit de buurt van fornuizen en
verwarmingsbronnen.
6. Blokkeer de inlaatopening en de ventilatieope-
ningen niet.
BEWAAR DEZE INSTRUCTIES.
Belangrijke veiligheidsinstructies
voor een accu
1. Lees alle voorschriften en waarschuwingen op
(1) de acculader, (2) de accu, en (3) het product
waarvoor de accu wordt gebruikt, alvorens de
accu in gebruik te nemen.
2. Neem de accu niet uit elkaar.
3. Als de gebruikstijd van een opgeladen accu
aanzienlijk korter is geworden, moet u het
gebruik ervan onmiddellijk stopzetten.
Voortgezet gebruik kan oververhitting, brand-
wonden en zelfs een ontplofng veroorzaken.
4. Als elektrolyt in uw ogen is terechtgeko-
men, spoelt u uw ogen met schoon water
en roept u onmiddellijk de hulp van een
dokter in. Elektrolyt in de ogen kan blindheid
veroorzaken.

37 NEDERLANDS
5. Voorkom kortsluiting van de accu:
(1) Raak de accuklemmen nooit aan met een
geleidend materiaal.
(2) Bewaar de accu niet in een bak waarin
andere metalen voorwerpen zoals spij-
kers, munten e.d. worden bewaard.
(3) Stel de accu niet bloot aan water of regen.
Kortsluiting van de accu kan oorzaak zijn van
een grote stroomafgifte, oververhitting, brand-
wonden, en zelfs defecten.
6. Bewaar het gereedschap en de accu niet op
plaatsen waar de temperatuur kan oplopen tot
50°C of hoger.
7. Werp de accu nooit in het vuur, ook niet wan-
neer hij zwaar beschadigd of volledig versleten
is. De accu kan ontploffen in het vuur.
8. Wees voorzichtig dat u de accu niet laat vallen
en hem niet blootstelt aan schokken of stoten.
9. Gebruik nooit een beschadigde accu.
10. De bijgeleverde lithium-ionbatterijen zijn
onderhevig aan de vereisten in de wetgeving
omtrent gevaarlijke stoffen.
Voorcommercieeltransportendergelijkedoor
derden en transporteurs moeten speciale vereis-
ten ten aanzien van verpakking en etikettering
worden nageleefd.
Als voorbereiding van het artikel dat wordt
getransporteerdishetnoodzakelijkeenexpertop
hetgebiedvangevaarlijkestoffenteraadplegen.
Houdutevensaanmogelijkstrengerenationale
regelgeving.
Blootliggende contactpunten moeten worden
afgedekt met tape en de accu moet zodanig
worden verpakt dat deze niet kan bewegen in de
verpakking.
11. Volg bij het weggooien van de accu de plaatse-
lijke voorschriften.
12. Gebruik de accu’s uitsluitend met de gereed-
schappen die door Makita zijn aanbevolen. Als
de accu’s worden aangebracht in niet-compatibele
gereedschappen, kan dat leiden tot brand, bui-
tensporige warmteontwikkeling, een explosie of
lekkage van elektrolyt.
BEWAAR DEZE INSTRUCTIES.
LET OP: Gebruik uitsluitend originele Makita
accu’s. Het gebruik van niet-originele accu’s, of
accu’sdiezijngewijzigd,kanertoeleidendatdeaccu
ontploftenbrand,persoonlijkletselenschadeveroor-
zaakt. Ook vervalt daarmee de garantie van Makita
op het gereedschap en de lader van Makita.
Tips voor een maximale levens-
duur van de accu
1.
Laad de accu op voordat hij volledig ontladen is.
Stop het gebruik van het gereedschap en laad
de accu op telkens wanneer u vaststelt dat het
vermogen van het gereedschap is afgenomen.
2. Laad een volledig opgeladen accu nooit
opnieuw op. Te lang opladen verkort de
levensduur van de accu.
3. Laad de accu op bij een omgevingstempe-
ratuur tussen 10°C en 40°C. Laat een warme
accu afkoelen alvorens hem op te laden.
BESCHRIJVING VAN DE
FUNCTIES
LET OP: Zorg altijd dat het gereedschap is
uitgeschakeld en de accu ervan is verwijderd
alvorens de functies op het gereedschap af te
stellen of te controleren.
LET OP:
Wees voorzichtig dat uw vinger(s) niet
bekneld raken tussen de stofzuiger en de accu tijdens
het aanbrengen van de accu, zoals aangegeven in de
afbeelding. Beknelde vinger(s) kunnen tot letsel leiden.
►Fig.1
De accu aanbrengen en verwijderen
LET OP: Schakel het gereedschap altijd uit
voordat u de accu aanbrengt of verwijdert.
LET OP: Houd het gereedschap en de accu
stevig vast tijdens het aanbrengen of verwijderen
van de accu. Als u het gereedschap en de accu niet
stevig vasthoudt, kunnen deze uit uw handen glippen
en het gereedschap of de accu beschadigen, of kan
persoonlijkletselwordenveroorzaakt.
►Fig.2: 1. Rood deel 2. Knop 3. Accu
Omdeaccuteverwijderenverschuiftudeknopaande
voorkantvandeaccuenschuiftutegelijkertijddeaccu
uit het gereedschap.
Omdeaccuaantebrengenlijntudelipopdeaccuuitmet
degroefindebehuizingenduwtudeaccuopzijnplaats.
Steekdeaccuzovermogelijkinhetgereedschaptotueen
klikgeluid hoort. Als u het rode deel aan de bovenkant van
de knop kunt zien, is de accu niet goed aangebracht.
LET OP:
Breng de accu altijd helemaal aan
totdat het rode deel niet meer zichtbaar is. Als u dit
niet doet, kan de accu per ongeluk uit het gereedschap
vallen en u of anderen in uw omgeving verwonden.
LET OP:
Breng de accu niet met kracht aan. Als
deaccunietgemakkelijkinhetgereedschapkanwor-
den geschoven, wordt deze niet goed aangebracht.
Accubeveiligingssysteem
Het gereedschap is uitgerust met een accubeveiligings-
systeem. Dit systeem sluit automatisch de voeding naar
de motor af om de levensduur van de accu te verlengen.
Hetgereedschapkantijdensgebruikautomatischstop-
pen wanneer het gereedschap en/of de accu aan één
van de volgende omstandigheden wordt blootgesteld:
Overbelasting:
Als het gereedschap wordt gebruikt op een manier die
een abnormaal hoge stroomsterkte vergt.
Schakel in dat geval het gereedschap uit en stopt u met de toe-
passing waardoor het gereedschap overbelast raakte. Schakel
vervolgens het gereedschap in om het weer te starten.
Onvoldoende accuspanning:
De resterende accucapaciteit is te laag en het gereed-
schap start niet. Als u het gereedschap inschakelt,
draait de motor wel maar stopt kort daarna. In dat geval
verwijdertudeaccuenlaadtudieopnieuwop.

38 NEDERLANDS
De resterende acculading
controleren
Alleen voor accu’s met indicatorlampjes
►Fig.3: 1.Indicatorlampjes2. Testknop
Druk op de testknop op de accu om de resterende
acculadingtezien.Deindicatorlampjesbrandengedu-
rende enkele seconden.
Indicatielampjes Resterende
capaciteit
Brandt Uit
75% tot 100%
50% tot 75%
25% tot 50%
0% tot 25%
OPMERKING:Afhankelijkvandegebruiksomstan-
digheden en de omgevingstemperatuur, is het moge-
lijkdatdeaangegevenacculadingverschiltvande
werkelijkeacculading.
De trekkerschakelaar gebruiken
►Fig.4: 1. AAN-/snelheidsinstelknop 2. UIT-knop
Om de stofzuiger in te schakelen, drukt u gewoon op de
AAN-/snelheidsinstelknop. Om uit te schakelen, drukt u
op de UIT-knop.
U kunt de snelheid van de stofzuiger in drie standen
instellen door op de AAN-/snelheidsinstelknop te
drukken.
Na de eerste druk op deze knop staat de stofzuiger in
de stand voor hoge snelheid, na de tweede druk staat
hijindestandvoormaximalesnelheid,ennadederde
drukindestandvoornormalesnelheid.Bijelkedruk
op deze knop wordt de hoog/maximaal/normaal-cyclus
stapsgewijsdoorlopen.
De lamp inschakelen
LET OP: Kijk niet direct in het lamplicht of in
de lichtbron.
►Fig.5: 1. AAN-/snelheidsinstelknop 2. UIT-knop
3. Lamp
Om de lamp in te schakelen, drukt u op de AAN-/snel-
heidsinstelknop. Druk op de UIT-knop om de lamp uit
teschakelen.Terwijlhetgereedschapisingeschakeld,
brandt de lamp.
Als de resterende acculading laag wordt, begint de
lamp te knipperen.
OPMERKING: Het moment waarop de lamp begint
teknipperenisafhankelijkvandetemperatuuropde
werkplek en de staat van de accu.
MONTAGE
LET OP: Zorg altijd dat het gereedschap is
uitgeschakeld en de accu ervan is verwijderd
alvorens enig werk aan het gereedschap uit te
voeren.
Type lter
Normaal lter
►Fig.6: 1. Beker 2.Voorlter3. Filter
Hoogwaardig lter
►Fig.7: 1. Beker 2.Hoogwaardiglter
Het stof weggooien
LET OP: Leeg de stofzuiger voordat deze te
vol raakt omdat dan de zuigkracht afneemt.
LET OP: Vergeet niet ook het stof binnenin
de stofzuiger zelf te verwijderen. Als u dit nalaat,
kanhetlterverstoptrakenofdemotorbeschadigd
raken.
Stof weggooien uit een normaal lter
Omhetstofdataanhetlterkleeftindebekertelaten
vallen, tikt u met uw hand 4 of 5 keer tegen de beker.
►Fig.8: 1. Beker 2. Zuigmond
Richt de zuigmond omlaag, draai de beker in de richting
vandepijlzoalsaangegevenindeafbeelding,enhaal
de beker langzaam en recht eraf.
►Fig.9: 1. Beker 2. Zuigmond
OPMERKING: Houd de vuilniszak onder de beker
aangezien stof eruit kan vallen wanneer de beker eraf
wordt gehaald.
Verwijderhetverzameldestofuitdebinnenkantvande
bekerenvanafhetvoorlter.
►Fig.10: 1.Voorlter2. Beker
Verdraaihetvoorlterinderichtingvandepijlomde
bevestigingslip los te maken van de behuizing van de
stofzuiger,entrekvervolgenshetvoorltereraf.
►Fig.11: 1.Voorlter2. Bevestigingslip
Verwijderhetjnestofuithetvoorlter.Trekvervolgens
hetltererafentikervoorzichtigtegenomhetstofte
verwijderen.
►Fig.12: 1. Filter 2.Voorlter
Stof weggooien uit een hoogwaardig
lter
Omhetstofdataanhetlterkleeftindebekertelaten
vallen, tikt u met uw hand 4 of 5 keer tegen de beker.
Richt nu de zuigmond omlaag, draai de beker in de
richtingvandepijlzoalsaangegevenindeafbeelding,
en haal de beker langzaam en recht eraf.
►Fig.13: 1. Beker 2. Zuigmond

39 NEDERLANDS
OPMERKING: Wanneer de beker eraf wordt gehaald,
kan het stof eruit vallen, dus plaatst u eerst een afval-
zak onder de beker.
Verwijderhetverzameldestofuitdebinnenkantvande
bekerenvanafhethoogwaardigelter.
►Fig.14: 1. Beker 2.Hoogwaardiglter
Verdraaihethoogwaardigelterinderichtingvandepijl
om de bevestigingslip los te maken van de behuizing
van de stofzuiger, en trek vervolgens het hoogwaardige
ltereraf.
►Fig.15: 1. Bevestigingslip
Verwijderhetjnestofentikervoorzichtigtegenomhet
stoflostemakenuithethoogwaardigelter.
In elkaar zetten
Het normale lter aanbrengen
Brenghetltervolledigopzijnplaatsaanopdebehui-
zing van de stofzuiger.
►Fig.16: 1. Filter
KENNISGEVING: Zorg ervoor dat het lter er
recht op aangebracht wordt zonder dubbelge-
vouwen te worden.Alshetlterverkeerderopaan-
gebracht wordt, zoals aangegeven in de afbeelding,
zal het stof binnendringen in het motorhuis en tot
motorstoring leiden.
►Fig.17: 1. Filter
Brenghetvoorlteraan.Leterdaarbijophetvoorlter
te verdraaien zodat de bevestigingslip goed vergren-
deld wordt in de behuizing van de stofzuiger.
►Fig.18: 1.Voorlter2. Bevestigingslip
►Fig.19
Brengdebekeraan.Lijnhetmerktekenopdebeker
uitmethetmerktekenbijdehandgreepenverdraai
debekerdaarnasteviginderichtingvandepijltothij
wordt vergrendeld.
►Fig.20: 1. Merkteken
►Fig.21: 1. Beker 2. Handgreep 3. Merkteken
OPMERKING:Verwijderhetstofaltijdtijdigomdatde
zuigkracht lager wordt wanneer er te veel stof in de
stofzuiger zit.
KENNISGEVING: Controleer altijd of het lter
en voorlter correct zijn aangebracht voordat u
de stofzuiger gaat gebruiken. Als deze niet correct
zijnaangebracht,zalhetstofbinnendringeninhet
motorhuis en tot motorstoring leiden. In het geval de
volgendesituatieszichvoordoen,zijnhetlteren/
ofvoorlternietcorrectaangebracht.Brengdeze
opnieuw en correct aan om het probleem op te
lossen.
Voorbeelden van problemen
Voorbeeld1:Alleenhetvoorlterisaangebracht(geen
lter)
►Fig.22: 1.Voorlter
Voorbeeld2:Alleenhetlterisaangebracht(geen
voorlter)
►Fig.23: 1. Filter
Voorbeeld3:Hetlterisaangebracht,maaris
dubbelgevouwen
►Fig.24: 1. Filter
Voorbeeld4:Debevestigingslipvanhetvoorlterisniet
goed vergrendeld in de gleuf in de behuizing van de
stofzuiger
►Fig.25: 1. Bevestigingslip 2.Voorlter3. Gleuf in de
behuizing van de stofzuiger
Het hoogwaardig lter aanbrengen
Brenghethoogwaardiglteraan.Leterdaarbijophet
hoogwaardigelterteverdraaienzodatdebevesti-
gingslip goed vergrendeld wordt in de behuizing van de
stofzuiger.
►Fig.26: 1.Hoogwaardiglter2. Bevestigingslip
►Fig.27: 1. Bevestigingslip
Brengdebekeraan.Lijnhetmerktekenopdebeker
uitmethetmerktekenbijdehandgreepenverdraai
debekerdaarnasteviginderichtingvandepijltothij
wordt vergrendeld.
►Fig.28: 1. Merkteken
►Fig.29: 1. Beker 2. Handgreep 3. Merkteken
OPMERKING:Verwijderhetstofaltijdtijdigomdatde
zuigkracht lager wordt wanneer er te veel stof in de
stofzuiger zit.
OPMERKING:Controleeraltijdofhethoogwaardige
ltercorrectisaangebrachtvoordatudestofzuiger
gaatgebruiken.Alsdezenietcorrectzijnaange-
bracht, zal het stof binnendringen in het motorhuis en
tot motorstoring leiden.
In het geval de volgende situaties zich voordoen,
ishethoogwaardigelternietcorrectaangebracht.
Breng deze opnieuw en correct aan om het probleem
op te lossen.
Voorbeelden van problemen
Debevestigingslipvanhethoogwaardigelterisniet
goed vergrendeld in de gleuf in de behuizing van de
stofzuiger.
►Fig.30: 1. Bevestigingslip 2. Gleuf in de behuizing
van de stofzuiger
BEDIENING
LET OP: Om een accessoire, zoals een mond-
stuk, aan te brengen, steekt u de accessoire in
de zuigmond en verdraait u deze in de richting
van de pijl voor een stevige verbinding tijdens
gebruik. Om de accessoire eraf te halen, verdraait
u deze ook in de richting van de pijl en trekt u hem
eraf. Als u de accessoire in de tegenovergestelde
richtingverdraaitbijhetaanbrengenoferafhalen,
kan de beker los raken.
►Fig.31: 1. Beker

40 NEDERLANDS
Schoonmaken (zuigen)
Mondstuk
Bevestig het mondstuk voor het schoonmaken van
tafels, bureaus, meubels, enz. Het mondstuk kan een-
voudig op de stofzuiger worden geplaatst.
►Fig.32: 1. Mondstuk
Mondstuk + verlengbuis (rechte buis)
De verlengbuis past tussen het mondstuk en de stofzui-
germond.Dezewerkwijzeishandigbijhetstofzuigen
vandegrondterwijlurechtopstaat.
►Fig.33: 1. Behuizing van de stofzuiger
2. Verlengbuis 3. Mondstuk
Hoekmondstuk
Bevestig het hoekmondstuk voor het stofzuigen in
hoeken en spleten van meubels of in auto’s.
►Fig.34: 1. Hoekmondstuk 2. Behuizing van de
stofzuiger
Hoekmondstuk + verlengbuis (rechte buis)
In kleine ruimten waar de stofzuiger zelf niet in past, of
ophogeplaatsendiemoeilijktebereikenzijn,gebruikt
udezewerkwijze.
►Fig.35: 1. Hoekmondstuk 2. Verlengbuis
3. Behuizing van de stofzuiger
Stofzuigen zonder mondstuk
U kunt poeder en stof opzuigen zonder een mondstuk.
►Fig.36
ONDERHOUD
LET OP: Zorg altijd dat het gereedschap is
uitgeschakeld en de accu ervan is verwijderd
alvorens te beginnen met onderhoud of inspectie.
Na gebruik
KENNISGEVING: Als u de stofzuiger tegen een
muur laat leunen zonder enige andere steun, kan
de stofzuiger omvallen en beschadigd raken.
►Fig.37
Schoonmaken
KENNISGEVING: Gebruik nooit benzine, was-
benzine, thinner, alcohol en dergelijke. Hierdoor
kunnen verkleuring, vervormingen en barsten
worden veroorzaakt.
KENNISGEVING: Blaas stof dat op de stofzui-
ger en lters zit er niet af met behulp van een
persluchtpistool. Hierdoor kan het stof in het huis
komen en een defect veroorzaken.
KENNISGEVING: Nadat de lters zijn gewas-
sen, droogt u ze grondig voordat u ze gebruikt.
Onvoldoendegedroogdelterskunnenleiden
tot slecht zuigen en de levensduur van de motor
verkorten.
KENNISGEVING: Nadat de lters en het
sponslter zijn gereinigd, vergeet u niet ze weer
aan te brengen vóór gebruik. Als u de stofzuiger
gebruiktzonderdeltersenhetsponslter,zalhet
stof binnendringen in het motorhuis en een defect
veroorzaken.
Behuizing van de stofzuiger
Veeg regelmatig de buitenkant (behuizing) van de stof-
zuiger schoon met een in zeepwater bevochtigde doek.
Maaktevensdestofzuigermondendelterbevesti-
gingsplaats schoon.
►Fig.38
Filter
Washetlterinzeepwateralsdezeverstoptzitmetstof
en de zuigkracht van de stofzuiger is afgenomen. Droog
het goed alvorens weer te gebruiken.
►Fig.39
Sponslter
Wanneerhetsponsltervuilisgeworden,maaktuhet
als volgt schoon.
1. Verwijderhetlter.
2. Trekhetsponsltertussendestangendooreruit.
3. Maakhetsponslterschoondoorhettekloppen
of te wassen. Als u het wast, droogt u het goed alvorens
het te gebruiken.
4. Plaatshetsponsltertussendestangendoorop
zijnoorspronkelijkeplaats.Zorgervoordatelkeonder-
randvaneenstanghetsponslteropzijnplaatsgedrukt
houdtenergeenopeningzittussenhetsponslteren
de stofzuigermond.
►Fig.40: 1.Sponslter2. Onderrand van stang

41 NEDERLANDS
Problemen oplossen
Alvorens om reparatie te verzoeken, controleert u de volgende punten.
Symptoom Mogelijke oorzaak Mogelijke oplossing
Geringe zuigkracht Zit de beker vol stof? Gooi het stof in de beker weg.
Zithetlterverstopt? Reinigofwashetlter.
Is de accu leeg? Laad de accu op.
Apparaat werkt niet Is de accu leeg? Laad de accu op.
LET OP: Probeer de stofzuiger niet zelf te repareren.
Om de VEILIGHEID en BETROUWBAARHEID van het gereedschap te handhaven, dienen alle reparaties, onder-
houdofafstellingentewordenuitgevoerdbijeenerkendMakita-servicecentrumofdeMakita-fabriek,enaltijdmet
gebruik van Makita-vervangingsonderdelen.
OPTIONELE
ACCESSOIRES
LET OP: Deze accessoires of hulpstukken
worden aanbevolen voor gebruik met het Makita
gereedschap dat in deze gebruiksaanwijzing is
beschreven.Bijgebruikvanandereaccessoiresof
hulpstukkenbestaathetgevaarvanpersoonlijkelet-
sel. Gebruik de accessoires of hulpstukken uitsluitend
voor hun bestemde doel.
Wenstumeerbijzonderhedenoverdezeacces-
soires,neemdancontactopmethetplaatselijke
Makita-servicecentrum.
• Verlengbuis (rechte buis)
• Mondstuk
• Mondstukvoortapijt
• Boekenplankborstel
• Hoekmondstuk
• Stoelmondstuk
• Vrijmondstuk
• Spleetmondstuk
• Ronde borstel
• Flexibele slang
• Filter
• Voorlter
• Hoogwaardiglter
• Originele Makita accu’s en acculaders
OPMERKING:Sommigeitemsopdelijstkunnen
zijninbegrepenindedoosvanhetgereedschapals
standaard toebehoren. Deze kunnen van land tot land
verschillen.
Other manuals for CL108FD
6
Table of contents
Languages:
Other Makita Vacuum Cleaner manuals

Makita
Makita DVC260 User manual

Makita
Makita VC002GL User manual

Makita
Makita DRC300PG2 User manual

Makita
Makita DVC864L User manual

Makita
Makita VC001GL User manual

Makita
Makita DVC862L User manual

Makita
Makita CL072D User manual

Makita
Makita VC4210M User manual

Makita
Makita DVC750L User manual

Makita
Makita CL106FD User manual

Makita
Makita CL117FDX4 User manual

Makita
Makita DVC260 User manual

Makita
Makita DCL280F User manual

Makita
Makita DCL182Z User manual

Makita
Makita VC002GL User manual

Makita
Makita DVC150L User manual

Makita
Makita M12HV User manual

Makita
Makita DVC350F User manual

Makita
Makita DCL142 User manual

Makita
Makita VC007GL User manual