Makita DCL181F User manual

INSTRUCTION MANUAL
MANUEL D'INSTRUCTION
MANUAL DE INSTRUCCIONES
Cordless Cleaner
Aspirateur sans Fil
Aspiradora Inalámbrica
DCL181F
IMPORTANT: Read Before Using.
IMPORTANT : Lire avant usage.
IMPORTANTE: Lea antes de usar.

2ENGLISH
ENGLISH (Original instructions)
SPECIFICATIONS
Model: DCL181F
Capacity 650 mL
Continuous use
(with battery BL1830B)
HIGH Approx. 20 min
LOW Approx. 40 min
Overall length 999 mm (39-5/16")
Rated voltage D.C. 18 V
Net weight 1.2 - 1.5 kg (2.7 - 3.4 lbs)
• Duetoourcontinuingprogramofresearchanddevelopment,thespecicationshereinaresubjecttochange
without notice.
• Specicationsmaydierfromcountrytocountry.
• The weight does not include accessories but battery cartridge(s). The lightest and heaviest combination weight
of the appliance and battery cartridge(s) are shown in the table.
Applicable battery cartridge and charger
Battery cartridge
BL1815N / BL1820B / BL1830 / BL1830B / BL1840B / BL1850B / BL1860B
Charger
DC18RC / DC18RD / DC18RE / DC18SD / DC18SE / DC18SF / DC18SH
• Some of the battery cartridges and chargers listed above may not be available depending on your region of
residence.
WARNING: Only use the battery cartridges and chargers listed above. Use of any other battery cartridges
andchargersmaycauseinjuryand/orre.
SAFETY WARNINGS
IMPORTANT
SAFETY
INSTRUCTIONS
When using an electrical appliance,
basic precautions should always be fol-
lowed, including the following:
READ ALL
INSTRUCTIONS
BEFORE USING
THIS APPLIANCE.
WARNING
To reduce the risk of re, electric shock
or injury:
1. Do not leave appliance when battery
tted. Remove battery from appli-
ance when not in use and before
servicing.
2. Do not use on wet surfaces. Do not
expose to rain. Store indoors.
3. Do not allow to be used as a toy.
Close attention is necessary when
used by or near children.
4. Use only as described in this man-
ual. Use only manufacturer's recom-
mended attachments.
5. Do not use with damaged battery.
If appliance is not working as it
should, has been dropped, dam-
aged, left outdoors, or dropped into
water, return it to a service center.
6. Do not handle appliance with wet
hands.

3ENGLISH
7.
Do not put any object into openings.
Do not use with any opening blocked;
keep free of dust, lint, hair, and any-
thing that may reduce air ow.
8. Keep hair, loose clothing, ngers,
and all parts of body away from
openings and moving parts.
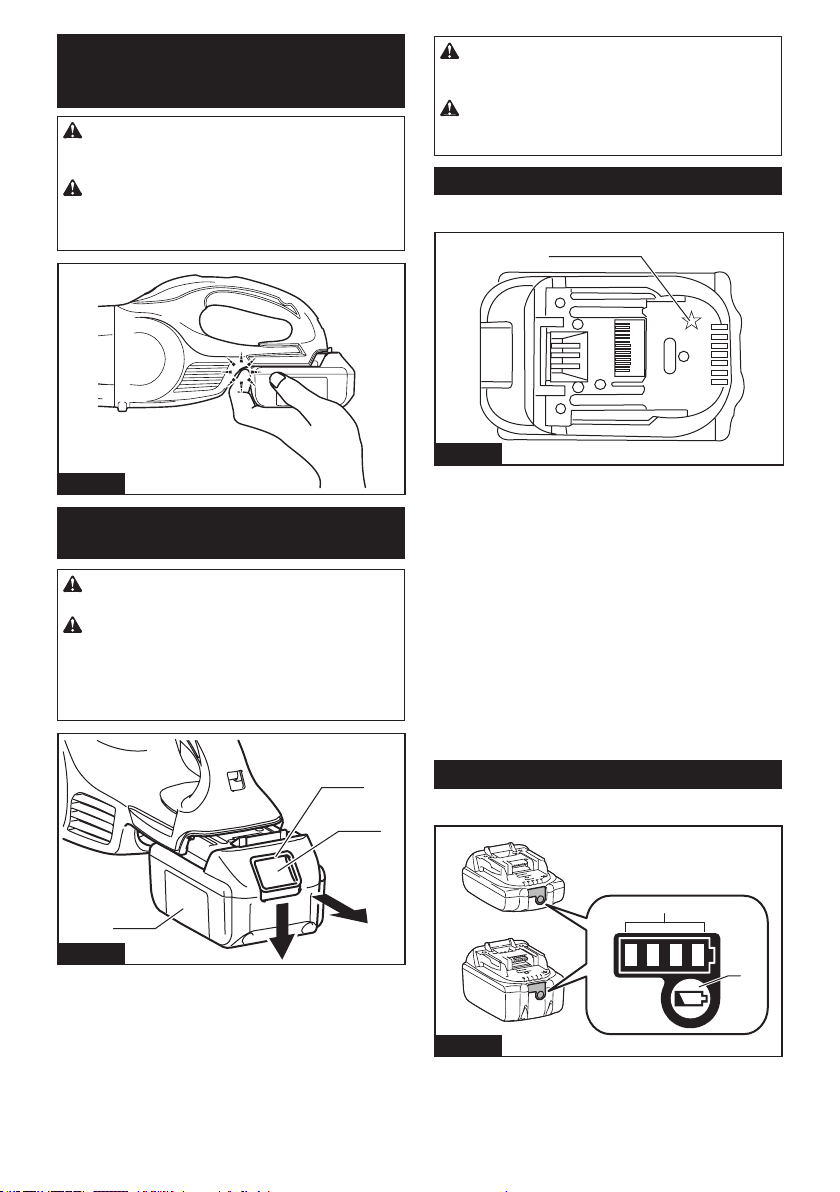
9. Turn o all controls before removing
the battery cartridge.
10.
Use extra care when cleaning on stairs.
11. Do not use to pick up ammable or
combustible liquids, such as gaso-
line, or use in areas where they may
be present.
12. Do not pick up anything that is burn-
ing or smoking, such as cigarettes,
matches, or hot ashes.
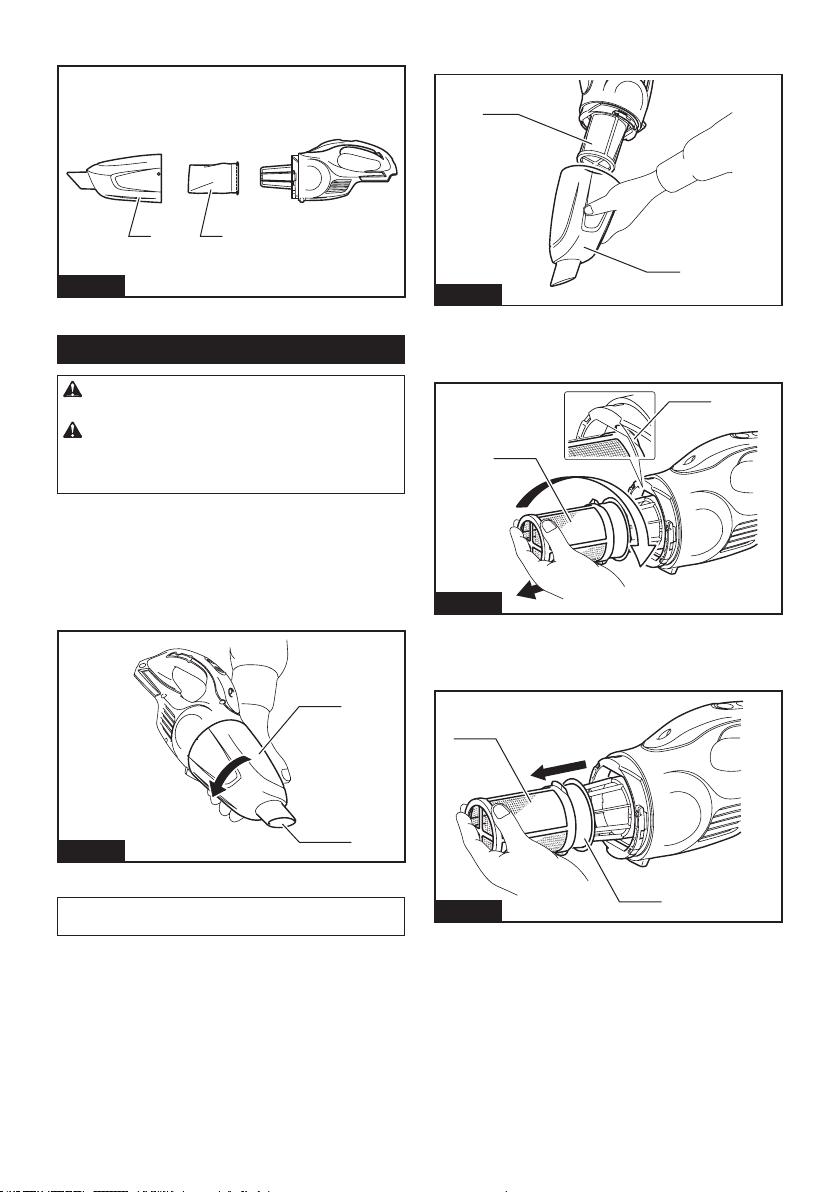
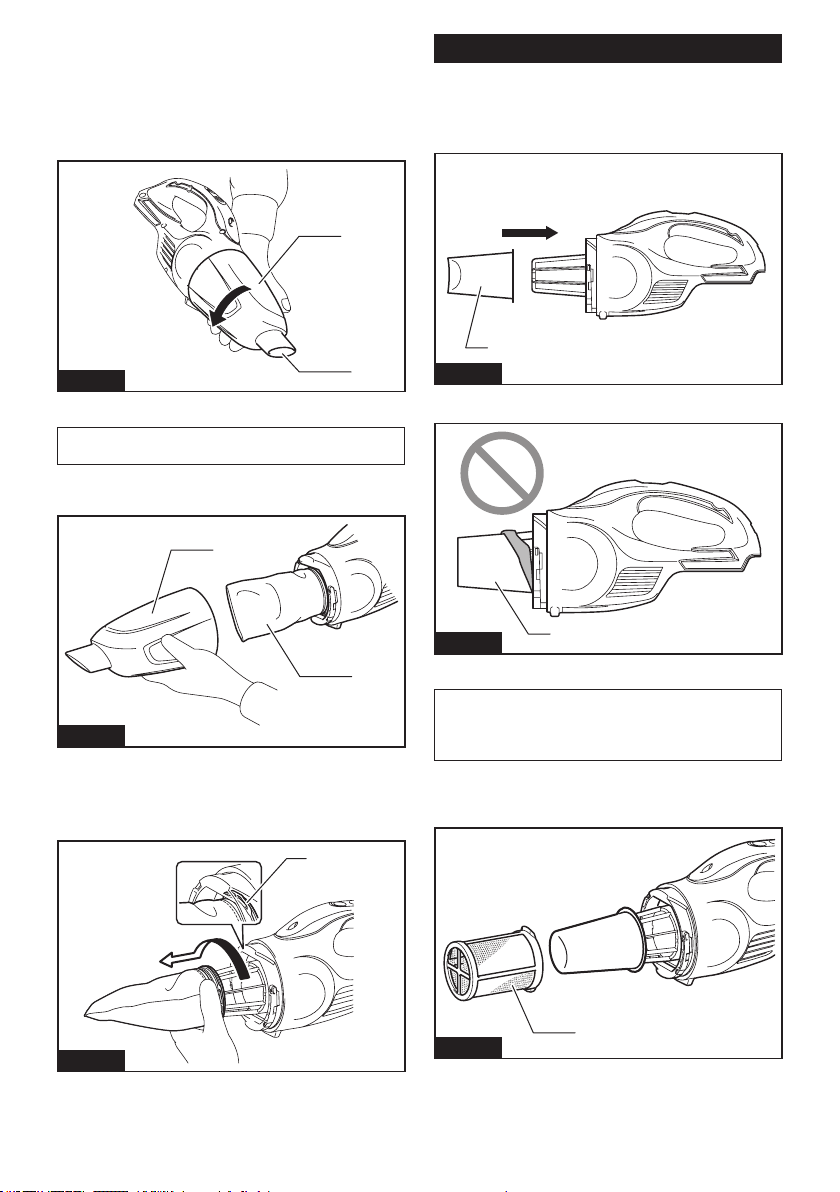
13. Do not use without dust bag and/or
lters in place.
14. Do not charge the battery outdoors.
15. Prevent unintentional starting.
Ensure the switch is in the o-po-
sition before connecting to battery
pack, picking up or carrying the
appliance. Carrying the appliance with
yourngerontheswitchorenergiz-
ing appliance that have the switch on
invites accidents.
16. Disconnect the battery pack from
the appliance before making any
adjustments, changing accessories,
or storing appliance. Such preventive
safety measures reduce the risk of
starting the appliance accidentally.
17. Recharge only with the charger
specied by the manufacturer. A
charger that is suitable for one type of
batterypackmaycreateariskofre
when used with another battery pack.
18. Use appliances only with speci-
cally designated battery packs. Use
of any other battery packs may create
ariskofinjuryandre.
19. When battery pack is not in use,
keep it away from other metal
objects, like paper clips, coins,
keys, nails, screws or other small
metal objects, that can make a
connection from one terminal to
another. Shorting the battery terminals
togethermaycauseburnsorare.
20. Under abusive conditions, liquid
may be ejected from the battery;
avoid contact. If contact acciden-
tally occurs, ush with water. If liq-
uid contacts eyes, additionally seek
medical help. Liquidejectedfromthe
battery may cause irritation or burns.
21.
Do not use a battery pack or appliance
that is damaged or modied. Damaged
or modied batteries may exhibit
unpredictable behaviour resulting in
re, explosion or risk of injury.
22.
Do not expose a battery pack or appli-
ance to re or excessive temperature.
Exposure to re or temperature above
130 °C may cause explosion.
23. Follow all charging instructions
and do not charge the battery
pack or appliance outside of the
temperature range specied in the
instructions. Charging improperly or
at temperatures outside of the speci-
edrangemaydamagethebatteryand
increasetheriskofre.
24. Have servicing performed by a
qualied repair person using only
identical replacement parts. This will
ensure that the safety of the product is
maintained.
25. Do not modify or attempt to repair
the appliance or the battery pack
except as indicated in the instruc-
tions for use and care.
SAVE THESE
INSTRUCTIONS.
ADDITIONAL
SAFETY RULES
This appliance is intended for commer-
cial use.
1. Read this instruction manual and
the charger instruction manual care-
fully before use.
2. Do not vacuum the following:
• Flammable liquid (kerosene,
gasoline, solvents such as ben-
zine, thinner, etc.)

4ENGLISH
• Hot substances that are burn-
ing or smoking (cigarettes,
matches, incense sticks, can-
dles, hot ashes), sparks and
metal dust generated by cutting
or grinding metal, etc.
• Flammable material (toner,
paint, spray, etc.)
• Foam like carpet cleaning agent,
etc. (they may cause explosion
or re)
• Explosive or pyrophoric sub-
stances (nitroglycerin, alumi-
num, magnesium, titanium, zinc,
red phosphorus, yellow phos-
phorus, celluloid, etc. and their
dust, gas or steam)
• Sharp objects (glass, cutlery,
wood splinter, metal, stone, nail,
razor, push pin, etc.)
• Solidifying and conductive
ne powder (metal or carbon
powder)
• Dehumidier
• Large amount of powder (our,
re extinguisher powder, etc.)
• Substances that cause toxic
symptoms
• Aggressive chemicals (acid,
leach, etc.)
• Liquid or damp garbage, includ-
ing vomit and excreta
• Asbestos
• Pesticides
Such action may cause re, injury
and/or property damage.
To reduce your exposure to these
chemicals, always wear approved
respiratory protection such as dust
masks that are specially designed
to lter out microscopic particles.
Direct the exhaust air away from
your face and body.
3. Stop operation immediately if you
notice anything abnormal.
4. If you drop or strike the cleaner,
check it carefully for cracks or dam-
age before operation.
5. Do not bring close to stoves or other
heat sources.
6. Do not block the intake hole or vent
holes.
SAVE THESE
INSTRUCTIONS.
Symbols
The followings show the symbols used for
tool.
volts
direct current
Important safety
instructions for
battery cartridge
1. Before using battery cartridge,
read all instructions and cautionary
markings on (1) battery charger,
(2) battery, and (3) product using
battery.
2. Do not disassemble or tamper the
battery cartridge. It may result in a
re,excessiveheat,orexplosion.
3. If operating time has become
excessively shorter, stop operating
immediately. It may result in a risk
of overheating, possible burns and
even an explosion.
4. If electrolyte gets into your eyes,
rinse them out with clear water and
seek medical attention right away. It
may result in loss of your eyesight.
5. Do not short the battery cartridge:
(1) Do not touch the terminals with
any conductive material.
(2) Avoid storing battery cartridge
in a container with other metal
objects such as nails, coins, etc.
(3) Do not expose battery cartridge
to water or rain.
A battery short can cause a large
current ow, overheating, possible
burns and even a breakdown.

5ENGLISH
6. Do not store and use the tool and
battery cartridge in locations where
the temperature may reach or
exceed 50 °C (122 °F).
7. Do not incinerate the battery car-
tridge even if it is severely damaged
or is completely worn out. The bat-
tery cartridge can explode in a re.
8. Do not nail, cut, crush, throw, drop
the battery cartridge, or hit against a
hard object to the battery cartridge.
Suchconductmayresultinare,
excessive heat, or explosion.
9. Do not use a damaged battery.
10. The contained lithium-ion batteries
are subject to the Dangerous Goods
Legislation requirements.
For commercial transports e.g. by
third parties, forwarding agents,
special requirement on packaging
and labeling must be observed.
For preparation of the item being
shipped, consulting an expert for
hazardous material is required.
Please also observe possibly more
detailed national regulations.
Tape or mask o open contacts and
pack up the battery in such a man-
ner that it cannot move around in
the packaging.
11. When disposing the battery car-
tridge, remove it from the tool and
dispose of it in a safe place. Follow
your local regulations relating to
disposal of battery.
12. Use the batteries only with the prod-
ucts specied by Makita. Installing
the batteries to non-compliant products
mayresultinare,excessiveheat,
explosion, or leak of electrolyte.
13. If the tool is not used for a long
period of time, the battery must be
removed from the tool.
14. During and after use, the battery
cartridge may take on heat which
can cause burns or low temperature
burns. Pay attention to the handling
of hot battery cartridges.
15. Do not touch the terminal of the tool
immediately after use as it may get
hot enough to cause burns.
16. Do not allow chips, dust, or soil
stuck into the terminals, holes, and
grooves of the battery cartridge. It
maycauseheating,catchingre,burst
and malfunction of the tool or battery
cartridge, resulting in burns or personal
injury.
17. Unless the tool supports the use
near high-voltage electrical power
lines, do not use the battery car-
tridge near a high-voltage electrical
power lines. It may result in a mal-
function or breakdown of the tool or
battery cartridge.
18. Keep the battery away from
children.
SAVE THESE
INSTRUCTIONS.
CAUTION: Only use genuine Makita batteries.
Use of non-genuine Makita batteries, or batteries that
have been altered, may result in the battery bursting
causingres,personalinjuryanddamage.Itwill
also void the Makita warranty for the Makita tool and
charger.
Tips for maintaining maximum
battery life
1. Charge the battery cartridge before completely
discharged. Always stop tool operation and
charge the battery cartridge when you notice
less tool power.
2. Never recharge a fully charged battery car-
tridge. Overcharging shortens the battery
service life.
3. Charge the battery cartridge with room tem-
perature at 10 °C - 40 °C (50 °F - 104 °F). Let
a hot battery cartridge cool down before
charging it.
4. When not using the battery cartridge, remove
it from the tool or the charger.
5. Charge the battery cartridge if you do not use
it for a long period (more than six months).

6ENGLISH
FUNCTIONAL
DESCRIPTION
CAUTION: Always be sure that the tool is
switched o and the battery cartridge is removed
before adjusting or checking function on the tool.
CAUTION: Take care not to trap nger(s)
between cleaner and battery as shown in diagram
when loading battery. Trappingnger(s)maycause
injury.
Fig.1
Installing or removing battery
cartridge
CAUTION: Always switch o the tool before
installing or removing of the battery cartridge.
CAUTION: Hold the tool and the battery car-
tridge rmly when installing or removing battery
cartridge. Failure to hold the tool and the battery
cartridgermlymaycausethemtoslipoyourhands
and result in damage to the tool and battery cartridge
andapersonalinjury.
1
2
3
Fig.2
►1. Red indicator 2. Button 3. Battery cartridge
To remove the battery cartridge, slide it from the tool
while sliding the button on the front of the cartridge.
To install the battery cartridge, align the tongue on the
battery cartridge with the groove in the housing and slip
it into place. Insert it all the way until it locks in place
with a little click. If you can see the red indicator as
showninthegure,itisnotlockedcompletely.
CAUTION:
Always install the battery cartridge fully
until the red indicator cannot be seen. If not, it may accidentally
falloutofthetool,causinginjurytoyouorsomeonearoundyou.
CAUTION: Do not install the battery cartridge
forcibly. If the cartridge does not slide in easily, it is
not being inserted correctly.
Battery protection system
Lithium-ion battery with star marking
1
Fig.3
►1. Star marking
Lithium-ion batteries with a star marking are equipped
with a protection system. This system automatically
cutsopowertothetooltoextendbatterylife.
The tool will automatically stop during operation if the tool and/
or battery are placed under one of the following conditions:
Overloaded:
The tool is operated in a manner that causes it to draw
an abnormally high current.
Inthissituation,turnthetooloandstoptheapplicationthatcaused
the tool to become overloaded. Then turn the tool on to restart.
If the tool does not start, the battery is overheated. In this
situation, let the battery cool before turning the tool on again.
Low battery voltage:
The remaining battery capacity is too low and the tool will not
operate. In this situation, remove and recharge the battery.
Indicating the remaining battery capacity
Only for battery cartridges with the indicator
1
2
Fig.4
►1. Indicator lamps 2. Check button
Press the check button on the battery cartridge to indi-
cate the remaining battery capacity. The indicator lamps
light up for a few seconds.

7ENGLISH
Indicator lamps Remaining
capacity
Lighted O Blinking
75% to 100%
50% to 75%
25% to 50%
0% to 25%
Charge the
battery.
The battery
may have
malfunctioned.
NOTE: Depending on the conditions of use and the
ambienttemperature,theindicationmaydierslightly
from the actual capacity.
NOTE:Therst(farleft)indicatorlampwillblinkwhen
the battery protection system works.
Switch action
1
2
Fig.5
►1. OFF button 2. HIGH/LOW button
To start the cleaner, simply press the "HIGH/LOW"
button.Toswitcho,pressthe"OFF"button.Tochange
the cleaner speed, press the "HIGH/LOW" button. The
rstpressonthisbuttonisforhighspeedandthesec-
ond press for low speed and then each press on this
button repeats the high/low speed cycle alternatively.
Lighting the lamp
CAUTION: Never look into the light directly.
Direct light causes damage to your eyes.
1
2
3
Fig.6
►1. OFF button 2. HIGH/LOW button 3. Lamp
To turn on the lamp, simply press the "HIGH/LOW"
button.Toturnothelamp,pressthe"OFF"button.
ASSEMBLY
CAUTION: Always be sure that the tool is
switched o and the battery cartridge is removed
before carrying out any work on the tool.
Type of lter
Normal lter
321
Fig.7
►1. Capsule 2.Prelter3. Filter

8ENGLISH
High performance lter
21
Fig.8
►1. Capsule 2.Highperformancelter
Disposing of dust
CAUTION: Empty the cleaner before it
becomes too full, or the suction force weakens.
CAUTION: Be sure to empty out the dust
inside the cleaner itself. Failure to do so may
cause the lter to be clogged or the motor to be
damaged.
Disposing of dust for normal lter
1. Inordertodropduststickingonthelterinthe
capsule, tap the capsule 4 or 5 times with your hand.
Now point suction inlet downwards, turn capsule in
direction of arrow in diagram, and disconnect capsule
slowly and straight.
1
2
Fig.9
►1. Capsule 2. Suction inlet
NOTE: Dust may spill out when capsule is opened, so
be sure to set a garbage bag beneath capsule.
2. Remove accumulated dust from inside of capsule
andoofprelter.
2
1
Fig.10
►1.Prelter2. Capsule
3. Twistprelterindirectionofarrowtounfasten
securinglipfromcleanerunitandthenpulloprelter.
2
1
Fig.11
►1.Prelter2. Securing lip
4. Cleanoutnedustfromprelter.Next,remove
lter,andlightlytaptodislodgedust.
2
1
Fig.12
►1.Prelter2. Filter

9ENGLISH
Disposing of dust for high
performance lter
1.
Inordertodropduststickingonthelterinthecapsule,
tap the capsule 4 or 5 times with your hand.
Now point suction inlet downwards, turn capsule in direction of
arrow in diagram, and disconnect capsule slowly and straight.
1
2
Fig.13
►1. Capsule 2. Suction inlet
NOTE: Dust may spill out when capsule is opened, so
be sure to set a garbage bag beneath capsule.
2. Remove accumulated dust from inside of capsule
andoofhighperformancelter.
1
2
Fig.14
►1. Capsule 2.Highperformancelter
3. Twisthighperformancelterindirectionofarrow
to unfasten securing lip from cleaner unit and then pull
othelter.
1
Fig.15
►1. Securing lip
4. Cleanoutthenedustandlightlytaptodislodge
dustfromhighperformancelter.
Reassembly
Reassembly for normal lter
1. Putonlteruntilitisfullyinpositiononthecleaner
unit.
1
Fig.16
►1. Filter
1
Fig.17
►1. Filter
NOTE:Makesurelterisputonstraightwithout
beingpeeledback.Iflterisputonincorrectlyas
shown in diagram, dust will get into motor housing,
and cause motor failure.
2. Connectprelter.Atthistime,makesuretotwist
preltersothatsecuringlipisrmlylockedintocleaner
unit.
1
Fig.18
►1.Prelter

10 ENGLISH
Fig.19
3. Connect capsule. Align O mark on capsule with O
markonhandleandthenrmlytwistcapsuleindirection
of arrow until it is secured.
1
Fig.20
►1. O Mark
2
1
Fig.21
►1. Handle 2. Capsule
NOTE: Always remove dust ahead of time, as suction
power will be reduced if there is too much dust in
cleaner.
NOTE:Alwaysbesuretocheckthatbothlterand
prelterareloadedcorrectlypriortousingcleaner.
If they are not loaded correctly, dust will get into the
motor housing, and cause motor failure.
Ifthefollowingexamplesoccur,lterandprelterare
not loaded correctly. Reload them correctly to rectify
problem.
Problem Examples
Example1:Onlyprelterhasbeenloaded(nolter)
1
Fig.22
►1.Prelter
Example2:Onlylterhasbeenloaded(noprelter)
1
Fig.23
►1. Filter
Example 3: Filter has been loaded in a peeled back
state
1
Fig.24
►1. Filter

11 ENGLISH
Example4:Prelter'ssecuringlipisnotrmlylocked
into groove of cleaner housing
2
13
Fig.25
►1. Groove of cleaner housing 2.Prelter3. Securing
lip
Reassembly for high performance
lter
1. Connecthighperformancelter.Atthistime,make
suretotwisthighperformanceltersothatsecuringlip
isrmlylockedintocleanerunit.
1 2
Fig.26
►1.Highperformancelter2. Securing lip
1
Fig.27
►1. Securing lip
2. Connect capsule. Align O mark on capsule with O
markonhandleandthenrmlytwistcapsuleindirection
of arrow until it is secured.
1
Fig.28
►1. O Mark
2
1
Fig.29
►1. Handle 2. Capsule
NOTE: Always remove dust ahead of time, as suction
power will be reduced if there is too much dust in
cleaner.
NOTE: Always be sure to check that high perfor-
mancelterisloadedcorrectlypriortousingcleaner.
If they are not loaded correctly, dust will get into the
motor housing, and cause motor failure.
If the following examples occur, high performance
lterisnotloadedcorrectly.Reloadthemcorrectlyto
rectify problem.
Problem Examples
Securinglipofhighperformancelterisnotrmly
locked into groove of cleaner housing.
12
Fig.30
►1. Securing lip 2. Groove of cleaner housing

12 ENGLISH
OPERATION
CAUTION: To connect attachments, such
as nozzle, twist and insert the attachment in
direction of the arrow to secure the connection
during use. To disconnect the attachments, twist
and extract it also in direction of the arrow. If an
attachment is twisted in the opposite direction when
being connected or disconnected, the capsule may
become loose.
1
Fig.31
►1. Capsule
Cleaning (Suction)
Nozzle
Attachthenozzletocleanotables,desks,furniture,
etc.Thenozzleslipsoneasily.
1
Fig.32
►1.Nozzle
Nozzle + Extension wand (Straight pipe)
Theextensionwandtsinbetweenthenozzleandthe
cleaner itself. This arrangement is convenient for clean-
ingaoorinastandingposition.
1
23
Fig.33
►1. Cleaner body 2. Extension wand 3.Nozzle
Corner nozzle
Fitonthecornernozzleforcleaningcornersandcrev-
ices of a car or furniture.
21
Fig.34
►1.Cornernozzle2. Cleaner body
Corner nozzle +Extension wand
(Straight pipe)
In tight quarters where the cleaner itself cannot
squeezein,orinhighplaceshardtoreach,usethis
arrangement.
3
12
Fig.35
►1.Cornernozzle2. Extension wand 3. Cleaner body

13 ENGLISH
Cleaning without nozzle
Youcanpickuppowderanddustwithoutnozzle.
Fig.36
MAINTENANCE
CAUTION: Always be sure that the tool is
switched o and the battery cartridge is removed
before attempting to perform inspection or
maintenance.
After use
CAUTION: Putting the cleaner against the
wall without any other support may cause the
cleaner to fall down, resulting in personal injury
or damage to the cleaner.
Fig.37
Cleaning
NOTICE: Never use gasoline, benzine, thinner,
alcohol or the like. Discoloration, deformation or
cracks may result.
NOTICE: Do not blow dust sticking on the
cleaner and lters by air duster. It brings dust into
the housing and causes failure.
NOTICE: After washing lters, dry them thor-
oughly before use.Insucientlydriedltersmay
cause poor suction and shorten the service life of the
motor.
NOTICE: After cleaning lters and sponge lter,
be sure to re-install them before use. If you use the
cleanerwithoutltersandspongelter,dustcomes
into the motor housing and cause malfunction.
Cleaner body
Fromtimetotimewipeotheoutside(cleanerbody)of
the cleaner using a cloth dampened in soapy water.
Cleanoutalsothesuctionopeningandltermounting
area.
Fig.38
Filter
Washthelterinsoapywaterwhenitiscloggedwith
dust and the cleaner power becomes weak. Dry it out
thoroughly before use.
Fig.39

14 ENGLISH
Sponge lter
Whenthespongelterbecomesdirty,cleanitas
follows.
1. Removethelter.
2. Pulloutthespongelterfrombetweenthepillars.
3. Cleanthespongelterbytappingorwashing.If
you wash it, dry it out thoroughly before use.
4. Insertthespongelterfrombetweenthepillars
and set it in the original position. Make sure that each
bottomedgeofthepillarholdsdownthespongelter,
andthereisnogapbetweenthespongelterandsuc-
tion opening.
1
2
Fig.40
►1.Spongelter2. Bottom edge of pillar
Wall mount for cordless cleaner
Optional accessory
NOTE: The screw to mount the holder is not included.
Prepareascrewwhichtswiththematerialtoscrew
into.
Attach the wall mount for cordless cleaner to a hard
wooden wall, beam or column, where the wall mount
forcordlesscleanercanbermlysecured.Alwaysbe
sure that the wall mount for cordless cleaner is securely
attached before hanging the cleaner.
1
Fig.41
►1. Wall mount for cordless cleaner
CAUTION: Do not hang the cleaner to the wall
mount violently or hang other appliances than the
cleaner.
Troubleshooting
Before asking for repairs, check the following points.
Symptom Area to be investigated Fixing method
Weak suction power Is the capsule full of dust? Empty the capsule of dust.
Isthelterclogged? Cleanorwashthelter.
Is the battery cartridge discharged? Charge the battery cartridge.
Not working Is the battery cartridge discharged? Charge the battery cartridge.
CAUTION: Do not attempt to repair the cleaner by yourself.
TomaintainproductSAFETYandRELIABILITY,repairs,anyothermaintenanceoradjustmentshouldbeperformed
byMakitaAuthorizedorFactoryServiceCenters,alwaysusingMakitareplacementparts.

15 ENGLISH
OPTIONAL
ACCESSORIES
CAUTION: These accessories or attachments
are recommended for use with your Makita tool
specied in this manual. The use of any other
accessories or attachments might present a risk of
injurytopersons.Onlyuseaccessoryorattachment
for its stated purpose.
If you need any assistance for more details regard-
ing these accessories, ask your local Makita Service
Center.
• Extension wand (Straight pipe)
• Nozzle
• Nozzleforcarpet
• Shelf brush
• Cornernozzle
• Round brush
• Flexible hose
• Freenozzle
• Filter
• Prelter
• Highperformancelter
• Wall mount for cordless cleaner
• Cyclone attachment
• Makita genuine battery and charger
NOTE: Some items in the list may be included in the
tool package as standard accessories. They may
dierfromcountrytocountry.
Cyclone attachment
1
2
3
Fig.42
►1. Straight pipe 2. Cyclone attachment 3. Suction
inlet
About the cyclone attachment
Using the cleaner with the cyclone attachment installed
reduces the amount of dust that enters the capsule,
which helps to prevent the suction force from weaken-
ing. In addition, cleaning after use is also simple.
CAUTION: Always be sure that the tool is
switched o and the battery cartridge is removed
before carrying out any work on the tool. If the
battery cartridge is left inserted, the cleaner may start
unexpectedlyandresultininjury.
CAUTION: Clean the mesh lter of the
cyclone attachment and the lters of the cleaner
unit when they become clogged. Continued use in
the clogged condition may result in heating or smoke.
NOTICE: When the cyclone attachment is
attached, do not use the cleaner in the horizontal
or upward facing condition. Doing so may cause
themeshltertobecomeclogged.
NOTICE: Always use the cleaner with the lters
installed, even when using the cyclone attach-
ment.Usingthecleanerwithouttheltersinstalled
may result in a motor malfunction.
NOTE: Check that the cyclone attachment, cleaner,
and straight pipe are locked properly before use.
NOTE: Empty the dust case of the cyclone attach-
ment and the capsule of the cleaner when dust has
accumulated. Continued use will result in weakened
suction force.
Disposing of dust
When dust has accumulated up to the full line of the
dust case, follow the procedure below and dispose of
the dust.
1. Holdthedustcasermly,pressandholdthetwo
buttons, and remove the dust case.
2
3
1
4
Fig.43
►1. Full line 2. Dust case 3. Button (two locations)
4.Meshlter
2. Dispose of the dust inside the dust case and
remove any dust and powder adhered to the surface of
themeshlter.

16 ENGLISH
3. Insert the dust case all the way until the two but-
tons lock with a click.
2
1
Fig.44
►1. Dust case 2. Button (two locations)
NOTE: Check that the cyclone attachment, cleaner,
andstraightpipeareallrmlyconnectedbefore
restarting operation.
NOTE: If the suction force does not recover even
after disposing of the dust and cleaning the mesh
lter,checkwhetherdusthasaccumulatedinthe
capsule of the cleaner or clogging has occurred.
Cleaning
Whenthedustcasebecomesdirtyorthemeshlteris
clogged, remove and wash them with water. (Refer to
“Disposing of dust” for the removal procedure.)
Dry the parts thoroughly before reinstallation and use.
1
2
Fig.45
►1. Dust case 2.Meshlter
Whenthemeshltergetsdirtybadly,cleanitinthe
following procedures.
1. Turnthemeshltercounterclockwiseandremove
it while the hooks are unlocked.
1
2
Fig.46
►1.Meshlter2. Hook
2. Removethedustonthemeshlterandthenwash
it with water. After that, dry it thoroughly.
3. Insertthemeshlterintothebasewhilethehooks
arealignedwiththeport.Turnthemeshlterclockwise
until the hooks are locked with a click. Make sure that
themeshlterisinstalledsecurely.
2
1
3
Fig.47
►1.Meshlter2. Hook 3. Port

17
MAKITA LIMITED
WARRANTY
Please refer to the annexed warranty sheet for the
most current warranty terms applicable to this product.
If annexed warranty sheet is not available, refer to the
warranty details set forth at below website for your
respective country.
United States of America: www.makitatools.com
Canada: www.makita.ca
Other countries: www.makita.com
ENGLISH

18 FRANÇAIS
FRANÇAIS (Mode d’emploi original)
SPÉCIFICATIONS
Modèle : DCL181F
Capacité 650 ml
Utilisation continue
(avec batterie BL1830B)
ÉLEVÉE Environ 20 min.
BASSE Environ 40 min.
Longueur totale 999 mm (39-5/16")
Tension nominale C.C. 18 V
Poids net 1,2 - 1,5 kg (2,7 - 3,4 lbs)
• Étantdonnél’évolutionconstantedenotreprogrammederechercheetdéveloppement,lesspécications
contenuesdanscemanuelsontsujettesàmodicationsanspréavis.
• Lesspécicationspeuventvariersuivantlespays.
• Le poids ne comprend pas les accessoires autres que la/les batterie(s). Les combinaisons la plus légère et la
plus lourde d’appareil et de batterie(s) sont indiquées dans le tableau.
Batteries et chargeurs applicables
Batterie
BL1815N / BL1820B / BL1830 / BL1830B / BL1840B / BL1850B / BL1860B
Chargeur
DC18RC / DC18RD / DC18RE / DC18SD / DC18SE / DC18SF / DC18SH
• Suivantlarégionoùvoushabitez,ilsepeutquecertainesdesbatteriesetcertainsdeschargeursénumérés
ci-dessus ne soient pas disponibles.
MISE EN GARDE : Utilisez exclusivement les batteries et chargeurs énumérés ci-dessus. L’utilisation
de toute autre batterie ou tout autre chargeur peut entraîner une blessure et/ou un incendie.
CONSIGNES DE
SÉCURITÉ
IMPORTANTES
CONSIGNES DE
SÉCURITÉ
Lors de l’utilisation d’un appareil élec-
trique, vous devez toujours prendre
des précautions de base, dont les sui-
vantes :
CONSERVEZ CES
INSTRUCTIONS.
MISE EN GARDE
Pour réduire les risques d’incendie, de
décharge électrique et de blessure :
1. Ne quittez pas l’appareil alors que la
batterie y est insérée. Retirez la bat-
terie de l’appareil lorsqu’il n’est pas
utilisé et avant de le faire réparer.
2. Ne l’utilisez pas sur des surfaces
mouillées. Ne l’exposez pas à la
pluie. Rangez-le à l’intérieur.
3. Ne laissez pas les enfants l’utiliser
comme jouet. Une attention particu-
lière est nécessaire lors de l’utilisa-
tion par les enfants ou près d’eux.
4. Utilisez l’outil uniquement de la
façon décrite dans ce manuel.
Utilisez uniquement les accessoires
recommandés par le fabricant.
5.
Ne l’utilisez pas avec une batterie endom-
magée. Si l’appareil ne fonctionne pas
bien, s’il a été échappé, endommagé, laissé
à l’extérieur ou échappé dans l’eau, retour-
nez-le à un centre de service après-vente.

19 FRANÇAIS
6. Ne manipulez pas l’appareil avec les
mains mouillées.
7. Ne mettez rien dans les ouvertures.
N’utilisez jamais l’outil si une des
ouvertures est bouchée ; gardez ces
dernières exemptes de poussières,
charpies, cheveux ou tout objet pou-
vant réduire la circulation de l’air.
8. Gardez les cheveux, les vêtements
amples, les doigts et toute autre par-
tie du corps à l’écart des ouvertures
et des pièces en mouvement.
9. Mettez toutes les commandes hors
tension avant de retirer la batterie.
10. Soyez tout particulièrement pru-
dent lorsque vous nettoyez sur les
marches d’un escalier.
11. Ne l’utilisez pas pour aspirer des
liquides inammables ou com-
bustibles tels que l’essence, ou
dans des zones où de tels liquides
peuvent être présents.
12. N’aspirez pas d’objets qui brûlent
ou dégagent de la fumée, tels que
des cigarettes, des allumettes ou
des cendres encore chaudes.
13.
Ne l’utilisez pas sans avoir mis en place
le sac à poussière et/ou les ltres.
14.
Ne chargez pas la batterie à l’extérieur.
15. Évitez le démarrage accidentel.
Assurez-vous que l’interrupteur
est sur la position d’arrêt avant de
connecter la batterie, de ramas-
ser l’appareil ou de le transporter.
Transporter l’appareil avec le doigt
sur l’interrupteur, ou mettre l’appareil
sous tension avec l’interrupteur en
position de marche ouvre la porte aux
accidents.
16. Déconnectez la batterie de l’appareil
avant d’eectuer tout réglage, de
remplacer les accessoires ou de
ranger l’appareil. Ces mesures de
sécurité préventives réduiront le risque
de démarrage accidentel de l’appareil.
17. Ne rechargez la batterie qu’avec le
chargeur spécié par le fabricant.
Un chargeur adéquat pour un type
donné de batterie peut entraîner un
risque d’incendie lorsque utilisé avec
un autre type de batterie.
18. Utilisez les appareils uniquement
avec les batteries spéciquement
désignées. L’utilisation de toute autre
batterie peut entraîner un risque de
blessure et d’incendie.
19. Lorsque la batterie n’est pas utili-
sée, gardez-la à l’écart des autres
objets métalliques tels que trom-
bones, pièces de monnaie, clés,
clous, vis et autres petits objets
métalliques qui peuvent établir une
connexion entre deux bornes.Le
court-circuitage des bornes de bat-
terie peut causer des brûlures ou un
incendie.
20. Dans des conditions d’utilisation
abusives, du liquide peut être éjecté
de la batterie; évitez tout contact. En
cas de contact accidentel, rincez à
l’eau. Si le liquide entre en contact
avec les yeux, consultez aussi un
médecin. Leliquideéjectédelabat-
terie peut causer de l’irritation ou des
brûlures.
21. N’utilisez pas une batterie ou un
appareil endommagé ou modié.
Les batteries endommagées ou
modiées peuvent avoir un compor-
tement imprévisible dont peuvent
résulter un incendie, une explosion
ou un risque de blessure.
22. N’exposez pas une batterie ou un
appareil au feu ou à une tempéra-
ture excessive. L’exposition au feu
ou à une température supérieure à
130 °C peut entraîner une explosion.
23. Respectez toutes les instructions de
charge, et ne chargez pas la batte-
rie ou l’appareil hors de la plage de
température spéciée dans les ins-
tructions. Charger de manière inadé-
quateouàdestempératureshorsde
laplagespéciéepeutendommager
la batterie et fait augmenter le risque
d’incendie.
24. L’entretien doit être coné à un
réparateur qualié et n’utilisant que
des pièces de rechange identiques
aux pièces d’origine. Cela assurera
le maintien du produit dans un état
sécuritaire.

20 FRANÇAIS
25. Ne modiez pas ou n’essayez pas
de réparer l’appareil ou la batterie
autrement que tel qu’indiqué dans
les instructions d’utilisation et
d’entretien.
CONSERVEZ CES
INSTRUCTIONS.
RÈGLES DE
SÉCURITÉ
SUPPLÉMENTAIRES
Cet appareil est conçu pour un usage
commercial.
1. Lisez attentivement ce mode d’em-
ploi et le mode d’emploi du chargeur
avant d’utiliser l’appareil.
2. N’utilisez pas l’appareil pour aspirer
les matières suivantes :
• Liquides inammables (kéro-
sène, essence, solvants tels que
benzine, diluant, etc.)
• Substances chaudes qui
brûlent ou dégagent de la fumée
(cigarettes, allumettes, bâtons
d’encens, chandelles, cendres
chaudes), étincelles et pous-
sières métalliques générées
par la coupe ou le meulage du
métal, etc.
• Matières inammables (encre
en poudre, peinture, substance
vaporisée, etc.)
• Mousses telle qu’agent de net-
toyage pour tapis, etc. (elles
peuvent causer une explosion
ou un incendie)
• Substances explosives ou
pyrophoriques (nitroglycérine,
aluminium, magnésium, titane,
zinc, phosphore rouge, phos-
phore jaune, celluloïd, etc.,
et leurs poussières, gaz ou
vapeurs)
• Objets tranchants (verre, coutel-
lerie, éclat de bois, métal, pierre,
clou, rasoir, punaise, etc.)
• Poudre ne solidiante et
conductrice (poudre de métal ou
de carbone)
• Déshydrateur
• Grande quantité de poudre
(farine, poudre d’extincteur, etc.)
• Substances qui causent des
symptômes d’intoxication
• Produits chimiques corrosifs
(acide, lixiviat, etc.)
• Déchets liquides ou humides, y
compris vomi et excréments
• Amiante
• Pesticides
Ces applications peuvent causer
un incendie, une blessure et/ou des
dommages matériels.
Pour réduire le risque d’exposition
à ces produits chimiques, portez
toujours des dispositifs de protec-
tion respiratoire approuvés, tels
que des masques antipoussières
spécialement conçus pour ltrer les
particules microscopiques. Dirigez
l’air évacué loin de votre visage et
de votre corps.
3. Arrêtez immédiatement votre outil
dès que vous observez quelque
chose d’anormal.
4. Si vous échappez ou heurtez l’as-
pirateur, vériez soigneusement
l’absence de ssures ou dommages
avant de l’utiliser à nouveau.
5. Ne l’approchez pas du four ni de
toute autre source de chaleur.
6. N’obstruez pas le trou d’admission
ou les trous d’évent.
CONSERVEZ CES
INSTRUCTIONS.
Symboles
Les symboles utilisés pour l’outil sont indi-
qués ci-dessous.
volts
courant continu
Other manuals for DCL181F
10
Table of contents
Languages:
Other Makita Vacuum Cleaner manuals

Makita
Makita VC006GM User manual

Makita
Makita DCL140 User manual

Makita
Makita BCL142 User manual

Makita
Makita XCV19 User manual

Makita
Makita DCL281F User manual

Makita
Makita GCV02 User manual

Makita
Makita VC4210MX3 User manual

Makita
Makita DRC200 User manual

Makita
Makita VC3211M User manual

Makita
Makita XCV08 User manual

Makita
Makita DVC261Z User manual

Makita
Makita DVC866L User manual

Makita
Makita DVC152L User manual

Makita
Makita CL107FD User manual

Makita
Makita HANDY VAC II 4071D User manual

Makita
Makita 4076D User manual

Makita
Makita LXLC01 User manual

Makita
Makita CL106FD User manual

Makita
Makita DVC750L User manual

Makita
Makita CL107FD User manual