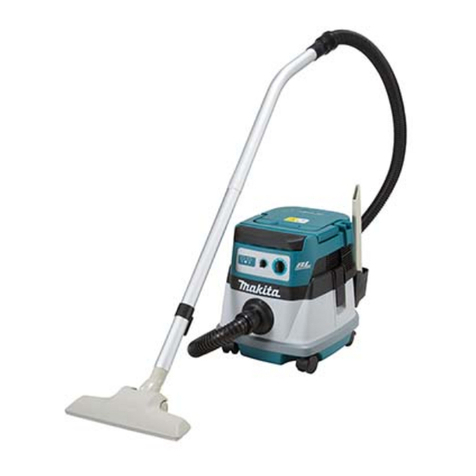
Makita VC2510L User manual

1
GB Vacuum Cleaner INSTRUCTION MANUAL
UA Пилосос ІНСТРУКЦІЯ ЗЕКСПЛУАТАЦІЇ
PL Odkurzacz INSTRUKCJA OBSŁUGI
RO Aspirator MANUAL DE INSTRUCŢIUNI
DE Absauggerät BEDIENUNGSANLEITUNG
HU Porszívó HASZNÁLATI KÉZIKÖNYV
SK VysávačNÁVOD NA OBSLUHU
CZ VysavačNÁVOD K OBSLUZE
VC1310L
VC2510L
VC3210L

2
12
1 011593
12
2 011594
1
2
3
4
3 011595
12
4 011594
1
5 011609
1
2
6 011597
1
7 011598
1
8 011599 9 011645
12
3
4
10 011611
1
2
3
4
11 011615
1
12 011638

3
1
13 011588 14 011589
1
15 011604
1
16 011606
1
2
3
17 011607 18 011608
1
2
19 011631
1
2
20 011632 21 011590
1
2
22 011591
12
3
23 011592
1
2
3
24 011600

4
25 011602
1
2
26 011610
1
2
27 011633
1
2
28 011597
1
2
29 011635
1
2
30 011634
1
2
31 011614 32 011601

5
ENGLISH (Original instructions)
Explanation of general view
1-1. Suction force adjusting knob
1-2. Switch lever
2-1. Suction force adjusting knob
2-2. Switch lever
3-1. Cap
3-2. Power supply cord
3-3. Suction force adjusting knob
3-4. Switch lever
4-1. Suction force adjusting knob
4-2. Switch lever
5-1. Holder
6-1. Power supply cord
6-2. Base hook
7-1. Front cuffs
8-1. Hose
10-1. Caster
10-2. Stopper lever
10-3. FREE position
10-4. LOCK position
11-1. Caster
11-2. Stopper lever
11-3. FREE position
11-4. LOCK position
12-1. Rubber holder
13-1. Paper pack
15-1. Cord hook
16-1. Press with a force and lower
17-1. Tank cover
17-2. Protrusion of the pipe holder
17-3. Groove
19-1. Tank cover
19-2. Hook
20-1. Tank cover
20-2. Hook
22-1. Holder plate
22-2. Tank
23-1. Polyethylene bag
23-2. Holder plate
23-3. Tank
24-1. Tank cover
24-2. Polyethylene bag
24-3. Hook
26-1. Handle
26-2. Head
27-1. Cord hook
27-2. Power supply cord
28-1. Power supply cord
28-2. Base hook
29-1. Cord hook
29-2. Power supply cord
30-1. Power supply cord
30-2. Base hook
31-1. Tank
31-2. Prefilter
SPECIFICATIONS
Model VC1310L / VC2510L / VC3210L
EU AU/NZ GB 110V GB 230V CL
Voltage Volt 230 - 240 230 - 240 110 230 - 240 220
Power consumption
Watt 1050 1050 1050 1050 1050
Connected load for
appliance socket
Watt at
symbol mode 2400 1350 650 2000 2400
Connected load for
appliance socket
Watt at
symbol mode 2600 1600 950 2400 2600
Total connected load
Watt 3650 2650 2000 3450 3650
Model VC1310L VC2510L VC3210L
Volume flow (air) 2.0m3/min.
Vacuum 22 kPa
Protection class 1
Type of protection IP X4 (splash-proof)
Dust 13L 25L 32L
Recoverable
capacity Water 7L 14L 27L
Dimensions (L x W x H)
366 mm x 334 mm
x 420 mm
432 mm x 416 mm
x 451 mm
552 mm x 398 mm
x 685 mm
Net weight 9.6 Kg 10.5 Kg 14.5 Kg
• Due to our continuing programme of research and development, the specifications herein are subject to change without notice.
• Specifications may differ from country to country.
• Weight according to EPTA-Procedure 01/2003

6
END108-2
Symbols
The following show the symbols used for the equipment.
Be sure that you understand their meaning before use.
・Read instruction manual.
・Warning! The cleaner may contain
hazardous dust.
・Never stand on the cleaner.
・Only for EU countries
Do not dispose of electric equipment
together with household waste material!
In observance of European Directive
2002/96/EC on waste electric and
electronic equipment and its
implementation in accordance with
national law, electric equipment that
have reached the end of their life must
be collected separately and returned to
an environmentally compatible recycling
facility.
ENE016-1
Intended use
The tool is intended for collecting both wet and dry dust.
ENF001-1
Power supply
The tool should be connected only to a power supply of
the same voltage as indicated on the nameplate, and can
only be operated on single-phase AC supply. This tool
should be grounded while in use to protect the operator
from electric shock. Use only three-wire extension cords
which have three-prong grounding-type plugs and
three-pole receptacles which accept the tool's plug.
ENG905-1
Noise
The typical A-weighted noise level determined according
to EN/IEC60704:
Model VC1310L
Sound pressure level (LpA) : 72 dB(A)
Uncertainty (K) : 2.5 dB(A)
The noise level under working may exceed 80 dB (A).
Model VC2510, LVC3210L
Sound pressure level (LpA) : 73 dB(A)
Uncertainty (K) : 2.5 dB(A)
The noise level under working may exceed 80 dB (A).
Wear ear protection
ENH038-1
For European countries only
EC Declaration of Conformity
We Makita Corporation as the responsible
manufacturer declare that the following Makita
machine(s):
Designation of Machine:
Vacuum Cleaner
Model No./ Type: VC1310L, VC2510L, VC3210L
are of series production and
Conforms to the following European Directives:
2006/42/EC
And are manufactured in accordance with the following
standards or standardised documents:
EN60335
The technical documentation is kept by our authorised
representative in Europe who is:
Makita International Europe Ltd.
Michigan Drive, Tongwell,
Milton Keynes, Bucks MK15 8JD, England
23.06.2010
000230
Tomoyasu Kato
Director
Makita Corporation
3-11-8, Sumiyoshi-cho,
Anjo, Aichi, 446-8502, JAPAN
ENB119-3
VACUUM CLEANER SAFETY
WARNINGS
WARNING! IMPORTANT READ CAREFULLY all
safety warnings and all instructions BEFORE USE.
Failure to follow the warnings and instructions may result
in electric shock, fire and/or serious injury.
1. Before use, make sure that this cleaner must
be used by people who have been adequately
instructed on the use of this cleaner.
2. Only use the socket outlet on the cleaner for
purposes specified in the instructions.
3. If liquid escapes from the cleaner, switch off
immediately.
4. Clean the water level limiting device regularly
and examine it for signs of damage.
5. Do not use the cleaner without the filter.
Replace a damaged filter immediately.
6. USE OF EXTENSION CORD. When using an
extension cord because of the great distance
to your power source, try to employ a cord
that is sufficiently thick but not too long, or
cleaner performance will be adversely affected.
For outdoor applications use an extension
cord suitable for outdoor use.

7
7. VOLTAGE WARNING: Before connecting the
cleaner to a power source (receptacle, outlet,
etc.) be sure the voltage supplied is the same
as that specified on the nameplate of the
cleaner. A power source with voltage greater
than that specified for the cleaner can result in
SERIOUS INJURY to the operator as well as
damage to the cleaner. If in doubt, DO NOT
PLUG IN THE CLEANER. Using a power
source with voltage less than the nameplate
rating is harmful to the motor.
8. AVOID UNINTENTIONAL STARTING. Be sure
switch is OFF when plugging in.
9. Do not attempt to pick up flammable materials,
fire works, lighted cigarettes, hot ashes, hot
metal chips, sharp materials such as razors,
needles, broken glass or the like.
10. NEVER USE THE CLEANER IN THE VICINITY
OF GASOLINE, GAS, PAINT, ADHESIVES OR
OTHER HIGHLY EXPLOSIVE SUBSTANCES.
The switch emits sparks when turned ON and
OFF. And so does the motor commutator
during operation. A dangerous explosion may
result.
11. Never vacuum up toxic, carcinogenic,
combustible or other hazardous materials
such as asbestos, arsenic, barium, beryllium,
lead, pesticides, or other health endangering
materials.
12. Never use the cleaner outdoors in the rain.
13.
Do not use close to heat sources (stoves, etc.).
14. GUARD AGAINST ELECTRIC SHOCK. Prevent
body contact with grounded surfaces. For
example; pipes, radiators, ranges, refrigerator
enclosures.
15. Do not block cooling vents. These vents
permit cooling of the motor. Blockage should
be carefully avoided otherwise the motor will
burn out from lack of ventilation.
16. Keep proper footing and balance at all times.
17. DO NOT ABUSE CORD. Never carry the
cleaner by cord or yank it to disconnect from
receptacle. Keep cord away from heat, oil, and
sharp edges.
18. Do not fold, tug or step on the hose.
19. Stop the cleaner immediately if you notice
poor performance or anything abnormal
during operation.
20. DISCONNECT THE CLEANER. When not in
use, before servicing, and when changing
accessories.
21. Clean and service the cleaner immediately
after each use to keep it in tiptop operating
condition.
22. MAINTAIN THE CLEANER WITH CARE. Keep
the cleaner clean for better and safer
performance. Follow instructions for changing
accessories. Inspect cleaner cords
periodically and if damaged, have repaired by
authorized service facility. Inspect extension
cords periodically and replace if damaged.
Keep handles dry, clean, and free from oil and
grease.
23. CHECK DAMAGED PARTS. Before further use
of the cleaner, a guard or other part that is
damaged should be carefully checked to
determine that it will operate properly and
perform its intended function. Check for
alignment of moving parts, binding of moving
parts, breakage of parts, mounting, and any
other conditions that may affect its operation.
A guard or other part that is damaged should
be properly repaired or replaced by an
authorized service center unless otherwise
indicated elsewhere in this instruction manual.
Have defective switches replaced by
authorized service center. Don’t use the
cleaner if switch does not turn it on and off.
24. REPLACEMENT PARTS. When servicing, use
only identical replacement parts.
25. STORE IDLE CLEANER. When not in use, the
cleaner should be stored indoors.
26. Be kind to your cleaner. Rough handling can
cause breakage of even the most sturdily built
cleaner.
27. Do not attempt to clean the exterior or interior
with benzine, thinner or cleaning chemicals.
Cracks and discoloration may be caused.
28. Do not use cleaner in an enclosed space
where flammable, explosive or toxic vapors
are given off by oil-base paint, paint-thinner,
gasoline, some mothproofing substances, etc.,
or in areas where flammable dust is present.
29. Do not leave the cleaner cord lying on the
floor after you have finished a cleaning job. It
can become a tripping hazard or may cause
damage to the cleaner.
30. Do not operate this or any tool while under the
influence of drugs or alcohol.
31. As a basic rule of safety, use safety goggles or
safety glasses with side shields.
32. Use a dust mask in dusty work conditions.
33.
The cleaner is not intended for use by young
children or infirm persons without supervision.
34. Young children should be supervised to
ensure that they do not play with the cleaner.
35. Never handle plug cord or cleaner with wet
hands.
36. Use extreme caution when cleaning on stairs.
KEEP FOR FUTURE REFERENCE
WARNING:
DO NOT let comfort or familiarity with product
(gained from repeated use) replace strict adherence
to safety rules for the subject product. MISUSE or
8
failure to follow the safety rules stated in this
instruction manual may cause serious personal
injury.
This cleaner is intended for commercial use, for example
in hotels, schools, hospitals, factories, shops, offices and
rental businesses.
FUNCTIONAL DESCRIPTION
WARNING:
•
Before plugging the cleaner, always make sure
that the cleaner is switched off.
Plugging the
cleaner with the switch on may cause an
unexpected start resulting in serious personal injury.
Switch action
Fig.1
To start the cleaner, rotate the switch lever to the "I" side.
To stop it, rotate the switch lever to the "O" side.
Fig.2
The suction power can be adjusted according to your
work need.
Suction power can be increased by turning the suction
force adjusting knob from the symbol to the
symbol.
Connecting electric power tools
WARNING:
• Observe the maximum connected loads for the
appliance socket (Refer to the SPECIFICATIONS.)
• Make sure that both the cleaner and the electric
power tool are switched off before connecting or
disconnecting. Connecting the power tool to the
cleaner with both of them being switched on may
cause unexpected and sudden start resulting
serious personal injury.
Fig.3
When connecting a grounded tool, insert a plug with a
grounding plate to the socket of the cleaner.
CAUTION:
•
Never connect an electric power tool with an input
power exceeding that specified in the "
SPECIFICATIONS " to the socket of the cleaner by
turning the suction force adjusting knob. Connecting
the electric power tool exceeding the specified input
power may cause overheat and damage to the
cleaner. Refer to the specifications to avoid this.
The cleaner can be connected to an electric power tool
up to input power shown in the " SPECIFICATIONS ".
To connect an electric power tool, open the cap and
insert the power tool plug into the socket of the cleaner.
Fig.4
Rotate the switch lever to the " AUTO " position.
Move the suction force adjusting knob to the position
suitable for the input power of the electric power tool you
intend to use. Refer to the SPECIFICATIONS for the
relation between suction force adjusting knob and the
electric power tool input power.
Switching on and off of the connected electric power tool
simultaneously brings the cleaner switching on and off
action. The cleaner still works for a few seconds even
after the electric power tool is switched off.
After use, disconnect the power tool from the socket of
cleaner.
Switch off the cleaner after use.
Auto-suction stop during suction operation
WARNING:
• Do not use for a long time while the float is at
work. Using the cleaner with its float at work for a
long time can cause overheat, resulting in the
cleaner deformation.
• Do not pick up foam or soapy liquid. Picking up
foam or soapy liquid can cause foam to come out of
air exit before the float works. Continuing to using in
this condition may cause an electric shock and
breakage of the cleaner.
The cleaner has a float mechanism that prevents water
from immersing into the motor when picking up more
than a certain amount of water.
When the tank is full and the cleaner no longer picks up
water, switch off the cleaner and empty the tank.
Installing the holder
Fig.5
When connecting an electric power tool, secure the
power supply cord and hose using the holders at a 70 cm
- 80 cm distance among the holders that are provided
with the cleaner so that the hose is not entangled by the
power supply cord.
Usage of base hook
CAUTION:
• Be careful not to pinch your fingers when
closing the base hook. Failure to do so may
cause personal injury.
NOTE:
• Do not apply an excessive force on the base hook.
The excessive force on the base hook may damage
the base hook. Close the base hook when not in
use.
Opening the base hook allows the following usage.
1. Storing the power supply cord
NOTE:
• Do not use the cleaner or a connected electric
power tool with a power supply cord wound on
the base hook. Using the cleaner or the connected

9
electric power tool with power supply cord may
cause damage the power supply cord.
Fig.6
2. Storing the front cuffs
Front cuffs 22, 24 and 38 can be stored (up to two at a
time.)
Fig.7
3. Storing the hose
Fig.8
4. Resting a reasonable size of electric power
tool for the base hook, such as circular saw.
Fig.9
Locking or unlocking the caster
For Models VC1310L and VC2510L
Fig.10
For Model VC3210L
Fig.11
To lock the caster with a stopper, lower the stopper lever
and the caster no longer will rotate. To release the caster
from the locked position, raise the stopper lever.
Locking the caster is convenient when storing the cleaner,
stopping the work on the way and keeping the cleaner
still.
To operate the stopper, move it by hand.
NOTE:
• When moving the cleaner, make sure that the
caster is unlocked. Moving the cleaner with the
caster in the locked position may cause damage to
the caster.
ASSEMBLY
CAUTION:
• Always be sure that the cleaner is switched off and
unplugged before carrying out any work on the
cleaner.
Installing the water filter
6
1
2
3
4
5
011637
To pick up water or wet dust, remove prefilter and
damper and then use water filter.
3
1
2
011630
When installing the water filter on the tank, set it tight at
the opening of the tank so that the hook of the water filter
engages the tank opening firmly and there is no space
between the water filter and the tank.
Also, install the water filter so that the mounting position
marking can be aligned.
1. Tank cover
2. Powder filter
3. Damper
4. Prefilter
5. Tank
6. Mounting position marking
1. Water filter
2. Tank
3. Mounting position marking

10
NOTE:
• Models VC2510L and VC3210L have no mounting
position marking and no need to align it.
Installing the paper pack
WARNING:
• When using the paper pack, also use the prefilter
together that is preinstalled on the tool. Failure to
use the prefilter together may cause unusual noise
and heat, resulting in a fire.
CAUTION:
• Never pick up water or other liquids or wet dusts
when using the paper pack. Picking up such things
may cause the paper pack breakage.
Fig.12
1. Remove the rubber holder.
2. Extend the paper pack.
Fig.13
Fig.14
3. Align the paper pack opening with the dust suction
opening of the cleaner.
4. Insert the cardboard of the paper pack onto the
tool so that it is positioned at the end beyond the
detent protrusion.
Installing the pipe holder (optional accessory)
For Model VC1310L only
Fig.15
Depress the cord hook as shown in the figure.
1
2
3
45
011605
Attach the pipe holder onto the cord hook. (The hooks
are away from the tank cover.)
Raise the pipe holder as far as the hooks contact the tank
cover and press the A section of the pipe holder.
Fig.16
Press the A section with a great force and with the A
section so pressed lower the pipe holder.
Fig.17
Fig.18
Fit two protrusion of the pipe holder into the grooves of
the tank cover and then press down the pipe holder.
Fig.19
NOTE:
• The pipe holder that is excessively lowered than
the intended position cannot be installed on the
cord hook with the hook away from the tank cover
as shown in the figure.
Fig.20
NOTE:
• Make sure that the two hooks of the pipe holder are
hooked on the tank cover securely.
Connecting a hose
CAUTION:
• Never force the hose for bending or stamp it. Never
move the cleaner by a hose. Forcing, stamping and
pulling the hose may cause a breakage or
deformation of the hose.
• When picking up large wastes such as planer
carvings, concrete dusts or similars other than
small wastes, use the 38 mm inner diameter hose
(optional accessory). Using the 28 mm inner
diameter hose may cause a hose stuffing and
damage.
Fig.21
Insert the hose onto the mounting port of the tank and
turn it clockwise until it locks.
Installing polyethylene bag
Cleaner can also be used without polyethylene bag.
However, using polyethylene bag is easier to empty the
tank without letting your hands dirty.
Fig.22
Spread the polyethylene bag in the tank. Insert it
between the holder plate and the tank, and pull it to the
hose inlet.
Fig.23
Spread the bag around the top of the tank.
Hook up the other side of the bag around the top of the
tank so that the prefilter hook can catch and hold it
securely
NOTE:
• A polyethylene bag available on the market can be
used. The 0.04 mm or thicker one is recommended.
• Too much dust will tear the bag easily, so do not
collect the dust more than the half of the bag
capacity.
1. Press
2. Pipe holder
3. A section
4. Hooks
5. Tank cove
r

11
Emptying the polyethylene bag
WARNING:
• Always make sure that the cleaner is switched off
and unplugged before emptying the polyethylene
bag. Failure to do so may cause an electric shock
and serious personal injury.
CAUTION:
• Do not apply a great impact on the powder filter and
tank. Applying a great impact may cause
deformation and damage to powder filter and tank.
• Empty the tank at least once a day although this
depends on picked-up dust volume in the tank. Or,
the suction force will weaken and the motor may be
broken.
• Do not grab the hook when emptying the tank.
Grabbing the hook may cause the hook to break.
Fig.24
Unhook and lift up the tank cover.
Fig.25
Shake off the dust from powder filter, damper and prefilter
and then take the polyethylene bag out of the tank.
NOTE:
• Take the polyethylene bag carefully out of the tank
so that the polyethylene bag cannot be caught and
torn by the protrusion inside the tank when
emptying it.
• Empty the polyethylene bag before it becomes full.
Too much dust in the tank may cause the
polyethylene bag to be torn.
Installing powder filter
6
1
2
3
4
5
011637
Place the prefilter in the tank.
Next, mount the damper on the powder filter and then
place it in the prefilter.
When installing powder filter and prefilter, the mounting
position marking on each of them are aligned with that
one at the top of the tank.
Finally, mount the tank cover.
NOTE:
• Models VC2510L and VC3210L have no mounting
position marking and no need to align it.
• Before using the powder filter, make sure that
prefilter and damper are always used together. It is
not allowed to install powder filter solely.
• Before using the paper pack, make sure that
powder filter, damper and prefilter are always used
together.
Carrying the cleaner
Fig.26
When carrying the cleaner, carry it by holding the handle
on the head as shown in the figure. The handle is
retractable at the head when not in use.
1. Tank cover
2. Powder filter
3. Damper
4. Prefilter
5. Tank
6. Mounting position marking

12
MAINTENANCE
CAUTION:
• Always be sure that the tool is switched off and
unplugged before attempting to perform inspection
or maintenance.
Storage of power supply cord
For Model VC1310L only
Fig.27
Fig.28
Pull out the cord hook or open the base hook. Wind up
the power supply cord and hang it on the cord hook or
wind it around the base hook.
NOTE:
• Do not force the power supply cord off the cord
hook when trying to disconnect it from there.
Forcing power supply cord to disconnect from the
cord hook may cause damage to the cord
For Models VC2510L and VC3210L
Fig.29
Fig.30
Wind up the power supply cord around the base hook.
Storage of accessories
NOTE:
• Do not apply an excessive force to the accessories
that are held by the pipe holder. Applying an
excessive force to these accessories may cause
damage to the pipe holder.
For Model VC1310L only
1
2
3
011612
Pipe holder can be used to store straight pipe, bent pipe,
corner nozzle and similars by just inserting these
accessories.
1
2
011613
The pipes can be placed into the pipe holder when also
stopping using the cleaner on the way for a while.
1. Straight pipe
2. Corner nozzle
3. Pipe holder
1. Stopper
2. Pipe holde
r

13
For Models VC2510L and VC3210L
011622
Pipe rest can be used to store straight pipe, bent pipe
and others by just inserting these accessories.
011623
The pipes can be placed into the pipe holder when also
stopping using the cleaner on the way for a while.
Cleaning
CAUTION:
• Never use gasoline, benzine, thinner, alcohol or the
like. Discoloration, deformation or cracks may
result.
Fig.31
Clogged powder filter, prefilter and damper cause poor
suction performance.
Clean out the filters and dampers from time to time.
To remove dust or particles adhering to the filters, shake
the frame bottom quickly several times.
Fig.32
Occasionally wash the powder filter in water, rinse and
dry thoroughly in the shade before use. Never wash
filters in a washing machine.
NOTE:
• Do not rub and scratch the powder filter, the
prefilter or the damper with hard objects such as a
brush and a paddle.
• The filters are consumable and are recommended
to have some spares for them.
To maintain product SAFETY and RELIABILITY, repairs,
any other maintenance or adjustment should be
performed by Makita Authorized Service Centers, always
using Makita replacement parts.
ACCESSORIES
CAUTION:
• These accessories or attachments are
recommended for use with your Makita tool
specified in this manual. The use of any other
accessories or attachments might present a risk of
injury to persons. Only use accessory or
attachment for its stated purpose.
If you need any assistance for more details regarding
these accessories, ask your local Makita Service Center.
• Hose (1.5 m, 2.5 m, 3.5 m or 5 m)
• Front cuffs (22, 24, 38)
• Straight pipe
• Corner nozzle
• Round brush
• Powder filter (For dry type)
• Damper
• Prefilter
• Nozzle assembly
• Bent pipe
• Polyethylene bag
• Filter (For water)
• Paper pack
• Holder set
• Pipe holder (for Model VC1310L only)

14
УКРАЇНСЬКА (Оригінальні інструкції)
Пояснення до загального виду
1-1. Ручка регулювання сили
всмоктування
1-2. Важіль вимикача
2-1. Ручка регулювання сили
всмоктування
2-2. Важіль вимикача
3-1. Ковпачок
3-2. Шнур живлення
3-3. Ручка регулювання сили
всмоктування
3-4. Важіль вимикача
4-1. Ручка регулювання сили
всмоктування
4-2. Важіль вимикача
5-1. Тримач
6-1. Шнур живлення
6-2. Вигнута площадка на корпусі
7-1. Передні манжети
8-1. Шланг
10-1. Коліщатко
10-2. Стопорний важіль
10-3. Положення FREE
10-4. Заблоковане положення
11-1. Коліщатко
11-2. Стопорний важіль
11-3. Положення FREE
11-4. Заблоковане положення
12-1. Резиновий тримач
13-1. Паперовий пакет
15-1. Гак для шнура живлення
16-1. Натисніть із зусиллям вниз
17-1. Кришка бака
17-2. Виступ труботримача
17-3. Паз
19-1. Кришка бака
19-2. Скоба
20-1. Кришка бака
20-2. Скоба
22-1. Пластинчастий тримач
22-2. Бак
23-1. Поліетиленовий мішок
23-2. Пластинчастий тримач
23-3. Бак
24-1. Кришка бака
24-2. Поліетиленовий мішок
24-3. Скоба
26-1. Ручка
26-2. Верхня частина
27-1. Гак для шнура живлення
27-2. Шнур живлення
28-1. Шнур живлення
28-2. Вигнута площадка на корпусі
29-1. Гак для шнура живлення
29-2. Шнур живлення
30-1. Шнур живлення
30-2. Вигнута площадка на корпусі
31-1. Бак
31-2. Первинний фільтр
ТЕХНІЧНІ ХАРАКТЕРИСТИКИ
Модель VC1310L / VC2510L / VC3210L
EU AU/NZ GB 110V GB 230V CL
Напруга Вольт 230 - 240 230 - 240 110 230 - 240 220
Споживання електроенергії
Ватт 1050 1050 1050 1050 1050
Встановлена потужність
для розетки пристрою
Ватт у
режимі 2400 1350 650 2000 2400
Встановлена потужність
для розетки пристрою
Ватт у
режимі 2600 1600 950 2400 2600
Загальна встановлена
потужність приєднаних пристроїв
Ватт 3650 2650 2000 3450 3650
Модель VC1310L VC2510L VC3210L
Об'єм потоку (повітря) 2,0 м3/хв.
Вакуум 22 кПа
Клас захисту 1
Тип захисту IP X4 (захист від бризок)
Пил 13 л25 л32 л
Одноразова місткість Вода 7 л14 л27 л
Розміри (ДхШхВ)
366 мм x 334 мм
x 420 мм
432 мм x 416 мм
x 451 мм
552 мм x 398 мм
x 685 мм
Чиста вага 9,6 кг 10,5 кг 14,5 кг
• Через те, що ми не припиняємо програми досліджень ірозвитку, наведені тут технічні характеристики можуть бути змінені
без попередження.
• Урізних країнах технічні характеристики можуть бути різними.
• Вага відповідно до EPTA-Procedure 01/2003

15
END108-2
Символи
Далі наведені символи, які застосовуються для
позначення обладнання. Перед користуванням
переконайтеся, що Ви розумієте їхнє значення.
・Прочитайте інструкцію зексплуатації.
・Увага! Пилосос може містити
небезпечний пил.
・Ніколи не ставайте на пилосос.
・Тільки для країн ЄС
Не викидайте електричне обладнання
разом зпобутовим сміттям!
Відповідно до Європейської
директиви 2002/96/EC про утилізацію
електричного та електронного
обладнання та її застосуванням згідно
знормами національного
законодавства, електрообладнання,
яке вийшло зладу, необхідно збирати
окремо та відправляти на переробне
підприємство, яке відповідає вимогам
охорони довкілля.
ENE016-1
Призначення
Пристрій призначено для збирання як вологого, так і
сухого пилу.
ENF001-1
Джерело живлення
Інструмент можна підключати лише до джерела
струму, що має напругу, зазначену втабличці з
заводськими характеристиками. Інструмент може
працювати лише від однофазного джерела
перемінного струму. Для запобігання враженню
електричним струмом інструмент має бути
заземленим. Слід використовувати лише трижильні
подовжувальні шнури зтриполюсними вилками,
призначеними для заземлення, та розетками,
передбаченими для цього інструмента.
ENG905-1
Шум
Рівень шуму за шкалою Аутиповому виконанні,
визначений відповідно до EN/IEC60704:
Модель VC1310L
Рівень звукового тиску (LpA): 72 дБ(A)
Погрішність (К): 2,5 дБ(A)
Рівень шуму під час роботи може перевищувати 80
дБ (A).
Модель VC2510, LVC3210L
Рівень звукового тиску (LpA): 73 дБ(A)
Погрішність (К): 2,5 дБ(A)
Рівень шуму під час роботи може перевищувати 80
дБ (A).
Користуйтеся засобами захисту слуху
ENH038-1
Тільки для країн Європи
Декларація про відповідність стандартам
ЄС
Наша компанія, Makita Corporation, як
відповідальний виробник, наголошує на тому, що
обладнання Makita:
Позначення обладнання:
Пилосос
№моделі/ тип: VC1310L, VC2510L, VC3210L
єсерійним виробництвом та
Відповідає таким Європейським Директивам:
2006/42/EC
Та вироблені увідповідності до таких стандартів та
стандартизованих документів:
EN60335
Технічна документація знаходиться унашого
уповноваженого представника вЄвропі, асаме:
Makita International Europe Ltd.
Michigan Drive, Tongwell,
Milton Keynes, Bucks MK15 8JD, Англія
23.06.2010
000230
Tomoyasu Kato
Директор
Makita Corporation
3-11-8, Sumiyoshi-cho,
Anjo, Aichi, 446-8502, ЯПОНІЯ
ENB119-3
ПОПЕРЕДЖЕННЯ ПРО
НЕОБХІДНУ ОБЕРЕЖНІСТЬ ПІД
ЧАС РОБОТИ ЗПИЛОСОСОМ
УВАГА! ВАЖЛИВО ПЕРЕД ВИКОРИСТАННЯМ
УВАЖНО прочитайте всі попередження про
необхідну обережність під час роботи та всі
інструкції.Недотримання попереджень та інструкцій
може призвести до ураження електричним струмом,
до виникнення пожежі та/або до отримання
серйозних травм.
1. Перед використанням перевіряйте, щоб цей
пилосос використовувався особами, які
були відповідним чином ознайомлені з
інструкціями звикористання пилососа.
2. Штепсельну розетку на пилососі
використовуйте тільки для цілей,
зазначених вінструкції.
3. Уразі витікання рідини зпилососа негайно
його вимикайте.
4.
Регулярно чистьте обмежувач рівня води та
перевіряти його на наявність пошкоджень.

16
5. Не користуйтеся пилососом без фільтра.
Пошкоджений фільтр підлягає негайній
заміні.
6.
ВИКОРИСТАННЯ ПОДОВЖУВАЛЬНОГО
ШНУРА. Уразі використання
подовжувального шнура через велику
відстань до джерела живлення намагайтеся
використовувати достатньо товстий, але не
занадто довгий шнур, інакше експлуатаційні
якості пилососа можуть погіршитися. Під
час використання просто неба
використовуйте подовжувальний шнур,
придатний для роботи поза приміщенням.
7. ПОПЕРЕДЖЕННЯ ПРО РОБОТУ ПІД
НАПРУГОЮ: Перед під'єднанням пилососа
до джерела живлення (штепсельного
роз'єму, розетки тощо) перевіряйте, щоб
напруга живлення відповідала маркуванню
на пилососі. Підключення до джерела
живлення знапругою більшою за вказану
на пилососі може спричинити серйозну
травму користувачу та пошкодити пилосос.
Якщо увас виникли сумніви, НЕ
ВСТАВЛЯЙТЕ ШТЕПСЕЛЬ ПИЛОСОСА У
ДЖЕРЕЛО ЖИВЛЕННЯ. Використання
джерела живлення знапругою меншою за
вказану на маркуванні шкодить двигуну.
8. УНИКАЙТЕ ВИПАДКОВОГО УВІМКНЕННЯ.
Перевіряйте, щоб перемикач живлення на
пилососі був увимкненому положенні під
час під'єднання пилососа до джерела
живлення.
9. Не намагайтеся збирати легкозаймисті
матеріали, петарди, запалені сигарети,
гарячий попіл, гарячу металеву стружку,
гострі речі, такі як леза, голки, розбите скло
тощо.
10. НІКОЛИ НЕ ВИКОРИСТОВУЙТЕ ПИЛОСОС
ПОРЯД ЗБЕНЗИНОМ, ГАЗОМ, ФАРБОЮ,
КЛЕЄМ АБО ІНШИМИ ВИБУХОВИМИ
РЕЧОВИНАМИ. Перемикач випускає іскри
під час вмикання або вимикання. Також
іскрить колекторний двигун під час роботи.
Існує небезпека вибуху.
11. Ніколи не збирайте пилососом токсичні,
канцерогенні, легкозаймисті або інші
небезпечні речовини, такі як азбест, арсен,
барій, берилій, свинець, пестициди, або
інші шкідливі для здоров'яречовини.
12. Ніколи не використовуйте пилосос просто
неба під дощем.
13. Заборонено використовувати пристрій
поблизу джерел тепла (плит тощо).
14. ЗАХИСТ ВІД ЕЛЕКТРИЧНОГО ШОКУ.
Уникайте фізичного контакту ззаземленими
поверхнями. Наприклад: трубопроводами,
радіаторами, кухонними плитами,
холодильними установками.
15. Не закривайте вентиляційні отвори.
Завдяки цим отворам відбувається
охолодження двигуна. Слід обов'язково
уникати блокування цих отворів, інакше
двигун займеться через нестачу вентиляції.
16. Слід завжди твердо стояти на ногах та
тримати рівновагу.
17. Не пошкоджуйте шнур. Не переносьте
пилосос за шнур іне смикайте шнур, щоб
витягнути штепсельну вилку зрозетки.
Тримайте шнур на відстані від джерела
тепла, мастила та гострих країв.
18. Не згинайте, не смикайте та не ставайте на
шланг.
19. Негайно зупиняйте роботу пилососа, якщо
ви помітили, що він працює неналежним
чином, або помітили щось незвичне.
20. ВІД'ЄДНУЙТЕ ПИЛОСОС ВІД ДЖЕРЕЛА
ЖИВЛЕННЯ. Коли він не використовується,
перед технічним обслуговуванням та під
час заміни приладдя.
21. Чистьте та обслуговуйте пилосос одразу
після кожного використання, щоб тримати
його увідмінному робочому стані.
22.
ТРИМАЙТЕ ПИЛОСОС УНАЛЕЖНОМУ СТАНІ.
Тримайте пилосос учистоті для кращої та
безпечнішої роботи. Дотримуйтесь
інструкцій із заміни приладдя. Час від часу
перевіряйте шнури, ауразі їх пошкодження
звертайтеся до сервісного центру для
проведення ремонту. Час від часу оглядайте
подовжувальні шнури та замінюйте їх уразі
пошкодження. Ручки повинні бути сухими,
чистими, без мастила.
23. ПЕРЕВІРЯЙТЕ ПОШКОДЖЕНІ ДЕТАЛІ. Перш
ніж продовжувати використання пилососа,
слід перевірити пошкоджену деталь або
захисний пристрій, щоб переконатися втім,
що вони можуть далі виконувати свої
функції належним чином. Перевіряйте
положення та закріплення рухомих частин,
наявність поломок деталей, монтаж та інші
аспекти, які можуть впливати на
експлуатацію. Ремонтувати або замінювати
пошкоджені деталі та захисний прилад має
авторизований сервісний центр, якщо інше
не зазначено вцій інструкції. Пошкоджені
перемикачі необхідно замінювати в
авторизованому сервісному центрі. Не
використовуйте пилосос, якщо перемикач
не вмикає або не вимикає його.
24. ЗАМІНА ДЕТАЛЕЙ. Під час обслуговування
використовуйте тільки ідентичні
запчастини.
25. ЗБЕРІГАННЯ ВИМКНЕНОГО ПИЛОСОСА.
Коли пилосос не використовується, його
слід зберігати уприміщенні.

17
26. Обережно поводьтеся звашим пилососом.
Грубе поводження може спричинити
поломку навіть найміцнішого пилососа.
27. Не намагайтеся почистити пилосос ззовні
або зсередини бензином, розчинником або
чистячими засобами. Це може спричинити
появу тріщин та зміну кольору.
28. Не використовуйте пилосос узакритому
приміщенні, де масляні фарби, розчинники,
бензин, деякі протимільні засоби можуть
виділяти легкозаймисті, вибухонебезпечні
або токсичні випаровування, або умісцях,
де єлегкозаймистий пил.
29. Не залишайте шнур від пилососа на підлозі,
після того як закінчили прибирання. Існує
небезпека перечепитися через нього або
пошкодити пилосос.
30. Не використовуйте цей або будь-який
інший пристрій, коли знаходитесь під дією
алкоголю або лікарських препаратів.
31. Загальним правилом безпеки є
використання захисних окулярів або
окулярів із бічними захисними щитками.
32. Використовуйте протипиловий респіратор
під час роботи взапилених умовах.
33. Забороняється користуватися пилососом
маленьким дітям та інвалідам без нагляду.
34. Завжди стежте за тим, щоб маленькі діти не
грали зпилососом.
35. Ніколи не беріться за шнур живлення або
пилосос вологими руками.
36. Будьте особливо обережні під час
прибирання на сходах.
ЗБЕРІГАЙТЕ ДЛЯ ОТРИМАННЯ
ІНФОРМАЦІЇ ВМАЙБУТНЬОМУ
УВАГА:
НІКОЛИ НЕ СЛІД втрачати пильності та
розслаблюватися під час користування виробом
(що приходить при частому використанні); слід
завжди строго дотримуватися правил безпеки під
час використання цього пристрою. НЕНАЛЕЖНЕ
ВИКОРИСТАННЯ або недотримання правил
безпеки, викладених вцьому документі, може
призвести до серйозних травм.
Цей пилосос призначений для комерційного
застосування, наприклад, вготелях, школах, лікарнях,
на заводах, вофісах, вмагазинах та впрокатному
бізнесі.
ІНСТРУКЦІЯ ЗВИКОРИСТАННЯ
УВАГА:
• Перед під'єднанням пилососа до джерела
живлення, перевіряйте, щоб пилосос був
вимкнений.Під'єднання пилососа до джерела
живлення, коли перемикач живлення
знаходиться вувімкненому положенні, може
спричинити несподіваний запуск пристрою та
завдати серйозних травм.
Дія вимикача.
Fig.1
Для того щоб запустити пилосос, слід пересунути
важіль перемикача вположення “І”. Для того щоб
зупинити пилосос, слід пересунути важіль
перемикача вположення “O”.
Fig.2
Силу всмоктування можна регулювати залежно від
ваших потреб.
Силу всмоктування можна збільшити, повернувши
ручку регулювання сили всмоктування зположення
уположення .
Під'єднання електричних приладів
УВАГА:
• Дотримуйтесь вимог щодо встановленої
максимальної потужності для розетки пристрою
(див. ТЕХНІЧНІ ХАРАКТЕРИСТИКИ)
• Перевіряйте, щоб перед під'єднанням або
від'єднанням пилосос та електричний прилад
були вимкнені. Під'єднання електричного
приладу до пилососа, коли вони обидва
увімкнені, може спричинити несподіваний
раптовий запуск та завдати серйозних травм.
Fig.3
При під'єднанні заземленого приладу, вставте
штепсель зпластиною заземлення урозетку
пилососа.
ОБЕРЕЖНО:
• Ніколи не під'єднуйте електричний прилад із
вхідною потужністю, яка перевищує вказану у
таблиці “ТЕХНІЧНІ ХАРАКТЕРИСТИКИ”, до
розетки пилососа, повернувши при цьому ручку
регулювання сили всмоктування. Під'єднання
електричного приладу, потужність якого
перевищує вказану вхідну потужність, може
спричинити перегрів та пошкодження пилососа.
Щоб уникнути цього, див. ТЕХНІЧНІ
ХАРАКТЕРИСТИКИ.
Пилосос можна під'єднати до електричного приладу з
вхідною потужністю включно до вказаної у“ТЕХНІЧНІ
ХАРАКТЕРИСТИКИ”.

18
Щоб під'єднати електричний прилад, відкрийте
кришку та вставте штепсель електричного приладу у
розетку пилососа.
Fig.4
Поверніть важіль перемикача уположення “AUTO”.
Переведіть ручку регулювання сили всмоктування у
положення відповідно до вхідної потужності
електричного приладу, який хочете використати. Див.
ТЕХНІЧНІ ХАРАКТЕРИСТИКИ, щоб встановити
співвідношення між ручкою регулювання сили
всмоктування та вхідною потужністю електричного
приладу.
Увімкнення та вимкнення під'єднаного електричного
приладу спричиняє одночасне увімкнення та
вимкнення пилососа. Пилосос ще буде працювати
декілька секунд навіть після вимкнення електричного
приладу.
Після використання від’єднайте електричний прилад
від розетки на пилососі.
Після використання вимкніть пилосос.
Автоматична зупинка всмоктування під час
всмоктування
УВАГА:
• Не використовуйте довгий час, коли працює
поплавець.Довге використання пилососа з
працюючим поплавцем може спричинити
перегрів та деформацію пилососа.
•
Не збирайте піну або мильний розчин.
Всмоктування піни або мильного розчину може
спричинити вихід піни звипускного отвору
повітря до спрацьовування поплавця. Подальше
використання пилососа утаких умовах може
призвести до ураження електричним струмом та
спричинити пошкодження пилососа.
Пилосос має поплавковий механізм, який запобігає
проникненню води удвигун під час усмоктування
води, кількість якої перевищує визначену кількість.
Коли бак повний, апилосос більше не збирає воду,
вимкніть пилосос та спорожніть бак.
Встановлення тримача
Fig.5
Під час під’єднання електричного приладу
закріплюйте шнур живлення та шланг,
використовуючи тримачі, що постачаються з
пилососом, на відстані 70-80 см один від одного, щоб
шланг не переплутався зі шнуром живлення.
Використання вигнутої площадки на
корпусі
ОБЕРЕЖНО:
• Не защеміть пальці, коли закриваєте вигнуту
площадку на корпусі.Недотримання техніки
безпеки може призвести до травми.
ПРИМІТКА:
• Не докладайте надмірного зусилля, під час
використання вигнутої площадки на корпусі. У
разі докладання надмірного зусилля її можна
пошкодити. Закривайте вигнуту площадку на
корпусі, коли ви її не використовуєте.
Відкриту вигнуту площадку на корпусі можна
використовувати наступним чином.
1. Зберігати шнур живлення
ПРИМІТКА:
• Не використовуйте пилосос або під’єднаний
електричний прилад зі шнуром живлення,
намотаним на вигнуту площадку на корпусі.
Таке використання пилососа або під’єднаного
електричного приладу може спричинити
пошкодження шнура живлення.
Fig.6
2. Зберігати передні манжети
Можна зберігати передні манжети 22, 24 та 38 (по дві
одночасно).
Fig.7
3. Зберігати шланг
Fig.8
4. Залишати невеликий електричний прилад,
наприклад, циркулярну пилу.
Fig.9
Блокування та розблокування коліщаток
Для моделей VC1310L та VC2510L
Fig.10
Для моделі VC3210L
Fig.11
Щоб заблокувати коліщатко за допомогою стопора,
опустіть важіль стопора іколіщатко не буде більше
обертатися. Щоб звільнити коліщатко, підніміть
важіль стопора.
Функція блокування коліщаток зручна для зберігання
пилососа, зупинення роботи та тримання пилососа у
нерухомому положенні.
Керування стопором слід здійснювати вручну.
ПРИМІТКА:
• Перед пересуванням пилососа слід перевіряти,
щоб коліщатка були незаблоковані.
Пересування пилососа із заблокованими
коліщатками може їх пошкодити.

19
КОМПЛЕКТУВАННЯ
ОБЕРЕЖНО:
• Завжди перевіряйте, щоб пилосос був
вимкнений, ашнур живлення від’єднаний від
джерела живлення, перед тим як проводити
будь-які роботи на пилососі.
Встановлення водяного фільтра
6
1
2
3
4
5
011637
Щоб збирати воду або вологий пил, видаліть фільтр
попередньої очистки та глушник та встановіть
водяний фільтр.
3
1
2
011630
Під час встановлення водяного фільтра на бак
встановіть його щільно на отворі баку, щоб гак
водяного фільтра міцно зачепився за отвір бака та
щоб між фільтром та баком не було зазору.
Також під час встановлення водяного фільтра
узгоджуйте маркування монтажного положення.
ПРИМІТКА:
• Моделі VC2510L та VC3210L не мають
маркування монтажного положення, тому не
вимагають його узгодження.
Встановлення паперового пакета
УВАГА:
• Під час використання паперового пакета
одночасно використовуйте фільтр попередньої
очистки, який був заздалегідь встановлений на
пристрій. Невикористання фільтра попередньої
очистки разом зпаперовим пакетом може
спричинити незвичний шум та нагрівання, що
може призвести до займання.
ОБЕРЕЖНО:
• Ніколи не збирайте воду або іншу рідину або
вологий пил, якщо використовуєте паперовий
пакет. Це може спричинити пошкодження
паперового пакета.
Fig.12
1. Зніміть резиновий тримач.
2. Розпряміть паперовий пакет.
Fig.13
Fig.14
3. Розташуйте отвір паперового пакета навпроти
отвору для всмоктування пилу на пилососі.
4. Вставте картонну частину паперового пакета у
пристрій, щоб вона розташувалась поза
виступом фіксатора.
1. Кришка бака
2. Порошковий фільтр
3. Глушник
4. Первинний фільтр
5. Бак
6. Маркування монтажного положення
1. Водяний фільтр
2. Бак
3. Маркування монтажного положення

20
Встановлення труботримача (додаткове
приладдя)
Тільки для моделі VC1310L
Fig.15
Відтисніть гак для шнура живлення, як показано на
малюнку.
1
2
3
45
011605
Під’єднайте труботримач до крючка для шнура
живлення (гаки на відстані від кришки бака.)
Підніміть труботримач, доки гаки не торкнуться
кришки бака, та натисніть секцію Ана труботримачеві.
Fig.16
Сильно натисніть секцію Ата, утримуючи секцію А
натиснутою, опустіть труботримач.
Fig.17
Fig.18
Вставте два виступи труботримача упази на кришці
бака та натисніть труботримач.
Fig.19
ПРИМІТКА:
•
Якщо труботримач знаходиться занадто низько,
його не можна буде встановити на гак для шнура
живлення таким чином, щоб гак був на відстані
від кришки бака, як показано на малюнку.
Fig.20
ПРИМІТКА:
• Перевірте, щоб два гака труботримача були
міцно зафіксовані на кришці бака.
Під’єднання шланга
ОБЕРЕЖНО:
• Ніколи не скручуйте шланг та не ставайте на
нього ногами. Ніколи не пересувайте пилосос,
тримаючи його за шланг. Ви можете спричинити
поломку або деформацію шланга, скручуючи
його, наступаючи на нього або тягнучи за нього.
•
Під час всмоктування великого сміття, такого як
стружки, бетонний пил тощо, використовуйте
шланг із внутрішнім діаметром 38 мм (додаткове
приладдя). Шланг із внутрішнім діаметром 28 мм
може засмітитися або пошкодитися.
Fig.21
Вставте шланг умонтажний отвір бака та поверніть
його за годинниковою стрілкою, доки він не
заблокується.
Встановлення поліетиленового мішка
Пилосос також можна використовувати без
поліетиленового мішка. Проте зполіетиленовим
мішком легше спорожнити бак, не забруднюючи руки.
Fig.22
Розгорніть поліетиленовий мішок убаку. Вставте його
між пластинчастим тримачем та баком іпотягніть до
впускного отвору шланга.
Fig.23
Розподіліть мішок коло верхівки бака.
Зачепіть іншу сторону мішка коло верхівки бака таким
чином, щоб гак фільтра попередньої очистки затиснув
іміцно тримав його.
ПРИМІТКА:
• Можна використовувати поліетиленові мішки,
наявні упродажу. Рекомендуються мішки
товщиною 0,04 мм або товщі.
• Занадто велика кількість пилу може легко
розірвати мішок, тому не збирайте пилу більше,
ніж половина ємності мішка.
Спорожнення поліетиленового мішка
УВАГА:
• Завжди перевіряйте, чи вимкнений пилосос та
чи від’єднаний він від джерела живлення, перед
спорожненням поліетиленового мішка.
Недотримання цих правил може призвести до
ураження електричним струмом та до серйозних
травм.
ОБЕРЕЖНО:
• Не навантажуйте надмірно порошковий фільтр
та бак. Надмірне навантаження може
спричинити деформацію та пошкодження
порошкового фільтра та бака.
• Спорожнюйте бак хоча бодин раз на день, хоча
це залежить від кількості зібраного пилу убаці.
Інакше зменшиться сила всмоктування та може
вийти зладу двигун.
1. Натиснути
2. Тримач труби
3. Секція А
4. Кріплення
5. Кришка бака
This manual suits for next models
5
Table of contents
Languages:
Other Makita Vacuum Cleaner manuals

Makita
Makita DVC150L User manual

Makita
Makita DVC860L Manual

Makita
Makita DVC860L User manual

Makita
Makita DVC865L User manual

Makita
Makita DVC750L User manual

Makita
Makita CL117FD User manual

Makita
Makita DVC665 User manual

Makita
Makita DCL282F User manual

Makita
Makita VC005GL User manual

Makita
Makita DVC340 User manual

Makita
Makita DVC152L User manual

Makita
Makita GCV02 User manual

Makita
Makita DVC150L User manual

Makita
Makita DVC866L User manual

Makita
Makita VC005GL User manual

Makita
Makita XCV07 User manual

Makita
Makita VC3211H User manual

Makita
Makita BVC340 User manual

Makita
Makita CL117FD User manual

Makita
Makita DVC660Z User manual