Marlec VEVA TETHERED User manual

For models:
Single Phase 7.4kW 230V
VEVA TETHERED & UNTETHERED
Electric Vehicle Charge Points
USER GUIDE

2
Welcome to your VEVA electric vehicle charging point.
We hope your charge point has now been installed and is ready to use.
If your unit is not yet installed, please ensure it is installed by a qualied electrician and
they follow the guidance in the ‘Electrical Installers Guide’ supplied.
This user guide is for Electric Vehicle (EV) owners and describes how to operate the
VEVA charge point in conjunction with the VEVA app. It explains the features of the unit
and troubleshooting advice in case of problems. Please read this guide before using the
charge point.
• Tethered and Untethered cable versions
• Tethered version is designed for wrap around cable storage with an
integral holster to hold and protect the charging connector.
• Solar charging mode
• Allows you to charge using surplus generation from your solar system.
• Scheduled Charging
• Use economy rate electricity to charge your EV.
• Demand control
• Prevents an overload of your main supply by reducing the available
power to your EV.
• Wi-Fi communications
• Remote control and set-up via the VEVA app
• Monitor your VEVA unit remotely and change settings as required.
• View your charging history and costs.
• Override delays or Boost Charge for a set period. Pause a charge remotely.
• Holiday Mode
• Locks out the VEVA unit to prevent use while you are away.
• Automatic software updates
FEATURES OF THE VEVA SYSTEM

3
SAFETY ADVICE
Important safety advice when using your VEVA charge point:
• The electrical installation of this device must only be undertaken by a suitably
trained and qualied electrician. All work must satisfy Building/IEE Wiring
regulations in force at the time. Failure to comply with the installation instructions
may result in damage to the unit and invalidate the warranty.
• This appliance may be used by children aged from 8 years and persons with reduced
physical or sensory capabilities or lack of experience and knowledge, providing they
have been given supervision or instruction concerning the use of the appliance in a
safe way and understand the hazards involved.
• Children shall not play with the appliance. Cleaning or maintenance of the appliance
shall not be performed by children.
• Do not use the unit if it appears broken, defective or otherwise damaged.
• Only use the unit as directed in this and the ‘Electrical Installers’ guides.
• Ensure the charging cable is stowed away after use and does not present a trip
hazard when connected to your EV.
VEVA units are available in a Tethered version (with its own charging cable tted) or
Untethered (where the unit has a socket and you use your own charging cable). Both
types are designed to charge electric vehicles that are tted with a type 2 charging
socket; this covers most of the vehicles supplied today in the UK and Europe.
The unit will supply a maximum output of 7.4kW and when plugged into your vehicle,
will instruct it of the maximum charge it may draw. This communication allows a
number of smart charging options to be used, including scheduled charging where a
charge is delayed until off-peak electricity is available, or if you have a solar system
tted, allows charging using your own surplus electricity generation.
For some of the features to operate (such as solar charging), a measurement clamp must
be tted around your incoming supply cable to allow the VEVA unit to measure the
power owing into or out of your home. Please check the tting with your installer.
To use the VEVA app your VEVA unit must be connected to a Wi-Fi network. Your
installer may have already connected your unit to your Wi-Fi network during
installation, but if not, this guide will show you how to do so.

4
5
VEVA TETHERED
1
2
3
4
5
Removable front facia assembly
Light-ring status indicator
Holster (Tethered unit only)
Tethered charging cable (8m length)
Type 2 Charging socket with integral cable
lock (Untethered unit only)
1. YOUR VEVA EV CHARGE POINT...
4
VEVA UNTETHERED
1
2
3
1
2
3
1
2
3
Loosen the two screws tted along the bottom
edge of the fascia with a no. 1 Pozi-drive
screwdriver (no need to remove the screws)
and lift the cover away from the base at the
bottom . Remove cover by pulling upwards and
unhooking at the top edge .
REMOVING THE VEVA FASCIA PLATE
To join your unit to your Wi-Fi network or reconnect the unit to a new Wi-Fi hub will
require you to remove the front facia panel to access a hidden installation button, see
page 12. The fascia is simple to remove as follows:
The main parts of your VEVA charge point:

5
Once your VEVA charge point is installed, you are ready to begin charging. Simply plug
in your EV.
Please be aware:
The Smart Charge Points Regulations, governing the legal requirements for charge
points sold in England, Wales and Scotland, require all new charge points to be initially
set to only charge during off-peak hours. In compliance with these rules, the VEVA unit
is factory set with the off-peak charging settings, described on page 9. You may change
these settings using the VEVA app, or continue to use the settings, however please be
aware your charge may not begin immediately.
- USING AN UNTETHERED UNIT
When using an Untethered VEVA unit and your own charging cable, always connect the
charging connector to the VEVA unit rst, and then your vehicle. The charging
connector will be locked into the VEVA unit when charging. When nished, remove the
connector from the vehicle rst.
- TETHERED CHARGING CABLES
The VEVA charger is designed so that the charging cable can be wrapped around the
body of the unit for cable stowage:
• When not in use, coil the cable several times loosely around the body leaving
sufcient cable to plug the charging connector into the holster within the light-ring.
• Do not wrap the cable tightly as this may break the internal wires.
• When using the charge point always ensure the cable is fully unwound.
The holster will protect the charging connector and should always be used when the
cable is not in use. To remove the charging connector from the holster, simply press on
the button at the top to unlatch.
Do not leave the cable trailing on the ground when not in use.
BEGINNING CHARGING

6
STATUS LIGHT-RING
The light-ring surrounding the charging socket or cable holster provides a quick
indication of the charge point condition:
STANDBY
When in standby (where no vehicle is connected) the light-ring will be
lit blue and the brightness slowly fade in and out.
→
CHARGING
WAITING
ERROR
A rotating pattern indicates charging. The colour may be as follows:
Green - Charging or boost charge is active
Yellow - Charging using solar generation (solar schedule active)
Blue - Charging is paused, either vehicle battery is full, there is
insufcient supply or charging is paused via the VEVA app
When charging, the pattern rotates quicker the higher the charge rate.
Red - A problem has occurred and charging has
stopped. The problem will be shown on the app
screen but a fault code can also be read by counting
the number of lights shown (the indicator will toggle
between all red lights and the fault code).
See Troubleshooting, page 23.
Purple - The charge point is waiting before beginning the next charge
session. It may be waiting for the next scheduled charge session to
begin or a random delay to complete.
The day and night-time brightness of the light-ring may be adjusted through the VEVA
app. At night the light-ring will automatically switch over to a night-time setting to
allow dimming if required.

7
Your VEVA unit offers a number of different charging modes. Charging modes are set up
through the VEVA app, see pages 14-16
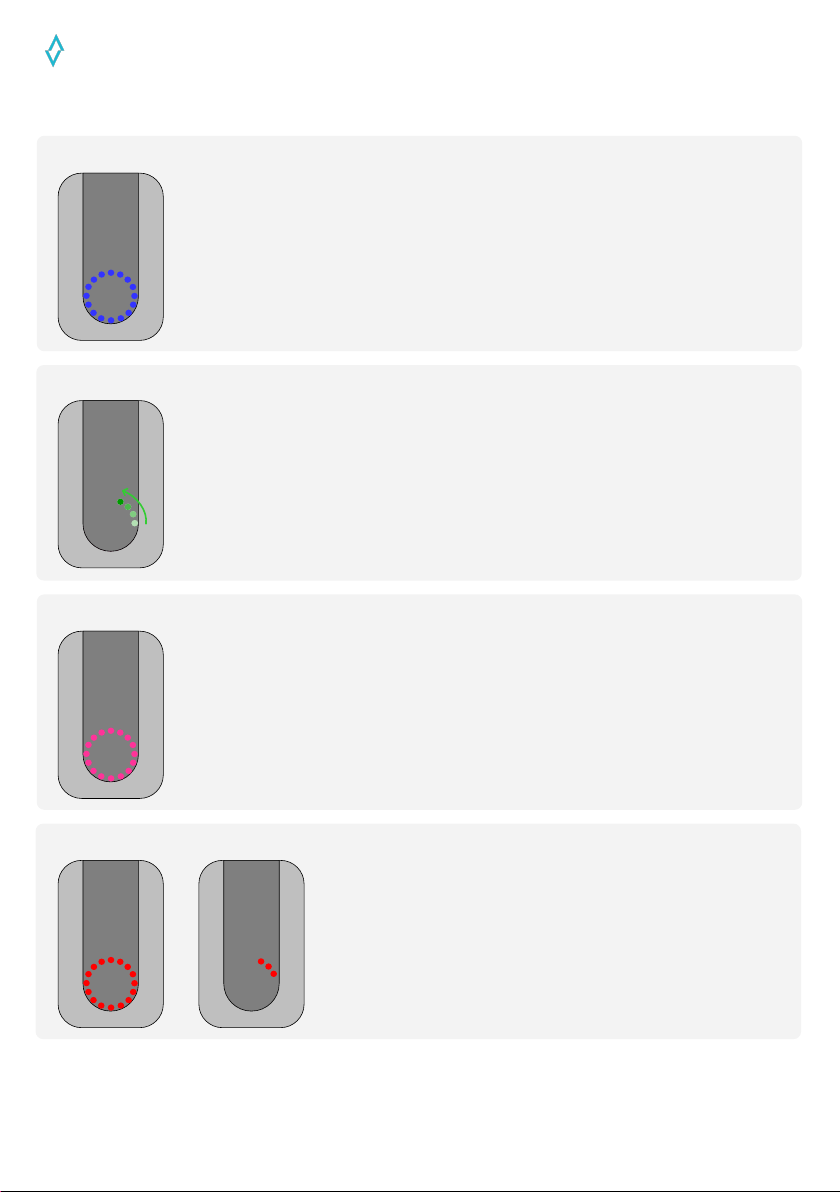
Anytime Charging
If you simply want to charge your EV whenever you plug-in, set your VEVA unit to
Anytime Charging and charging will begin immediately, after any random delay has
completed. With Anytime Charging all other charging modes are ignored.
Off-Peak Charging
The VEVA unit may be programmed to charge at times when there is less demand on the
electricity grid, or if you have a Time-of-Use economy electricity tariff, when the price is
lower. Using off-peak electricity is better for the electricity grid and environment.
Solar Charging
If you have your own solar system, you may charge your EV using surplus energy
generated by your system. This energy would normally ow out of your home and onto
the electricity grid as export energy for little or no gain.
The VEVA unit uses a special measuring clamp, tted around your electricity meter
cable, to measure your supply and detect export energy ow. When using solar charging
and export energy is detected, the VEVA unit will dynamically change the charging rate
of the EV to balance this out, effectively diverting the energy to your EV. The charging
rate will be dependant on the level of surplus generation available.
Boost Charging
When using off-peak or solar charging, there may be times when you need to charge at
full power for a period, e.g. needing your car unexpectedly. A full power boost can be
applied from the VEVA app.
Additional Top-up Charging
The additional top-up charge is exible any time charge and may be set to occur every
day, e.g., if you use your vehicle the same time each day, it may be used to provide a
quick top-up just before you need it.
2. SMART CHARGING
DEMAND CONTROL
CHARGING OPTIONS
The Demand Control function provides overload protection for your main incoming
supply fuse and is especially important if you have a smaller fuse rating. A smaller fuse
may become more easily overloaded by high power devices in your home.
Demand Control works by monitoring your incoming supply using the measuring clamp
connected around your electricity meter cable (as also used for solar charging). Your
installer will have programmed the rating of your fuse during installation. When
charging, the unit will measure the total current owing into you home and reduce the
charge rate if this becomes close to your supply fuse rating. See example over the page.

8
LOCAL OVERRIDE BOOST
When you plug your EV into the VEVA unit, there may be times where
the unit will wait before commencing a charge, such as the period
before a schedule charge is set to begin or if a random delay has been
applied, see page 9.
Your charger’s light-ring will be lit purple during this time.
If you need the VEVA unit to begin charging straight away, you may use the VEVA app
to boost charge or cancel the random delay, see page 20.
Alternatively you may signal the VEVA unit to automatically boost or cancel the delay
by using the Local Override feature. The Local Override is signalled when you plug the
charging connector into your vehicle, unplug and then re-plug within 5 seconds. When
the VEVA unit detects this happening it automatically boosts or cancels the delay.
The sequence is as follows:
Waiting Standby Charging
Plug-in
Un-plug
Plug-in
Within 5 seconds
Please note: Some vehicles may require unlocking before allowing the connector to be
unplugged.
Demand Control example— Your EV is charging at the full charge rate (taking 32 Amps
from your mains supply). You may also have additional appliances on in the home, say
taking 20A. The total current drawn from your supply would then be 52A. If your fuse
rating was set as 60A and you were then to switch on a kettle (13Amps), the total load
would exceed the fuse rating. The VEVA unit will detect the supply current is too high
and reduce the EV charge rate to around 27 Amps, lowering the overall current drawn
below 60A. When other appliances are switched off, the full charge rate would resume.

9
3. THE (SMART CHARGE POINTS) REGULATIONS
As the demand for Electric Vehicles and therefore electricity rises, the government has
set out regulations to which new domestic and workplace charge points must comply.
One of the regulation’s key areas is for charge points to have smart functionality and
prioritise charging during the electricity grid’s quieter times, when more capacity is
available. Your VEVA charge point is compliant with these regulations.
Additionally, the regulations also require that detailed charging information is available
to the user, which is available via the VEVA app, along with increased cyber security
requirements.
DEFAULT CHARGING TIMES
To help reduce demand on the electricity grid, all new charge points must be pre-
programmed to charge outside of peak demand hours. Your VEVA unit is therefore
programmed to charge between the following hours:
Weekdays - Midnight to 8am, 11am to 4pm, 10pm thru to midnight
Weekends - All day Saturday and Sunday
Charging hours may however, be adjusted via the VEVA app. When adding your new
charge point to the app, you will be asked whether to keep or alter the charging hours.
See pages 14—16 for details on how to set up schedules, the default schedules set in to the
unit are:
Weekdays Off-peak schedule 22:00—08:00, Additional Top-Up schedule 11:00-16:00
Weekends Off-peak schedule 00:00– 24:00.
To help reduce any surge, the VEVA unit will delay the
start of a charge with a random delay of up to 10 minutes.
The light-ring will be lit purple during this time.
The delay may be cancelled from the app, see page 20 or by
a Double Plug Boost, see page 8.
Please note: A random delay is always applied at the beginning and end of a scheduled
charge and at the start of an Anytime Charge.
RANDOMISED DELAY
In addition to prioritising off peak hours for charging, all change points must help
protect the electricity grid from overload. At the beginning of an off-peak period, or
straight after a power outage, many chargers could switch on together, creating a surge
in electricity demand.

10
1. Search for ‘VEVA electric’ in the App Store or on
Google Play, or scan a QR code opposite and install
the app onto your smartphone
2. Using the app, create an account
3. Add your VEVA unit to your account
4. Connect the VEVA unit to Wi-Fi (if necessary,
the unit may already have been connected by
your installer)
5. Set up your VEVA unit the way you like, then use the app to monitor
your charging
When rst using the app, it may request you to accept Location Services. Accept the
request as this may help when connecting the unit to Wi-Fi later.
You may still use the VEVA unit without the app but it will only provide charging during
off-peak hours, see Smart Charge Points Regulations, see page 9.
To use the Smart Charging functions of the VEVA unit, you will need to download the
VEVA app…
CREATING AN ACCOUNT
THE VEVA APP
To use the features of the VEVA charger, you will rst need to
create an account via the VEVA app.
When creating an account, enter your name, email address and
password.
After creating your account you will need to verify your email
address. Simply check for your email account for a verication
mail and click on the link supplied. It is important we have
your correct email address as we will use this to notify you of
any upcoming changes, including new software upgrades for
your VEVA unit.
Please note: Your email address must be veried within 7 days
of creating your account otherwise the account will be
deactivated. Please check your email for reminders.
Please keep your email address up-to-date. You can update
account information from Settings > My Account.

11
ADDING A CHARGE POINT TO YOUR ACCOUNT
After creating an account, you will be asked to link your VEVA
unit. Click on the + Add new charge point button.
You may add a VEVA unit by either typing in the serial
number of the unit or by simply scanning the QR code on the
label tted to the side of the unit or box.
If the label can’t be read for any reason, a second label can be
found under the front fascia plate, see page 4 for how to
remove the plate.
To scan the QR code, press the
Scan QR Code button and
allow access to your camera.
Position the serial number
label QR code in the centre of
the screen.
The app will automatically
read the code and connect the
unit to your account.
Once added to your account, the app will notify you if you need to connect the VEVA unit
to your Wi-Fi. If you need to do this, follow the instructions on the app and pages 14 & 15.
You can view your connected unit, give it a name, and add further units using -
Settings > My Charge Points & Scheduling.
You may connect several VEVA units to your account. A list of your chargers will be
shown in My Charge Points & Scheduling. You can swipe across on the Dashboard and
History to view different units.

12
CONNECTING THE VEVA UNIT TO Wi-Fi
Wi-Fi
Access
button
Follow this process if the VEVA app asks you to connect your unit to Wi-Fi, or if your
Wi-Fi network changes anytime e.g. your Wi-Fi hub is replaced.
It will help later if your smartphone is connected to your home Wi-Fi before starting.
However, ensure the network you are connected to, and wish to connect the VEVA unit
to, is a 2.4GHz Wi-Fi network (the VEVA unit will only connect to 2.4GHz networks).
3. Select Wi-Fi Setup. On the VEVA app, press the Settings icon
at the bottom of the app and select Wi-Fi Setup from the
Settings list. The instruction page (opposite) will be shown.
2. Push the Wi-Fi Access Point button on the unit front (shown)
and hold for two seconds. The light-ring will change colour to
yellow to indicate the unit has entered installation mode.
Please note: Installation mode will time out after 3 minutes.
1. Remove the front fascia from the VEVA unit.
See page 4 for help to do this.
4. Join to the VEVA hotspot. The VEVA
unit will have created a temporary Wi-Fi
hotspot named VEVA, plus the last 4
digits of the serial number.
Leave the app and go to the Wi-Fi Settings
page of your smartphone and select the
VEVA hotspot from the list of networks
available. The VEVA network may take a
few seconds to appear depending on your
device.
Your smartphone will connect to the
unit’s Wi-Fi hotspot.
Once joined to the network, return to the VEVA app.
5. Connected. When returning to the VEVA app, it will
automatically attempt to connect to the VEVA unit and conrm
connection on the screen. Press Connect to continue to the next
section.
If the app does not connect, return to the home screen then retry
the process. Try turning off mobile data or disable Wi-Fi assist.

13
7. Check that the VEVA unit has successfully joined the network.
The light-ring on the VEVA unit will indicate whether the unit has successfully joined
the network. When connecting, the right half of the ring indicates Wi-Fi connection
success, the left half indicates connection to the VEVA cloud.
Check the nal colour as follows:
All Green
The unit has successfully connected to the Wi-Fi network and can
communicate with the VEVA cloud. Wi-Fi set up is fully complete.
All Red
The unit has unfortunately not connected. This could be :
• An incorrect password or SSID name was used (both halves Red);
• Insufcient Wi-Fi signal strength at the VEVA unit (both halves Red), a
Wi-Fi extender may be required in this case;
• The Wi-Fi network being connected to is a 5GHz network. The VEVA
unit will only connect to 2.4GHz networks (both halves Red);
• No internet connection and the unit cannot communicate with the
VEVA cloud (initially right half of ring shown Green, before fully
turning Red). This indicates Wi-Fi has connected but no internet).
Check the internet connection and retry the Wi-Fi set up.
If a network is not suggested, type in the SSID (name) of the
Wi-Fi network to be used, together with password, see left.
Press Join and the VEVA unit will attempt to join to the Wi-Fi
network selected.
6. Select the Wi-Fi network you want to connect the VEVA unit to
and add the password.
Android devices — See right, select the desired network from the
list of networks found. Enter the Wi-Fi password at the next page.
Apple iOS devices — Privacy rules
prevent a list of networks being shown.
However, if Location Services have been
accepted (when rst using the app) and
the smartphone is connected to your Wi-
Fi network, the app will automatically
suggest the Wi-Fi network you were last
connected to and just require the
password.

14
SETTING UP YOUR VEVA UNIT...
CHARGING MODES AND SCHEDULES
Off-peak, Solar charging and the Additional Top-up charging modes are enabled by
setting Start and End time schedules. All three charging modes are set this way:
To set your VEVA unit to Anytime charging, go to
Settings > My Charge Points & Scheduling, select
your VEVA unit, then go to Charging Schedules.
Switch on Anytime charging.
Read about the different smart charging options on page 7.
ANYTIME CHARGING
SETTING SCHEDULE TIMES
1. Select Schedule. Schedules are programmed
through Settings > My Charge Points & Scheduling,
select your VEVA unit, then go to Charging
Schedules.
Select the mode you wish to use from the schedules
shown. Anytime charging must be switched off to
use schedules.
2. Enable selected schedule. After selecting a
particular schedule it must rst be enabled, see right.
The schedule settings and other options for the mode
will then be shown.
3. Set Start & End times. Each schedule may be set
separately for weekdays and weekends. You may
wish to alter the hours at weekends.
Press on the start or end time you wish to change
and edit the hours and minutes as shown. Press on
the start or end time again when nished.
To set the time to midnight at the end of a day use
24:00, 00:00 will set the start of the day.
Schedules may be set to begin before midnight e.g.,
23:00.

15
OFF-PEAK CHARGING
ADDITIONAL TOP-UP
If you have a Time-of-Use electricity tariff (such as Economy 7) you can use the off-peak
schedule to begin charging when your cheaper low rate electricity becomes available.
Time-of-Use tariffs normally offer a number of hours of low-rate electricity every day
during the night, as an example, 00:00 to 07:00. Some tariffs may also have different
hours during the weekends.
To make use of low rate electricity, match the VEVA Off-Peak schedule to your low rate
tariff hours. You may need to check your electricity meter or bill for your hours.
Many electricity meters operate in Greenwich Mean Time (winter time) all year round.
This means that in summer, your low-rate hours will seem shifted forward one hour by
the clock change due to British Summer Time, e.g. if your meter’s low rate is set as 00:00
to 07:00, in the summer time this will operate 01:00 to 08:00.
To help synchronise your off-peak schedule with a
GMT electricity meter, a special option can be selected
which forces the VEVA unit to operate the schedule in
GMT time all year round.
Switch on the Use GMT all year round setting if your electricity meter remains in GMT.
You may be able to check the meter’s time display to investigate this further.
Even if you don’t have a time-of-use tariff, you can still use the schedule to shift your
charging times to when there is less demand and help balance the electricity grid.
The Additional Top-up schedule may be used to add an additional charge at any time for
any duration. It is totally exible how and when this may be used.
The different charging modes may be set to operate together across a day, such as the
example below where the VEVA unit is programmed to charge during off-peak hours
after midnight, provide a Solar charge during the day and a Top-up in the evening:
Scheduling is very exible and any of the schedule types may be disabled and not used.
Schedules should not overlap but if they do, priority is given to the Off-Peak schedule,
then the Top-up schedule.
The VEVA unit will be set with default Off-Peak and Additional Top-Up settings
according to the Smart Charge Point regulations, see page 9.
Off-Peak schedule Solar schedule Top-up
07:00 09:00 17:00 19:0000:00 24:0021:00

16
CHARGING WITH SOLAR
By setting a solar charging schedule, you may charge your EV using the surplus energy
generated by your solar system during the start and end times set.
The VEVA unit uses a special measuring clamp tted around your electricity meter
cable to measure your supply and detect when your home is exporting energy. When
exporting, the VEVA unit dynamically varies the charge rate to balance out any export
energy, your EV is then able to charge without using grid energy, just the electricity that
would otherwise have been sent to the grid.
ELECTRICITY GRID CHARGE SUPPORT
BATTERY STORAGE SAVE MODE
An EV requires a minimum charge rate to enable it to charge, which is typically 1.4kW
(6 Amps). Depending on the size of your solar installation and weather conditions, there
may be times when there is insufcient excess generation above the minimum level for
the EV to charge. At these times the charge would have to pause, causing any available
energy below this threshold to be wasted until sufcient export energy is available.
To help with this, the charge rate may be assisted by
allowing some energy to be taken from the grid. The
amount may be selected, between 0 and 6 Amps which
will help ensure that a level of charge takes place.
Although some grid energy may then be used in the
charge, it does prevent any excess generation being
wasted.
The level of charge support can be altered using the Grid Power Support sliding scale
shown above in the Solar Charge schedule settings. To set no grid support move the
slider to the left, to provide up to 6 Amps support, move the slider to the right. You may
need to adjust the level over time to nd the most appropriate level for your system.
Please Note: When setting Grid Power Support to Always Charge, the charge point will
always ’trickle charge’ your EV at 6 Amps. If there is little generation available, the solar
percentage shown in the History pages, may show 0% from solar.
If you have a solar system with battery storage, there are circumstances where the
battery unit may clash with the VEVA unit in trying to capture your export energy. This
may result in the stored battery energy inadvertently being used to charge your EV.
To prevent this, a Battery Storage Save Mode is
available which backs off the VEVA unit when
measuring the export energy. This allows the battery
storage to have priority.
The mode can be switched on in the Solar Charge schedule settings.

17
LIGHT-RING BRIGHTNESS
The light-ring brightness may be adjusted to suit your VEVA unit’s local environment.
As an example, when situated outside, full brightness may be required during the day, if
installed in a garage, the brightness may need to be dimmed.
Adjust the light-ring brightness using the sliding
scales found in you charge point’s Light Ring Settings.
The VEVA unit is programmed with average dawn and
dusk times for each calendar month. During the
evening and night the unit will automatically switch to
the Night-time brightness setting to allow dimming.
The light-ring may be switched off by setting to 0%
HOLIDAY MODE
To prevent unauthorised charging while you are away from your property, a Holiday
Mode may be enabled temporarily which locks out the VEVA unit from charging when
an EV is plugged in.
Go to Settings > My Charge Points & Scheduling, select
the charge point required and turn on Holiday Mode
from the selection at the bottom of the screen.
Please note: Once enabled, Holiday Mode can only be disabled via the app. Always
ensure you have a means to disable it when you return. There is no manual override.
LOCAL OVERRIDE BOOST
The Local Override boost feature, see page 8, may be disabled.
Go to Settings > My Charge Points & Scheduling, select
your VEVA unit, then Local Override Boost selection.
You may wish to disable the feature to prevent unauthorised charging if you are using a
schedule setting to restrict the hours your VEVA unit will operate, e.g., a business that
wishes to restrict charging to ofce hours.

18
ELECTRICITY PRICING
The VEVA Dashboard and Charging History screens show the cost of your charging
activity. To allow your charging costs to be calculated, the price(s) of your electricity
must be entered. The app will notify you if no pricing has been set.
Go to Settings > My Charge Points and Scheduling,
select your VEVA unit, then go to Set Electricity
Pricing. Enter the prices for your electricity from your
electricity bill.
Off-Peak pricing
Off-peak prices are applied when an off peak schedule
is active.
• If you have a time-of-use electricity tariff (e.g.,
Economy 7) and have set an off-peak schedule,
enter your low rate price in the off-peak weekday
and weekend prices and normal rate price in both
peak prices. Any additional Boosts or the Additional
Top-up schedule will use the peak price.
• If you have a Weekday/Weekend tariff you can
apply different prices for weekdays and weekends.
Peak Pricing
• If you are using Anytime charging, enter your electricity price into the Weekday peak
price.
• Use the peak price to enter your day rate if you have a time-of-use tariff.
• Peak prices are applied to Boosts and the Additional Top-up schedule.
Always remember to use the Save Price button after setting or editing.

19
HOME SCREEN - DASHBOARD
MONITORING YOUR VEVA...
The Home Screen provides an up-to-date dashboard style display of the status of your
VEVA unit.
The screen will indicate whether the unit is at standby with no vehicle connected,
connected and charging, waiting for a scheduled charge to begin or if charging by solar
etc.
During charging, information on your
current charging session is shown and
continuously updated. When in standby, the
last charging session information is
displayed.
If you have more than one charge point
assigned to your account, use the arrows to
move between your charge points.
Boost, Pause or Cancel button (shown
dependant on the charging condition).
See page 20.
Your VEVA unit’s present charging condition
Your EV’s connection state and charge rate.
When charging by solar, there may be times when there is insufcient solar power
available to charge your EV. At these times an Insufcient Supply screen is shown. You
may wish to alter your Electricity Grid Charge Support setting if this happens too often.
Setting grid support to ‘Always Charge’ will resolve an insufcient supply issue and the
charge point will immediately begin ’trickle charging’ your vehicle. See page 16.
If the VEVA unit detects a problem, a warning message is displayed, together with
information on how to try to resolve the issue. The warning message will show a fault
code which is useful if having to report the problem. See page 23, Troubleshooting.
If your VEVA unit shows Waiting (before
beginning a scheduled charge), the start time
of the next charge
is shown.

20
PAUSING, BOOSTING A CHARGE AND CANCELLING A RANDOM DELAY
Pausing a charge
During a charge session there may be times when you may wish to pause the charge.
If your VEVA unit is charging while congured to Anytime Charging mode or if a
scheduled charge is underway, a Pause Charge button will be shown on the dashboard.
Pressing the Pause button will temporarily halt the session. A Restart Charge button
then allows you to continue the session.
Boosting a charge
When charging by Solar or when your EV is connected
but the VEVA unit is waiting for a scheduled charge to
begin, a boost option is offered.
The boost will charge your EV at full power for the
duration you select.
To activate a boost select the Activate Boost button and
a Set Boost Duration time screen will be shown. Select
the number of hours and minutes you wish to boost
charge your EV.
You may cancel a boost at any time.
Cancelling a Random delay
When plugging in your EV and the VEVA unit is ready to charge, a random delay will be
applied. See page 9, Smart Charge Regulations, Random delay.
If you do not wish to wait for the random delay to complete you may cancel the delay
and start charging immediately by pressing the Cancel Delay button.
Other manuals for VEVA TETHERED
1
This manual suits for next models
1
Table of contents
Other Marlec Batteries Charger manuals
Popular Batteries Charger manuals by other brands

Peak
Peak PKC0C1500 owner's manual

GRAUPNER
GRAUPNER POLARON AC/DC SPORTS operating instructions

Digital Data Communications
Digital Data Communications 245520 instructions

Monacor
Monacor IMG STAGELINE RBC-1AA manual

FDS
FDS FDPWRU28-2 Installation and operation manual

PowerTech
PowerTech MB3912 instruction manual