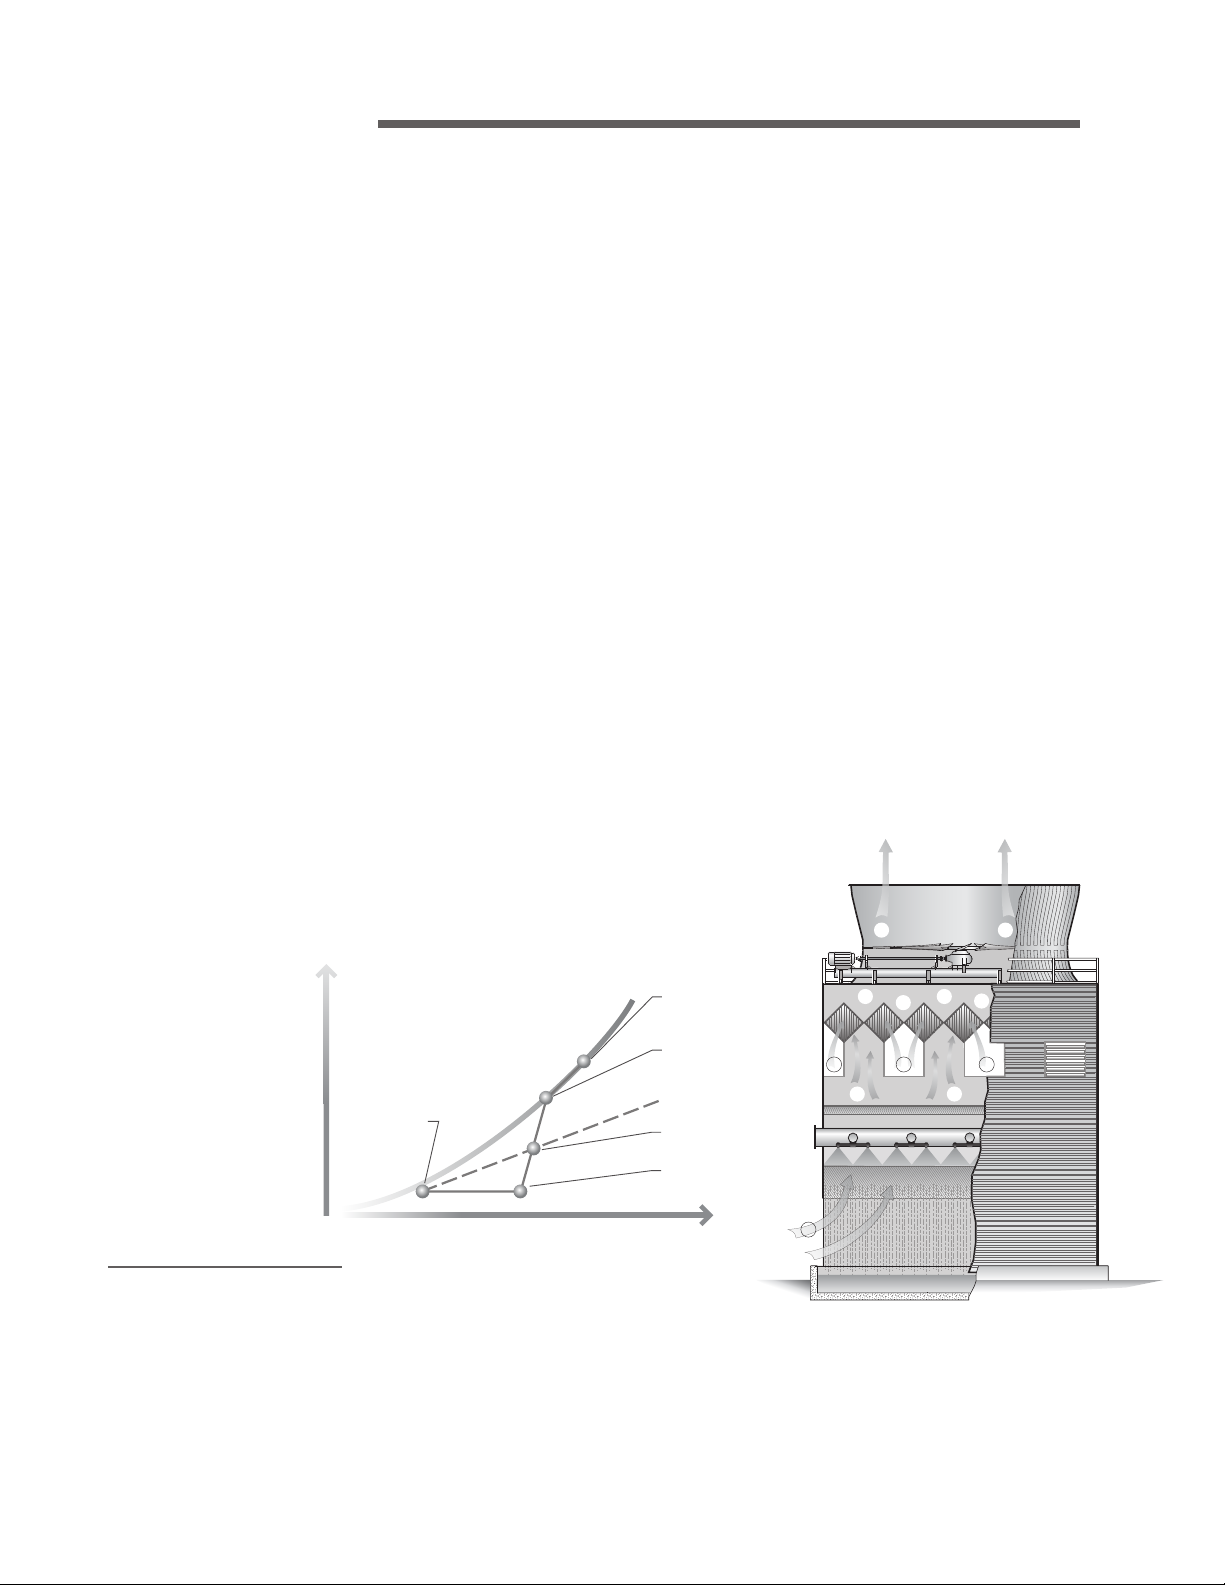
Marley Clearsky F400 User manual

F400 Clearsky®cooling tower
OPERATION - MAINTENANCE
Z0414966_C ISSUED 8/2018 READ AND UNDERSTAND THIS MANUAL PRIOR TO OPERATING OR SERVICING THIS PRODUCT.
user manual

2
contents
These instructions assist in obtaining efficient, long life from Marley counterflow
cooling towers. Direct questions concerning cooling tower operation and main-
tenance to your Marley sales representative. Always include your tower serial
number when requesting information or ordering parts. Look for this number on
the serial number nameplate.
Note
The following defined terms are used throughout this manual to bring attention
to the presence of hazards of various risk levels, or to important information
concerning the life of the product.
Indicates presence of a hazard which can cause severe personal injury, death
or substantial property damage if ignored.
Indicates presence of a hazard which will or can cause personal injury or prop-
erty damage if ignored.
Indicates special instructions on installation, operation or maintenance which
are important but not related to personal injury hazards.
Warning
Caution
Note
Plume Characteristics _________________________________________________ 3
Before Startup _______________________________________________________ 5
Starting Procedure ____________________________________________________ 6
Operation ___________________________________________________________ 6
ClearSky Plume Abatement System______________________________________ 7
ClearSky Operation Logic Diagram______________________________________ 10
Tower Maintenance __________________________________________________ 12
Water Quality and Blowdown___________________________________________ 13
Spare Parts_________________________________________________________ 16
Seasonal Shutdown Instructions________________________________________ 16
Tower Inspection and Maintenance______________________________________ 17
Troubleshooting _____________________________________________________ 18
Safety _____________________________________________________________ 19
Inspection Checklist__________________________________________________ 20
Inspection and Maintenance Schedule___________________________________ 23

3
plume characteristics
Because of the evaporation that takes place in a cooling tower, the leaving airstream
is saturated with water vapor. This plume of saturated air can be highly visible because
it is usually warmer and contains considerably more moisture than the surrounding
atmosphere. As it cools to reach equilibrium with the ambient air, its excess water vapor
condenses because cold air is incapable of assimilating as much moisture (specific
humidity) as warm air. This condensed plume of moisture becomes visible as fog.
The cooling of this plume also decreases its buoyancy—its ability to rise. In many cases,
particularly in adverse wind conditions, cooling plumes will remain at very low levels
until they dissipate, often reinforcing ground level fogging. This is unacceptable in the
vicinity of airports and is of serious concern when the density and persistency affects
road visibility. The density, persistency, and buoyancy of this visible plume is a function
of the total amount of heat extracted from the water by evaporation, the temperature
at which the heat is extracted and the temperature of the ambient atmospheric air. The
greater the difference between the temperature of the warm exhaust air and the cool
ambient air, the more visible the plume.
Visible plumes are typically much more dense and persistent in the wintertime than
summer. This is shown graphically in Figure 1 which relates the characteristics of the
plume to the saturation curve of a psychrometric chart. In winter operation, air enters
the tower at condition 1 and leaves saturated at condition 2. On leaving the tower, the
air reaches equilibrium with the ambient air along line 2–1. In doing so, it remains in
the supersaturated (fog) region of the chart for a considerable time. Conversely, sum-
mer air enters the tower at condition 3, and exits saturated at condition 4. Returning
to ambient conditions along line 4–3, the leaving airstream is never within the fog
region. This classifies the plume visibility as wispy and short-lived, often not persisting
beyond a few meters above the fan cylinder. Although higher heat loads can increase
the persistency of summertime plumes, they never reach the density of those that form
in cooler seasons. ➠
1
2 4
3
DRY BULB TEMPERATURE
MIXING AIR
ABOVE TOWER
MIXING AIR
WITHIN TOWER
VISIBLE PLUME
FOG AREA
NON
FOG AREA
MOISTURE CONTENT
S
A
T
U
R
A
T
I
O
I
N
C
U
R
V
E
1
3
4
2
Figure 1

4
plume characteristics
Marley ClearSky provide a means by which the plume leaving the tower can be made
less visible, or more buoyant, or both resulting in reduced ground fogging. This is done
by reducing the actual grains of moisture in the plenum airstream and at the same time
producing a stream of heated dry air that is mixed with the tower’s primary saturated
airstream prior to its exit from the tower. This results in desaturation of the plume to the
point where it does not cross into the fog region on its way back to ambient atmospheric
air conditions. In other words, little or no condensation will occur. Visibility reduction
is explained graphically in the Figure 2 ClearSky psychrometric diagram. The primary
airstream leaves the cooling tower’s wet section (fill) at condition 1 and it then passes
through the ClearSky heat exchanger where a secondary airstream enters the dry side
of the ClearSky heat exchanger, cooling the plume airstream and condensing a portion
of the moisture moving the airstream condition along the saturation line to condition 2.
The dry airstream gains heat but no moisture content and leaves at condition 3. These
two airstreams mix together along line 3–2 exiting the tower at condition 4. Returning
to atmospheric conditions along line 4–5, the plume is therefore neither dense nor
persistent. Plume characteristics depend upon the application of the ClearSky heat
exchanger modules to the cooling tower. In many cases, the plume can be made to
become invisible within one or two fan diameters above the top of the tower fan cylinder.
Figure 2
22
1
5 5 5
5
3
4 4
3
1
DRY BULB TEMPERATURE
WET-BULB OUT
OF WET SECTION
MOISTURE CONTENT
S
A
T
U
R
A
T
I
O
I
N
C
U
R
V
E
WET-BULB OUT
OF CLEARSKY
DRY-BULB OUT
OF CLEARSKY
MIX LINE TO AMBIENT
FAN EXIT POINT
PLUME DESIGN
POINT
VISIBLE PLUME
AREA
1
2
3
4
5

5
Before Startup
Microorganisms including Legionella bacteria can exist in premise plumbing in-
cluding cooling towers. The development of an effective water management plan
(WMP) and implementation of maintenance procedures are essential to prevent
the presence, dissemination and amplification of Legionella bacteria and other
waterborne contaminants throughout premise plumbing. Before operating the
cooling tower, the water management plan and maintenance procedures must
be in place and regularly practiced.
1–Consult a knowledgeable water treatment professional to clean and treat your new
cooling tower prior to startup. Cooling towers must be cleaned and disinfected
regularly in accordance with ASHRAE Standard 188 and Guideline 12.
2–Do NOT attempt any service unless the fan motor is locked out.
When starting in freezing weather, follow procedures outlined in Freezing Weather
Operation.
INSPECTION–It is imperative that all operating assemblies be inspected before they
are placed in operation. The following is a list of components to be checked before
starting the tower:
1–Check driveshaft alignment. Realign if necessary. See the Drive Shaft User Manual.
2–Check tightness of bolts in fan cylinder joints.
3–Check tightness of the following bolted joints in the fan and drive assemblies:
a–Fan hub clamp bolts. See the Fan User Manual for correct torque setting).
b–Fan hub cover bolts.
c–Geareducer®and motor mounting bolts.
d—Driveshaft coupling and guard bolts.
4–Check Geareducer oil for sludge or water by draining off and testing a sample as
outlined in the Geareducer User Manual.Check Geareducer oil level at “oil level” mark
on the side of the case. Add oil as required. The oil level placard must be adjusted
so that its “full” mark is at the same elevation as the “full” mark on the side of the
Geareducer case. Check oil lines to be sure there are no leaks. See the Geareducer
User Manual for oil filling procedure and list of recommended lubricants.
5–Rotate fan by hand to be sure of free rotation and ample tip clearance. See the
Fan User Manual.
6–Check motor insulation with a megohm meter. Refer to the Maintenance Section
of the Marley “Fan Motor” User Manual.
Warning
Note
➠
operation

6
7–Lubricate the motor according to motor manufacturer’s instructions.
8–Test run each fan separately for a short time. Check for excessive vibration or
unusual noise. If either is present, see Troubleshooting Guide on pages 18 and
19 of this manual. Fan must rotate clockwise when viewed from above. Recheck
Geareducer oil level.
9–Check functioning of make-up water supply.
10–Make sure the blowdown will carry the proper amount of water.
11–Check dry damper linkage to be sure linkage is properly functioning.
Actuate dry dampers to make sure they open and close.
12–Check dry duct vent doors to see that linkage is properly functioning. In cold weather
if possible inspect doors for snow and ice that may freeze doors shut. Tower may
need to operate with heat load to melt snow and ice prior to operating vent doors.
Actuate dry duct vent doors to make sure they open and close.
Starting Procedure
WATER SYSTEM–Fill the cold water collection basin and circulating water system until
the operating water level is reached. See Operation. Prime and start the circulating
water pumps. Increase the flow of circulating water gradually to design water flow rate
to avoid water hammer which could damage the distribution piping system.
Clean the sump screens several times during the first weeks of operation. After
this, clean sump screens weekly.
When starting in cold weather, follow procedures outlined in Cold Weather Op-
eration.
FAN START–After 30 minutes of operating time to permit Geareducer oil to come up
to operating temperature, check motor load with watt meter, or take operating volt and
ampere readings and calculate motor hp. Refer to the Fan User Manual for instructions.
Pitch fans to pull correct contract horsepower when circulating design water rate at
design hot water temperature.
Note
Note
operation

7
Operation
Entering water temperature in excess of 125°F may result in fill deformation.
TOWER PERFORMANCE–Keep the cooling tower clean and water distributionuniform
to obtain continued maximum cooling capacity.
The capacity of a cooling tower to cool water to a given cold water temperature varies
with the wet-bulb temperature and the heat load applied to the cooling tower. As the
wet-bulb temperature drops, the cold water temperature also drops. However, the cold
water temperature does not drop linearly with the wet-bulb temperature.
A cooling tower will not control heat load. The flow rate of water circulated through
the cooling tower will determine the temperature range of cooling in conjunction with
a given heat load. The hot water and cold water temperatures will increase with higher
heat loads.
ClearSky Plume Abatement System
ClearSky towers have the unique ability to vary operation between Maximum Thermal
Performance Mode and Maximum Plume Abatement Mode. This system variation
is achieved by manipulating motor operated control linkages to alter the air paths
between heated saturated air or dry ambient air. Mechanically actuated vent doors
located in a horizontal plane just above the mist eliminators at the base of dry air ducts
can be opened to permit passage of heated saturated air from the wet section of the
cooling tower into dry path air ducts. Dry dampers mounted on the tower’s exterior
can regulate the amount of dry ambient air passing through the dry ducts and then
heated in the ClearSky heat transfer media packs before being exhausted through
the fan cylinder. By closing the dry dampers and opening the vent doors, heated
saturated air is permitted to pass through the ClearSky media passages designed for
dry air. Thus maximum heated saturated air flow through the fill is achieved producing
maximum cooling.
MAXIMUM THERMAL PERFORMANCE MODE–Position the dry dampers in the
closed position and position the vent doors in the open position.
MAXIMUM PLUME ABATEMENT MODE–Position the vent doors in the closed posi-
tion and position the dry dampers in the open position.
Caution
➠
operation

8
In transitioning from maximum thermal performance to maximum plume abate-
ment, the hot and cold water temperatures will rise. Care must be exercised
to ensure that the water temperatures do not rise above 125°F or a lower limit
defined by the user's process.
PARTIAL PLUME ABATEMENT MODE–When managing maximum water tempera-
tures and reducing plume, the tower may be operated in partial plume abatement mode.
Position the vent doors in the closed position. Initially place the dry dampers in the
closed position and let the water temperatures stabilize. If the water temperatures are
too high, then open the vent doors for maximum cooling. If the water temperatures are
below maximum acceptable temperatures, adjust the dry dampers incrementally open
until either the plume is acceptable or until maximum water temperatures are reached.
Reference ClearSky Operation Logic Diagram and Notes on pages 10 and 11.
Partial section showing the ClearSky plume abatement components
HOT WATER DISTRIBUTION SYSTEM–Maintain uniform water distribution at the
nozzles (uniform spray cone). The amount of water circulated should approximate the
contract requirements and the nozzle pressure should be kept constant. Lower pres-
sures may indicate excessive losses in the piping system and/or insufficient pump
capacity; greater pressures might indicate clogged nozzles and/or overpumping. If a
greatly reduced water flow rate is desired, it may be advisable to change nozzle sizes
Caution
Note
Figure 3
operation
CLEARSKY
HEAT EXCHANGERS
DRY DAMPER
WET AIR DUCT
VENT DOOR—SHOWN OPEN TO
VENT WET AIR INTO DRY DUCT
WALL REMOVED AT DASHED
LINES TO SHOW INTERNAL
FEATURES
DRY AIR DUCT
WET AIR DUCT

9
to obtain the desired pressure and maintain proper water distribution. An SPX Cooling
Technologiesengineercanadviseminimumand maximum flow rates foreven distribution.
COLD WATER COLLECTION BASIN–A suitable depth must be maintained to keep
the pumps from pulling air into the line. The amount of “make-up” water required to keep
the water in the collection basin at the required depth depends upon the “evaporation
loss” and “blowdown” .
FAN DRIVE–When using two-speed motors, allow a time delay of 20 seconds minimum
after de-energizing the high-speedwinding and before energizing the low-speedwinding.
Tremendous stresses are placed on driven machinery and motors unless the motors are
allowed to slow to low-speed RPM or less before the low-speed winding is energized.
FREEZING WEATHER OPERATION–During periods of cold temperature operation,
35°F to 40°F or below, ice will form on the relatively dry parts of the cooling tower that
are in contact with the incoming air. Primarily, this includes the air inlet and adjacent
structural framing. Your understanding of cold weather operation will be enhanced if
you read “Cooling Towers and Freezing Weather” Marley Technical Report H-003.
Ice forming characteristics on any given cooling tower will vary, depending on velocity
and direction of wind, circulating water rate, and heat load. Excessive ice formation
may be controlled by regulating air and water flow through the tower by one or more
of the following procedures:
1–Shut the fan down. This reduces the cooling air rate to a minimum and increases
the quantity of warm water at the air inlet to a maximum. However, normal “fan off”
operation causes reverse air flow by aspiration and may cause water blowout and
therefore must be done with caution and monitoring. For automatic operation, a timer
switch can be provided to shut the fan down for a few minutes each hour.
2–When a cooling tower has two-speed motors, operate the fans at half speed forward.
This reduces the cooling air rate (heat transfer) and increases the quantity of warm
water at the air inlet. Not recommended for plume control.
3–With no heat load on the circulating water, icing cannot be controlled. Towers must
not be operated with reduced water rate and/or no heat load during freezing weather.
If a bypass directly into the cold water basin is used, all water must be bypassed.
Reverse operation of fans is not recommended . See “Fan Drive” for fan speed
change precautions.
INTERMITTENT OPERATION–When the unit is operated intermittently during win-
ter weather, it is necessary that the water be drained from the tower piping to insure
protection against freezing and possible rupture.
Caution
operation

10
Close vent doors
No action required
Open vent doors
No
Yes
Reduce dry
damper opening
by an increment
Tower is in maximum
thermal performance
mode
Yes
Tower is in maximum plume abatement mode
Yes
No Increase dry damper
opening by an increment
Is tower
pluming?
Are
vent doors
open?
Are dry
dampers
100%
open?
Is
CW +∆CW
<CWMAX?
Yes
No
No
Read cold water temp CW
Is CW <
CWMAX?
Are dry
dampers
open?
Wait several minutes
Yes
No No
Yes
Yes
No
Closing the vent doors will increase CW temp. If CW temp
is near CWMAX then closing the doors may cause the CW
temp to exceed CWMAX. Opening the dry dampers will
increase the CW temp further.
∆CW may be determined by operating the tower with the vent
doors open and determining the CW temp, CWOPEN. Then close
the vent doors and measure the CW temp, CWCLOSED.
∆CW=CWCLOSED –CWOPEN. This value will vary depending on
the temp range (HW –CW) but is usually from 2° to 5°F.
Are
vent doors
open?
ClearSky Operation Logic Diagram

11
ClearSky Operation Logic Diagram Notes
1–Assumes maximum cold water (CWMAX) temperature has priority over plume
abatement.
2–Assumes fans are operating at full speed.
3–Assumes vent doors are either all open or all closed. Further operational flexibility
could be gained by only opening or closing some of the vent doors.
4–Assumes dry dampers are closed when vent doors are open.
5–CWMAX is the maximum allowable cold water temperature established by the user.
Material temperature limits or process limits may influence this value.
6–
∆CW is a nominal rise in cold water temperature due to closing vent doors from
their open position. Dry dampers are assumed closed before and after the vent
doors are closed.
7–Dry damper opening increments may need to be empirically determined as the
actuator position is not linear with air flow.
8–Maximum thermal performance mode means that no more damper or vent options
are available to increase thermal performance (to lower the cold water temperature).
9–Maximum plume abatement mode means that no more damper or vent options are
available to increase plume abatement.
➠
operation
DRY DAMPERS
CLEARSKY
HEAT EXCHANGERS
DRY AIR
DUCT
CLOSED VENT
DOOR
OPEN VENT
DOOR
Figure 4

12
Tower Maintenance
Always shut off electrical power to the tower fan motor prior to performing any
inspections that may involve physical contact with the mechanical or electrical
equipment in or on the tower. Lock out and tag out any electrical switches to
prevent others from turning the power back on. Service personnel must wear
proper personal protective clothing and equipment.
Well-maintained equipment gives the best operating results and the least maintenance
cost. SPX recommends setting up a regular inspection schedule to insure effective, safe
operation of the cooling tower. Use the schedule on page 17 to obtain continuously
good performance with the least tower maintenance. See Cooling Tower Inspection
Check List in this manual. Keep a continuous lubrication and maintenance record for
each cooling tower.
HOT WATER DISTRIBUTION SYSTEM–Keep the circulating water and distribution
system (piping and nozzles) clean and free of dirt, algae, and scale. Algae and scale
may clog nozzles, eliminators, fill, and piping, and may collect on the equipment served
thus reducing its performance.
An access hatch in the fan deck with ladder to an intermediate platform provides means
for inspection of the plenum area above the eliminators. Removal of an access hatch at
the plenum level allows access to the spray chamber for inspection and maintenance
of the nozzles and top of fill. Provide surface protection before walking on the fill.
DRIFT ELIMINATORS–Eliminators should be kept clean.
Do not walk or step on the eliminators without planking and safety harness.
COLD WATER COLLECTION BASIN (supplied by others)–Inspect collection basin
occasionally for leaks and repair if necessary. Keep cold water outlets clean and free
of debris. Makeup and circulating water controls must operate freely and maintain the
desired water quantity in the system.
DRIVESHAFT–Check drive shaft alignment and condition of couplings every six
months. See the Drive Shaft User Manual for correcting misalignment, balancing, or
replacing parts.
FAN MOTOR–Lubricate and maintain each electric motor in accordance with the
manufacturer’s instructions. If repair work is necessary, contact the nearest represen-
tative of the motor manufacturer. See Warranty Section of the Marley “Fan Motor”
User Manual. Fan motors with sealed bearings do not require lubrication maintenance.
Warning
Warning
maintenance

13
FAN–Inspect fan blade surfaces every six months. For detailed maintenance informa-
tion, refer to the Fan User Manual.
GEAREDUCER–Make weekly and monthly oil checks. Inspect internal parts during
seasonal oil change. Refer to the Geareducer User Manual for detailed maintenance
instructions.
DRY DAMPERS–Inspect linkages, adjust and lubricate as needed.
VENT DOORS–Inspect linkages and bearings, adjust and lubricate as needed.
PAINTING–Periodically clean and, ifnecessary, recoat all metal partssubject to corrosion.
Water Quality and Blowdown
BLOWDOWN–Blowdown, or bleed-off, is the continuous removal of a portion of the
water from the circulating system. Blowdown is used to prevent the dissolved solids
from concentrating to the point where they will form scale. The amount of blowdown
required depends upon the cooling range (the difference between the hot and cold
water temperatures), the composition of the make-up water (water added to the sys-
tem to compensate for losses by blowdown, evaporation and drift). and the amount
of condensed water returned from the ClearSky heat exchanger modules. The follow-
ing table shows an approximate amount of blowdown required to maintain different
concentrations with various cooling ranges—these numbers are reduced by the % of
condensed water at a given weather condition:
BLOWDOWN–% OF CIRCULATING RATE
EXAMPLE: 7000 gpm circulating rate, 15° cooling range. To maintain 4 concentra-
tions, the required blowdown is .38% or .0038 times 7000 gpm which is 26.6 gpm.
Cooling Range Number of Concentrations
X5.1X0.2X5.2X0.3X0.4X0.
5X
0.6
.783°C
6°C
9°C
12°C
14°C
1.58
2.38
3.18
3.98
3.52.81.11.80
.6
0.
7.15.83.52.81
.4
1.
1.187.85.83.82
.2
2.
5.150.187.15.83
.0
3.
9.123.189.46.84
.8
3.
Multipliers are based on drift of 0.02% of the circulating water rate
➠
maintenance

14
If tower is operated at 4 concentrations, circulating water will contain four times as
much dissolved solid as the make-up water, providing none of the solids form scale or
are otherwise removed from the system.
The blowdown quantity is normally and most easily achieved using a bleed value acti-
vated by a measurement of the water’s dissolved solids. In this way, no exact calculation
of blowdown gpm is required on an ongoing basis.
CHEMICAL TREATMENT– Chemical treatment is required to control biological growth
in the cooling tower fill, basins, and piping. In most cases chemical treatment of the
circulating water is not required if adequate blowdown is maintained. In most cases,
however, chemical treatment is required to prevent scale formation and corrosion.
Sulfuric acid or one of the polyphosphates is most generally used to control calcium
carbonate scale. Various proprietary materials containing chromates, phosphates or
other compounds are available for corrosion control. When water treatment chemicals
are required, the services of reliable water treating companies should be obtained.
Biofilm, a gelatinous organic growth, and algae, a green moss, may grow in the cool-
ing tower or heat exchangers. Their presence can interfere with cooling efficiencies.
Proprietary compounds are available from water treating companies for the control of
slime and/or algae; however, compounds which contain copper are not recommended.
Chlorine and chlorine containing compounds are effective algaecides and slimicides. If
used, chlorine should be added as intermittent (or shock) treatment only as frequently
as needed to control the slime and algae. Chlorine and chlorine containing compounds
should be added carefully since very high levels of chlorine may occur at or near the
point of entry into the circulating water system.
FOAMING–Heavy foaming sometimes occurs when a new tower is put into operation.
This type of foaming generally subsides after a relatively short period of operation.
Persistent foaming can be caused by the concentrations of certain combinations of
dissolved solids or by contamination of the circulating water with foam-causing com-
pounds. This type of foaming can sometimes be minimized by increasing the blowdown,
but in some cases foam depressant chemicals must be added to the system. Foam
depressants are available from a number of chemical companies.
MAINTENANCE OF FILL PERFORMANCE
Owner must keep water clean by treatment, screening, or filtering to avoid the
possibility of fill clogging and loss of thermal performance.
Caution
maintenance

15
Potential Causes of Fill Clogging:
• Suspended materials—Debris, etc.
• Scale—Can be sulfates, silicates, carbonates, or oxides. Scaling effects can be ac-
centuated by suspended solids.
• Algae and/or Biofilm—Consult a qualified water treatment professional.
Possible Sources of Scale:
• Calcium Sulfate—From make-up and sulfates produced by sulfuric acid for pH adjust-
ment. Calcium sulfate should be kept below 1000 ppm expressed as CaCO3
.
• Calcium Carbonate—Generally will not form scale in the cooling tower if carbonate
scaling does not occur in the condenser.
• Exceptions: If make-up water contains surplus free carbon dioxide, scaling may be
inhibited in the condenser, but may occur in the tower fill because of CO2stripping.
• Silicates and Oxides—Silica scale is virtuallyimpossible toremove. Silica scaleis unlikely
if SiO2is held below 150 ppm. Oxides, such as iron oxide, can coat all parts of the
system if soluble iron is present in concentrations above 0.5 ppm. Iron oxides do not
usually develop into thick scales but can accentuate the development of other scales.
MAINTENANCE OF CLEARSKY PVC HEAT EXCHANGERS
Fouling
• Dust may accumulate in the dry air ducts over time causing reduced heat transfer.
Do not use high pressure washing equipment on ClearSky PVC heat exchangers.
• Low pressure washing from a municipal or similar water supply system using a hose
with a spray nozzle on a shower setting is recommended. Do not spray a jet stream
directly on the PVC ClearSky heat exchangers. Spray water at the top of the ClearSky
heat exchangers.
Leaks
• Water should not be allowed to accumulate in the dry air ducts (except when clean-
ing). Evaporation of water in the dry ducts will reduce plume abatement. Furthermore,
in cold climates ice accumulation may cause damage.
• Leaks at casing and or flashing should be resealed.
• Leaks in the PVC heat exchange tubes may be sealed with an adhesive. PVC cement
is not recommended because it may soften the plastic. In the event that the source of
the leak can not be identified, the wet path of that tube should be plugged. A closed
cell flexible foam that can be inserted and removed is recommended.
Caution
maintenance

16
Spare Parts
SPX Cooling Technologies manufactures and inventories cooling tower replacement
parts. Typical lead time is 10 working days. Contact your Marley representative for
emergency service.
Owners should consider maintaining an inventory of critical mechanical components,
such as a fan assembly, gear drive and driveshaft to avoid emergency shutdown of
cooling tower operations. Be sure to furnish the cooling tower serial number when
ordering parts.
Seasonal Shutdown Instructions
Tower–Drain all tower piping.
During shutdown, follow recommendations in the Cooling Tower Inspection and
Maintenance section of this manual before attempting repairs. Apply protective coat-
ing as required to all metal parts. Particular attention should be given to mechanical
equipment supports, drive shaft and drive shaft guards.
Mechanical Equipment
Geareducer – Downtime for 3 months or less
1–Each month, drain water condensate from the lowest point of the Geareducer and
its oil system. Check oil level and add oil if necessary. Operate to coat all interior
surfaces with oil.
2–At start-up, drain water condensate and check oil level. Add oil if necessary. Refer
to the Geareducer User Manual for maintenance and lubrication instructions.
Geareducer – Downtime for 3 months or more
1–If the fan motors have space heaters, operate mechanical equipment one hour
each month.
2–If the fan motors do not have space heaters, operate mechanical equipment one
hour each week.
3–At startup, operate mechanical equipment one hour or until oil is warm, then shut
the equipment down. Drain the oil and refill. Refer to the Geareducer User Manual
for instruction on changing oil. Refer to the Downtime Instructions User Manual for
downtime exceeding six months.
Fan Motors
1–Do not start motor without determining that there will be no interference with free
rotation of the fan drive.
2–Refer to the “Fan Motor” User Manual for additional information.
maintenance

17
maintenance
3–If shutdown period is longer than seasonal, contact your Marley sales representative
for additional information.
ClearSky Plume Abatement System Close dry dampers to prevent foreign objects
from entering the dry ducts.
Cooling Tower Inspection and Maintenance:
Microorganisms including Legionella bacteria can exist in premise plumbing in-
cluding cooling towers. The development of an effective water management plan
(WMP) and implementation of maintenance procedures are essential to prevent
the presence, dissemination and amplification of Legionella bacteria and other
waterborne contaminants throughout premise plumbing. Before operating the
cooling tower, the water management plan and maintenance procedures must
be in place and regularly practiced.
In addition, the following steps are recommended:
Do NOT attempt any service unless the fan motor is locked out.
• Consult a knowledgeable water treatment professional to clean and treat your cool-
ing tower prior to startup. See Before Startup section of this manual.
• Cooling towers must be cleaned and disinfected regularly in accordance with
ASHRAE Standard 188 and Guideline 12.
• Workers performing decontamination procedures must wear personal protective
equipment (PPE) as directed by their facility safety officer.
• Cooling towers must be visually inspected regularly to assess signs of bacterial
growth, appearance of debris and scale on drift eliminators and general operating
conditions. Refer to ASHRAE Standard 188 and Guideline 12 for specific frequency
recommendations.
• Replace worn or damaged components.
To minimize the presence of waterborne microorganisms, including Legionella, follow
the water management plan for your facility, perform regularly scheduled cooling tower
inspections and maintenance, and enlist the services of water treatment professionals.
For additional technical support, contact your Marley sales repre-
sentative. For help identifying the sales representative in your area, visit
spxcooling.com/replocator.
References:
ashrae.org. Search “ASHRAE Standard 188” and “ASHRAE Guideline 12.”
cdc.gov. Search “Water Management Program.”
Warning

18
troubleshooting
Trouble Cause Remedy
Motor will not start
Power not available at motor
terminals
Check power at starter. Correct any bad connections between the
control apparatus and the motor.
Check starter contacts and control circuit. Reset overloads, close
contacts, reset tripped switches or replace failed control switches.
If power is not on all leads at starter, make sure overload and short
circuit devices are in proper condition.
Wrong connections Check motor and control connections against wiring diagrams.
Low voltage Check nameplate voltage against power supply. Check voltage at
motor terminals.
Open circuit in motor winding Check stator windings for open circuits.
Fan drive stuck Disconnect motor from load and check motor and Geareducer for
cause of problem.
Rotor defective Look for broken bars or rings.
Unusual motor noise
Motor running single-phase Stop motor and attempt to start it. Motor will not start if single phased.
Check wiring, controls and motor.
Motor leads connected incorrectly Check motor connections against wiring diagram on motor.
Bad bearings Check lubrication. Replace bad bearings.
Electrical unbalance Check voltages and currents of all three lines. Correct if required.
Air gap not uniform Check and correct bracket fits or bearing.
Rotor unbalance Rebalance.
Cooling fan hitting end bell-guard Reinstall or replace fan
Motor runs hot
Wrong voltage or unbalanced
voltage
Check voltage and current of all three lines against nameplate values.
Overload Check fan blade pitch. See Fan User Manual. Check for drag in fan
drivetrain as from damaged bearings.
Wrong motor RPM Check nameplate against power supply. Check RPM of motor and gear
ratio.
Bearings over greased Remove grease reliefs. Run motor up to speed to purge excessive
grease. Does not apply to motors with sealed bearings.
Wrong lubrication in bearings Change to proper lubricant. See motor manufacturer’s instructions.
One phase open Stop motor and attempt to start it. Motor will not start if single phased.
Check wiring controls and motor
Poor ventilation Clean motor and check ventilation openings. Allow ample ventilation
around motor.
Winding fault Check with Ohmmeter.
Bent motor shaft Straighten or replace shaft.
Insufficient grease Remove plugs and regrease bearings. Does not apply to motors with
sealed bearings.
Too frequent starting or speed
changes
Limit cumulative acceleration time to a total of 30 seconds per hour.
Set on/off or speed change set-points farther apart. Consider installing
a Marley VFD for fine temperature control.
Deterioration of grease or foreign
material in grease
Flush bearings and relubricate. Does not apply to motors with sealed
bearings.
Bearings damaged Replace bearings.

19
Ladders, Stairways,
Walkways, Handrails, Covers,
Decks and
Access Doors
Davits, Derricks, and Hoists
Inspect for General Condition
Semi-annually
Semi-annually
Inspect and Repair for Safe Use
Yearly
Inspect and Repair Before Each Use
As Required
SAFETY–The F400 Clearsky cooling tower has been designed to provide a safe working environment while either
operating or shut down. The ultimate responsibility for safety rests with the operator and owner. When water flow to
the tower is shut off or when portions of the tower require maintenance, temporary safety barricades may be required
around openings and fall protection equipment should be utilized where appropriate for compliance with OSHA regula-
tions, standards and good safety practices.
Routine periodic maintenance must be
performed on all personnel access and
material handling accessories in accordance
with the following schedule:
troubleshooting
Trouble Cause Remedy
Motor does not come up to
speed
Voltage too low at motor
terminals because of line drop
Check transformer and setting of taps. Use higher voltage on
transformer terminals or reduce loads. Increase wire size or reduce
inertia.
Broken rotor bars Look for cracks near the rings. A new rotor may be required. Have
motor service person check motor.
Wrong motor rotation Wrong sequence of phases Switch any two of the three motor leads.
Geareducer noise
Geareducer bearings
If new, see if noise disappears after one week of operation. Drain, flush
and refill Geareducer oil. See Geareducer User Manual. If still noisy,
replace.
Gears Correct tooth engagement. Replace badly worn gears. Replace gears
with broken or damaged teeth
Unusual fan drive vibration
Loose bolts and cap screws Tighten all bolts and cap screws on all mechanical equipment and
supports.
Unbalanced driveshaft or worn
couplings
Make sure motor and Geareducer shafts are in proper alignment and
“match marks” properly matched. Repair or replace worn couplings.
Rebalance driveshaft by adding of removing weights from balancing
cap screws. See Driveshaft User Manual.
Fan
Make certain all blades are as far from center of fan as safety devices
permit. All blades must be pitched the same. See Fan User Manual.
Clean off deposit build-up on blades
Worn Geareducer bearings Check fan and pinion shaft endplay. Replace bearings as necessary.
Unbalanced motor Disconnect load and operate motor. If motor still vibrates, rebalance
motor.
Bent Geareducer shaft Check fan and pinion shaft with dial indicator. Replace if necessary.
Fan noise
Blade rubbing inside of fan
cylinder Adjust cylinder to provide blade tip clearance.
Loose bolts in blade clamps Check and tighten if necessary.
Insufficient Cold Water Tower operating in plume
abatement mode See ClearSky Operation Logic diagram on page 10.
Plume
Insufficient dry air Close vent doors and incrementally open dry dampers. See ClearSky
Operation Logic diagram on page 10.
Duty more difficult than design Tower will plume. Configure for maximum plume mode. See ClearSky
Operation Logic diagram on page 10.

20
inspection checklist
Date Inspected Inspected By
Owner Location
Owner's Tower Designation
Tower Manufacturer Model No. Serial No.
Process Served by Tower Operation: Continuous Intermittent Seasonal
Design Conditions gpm HW °F CW °F WB °F
Number of Fan Cells
Condition: 1—Good 2—Keep an eye on it 3—Needs immediate attention
1 2 3 Comments
Structure
Casing Material
Structural Material
Fan Deck Material
Stairway? Material
Ladder? Material
Handrails? Material
Interior Walkway? Material
Cold Water Basin Material
Water System
Distribution System
Header Material
Manifold Material
Branch Arms
Nozzles — Orifice Diameter "
Heat Transfer System
Fill
Eliminators
Inlet Face of Fill
Use this space to list specific items needing attention:
❑❑❑
Table of contents
Other Marley Industrial Equipment manuals
Popular Industrial Equipment manuals by other brands

Eaton
Eaton Airflex RTK Installation, operation and maintenance manual

Festo
Festo Checkbox Compact CHB-C-F Supplementary information

Tesmec
Tesmec CRT160 Instructions for use

Vokkero
Vokkero ELITE 4 user guide

MATE
MATE ROLLER SOLUTIONS ROLLING SHEAR Use and maintenance instructions

Dai
Dai VKM50GBMV1 installation manual

3M
3M Wrist Strap and Ground Monitor 773 user guide

PR electronics
PR electronics 4500 Series product manual

Branick
Branick 5500 Installation, Operation and Repair Parts Information

Jäger
Jäger KS2-10/80 manual

Herzog
Herzog BHP Installation & service instructions

Condux
Condux TESMEC PT1150 quick start guide