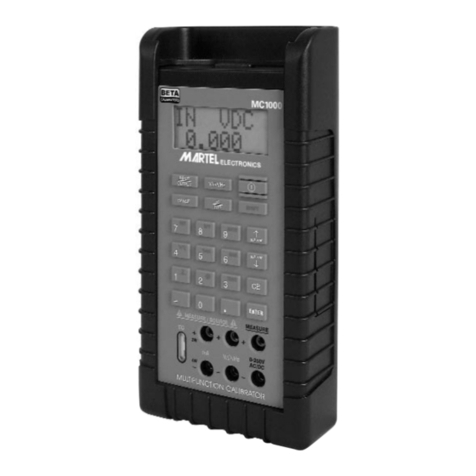
Martel M2000 User manual

M2000
Operator’s Manual

Table of Contents
I. INTRODUCTION . . . . . . . . . . . . . . . . . . . . . . . . . . . . . . . . . . . . . . . . . .3
II. STANDARD EQUIPMENT . . . . . . . . . . . . . . . . . . . . . . . . . . . . . . . . . . .3
III. OPTIONS AND ACCESSORIES . . . . . . . . . . . . . . . . . . . . . . . . . . . . . .3
IV. UNPACKING . . . . . . . . . . . . . . . . . . . . . . . . . . . . . . . . . . . . . . . . . . . . .3
V. NOMENCLATURE . . . . . . . . . . . . . . . . . . . . . . . . . . . . . . . . . . . . . . . . .3
VI. GETTING STARTED . . . . . . . . . . . . . . . . . . . . . . . . . . . . . . . . . . . . . . . .6
VII. VOLTAGE OUTPUT . . . . . . . . . . . . . . . . . . . . . . . . . . . . . . . . . . . . . . . .6
VIII. CURRENT OUTPUT . . . . . . . . . . . . . . . . . . . . . . . . . . . . . . . . . . . . . . . .7
IX. SETPOINTS . . . . . . . . . . . . . . . . . . . . . . . . . . . . . . . . . . . . . . . . . . . . . .8
X. REMOTE INTERFACE . . . . . . . . . . . . . . . . . . . . . . . . . . . . . . . . . . . . . .8
XI. REMOTE COMMANDS . . . . . . . . . . . . . . . . . . . . . . . . . . . . . . . . . . . .19
XII. SPECIFICATIONS
General Specifications . . . . . . . . . . . . . . . . . . . . . . . . . . . . . . . . . . . . .26
DC Voltage, Output . . . . . . . . . . . . . . . . . . . . . . . . . . . . . . . . . . . . . . . .26
DC Current, Output . . . . . . . . . . . . . . . . . . . . . . . . . . . . . . . . . . . . . . . .27
2

I. INTRODUCTION
The Martel series M2000 calibrator is designed to be an accurate DC calibrator for R & D,
manufacturing and calibration lab applications. The units simple design and ease of opera-
tion allows users to quickly familiarize themselves with its operations and features. Time sav-
ing functions like the ability to save, recall and automatically cycle through setpoints for each
output range and a complete remote interface are several key features the M2000 offers.
II. STANDARD EQUIPMENT
• Power cord (for 120 VAC versions)
• Manual
• Certificate of Calibration
III. OPTIONS AND ACCESSORIES
• Panel mount kit (Martel P/N M2000-PMK)
• Low EMF Beryllium copper test leads
IV. UNPACKING
Upon receipt of shipment, inspect the container and equipment for any signs of damage.
Take particular note of any evidence of rough handling in transit. Immediately report any
damage to the shipping agent.
NOTE: The carrier will not honor any claims unless all shipping material is saved for their
examination.
After examining and removing contents, save packing material and carton in the event
re-shipment is necessary.
Remove the Packing List and verify that all equipment has been received. If there are any
questions about the shipment, please call Martel Electronics at 1-800-821-0023.
Check to see if your calibrator is complete. It should include: M2000 Calibrator
Instruction Manual
AC Line Cord
V. NOMENCLATURE
Front Panel Controls and Functions (Refer to Figure 1 for locations)
Fig. 1 Location Description Function
1 Cursor Control Keys Left and Right arrows control cursor placement.
Up and Down arrows increment or decrement the selected
decade.
2 Enter Key Used to acknowledge or accept a value entered through
the keypad. Note: The output will only go to the new
value after the enter key is pressed.
3 Data Entry Keys This numeric keypad is used to set the calibrator to a
specific output.
Several of the keys also act as “second function” keys.
3

4
4 Primary Function Keys
VOLTS/mA Toggles through the Voltage and mA output ranges.
STBY/OPR Toggles between standby and operate modes.
2nd The “second function” key allows the use of the features
described by the second function keys.
CE The “clear entry” will clear the display if a mistake is made
during data entry.
5 Secondary Function Keys These keys perform second functions after the 2nd key has
been pressed.
CAL Used to set LCD contrast, backlight and interface
parameters RS-232 or GPIB (2001A).
For a complete electrical calibration the RS-232 mode is
used. Contact factory for more information.
SET Used to set a setpoint.
See
Section IX RCL Used to recall a setpoints.
AUTO Used to initiate auto setpoint.
See Section X LOCAL Used to regain local control.
6 Output Binding Posts These binding posts are made of a special copper alloy to
reduce thermal EMF’s. These posts support the use of
both standard banana plugs or discreet wires.
7 Display The 16 character by 2 line display is backlit and provides
all visual user feedback.
7A Range Field Displays the range and setpoint number if applicable.
7B OPR/STBY Displays the output state.
7C Unit Field Displays output units.
7D Value Field Displays output value.

5
Refer to Figure 2 for locations
Fig. 2 Location Description Function
1 Voltage Selector and Removing this door allows the user to access the input
Fuse Holder voltage selector switch and the two (2) user replaceable
fuses.
2 On/Off Rocker Switch This is the main power switch for the M2000. It is a double
pole designed for safety.
3 AC Power Inlet This is a standard IEC universal AC input power connector
for worldwide line cord usage.
4 RS-232 Connector The male 9 pin “D” connector allows the M2000 to be con-
nected to any computers serial interface.
5 IEEE 488.2 Connector This connector is only installed on the M2000A for connec-
tion to an IEEE 488.2 (GPIB) Bus.
Figure 1
Front Panel Layout
Figure 2
Rear Panel Layout
1 Cursor Control and
output adjustment
keys
2 Enter or Return key
3 Numeric Data Entry and
2nd function keys
4 Primary Function Control
keys
5 Secondary Function Keys
6 Terillium/copper
output binding
posts
7 16 x 2 Backlit LCD
w/contrast control
7A
7B
7C
7D
4 RS-232 Connector
standard on both the
M2000 and M2000A
5 Optional IEEE 488.2
(GPIB) connector
(Note: M2000A ONLY)
1 Input Voltage
Selector and Fuse
holder (see mainte-
nance section for
fuse specifications)
2 Main Power On/Off
Rocker Switch
3 Standard IEC AC Power
Inlet 120/240 VAC

6
VI. GETTING STARTED
1. After unpacking the M2000 and becoming familiar with the nomenclature of the unit as
described in the previous section, the M2000 is ready to be operated.
2. Before attaching the power cord to the rear connector the voltage selector must be set
to the proper line voltage. To do this, remove the rear fuse cover found just above the
On/Off rocker switch (see Figure 2, item #1). Pull out the voltage selector connector and
set it for the proper line voltage using the following guidelines:
Line Voltage (50/60Hz) Selector Position
90 to 135 VAC 120 VAC position
220 to 250 VAC 240 VAC position
3. Once the voltage selection has been made, making sure the power switch is off, connect
the AC power cord to the M2000. (See figure 2, item #3 for reference).
4. Turn on the M2000 using the rear panel mounted rocker switch. The M2000 should
power up within a few seconds. For good stability it is best to leave the M2000 on all the
time.
NOTE: If power up does not occur within 30 seconds re-power the unit.
VII. VOLTAGE OUTPUT
1. To output a voltage, enter voltage mode by pressing the key. The calibra-
tor will auto-range in voltage source based on the value of the outputted value. If you
want to lock the calibrator in a specific voltage range press the key followed
by the key.
2. Connect the unit under test (UUT) to the voltage output jacks of the M2000. See figure 3.
3. Using either cursor keys or numeric keypad, enter the desired output value. If the
numeric keypad is used for data, all entries must be acknowledged by pressing the
key.
4. When selecting an output on a new range the M2000 will be in the standby (STBY) mode
which puts the positive (+) output jack in a high impedance state (>100k ohm) for safety.
The output can be placed into the active state by pressing the key which
toggles between the standby and operate modes.
NOTE: The standby mode is also activated if a fault occurs during operation such as an
overload or short circuit condition. For safety the standby mode is activated for the first
output over 30 VDC. Refer to the product specification section of this manual for maxi-
mum drive currents.
5. When small changes to an output value are required or if specific decades need to be
incremented or decremented the cursor controls offers a simple solution. The left and
right arrow keys move a cursor that is used to underscore any digit of the output. The
up/down arrow keys allow the digit to be incremented and decremented.
STBY/OPR
Enter
CAUTION
For best accuracy on the mV range use only test leads with
copper plugs. This will minimize thermal EMFs.
Volts/mA
Shift
Volts/mA
WARNING – To prevent electrical shock, only set
the line voltage with the power cord removed.
!

7
VIII. CURRENT OUTPUT
1. To output currents of up to 100mA press the key until the milliamp output
range appears on the display.
2. Operation of the mA output is similar to voltage, operating where output values can be
selected or manipulated by using the numeric data entry keys or cursor controls.
NOTE: Standby mode is activated if the voltage compliance for a given output current is
exceeded. Trying to output a current with no connection made to the output jacks will
force the M2000 into standby mode.
See Figure 4.
3. The M2000 has a typical voltage compliance of 10V so that 4-20mA application loads up
to 500 ohms can be driven. At maximum current (100mA) the maximum load is 100
ohms.
V/mA
Figure 3
Connections for Outputting DC Voltage
Figure 4
Connections for Outputting DC Current

8
IX. SETPOINTS
The M2000 offers functionality which allows the user to store and recall output levels (set-
points). Additional functionality allows the user to automatically step through a number of set-
points at a configurable interval. Up to 9 setpoints can be programmed for each range.
A. Setting a Setpoint
1. To set a setpoint go to the desired range and enter the desired output value.
2. Once you have entered the output value press the key followed by the
key.
3. Select the number of the setpoint in which the present output value is to be stored.
B. Recalling a Setpoint
1. To recall a setpoint press the key followed by the key.
2. Select the number of the setpoint you wish to recall.
C. Auto Setpoints
1. To initialize auto setpoint functionality, press the key followed by the
key.
2. Select the number of setpoints to be recalled. Setpoints step up from setpoint one to the
setpoint selected and then down.
3. Select the interval (in seconds) between setpoints.
NOTE: During auto setpoint mode the can be used. Pressing any other
key will cause the unit to exit this mode.
X. REMOTE INTERFACE
Setting up the RS-232 Port for Remote Control
The M2000 is fully programmable over an RS-232 link with a PC.
The RS-232 cable length for the port should not exceed 15 meters (50 feet), although longer
cable lengths are permitted if the load capacitance measured at a connection point (including
signal terminator) does not exceed 2500 pF.
RS-232 Port Setup Procedure
Serial parameters are fixed with the values shown below:
· 9600 baud
· 8 data bits
· 1 stop bit
· no parity
· Xon/Xoff
· EOL (end-of-line) character CR (Carriage Return)
A typical connection is shown in Figure 5. Note the use of a null modem cable for connection.
STBY/OPR
AUTO
2nd
RCL2nd
SET
2nd
CAUTION
When in auto setpoint mode the unit does not go to standby
even if the output goes above 30V.

9
Setting up the IEEE-488 Port for Remote Control
The M2000 is fully programmable for use on the IEEE Standard 488 interface bus. The IEEE-
488 interface is also designed in compliance with supplemental standard IEEE-488.2, which
describes additional IEEE-488 features. Devices connected to the IEEE-488 bus are designat-
ed as talkers, listeners, talker/listeners, or controllers. Under remote control of an instrument,
the M2000 operates as a talker/listener.
A PC equipped with an IEEE-488 interface controls the M2000. Compatible software for IEEE-
488 operation, MET/CAL, may be purchased from Fluke.
When using the IEEE-488 remote control interface, there are two restrictions:
1. Number of Devices A maximum of 15 devices can be connected in a single IEEE-488
bus system.
2. Cable Length The total length of IEEE-488 cables used in one IEEE-488 system is 2
meters times the number of devices in the system, or 20 meters, whichever is less.
IEEE-488 Port Setup Procedure
Complete the following procedure to set up the M2000 for remote operations using the IEEE-
488 remote control port. The purpose is to select GPIB as the interface and to select the GPIB
address for the interface.
To set up the IEEE-488 port
1. Turn the M2000 power on and wait until the initialization procedure completes. You
may operate the M2000 during warm-up, but specifications are not guaranteed until
warm-up is complete.
2. Press SETUP ( + ).
3. Press until Remote Interface: is displayed.
4. Press the or key to select GPIB, if not already selected.
5. Press to accept the interface choice.
6. Press the or key to select the desired address. The factory default is 4.
7. Press to accept the address choice and exit the Setup menu.
See Figure 6 for a typical IEEE-488 connection
ENTER
▼▲
ENTER
▼▲
ENTER
0SHIFT
Figure 5
RS232 Remote Control connections
Figure 6
Typical IEEE-488 connections

10
Changing Between Remote and Local Operation
In addition to Local mode (front panel operation) and remote, the M2000 can be placed in a
local lockout condition at any time by command of the controller. Combined, the local,
remote, and lockout conditions yield four possible operating states described as follows.
Local State
The M2000 responds to local and remote commands. This is normal front panel operation. All
remote commands are allowed to execute.
Local with Lockout State
Local with lockout is identical to local, except the M2000 will go into the remote with lockout
state instead of the remote state when it receives a remote command.
Remote State
When the M2000 is placed in remote, either via RS-232 REMOTE command, or via IEEE-488
asserting the REN line, it enters the remote state. The top line of the display changes to: REM.
Front panel operation is disabled except for the LOCAL (“–” key). Pressing “–”, using RS-232 to
send the command LOCAL, or IEEE-488 to send the GTL (Go To Local) message returns the
M2000 to the local state.
Remote with Lockout State
When the M2000 is placed in lockout, either via RS-232 LOCKOUT command, or via the IEEE-
488 message LLO, the M2000 front panel controls are totally locked out. The top line of the
display changes to: REM.
To return the M2000 to the local with lockout state, send the RS-232 LOCAL command or the
IEEE-488 GTL (Go To Local) message.
Table 3 summarizes the possible Operating state transitions. (For more information on IEEE-
488 GPIB messages, see "IEEE-488 Overview."
Table 3. Operating State Transitions
From To Front Panel GPIB Serial
Message Command
Local Remote MLA (REN True) REMOTE
Local with LLO LOCKOUT
Lockout
Remote Local Local key GTL or REN LOCAL
False
Remote with LLO LOCKOUT
Lockout
Local with Local REN False LOCAL
Lockout Remote with MLA (REN True) REMOTE
Lockout
Remote with Local REN False LOCAL
Lockout GTL
IEEE-488 Interface Overview
The IEEE-488 parallel interface sends commands as data and receives measurements and
messages as data. The maximum data exchange rate is 1 Mbyte, with a maximum distance of
20 meters for the sum length of the connecting cables. A single cable should not exceed 4
meters in length. Some commands are reserved for RS-232 serial operation because these
functions must be implemented as IEEE messages per the IEEE Standards. For example, the
command REMOTE could be sent as data over the IEEE-488 interface to place the M2000
into remote, but it is not because the IEEE Standards call for the remote function to be sent to
the device as the uniline message REN. This is also true for several other commands and
functions, as shown below, with their equivalent RS-232 emulation. A summary of IEEE-488
messages is shown in Table 4.

11
Table 4. RS-232 Emulation of IEEE-488 Messages
IEEE-488 Message RS-232 Equivalent
GTL LOCAL command
GTR REMOTE command
LLO LOCKOUT command
SDC, DCL (not emulated on RS-232)
GET (not emulated on RS-232)
SPE, SPD (not emulated on RS-232)
UNL, UNT (not emulated on RS-232)
The IEEE-488 interface is based on the IEEE Standards 488.1 and 488.2. For detailed infor-
mation, refer to the IEEE-488.1 and IEEE-488.2 standards.
Using Commands
Communications between the controller and the M2000 consists of commands, queries, and
interface messages. Although the commands are based on the 488.2 standard, they can be
used on either the IEEE-488 or RS-232 interface, except for a few specialized RS-232 com-
mands described in "Commands for RS-232 Only." (For more information on command struc-
tures, see the IEEE 488.2 standard.)
Refer to Chapter XI, "Remote Commands" when you require additional information about
command references used in this chapter.
All commands and units may be entered in UPPER or lower case.
Types of Commands
The commands for the M2000 can be grouped into one or more categories, depending on
how they function. Each category is described below.
Device-Dependent Commands
Device-dependent commands are unique to the M2000. An example of a device-dependent
command is,
OUT 1 V
instructing the M2000 to source 1 volt dc.
Common Commands
Common commands are defined by the IEEE 488.2 standard and are common to most bus
devices. Common commands always begin with an * character. Common commands are
available whether you are using the IEEE-488 or RS-232 interface for remote control. An
example of a common command is,
*IDN?
instructing the M2000 to return the instrument identification string.
Query Commands
Query commands request information, which is returned as the command executes, or
placed in a buffer until requested. An example of a query, which always ends with a question
mark, is,
RANGE?
returning the M2000 dc voltage output range.
Interface Messages (IEEE-488)
Interface messages manage traffic on the IEEE-488 interface bus. Device addressing and
clearing, data handshaking, and commands to place status bytes on the bus are all directed
by interface messages. Some of the interface messages occur as state transitions of dedicat-

ed control lines. The rest of the interface messages are sent over the data lines with the ATN
signal true. (All device-dependent and common commands are sent over the data lines with
the ATN signal false.)
An important thing to note about interface messages is that unlike device-dependent and
common commands, interface messages are not sent literally (in a direct way).
IEEE-488 standards define interface messages. Interface messages are handled automatically
in most cases.
Compound Commands
A compound command is two or more commands in a single command line. For example,
the following two commands could be entered individually,
OUT 1 V
OPER
where the M2000 sources 1 V dc, and then goes into operate, or they could be combined
into a compound command,
OUT 1 V ; OPER
using a semi-colon as a separator.
Overlapped Commands
Commands that begin execution but require slightly more time to complete are called over-
lapped commands, because they can be overlapped by the next command before they have
completed execution.
The command graphic Overlapped shows a check for overlapped commands.
You can use the command *WAI to wait until the overlapped command has completed execu-
tion before executing the next command. For example,
OUT 1 V ; *WAI
You can also use the status commands *OPC and *OPC? to detect completion of overlapped
commands. (See "Checking M2000 Status.")
Sequential Commands
Commands that execute immediately are called sequential commands.
The command graphic Sequential shows a check for sequential commands.
The majority of the commands are sequential.
Commands for RS-232 Only
The command graphic IEEE-488 RS-232 indicates RS-232 interface commands.
The IEEE-488 and RS-232 interfaces both send commands to the M2000 as data, except for
those IEEE-488 functions that must be implemented as a message as specified in the IEEE-
488 standards. For example, the RS-232 interface uses the command REMOTE to place the
M2000 in the Remote mode. Although the IEEE-488 interface could also send a command
REMOTE as data, it does not because this is one of the functions that must be implemented
per IEEE-488 Standards. The relationship between these IEEE-488 messages and the equiva-
lent RS-232 emulation is shown in Table 5.
Table 5. Commands for RS-232 Only
IEEE-488 Message [1] RS-232 Equivalent
GTL LOCAL command
GTR REMOTE command
LLO LOCKOUT command
Commands for IEEE-488 Only
The command graphic IEEE-488 indicates commands that are used for the IEEE-488
interface. This is all the commands, except for those used for RS-232 operations. (See
"Commands for RS-232 Only.") All commands are transferred over the IEEE-488 as data,
X
X
X
X
12

13
except for the commands LOCAL, REMOTE, and LOCKOUT, which are implemented per IEEE
Standards as messages.
Command Syntax
The following syntax rules apply to all the remote commands. Information about syntax of
response messages is also given.
Parameter Syntax Rules
Table 6 lists the units accepted in command parameters and used in responses. All com-
mands and units may be entered in upper or lower case.
Table 6. Units Accepted in Parameters and Used in Responses
Units Meaning
uV Volts in units of microvolts1
mV Volts in units of millivolts1
V Volts in units of volts
kV Volts in units of kilovolts1
uA Current in units of microamperes1
mA Current in units of milliamps1
A Current in units of amps
1. Parameter only
General Rules The general rules for parameter usage is as follows:
1. Numeric parameters may have up to 15 significant digits and their exponents can be in
the range +/-1.0E+/-20.
2. Including too many or too few parameters causes a command error.
3. Null parameters cause an error, e.g., the adjacent commas in OUT 1V, ,;OPER.
4. Expressions, for example 4+2*13, are not allowed as parameters.
Extra Space or Tab Characters
In the command descriptions, parameters are shown separated by spaces. One space after a
command is required (unless no parameters are required). All other spaces are optional.
Spaces are inserted for clarity in the manual and may be left in or omitted as desired. You can
insert extra spaces or tabs between parameters as desired. Extra spaces within a parameter
are generally not allowed, except for between a number and its associated multiplier or unit.
Terminators
Table 7 summarizes the terminator characters for both the IEEE-488 and RS-232 remote inter-
faces. Table 7. Terminator Characters
Terminator ASCII Character Control Command Language
Command
Function Number Program Terminator Terminator
Carriage Return (CR) 13 Chr(13) <Cntl> M \n
Line Feed (LF) 10 Chr(10) <Cntl> J \r
Examples:
RS-232 Mode using a terminal OUT 1 V <Enter>
RS-232 Mode using a program Comm1.Output = "OUT 1 V" + Chr(10)
IEEE-488 Mode OUT 1 V

IEEE-488 Interface The M2000 sends the ASCII character Carriage Return with the EOI control
line held high as the terminator for response messages. The M2000 recognizes the following
as terminators when encountered in incoming data:
• ASCII CR character
• Any ASCII character sent with the EOI control line asserted
RS-232 Interface The M2000 returns a Carriage Return (CR) character with each response.
The M2000 recognizes the following as terminators when encountered in incoming data:
• ASCII CR character
• ASCII LF character
Incoming Character Processing
The M2000 processes all incoming data as follows:
1. The most significant data bit (DIO8) is ignored.
2. All data is taken as 7-bit ASCII.
3. Lower-case or upper-case characters are accepted.
Response Message Syntax
In the command descriptions responses from the M2000 are described wherever appropriate.
In order to know what type of data to read in, refer to the first part of the entry under
"Response" in the tables.
14

Checking M2000 Status
You have access to status registers, enable registers, and queues in the M2000 to indicate
various conditions in the instrument as shown in Figure 7. Some registers and queues are
defined by the IEEE-488.2 standard. The rest are specific to the Calibrator. In addition to the
status registers, the Service Request (SRQ) control line, and a 16-element buffer called the
Error Queue provide status information. Table 8 lists the status registers and gives the
read/write commands and associated mask registers.
Table 8. Status Register Summary
Status Register Read Write
Command Command
Serial Poll Status Byte (STB) *STB? —
Service Request Enable Register (SRE) *SRE? *SRE
Event Status Register (ESR) *ESR? —
Event Status Enable Register (ESE) *ESE? *ESE
Each status register and queue has a summary bit in the Serial Poll Status Byte.
Enable registers are used to mask various bits in the status registers and generate
summary bits in the Serial Poll Status Byte. For IEEE-488 interface operation, the
Service Request Enable Register is used to assert the SRQ control line on detection
of any status condition or conditions the programmer chooses. For RS-232
interface operation, the SRQSTR string is sent over the serial interface when the
SRQ line is set. (See the SRQSTR command description for more information.)
Serial Poll Status Byte (STB)
The Calibrator sends the serial poll status byte (STB) when it responds to a serial poll. This
byte is cleared (set to 0) when the power is turned on. The STB byte is defined as shown in
Figure 7. Refer to the *STB? Command for RS-232 interface operation for more information.
15
0
1
2
345
6
7
0
1
2
345
6
7
&
&&&&
&&
&
Logical OR
Event Status
Register
Read using *ESR?
Event Status
Enable Register
Read using *ESE?
Write using *ESE
PON
0CME
EXE
DDE
QYE
0OPC
0
00
0
1
2
3457
&&&&
&&
&
Logical OR
Status Byte Register
Service Request
Enable Register
ESB MAV
Read using *SRE?
Write using *SRE
Error Queue
Read using ERR?
Read by Serial Poll
Read using *STB?
Service Request
Generation
SRQ
on
IEEE bus
Output Buffer
EAV
Data
Available?
Error
Available?
MSS
6
RQS
0
Figure 7
Status Register Overview
Read using FAULT?

16
7 6 5 4 3 2 1 0
0
RQS ESB MAV EAV 0 0 0
MSS
RQS Requesting service. The RQS bit is set to 1 whenever bits ESB, MAV, EAV, or ISCB
change from 0 to 1 and are enabled (1) in the SRE. When RQS is 1, the M2000
asserts the SRQ control line on the IEEE-488 interface. You can do a serial poll to
read this bit to see if the M2000 is the source of an SRQ.
MSS Master summary status. Set to 1 whenever bits ESB, MAV, EAV, or ISCB are 1 and
enabled (1) in the SRE. This bit can be read using the *STB? command in serial
remote control in place of doing a serial poll.
ESB Set to 1 when one or more ESR bits are 1.
MAV Message available. The MAV bit is set to 1 whenever data is available in the
M2000’s IEEE-488 interface output buffer.
EAV Error available. An error has occurred and an error is available to be read from the
error queue by using the FAULT? query.
Figure 8. Serial Poll Status Byte (STB) and Service Request Enable (SRE)
Service Request (SRQ) Line
IEEE-488 Service Request (SRQ) is an IEEE-488.1 bus control line that the M2000 asserts to
notify the controller that it requires some type of service. Many instruments can be on the
bus, but they all share a single SRQ line. To determine which instruments set SRQ, the
Controller normally does a serial poll of each instrument. The calibrator asserts SRQ whenev-
er the RQS bit in its Serial Poll Status Byte is 1. This bit informs the controller that the M2000
was the source of the SRQ.
The M2000 clears SRQ and RQS whenever the controller/host performs a serial poll, sends
*CLS, or whenever the MSS bit is cleared. The MSS bit is cleared only when ESB and MAV
are 0, or they are disabled by their associated enable bits in the SRE register being set to 0.
Service Request Enable Register (SRE)
The Service Request Enable Register (SRE) enables or masks the bits of the Serial Poll Status
Byte. The SRE is cleared at power up. Refer to Figure 7 for the bit functions.
Programming the STB and SRE
By resetting (to 0) the bits in the SRE, you can mask (disable) associated bits in the serial poll
status byte. Bits set to 1 enable the associated bit in the serial poll status byte.
Event Status Register (ESR)
The Event Status Register is a two-byte register in which the higher eight bits are always 0,
and the lower eight bits represent various conditions of the M2000. The ESR is cleared (set to
0) when the power is turned on, and every time it is read.
Many of the remote commands require parameters. Improper use of parameters causes com-
mand errors to occur. When a command error occurs, bit CME (5) in the Event Status
Register (ESR) goes to 1 (if enabled in ESE register), and the error is logged in the error
queue.
Event Status Enable (ESE) Register
A mask register called the Event Status Enable register (ESE) allows the controller to enable
or mask (disable) each bit in the ESR. When a bit in the ESE is 1, the corresponding bit in the
ESR is enabled. When any enabled bit in the ESR is 1, the ESB bit in the Serial Poll Status
Byte also goes to 1. The ESR bit stays 1 until the controller reads the ESR or does a device
clear, a selected device clear, or sends the reset or *CLS command to the M2000. The ESE is
cleared (set to 0) when the power is turned on.

Bit Assignments for the ESR and ESE
The bits in the Event Status Register (ESR) and Event Status Enable register (ESE) are
assigned as shown in Figure 9.
15 14 13 12 11 10 9 8
0 0 0 0 0 0 0 0
7 6 5 4 3 2 1 0
PON 0 CME EXE DDE QYE 0 OPC
PON Power on. This bit is set to 1 if line power has been turned off and on since the last
time the ESR was read.
CME Command error. The M2000's IEEE-488 interface encountered an incorrectly
formed command. (The command FAULT? fetches the latest error code in the error
queue, which contains error codes for the first 15 errors that have occurred.)
EXE Execution error. An error occurred while the M2000 tried to execute the last com-
mand. This could be caused, for example, by a parameter being out of range. (The
command FAULT? fetches the latest error in the error queue, which contains error
codes for the first 15 errors that have occurred.)
DDE Device-dependent error. An error related to a device-dependent command has
occurred.
QYE Query error. The M2000 was addressed to talk when no response data was avail-
able or appropriate, or when the controller failed to retrieve data on the output
queue.
OPC Operation complete. All commands previous to reception of a *OPC command
have been executed, and the interface is ready to accept another message.
Figure 9. Event Status Register (ESR) and Event Status Enable (ESE)
Programming the ESR and ESE
To read the contents of the ESR, send the remote command, *ESR?. The ESR is cleared (set
to 0) every time it is read. To read the contents of the ESE, send the remote command,
*ESE?. The ESE is not cleared when it is read. When you read either register, the M2000
responds by sending a decimal number that when converted to binary represents bits 0
through 15.
Output Queue
The output queue is loaded whenever a query is processed, and holds up to 250 characters.
The controller reads it with a statement such as a BASIC INPUT statement, removing what it
reads from the queue. If the queue is empty, the M2000 does not respond to the INPUT state-
ment from the controller. The Message Available (MAV) bit in the Serial Poll Status Byte is 1 if
there is something in the output queue and 0 if the output queue is empty.
Error Queue
When a command error, execution error, or device-dependent error occurs, its error code is
placed in the error queue where it can be read by the FAULT? command. (See Chapter 5 for
a list of error messages.) Reading the first error with the FAULT? command removes that error
from the queue. A response of 0 means the error queue is empty. The error queue is cleared
when you turn off the power, and when you use the *CLS (Clear Status) common command.
The error queue contains up to 15 entries. If more than 15 errors occur, only the first 15 errors
are kept in the queue. A 16th entry in the queue is always an "error queue overflow" error, and
all later errors are discarded until the queue is at least partially read. The first errors are kept,
17

because if many errors occur before the user can acknowledge and read them, the earliest
errors are the most likely to point to the problem. The later errors are usually repetitions or
consequences of the original problem.
Input Buffer Operation
As the M2000 receives each data byte from the controller, it places the bytes in a portion of
memory called the input buffer. The input buffer holds up to 250 data bytes and operates in a
first in, first out fashion.
IEEE-488 The M2000 treats the EOI IEEE-488 control line as a separate data byte and inserts
it into the input buffer if it is encountered as part of a message terminator. Input buffer opera-
tion is transparent to the program running on the controller. If the controller sends commands
faster than the M2000 can process them, the input buffer fills to capacity. When the input
buffer is full, the M2000 holds off the IEEE-488 bus with the NRFD (Not Ready For Data)
handshake line. When the M2000 has processed a data byte from the full input buffer, it then
completes the handshake, allowing the controller to send another data byte. The calibrator
clears the input buffer on power-up and on receiving the DCL (Device Clear) or SDC
(Selected Device Clear) messages from the controller.
RS-232 Under RS-232-C serial port remote control using ^S (<Cntl> S) XOFF protocol, the
M2000 issues a ^S XOFF when the input buffer becomes 80% full. The calibrator issues a
^Q (<Cntl> Q) XON when it has read enough of the input buffer so that it is less than 40%
full.
18

XV. REMOTE COMMANDS
Introduction
Remote commands duplicate activities that can be initiated from the front panel in local
operation. Following the summary table is a complete alphabetical listing of all commands
complete with protocol details. Separate headings in the alphabetical listing provide the
parameters and responses, plus an example for each command. For information on using
commands, see "Remote Operation."
Command Summary by Function
Common Commands
Command Description
*CLS (Clear status.) Clears the ESR, the error queue, and the RQS bit in the status byte.
This command terminates pending operation complete commands (*OPC or *OPC?).
*ESE Loads a byte into the Event Status Enable register.
*ESE? Returns the contents of the Event Status Enable register.
*ESR? Returns the contents of the Event Status register and clears the register.
*IDN? Identification query. Returns the manufacturer, model number, and firmware revision
level of the Calibrator.
*OPC Enables setting of bit 0 (OPC for "Operation Complete") in the Event Status Register to
1 when all pending device operations are complete.
*OPC? Returns a 1 after all pending operations are complete. This command causes program
execution to pause until all operations are complete. (See also *WAI.)
*OPT? Returns a list of the installed hardware and software options.
*RST Resets the state of the instrument to the power-up state. This command holds off
execution of subsequent commands until it is complete. (Overlapped command.)
*SRE Loads a byte into the Service Request Enable register (SRE).
*SRE? Returns the byte from the Service Request Enable register.
*STB? Returns the status byte.
*TST? Initiates a series of self-tests, then returns a "0" for pass or a "1" for fail. If any faults are
detected, they are logged into the fault queue where they can be read by the FAULT?
query.
*WAI Prevents further remote commands from being executed until all previous remote
commands have been executed.
Output Commands
Command Description
FUNC? Returns the present output, measurement, or calibration function.
OPER Activates the M2000 output if it is in standby.
OPER? Returns the operate/standby setting.
OUT Sets the output of the M2000.
OUT? Returns the output amplitude of the M2000.
RANGE? Returns the present output range. (Voltage only).
RANGELCK Locks the present output range (Voltage only).
RANGELCK? Returns the RANGELOCK state (Voltage only).
STBY Deactivates the M2000 output if it is in Operate mode.
19

RS-232 Port Commands
Command Description
LOCAL Puts the M2000 into the local state and disables lockout.
LOCKOUT Puts the M2000 into the lockout state. This command duplicates the
IEEE-488 LLO (Local Lockout) message.
REMOTE Puts the M2000 into the remote state. This command duplicates the
IEEE-488 REN (Remote Enable) message.
Status Commands
Command Description
FAULT? Returns the most recent error code in the M2000 error queue, then removes that error
code from the queue.
Error Code Listing
Error Message
Number Class Description
1 DDE Error queue overflow.
101 CME A non-numeric entry was received in a field that should contain a numeric
entry.
102 EXE The numeric field exceeds 10 characters.
105 EXE Entry is above upper limit for the selected output range.
106 EXE Entry is below lower limit for the selected output range.
107 EXE OUT? was received when the M2000 was not in a Source mode.
108 CME A required command parameter was missing.
110 CME An invalid RANGELCK parameter (not ON or OFF) was received.
111 EXE RANGELCK ON was received when the M2000 is not in Volts mode.
117 CME An unrecognizable command was received.
118 CME An invalid parameter was received.
120 EXE The serial input buffer overflowed
121 EXE The command string buffer overflowed.
122 QYE The serial output buffer overflowed.
123 DDE The output overloaded.
124 DDE M2000 is out of tolerance. This error is set after a failed initialization or a
failed *TST?.
125 DDE M2000 has a ADC failure. This error is set after a failed initialization or a
failed *TST?.
Remote Command Listing
The following is an alphabetical list of all M2000 commands and queries, including common
commands and device-dependent commands. Each command title includes a graphic that
indicates remote interface applicability, IEEE-488 and RS-232, and command group:
Sequential and Overlapped.
*CLS IEEE-488 RS-232 Sequential Overlapped
(Clear Status command) Clears the ESR, the error queue, and the RQS bit in the status byte.
This command terminates pending operation complete commands (*OPC or *OPC?).
Parameter: (None)
Example: *CLS
Clear the ESR, the error queue, and the RQS bit in the status byte.
XXX
20
Table of contents
Other Martel Test Equipment manuals

Martel
Martel PSC4010 User manual

Martel
Martel MC1000 User manual

Martel
Martel IVC-222HPII User manual

Martel
Martel T150 User manual

Martel
Martel T120 User manual

Martel
Martel LC100 User manual

Martel
Martel TC100 User manual

Martel
Martel DPC300A User manual

Martel
Martel 3001 User manual

Martel
Martel T130 User manual