4444 Lawton Avenue, Detroit, MI 48208 USA • Tel:(313)895-0700/Fax:(313)895-0709
August 07- RPI
STEP 1] Assembly Base of Table
Begin by attaching the Cross support (part 5) to each Base
End Unit (part 4). Secure cross support to leg of base units
with [2] 6x45mm bolts (part 20). Tighten with Allen Wrench.
See FIG 1.
Continue by taking the [2] Lower Base End units (part 4) and
attach the base floor support (part 6) to the lower Base End
units using a floor support spacer (part 17) between each end
of floor support and base end unit. Secure with [2] 6x50mm
bolts (part 19). Tighten with Allen Wrench. See FIG 1.
Continue by attaching [4] floor guides (part 16) into the base
by screwing in the guides into the specified holes on the
bottom of the base units.
Complete Step 1 by attaching the [4] collars (part 25) onto
each of the [4] ends of the lower portion of the base. Tighten
lower bolt found below knob on collar. This secures collar to
leg. Repeat with all 4 collars. See FIG 1.
NOTE: Knobs on collars are to secure table at desired
height.
6
16
5
FIG 1
STEP 2] Assembly Top portion of Base
Take each upper Base ends (part 2 & 3) attach to base
assembly by inserting the ends of upper base units into the
[4] collars (part 25) found on the base assembly. Tighten
knobs on collars to secure. See FIG 2.
Continue by attaching Drawer Supports (part 10) to Upper
Portion Base Unit (part 2). Begin by securing the Drawer
Support Rod (part 8) to the base end unit using [1] 6x45mm
bolt. Insert the bolt (part 20) through the inside edge of the
base end unit (part 2), through the hole in the Drawer Support
(part 10) and secure into the Drawer Support Rod. Secure
with Allen Wrench.
Continue by securing other end of Drawer support to Drawer
Support Rod using a 6x25mm bolt. Secure to Drawer
Support Rod with Allen Wrench.
Repeat with second Drawer Support See FIG 3A.
Attach Media Support (part 9) to Upper Portion Base unit
(part 3) using [2] 6x8mm bolts. Secure with Allen Wrench.
See FIG 3B.
FIG 3A Pg. 2
4
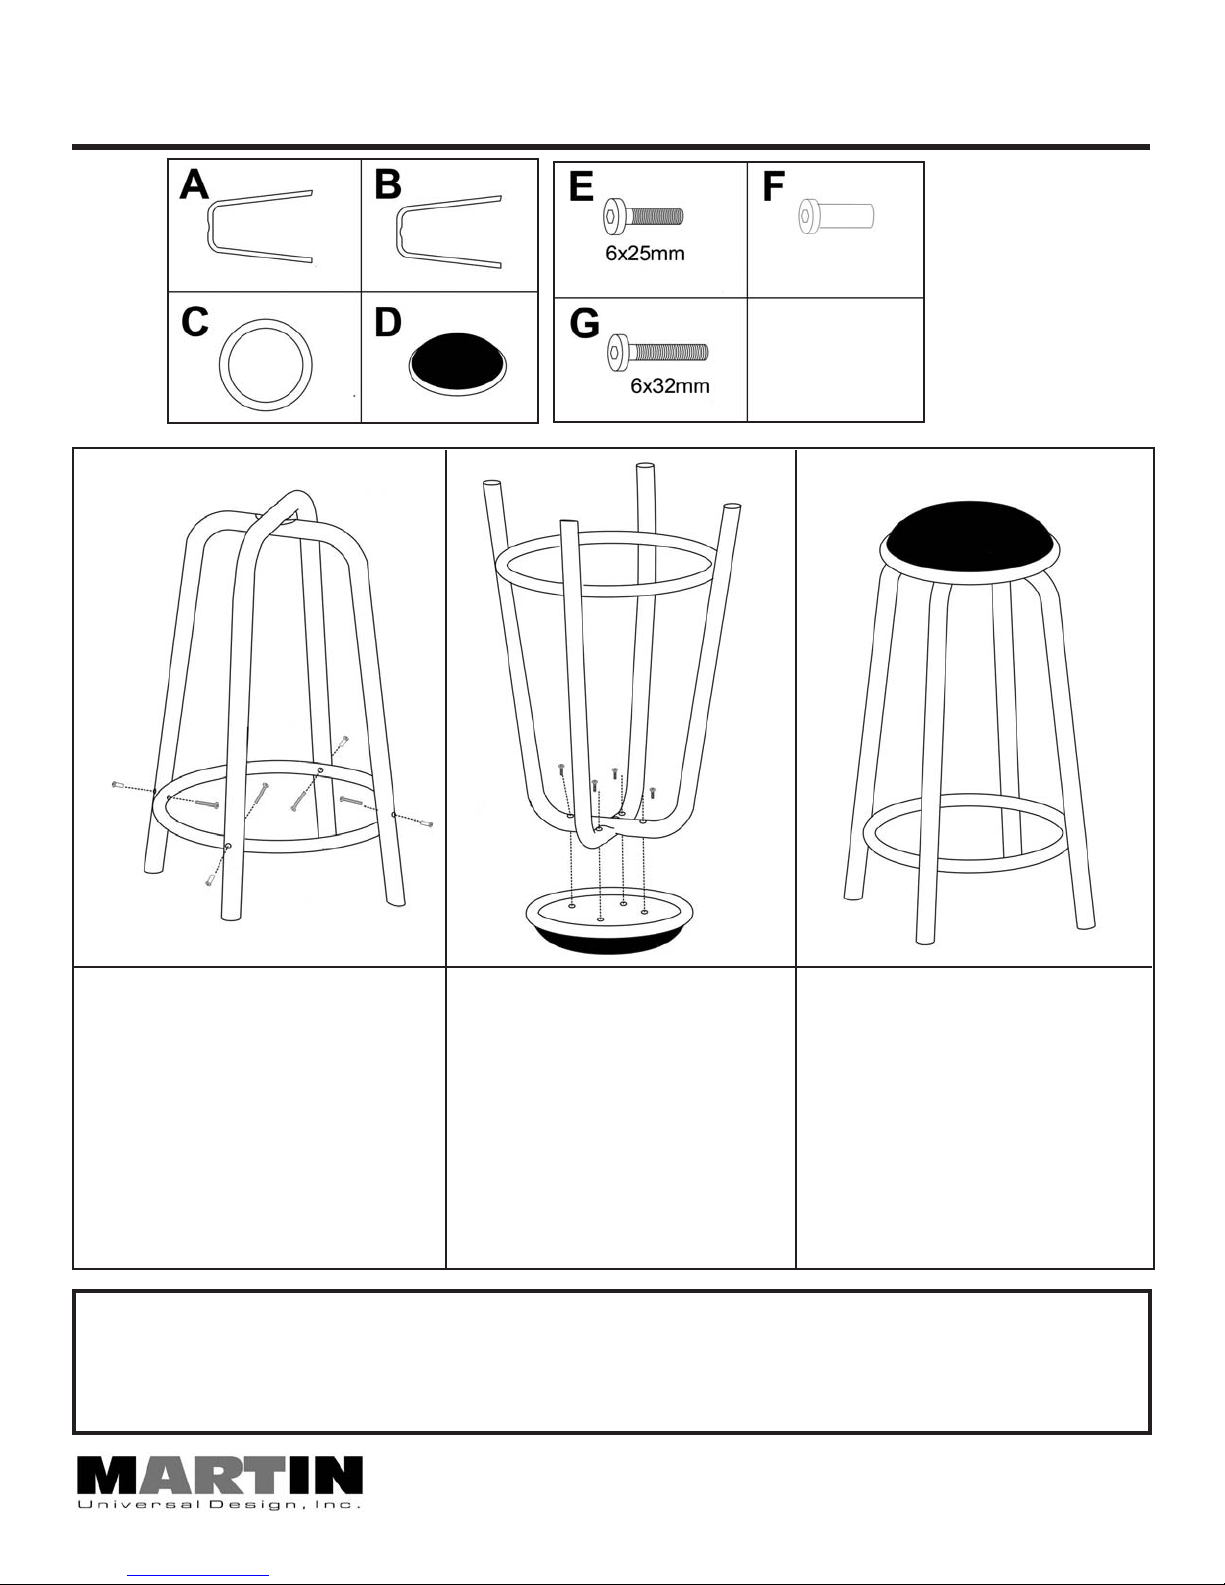
U-DS92ST Ashley Creative Center With Padded Stool
Assembly Instructions
4
17
17
19
19
20
20
25
23
25
FIG 2
10
9
8
24
FIG 3B
26
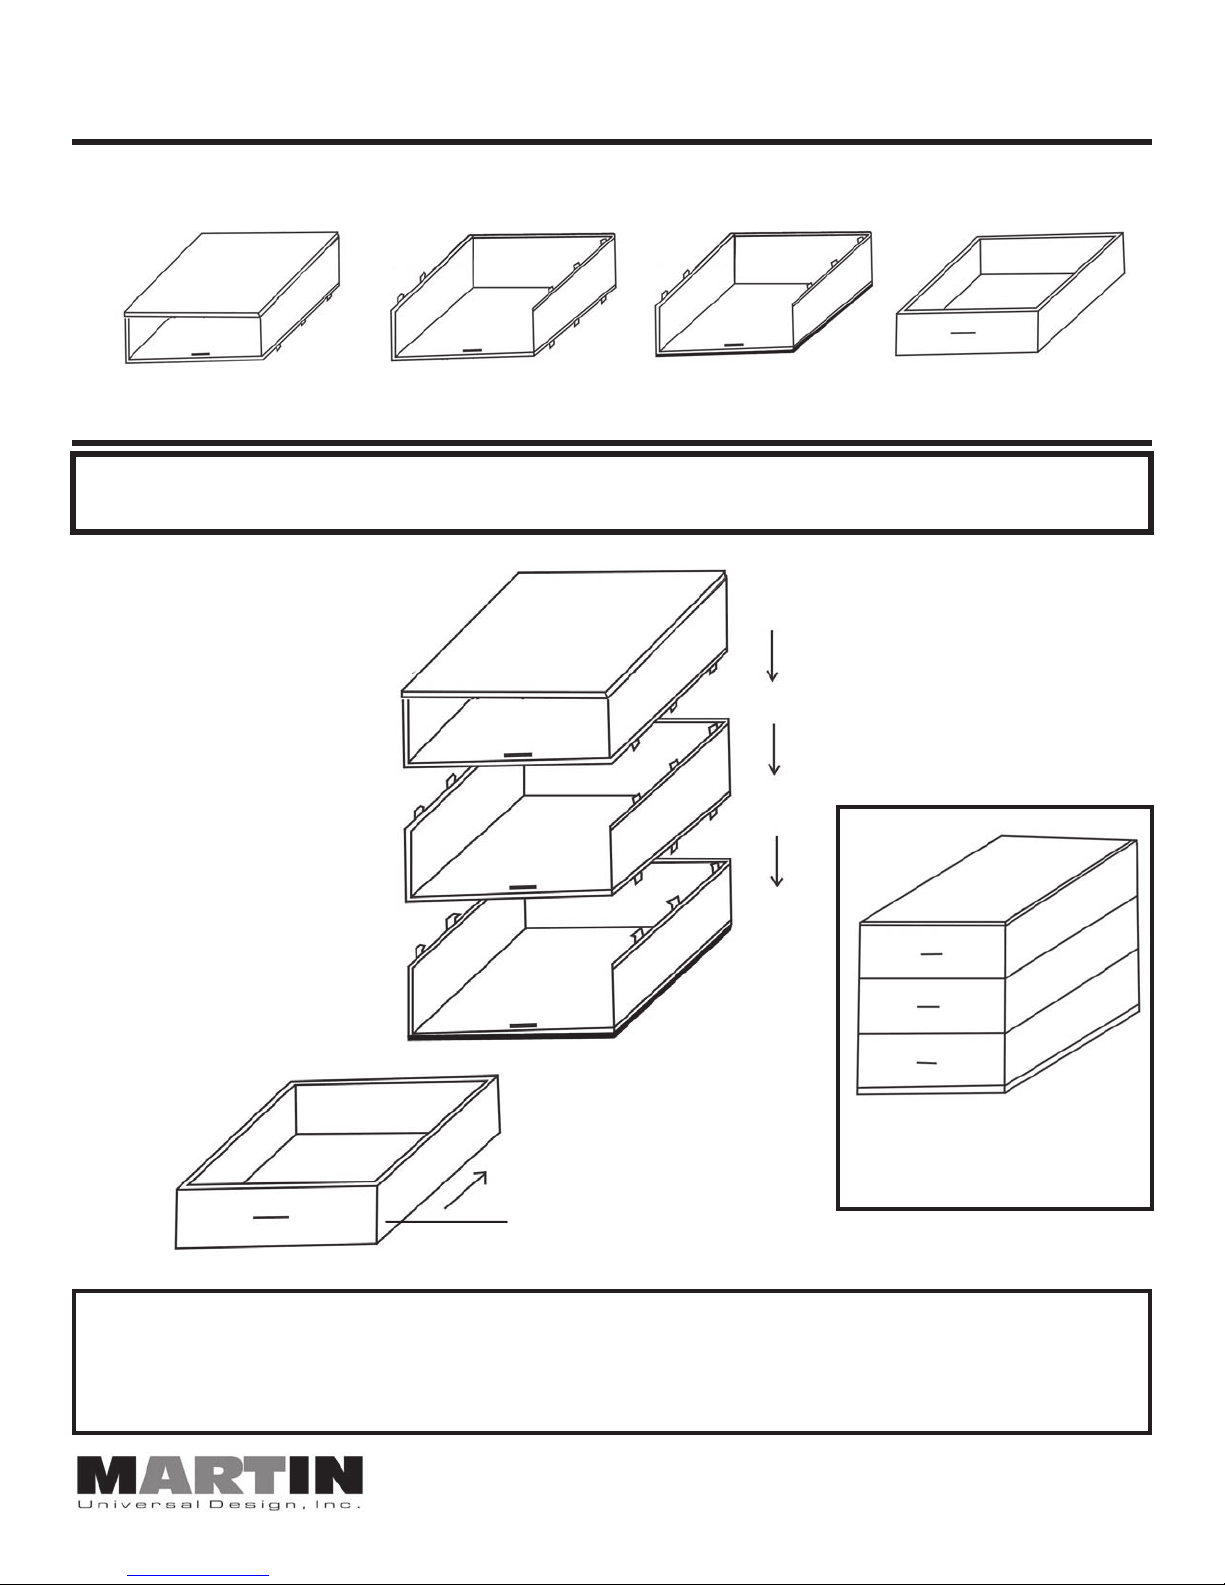
STEP 3] Attach Drawer & Media Support