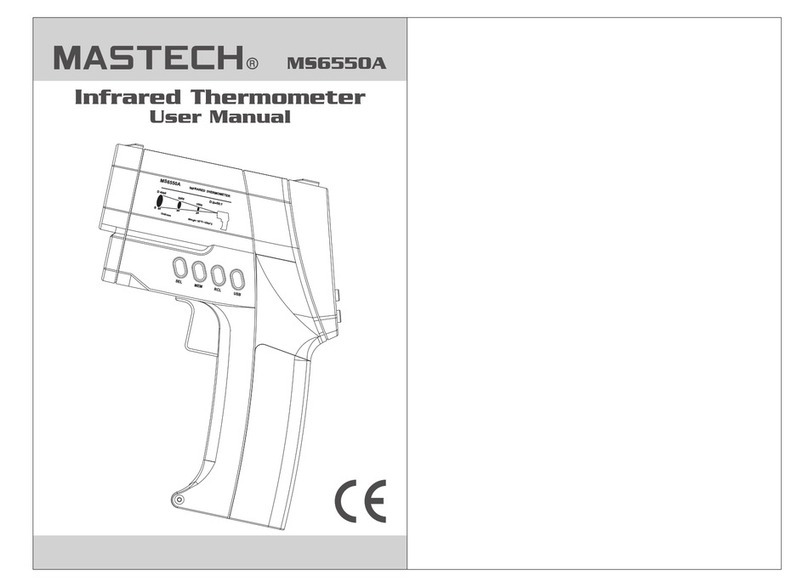
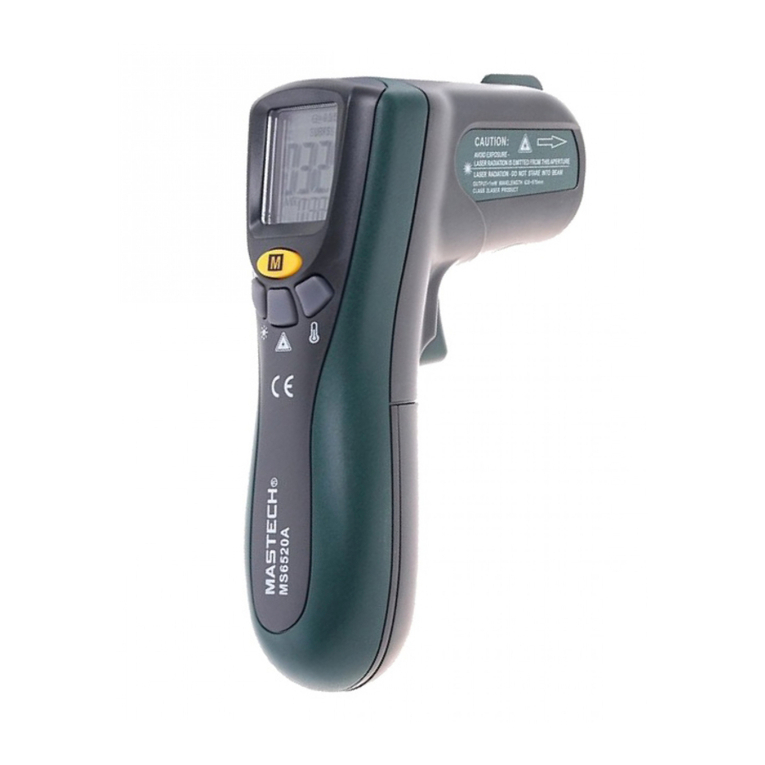
Mastech MS6550B User manual

MS6550B
Infrared Thermometer
User Manual
40 20
MEM USB
RCL
SEL
80
S
Unit:mm Range:-32°C~1600°C
MS6550B INFRARED THERMOMETER
D4000
2000
1000
D:S=50:1

CONTENTS
1. Product Overview...............................1
2. Safety Precautions.............................1
3. Appearance.......................................4
4. LCD..................................................4
5. Operation Instructions........................5
5.1 Manual Measurement..............................5
5.2 Degree Celsius/
Fahrenheit Toggling.............................5
5.3 View Max/Min/ Ave/
Diff Temperature..................................5
5.5 Emissivity Settings...................................6
5.6 Temperature Limit
Alarming Function................................7
CONTENTS
5.8 Save /Recall /Delete A Record....................9
6. Distance To Object
Size Ratio (D:S )..............................11
7. Emissivity..........................................12
8. Maintenance......................................13
8.1 Battery Replacement:...............................13
8.2 Lens Cleaning.........................................14
8.3 Housing Cleaning....................................14
9. Technical Specifications.....................14
10. Accessories.....................................15
5.4 Connect The Temperature Probe..............5
5.7 Settings For Auto Measurement.................8
5.9 AC Power, USB Communication................10

This hand-held infrared temperature sensors (hereinafter
referred to as “temperature sensor”) can be used for
measuring temperatures in a non-contact way, which
determines the surface temperature of a test object by
measuring the infrared energy radiated from the surface
of the object. These are high-performance and
high-quality instruments which employ micro computers
for data acquisition and processing.
The instrument have such advantages as large distance
coefficient, broad temperature measuring range, high
precision, and fast response. Boasting multi functions
including emissivity adjusting, maximum temp. reading,
minimum temp. reading, average temp. reading, temp.
difference and upper/lower temp limit setting, over-limit
alarming, etc., the temperature sensors are nevertheless
of small size and light weight, easy to operate, and very
reliable. The devices can be widely used in the industries
of petroleum, chemical engineering, railway, medical
care, power, metallurgy, textile, plastics, metalworking,
energy-saving, etc., where rapid and non-contact
surface-temperature measurements are needed.
1. Product Overview
2. Safety Precautions
WARNING
• Please do not direct laser beam into the eye directly, or
indirectly through reflection.
• Please check the housing of the temperature sensor
before using. Never use a damaged sensor. Check for
any damage or any missing plastic/rubber part.
01
• The battery should be replaced immediately in case the
battery indictor ( ) is shown on display.
• In case the temperature sensor does not function well,
please stop using it. The protecting device of the sensor
may have been damaged. If it appears to have any
problem, please send the sensor for repairing.
• Never use a temperature sensor where there is
explosive gas, vapor or dust nearby.
• Please do not connect the attached probe to a
powered-on circuit.
• In order to avoid being burnt, please be noted that the
measured temperatures for an object with high
reflectivity are lower than its actual temperature.
• In case the temperature sensor is not operated in
accordance with the instructions as stated in this
manual, the protecting function provided for the device
might not function well.
To avoid damaging the temperature sensor or the
equipment to be tested, please protect them from
the following hazards or improper handling:
Attention
• Static charge
• EMF (electromagnetic field) generated by an arc
welder or induction heater, etc.
• Heat impact (Heat impact is caused by large or abrupt
change of the ambient temperature, in which case one
has to wait for 20 minutes to stabilize the sensor before
using).
• Please do not place the sensor on or close to a
high-temperature object.
02

04
The temperature sensor conforms with the
followingstandards:
■ EN61326-1 EMC(Electromagnetic Compatibility)
■ EN61010-1
■ EN60825-1 Safety specifications
Symbol and Safety Label
The symbols and safety labels used on the temperature
sensor and in this manual are listed in Table 1 and
Figure 1.
Symbol Symbol
High voltage hazard. Danger level is
higher than that of “CAUTION” label!
Caution: Laser
Conforms with requirements of EU
and EFTA
Danger
Table 1. Symbols
03
A. LCD B. Laser key
C. Mode selection key D. Backlight key
E. °C/°F toggle key F. Function selection key
G. Save key H. Recall Data key
I. USB Communication key J. Trigger
K. Aiming device L. Battery cover
M. USB communication port N. Power input (DC 9V)
P. K-type temperature
input terminal
4. LCD
3. Appearance

0605
1. Emissivity display. Emissivity is adjustable when EMS
symbol is on display.
2. °C/°F symbol (degree Celsius / Fahrenheit)
3. The first temperature display
4. Symbol of high-alarming and low alarming
5. Battery low symbol
6. Memory / saved data / saved-data retrieving indicator
7. USB communication status indicator
8. The second temperature display (maximum, minimum,
average, and temperature difference)
9. Symbols for the maximum, the minimum, the average,
and temperature difference.
10. K-type temperature measuring mode
11. Hold the reading
12. Symbol for “starting” the laser aiming device
13. Measuring mode (flashing symbol indicates manual
measuring, and static symbol indicates auto
measuring)
5. Operation Instructions
5.1 Manual Measurement
To measure temperature, point the temperature sensor
right toward the object, and then pull the trigger to start it.
Please do pay attention to the optical resolution(D:S)
and the observation view. The laser is used only for the
aiming purpose.
Gently touch the MODE key on the panel to switch the
flashing symbol at the lower-left corner of the panel
cyclically in the shown order.
5.2 Degree Celsius/ Fahrenheit Toggling
Gently touch the °C/°F key on the panel to conveniently
toggle between degree Celsius and degree Fahrenheit.
5.3 View Max/Min/ Ave/Diff Temperature
5.4.1 When using K-type probe for measuring
temperature, please do properly insert the K-type
probe into the K-type standard temperature base
at the lower part of the sensor.
5.4.2 Pull the trigger on the sensor, wait for the sensor to
be switched into the measuring mode, and then
gently touch “SEL” key on the sensor for a short
moment. The sensor will then be switched into the
mode of K-type temperature measurement (as
shown in the figure).
Please do not connect the attached probe to a
circuit with power on.
There might be a difference between the measured
values for the same object under the infrared mode
and the probe measurement mode. The reason is
due to the emissivity of the object being tested.
For details, please refer to the emissivity
comparison table.
•
•
5.4 Connect the Temperature Probe
5.5.1 Emissivity is a measure of the radiation energy of
the corresponding material. Most organic material
and painted surfaces or oxidized surfaces have an
emissivity of 0.95. The preset emissivity of the
temperature sensor is 0.95. The readings might
not be accurate when measuring shining metal
surfaces. To correct the readings, you can use
opaque photo paper or black paint to cover the test
surface (< 148°C /300°F). Wait until the
temperature of the photo paper or paint is the
same as that of the covered surface. Then,
measure the temperature of the photo paper or the
surface of the paint.
5.5 Emissivity Settings

0807
5.5.2 Pull the trigger on the sensor and wait the sensor
to be switched to the measuring mode, and then
gently touch “SEL” key on the sensor twice. The
emissivity symbol “EMS” will be shown on LCD,
together with the value of emissivity E=1.00.
5.5.3 Gently touch the “▲”key on the panel to increase
the emissivity value as shown on display; Press
the “▼” key to decrease it.
5.5.4 After the above setup is complete, press “MODE”
to confirm the value of emissivity.
5.5.5 The effective setup range for radiation: “EMS” is
between 0.10 and 1.00.
5.6 Temperature Limit Alarming Function
5.6.1 Pull the trigger on the sensor, and gently touch
“SEL” key on the left panel consecutively for three
times, and then “HAL” symbol and “1000” are
shown on display, and the sensor is switched to
the mode for setting the upper limit alarming.
Gently touch “▲”or “▼” to adjust the upper
temperature limit alarming value.
5.6.2 After the value is set, gently touch “MEM” key on
the panel to turn on/off the alarming mode. When
under “alarming on” mode, “ ” symbol is shown
on display.
5.6.3 Pull the trigger on the sensor, and gently touch
“SEL” key on the left panel consecutively for four
times, and then “LAL” symbol and “00” are shown
on display, and the sensor is switched to the mode
for setting the lower limit alarming. Gently touch
“▲”or “▼”to adjust the lower temperature limit
alarming value.
HIB
5.6.5 When the sensor detects that the surface
temperature of an object is higher or lower than
the preset alarming value, it will give off “doo-doo”
alarming sound, in the mean time “HAL” or “LAL”
symbol will flash on display.
Under the attached probe measuring mode, the
upper/lower limit alarming function is deactivated.
5.7 Settings For Auto Measurement
5.7.1 Pull the trigger on the sensor and wait the sensor
to be switched to measuring mode, and then gently
touch “ USB ” key on the left side of the sensor for
a short moment to shown “ ” symbol on LCD;
Then, press “SEL” key for 3 seconds and the
“SCAN” symbol on LCD stops flashing. Release
the trigger, and the sensor is switched to the mode
of auto measuring.
5.7.2 Under the mode of auto measuring, gently touch
the “USB” key on the left side of the sensor for a
short moment, and the mode of auto measuring
is switched off.
USB
5.6.4 After the value is set, gently touch “MEM” key on
the panel to turn on/off the alarming mode. When
under “alarming on” mode, “ ” symbol is shown
on display.
LOB

1009
5.8.3 Repeat the above steps to record again. When a
record position number of “99” is shown, pressing
“MEM” will not activate data recording.
5.8.4 To recall the saved data of an infrared
measurement, you need to pull the trigger. Then,
gently touch “RCL” key, and “RCL”(recall) is shown
at the lower left corner of LCD; Gently touch “▲” or
“▼” to select the position number of the recorded
data, and in the mean time, the saved temperature
values are shown on LCD.
5.8.5 “Record Clear” function allows you quickly clear all
data records saved in the temperature sensor.
This function is effective only when the sensor is
under “RCL”(recall) mode. No matter how many
data records are saved in the sensor, you can use
this “clear” function.
Attention: Use “Record Clear” function only when
all data records saved in the memory of the
temperature sensor are to be deleted.
5.9 AC Power, USB Communication
5.9.1 There are a power socket (DC 9V) and a USB
communication port on the base of the sensor.
The DC 9V power supplier can power the
temperature sensor to perform measurements
for a long period of time. (For your safety, please
use the power supplier provided by our company).
5.9.2 To use the function of USB communication, firstly,
install the communication software from CD, then,
insert the USB data cable to PC and the sensor,
and then pull the trigger. Gently touch “USB” key
on the left side of the sensor so that “ ” symbol
is shown on display; Then, real-time data
transmission can be carried out between the
sensor and PC.
USB
5.8.1 The sensor can save data (up to 100 data positions).
It can also save infrared radiation temperature,
temperature standard (°C or °F) and emissivity.
5.8.2 To save the readings of an infrared measurement,
you need to pull the trigger. In the mean time,
gently touch “MEM” key, and “MEM” (recording) is
shown at the lower left corner of LCD. The Number
for the recorded position is shown at the side of
“MEM”(recording) symbol.
5.8 Save /Recall /Delete A Record 5.8.6 To use “Record Clear” function, you need to
release the trigger under the “RCL”(recall) mode,
and then press “SEL” key for 3 seconds to switch
off the “RCL”(recall) mode. This indicates that
data records have been cleared.

1211
The temperature sensor has an angle of view and a
range of view, as shown in the picture below.
6. Distance To Object Size Ratio (D:S )
Make sure that the test object fully occupies the range
of view of the temperature sensor, i.e., let the sensor
“see” the test object only, without “seeing” any other
object. The larger the object is, the longer the measuring
distance must be; On the contrary, the smaller the object
is, the shorter the distance must be. Measuring distance
to size of the test object ratio (D:S ratio) is 30:1
(MS6540 series) or 50:1 (MS6550 series), as shown in
the graph below:
In order to make sure that the temperature sensor does
not receive infrared radiation from objects other than
the test object, it is advisable to carry out measurements
in a distance shorter than what is calculated according
to D:S.
7. Emissivity
Emissivity is a measure of the radiation energy of the
corresponding material. This temperature sensor allows
you to adjust the emissivity of the sensor according to
the type of the test surface. Please refer to Table 2.
Table 2. Surface Emissivity
Test
Metal
Aluminum
Oxidized
Alloy A3003
Oxidized
Roughened
Brass
Polished
Oxidized
Copper
Oxidized
EMS
0.2-
0.3
0.1-
0.3
0.5
0.4-
Test Surface
Iron
Oxidized
Rusted
Iron (Cast)
Oxidized
Unoxidized
Molten
Iron
Dull
Lead
Rough
EMS
0.5-
0.5-
0.6-
0.2
0.2-0.3
0.9
0.4
Oxidized
Molybdenu
Oxidized
Nickel
Oxidized
Platinum
Black
Elec.
Haynes
Alloy
Inconel
Oxidized
Sandblasted
Electropolish
0.6
0.3-
0.7-
0.3-
0.95
0.2-
0.2-
0.2-
0.9
Test Object Lens Cylinder Optical Sensor

1413
Table 2. Surface Emissivity (continued)
Test EMS
0.7-
0.4-
0.1
0.1
Test Surface EMS
0.95
0.95
0.95
Steel
Cold-Rolle
Ground
Polished
Zinc
Oxidized
Clay
Concrete
Cloth
Glass
Plate
Gravel
Gypsum
Ice
Limestone
Paper
(of any
Plastic
Opaque
Earth
Water
Wood(natur
Non-Metal
Asbestos
Asphaltum
Basalt
Carbon
Non-oxidiz
Graphite
Carborund
Ceramic
0.95
0.95
0.7
0.8-
0.7-
0.9
0.95
8. Maintenance
8.1 Battery Replacement:
When the battery is exhausted, the battery indicator
is turned on, which warns you that it is time to replace
the battery. Hold the middle part of the battery lid with
your fingers, and pull the lid downward, and then
replace the 9V battery with a new one.
8.3 Housing Cleaning
Use sponge or soft cloth dampened with soap and water
to clean the housing.
9. Technical specifications
♦ Temperature range for infrared measurement:
Temperature Range
Model
-32 to 1200 ºC (-25 to 2192 ºF)
Accuracy:
>510 ºC: ±1.5% of the reading
50 ~510 ºC: ±1.5% of the reading +1ºC
15 ~ 50 ºC: ±1.5% of the reading + 2ºC
-32 ~15 ºC: ±3 ºC
Repeat error: < ±0.5 % of the reading, or ± 0.5 ºC
8.2 Lens Cleaning
Firstly, use clean compressed air to blow off any small
particles on the lens surface, and then use a damp
cotton swab to carefully clean the surface. You may use
a little amount of water to dampen the cotton swab.
0.85
0.95
0.8-0.9
0.98
0.98
0.95
0.95
0.9-
0.93
0.9-
-32 to 1650 ºC (-25 to 3000 ºF)
♦ Temp. range for K-type measure.: (-40 to 1370 ºC)
Accuracy: ±1.5% of the reading +1ºC
♦ Optical Resolution (D:S) ( series = 50:1)
♦ Co-axial laser aiming mode
♦ Temperature Resolution: 0.1 ºC or 0.1 ºF
♦ LCD with double temperature display and 4 bits
♦ MAX(highest), MIN(lowest), DIF(difference), and AVG
(average) temperature display
♦ Emissivity adjustable (0.10 to 1.00), preset value: 0.95
♦ High-temp. and low-temp. alarm., preset value:
high=100 , low=00

15
♦ Data recording (it can record up to 100 group of data)
♦ Response time: 500 mSec
♦ Laser power: Less than 1 milli watt
♦ Optical Response: 8 μm to 14 μm
♦ Reading Hold function (HOLD)
♦ Battery low-voltage indicator ( )
♦ Working Voltage: 9V battery
♦ Ambient temperature: -10 to +50 ºC
♦ Ambient Humidity: 10% to 90% RH at 30 ºC
♦ Storage temperature: -20 to +50 ºC, without battery
♦ Dimensions: Length 140×56×190
♦ Weight: 500g
10. Accessories
Standard Accessories:
Instruction Manual 1
Standard K-type thermo. couple (-40 to 260 ºC) 1
USB data cable 1
Data communication software (CD) 1
Leather bag 1
9V battery (6F22) 1
Optional Accessories:
DC 9V power supply (7101 - 100 mA)
HYS006681
Table of contents
Other Mastech Thermometer manuals

Mastech
Mastech ms6520a User manual

Mastech
Mastech MS6540A User manual

Mastech
Mastech MS6530 User manual

Mastech
Mastech MS6501 User manual

Mastech
Mastech MS6550A User manual

Mastech
Mastech MS6530B User manual

Mastech
Mastech MS6500 User manual

Mastech
Mastech MS6511 SERIES User manual

Mastech
Mastech MS6520B User manual

Mastech
Mastech MS6530T User manual