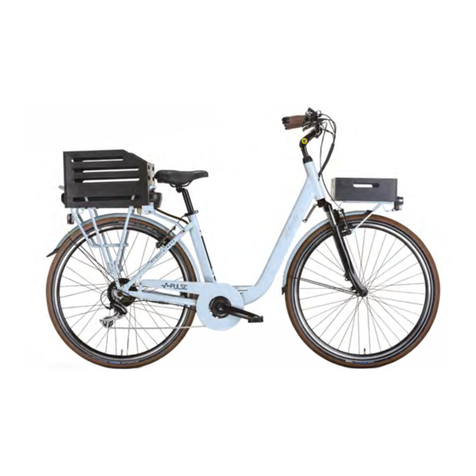
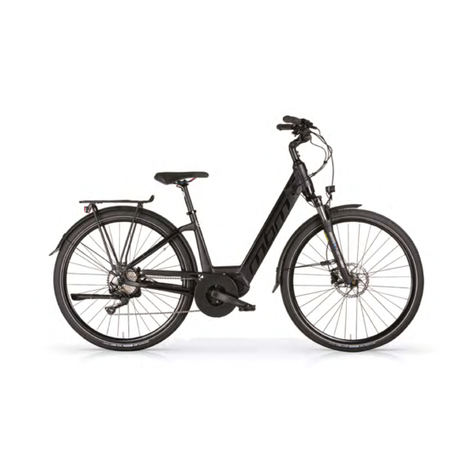
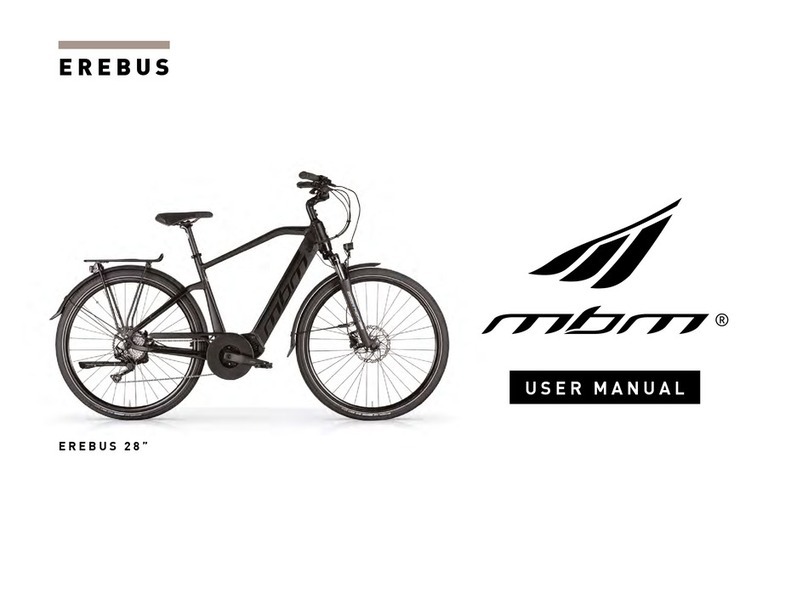
MBM E-METRO User manual

E-METRÒ
USER MANUAL
E-METRÒ

E-METRÒ USER MANUAL
1. FOREWORD 3
1.1 General 3
1.2 Assistance 3
1.3 Graphic form of safety warnings 3
2. SAFETY WARNINGS 4
2.1 General safety rules 4
2.2 Responsibility 4
2.3 Warnings for users 5
2.4 Maintenance warnings 5
2.5 Other provisions 6
2.6 Unpacking and setup 6
2.6.1 Saddle adjustment
6
2.6.2 Pedal assembly
7
3. GENERAL DESCRIPTION 8
3.1 General description 8
3.2 Technical sheet 9
3.3 Brake levers 10
3.4 Speed change 10
3.5 Assistance system management 11
3.5.1 Commands
11
3.5.2 Assistance levels
11
3.6 Activation of assistance 11
3.7 Walk assistance mode 13
3.8 Battery 13
3.8.1 Battery installation / removal
13
3.8.2 State of charge
13
3.8.3 Battery charging
14
3.8.4 Troubleshooting
14
3.9 Front and rear light 15
4. TERMS OF USE AND ENVIRONMENT FORESEEN 16
4.1 Intended use 16
4.2 Environment of use 16
4.3 Improper uses and contraindications 17
5. LIFTING AND TRANSPORT 18
5.1 Lifting 18
INDEX
5.2 Transport 18
6. COMMISSIONING 19
6.1 Charging the battery 20
6.2 Preliminary functional checks 20
6.2.1 Control devices
20
6.2.2 Wheels
20
6.2.3 Braking system
20
6.2.4 Frame, handlebar and seat position
21
6.2.5 Brake adjustment
22
6.2.7 Lights operation
23
7. USE OF THE BICYCLE 24
7.1 Riding the bicycle 25
7.2 Braking 25
7.3 Parking the bicyc 25
8. MAINTENANCE 26
8.1 General 26
8.2 Daily maintenance and checks 26
8.2.1 Checking the labels and pictograms
26
8.2.2 Checking the wheels
26
8.2.3 Check brake operation
26
8.3 Maintenance and weekly checks 27
8.3.1 Washing and cleaning
27
8.3.2 Lubrication and chain tension control
27
8.3.3 Checking the frame and bolts
27
8.4 Maintenance and monthly checks 28
8.4.1 Checking the circuits and electrical compo-
28
9. TECHNICAL ASSISTANCE AND SPARE PARTS 29
10. WAREHOUSE DEPOSIT 29
11. DISPOSAL OF COMPONENTS AND MATERIALS 30
12.WARRANTY RULES 31
13. COMPLIANCE 32

E-METRÒ USER MANUAL
p.3
1. FOREWORD
1.1 GENERAL
This manual is an integral and essential part of the E-METRO pedal assisted bicycle.
Before starting it is essential that users read, understand and scrupulously follow the following instructions.
The manufacturer is not liable for damage caused to people and / or things or to pedal assisted bicycles, if they are used
incorrectly with respect to the prescriptions indicated. With a view to continuous technological development, the man-
ufacturer reserves the right to modify the components, including the frame without notice, without this manual being
automatically updated.
1.2 ASSISTANCE
For any inconvenience or request for clarification, contact the authorized dealer, who has competent and specialized per-
sonnel, as well as specific equipment and original spare parts.
1.3 GRAPHIC FORM OF SAFETY WARNINGS
To identify the safety messages in this manual, the following graphic warning symbols will be used. They have the func-
tion of attracting the attention of the reader / user for the purposes of a correct and safe use of the pedal assisted bicycle.
It highlights behavioral rules to keep in order
to avoid damage to the pedal assisted bicycle
and / or the onset of dangerous situations.
It highlights the presence of dangers that
cause residual risks to which the user must
pay attention in order to avoid injury or ma-
terial damage.
DANGER
ATTENTION

E-METRÒ USER MANUAL
p.4
2. SAFETY WARNINGS
2.1 GENERAL SAFETY RULES
Even if you are already familiar with the use of pedal assisted bicycles, you must follow the instructions given here, in ad-
dition to the general precautions to be observed while driving a motor vehicle. In particular:
• Acquire full knowledge of the pedal assisted bicycle.
• Read the manual carefully to learn about the operation, the safety devices and all the precautions necessary for the safe
use of the vehicle. All this to allow safe use.
• Carefully keep the pedal assisted bicycle in perfect working order.
For any inconvenience or request for clarification, please contact the authorized dealer without hesitation, who has com-
petent and specialized personnel, specific equipment and original spare parts.
2.2 RESPOSABILITY
Failure to comply with the operating instructions and safety prescriptions contained in this manual exempts the man-
ufacturer from any liability.
If the maintenance of the pedal assisted bicycle is carried out in a way that does not comply with the instructions provid-
ed, with non-original spare parts or in any case in such a way as to compromise its integrity or modify its characteristics,
the manufacturer will be relieved of any responsibility relating to the safety of persons. and malfunction of the pedal as-
sisted bicycle.
ATTENTION
ATTENTION
USE OF THE ASSISTED BICYCLE
Each user must first have read the instruction manual, in particular the chapter on safety information.
RISKS RELATED TO THE USE OF THE ASSISTED BICYCLE
• Despite the application of safety devices, for safe use of the pedal assisted bicycle, you must take note of all the provisions
relating to the prevention of accidents contained in this manual.
• Always remain focused while driving and DO NOT underestimate the residual risks associated with the use of pedal assist-
ed bicycles.

E-METRÒ USER MANUAL
p.5
For any data not included or not deductible from this manual, it is recommended to consult the authorized reseller directly.
2.3 WARNINGS FOR USERS
1. It is forbidden to carry a passenger.
2. Can only be used by experienced adults and children.
3. Do not take alcohol or drugs before riding the pedal assisted bicycle.
4. These pedals assisted bicycle models are designed and built to be used outdoors, on roads and private and public en-
vironments.
5. Do not ask the pedal assisted bicycle to perform better than that for which it was designed.
6. Never ride the pedal assisted bicycle with parts that have been disassembled.
7. Avoid uneven surfaces and obstacles.
8. Drive with both hands on the handlebar.
9. Replace worn and / or damaged parts, check that the protections work correctly before use.
2.4 MAINTENANCE WARNING
1. All maintenance operations must be carried out with the battery disconnected.
2. During each maintenance phase, operators must be equipped with the necessary accident prevention equipment.
3. The tools used for maintenance must be suitable and of good quality.
4. Do not use gasoline or flammable solvents as cleaning agents, but always use non-flammable and non-toxic solvents.
5. Limit the use of compressed air for cleaning as much as possible (max 2 bar) and protect yourself with goggles with
side shields.
6. Never resort to the use of open flames as a means of lighting when carrying out inspection or maintenance operations.
7. After any maintenance or adjustment, make sure that no tools or foreign bodies are left between the movement parts
of the pedal-assisted bicycle.
ATTENTION
ATTENTION
UNAUTHORIZED MODIFICATIONS
If you hear unusual noises, or feel something strange, stop the pedal-assisted bicycle immediately. Then carry out a check
and, if necessary, contact the authorized dealer.
ORIGINAL REPLACEMENTS
Use only original spare parts supplied by M.B.M. S.r.l.
Any liability of the Manufacturer for damage or loss of functionality caused
following the use of non-original accessories and parts is excluded.

E-METRÒ USER MANUAL
p.6
2.5 OTHER PROVISIONS
The first thing to do when starting use is to check the presence and integrity of the protections and the operation of the
safety devices. If you find any defects, do not use the pedal assisted bicycle!
2.6 UNPACKING AND SETUP
The pedal assisted bicycle is delivered fully assembled and in working condition.
2.6.1 SADDLE AND ADJUSTMENTS
Adjusting the height of the saddle is an essential prerogative for the correct use of the pedal assisted bicycle. Incorrect
adjustment can generate structural breaks in the frame.
Adjust the height of the saddle by activating the quick release mechanism (Ref. A - Figure 1). Check that the mechanism is
tightened before testing the seat and using the vehicle. Do not raise the saddle beyond the limit switch signal located in
the seat post (Ref. B - Figure 1).
SHELTERS
It is therefore strictly forbidden to modify or remove the guards,
controls, labels and information plates.
DANGER
DANGER
IMPORTANT WARNING:
For your safety, the seat post reference
mark (B) should never be outside the
tube where the seat post is inserted.
ATTENTION
ASSEMBLY
In the event that you do not have the ap-
propriate instrumentation for adjustment
or do not have the skills, contact the au-
thorized reseller.
FIG. 1

E-METRÒ USER MANUAL
p.7
ATTENTION
ASSEMBLY
In the event that you do not have the appropriate
tools for adjustment
or do not have the skills, contact the authorized
dealer.
2.6.2 PEDALS ASSEMBLY
Right Pedal: it is identified by the letter R marked on its pin.
To assemble the pedal, screw it by turning the pin clockwise.
(Figure 4)
Left Pedal: it is identified by the letter L marked on its pin.
To assemble the pedal, screw it by turning the pin counter-
clockwise. (Figure 4)
FIG. 4

E-METRÒ USER MANUAL
p.8
3. GENERAL DESCRIPTION OF THE BICYCLE
3.1 GENERAL DESCRIPTION
The pedal assisted bicycle is designed and built to be used outdoors, on roads and private or public environments. In par-
ticular, the components and the type of pedal assisted bicycle allow you to tackle routes with asphalted surfaces or with
similar characteristics without particular roughness.
The pedal assisted bicycle is equipped with a rechargeable battery and an electric motor, whose intervention takes place
only in conjunction with the pedaling and progressively stops as the vehicle speed approaches 25 km / h, and then comes
to a complete stop. at that speed.
To manage the assistance system there is a special control located next to the left grip on the handlebar.
On the right side of the handlebar there is a control system for adjusting the gears.
INCORRECT AND UNINTENDED USE
The bicycle was designed and built for the specified use; a different use and
non-compliance with the technical parameters set by the manufacturer may con-
stitute a dangerous condition for users.
DANGER

E-METRÒ USER MANUAL
p.9
3.2 Scheda tecnica
1. HANDLEBAR AND CONTROLS
2. ENGINE
3. SADDLE
4. BATTERY
5. PEDALS
6. FORK
7. LIGHT
CODE E341
FRAME ALLUMINIUM
FORK MBM HI-TEN STEEL
CRANKSET 46X170 ALLOY
REAR DERAILLEUR SHIMANO TY300
SHIFTER 7 SPEEDS
BRAKES V-BRAKE
WHEELS 20X2.00
SADDLE BASSANO
LIGHTS LIGHTS BATTERY
MOTOR REAR HUB
BATTERY TO THE RACK
SPEED 25 KM/H
DISPLAY LCD
POWER LEVELS 5 LEVELS
WEIGHT 21 KG

E-METRÒ USER MANUAL
p.10
3.3 BRAKE LEVERS
The brake levers (Ref. F - Figure 5) are located on the handlebar of the pedal assisted bicycle, near the knobs (Ref. G-Fig-
ure 5). These systems allow the braking system to be activated by controlling the movement of the pads until they come
into contact with the wheel rim. The pads, sliding on special guides obtained in the profile of the rim, generate the friction
necessary to stop the motion of the bicycle in proportion to the force applied to the lever. The right brake lever activates
the rear brake fixed to the frame while the left brake lever activates the front brake fixed to the fork.
3.4 SPEED CHANGE
The pedal assisted bicycle has a 7-speed gearbox, with the sprockets positioned on the rear wheel hub, selectable using
the opposing levers, located at the base of the right knob. The indicator (Ref. H - Figure 5) present in the upper part of the
handlebar allows you to view the selected ratio.
FIG. 5

E-METRÒ USER MANUAL
p.11
3.5.2 Assistance levels
To know the exact intensity of assistance,
based on the selected value, see below.
3.6 ASSISANCE ATTIVATION
The assistance system is controlled by the controller on the
handlebar, near the left grip. In particular, assistance is acti-
vated or deactivated using the “M” button (Ref. L - Figure 6).
Once the system is activated, the management display itself
(Ref. I - Figure 6) is switched on, through which it is possible
to see the activity status of the vehicle. The power of the en-
gine depends on the force impressed on the pedals, accord-
ing to a multiplication factor based on the level of assistance
selected. Assistance decreases linearly until reaching 25 km
/ h. once this speed is exceeded, assistance is automatically
deactivated.
LEVEL 1 - 0 ASSISTANCE
LEVEL 2 - ASSISTANCE 25%
Recommended route: plain / hilly - medium-long distances
LEVEL 3 - ASSISTANCE 50%
Recommended route: hilly / medium ascent - medium distances
LEVEL 4 - ASSISTANCE 75%
Recommended route: uphill - medium-short distances
LEVEL 5 - ASSISTANCE 100%
Recommended route: challenging climb - short distance
3.5 ASSISTANCE SYSTEM MANAGEMENT
3.5.1 Commands
To manage the assistance system there is a controller on the left side of the handlebar. This device allows you to vary the
level of assistance of the system, to view information regarding the route and the status of the battery.
L-Press and hold to turn on / off.
Press instantly to change the information shown on the dis-
play.
M-The button allows you to increase the level of assistance.
N-The button allows you to decrease the level of assis-
tance.
I-The display allows you to view the following information:
1- Total distance
2- Time
3- Speed
4- Walk mode
5- PAS level
6- Battery status
FIG. 6

E-METRÒ USER MANUAL
p.12
3.8 BATTERY
The assistance system of the pedal assisted bicycle, in order to function, requires the presence of the power supply bat-
tery. Specifically, the battery is removable, so it can be removed for maintenance or when you want to store the vehicle.
3.8.1 BATTERY INSTALLATION/REMOVAL
To insert the battery proceed as follows:
1. Insert the battery release key in the slot on the left front part of the luggage rack and turn them counterclockwise (Ref.
1- 2- Figure 7);
2. Insert the battery, making sure to align the guide in the housing with the one in the lower part of the battery. Press the
battery until you hear the click of correct insertion (Ref. 2 - Figure 7);
3. Turn the key clockwise (to lock the battery) and remove it (Ref. 3 - Figure 7).
3.7 WALK ASSISTANCE MODE
The pedal assisted bicycle is equipped with the walking assistance function. This function allows you to move the bicycle
more easily during manual movement in case you face small climbs.
On flat routes it is useful for starting pedaling, up to a maximum speed of 6 km / h.
To activate the aforementioned mode, turn on the assistance system using the appropriate “M” button (Ref. L - Figure 6).
At this point, select an assistance level that is not the minimum and keep the “-“ button pressed (Ref. N - Figure 6). Once
the “-” button is released, assistance is automatically disabled.
FIG. 7
1 2 3

E-METRÒ USER MANUAL
p.13
To remove the battery proceed as follows:
1. Insert the battery release key in the slot in the left front part of the luggage rack (Ref. 1 in Figure 8) and turn it counter-
clockwise until the release click occurs;
2. Remove the battery, acting on the appropriate handle at the rear of the same, taking care not to exert excessive force
(Ref. 2 in Figure 8);
3. Remove the key (key 3 in figure 8).
3.8.2 BATTERY CHARGE STATUS
On the upper side of the battery there is a button to display the state of charge of the same battery. Press the button and
wait for the battery charge level LEDs to light up. As the battery is discharged, the notches indicating the state of charge
on the display will turn off and then the assistance system will turn off when the system power supply battery is com-
pletely discharged. It is also possible to view the state of charge of the battery directly on it, thanks to the 5 LED lights (Ref.
O - Figure 9) and the power button (Ref. P- Figure 9), present.
LED CHARGE SATUS
1 0 - 20 %
2 20 – 40 %
3 40 – 60 %
4 60 – 80 %
5 80 – 100 %
FIG. 8
1 2 3
FIG. 9

E-METRÒ USER MANUAL
p.14
3.8.3 BATTERY CHARGING
Recharging the battery of the pedal assisted bicycle can be carried out with the battery assembled on the vehicle or re-
moved from it. In particular, proceed as follows:
1- Turn off the assistance system of the pedal-assisted bicycle using the appropriate button “M” (Ref. L - Figure 6);
2- Remove the battery in case you want to charge the battery separately;
3- Lift the rubber cap on the appropriate battery charging socket, located on the left side of the same (Figure 10);
4- Connect the supplied battery charger to the socket with the appropriate plug;
5- Connect the battery charger to a power socket (230 V / 50 Hz) and let the battery charge for the necessary time.
FIG. 10
3.8.4 TROUBLESHOOTING
ATTENTION
TROUBLESHOOTING
In the event that the assistance system does
not activate even if the battery is charged,
contact the authorized dealer.
PROBLEM CAUSE/SOLUTION
The system doesn’t turn on Check if charger is on
PROBLEM CAUSE/SOLUTION
Assistance doesn’t work Check if the charging level is suffi-
cient.
ATTENTION
CHARGER
Always connect the plug to the bat-
tery first and then the battery charg-
er to the power outlet.

E-METRÒ USER MANUAL
p.15
3.9 FRONT AND REAR LIGHT
To ensure visibility both during the day and at night, two headlights are installed, one front (Figure 11) and one rear (Figure
12). These devices are activated by means of an on / off button (Ref.Q - Figures 11-12).
To replace the batteries, remove the screw (Ref. R - Figures 13-14) and open the device.
FIG. 11
FIG. 13 FIG. 14
FIG. 12

E-METRÒ USER MANUAL
p.16
4. CONDITIONS OF USE AND INTENDED ENVIRONMENTS
4.1 INTENDED USE
The pedal assisted bicycle is designed and built to be used outdoors, on roads and private or public environments. In par-
ticular, the components and the type of pedal assisted bicycle allow you to tackle routes with asphalted surfaces or with
similar characteristics without particular roughness.
Any modification of the state of construction can compromise the behavior, safety and stability of the pedal assisted bi-
cycle and can lead to an accident.
Other types of use, or the extension of use beyond that envisaged, do not correspond to the destination assigned by the
manufacturer, and therefore the same cannot assume any responsibility for any resulting damage.
4.2 ENVIRONMENTS USAGE
The pedal assisted bicycle can be used outdoors, in the absence of adverse weather conditions (heavy rain, hail, snow,
strong wind, etc.):
• Maximum allowed temperature: + 40 ° C
• Minimum allowed temperature: +5 ° C
• Maximum permissible humidity: 80%
The environment of use may have an asphalted surface or with not excessively high roughness.
Furthermore, the place of use must be illuminated, by the sun or by artificial lights, in such a way as to ensure the correct
view of the path and of the pedal assisted bicycle controls (recommended from 300 to 500 lux). The pedal assisted bicycle
is equipped with front white light and rear red light.
ATTENTION
FORBIDDEN ENVIRONMENTS
The pedal assisted bicycle must not be used:
• in areas subject to risk of fire or explosion;
• in environments with a corrosive and / or chemically active atmosphere;
• in poorly lit environments;
• On excessively rough terrain, given its characteristics (frame, wheels, etc.);
• In closed spaces, if they do not allow safe use;
• In extremely dark environments.

E-METRÒ USER MANUAL
p.17
4.3 IMPROPER USE AND CONTROINDICATIONS
The actions described below, which obviously cannot cover the entire range of potential possibilities of “misuse” of the
pedal assisted bicycle, are to be considered absolutely prohibited.
ATTENTION
FORBIDDEN OPERATIONS
• The performance of prohibited operations invalidates the warranty.
• The manufacturer declines all responsibility for any damage to property and people resulting from the execution of prohib-
ited operations
PROHIBITED
• To ride the pedal assisted bicycle for uses other than those for which it was built, that is, the pleasure of a passenger.
• Ride the pedal assisted bicycle in areas where there is a danger of explosions.
• Ride the pedal assisted bicycle in adverse weather conditions (heavy rain, hail, snow, strong wind, etc.).
• Carrying a passenger in addition to the driver.
• Riding the pedal assisted bicycle under the influence of alcohol or drugs.
• Ride the pedal-assisted bicycle if your weight is greater than the permitted weight.
• Charge the battery in an environment that is too hot or not sufficiently ventilated.
• Cover the battery while charging.
• Smoke or use open flames near the charging area.
• Transiting or stopping on sloping (greater than 10%) or excessively bumpy surfaces (with holes, dips, obstacles, etc.).
• Perform any maintenance with the battery connected.
• Use non-original spare parts.
• Insert your limbs or fingers between the moving parts of the bicycle.
• Use the pedal assisted bicycle on unpaved or similar terrain.
DANGER

E-METRÒ USER MANUAL
p.18
5. LIFTING AND TRANSPORT
5.1 LIFTING
The weight of the E - METRÒ model assisted pedal bicycle is such that it can be lifted and transported by one person, also
due to its overall dimensions.
The optimal solution for carrying out the movement is to grab a movable part of the handlebar and the rear of the saddle.
5.2 TRANSPORT
To ensure the safety of transport in vans, it is necessary to prevent the pedal-assisted bicycle from moving. This is achieved
by binding it with anchoring bands or cables in good condition.
In this regard, the coupling devices must be installed in such a way as not to damage the frame and other parts of the
bicycle.
The manufacturer is not liable for breakages caused by lifting and / or transporting the
pedal assisted bicycle after delivery.
CRUSHING AND IMPACT
• During lifting, you must operate with extreme caution to avoid damage to people and property.
• This operation must be performed by sturdy people
RISK OF INJURY
• ALWAYS make sure that the frame and handlebar adjustment screws are tightened before each ride. Otherwise,
accidents, even serious ones, could result!
DANGER
DANGER

E-METRÒ USER MANUAL
p.19
6. COMMISSIONING
6.1 BATTERY CHARGE
Before using the bicycle for the first time, the battery must be charged for at least 24 hours, using the special battery
charger, supplied.
The pedal assisted bicycle, model E - METRÒ, is equipped with an electric motor powered by a 37 V lithium-ion battery. The
battery pack is housed in the rear part of the bicycle, under the luggage rack.
The average charging time varies from 4 to 6 hours.
The recharging operation can be carried out in a well-ventilated box with the battery installed on the bicycle. To charge
the battery proceed as in paragraph 3.8.3.
ATTENTION
LEVEL OF BATTERY CHARGE
The battery should not be fully discharged to
preserve its life and not run the risk of damaging
it. In any case, it must be recharged at least every
3 months even if the bicycle is not used.
PRECAUTIONS DURING CHARGING PROCESS
• Always connect the plug to the battery and then the power plug to the mains.
• When charging is complete, always disconnect the plug from the mains first and then the plug from the battery.
• Always recharge the battery fully.
• Always use the original power supply supplied.
• Do not leave the battery charging longer than necessary.
• Always recharge in a ventilated area.
• Do not recharge the battery in too hot environments.
• Do not recharge the battery near flammable liquids.
• Do not cover the battery in any way while charging.
• If the battery emits a bad smell, immediately disconnect the plug from the power supply and ventilate the
room, do not touch the battery.
PERICOLO
ATTENTION
CHARGER
Always connect the plug to the battery first and
then the battery charger to the power outlet.

E-METRÒ USER MANUAL
p.20
6.2.1 Control devices
Check the efficiency and state of charge of the battery. Use in a very cold environment quickly degrades the efficiency of
the battery. Check chain tension and lubrication.
6.2.2 Wheels
Check the tire inflation pressure. Check the state of wear of the tread: there must be no cuts, cracks, foreign bodies, ab-
normal bulges, visible plies and other damage.
ATTENTION
ATTENTION
NEGATIVE TEST
In the event that, during the preliminary checks, defects of any kind are found
and even a single check is negative, DO NOT RIDE THE BICYCLE WITH ASSISTED RIDING.
Immediately take all measures to carry out an adequate repair and, if necessary,ù
contact the authorized dealer or an authorized workshop.
Do not inflate the tires beyond the allowable value
indicated by the manufacturer on the side surface of the
tires.
6.2 PRELIMINARY FUNCTIONAL CHECKS
Before each use, the driver must check the safety status of the pedal assisted bicycle. Therefore, perform the following
inspections before riding the pedal-assisted bicycle.
6.2.3 Braking system
Carry out a visual check of the braking system, verifying that there are no damaged cables or lubricants in the braking sur-
faces of the brake and rim. Check the operation of the brakes with a low-speed braking test in an obstacle-free area, first
with the rear brake and then with the front one. Test the efficiency of the braking system on a flat path and at low speed.
Table of contents
Other MBM Bicycle manuals

MBM
MBM HYPERION 29 User manual

MBM
MBM FUNK URBAN 20 User manual

MBM
MBM EREBUS 28 User manual

MBM
MBM PULSE 28 MAN User manual

MBM
MBM KAIROS PLUS User manual

MBM
MBM RAMBLA SPORT LADY User manual

MBM
MBM FUNK CROSS 20 User manual

MBM
MBM LA RUE 28 User manual

MBM
MBM HYPERION PLUS User manual

MBM
MBM CHAOS 26 User manual