manuals.online logo
Brands
  1. Home
  2. •
  3. Brands
  4. •
  5. meitav-tec
  6. •
  7. Thermostat
  8. •
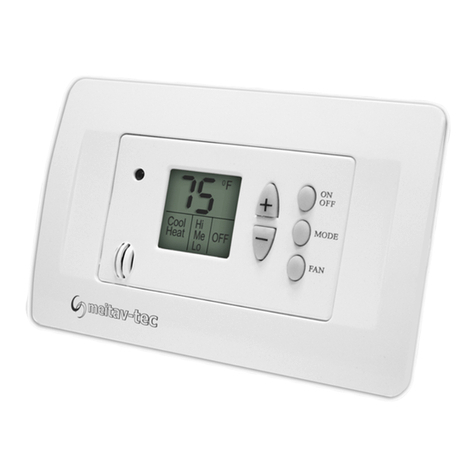
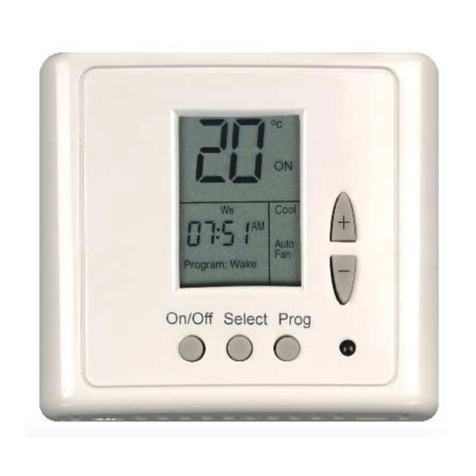
  9. meitav-tec ETN-24-HC22 PROG-C User manual

meitav-tec ETN-24-HC22 PROG-C User manual

ETN-24-HC22
PROG-C
(TRE-24-HC22-PROG)
Owner's Manual - Installation
and Operating Instructions
Meitav-tec Ltd (Contel group)
Tel: +972-3-9626462 Fax: +972-3-9626620
Rev. 6.4 12.06 www.meitavtec.com - su
pp
ort
@
meitavtec.com
2
Please read this manual carefully before installation and use.
Index
Options and accessories 1
Installation Instructions 2
WiringConnections 3
DIP switch explanation - different configurations 4
Operating Manual 5
Hand held remote control - Option. (With weekly program built in) 6
Troubleshooting for the technician 7
1. Options and Accessories
•Hand held remote control with weekly program.
•Individual cool and heat set points.
•External sensor option:
RS01 for remote temperature sensing (1 required)
RS01 for averaging temperature with thermostat (4 required)
RS02 for averaging temperature with thermostat (2 required RS02 has two thermistors
in one enclosure)
3
2. Installation Instructions
Separate the front panel from back panel by depressing
the tongue located in the top of the unit.
Pull the back panel out.
Line the back panel up against the wall or flat surface.
Install three screws as required.
Make electrical connections as shown on enclosed
electrical wiring diagram. (Next page)
Install the cover to the back panel; first the two tabs on
the bottom and then the top tongue. Push until tight
against the wall.
On/Off Select Prog
Setting
Cool
Heat
Auto
Fan If you have the Super Model, make sure that
you have chosen the right DIP
switch
selection – see table 4.1
4
3. Wiring Connections
Table 3.1 - Connections for all applications
Switch Function ETN
Rc 24 Vac RED
Rh 24 Vac RED (jumpered to Rc)
C 24 VAC Common from
transformer
W1 Heater 1
W2 Heater 2
T External Sensor
T External Sensor
Y2 Compressor 2
G Fan
Y1 Compressor 1
Note: #1 - “T”,”T” Terminals can be used in any systems configuration when a
Meitav-tec external sensor is terminated and the switch is correctly configured
(Table #3.1).
Note: #2 - If one transformer is used, they the factory installed jumper between
Rc and Rh must be used.
5
IMPORTANT! Before making any changes in the dipswitch disconnect
electricity in the main board.
4. DIP switch Explanations (different configurations)
4.1 The DIP switch is located in the middle of the board as shown in the drawing.
(Inside the thermostat)
DIP switch
DEFAULT SWITCH FROM FACTORY
1 2 3 4 5 6
6
Table 4.1 – Dipswitch selection
Switch Function ON OFF Default
Internal Sensor Control X
1 External sensor control X ON
2 Not in use X OFF
Heat Pump in COOL mode (“O”) X
3 Heat Pump in HEAT mode (“B”) X OFF
3 minutes delay for compressor X
4 No delay X OFF
Internal Sensor Control X
5 External sensor control X OFF
Internal Sensor Control X
6 External sensor control X ON
Use this table together with the illustration above showing the switch configuration.
7
4.2 DIP Switch Operation
1 2 3 4
5 6
The Dipswitch has 6 pins.
Each pin can be ON or OFF.
In the picture, pins 1,6 - ON and pins 2,3,4,5 - OFF
4.3 External sensor connection - option
Important! The external sensor must be Meitav-tec type.
Default switch from factor
y
Table 4.3 - N.TC. Sensor: Temperature ~ Resistance Characteristics
Temp °C 7.2 10.0 12.8 15.6 18.3 21.1 23.9 26.7 29.4 32.2
Temp °F 45 50 55 60 65 70 75 80 85 90
Res. k 115.8 100.9 88.1 77.1 67.7 59.6 52.5 46.4 41.2 36.6
The default from factory is INTERNAL SENSOR.
8
4.5 External sensor switch configuration
1. Disconnect power to the thermostat 24Vac by removing the front half of the sensor.
2. Move the Dipswitch as in the picture. Switches #2,3 & 4 should be configured for
the heating and cooling system as shown in Table 4.1.
1 2 3 4 5
6
Switch 1 - OFF
Switch 5 - ON
Switch 6 – OFF
3. Connect the temperature sensor to T-T terminals.
4. Reconnect power 24Vac.
5. Make sure the reading in the display is by the external sensor only.
The wire length for the external sensor can be up to 100 feet (30 meters) with
standard cable.
If the distance is greater than 100 feet then it MUST be shielded type.
There is a wide range of sensors for different applications, duct, rooms, etc. There
are also options for averaging the temperature. For details please contact our
technical line or visit our web site, see details at the end of this manual.
The external sensor can be connected in ALL the applications, heat pump, fan
mode, etc.
9
5. Operating Manual
5.1 On/Off
Press ON/OFF button to activate or deactivate the thermostat.
The word "ON" or "OFF" will appear in the display.
5.2 Temperature adjustment
•Press the SET buttons (+) or (-); the temperature will flash.
•Change temperature with the set buttons (+) or (-).
•The display will show "COOL" or "HEAT" (Instead of the clock display).
•In auto-change mode, press the set buttons (+) or (-), “COOL” and TEMPERATURE
will flash.
•Set the cooling temperature with (+) or (-) buttons.
•After three seconds, “HEAT” will be displayed and the TEMPERATURE will flash.
•Set heating with (+) or (-) buttons.
•If the thermostat is in HEATING or COOLING only (not in AUTO CHANGEOVER) the
selected mode will be the only temperature adjustable at that time.
The thermostat keeps a minimum differential of at least 1 degree between Heat
set and Cool set (Heat is always less than Cool).
10
5.3 Select button
With the select button you can choose:
•System Mode: Heating only, cooling only, auto changeover, or fan only.
•Fan Mode: Fan On or Auto fan (while heating or cooling).
•Press the SELECT button.
•The Heating and Cooling MODE will appear.
•Make adjustments using the set buttons (+) or (-).
•Press SELECT button again - fan will appear.
•Use the set buttons (+) or (-) to choose between Fan On and Auto Fan.
Change
Mode
1. Cool Heat
2. Heat
3. Cool
4. Fan Only
Change
Fan Mode
Return to normal
display
1.Auto Fan
2. Fan
5.4 Program (Prog) Button
Use the Program button to adjust:
•Real-time clock.
•Programming.
See program chart.
11
5.5 Programming:
The thermostat is a 5-1-1 programmable; weekdays Monday through Friday, Saturday
and Sunday both have individual programs.
There is four program events per day: 1-Wake, 2-Day, 3-Return, 4-Sleep
Before programming your thermostat you
should be familiar with the display of the unit:
Thermostat Display
1. Temperature digits
In normal display will show the temperature in the room.
When +/- is pressed, it will flash and show the set point for the selected mode.
2. Days of the week
When setting the program. It will display the period that you are setting. Example:
when display shows: MON-TUE-WED-THU-FRI, you are setting the weekdays
program. (The program will repeat on each of these days).
In normal display the actual day of the week will be displayed.
3. Real time clock, AM/PM.
When setting the program, "COOL" or "HEAT" will be displayed in place of the
time to indicate the setting.
12
4. Program event currently being adjusted will be indicated:
•Wake 1
st program of day
•Day 2
nd program of day
•Return 3
rd program of day
•Sleep 4
th program of day
5. Set - When changing the temperature set point, the temperature digits will flash,
and the "SET" will appear in the display.
6. ON/OFF - thermostat active or deactivated.
7. Heat/Cool modes. When both in the display, auto change (heat & cool)
8. Fan Mode
When the display shows "FAN" – the unit’s mode is Fan ON.
When the display shows "Auto Fan" - the unit’s mode is Auto Fan.
Normal display
In normal display, the display will show:
•Ambient temperature in the room.
•ON or OFF.
•Current day of the week.
•Current time of day.
•Current active program.
•Mode.
•Fan mode.
13
Program Example
Monday to Friday 1 (Wake) 2 (Day) 3 (Return) 4 (Sleep)
Start time 6:30 AM 8:00 AM 5:30 PM 10:00 PM
Cool Set Point 25°C 29°C 25°C 28°C
Heat Set Point 21°C 17°C 21°C 17°C
Saturday 1 (Wake) 2 (Day) 3 (Return) 4 (Sleep)
Start time 7:30 AM 12:30 PM 6:00 PM 11:30 PM
Cool Set Point 24°C 23°C 22°C 25°C
Heat Set Point 21°C 21°C 21°C 18°C
Sunday 1 (Wake) 2 (Day) 3 (Return) 4 (Sleep)
Start time 7:30 AM 12:30 PM 6:00 PM 11:30 PM
Cool Set Point 24°C 23°C 22°C 25°C
Heat Set Point 21°C 21°C 21°C 18°C
•The following chart will help simplify making normal adjustments
(System Mode, Fan Operation) and the program.
•We recommend that you fill out the chart BEFORE setting the weekly program.
•On the chart, select a cooling and a heating temperature. Remember to keep a safe
differential between Heat and Cool for auto changeover.
•The display will show the program (weekday, Saturday or Sunday)
•During programming, the display will NOT return to normal display unless the entire
program is review.
•To exit the Program mode, press ON button until normal display is reach.
14
Pro
g
rammin
g
Adjust Clock
Settings-Hours
Adjust Clock
Settin
g
s-Minutes Adjust Clock -
Day of the week
2
Heat Temp.
1
Program No.
Hour Minutes Cool Temp.
Program No.
Hour Minutes
Wake
Day
Heat Temp.
Cool Temp.
15
3
4
Program No.
Hour Minutes
Program No.
Hour Minutes
Saturday and
Sunday
programming
Return
Sleep
Heat Temp.
Cool Temp.
Heat Temp.
Cool Temp.
Follow the steps above to set the programs for Saturday and Sunday.
At any time during the programming you can review the settings quickly by
pressing the ON button.
16
5.6 Override set temperature:
At anytime you may change the temperature by pressing the set (+/-) buttons.
The new temperature will be retained until the next program starts.
The thermostat’s memory (program and real time clock) will be kept for 12
hours during power failure without the use of batteries.
5.7 Back Light
The backlight of the unit will activate when any button is pressed or the information is send
from the remote control.
6. RT04 - Hand held remote control – Option – Purchase separately
6.1 General
This remote control is Infrared; the remote must be pointed at the
thermostat to operate.
Every time you change a parameter in the Remote Control, you
must send it to the thermostat by pressing the ON/SEND button.
Every time that the information is sent to the thermostat, the Back
Light will turn ON for a few seconds.
17
6.2 Operating Manual
On/Send,OFF
•Press ON/SEND to activate the air conditioner and/or
updating information.
•Press OFF to turn the thermostat off and update information.
When sending information to the thermostat – the remote
control must point towards the thermostat.
Fan:
•Press FAN button to change between:
FAN ON ( ) or AUTO FAN (A).
•Press ON/SEND button to send information to thermostat.
Mode:
•Press MODE button to change between:
COOL, HEAT, AUTO CHANGE and FAN ONLY.
•Press ON/SEND button to send information to thermostat.
Temperature Set Point:
Cool Mode:
•Press the set buttons (+) or (-).
“COOL” & digits will flash.
•Select the desired temperature.
•Press ON/SEND button to send information
to thermostat.
18
Heat Mode:
•Press the set buttons (+) or (-).
•“HEAT” & digits will flash.
•Select the desired temperature.
•Press ON/SEND button to send information
to thermostat.
Auto Change Mode:
•Press the adjustment buttons (+) or (-)
•“COOL” and “SET TEMP” will flash.
•Set cooling with (+) or (-) buttons.
•Press SELECT button.
•“HEAT” and “SET TEMP” will flash.
•Set the heating set point with (+) or (-) buttons.
Press the
•SELECT button again or Press
The thermostat keeps a minimum differential of at least 1 degree between
ON/SEND button to send information to the
thermostat.
Heat set and Cool set (Heat is always less than Cool).
19
Real Time Clock and Day:
•Press SELECT button - CLOCK SET will flash.
•Press (+) or (-) buttons - the hours will flash.
•Adjust the hours with (+) or (-) buttons.
•Press SELECT again - minutes will flash.
ram or
Programming:
emperature settings for the week:
riday),
•ning), 4 (Night)
•Adjust the minutes with (+) or (-) buttons.
•Press SELECT again - weekday will flash.
•Adjust the day with (+) or (-) buttons.
•Press SELECT again to exit from prog
Press ON/SEND button to send information
to the thermostat.
Set the Program times and T
•The remote is 5-1-1 programmable: weekdays (Monday to F
Saturday, and Sunday can be programmed differently.
4 program events per day: 1 (Morning), 2 (Day), 3 (Eve
20
The program can be set away from the thermostat and can be sent later on.
To send the program to the thermostat, follow the steps below without
adjusting times and temperatures. Only press the ON/SEND button each time
the word SEND blinks on display (point the remote control to the thermostat)
•To enter programming: Press and hold SELECT
button for three seconds.
“PROGRAM” (flashing) and the days Mon-Fri
will appear on display.
•Press (+) or (-) buttons, “PROGRAM 1” &
“START” (flashing) will appear.
•Press (+) or (-) button - the hours will flash.
•Adjust the hours with (+) or (-) buttons.
•Press SELECT button - the minutes will flash.
•Adjust the minutes with (+) or (-) buttons.
•Press SELECT button – “COOL” (flashing) &
Temperature will appear.
•Adjust the temperature with (+) or (-) buttons.
•Press SELECT button – “HEAT” (flashing) &
Temperature will appear.
•Adjust the temperature with (+) or (-) buttons.

This manual suits for next models

1

Other meitav-tec Thermostat manuals

meitav-tec ETN-12-P-3S User manual

meitav-tec

meitav-tec ETN-12-P-3S User manual

meitav-tec ETN24-P-FC-SUPER2 Safety guide

meitav-tec

meitav-tec ETN24-P-FC-SUPER2 Safety guide

meitav-tec Haften TRE24-PROG-HC11 User manual

meitav-tec

meitav-tec Haften TRE24-PROG-HC11 User manual

meitav-tec FMH-220-FAN-COIL-SUPER 3 User manual

meitav-tec

meitav-tec FMH-220-FAN-COIL-SUPER 3 User manual

meitav-tec ETNC24-FC-BAC-PIR-02 User manual

meitav-tec

meitav-tec ETNC24-FC-BAC-PIR-02 User manual

meitav-tec MTSC User manual

meitav-tec

meitav-tec MTSC User manual

meitav-tec ETN24-PM-HP-SUPER-BL User manual

meitav-tec

meitav-tec ETN24-PM-HP-SUPER-BL User manual

meitav-tec ETN24-P-3S-HU User manual

meitav-tec

meitav-tec ETN24-P-3S-HU User manual

meitav-tec FHV-H1-PR-IR User manual

meitav-tec

meitav-tec FHV-H1-PR-IR User manual

meitav-tec ETN-24-HC11-3S-PROG User manual

meitav-tec

meitav-tec ETN-24-HC11-3S-PROG User manual

meitav-tec MTS/SUPER/CO2 series Guide

meitav-tec

meitav-tec MTS/SUPER/CO2 series Guide

meitav-tec MTSC/SUPER/HU User manual

meitav-tec

meitav-tec MTSC/SUPER/HU User manual

meitav-tec SUPER-SI Series Manual

meitav-tec

meitav-tec SUPER-SI Series Manual

meitav-tec ETNC24-SUPER-MDB-01 User manual

meitav-tec

meitav-tec ETNC24-SUPER-MDB-01 User manual

meitav-tec FMH24-PD-1S-IR User manual

meitav-tec

meitav-tec FMH24-PD-1S-IR User manual

meitav-tec ETNC24-FC-BAC-PIR-01 User manual

meitav-tec

meitav-tec ETNC24-FC-BAC-PIR-01 User manual

meitav-tec ETN-24-SUPER-PROG Safety guide

meitav-tec

meitav-tec ETN-24-SUPER-PROG Safety guide

meitav-tec ETN24-PMH-SUPER User manual

meitav-tec

meitav-tec ETN24-PMH-SUPER User manual

meitav-tec TAT-SUPER User manual

meitav-tec

meitav-tec TAT-SUPER User manual

meitav-tec MTSCV/SUPER/PROG/HU/PIR User manual

meitav-tec

meitav-tec MTSCV/SUPER/PROG/HU/PIR User manual

meitav-tec BDIR User instructions

meitav-tec

meitav-tec BDIR User instructions

meitav-tec ETN-24-SUPER-SF Series User manual

meitav-tec

meitav-tec ETN-24-SUPER-SF Series User manual

meitav-tec ETN24-SUPER-SH-F User manual
meitav-tec

meitav-tec ETN24-SUPER-SH-F User manual

meitav-tec FMH-220-HP11-3S-IR User manual
meitav-tec

meitav-tec FMH-220-HP11-3S-IR User manual

Popular Thermostat manuals by other brands
Vimar Eikon 20446 Instruction handbook

Vimar

Vimar Eikon 20446 Instruction handbook

Z-Wave ZTS-100 user guide

Z-Wave

Z-Wave ZTS-100 user guide

ritetemp 8082C install guide

ritetemp

ritetemp 8082C install guide

Aube Technologies TH115 A/F/AF owner's guide

Aube Technologies

Aube Technologies TH115 A/F/AF owner's guide

Braeburn 2010 user manual

Braeburn

Braeburn 2010 user manual

Honeywell T8535L installation instructions

Honeywell

Honeywell T8535L installation instructions

Honeywell LP916A Service data

Honeywell

Honeywell LP916A Service data

Mapei Mapeheat Thermo Touch installation guide

Mapei

Mapei Mapeheat Thermo Touch installation guide

Carrier Connect 33CONNECTSTAT43FX installation guide

Carrier

Carrier Connect 33CONNECTSTAT43FX installation guide

ELV Electronik ETH comfort100 manual

ELV Electronik

ELV Electronik ETH comfort100 manual

Venstar TSTATEZ installation instructions
Venstar

Venstar TSTATEZ installation instructions

White Rodgers 1F82-261 Brochure & specs

White Rodgers

White Rodgers 1F82-261 Brochure & specs

IDEAL Touch user guide

IDEAL

IDEAL Touch user guide

Nortek Security & Control Gocontrol GC-TBZ48L Installation & operation guide

Nortek Security & Control

Nortek Security & Control Gocontrol GC-TBZ48L Installation & operation guide

Tekmar 510 User brochure

Tekmar

Tekmar 510 User brochure

Aprilaire 8800 System installation manual

Aprilaire

Aprilaire 8800 System installation manual

Theben RAMSES 812 BLE manual

Theben

Theben RAMSES 812 BLE manual

ENDA ETC1311 manual

ENDA

ENDA ETC1311 manual

manuals.online logo
manuals.online logoBrands
  • About & Mission
  • Contact us
  • Privacy Policy
  • Terms and Conditions

Copyright 2025 Manuals.Online. All Rights Reserved.