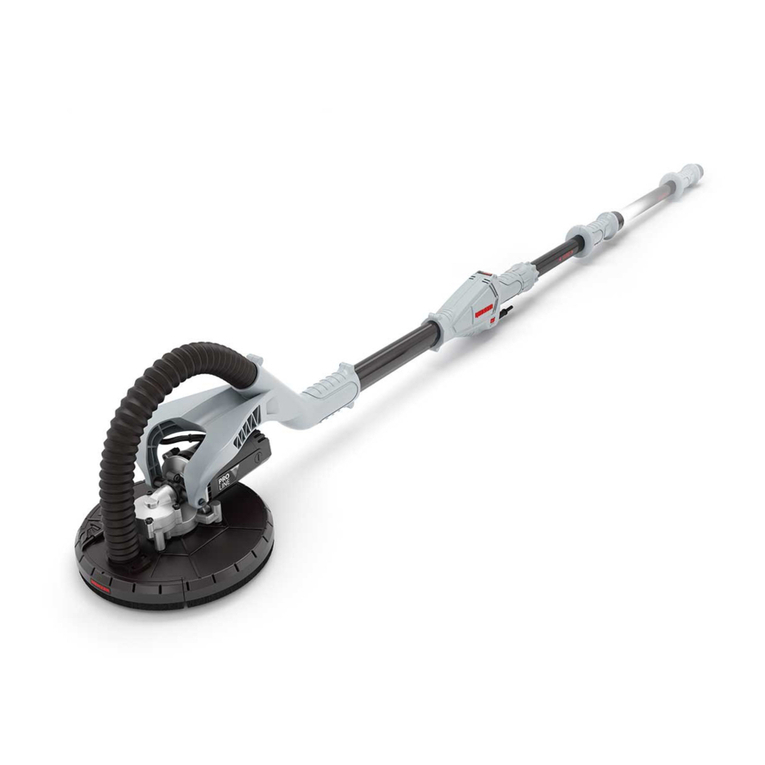
Menzer LHS 225 VARIO User manual

ČEŠTINAfrANçAIs dEuTschENglIshNEdErlANdsPOlsKI EsPAÑOlITAlIANO
sPEcIÁlNÍ ruČNÍ BrusKA s dlOuhÝM KrKEM
lANghAlsschlEIfEr
lONg-NEcK sANdEr
lIJAdOrA dE cuEllO lArgO
PONcEusE lONg cOu
lEVIgATrIcE A cOllO luNgO
lANghAlsschuurMAchINE
szlIfIErKA z długą szyJą
MAȘINĂ dE ȘlEfuIT PErEȚII cu cAPĂT luNg
ŠPEcIÁlNA ruČN Á BrÚsKA s dlhÝM KrKOM
Návod k použití
Originalbetriebsanleitung
Original instructions
Mode d’emploi
Manual original
Istruzioni originali per l’uso
Oorspronkelijke gebruiksaanwijzing
Tłumaczenie oryginalnej instrukcji
Instrucțiuni de utilizare originale
Návod na použitie
rOMâNĂslOVENČINA

SEZNAM
1. TECHNICKÉ ÚDAJE CZ 3
2. BEZPEČNOSTNÍ PŘEDPISY CZ 3
2.1 Připojení do elektrické sítě CZ 3
2.2 Pracovní předpisy CZ 3
2.3 Obsluha CZ 4
3. PROVOZ CZ 5
3.1 Uvedení do provozu CZ 5
3.2 Příprava k pracovnímu nasazení CZ 5
3.2.1 Připojení vysavače prachu CZ 5
3.2.2 Práce s bruskou CZ 5
3.2.3 Broušení stěn a stropů CZ 6
3.2.4 Výměna brusného kotouče CZ 6
3.2.5 Úprava pracovní šířky CZ 6
4. USKLADNĚNÍ CZ 6
5. ÚDRŽBA CZ 7
5.1 Odstranění závad CZ 7
5.2 Výměna brusného talíře CZ 7
5.3 Výměna kartáčového věnce CZ 7
6. STROJE DETAILY CZ 8
7. ES PROHLÁŠENÍ O SHODĚ CZ 10
8. ZÁRUČNÍ PODMÍNKY CZ 11
Milý zákazníku,
Ruční bruska MENZER LHS 225 VARIO s dlouhým krkem, pro kterou jste se rozhodli, je vysoce hodnotný
produkt. Za důvěru v nás vloženou Vám děkujeme a věříme, že s naším výrobkem budete plně spokojeni.
Než začnete s bruskou pracovat, přečtěte si prosím pozorně následující návod k použití a s ním související
bezpečnostní předpisy. To Vám zaručuje optimální výsledek Vaší práce. Dodržování bezpečnostních před-
pisů Vás ochrání před úrazem způsobeným nesprávným použitím této brusky.
Váš tým rmy MENZER
MENZER LHS 225 VARIO
SPECIÁLNÍ RUČNÍ BRUSKA S DLOUHÝM KRKEM
Návod k použití
Verze 1.3.2
ČEŠTINA

SEZNAM
1. TECHNICKÉ ÚDAJE CZ 3
2. BEZPEČNOSTNÍ PŘEDPISY CZ 3
2.1 Připojení do elektrické sítě CZ 3
2.2 Pracovní předpisy CZ 3
2.3 Obsluha CZ 4
3. PROVOZ CZ 5
3.1 Uvedení do provozu CZ 5
3.2 Příprava k pracovnímu nasazení CZ 5
3.2.1 Připojení vysavače prachu CZ 5
3.2.2 Práce s bruskou CZ 5
3.2.3 Broušení stěn a stropů CZ 6
3.2.4 Výměna brusného kotouče CZ 6
3.2.5 Úprava pracovní šířky CZ 6
4. USKLADNĚNÍ CZ 6
5. ÚDRŽBA CZ 7
5.1 Odstranění závad CZ 7
5.2 Výměna brusného talíře CZ 7
5.3 Výměna kartáčového věnce CZ 7
6. STROJE DETAILY CZ 8
7. ES PROHLÁŠENÍ O SHODĚ CZ 10
8. ZÁRUČNÍ PODMÍNKY CZ 11
Milý zákazníku,
Ruční bruska MENZER LHS 225 VARIO s dlouhým krkem, pro kterou jste se rozhodli, je vysoce hodnotný
produkt. Za důvěru v nás vloženou Vám děkujeme a věříme, že s naším výrobkem budete plně spokojeni.
Než začnete s bruskou pracovat, přečtěte si prosím pozorně následující návod k použití a s ním související
bezpečnostní předpisy. To Vám zaručuje optimální výsledek Vaší práce. Dodržování bezpečnostních před-
pisů Vás ochrání před úrazem způsobeným nesprávným použitím této brusky.
Váš tým rmy MENZER
MENZER LHS 225 VARIO
SPECIÁLNÍ RUČNÍ BRUSKA S DLOUHÝM KRKEM
Návod k použití
Verze 1.3.2
CZ 3
Návod k použití a údržbě speciální brusky s dlouhým krkem (držákem) má uživatele seznámit s její konstruk-
cí, jejími technickými předpoklady, její obsluhou při bezpečném provozu, správnou údržbou, její případnou
opravou, uskladněním a použitím. Použití a provoz brusky MENZER LHS 225 VARIO se děje na vlastní ne-
bezpečí a zodpovědnost provozovatele. Tento návod k použití a v něm obsažené bezpečnostní předpisy je
třeba dodržovat a pečlivě uložit k pozdějšímu nahlédnutí.
1. TECHNICKÉ ÚDAJE
Model: MENZER LHS 225 VARIO
Napětí: 230 V ~ 50 Hz / 110 V ~ 50 Hz
Výkon: 710 W
Otáčky: 1.000–2.100 min-1
Brusný talíř: Ř 225 mm
Váha: 4,9 kg
2. BEZPEČNOSTNÍ PŘEDPISY
Bruska MENZER LHS 225 VARIO je určena pro rekonstrukční práce a broušení nejrůznějších nátěrů, laků, tme-
lů a dřevěných obkladů stěn a stropů. Bruska byla vyvinuta pro kombinaci s průmyslovým vysavačem prachu.
2.1 PŘIPOJENÍ DO ELEKTRICKÉ SÍTĚ
• Kabel brusky smí být připojen pouze do zásuvky s napětím, které je vyznačeno na štítku brusky.
• Nedopusťte, aby se bruska dostala do kontaktu s vodou takovým způsobem, že by došlo v ústrojí brusky
ke krátkému spojení s nebezpečím poškození brusky a obsluhujícího personálu zásahem napětí.
• Udržujte síťový kabel brusky k zásuvce v bezpečné vzdálenosti od brusného talíře tak, aby nedošlo k po-
škození pláště tohoto kabelu. Vyvarujte se změn zástrčky nebo jiných částí elektrického přívodu brusky.
• Prodlužovací kabel se zásuvkovou lištou by měl být takového typu.
• Elektrický kabel brusky nepoužívejte za účelem přenášení nebo pověšení brusky. Netahejte za kabel,
chcete-li brusku odpojit z el. sítě. Udržujte kabel v bezpečné vzdálenosti od ostrých hran, horkých před-
mětů a olejů.
• V případě poškození připojovacího kabelu nechte kabel opravit nebo vyměnit odborným personálem.
Brusku s poškozeným kabelem nepoužívejte.
2.2 PRACOVNÍ PŘEDPISY
• Pro zabránění úrazu zajistěte dobré větrání a osvětlení pracoviště. Pro snížení prašnosti připojte vhodný
vysavač prachu.
• V případě, že na pracovišti hrozí exploze v důsledku husté koncentrace prachu, plynu nebo jiných příčin,
je zakázáno v tomto prostředí s bruskou pracovat. Exploze vzniklá brusnou jiskrou může ohrozit život.
ČEŠTINA
ČEŠTINA

4 CZ CZ 5
3. PROVOZ
3.1 UVEDENÍ DO PROVOZU
Pro první uvedení brusky do provozu nebo její přepravu proveďte následující úkony.
• Připojte na brusku vysavač prachu a zkontrolujte, zda má vhodný sběrný vak pro jemný brusný prach.
• Zjistěte, zda připojovací el. kabel a všechny přístroje spojené s bruskou (např. vysavač) jsou v dobrém,
neporušeném stavu.
• Zajistěte, aby se připojovací el. kabel a hadice nedostaly do dosahu brusného kotouče.
• Připevněte vhodný brusný kotouč na talíř brusky.
• Držte brusku pevně oběma rukama za trubku nebo její speciální držák. Konstrukce brusky vám umožňuje
vodit ji v každém místě krku a případně tento držák upevnit v různých polohách tak, abyste mohli změnit
účinnost páky a dosah.
3.2 PŘÍPRAVA K PRACOVNÍMU NASAZENÍ
3.2.1 Připojení vysavače prachu
• Podle návodu použitého vysavače připevněte sběrný vak prachu.
• Uvědomte si, že použití nevhodného vysavače může zvýšit koncentraci brusného prachu na pracovišti
takovým způsobem, že může způsobit poškození dýchacích cest obsluhujícího personálu.
• Hadici průmyslového vysavače napojte jednou stranou na samotný vysavač a druhou stranu spojte s ta-
lířem brusky. Doručujeme spojit elektrický kabel brusky souběžně s pružnou hadicí vysavače tak, abyste
zabránili jejich vzájemnému zamotání.
3.2.2 Práce s bruskou
Než připojíte brusku k el. síti, musí být elektrický spínač brusky v poloze „O“. Po zajištění všech bezpečnostních
opatření a přípravě vysavače s bruskou k provozu zapněte nejprve vysavač a následně brusku. V případě, že
použijete vysavač s automatickým náběhem, stačí pro následný provoz broušení zapnout pouze brusku.
Zapnutí obou přístrojů:
Zapněte nejprve spínač vysavače. Držte brusku levou rukou za trubku nebo za připevněný speciální držák a
pravou rukou pevně za hlavní držák. Leváci samozřejmě opačně. Zapněte el. spínač do polohy „I“ a zároveň
počítejte s točivým momentem.
Vypnutí brusky:
Posuňte el. spínač do polohy „O“. Počítejte s tím, že brusný kotouč ještě po vypnutí dobíhá, a proto odložte
brusku až po jejím úplném zastavení.
Nastavení rychlosti otáček:
Rychlost rotace brusky lze stupňovitě nastavit otočením regulátoru otáček. To lze provádět i během pra-
covního procesu. Vyšší rychlost otáček umožňuje rychlejší broušení, zatímco nižší rychlost lepší kontrolu
nad kvalitou broušení.
• Nedopusťte, aby se na vašem pracovišti zdržovaly nepovolané osoby (zvláště děti), které by během brou-
šení rušili vaši koncentraci.
• V případě, že během broušení nepřipojíte vysavač prachu, mělo by být pracovní prostředí dobře větráno,
aby bylo zatížení prachem co nejmenší.
2.3 OBSLUHA
• Předmětná bruska s dlouhým krkem by měla být užívána pouze vyškoleným personálem, který pozorně
přečetl návod k její obsluze a údržbě a porozuměl mu. Brusku neobsluhujte pod vlivem alkoholu, drog a
léků, které by snižovaly vaši koncentraci.
• Použijte průmyslový vysavač s vakem sběrače prachu zároveň s povolenou standardní maskou na ochra-
nu proti vdechování prachu a výparů. Dále je nutné použít ochranný oděv, ochranné brýle a pracovní boty,
které sníží riziko úrazu!
• K prevenci úrazů zajistěte, aby po připojení brusky k el. síti nedošlo k nežádoucímu nečekanému zapnutí
brusky. K tomu je nutné z pracovního dosahu brusky odstranit jiná nářadí.
• Aby se předešlo poškození brusky, je třeba před jejím použitím odstranit z brusných ploch hřebíky, šrou-
by a jiné kovové předměty
• Touto bruskou bruste výhradně suché plochy.
• Při práci se snažte o stabilní postavení (pevný kontakt s podlahou a dobrou rovnováhu) a nepracujte ve
velké vzdálenosti nad hlavou, aby jste neztratili rovnováhu.
• Brusku držte vždy oběma rukama, jinak hrozí, že nad ní ztratíte kontrolu a dojde ke zranění obsluhy nebo
jiné škodě.
• Své ruce, vlasy, nohy a nepřiléhavé nebo vlající části oděvu držte v bezpečné vzdálenosti od brus-
ného talíře.
• Zajistěte, aby předmětná bruska neobsahovala žádné závadné nebo poškozené části, její pohybové
části bezchybně fungovaly a žádné díly nebyly zlomené nebo prasklé. V opačném případě je funkce
brusky snížena.
• Dbejte na to, aby byl přívodní kabel v bezpečné vzdálenosti od broušené plochy.
• Při broušení částí obsahujících olovo se uvolňuje vysoce jedovatá substance, a proto se jejich broušení
nedoporučuje nebo by je měli provádět specialisté s odpovídajícím vybavením. Nebruste žádné materiály,
které obsahují azbest!
• Po vypnutí brusky čekejte s jejím odložení až do okamžiku, kdy se brusný talíř zastaví. Skladujte brusku
vždy v suchých prostorách; během pracovní přestávky nebo její opravy vytáhněte kabel ze sítě.
• Ihned vypněte brusku v případě, že uslyšíte nezvyklé zvuky nebo když přístroj začne vibrovat. Případnou
závadu nechte opravit kvalikovaným personálem.
ČEŠTINA
ČEŠTINA

6 CZ CZ 7
5. ÚDRŽBA
Všechny vzduchové průduchy a hnací části je třeba udržovat čisté a po každém použití očistit proudem
vzduchu. Při čištění proudem vzduchu používejte ochranné brýle. Části z umělé hmoty se vyčistěte vlhkou
utěrkou. K čištění nikdy neužívejte chemické prostředky.
5.1 ODSTRANĚNÍ ZÁVAD
Možná příčina Možná příčina Odstranění
1. Bruska je příliš hlučná.
2. Bruska silně vibruje.
Brusný talíř nebo brusný kotouč
nejsou správně připevněny.
Upevněte brusný talíř a brusný
kotouč správným způsobem
(vystřěděně).
Bruska produkuje příliš brusné-
ho prachu.
1. Trubice vysavače je ucpaná.
2. Prašný vak vysavače je příliš
plný.
1.
Vyčistěte ucpanou trubici.
2.
Vyprázdnite prachový vak.
Motor běží, ale nedosáhne
nastavených otáček.
Příliš tlačíte na brusnou hlavu. Zmírněte tlak.
5.2 VÝMĚNA BRUSNÉHO TALÍŘE
Nejprve se přesvědčte, zda je bruska odpojena z el. sítě. Zbytky brusného prachu odstraňte, nejlépe prou-
dem vzduchu. Brusný talíř je třeba držet společně s tělem brusky. Imbusovým klíčem zaxujte hřídel se
závitem ve středu brusného talíře. Nyní brusným talířem otáčejte proti směru hodinových ručiček, dokud
se neuvolní.
5.3 VÝMĚNA KARTÁČOVÉHO VĚNCE
Brusnou hlavu obepíná kartáčový věnec, který při broušení zadržuje podstatnou část brusného prachu
v hlavě brusky a je vstřebán připojeným vysavačem. V případě jeho opotřebení nebo poškození je třeba
ho vyměnit.
Při výměně kartáčového věnce odstraňte z brusného talíře brusný prostředek. Odstraňte šrouby, odstraňte
šrouby držící věnec a poté ho sejměte. Nasaďte nový kartáčový věnec a připevněte ho původními šrouby.
Následně obnovte brusné prostředky.
3.2.3 Broušení stěn a stropů
Brusku držte vždy oběma rukama.
Broušení začněte opatrným nasazením brusného kotouče na opracovávanou plochu. Brusný kotouč tlačte
na opracovávanou část pouze tak, aby lícovala s povrchem. Přílišný tlak způsobuje spirálovité škrábance
a nerovnosti na broušené ploše a může brusku trvale poškodit. Doporučuje se plynulé, kruhové vedení
brusné hlavy po brusné ploše. Delší spočinutí brusné hlavy na jednom místě způsobí hlubší stopy na
broušeném místě.
3.2.4 Výměna brusného kotouče
Pred výmenou brúsneho kotúča odpojte brúsku od prívodu el. prúdu. Odstráňte použitý brúsny kotúč a na
jeho miesto doprostred zatlačte nový kotúč. Brúsny kotúč drží pomocou upínacieho systému na mieste.
Pre každú prácu zvoľte vhodnú hrubosť brúsneho kotúča. Uvedomte si, že hrubý kotúč sťaží kontrolovanú
kvalitu brúsenia, zatiaľ čo v prípade jemného kotúča dochádza k jeho rýchlemu opotrebovaniu.
3.2.5. Úprava pracovní šířky
Pracovní délku brusky MENZER LHS 225 VARIO lze volně nastavit v rozmezí od 1.350 do 1.900 mm. Za tímto
účelem uvolněte xační kroužek na hlavní trubici tak, abyste mohli vysunout nebo zasunout teleskopickou
tyč. Nyní nastavte požadovanou délku a xační kroužek opět pevně utáhněte.
4. USKLADNĚNÍ
Bruska nesmí být vystavena vlhku. Před uskladněním je třeba brusku odpojit z elektrické sítě a přívodní
kabel nepoužívat k jejímu zavěšení. Uskladněte brusku vždy v příslušné tašce v bezpečné vzdálenosti z
dosahu dětí.
ČEŠTINA
ČEŠTINA

8 CZ CZ 9
6. STROJE DETAILY
KARTÁČOVÝ VĚNEC
BRUSNÝ TALÍŘ
KRYT MOTORU
ODSÁVACÍ HADICE PRO
BRUSNOU HLAVU
PRUŽNÁ SACÍ HADICE
SPECIÁLNÍ RUKOJEŤ
ADAPTER PRO VYSAVAČ
TRUBICE
KRYT BRUSNÉ HLAVY
KRYT ELEKTRONICKÉ ČÁSTI
ČEŠTINA
ČEŠTINA

10 CZ CZ 11
7. ES PROHLÁŠENÍ O SHODĚ
Tímto prohlašujeme, že níže označené stroje odpovídají jejich základní koncepcí a konstrukčním provede-
ním, stejně jako námi do provozu uvedenými konkrétními provedeními, příslušným zásadním požadavkům
o bezpečnosti a ochraně zdraví směrnic ES. Při jakýchkoli na stroji provedených změnách, které nebyly
námi odsouhlaseny, pozbývá toto prohlášení svou platnost.
Výrobek: Brúska
Typ: MENZER LHS 225 VARIO
Příslušné směrnice ES
2004/108/ES
2006/42/ES
Použité harmonizační normy
EN 55014-1: 2006 + A1: 2009
EN 55014-2: 1997 + A1: 2001 + A2: 2008
EN 61000-3-2: 2006 + A1: 2009 + A2: 2009
EN 61000-3-3: 2008
EN 60745-1: 2009
EN 60745-2-3: 2007 + A11: 2009
Použité národní normy
-
Torsten Ceranski
Jednatel
Taucha, 01/09/2013
CGL GmbH
Straße des 17. Juni 4
04425 Taucha
Německo
Při pořízení elektrických strojů a přístrojů MENZER poskytuje výrobce konečnému zákazníkovi 2 roky zá-
ruky od data nákupu.
Garantujeme, že naše elektrické nářadí nevykazuje žádné materiálové ani výrobní vady. Vyskytne-li se pří-
pad, kdy tomu tak není, provedeme v rámci naší výrobní záruky bezplatnou opravu, popř. vyměníme vadný
díl zdarma. Uznání dalších nároků, pokud ručení není stanoveno zákonem, je vyloučeno. Uplatnění záruční-
ho plnění neprodlužuje záruční lhůtu.
Výrobní záruka rmy MENZER bude poskytnuta za předpokladu, že bylo elektrické nářadí používáno v sou-
ladu s návodem k obsluze. Nárok na záruku lze uplatnit pouze v rámci záruční lhůty po předložení přístroje
v nerozloženém originálním stavu spolu s kopií dokladu o koupi. Nevyplaceně zaslané zásilky zásadně
nepřijímáme! Mějte, prosím, pochopení, že nevyplacenou zásilku a stroje bez objednávky opravy z logistic-
kých důvodů nelze přijímat. Veškeré informace a rovněž formulář pro přidělení objednávky opravy najdete
na adrese, viz níže:
www.menzer-tools.com > Služby
e-mail: [email protected]
telefon: +49 342 98 74 14 15
Nárok na záruku se vztahuje pouze na nářadí používané v souladu s jeho určením a ze záruky jsou vyloučeny
především:
• Díly, které podléhají provoznímu opotřebení
• Závady na základě nevhodného používání nebo nedodržování návodu k obsluze
• Demontovaná elektrická nářadí
• Škody způsobené přetížením elektrického přístroje
• Škody na základě používání nepovolených, vadných nebo nesprávně používaných částí příslušenství
• Škody, které byly způsobeny elektrickým nářadím
• Škody vzniklé používáním násilí
• Následné škody, vzniklé nevhodnou a nedostatečnou údržbou ze strany zákazníka nebo třetí osoby
• Poškození cizím zaviněním, resp. cizími tělesy
Záruční opravy mohou provádět výhradně servisní střediska rmy MENZER.
Tímto prohlášením o záruce nejsou dotčeny zákonné, resp. smluvní nároky na záruční plnění.
8. ZÁRUČNÍ PODMÍNKY
ČEŠTINA
ČEŠTINA

Version 1.3.2
INHALTSVERZEICHNIS
1. TECHNISCHE DATEN DE 3
2. SICHERHEITSHINWEISE DE 3
2.1 Elektrische Anschlüsse DE 3
2.2 Arbeitsumgebung DE 3
2.3 Bedienung DE 4
3. BETRIEB DE 5
3.1 Inbetriebnahme DE 5
3.2 Arbeitsbetrieb DE 5
3.2.1 Anschluss eines Industriesaugers DE 5
3.2.2 Betrieb des Langhalsschleifers DE 5
3.2.3 Schleifen von Wänden und Decken DE 6
3.2.4 Wechsel der Schleifscheibe DE 6
3.2.5 Anpassen der Arbeitslänge DE 6
4. LAGERUNG DE 6
5. INSTANDHALTUNG DE 6
5.1 Fehlerbehebung DE 7
5.2 Austausch des Schleiftellers DE 7
5.3 Austausch des Bürstenkranzes DE 7
6. MASCHINENDETAILS DE 8
7. CE-ERKLÄRUNG DE 10
8. GARANTIEBEDINGUNGEN DE 11
MENZER LHS 225 VARIO
LANGHALSSCHLEIFER
Originalbetriebsanleitung
Lieber Kunde,
mit dem Langhalsschleifer MENZER LHS 225 VARIO haben Sie sich für ein hochwertiges Produkt entschie-
den. Wir möchten uns bei Ihnen für das entgegengebrachte Vertrauen bedanken.
Bitte beachten Sie die Bedienungs- und Sicherheitshinweise auf den nachfolgenden Seiten, bevor Sie zum
ersten Mal mit dem Gerät arbeiten. Ein genaues Lesen garantiert Ihnen zudem ein optimales Arbeitsergeb-
nis. Die Sicherheitshinweise sollen Sie vor Unfällen durch unsachgemäße Benutzung des Langhalsschlei-
fers schützen.
Ihr MENZER-Team
dEuTsch

Version 1.3.2
INHALTSVERZEICHNIS
1. TECHNISCHE DATEN DE 3
2. SICHERHEITSHINWEISE DE 3
2.1 Elektrische Anschlüsse DE 3
2.2 Arbeitsumgebung DE 3
2.3 Bedienung DE 4
3. BETRIEB DE 5
3.1 Inbetriebnahme DE 5
3.2 Arbeitsbetrieb DE 5
3.2.1 Anschluss eines Industriesaugers DE 5
3.2.2 Betrieb des Langhalsschleifers DE 5
3.2.3 Schleifen von Wänden und Decken DE 6
3.2.4 Wechsel der Schleifscheibe DE 6
3.2.5 Anpassen der Arbeitslänge DE 6
4. LAGERUNG DE 6
5. INSTANDHALTUNG DE 6
5.1 Fehlerbehebung DE 7
5.2 Austausch des Schleiftellers DE 7
5.3 Austausch des Bürstenkranzes DE 7
6. MASCHINENDETAILS DE 8
7. CE-ERKLÄRUNG DE 10
8. GARANTIEBEDINGUNGEN DE 11
MENZER LHS 225 VARIO
LANGHALSSCHLEIFER
Originalbetriebsanleitung
Lieber Kunde,
mit dem Langhalsschleifer MENZER LHS 225 VARIO haben Sie sich für ein hochwertiges Produkt entschie-
den. Wir möchten uns bei Ihnen für das entgegengebrachte Vertrauen bedanken.
Bitte beachten Sie die Bedienungs- und Sicherheitshinweise auf den nachfolgenden Seiten, bevor Sie zum
ersten Mal mit dem Gerät arbeiten. Ein genaues Lesen garantiert Ihnen zudem ein optimales Arbeitsergeb-
nis. Die Sicherheitshinweise sollen Sie vor Unfällen durch unsachgemäße Benutzung des Langhalsschlei-
fers schützen.
Ihr MENZER-Team
DE 3
Die Bedienungs- und Wartungshinweise sollen den Benutzer des Langhalsschleifers mit dem Aufbau, den
technischen Voraussetzungen, dem Bedienen zum sicheren Gebrauch, der richtigen Wartung, Reparatur,
Lagerung und Anwendung vertraut machen. Der Betrieb des Gerätes geschieht auf eigene Gefahr und
Verantwortung. Diese Bedienungsanleitung und die darin enthaltenen Sicherheitshinweise sollten sorgfältig
aufbewahrt werden.
1. TECHNISCHE DATEN
Modell: MENZER LHS 225 VARIO
Spannung: 230 V ~ 50 Hz / 110 V ~ 50 Hz
Leistung: 710 W
Drehzahl: 1.000–2.100 min-1
Schleifteller: Ø 225 mm
Gewicht: 4,9 kg
2. SICHERHEITSHINWEISE
Der Langhalsschleifer MENZER LHS 225 VARIO wurde für Renovierungsarbeiten entwickelt und ist
für das Schleifen von jeglichem Wand- und Deckenmaterial, Farben, Lacken, Spachtelmassen sowie
Holzoberächen geeignet. Er wurde speziell für den Einsatz in Verbindung mit einem Industriesauger für
Feinstaub entwickelt.
2.1 ELEKTRISCHE ANSCHLÜSSE
• Die Maschine darf nur an Steckdosen angeschlossen werden, deren Spannung mit der auf dem Typen-
schild der Maschine angegebenen Spannung übereinstimmt.
• Vermeiden Sie, dass der Langhalsschleifer mit Wasser, etwa durch Regen oder sonstige Nässe, in Kon-
takt kommt, da durch das Eintreten von Wasser die Gefahr eines Kurzschlusses besteht und die Maschine
nachhaltig beschädigt werden kann. Zudem besteht für den Benutzer in diesem Fall Stromschlaggefahr.
• Halten Sie das Anschlusskabel vom Schleifteller fern, damit es nicht mit dem Schleifmittel in Berührung
kommt und so Schäden an der Ummantelung des Kabels entstehen. Nehmen Sie nie Änderungen am
Stecker oder anderen Teilen mit elektrischem Kontakt vor.
• Sollten Sie ein Verlängerungskabel benötigen, so muss dieses über einen ausreichenden Leitungsquer-
schnitt verfügen.
• Benutzen Sie das Anschlusskabel nicht dazu, den Langhalsschleifer zu tragen oder um das Gerät daran
aufzuhängen. Ziehen Sie nicht an dem Kabel, wenn Sie den Schleifer vom Stromnetz trennen wollen.
Halten Sie das Kabel von scharfen Kanten, Hitze, Öl und anderen Chemikalien fern.
• Lassen Sie schadhafte Anschlusskabel von speziell ausgebildetem Fachpersonal wechseln und nehmen
Sie den Schleifer nicht in Betrieb, wenn eine Beschädigung an dem Anschlusskabel vorliegt.
2.2 ARBEITSUMGEBUNG
• Stellen Sie sicher, dass Ihr Arbeitsplatz stets gut belüftet und beleuchtet ist, um Unfälle zu vermeiden.
Schließen Sie zur Verringerung der Staubbelastung einen passenden Industriesauger an.
dEuTsch
dEuTsch

4 DE DE 5
3. BETRIEB
3.1 INBETRIEBNAHME
Folgende Arbeitsschritte müssen Sie durchführen, wenn Sie zum ersten Mal mit der Maschine arbeiten
wollen oder diese transportiert haben:
• Schließen Sie einen Industriesauger an den Langhalsschleifer an und überprüfen Sie, ob ein für Feinstaub
geeigneter Staubsack im Industriesauger eingelegt ist.
• Überprüfen Sie, ob die Anschlusskabel des Langhalsschleifers und aller mit der Maschine verbundenen
Geräte (z. B. Industriesauger) intakt und unbeschädigt sind.
• Stellen Sie sicher, dass Anschlusskabel und Schläuche nicht in den Arbeitsbereich gelangen können.
• Bringen Sie eine passende Schleifscheibe auf dem Schleifteller des Langhalsschleifers an.
• Halten Sie den Langhalsschleifer mit beiden Händen am Rohr oder am Extragriff fest. Sie können den
Langhalsschleifer an jeder Stelle des Hauptrohres führen bzw. den Extragriff an verschiedenen Positio-
nen montieren, um den Hebel und die Reichweite zu variieren.
3.2 ARBEITSBETRIEB
3.2.1 Anschluss eines Industriesaugers
• Setzen Sie einen Staubsack für Feinstaub gemäß den Hinweisen der Industriesaugeranleitung ein.
• Beachten Sie, dass die Verwendung eines ungeeigneten Industriesaugers die Konzentration der Staub-
partikel in der Arbeitsumgebung so stark erhöhen kann, dass Schädigungen der Atmungsorgane auftre-
ten können.
• Schließen Sie das eine Ende des exiblen Saugschlauchs an den Industriesauger an, das andere Ende
wird mit dem Langhalsschleifer verbunden. Es ist zu empfehlen, das Anschlusskabel und den exiblen
Saugschlauch parallel zu führen und miteinander zu xieren, um eine Verwicklung zu vermeiden.
3.2.2 Betrieb des Langhalsschleifers
Stellen Sie vor Anschluss des Langhalsschleifers an die Steckdose sicher, dass der Geräteschalter auf „O“
steht. Sobald alle Sicherheitsvorkehrungen getroffen und Industriesauger sowie Schleifgerät betriebsbereit
sind, können Sie zuerst den Industriesauger und dann den Langhalsschleifer einschalten; wenn Sie einen
Industriesauger mit automatischem Anlauf verwenden, müssen Sie nur den Schleifer einschalten.
Einschalten:
Schalten Sie gegebenenfalls zuerst den Industriesauger ein. Halten Sie den Langhalsschleifer mit der linken
Hand am Rohr bzw. am Extragriff und der rechten am Hauptgriff fest. Linkshänder sollten die Haltepositi-
onen jeweils vertauschen. Drücken Sie den Schalter auf „I“. Rechnen Sie mit einer Drehwirkung durch die
Inbetriebnahme.
• Sollte durch Schleifstaub oder andere Umstände (z. B. durch brennbare Flüssigkeiten oder Gase) eine
Explosionsgefahr im Arbeitsbereich bestehen, dürfen Sie nicht mit dem Langhalsschleifer arbeiten. Ein
möglicher Funkenschlag könnte lebensgefährliche Folgen haben.
• Achten Sie darauf, dass sich keine weiteren Personen (insbesondere Kinder) an Ihrem Arbeitsplatz auf-
halten, durch die Sie während des Schleifens abgelenkt werden könnten.
• Wenn Sie keinen Industriesauger an den Langhalsschleifer anschließen, sollten Sie während des Schleif-
vorganges Ihren Arbeitsplatz gut lüften, damit die Staubbelastung verringert wird.
2.3 BEDIENUNG
• Der Langhalsschleifer sollte nur von ausgebildeten Fachkräften verwendet werden, die die Bedienungs-
und Wartungshinweise in diesem Heft aufmerksam gelesen und verstanden haben, den Umgang mit
der Maschine kennen und die nicht unter dem Einuss von Alkohol, Drogen oder Medikamenten stehen.
• Verwenden Sie immer einen Industriesauger mit einem Sammelbeutel für Feinstaub sowie eine genehmig-
te Atemschutzmaske, die Schutz gegen Staub und Dunst gewährt! Ein längeres Einatmen von Baustaub
kann sich negativ auf die Atemorgane auswirken. Zur Verringerung des Verletzungsrisikos verwenden Sie
außerdem Sicherheitskleidung, eine Schutzbrille sowie rutschfeste Arbeitsschuhe.
• Zur Vermeidung von Unfällen stellen sie vor jedem Anschluss der Maschine an eine Steckdose sicher,
dass ein unbeabsichtigtes Einschalten des Schleifers nicht möglich ist. Außerdem sind alle anderen
Werkzeuge aus dem Arbeitsbereich des Langhalsschleifers zu entfernen.
• Um Beschädigungen des Schleiftellers zu vermeiden, müssen vor Beginn des Schleifens alle Nägel, Schrau-
ben oder andere Metallgegenstände in die Bearbeitungsäche versenkt oder von dieser entfernt werden.
• Benutzen Sie den Langhalsschleifer ausschließlich für die Bearbeitung von trockenen Flächen.
• Sorgen Sie für einen sicheren Stand (guter Bodenkontakt und ein sicheres Gleichgewicht) und arbeiten
Sie nicht zu weit über Kopf, weil Sie das Gleichgewicht verlieren könnten.
• Halten Sie das Gerät immer mit beiden Händen, da sonst ein Kontrollverlust über das Werkzeug möglich
ist und Schäden entstehen können.
• Halten Sie Ihre Hände, Haare, Füße und nicht anhaftenden Kleidungsstücke vom Schleifteller fern.
• Stellen Sie sicher, dass am Werkzeug kein Schalter defekt ist, bewegliche Teile einwandfrei funktionieren
und keine Teile an- oder abgebrochen sind. Die Funktion des Langhalsschleifers wäre sonst beeinträchtigt.
• Achten Sie darauf, dass sich das Anschlusskabel stets außerhalb der aktuell zu bearbeitenden Flä-
che bendet.
• Das Abschleifen bleihaltiger Anstriche ist in hohem Maße giftig und sollte daher vermieden werden, bzw.
nur von Fachleuten mit entsprechender Ausrüstung durchgeführt werden.
• Warten Sie nach dem Abschalten des Werkzeuges, bis der Schleifteller zum Stillstand gekommen ist. Le-
gen Sie das Gerät erst dann ab. Lagern Sie den Langhalsschleifer immer in trockenen Räumen; während
der Arbeitspausen und für Reparaturen sollten Sie die Maschine ausschalten und vom Stromnetz trennen.
• Schalten Sie das Gerät sofort aus, wenn unübliche Geräusche zu hören sind oder ungewöhnliche Vibrati-
onen auftreten. Lassen Sie defekte Geräte nur von qualiziertem Personal reparieren.
dEuTsch
dEuTsch

6 DE DE 7
5.1 FEHLERBEHEBUNG
Problem Mögliche Ursache Beseitigung
1. Die Maschine produziert zu
viel Lärm.
2. Die Maschine vibriert
zu stark.
Der Schleifteller oder das
Schleifmittel sind eventuell nicht
richtig befestigt.
Befestigen Sie den Schleifteller
und die Scheibe ordnungsge-
mäß (zentriert).
Die Maschine produziert
zu viel Staub.
1. Das Absaugrohr ist verstopft.
2. Der Staubbeutel des Indus-
triesaugers ist zu voll.
1. Reinigen Sie das Absaug-
system.
2. Leeren Sie den Beutel.
Der Motor läuft, erreicht aber
nicht die angegebene Drehzahl.
Der Schleifteller wird
möglicherweise zu fest
aufgedrückt.
Üben Sie weniger Druck auf das
Gerät aus.
5.2 AUSTAUSCH DES SCHLEIFTELLERS
Vergewissern Sie sich, dass der Netzstecker des Schleifers nicht angeschlossen ist. Rückstände von
Baustaub sollten entfernt werden (z. B. mit Druckluft). Der Schleifteller muss zusammen mit dem Gehäuse
festgehalten werden. Fixieren Sie nun die Gewindeachse in der Mitte des Schleiftellers mit einem Innen-
sechskantschlüssel. Jetzt kann der Schleifteller entgegen dem Uhrzeigersinn von der Gewindeachse ge-
dreht und entnommen werden.
5.3 AUSTAUSCH DES BÜRSTENKRANZES
Der Schleifkopf ist von einem Bürstenkranz umgeben. Dieser sorgt dafür, dass der Großteil des Staubes im
Schleifkopf bleibt und so von dem angeschlossenen Industriesauger abgesaugt wird. Wenn der Bürsten-
kranz abgenutzt oder beschädigt wurde, muss er ausgetauscht werden.
Zum Austausch des Bürstenkranzes lösen Sie das Schleifmittel vom Schleifteller. Entfernen Sie die
Schrauben, die den Bürstenkranz festhalten und dann den Bürstenkranz selbst. Bringen Sie den neuen
Bürstenkranz an und schrauben Sie diesen mit den Schrauben fest. Nun können Sie das Schleifmittel
wieder anbringen.
Ausschalten:
Drücken Sie den Schalter auf „O“. Die Schleifscheibe wird nun nachrotieren. Stellen Sie sicher, dass die
Drehbewegung abgeschlossen ist, bevor Sie die Maschine ablegen.
Einstellung der Rotationsgeschwindigkeit:
Die Rotationsgeschwindigkeit kann nach Bedarf über den Drehzahlregler stufenlos eingestellt werden. Dies
ist auch während des Betriebes möglich. Höhere Drehzahlen ermöglichen einen höheren Abtrag, während
niedrigere mehr Kontrolle über den Schleifvorgang gewährleisten.
3.2.3 Schleifen von Wänden und Decken
Halten Sie den Schleifer stets mit beiden Händen.
Beginnen Sie den Schleifvorgang durch vorsichtiges Aufsetzen auf der zu bearbeitenden Oberäche. Drü-
cken Sie nur so fest auf, dass der Schleifkopf gerade und bündig auf der Oberäche auiegt. Zu festes
Andrücken kann spiralförmige Kratzmuster und Unebenheiten auf der Arbeitsäche hervorrufen und zudem
das Werkzeug nachhaltig beschädigen. Zu empfehlen ist eine kreisende Führung des Schleifkopfes über
der Arbeitsäche. Der Schleifer sollte immer in Bewegung bleiben, da zu langes Schleifen an einer Stelle zu
Schleifspuren führt.
3.2.4 Wechsel der Schleifscheibe
Trennen Sie den Schleifer von der Stromzufuhr, bevor Sie das Schleifmittel wechseln. Ziehen Sie nun die
verbrauchte Schleifscheibe vom Klettpad ab und drücken Sie die neue Scheibe zentriert auf. Die Schleif-
scheibe wird durch das Klettsystem an ihrem Platz gehalten. Wählen Sie eine für die Anwendung geeignete
Körnung. Beachten Sie, dass zu grobe Körnungen ein kontrolliertes Abtragen verhindern, während bei zu
feinen Körnungen der Verschleiß an Schleifmitteln zu groß ist.
3.2.5 Anpassen der Arbeitslänge
Die Arbeitslänge des MENZER LHS 225 VARIO lässt sich im Bereich von 1.350 bis 1.900 mm frei verstellen.
Lockern Sie dazu den Feststellring am Hauptrohr, bis Sie das Teleskoprohr ein- oder ausziehen können.
Stellen Sie nun die gewünschte Arbeitslänge ein und drehen Sie den Feststellring wieder fest.
4. LAGERUNG
Die Maschine darf keiner Feuchtigkeit ausgesetzt werden. Das Anschlusskabel ist vor der Einlagerung vom
Stromnetz zu trennen und nicht zum Aufhängen des Werkzeuges zu benutzen. Lagern Sie den Schleifer
stets in der dazugehörigen Tragetasche, außerhalb der Reichweite von Kindern.
5. INSTANDHALTUNG
Alle Luftdurchgänge und Gelenkstücke sind sauber zu halten und nach jedem Gebrauch mit Druckluft zu
reinigen. Tragen Sie dabei eine Schutzbrille. Kunststoffteile sind mit einem weichen und feuchten Tuch zu
reinigen. Verwenden Sie nie Lösungsmittel zur Reinigung.
dEuTsch
dEuTsch

8 DE DE 9
BÜRSTENKRANZ
SCHLEIFTELLER
MOTORGEHÄUSE
ABSAUGSCHLAUCH
FÜR SCHLEIFKOPF
FLEXIBLER SAUGSCHLAUCH
EXTRAGRIFF
SAUGERADAPTER
ROHR
SCHLEIFKOPFGEHÄUSE
ELEKTRONIKGEHÄUSE
6. MASCHINENDETAILS
dEuTsch
dEuTsch

10 DE DE 11
7. CE-ERKLÄRUNG
Hiermit erklären wir, dass die nachfolgend bezeichnete Maschine aufgrund ihrer Konzipierung und Bauart
sowie in der von uns in Verkehr gebrachten Ausführung den einschlägigen grundlegenden Sicherheits- und
Gesundheitsanforderungen der EG-Richtlinien entspricht. Bei einer nicht mit uns abgestimmten Änderung
der Maschine verliert diese Erklärung ihre Gültigkeit.
Produkt: Langhalsschleifer
Typ: MENZER LHS 225 VARIO
Einschlägige EG-Richtlinien
2004/108/EG
2006/42/EG
Angewandte harmonisierte Normen
EN 55014-1: 2006 + A1: 2009
EN 55014-2: 1997 + A1: 2001 + A2: 2008
EN 61000-3-2: 2006 + A1: 2009 + A2: 2009
EN 61000-3-3: 2008
EN 60745-1: 2009
EN 60745-2-3: 2007 + A11: 2009
Angewandte nationale Normen
-
Torsten Ceranski
Geschäftsführer
Taucha, 01/09/2013
CGL GmbH
Straße des 17. Juni 4
04425 Taucha
Deutschland
8. GARANTIEBEDINGUNGEN
Mit dem Erwerb eines MENZER-Elektrowerkzeugs werden dem Endverbraucher 2 Jahre Hersteller-Garantie
ab Kaufdatum gewährt.
Wir garantieren Ihnen, dass unsere Elektrowerkzeuge keine Material- oder Fertigungsfehler aufweisen.
Sollte ein Fall eintreten, in dem dies nicht so ist, nehmen wir im Rahmen unserer Herstellergarantie eine
kostenlose Reparatur bzw. einen kostenlosen Ersatz der defekten Teile vor. Weitergehende Ansprüche sind
– soweit eine Haftung nicht gesetzlich vorgeschrieben ist – ausgeschlossen. Eine Inanspruchnahme von
Garantieleistungen verlängert die Garantiezeit nicht.
Die MENZER-Herstellergarantie wird nur unter der Voraussetzung gewährt, dass das Elektrowerkzeug
entsprechend der Bedienungsanleitung eingesetzt wird. Der Garantieanspruch kann nur geltend gemacht
werden, wenn Sie uns das Elektrowerkzeug innerhalb der Garantiezeit im unzerlegten Originalzustand zu-
sammen mit einer Kopie des Kaufbeleges zukommen lassen. Unfrei versandte Elektrowerkzeuge werden
grundsätzlich nicht angenommen! Bitte haben Sie dafür Verständnis, dass unfreie Einsendungen und Ma-
schinen von denen uns kein Reparaturauftrag vorliegt, aus logistischen Gründen nicht angenommen wer-
den. Alle Informationen sowie das Formular zur Erteilung eines Reparaturauftrages nden Sie unter:
www.menzer-tools.com > Services
E-Mail: service@menzer-tools.de
Telefon: +49 342 98 74 14 15
Ein Garantieanspruch erstreckt sich nur auf die bestimmungsgemäße Verwendung des Elektrowerkzeugs,
ausgeschlossen sind insbesondere:
• Teile, die einem betriebsbedingten Verschleiß unterliegen
• Mängel aufgrund unsachgemäßer Anwendung o. Nichtbeachtung der Bedienungsanleitung
• Demontierte Elektrowerkzeuge
• Schäden durch Überlastung des Elektrowerkzeugs
• Schäden aus der Verwendung von nicht zugelassenen, defekten oder falsch
angewendeten Zubehörteilen
• Schäden, die durch das Elektrowerkzeug verursacht werden
• Schäden durch Gewaltanwendung
• Folgeschäden, die auf unsachgemäße oder ungenügende Wartung oder Instandsetzung seitens des
Kunden oder Dritter zurückzuführen sind
• Beschädigungen durch Fremdeinwirkung bzw. von Fremdkörpern
Garantiereparaturen dürfen ausschließlich von MENZER-Servicewerkstätten durchgeführt werden.
Von der Garantieerklärung bleiben die gesetzlichen bzw. vereinbarten Gewährleistungsansprüche unberührt.
dEuTsch
dEuTsch

TABLE OF CONTENTS
1. TECHNICAL SPECIFICATIONS EN 3
2. SAFETY INSTRUCTIONS EN 3
2.1 Instructions for power safety EN 3
2.2 Safety in your working environment EN 3
2.3 Operating safety tips EN 4
3. OPERATING THE MACHINE EN 5
3.1 Starting off EN 5
3.2 Operating the machine EN 5
3.2.1 Connecting an industrial vacuum cleaner EN 5
3.2.2 Operating the long-neck sander EN 5
3.2.3 Sanding walls and ceilings EN 6
3.2.4 Changing the sanding disc EN 6
3.2.5 Adjusting operating length EN 6
4. STORAGE EN 6
5. MAINTENANCE EN 6
5.1 Troubleshooting EN 7
5.2 Replacing the sanding wheel EN 7
5.3 Replacing the brush rim EN 7
6. MACHINE DETAILS EN 8
7. CE DECLARATION EN 10
8. TERMS OF GUARANTEE EN 11
Dear customer,
By purchasing the MENZER LHS 225 VARIO Long-Neck Sander you have selected a product of the high-
est quality. We would hereby like to express our gratitude for the trust you have shown in us and our tools.
Before using your power tool for the rst time, please take the time to read the operating and safety instruc-
tions on the following pages. Close observance of the information contained here will ensure an optimum
result for your work. The safety warnings are intended to protect you from accidents that could be caused
by improper use of the long-neck sander.
The MENZER Team
MENZER LHS 225 VARIO
LONG-NECK SANDER
Original instructions
Version 1.3.2
ENglIsh

TABLE OF CONTENTS
1. TECHNICAL SPECIFICATIONS EN 3
2. SAFETY INSTRUCTIONS EN 3
2.1 Instructions for power safety EN 3
2.2 Safety in your working environment EN 3
2.3 Operating safety tips EN 4
3. OPERATING THE MACHINE EN 5
3.1 Starting off EN 5
3.2 Operating the machine EN 5
3.2.1 Connecting an industrial vacuum cleaner EN 5
3.2.2 Operating the long-neck sander EN 5
3.2.3 Sanding walls and ceilings EN 6
3.2.4 Changing the sanding disc EN 6
3.2.5 Adjusting operating length EN 6
4. STORAGE EN 6
5. MAINTENANCE EN 6
5.1 Troubleshooting EN 7
5.2 Replacing the sanding wheel EN 7
5.3 Replacing the brush rim EN 7
6. MACHINE DETAILS EN 8
7. CE DECLARATION EN 10
8. TERMS OF GUARANTEE EN 11
Dear customer,
By purchasing the MENZER LHS 225 VARIO Long-Neck Sander you have selected a product of the high-
est quality. We would hereby like to express our gratitude for the trust you have shown in us and our tools.
Before using your power tool for the rst time, please take the time to read the operating and safety instruc-
tions on the following pages. Close observance of the information contained here will ensure an optimum
result for your work. The safety warnings are intended to protect you from accidents that could be caused
by improper use of the long-neck sander.
The MENZER Team
MENZER LHS 225 VARIO
LONG-NECK SANDER
Original instructions
Version 1.3.2
EN 3
The user of this long-neck sander is strongly advised to acquaint his or herself with the machine’s design,
technical requirements, operating procedures for safe use, correct maintenance and repair procedures and
the storage and application instructions described here. The user who operates this machine does so at
his or her own risk and assumes full responsibility for that operation. These instructions should be kept and
used for future reference.
1. TECHNICAL SPECIFICATIONS
Model: MENZER LHS 225 VARIO
Voltage: 230 V ~ 50 Hz / 110 V ~ 50 Hz
Power consumption: 710 W
Speed: 1,000–2,100 min-1
Driving disc: Ø 225 mm
Weight: 4.9 kg
2. SAFETY INSTRUCTIONS
The MENZER LHS 225 VARIO Long-Neck Sander has been designed for renovation works and is suitable
for the sanding of all wall and ceiling materials, paint, varnishes, llers and wood surfaces. It has also been
specially designed for use in conjunction with an industrial vacuum cleaner for removing ne dust particles
from your working environment.
2.1 INSTRUCTIONS FOR POWER SAFETY
• This machine may be connected ONLY to sockets that provide the operating voltage displayed on the
machine‘s identication label, and that are grounded in accordance with all applicable regulations.
• Avoid allowing your long-neck sander to come into contact with water, for example rain water, wetness or
dampness. Water that seeps in could cause the machine to short-circuit, thus causing long-term damage
in the process. Furthermore, there is a risk of electrocution for the operator in such situations.
• Keep the external power cable at a distance from the sanding wheel so that it does not come into contact
with the abrasive, which could damage the cable‘s insulation. Never attempt to make alterations to the
plug connector or other machine parts that have electrical contact.
• Should you need to use an extension cable, it must have a sufcient conductor cross-section.
• Do not use the external power cable as a means of carrying the long-neck sander or for hanging the de-
vice. Do not pull on the cable when you wish to disconnect the sander from the power supply. Keep the
cable away from sharp edges, heat, oil and other chemicals.
• In the event of a damaged power cable, have the part replaced by a trained professional. Do not attempt
to use the sander when there are signs of damage to the cable.
2.2 SAFETY IN YOUR WORKING ENVIRONMENT
• Ensure that your work area is always well-ventilated and well-lit so as to prevent potential accidents. In
order to minimise dust levels, attach a compatible industrial vacuum cleaner to the sander.
ENglIsh
ENglIsh

4 EN EN 5
3. OPERATING THE MACHINE
3.1 STARTING OFF
You must take the following measures before operating the machine for the rst time or after the machine
has been transported:
• Attach an industrial vacuum cleaner to the long-neck sander, then check to see if a suitable ne dust col-
lection bag has already been placed inside the vacuum cleaner.
• Check to see if the power cable of the long-neck sander, in addition to all other devices connected to the
machine (e.g. a vacuum cleaner), are in good order and free of damage.
• Make sure that no power cables or hoses can impede your work space.
• Attach a suitable sanding disc to the sanding wheel of the long-neck sander.
• Hold the long-neck sander tightly and with both hands – either by grasping the tube or by using the addi-
tional handle. It is possible to guide the long-neck sander by holding any point of the main tube. The addi-
tional handle can be mounted in different positions so as to adjust the leverage and reach of the machine.
3.2 OPERATING THE MACHINE
3.2.1 Connecting an industrial vacuum cleaner
• Insert a ne dust collection bag into the industrial vacuum cleaner according to the instructions provided
with the vacuum cleaner.
• Please note that the use of an unsuitable industrial vacuum cleaner can increase the concentration of dust
particles in working environment to such an extent that you may suffer damage to your respiratory organs.
• Attach one end of the exible vacuum hose to the vacuum cleaner, with the other end attached to the
long-neck sander. You are strongly recommended to have the power cable and the exible vacuum hose
bound together and running parallel to each other to avoid these becoming tangled.
3.2.2 Operating the long-neck sander
Before connecting the long-neck sander to a plug socket, ensure that the power switch is set to “O”. Only
once all safety precautions have been taken and the industrial vacuum cleaner and sander are t for op-
eration can you rst switch on the vacuum cleaner, followed by the long-neck sander. If you are using an
industrial vacuum cleaner with an automatic start function, you need only switch on the sander.
Starting up:
If necessary, rst switch on your industrial vacuum cleaner. Hold the long-neck sander with your left hand
placed on the tube (or an additional handle) and with your right hand grasping the main handle tightly.
Left-handed users should assume the same handling pattern but in reverse. Set the power switch to “I”. Be
prepared for the machine to start rotating.
• Should there be risk of an explosion in your work area (e.g. due to ammable liquids or gases), it is es-
sential that you do not operate the sander. Should sparks be produced, the consequences could be fatal.
• Ensure that there are no other people in your working environment (children in particular) who could
distract you while sanding.
• If you do not intend to attach an industrial vacuum cleaner to the long-neck sander, you should make sure
your place of work is properly aired so as to reduce dust levels.
2.3 OPERATING SAFETY TIPS
• This long-neck sander should only be operated by skilled professionals who have carefully read and un-
derstood the operating and maintenance instructions contained in this manual, who are familiar with such
machines and who are not under the inuence of alcohol, drugs or medication.
• Ensure that you use an industrial vacuum cleaner with a dust bag for collecting ne dust particles, in addi-
tion to an approved respirator mask that provides protection against dust and vapours. Extended inhalation
of dust generated from construction work can be harmful for the respiratory organs. Also wear protective
clothing, protective glasses and non-slip working shoes to minimise the risk of injury.
• In order to avoid accidents, before you attach the machine to a power source, ensure that there is no pos-
sibility of the sander being turned on unintentionally. Furthermore, all other tools should be removed from
the operating area of the long-neck sander.
• In order to avoid causing damage to the sanding wheel, any nails, screws or other metal objects must be
either be fully inserted or completely removed from the area that is to be treated before sanding can begin.
• Only use this long-neck sander for the treatment of dry surfaces.
• Ensure that you work with good posture (good contact with the oor and steady balance) and do not at-
tempt to carry out jobs too far above your head as this could result in you losing your balance.
• Always hold the machine with both hands, otherwise you could lose control of the tool and cause damage.
• Keep your hands, hair, feet and lose items of clothing at a safe distance from the sanding wheel.
• Ensure that there are no faulty switches on the tool, that all moveable parts function correctly and that
no parts have become broken or fallen off the machine. These factors could impede the operation of the
long-neck sander.
• Ensure that the power cable is always outside the surface area that is being treated.
• The sanding of lead paints or coatings can release toxic gases and should either be carried out by a pro-
fessional with appropriate safety equipment or be avoided entirely.
• Once you have switched off the machine, wait until the sanding wheel has come to a complete stop. Only
then should you set the machine aside. Always store the long-neck sander in a dry room. During breaks
in work and for the purposes of repairs, the machine should always be switched off and detached from
the power supply.
• Immediately switch off the machine if it begins to make unusual noises or movements. Only have repairs
carried out by qualied professionals.
ENglIsh
ENglIsh

6 EN EN 7
5.1 TROUBLESHOOTING
Problem Possible cause Correction
1. The machine produces too
much noise.
2. The machine is vibrating
heavily.
The sanding wheel or the
abrasive may not be correctly
fastened.
Fasten the sanding wheel and
disc correctly
(in a central position).
The machine produces
too much dust.
1. The suction tube is clogged.
2. The dust bag in the industrial
vacuum cleaner is full.
1. Clean the suction system.
2. Empty the bag.
The machine is running, but
does not reach the specied
rotation speed.
The sanding wheel may
have been attached
too tightly.
Apply less pressure
when using the machine.
5.2 REPLACING THE SANDING WHEEL
Ensure that the sander is not plugged into a power source. Dust residue should be removed from the wheel
(e.g. by using compressed air). Grip the sanding wheel together with its housing. Hold the threaded axle in
the middle of the sanding wheel in place using an Allen key. The sanding wheel can now be turned anticlock-
wise and removed from the threaded axle.
5.3 REPLACING THE BRUSH RIM
The sanding head is surrounded by a brush rim. This ensures that the majority of the dust collected remains
within the sanding head and can be extracted by the connected industrial vacuum cleaner. If the brush rim
becomes worn or damaged it must be replaced.
To replace the brush rim, rst detach the abrasive from the sanding wheel. Remove the screws holding the
brush rim in place and then remove the brush rim itself. Attach the new brush rim and fasten it in place using
the same screws. You can now re-attach the abrasive.
Shutting off:
Set the power switch to “O”. The sanding disc will continue to spin for a few moments. Make sure that the
machine has nished rotating before you put it aside or set it down.
Setting rotation speed:
Rotation speed is fully variable and can be adjusted as required using the rotation speed controller. This is
also possible while the machine is in operation. A higher rotation speed allows for a higher rate of surface
removal, while a lower speed provides greater control of the surface treatment.
3.2.3 Sanding walls and ceilings
Be sure to hold the sander with both hands at all times.
When starting to sand, carefully place the sander on the desired surface. Apply only enough pressure so
that the sanding head remains at and is resting on the surface. Applying too much pressure can produce
spiral-shaped scratches and uneven areas in the surface and may also cause damage to the tool itself. It is
recommended that you move the sanding head over the surface using a circular motion. The sander should
be moved continually, as sanding too long in one area can leave behind unwanted marks.
3.2.4 Changing the sanding disc
Remove the sander from the power supply before changing the sanding disc. Peel the used sanding disc
from the hook-and-loop pad and place the new disc in a central position. The sanding disc will be held in
place by the hook and loop system. Choose a suitable grit for your job. Beware that grits that are too rough
reduce your control of the surface treatment, whereas grits that are too ne cause excessive wear and tear
to abrasives.
3.2.5 Adjusting operating length
The operating length of the MENZER LHS 225 VARIO can be freely adjusted to between 1,350 and 1,900mm.
To do this, loosen the locking ring on the main tube until you are able to pull the telescopic tube inwards or
outwards. Set your desired operating length and turn the locking ring until it is tightly in place.
4. STORAGE
The machine must not be exposed to wet or damp storage conditions. The power cable must be removed
from the power source before storage. It must not be used to hang the tool. Always store the sander in its
carry bag and keep it out of the reach of children.
5. MAINTENANCE
All air passages and joints must be kept free of dirt and cleaned with compressed air after each use of the
machine. Wear protective goggles when doing this. Plastic parts should be cleaned with a soft, damp towel.
Never use solvents for cleaning purposes.
ENglIsh
ENglIsh

8 EN EN 9
6. MACHINE DETAILS
BRUSH RIM
DRIVING DISC
MOTOR COVER
VACUUM HOSE FOR
SANDING HEAD
FLEXIBLE VACUUM HOSE
EXTRA HANDLE
VACUUM ADAPTER
MAIN TUBE
SANDING HEAD HOUSING
ELECTRONICS HOUSING
ENglIsh
ENglIsh

10 EN EN 11
7. CE DECLARATION
We hereby declare that the machine described below complies with the relevant basic safety and health
requirements of the EU Directives, both in its basic design and construction as well as in the version put into
circulation by us. This declaration shall cease to be valid if the machine is modied without our prior approval.
Product: Long-Neck Sander
Type: MENZER LHS 225 VARIO
Relevant EU Directives
2004/108/EC
2006/42/EC
Applied harmonized standards
EN 55014-1: 2006 + A1: 2009
EN 55014-2: 1997 + A1: 2001 + A2: 2008
EN 61000-3-2: 2006 + A1: 2009 + A2: 2009
EN 61000-3-3: 2008
EN 60745-1: 2009
EN 60745-2-3: 2007 + A11: 2009
Applied national standards
-
Torsten Ceranski
Managing Director
Taucha, 01/09/2013
CGL GmbH
Straße des 17. Juni 4
04425 Taucha
Germany
Upon buying a MENZER power tool, the customer is granted a 2-year Manufacturer’s Warranty beginning
from the time the tool is purchased.
We guarantee that our power tools are free from defects in material or workmanship. Should this not be the
case, then, under the conditions of our Manufacturer’s Warranty, we will undertake the repair or replace-
ment of defective parts free of charge. Any further entitlements on the part of the Purchaser – provided there
is no legal obligation – shall be excluded. Availing of warranty provisions does not bring about an extension
of the warranty term.
The MENZER Manufacturer’s Warranty is only valid under the condition that the power tool is used in ac-
cordance with its operating instructions. A warranty claim is only valid when you, the Purchaser, send us
the power tool intact and in its original condition, within the warranty period and accompanied by a copy of
your proof of purchase. Power tools sent without pre-paid postage will not be accepted. Please note that
for logistical reasons, we cannot accept parcels without return labels or machines for which we have not
received a repair order. For all relevant information and to ll out a repair order form, please visit:
www.menzer-tools.com > Services
email: service@menzer-tools.com
phone: +49 342 98 74 14 15
This warranty only covers correct use of the power tool as is intended. The warranty excludes in particular:
• Parts subject to operational wear
• Defects resulting from improper use or disregard for operating instructions.
• Power tools that have been dismantled
• Damage caused by overloading the power tool
• Damage caused by use of additional and non-permitted, defective or incorrectly used tools
• Damage which is caused by the power tool
• Damage caused by the use of excessive or inappropriate force
• Damage which can be attributed to insufcient maintenance work or repairs carried out or
commissioned by the Purchaser or by a third party
• Damage caused by external inuences, for example foreign objects
Warranty repairs may only be carried out at MENZER service workshops.
Your statutory and/or other agreed rights are unaffected by the granting of this warranty.
8. TERMS OF GUARANTEE
ENglIsh
ENglIsh

INDICE
1. DATOS TÉCNICOS ES 3
2. INSTRUCCIONES DE SEGURIDAD ES 3
2.1 Conexiones eléctricas ES 3
2.2 Ámbito de trabajo ES 3
2.3 Manejo ES 4
3. FUNCIONAMIENTO ES 5
3.1 Puesta en marcha ES 5
3.2 Funcionamiento ES 5
3.2.1 Conexión de una aspiradora de seguridad ES 5
3.2.2 Funcionamiento de la lijadora de cuello largo ES 5
3.2.3 Lijado de paredes y techos ES 6
3.2.4 Cambio del papel de lija redondo ES 6
3.2.5 Ajuste de la longitud de la lijadora ES 6
4. ALMACENAMIENTO ES 6
5. MANTENIMIENTO ES 7
5.1 Correción de averías ES 7
5.2 Cambio del plato de lijar ES 7
5.3 Cambio de la corona de cepillos ES 7
6. DETALLES DE LA MÁQUINA ES 8
7. DECLARACIÓN CE ES 10
8. CONDICIONES DE GARANTÍA ES 11
Versión 1.3.2
Estimado cliente,
con la compra de la lijadora de cuello largo MENZER LHS 225 VARIO, usted ha optado por un producto de
alta calidad. Queremos agradecer la conanza que ha depositado en nosotros.
Por favor, preste atención a las siguientes páginas de las instrucciones de uso y seguridad, antes de usar
el aparato por primera vez. Una lectura detallada le garantizará además, un resultado de trabajo óptimo.
Las instrucciones de seguridad evitarán accidentes causados por el uso inadecuado de la lijadora de
cuello largo.
Su equipo de MENZER
MENZER LHS 225 VARIO
LIJADORA DE CUELLO LARGO
Manual original
EsPAÑOl
Table of contents
Languages:
Other Menzer Sander manuals

Menzer
Menzer TBS 225 AV User manual

Menzer
Menzer LHS 225 User manual
Menzer
Menzer LHS 225 Operational manual
Menzer
Menzer ESM 406 Quick guide

Menzer
Menzer ETS 150 5.0 Operational manual
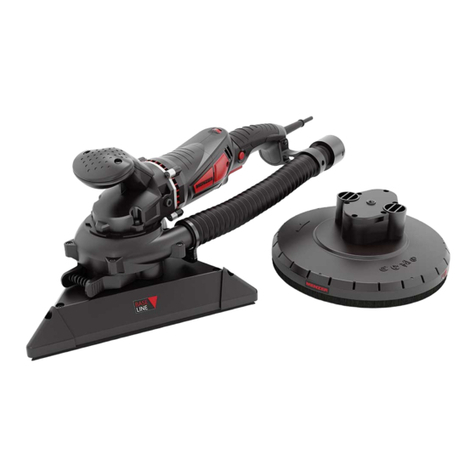
Menzer
Menzer TBS 225 User manual
Menzer
Menzer ETS 150 5.0 Operational manual

Menzer
Menzer ETS 150 5.0 User manual

Menzer
Menzer LHS 225 User manual
Menzer
Menzer TSW 225 Quick guide
Popular Sander manuals by other brands

Dynabrade
Dynabrade 59302 Operating and maintenance manual

Makita
Makita 9032 technical information

Craftsman
Craftsman 315.116091 owner's manual

Parkside
Parkside PHS 160 E5 Translation of the original instructions

Chicago Electric
Chicago Electric 93431 Assembly and operating instructions

Ingersoll-Rand
Ingersoll-Rand 311G instructions
