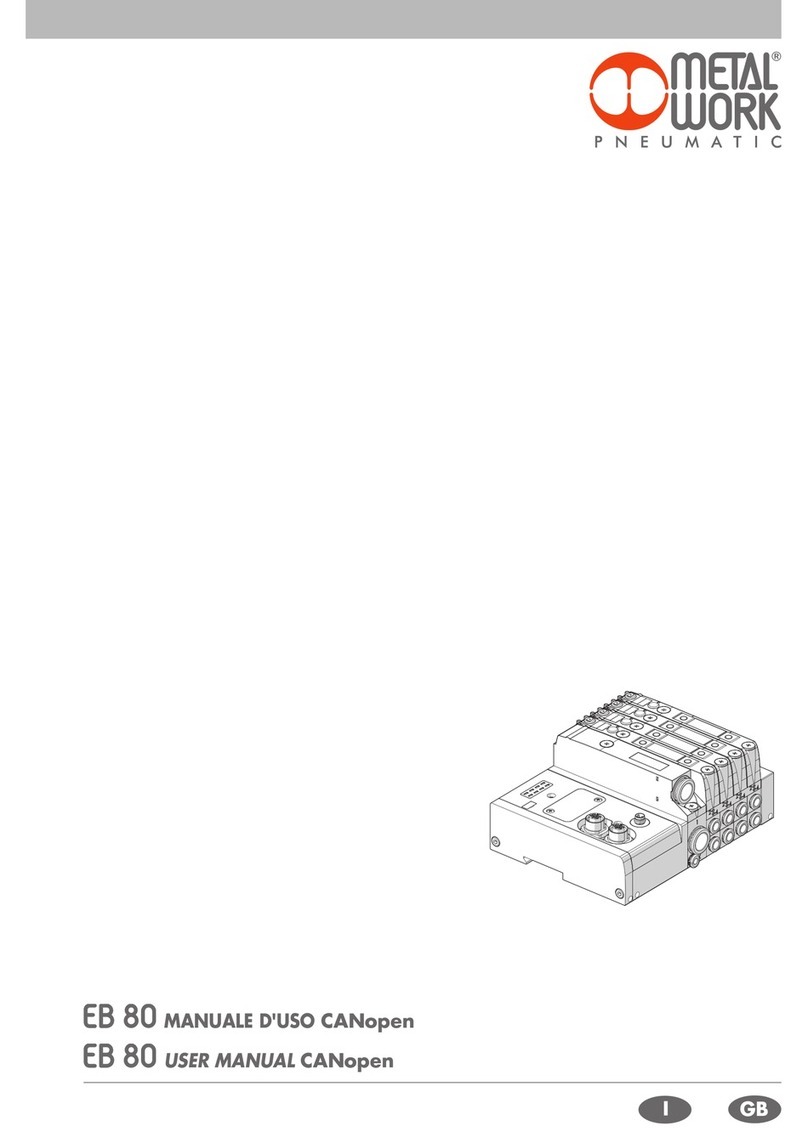
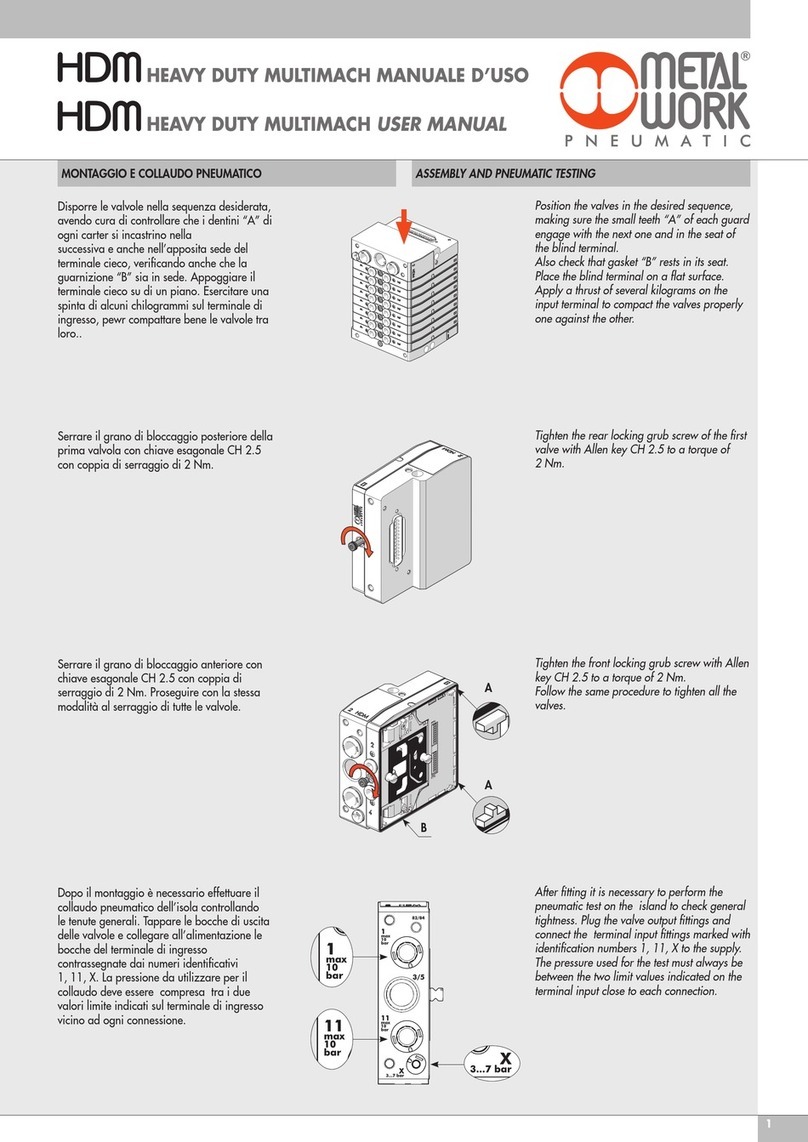
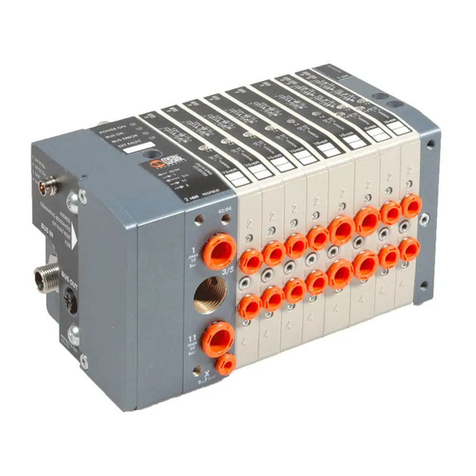
Metal Work EB 80 User manual

CONNESSIONE ELETTRICA MULTIPOLARE - MANUALE D’USO
MULTI-POLE ELECTRICAL CONNECTION - USER MANUAL

2
1.1 COLLEGAMENTO DELLA CONNESSIONE ELETTRICA MULTIPOLARE
L’isola EB 80 è dotata di un’elettronica di controllo, quindi è necessaria una alimentazione elettrica fissa.
L’alimentazione ed il comando delle elettrovalvole dell’isola, si effettuano attraverso un connettore D-Sub 25 o 44 poli. Il connettore 25 poli consente
di comandare fino a 21valvole (elettropiloti), il connettore 44 poli consente di comandare fino a 38 valvole (elettropiloti). Il tipo di comando può
essere configurato PNP o NPN, collegando il pin CONFIG PNP/NPN, rispettivamente al polo positivo se i comandi sono di tipo PNP, o al polo
negativo se i comandi sono di tipo NPN. Un eventuale guasto viene segnalato dall’attivazione di un uscita dedicata, dello stesso tipo, PNP o NPN,
configurato per i comandi, che può essere collegata ad un ingresso del sistema di controllo per un’adeguata gestione dell’evento.
1. INSTALLAZIONE E COLLEGAMENTI ELETTRICI
Posizione contatto Colore conduttore Funzione
elettrico corrispondente
1Bianco Out 1
2Marrone Out 2
3Verde Out 3
4Giallo Out 4
5Grigio Out 5
6Rosa Out 6
7Blu Out 7
8Rosso Out 8
9Nero Out 9
10 Viola Out 10
11 Grigio + anello Rosa Out 11
12 Rosso + anello Blu Out 12
13 Bianco + anello Verde Out 13
14 Marrone + anello Verde Out 14
15 Bianco + anello Giallo Out 15
16 Giallo + anello Marrone Out 16
17 Bianco + anello Grigio Out 17
18 Grigio + anello Marrone Out 18
19 Bianco + anello Rosa Out 19
20 Rosa + anello Marrone Out 20
21 Bianco + anello Blu Out 21
22 Marrone + anello Blu Segnalazione guasto
23 Bianco + anello Rosso Config. PNP/NPN
24 Marrone + anello Rosso + 24VDC
25 Bianco + anello Nero 0VDC
Posizione contatto Colore conduttore Funzione
elettrico corrispondente
1Bianco Out 1
2Marrone Out 2
3Verde Out 3
4Giallo Out 4
5Grigio Out 5
6Rosa Out 6
7Blu Out 7
8Rosso Out 8
9Nero Out 9
10 Viola Out 10
11 Grigio + anello Rosa Out 11
12 Rosso + anello Blu Out 12
13 Bianco + anello Verde Out 13
14 Marrone + anello Verde Out 14
15 Bianco + anello Giallo Out 15
16 Giallo + anello Marrone Out 16
17 Bianco + anello Grigio Out 17
18 Grigio + anello Marrone Out 18
19 Bianco + anello Rosa Out 19
20 Rosa + anello Marrone Out 20
21 Bianco + anello Blu Out 21
22 Marrone + anello Blu Out 22
23 Bianco + anello Rosso Out 23
24 Marrone + anello Rosso Out 24
25 Bianco + anello Nero Out 25
26 Marrone + anello Nero Out 26
27 Grigio + anello Verde Out 27
28 Giallo + anello Grigio Out 28
29 Rosa + anello Verde Out 29
30 Giallo + anello Rosa Out 30
31 Verde + anello Blu Out 31
32 Giallo + anello Blu Out 32
33 Verde + anello Rosso Out 33
34 Giallo + anello Rosso Out 34
35 Verde + anello Nero Out 35
36 Giallo + anello Nero OUT 36
37 Grigio + anello Blu OUT 37
38 Rosa + anello Blu OUT 38
39 Grigio + anello Rosso Segnalazione guasto
40 Rosa + anello Rosso Config. PNP/NPN
41 Grigio + anello Nero + 24VDC
42 Rosa + anello Nero + 24VDC
43 Blu + anello Nero 0VDC
44 Rosso + anello Nero 0VDC
CONNETTORE VASCHETTA 25 POLI PRECABLATO CONNETTORE VASCHETTA 44 POLI PRECABLATO
ATTENZIONE
Disattivare la tensione prima di inserire o disinserire il connettore (pericolo di danni funzionali)
Utilizzare solamente unità di valvole completamente assemblate.
Per l’alimentazione utilizzare esclusivamente alimentatori a norma IEC 742/EN60742/VDE0551 con resistenza minima di isolamento di 4kV (PELV).
L’isola deve essere collegata a terra utilizzando la connessione del terminale di chiusura, indicata con il simbolo PE
In caso di scariche elettrostatiche, la mancanza di collegamento a terra può causare malfunzionamenti e danni irreversibili.

3
1.2 TENSIONE DI ALIMENTAZIONE
Il sistema consente un range di alimentazione ampio, da 12VDC – 10% a 24VDC +30% ovvero da una tensione minima di 10.8VDC ad una tensione
massima di 31.2VDC.
ATTENZIONE
Una tensione maggiore di 32VDC danneggia irreparabilmente il sistema.
N° valvole attive N° valvole comandate simultaneamente Corrente totale [A]
Tensione di alimentazione 12VDC
10 3 1
5 5 1.35
0 20 5
Tensione di alimentazione 24VDC
10 10 1.35
5 5 0.7
20 10 1.5
Esempio:
1.3.1 Caduta di tensione del sistema
La caduta di tensione dipende dalla corrente massima assorbita dal sistema e dalla lunghezza del cavo di connessione al sistema.
In un sistema alimentato a 24VDC con lunghezze del cavo fino a 20 m non è necessario tenere conto delle cadute di tensione.
In un sistema alimentato a 12VDC, si deve garantire che la tensione fornita sia sufficiente per il corretto funzionamento. È necessario tenere conto
delle cadute di tensione dovute al numero di elettrovalvole attive, al numero di valvole comandate simultaneamente e alla lunghezza del cavo.
La tensione reale che arriva agli elettropiloti deve essere almeno 10.8 V.
Riportiamo qui in sintesi l’algoritmo per la verifica.
Corrente massima: I max [A] = N° elettropiloti comandati simultaneamente x 4 + N° elettropiloti attivi x 0.5
VDC
Caduta di tensione: con connettore a 25 poli: ΔV = Imax [A] x Rs [0.067Ω/m] x 2L [m]
Caduta di tensione: con connettore a 44 poli: ΔV = Imax [A] x Rs [0.067Ω/m] x L [m]
Ove Rs è la resistenza del cavo ed L la sua lunghezza.
La tensione all’ingresso del cavo, Vin deve essere almeno pari a 10.8 V + ΔV
Esempio:
Tensione di alimentazione 12 V, cavo lungo 5 m, connettore a 25 PIN, si attivano contemporaneamente 3 piloti mentre altri 10 sono già attivi:
I max = 3x4 + 10x0.5 = 1.41 A ΔV = (1.41 x 0.067 x 2x5) = 0.95 V
12
Perciò all’alimentatore serve una tensione maggiore o uguale a 10.8 + 0.95 = 11.75 V
Vin =12 V > 11.75 --> OK
1.3 CORRENTE ASSORBITA
Il controllo delle elettrovalvole avviene attraverso una scheda elettronica dotata di microprocessore.
Per garantire un azionamento sicuro della valvola e ridurre il consumo energetico, il comando è di tipo “speed up”, cioè all’elettropilota vengono
forniti 3W per 15 millisecondi e successivamente la potenza viene ridotta gradualmente a 0.3W. Il microprocessore attraverso un comando PWM
regola la corrente circolante nella bobina, che rimane costante indipendentemente dalla tensione di alimentazione e dalla temperatura, mantenendo
di conseguenza inalterato il campo magnetico generato dall’elettropilota.
Per dimensionare correttamente l’alimentazione del sistema si deve tener conto di quante valvole dovranno essere comandate simultaneamente*
e quante sono già attive.
*Per comando simultaneo si intende l’attivazione di tutti gli elettropiloti che hanno tra loro una differenza temporale minore di 15 millisecondi.
P1
P3
P2
T2T1
15 ms
T1 = P1 + P2 + P3 = 3 elettropiloti simultanei
T2 = P2 + P3 = 2 elettropiloti simultanei
I max [A] = N° elettropiloti simultanei x 3.2 + N° elettropiloti attivi x 0.3
VDC
Esempio:
N° elettropiloti simultanei = 10
N° elettropiloti attivi = 15
VDC = Tensione di alimentazione 24
I max = 10 x 3.2 +15 x 0.3 = 1.5 A
24
La potenza totale assorbita in ingresso è uguale alla potenza assorbita dagli elettropiloti più
la potenza assorbita dall’elettronica di controllo delle basi. Per semplificare il calcolo si può
considerare 3.2W la potenza di ogni elettropilota simultaneo e 0.3W la potenza di ogni
elettropilota attivo.

4
L’isola è protetta da sovraccarichi. NON è ammessa una inversione di polarità se non per pochi secondi. Per evitare danni permanenti, è necessario
utilizzare un alimentatore protetto da cortocircuiti o installare un dispositivo di protezione, ad esempio un fusibile, adeguatamente dimensionato in
funzione della corrente massima assorbita dal sistema. Per il calcolo della corrente massima fare riferimento al paragrafo 1.2.3 del manuale.
In caso di cortocircuito dell’elettropilota, segnalato dall’accensione del Led rosso Error e dal lampeggio del Led della valvola guasta, solo la valvola
guasta viene disconnessa. Il guasto viene segnalato al sistema di controllo tramite l’out Segnalazione GUASTO. Togliere l’alimentazione elettrica e
rimuovere la causa del guasto per resettare la segnalazione di allarme.
In caso di comando di un pilota interrotto o di una posizione con elettropilota mancante, l’anomalia viene segnalata dall’accensione del Led rosso
Error, e dal lampeggio del Led della valvola guasta; solo la valvola guasta viene disconnessa. Il guasto viene segnalato al sistema di controllo tramite
l’out Segnalazione GUASTO. L’uscita si ripristina automaticamente rimuovendo la causa. Togliere l’alimentazione elettrica e rimuovere la causa del
guasto per resettare la segnalazione di allarme.
In caso di tensione di alimentazione fuori range, l’anomalia viene segnalata dall’accensione del Led rosso Error, e dal lampeggio di tutti i Led delle
valvole. Il guasto viene segnalato al sistema di controllo tramite l’out Segnalazione GUASTO. Le elettrovalvole continuano a funzionare, fino a che, in
caso di tensione troppo bassa, essa non scenda al di sotto dei limiti di funzionamento degli elettropiloti.
2.1 VISUALIZZAZIONE DELLA DIAGNOSTICA
2.1.1 Diagnostica della connessione elettrica multipolare
La diagnostica della connessione elettrica multipolare è definita dallo stato dei Led di interfaccia.
La generazione di un allarme attiva l’Out Segnalazione GUASTO.
Led Verde
Power
Led Rosso
Error
Significato
ON (verde) OFF Il modulo funziona correttamente
ON (verde) ON (rosso) Guasto nelle basi valvola
1.3.2 Cadute di tensione sui cavi
Se il numero di elettrovalvole che vengono attivate simultaneamente è
elevato, si deve tenere conto della caduta di tensione di alimentazione
sui cavi di collegamento, causata dal passaggio di corrente.
Nel caso in cui la caduta di tensione sia tale da pregiudicare il corretto
funzionamento del sistema, è necessario inserire un intermedio con
alimentazione elettrica supplementare, descritto al paragrafo 4.
Lunghezza
cavo [m]
Corrente
[A]
Caduta di tensione
cavo 25 poli [V]
Caduta di tensione
cavo 44 poli [V]
Caduta di tensione
cavo M8 [V]
1
1 0.15 0.08 0.08
3 0.4 0.2 0.2
5 0.7 0.35 0.35
5
1 0.7 0.35 0.35
3 2 1 1
5 3.4 1.7 1.7
10
1 1.35 0.7 0.7
3 4 2 2
5 6.7 3.4 3.4
Esempio:
2.1.2 Diagnostica delle basi per valvole
La diagnostica delle basi per valvola è definita dallo stato dei Led di interfaccia.
La generazione di un allarme attiva l’Out Segnalazione GUASTO e il Led Error del sottoinsieme Connessione elettrica multipolare.
Led Verde
Base
Significato Stato dell’Out Segnalazione GUASTO e memorizzazione
OFF L’uscita non è comandata Out Segnalazione GUASTO - OFF
ON (verde) L’uscita è attiva e funziona correttamente Out Segnalazione GUASTO - OFF
VERDE Segnalazione per ogni singola uscita. Out Segnalazione GUASTO - Attiva
Elettropilota interrotto o mancante (falsa valvola o valvola con un elettropilota
L’uscita è Auto-ripristinante se la causa del guasto viene rimossa.
(doppio lampeggio) installata su una base per due elettropiloti) La segnalazione GUASTO è resettabile solo togliendo l’alimentazione elettrica.
VERDE Segnalazione per ogni singola uscita. Out Segnalazione GUASTO - Attiva, Permanente.
Elettropilota o uscita della base in cortocircuito L’uscita viene spenta. Resettabile solo togliendo l’alimentazione elettrica.
(lampeggiante)
VERDE
Tensione di alimentazione fuori range Minore di 10.8V o maggiore di 31.2V
Out Segnalazione GUASTO - Attiva, Auto-ripristinante rientrando nel range
Attenzione: una tensione maggiore di 32VDC danneggia irreparabilmente di funzionamento. Le segnalazioni permangono 5 secondi dopo il rientro nel
(lampeggio il sistema. range di funzionamento.
di tutti i Led della base)
2. PROTEZIONI E DIAGNOSTICA DEL SOTTOINSIEME CONNESSIONE ELETTRICA MULTIPOLARE

5
Il collegamento delle valvole avviene attraverso la scheda elettronica installata nella base.
Le basi sono di 4 tipi:
• a 3 posizioni per comandare 3 elettropiloti;
• a 3 posizioni per comandare 6 elettropiloti;
• a 4 posizioni per comandare 4 elettropiloti;
• a 4 posizioni per comandare 8 elettropiloti.
Le basi possono essere tutte connesse tra loro indifferentemente, fino ad occupare tutti i comandi consentiti dal connettore multipolare utilizzato.
Ogni base occupa sempre i comandi disponibili anche se non vengono utilizzati. Ciò consente di modificare la configurazione delle valvole installate,
senza modificare la mappatura degli indirizzi nel sistema di controllo.
ATTENZIONE
Il comando di uscite non connesse genera un allarme di elettropiloti interrotto.
CONNETTORE D-Sub 44 POLI
CONNETTORE D-Sub 25 POLI
a
Base a 3 posizioni per 6 piloti
bBase a 3 posizioni per 3 piloti
cValvola con 2 elettropiloti
dFalsa valvola o bypass
eValvola con 1 elettropilota
fIntermedio
gBase a 4 posizioni per 8 piloti
hTerminale cieco
OUT Segnalazione Guasto
3. COLLEGAMENTO ALLE VALVOLE

6
5. DATI TECNICI
Range di tensione di alimentazione V 12 -10% 24 +30%
Tensione minima di funzionamento V 10.8
Tensione massima di funzionamento V 31.2
Tensione massima ammissibile V 32*
Azionamento PNP o NPN configurabile
Potenza di alimentazione senza valvole comandate W 0.1 per “Connessione elettrica - E” + 0.25 per ogni “Base - B”
Potenza elettropilota all’accensione (Speed Up) W 3 per 15 msec
Potenza elettropilota dopo la fase di accensione (mantenimento) W 0.3
Corrente massima ammissibile A 6 continuativi, 9 istantanei
Protezioni Sistema protetto da sovraccarico;
uscita elettropilota protetto da cortocircuito
Diagnostica Led rosso e attivazione Out segnalazione GUASTO su “Connessione elettrica - E”
Segnalazione Led sulla valvola
Guasti segnalati Elettropilota in corto circuito; Elettropilota interrotto o mancante
Tensione di alimentazione fuori range (under voltage e over voltage)
Temperatura ambiente °C -10 ÷ + 50
°F 14 ÷ 122
Connessione elettrica Connettori a vaschetta
Connettore 25 PIN Connettore 44 PIN
Numero massimo di elettropiloti comandabili 21 38
Numero massimo di elettrovalvole comandabili Idem, in funzione del numero di elettropiloti e della tipologia di base
Numero massimo di elettropiloti comandabili contemporaneamente:
a 24VDC 21 38
a 12VDC In funzione della caduta di tensione - vedere pagina 3
Corrente massima a 24VDC A 3 5
Corrente massima a 12VDC A 6 9
Grado di protezione IP65 (con i connettori collegati o tappati se non utilizzati)
* ATTENZIONE: una tensione maggiore di 32VDC danneggia irreparabilmente il sistema.
ATTENZIONE
Non può essere utilizzata come funzione di sicurezza, in quanto garantisce solo che non venga effettuata nessuna attivazione elettrica.
Attivazioni manuali o guasti possono causare movimenti involontari. Per maggior sicurezza, scaricare l’impianto pneumatico prima di eseguire
interventi pericolosi.
Tra le basi delle valvole possono essere installati dei moduli intermedi con alimentazione elettrica supplementare.
Possono servire come alimentazione elettrica supplementare, quando il numero di elettropiloti azionato contemporaneamente è elevato, oppure per
separare elettricamente alcune parti dell’isola da altre, per esempio quando si vuole interrompere l’alimentazione elettrica di alcune elettrovalvole
all’apertura di una protezione della macchina, o alla pressione di un pulsante di emergenza. Solo le elettrovalvole a valle del modulo sono alimentate
dallo stesso.
4. INTERMEDIO CON ALIMENTAZIONE ELETTRICA SUPPLEMENTARE
PIN Colore Funzione
1Marrone + VDC
2Bianco + VDC
3Blu GND
4Nero GND
VDC Valvole
VDC Bus
Linea Bus
VDC Valvole
VDC Bus
Linea Bus
VDC Valvole

7
1.1 MULTI-PIN ELECTRICAL CONNECTION
The EB 80 valve island is equipped with an electronic control module, which requires fixed electrical power.
The valves are supplied and controlled by either a D-Sub 25-pin or a 44-pin connector. The 25-pin connector can control up to 21 valves (solenoids);
the 44-pin connector can control up to 38 valves (solenoids). The type of control can be either PNP or NPN configured by connecting the PNP/NPN
CONFIG pin to the positive pole in the case of PNP logic or to the negative pole in the case of NPN logic. Any failure is signalled by the activation
of a dedicated output of the same type, either PNP or NPN, which is configured for the controls and can be connected to a control system input for
proper management.
1. INSTALLATION AND ELECTRICAL CONNECTION
Position of Colour of the Function
electrical contact corresponding wire
1White Out 1
2Brown Out 2
3Green Out 3
4Yellow Out 4
5Grey Out 5
6Pink Out 6
7Blue Out 7
8Red Out 8
9Black Out 9
10 Violet Out 10
11 Grey + Pink ring Out 11
12 Red + Blue ring Out 12
13 White + Green ring Out 13
14 Brown + Green ring Out 14
15 White + Yellow ring Out 15
16 Yellow + Brown ring Out 16
17 White + Grey ring Out 17
18 Grey + Brown ring Out 18
19 White + Pink ring Out 19
20 Pink + Brown ring Out 20
21 White + Blue ring Out 21
22 Brown + Blue ring Fault reporting
23 White + Red ring Config. PNP/NPN
24 Brown + Red ring + 24VDC
25 White + Black ring 0VDC
Position of Colour of the Function
electrical contact corresponding wire
1White Out 1
2Brown Out 2
3Green Out 3
4Yellow Out 4
5Grey Out 5
6Pink Out 6
7Blue Out 7
8Red Out 8
9Black Out 9
10 Violet Out 10
11 Grey + Pink ring Out 11
12 Red + Blue ring Out 12
13 White + Green ring Out 13
14 Brown + Green ring Out 14
15 White + Yellow ring Out 15
16 Yellow + Brown ring Out 16
17 White + Grey ring Out 17
18 Grey + Brown ring Out 18
19 White + Pink ring Out 19
20 Pink + Brown ring Out 20
21 White + Blue ring Out 21
22 Brown + Blue ring Out 22
23 White + Red ring Out 23
24 Brown + Red ring Out 24
25 White + Black ring Out 25
26 Brown + Black ring Out 26
27 Grey + Green ring Out 27
28 Yellow + Grey ring Out 28
29 Pink + Green ring Out 29
30 Yellow + Pink ring Out 30
31 Green + Blue ring Out 31
32 Yellow + Blue ring Out 32
33 Green + Red ring Out 33
34 Yellow + Red ring Out 34
35 Green + Black ring Out 35
36 Yellow + Black ring OUT 36
37 Grey + Blue ring OUT 37
38 Pink + Blue ring OUT 38
39 Grey + Red ring Fault reporting
40 Pink + Red ring Config. PNP/NPN
41 Grey + Black ring + 24VDC
42 Pink + Black ring + 24VDC
43 Blue + Black ring 0VDC
44 Red + Black ring 0VDC
25-PIN PRE-WIRED PLUG CONNECTOR 44-PIN PRE-WIRED PLUG CONNECTOR
WARNING!
Power off the system before plugging or unplugging the connector (risk of functional damage).
Only use fully assembled valve units.
Only use power supply units to IEC 742/EN60742/VDE0551 standards with a minimum insulation resistance of 4kV (PELV).
Earth the module using the end plate connection, identified with PE
Failure to earth the system properly may cause malfunctions and serious damage in the event of electrostatic discharge.

8
1.2 SUPPLY VOLTAGE
The system is designed to operate with wide power ratings, ranging from 12VDC -10% to 24VDC +30%, i.e. with a minimum voltage rating of
10.8VDC and a maximum of 31.2VDC.
WARNING!
Voltage greater than 32VDC will damage the system irreparably.
1.3.1 System voltage drop
Voltage drop depends on the input maximum current drawn by the system and the length of the cable for connection to the system.
In a 24VDC-powered system, with cable lengths up to 20 m, voltage drops do not need to be taken into account.
In a 12VDC-powered system, there must be enough voltage to ensure correct operation. It is necessary to take into account any voltage drops due to
the number of active solenoid valves, the number of valves controlled simultaneously and the cable length.
The actual voltage supplied to the solenoid pilots must be at least 10.8 V.
A synthesis of the verification algorithm is shown here below.
Maximum current: I max [A] = no. of solenoid pilots controlled simultaneously x 4 + no. of active solenoid valves x 0.5
VDC
Voltage drop: with a 25-pole connector: ΔV = Imax [A] x Rs [0.067Ω/m] x 2L [m]
Voltage drop: with a 44-pole connector: ΔV = Imax [A] x Rs [0.067Ω/m] x L [m]
Where Rs is the cable resistance and L its length.
The voltage at the cable inlet, Vin must be at least 10.8 V + ΔV
Example:
12V supply voltage, 5 m cable, 25-pin connector, 3 pilots activate while other 10 are already active:
I max = 3x4 + 10x0.5 = 1.41 A ΔV = (1.41 x 0.067 x 2x5) = 0.95 V
12
This means that at the power supply voltage greater than or equal to 10.8 + 0.95 = 11.75 V is required.
Vin =12 V > 11.75 --> OK
No. of active valves No. of valves controlled simultaneously Total current [A]
Supply voltage 12VDC
10 3 1
5 5 1.35
0 20 5
Supply voltage 24VDC
10 10 1.35
5 5 0.7
20 10 1.5
Example:
1.3 INPUT CURRENT
Solenoid valves are controlled via an electronic board equipped with a microprocessor.
In order to ensure safe operation of the valve and reduce energy consumption, a “speed-up” control is provided, i.e. 3W is supplied to solenoid pilot
for 15 milliseconds and then power is gradually reduced to 0.3W. The microprocessor regulates, via a PWM control, the current in the coil, which
remains constant regardless of the supply voltage and temperature, thus keeping the magnetic field generated by the solenoid pilot unchanged.
For the system power supply to be properly scaled, it is important to take into account the number of valves to be controlled simultaneously* and the
number of those already active.
*By simultaneous control is meant the activation of all solenoid pilots with a time difference less than 15 milliseconds.
P1
P3
P2
T2T1
15 ms
T1 = P1 + P2 + P3 = 3 simultaneously-controlled solenoid pilots
T2 = P2 + P3 = 2 simultaneously-controlled solenoid pilots
I max [A] = No. of simultaneously-controlled solenoid pilots x 3.2 + no. of active solenoid pilots x 0.3
VDC
Example:
No. of simultaneously-controlled solenoid pilots = 10
No. of active solenoid pilots = 15
VDC = Supply voltage 24
I max = 10 x 3.2 +15 x 0.3 = 1.5 A
24
Total current consumption is equal to the power consumed by the solenoid pilots plus the current
consumed by the electronics controlling the bases. To simplify the calculation, you can consider
3.2W consumed by each solenoid pilot simultaneously and 0.3W by each active solenoid pilot.

9
The valve island is protected against overloads. NO polarity reversal is admitted, unless it lasts a few seconds. In order to avoid permanent
damage, it is necessary to either use a short-circuit protected power supply unit or install a protection device, e.g. a fuse suitably scaled according to
the maximum input power of the system. Please refer to subsection 1.2.3 of the manual for instructions on how to calculate maximum current.
If a solenoid pilot short circuits, which is signalled by the red Error Led light coming on and the valve faulty Led light flashing, and the faulty valve only
is disconnected. The failure is relayed to the control system via the FAULT signal output. It is then necessary to turn off the power supply and remove
the cause of failure to reset the alarm.
If a solenoid pilot is interrupted or a solenoid pilot position is missing, the failure is indicated by the red Error Led coming on and the valve faulty
Led light flashing and the faulty valve only is disconnected. The failure is relayed to the control system via the FAULT signal output. The output resets
automatically upon removal of the cause of failure. It is hen necessary to turn off the power supply and remove the cause of failure.
If the power supply is out of range, the failure is indicated by the red Error Led light coming on and all the valve Led lights flashing. The failure is
relayed to the control system via the FAULT signal output. The solenoid valves continue to operate until the voltage does not drop below the operating
limits established for the solenoid pilots.
2.1 DIAGNOSTICS DISPLAY
2.1.1 Multi-pin electrical connection diagnostics
Diagnostics of valve bases is defined by the interface Led light state.
The generation of an alarm activates both a FAULT signal output and an Error Led light of the multi-pin electrical connection subassembly.
Green Led
Power
Red Led
Error
Meaning
ON (green) OFF The module is operating correctly
ON (green) ON (red) Valve base failure
1.3.2 Cable voltage drop
If the number of simultaneously-controlled solenoid valves is high, it is
important to take into account the voltage drop on the connecting cables,
which is caused by the flow of current.
If the drop in voltage is of such an extent as to affect correct functioning
of the system, an intermediate module with additional power supply must
be inserted, as described in subsection 4.
Cable Length
[m]
Current
[A]
Voltage drop with
a 25-pin cable [V]
Voltage drop with
a 44-pin cable [V]
Voltage drop with
an M8 cable [V]
1
1 0.15 0.08 0.08
3 0.4 0.2 0.2
5 0.7 0.35 0.35
5
1 0.7 0.35 0.35
3 2 1 1
5 3.4 1.7 1.7
10
1 1.35 0.7 0.7
3 4 2 2
5 6.7 3.4 3.4
Example:
2. MULTI-PIN ELECTRICAL CONNECTION SUBASSEMBLY PROTECTIONS AND DIAGNOSTICS
2.1.2 Valve base diagnostics
Diagnostics of valve bases is defined by the interface Led light state.
The generation of an alarm activates both a FAULT signal output and an Error Led light of the multi-pin electrical connection subassembly.
Green Led
Base
Meaning FAULT signal output state and storage
OFF The output is not controlled FAULT signal output – OFF
ON (green) The output is active and works properly FAULT signal output – OFF
GREEN Signalling for each output.
Solenoid pilot interrupted or missing (false valve or valve with solenoid
pilot installed on a base for two
solenoid pilots)
FAULT signal output – Active
The output resets automatically when the cause of failure is removed.
(double flashing) The FAULT signal can only be reset by disconnecting the power supply.
GREEN Signalling for each output. FAULT signal output – Active, Permanent
Solenoid pilot or base output short-circuited The output is turned off. It can only be reset by disconnecting the power supply.
(continuous flashing)
GREEN
Supply voltage less than 10.8V or greater to 31.2V
FAULT signal output – Active, self-resettable to return within the operating
range. The alerts remain on 5 minutes after resetting.
IMPORTANT! Voltage greater than 32VDC will damage the system
(continuous flashing of irreparably.
all the lights of the base)

10
The valves are connected via the electronic board installed in the base.
The following types of base are available:
• 3-position for controlling 3 solenoid pilots;
• 3 positions for controlling 6 solenoid pilots;
• 4 positions for controlling 4 solenoid pilots;
• 4 positions for controlling 8 solenoid pilots.
All the bases can be connected one to the other interchangeably until all the controls of the multi-pin connector used are plugged.
Each base always occupies all the controls available, including those not used. This allows you to change the configuration of the valves installed
without modifying the system address map.
WARNING!
The control of non-connected outputs generates an interrupted solenoid pilot alarm.
3. VALVE CONNECTION
D-Sub 25-pin CONNECTOR
a
3-position base for 6 pilots
b3-position base for 3 pilots
cValve with 2 solenoid pilots
dDummy valve or bypass
eValve with 1 solenoid pilot
fIntermediate module
g4-position base for 8 pilots
hClosed end-plate
D-Sub 44-pin CONNECTOR
OUT Failure signal
OUT Failure Signal

11
WARNING!
It cannot be used as a safety function as it only prevents power supply from turning on.
Manual operation or faults can cause involuntary movements. For greater security, relieve all pressure in the compressed air system before carrying
out hazardous operations.
Intermediate modules with additional power supply can be installed between valve bases. They either provide additional power supply when
numerous solenoid pilots are activated at the same time or electrically separate some areas of the valve island from others, e.g. when some solenoid
valves need to be powered off when a machine safety guard needs to be opened or an emergency button has been pressed, in which case only the
valves downstream the module are powered on.
4. INTERMEDIATE MODULE - M, WITH ADDITIONAL POWER SUPPLY
PIN Colour Function
1Brown + VDC
2White + VDC
3Blue GND
4Black GND
VDC Valve
VDC Bus
Linea Bus
VDC Valve
VDC Bus
Linea Bus
VDC Valve
5. TECHNICAL DATA
Supply voltage range V 12 -10% 24 +30%
Minimum operating voltage V 10.8
Maximum operating voltage V 31.2
Maximum admissible voltage V 32 *
Drive Configurable PNP or NPN
Power supply without controlled valves W 0.1 for “Electrical connection - E” + 0.25 for each“Base - B”
Solenoid pilot power on start-up (Speed Up) W 3 for 15 msec
Solenoid pilot power after start-up (holding) W 0.3
Maximum current admissible A 6 continuous, 9 instantaneous
Protection System protected against overload;
short-circuit protected solenoid pilot Output
Diagnostics FAULT signal red light and Out signal on “Electrical connection - E”
Led light signal on valve
Faults signalled Short-circuited solenoid pilot; Solenoid pilot broken or missing
Power supply out of range (under-voltage or over-voltage)
Ambient temperature °C -10 to + 50
°F 14 to 122
Electrical connection Plug connectors
25-pin connector 44-pin connector
Maximum number of controllable solenoid pilots 21 38
Maximum number of controllable solenoid valves Ditto as above, depending on the number of solenoid pilots and type of base
Maximum number of simultaneously controllable solenoid pilots:
at 24VDC 21 38
at 12VDC Depending on the voltage drop – see page 3
Maximum current at 24VDC A 3 5
Maximum current at 12VDC A 6 9
Degree of protection IP65 (with connectors connected or plugged if not used)
* WARNING! Voltage greater than 32VDC will damage the system irreparably.

12
NOTES
www.metalwork.eu
EQZZZZ001 IT_EN - IM01_07/2019
Other manuals for EB 80
9
Table of contents
Languages:
Other Metal Work Control Unit manuals

Metal Work
Metal Work EB 80 User manual

Metal Work
Metal Work HDM User manual

Metal Work
Metal Work EB 80 User manual

Metal Work
Metal Work EB 80 User manual

Metal Work
Metal Work EB 80 User manual

Metal Work
Metal Work EB 80 User manual

Metal Work
Metal Work HDM series User manual

Metal Work
Metal Work Safe Air 70 series User manual

Metal Work
Metal Work EB 80 User manual

Metal Work
Metal Work HDM User manual