Metalworks DUAL START 3412 User manual

V1-28062011
829000110GBNLFE
829000120GBNLFE
MANUAL - HANDLEIDING- MANUEL D’UTILISATION - MANUAL
829000110 (DUAL START 3412)
829000120 (DUAL START 3424)
Battery charger
Batterijlader
Chargeur de batterie
Arrancador
Please read and keep for future reference
Gelieve te lezen en voor later gebruik bewaren
Veuillez lire et conserver pour usage ultérieur
Leer y guardar para posteriores consultas
NL
F
GB
E

V1-28062011
829000110GBNLFE
829000120GBNLFE
GB WARNING!
Read entire manual carefully before operating the product!
To ensure the product a longer life and more efficient, please note:
• Fully charge the battery when first received.
• Fully charge the battery after each use.
• Fully charge the battery every 3 months.
Operational instructions
1. Jump starting
1.1 Turn ignition off before making cable connections.
1.2 Make sure the power switch is on the OFF position until clamps are connected to the vehicle battery.
1.3 Connect POSITIVE (RED) clamp to POSITIVE (POS, P, +) ungrounded post of battery.
1.4 Connect NEGATIVE (BLACK) clamp to vehicle chassis or engine block away from battery post.
1.5 If connecting the clamps backward, the reverse alarm LED will be on and an audio alarm will sound.
Do not turn your jump starter on! This could cause serious damage. Reverse the connections, and
the reverse alarm LED is off and the audio alarm will stop.
1.6 Dual Start 3412: Turn the power switch to the 12V position.
Dual Start 3424: Turn the power switch to the 12V or 24V position according to your car or truck.
1.7 Crank the engine for 3-5 seconds. If the engine does not start within 10 seconds, stop cranking and wait
at least 4 minutes before attempting to start the vehicle again. (This permits the battery to cool down.)
1.8 After the engine starts, turn the power switch to the OFF position. Then disconnect the NEGATIVE
(BLACK) clamp and then the POSITIVE (RED) clamp in that order.
1.9 Always return the cables to their stored position.
1.10 Recharge the jump starter as soon as possible after use.
2. Charging
Turn the power switch to charging (12V) position!
Plug the adaptor into the main supply and then insert the other end into the charge port on the front panel
of the jump starter. Continue charging until the charging status LED turns red to green.
After charged, turn the power switch to OFF position.
V1-28062011
829000110GBNLFE
829000120GBNLFE
3. Checking internal battery status
Press on the TEST button; check the voltage of battery from the three indicating LED.
• HIGH LED means the jump starter is charged and ready to be used.
• MED LED means the jump starter needs to be charged as soon as possible.
• LOW LED means that the jump starter cannot be used and needs to be charged immediately.
4. Double 12V output sockets
If the jump starter is overloaded by output current (15A max), the circuit will be cut off automatically. Reduce output
power of electrical equipment and the circuit will be restored automatically in a few minutes.
Recharge the jump starter as soon as possible after using the output sockets.
5. Specifications
Dual Start 3412 Dual Start 3424
Voltage (DC Volts) 12V 12V / 24V
Cranking Amp 1200A 1200A-12V, 600A-24V
Peak Amp 2400A 2400A-12V, 1200A-24V
Battery 2 x 22 AH Lead-Acid 2 x 22 AH Lead-Acid
Internal battery status display LED LED
Charging mode Float charge Float charge
Power outlet 2 x 12 V 2 x 12 V
Additional functions Overload protection
Polarity alarm
Metal case
Overload protection
Polarity alarm
Metal case
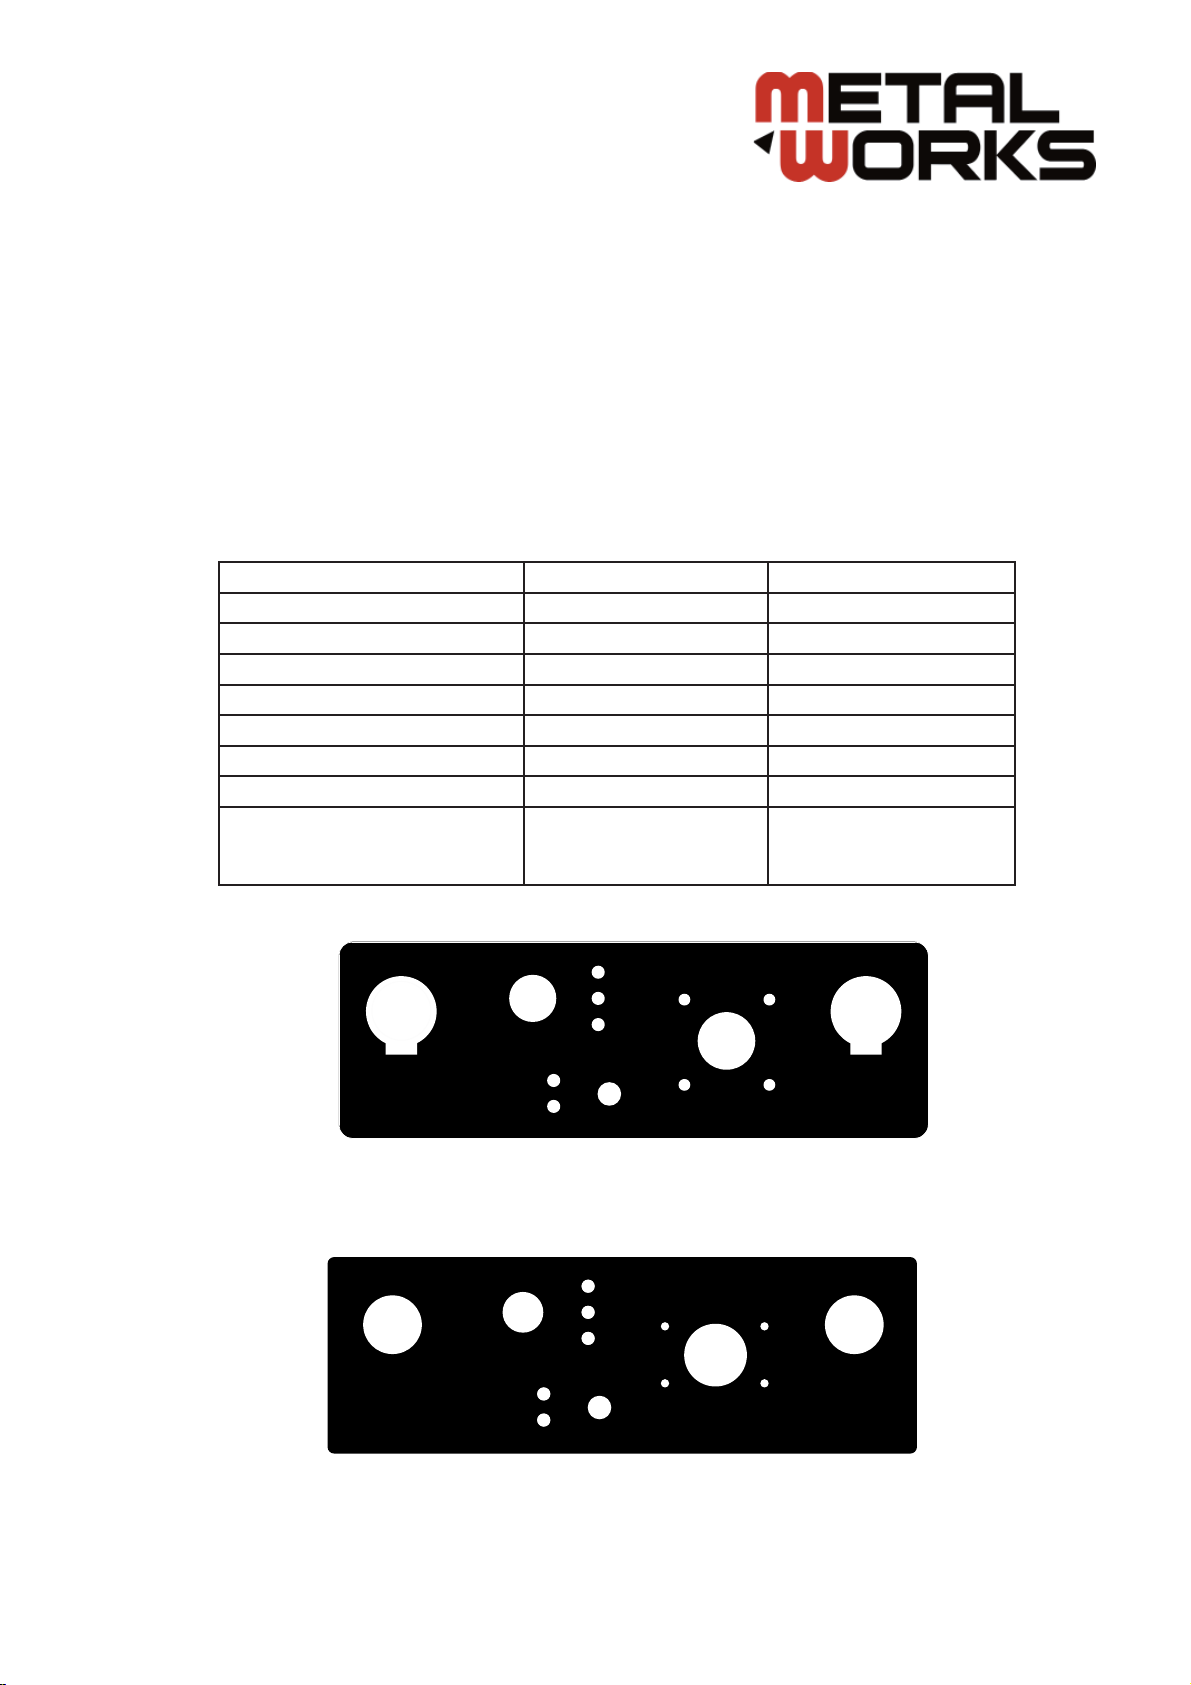
TEST
CHARGING STATUS
REVERSE ALARM
HIGH
MED
LOW
OFF
12V
CHARGE PORT
DUAL START 3412 - Front panel
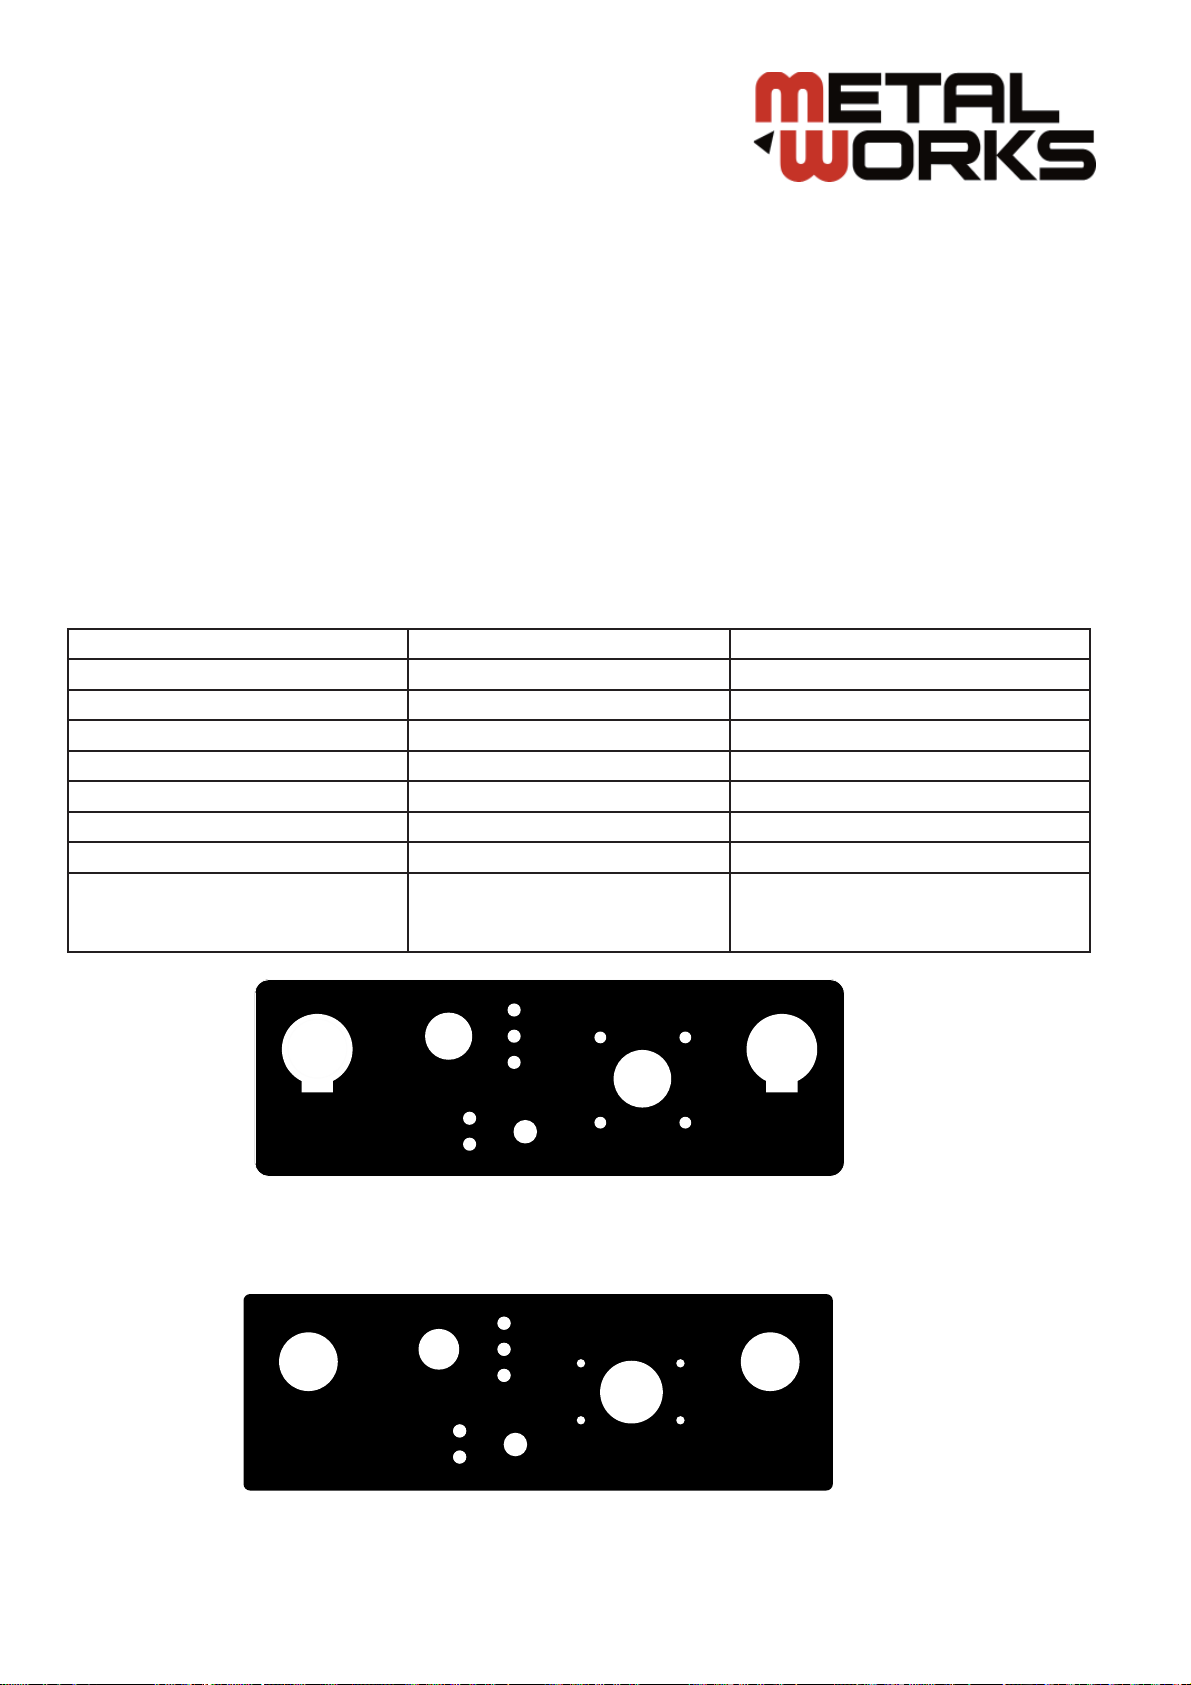
TEST
CHARGING STATUS
REVERSE ALARM
HIGH
MED
LOW
CHARGE PORT
OFF
12V
24V
CHARGING
DUAL START 3424 - Front panel

V1-28062011
829000110GBNLFE
829000120GBNLFE
WAARSCHUWING!
Lees aandachtig die handleiding vooraleer dit product te gebruiken!
Voor een lange levensduur en een betere rendement:
• Laad de acculader volledig op bij de ontvangst.
• Laad de acculader volledig op na elk gebruik.
• Laad de acculader volledig op elke drie maanden.
Gebruiksaanwijzing
1. Aansluitingen
1.1 Draai de omschakelaar naar OFF vooraleer de kabels aan te sluiten.
1.2 Controleer dat de omschakelaar op OFF blijft totdat de klemmen aan de batterij van de wagen
aangesloten zijn.
1.3 Sluit de POSITIEVE (RODE) klem op de POSITIEVE (POS, P, +) van de batterij aan.
1.4 Sluit de NEGATIEVE (ZWARTE) klem op de chassis van de wagen of van de motor, ver van de batterij.
1.5 Als u de klemmen verkeerd aansluit zal de reverse alarm LED gloeien en een geluidsalarm luiden.
Schakel de lader niet in! Dat zou ernstige schade kunnen veroorzaken. Verwissel de
aansluitingen en de alarmen zullen stoppen.
1.6 Dual Start 3412: Draai de omschakelaar naar de 12V positie.
Dual Start 3424: Draai de omschakelaar naar de 12V of 24V positie, afhangend van uw auto of
vrachtwagen.
1.7 Start de motor 3-5 seconden. Als de motor na 10 seconden niet opstart, stop en wacht tenminste
4 minuten vooraleer opnieuw te proberen. (Zo kan de batterij afkoelen)
1.8 Nadat de motor heeft gestart, draai de omschakelaar naar OFF. Daarna, trek de NEGATIEVE
(ZWARTE)
klem en dan de POSITIEVE (RODE) klem, in die volgorde.
1.9 Steek de kabels steeds in hun originele opbergplaats.
1.10 Laad de batterijlader opnieuw volledig op zo snel mogelijk na elk gebruik.
2. Opladen
Draai de omschakelaar op laadpositie (12V) !
Sluit de adapter stekker in een stopcontact aan, en de andere uiteinde in het voorpaneel van de lader
(CHARGE PORT). Laat het apparaat opladen totdat het indicator licht van rood naar groen verandert.
Na de lading, draai de omschakelaar naar OFF.
NL
V1-28062011
829000110GBNLFE
829000120GBNLFE
3. Toestand van de batterijlader testen
Druk op de knop TEST; lees de spanning op de LED indicator.
• HIGH LED: de lader is opgeladen en mag gebruikt worden.
• MED LED: de lader moet zo snel mogelijk opgeladen worden.
• LOW LED: de lader mag niet gebruikt worden en moet onmiddellijk opgeladen worden.
4. Dubbele output stekkers 12V
Als de uitgangsstroom te hoog is (15A max) zal het circuit automatisch verbroken worden. Verminder de
uitgangsstroom van uw inrichting en het circuit zal automatisch hersteld worden na enkele minuten.
Laad de batterijlader opnieuw volledig op na het gebruik van de output stekkers.
5. Specificaties
Dual Start 3412 Dual Start 3424
Spanning (DC Volts) 12V 12V / 24V
Startstroom 1200A 1200A-12V, 600A-24V
Piekstroom 2400A 2400A-12V, 1200A-24V
Batterijen 2 x 22 AH Lood-Zuur 2 x 22 AH Lood-Zuur
Display van interne batterijtoestand LED LED
Laadmodus Float laden Float laden
Stopcontact 2 x 12 V 2 x 12 V
Extra functies Bescherming tegen overbelasting
Polariteit alarm
Metalen behuizing
Bescherming tegen overbelasting
Polariteit alarm
Metalen behuizing
TEST
CHARGING STATUS
REVERSE ALARM
HIGH
MED
LOW
CHARGE PORT
OFF
12V
24V
CHARGING
DUAL START 3424 - Voorpaneel
DUAL START 3412 - Voorpaneel
TEST
CHARGING STATUS
REVERSE ALARM
HIGH
MED
LOW
OFF
12V
CHARGE PORT
This manual suits for next models
3
Table of contents
Languages:
Other Metalworks Batteries Charger manuals


