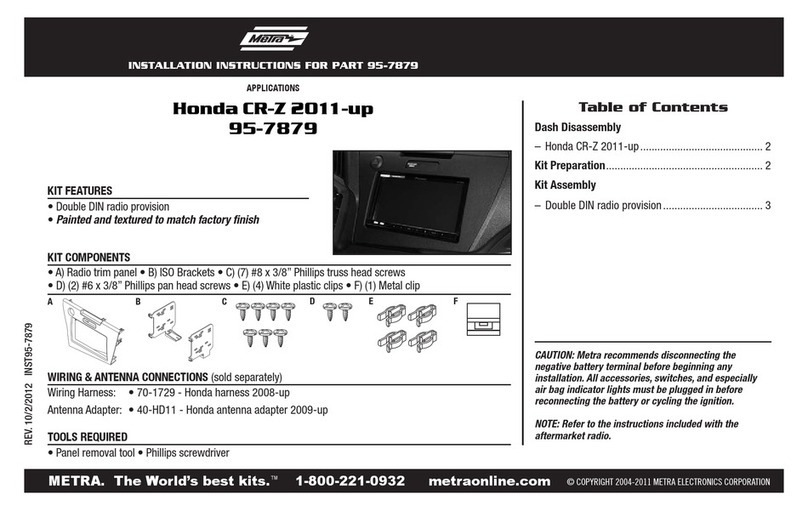
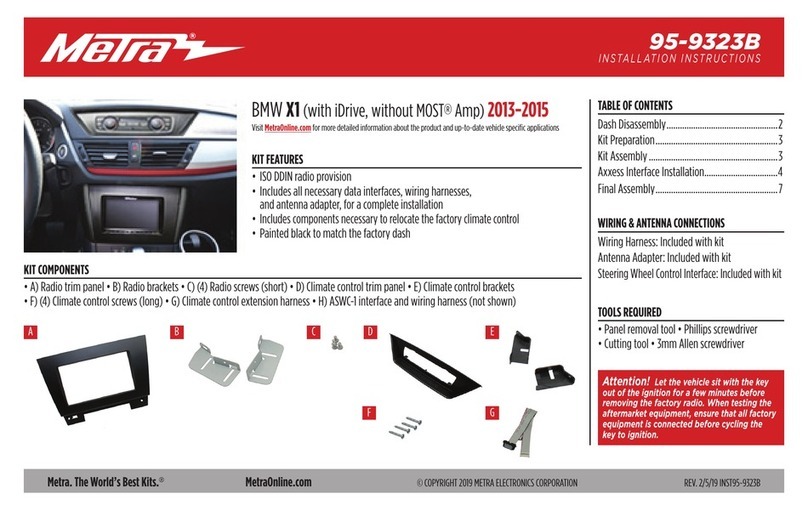
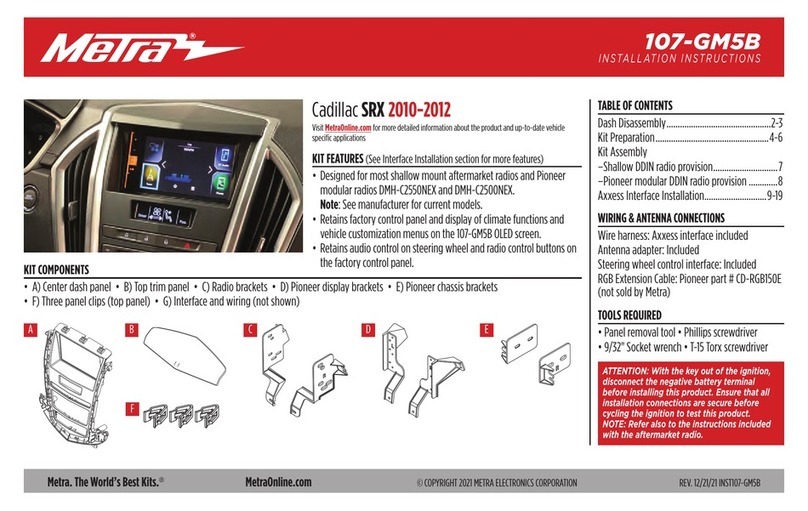
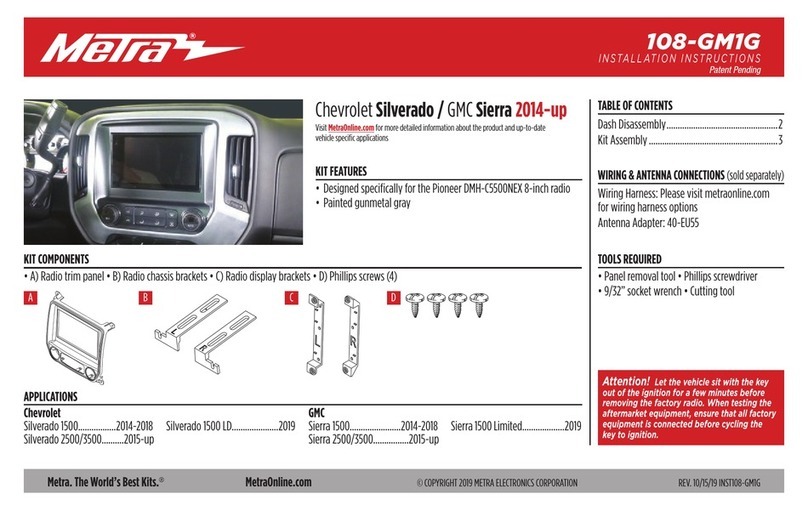
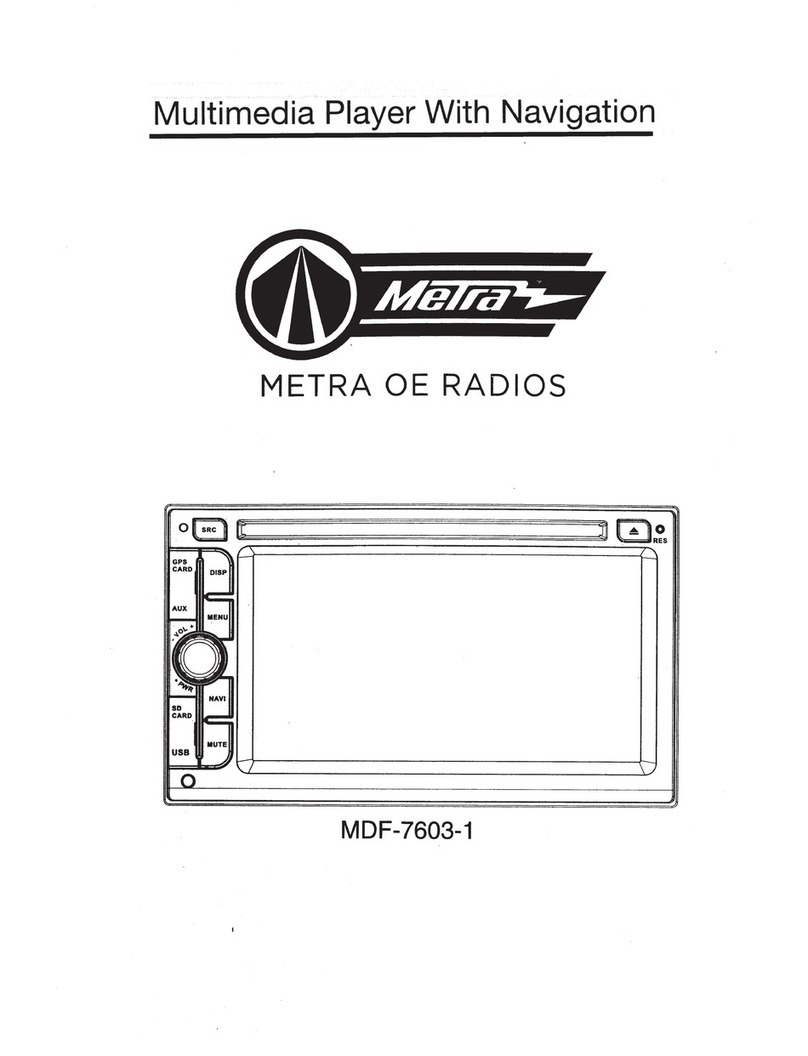
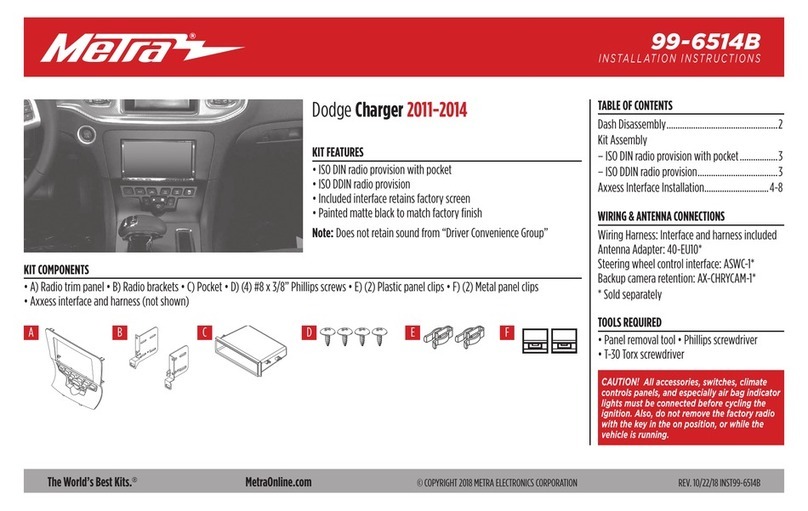
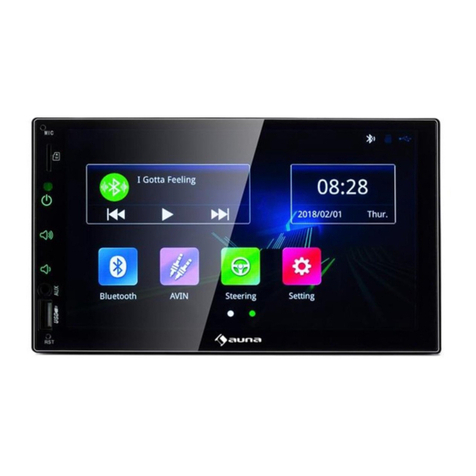
Metra Electronics MDF-9500-1 User manual

METRA
OE
RADIOS
~~
so
Jc
CAADI
:
AUX
~~
~~
,____
----------
0
-------------
MDF-9500-1

Preface Merge
NavMate navigation software provides turn-by-turn route guidance while traveling to your destination.
Before operating, take a few minutes to review the safety and operating instructions
in
this manual so
you can quickly and safely become familiar with your NavMate software's many features.
This User Manual explains the NavMate software's functions, and provides details
on:
• Using the control buttons
• Entering destinations
• Understanding the different screens available
on
your NavMate software
• Adjusting user preferences
Note: All users should read this manual prior to operating your NavMate software.
Copyright©
2011
All rights reserved.
NavMate·Software User Manual Version 4.0.60 (480 x 272}
This document and the software described
in
it are furnished under license and may be used or
copied only
in
accordance with such license. Except
as
permitted by such license, the contents of this
document may not be disclosed to third parties, copied, or duplicated
in
any form,
in
whole
or
in
part,
without the prior written permission of Horizon Navigation, Inc.
The NavMate software, including its operation and use, is covered by one or more of the following
patents:
US
Patents No. 5,262,775; 5,283,575; 5,291,412; 5,291,413; 5,291,414; 5,297,028; 5,303,159;
5,311,434; 5,339,246; 5,343,400; 5,345,382; 5,359,529; 5,374,933;
5,377,113;
5,390,123; 5,394,333;
5,402,120; 5,414,630; 5,430,655; 5,440,484; 5,477,220; 5,508,931; 5,515,283; 5,515,284; 5,550,538;
5,608,635; 5,712,788;
5,731
,978; 5,862,509; 5,898,390; 5,902,350; 5,904,728; 5,910,177; 5,912,635;
5,922,042; 5,928,307; 5,938,720; 5,987,381; 6,058,390; 6,144,919; 6,147,626; 6,253,154; 6,259,987;
6,282,496; 6,298,305; 6,360,165; 6,456,931; 6,456,935; 6,470,268; 6,542,814; 6,552,656; 6,600,994;
6,622,086; 6,735,516; 0364,840; 0397,046; 0457,823; EP0987665A3. The sale and/or licensing
of
the
NavMate software and associated materials does not include any licenses (implied or otherwise) to
patents or technology, unless specifically stated
in
writing.
NavMate® is a trademark
of
Horizon Navigation, Inc. The NavMate software and associated materials
are protected by copyright
in
the
US
and internationally.
End-User
License
Agreement
This
End-User
License
Agreement
(EULA)
is
a
legal
agreement
between
you
(either
an
individual
or
a
single
entity)
and
HORIZON
NAVIGATION,
INC.
for
the
operating software
and
updates
thereof that
run
the digital
map
database
and
associated
hardware
(collectively
the
"Software").
By
installing
or
using
the
Software,
you
agree
to
be
bound
by
the
terms
of
this
Agreement.
If
you
do
not
agree
to
the
terms
of
this
Agreement,
return
the
Software,
along
with
all
other
accompanying
items
in
the
form
they
were
purchased,
within
thirty
(30)
days
after
such
purchase
to
the
authorized
dealer
from
where
the
Software
was
purchased,
for
a
full
refund
of
any
fees
paid.
Use
of
the
Software
without
acceptance
of this
Agreement
is
unauthorized
and
not
permitted.
1.
License
Grant.
HORIZON
NAVIGATION,
INC.
grants
you
a
non-exclusive
license
to
use
your
purchased
copy
of
the
Software
for
your
own
internal
purposes
of
accessing
the
digital
map
database
and
running
the
associated
hardware
and
not
for
service
bureau
time-sharing,
or
other similar
purposes.
2.
Limitations
On
Use.
You
are
not
permitted
to
copy,
modify,
decompile,
disassemble,
or
reverse
engineer
any
portion
of
the
Software
without
the
expressed
written
permission
from
HORIZON
NAVIGATION,
INC.
3.
U.S.
Government
End
Users.
The
Software
is
provided
with
Restricted
Rights.
Use,
duplication,
or
disclosure
by
the
Government
is
subject
to
restrictions
as
set
forth
in
subparagraph
(c)
(1)
(II)
of
the
Rights
in
Technical
Data
and
Computer
Software
clause
at
DFARS
252.227-7013
or
subparagraphs
(c)
(1)
and
(2)
of the Commercial
Computer
Software-Restricted
Rights
at
48
CFR
52.227-19,
as
applicable.
HORIZON
NAVIGATION,
INC.,
4701
Patrick
Henry
Dr.
Suite
1301
Santa
Clara,
CA
95054
USA.
4.
Indemnity.
You
agree
to
indemnify,
defend
and
hold
free
and
harmless
HORIZON
NAVIGATION,
INC.,
including
its
licensors,
assignees,
subsidiaries,
affiliated
companies,
and
the
respective officers, directors,
employees,
shareholders,
agents,
authorized
dealers
or
sales
agents,
and
representatives
of
each
of
them
from
and
against
any
liability,
loss,
injury,
demand,
cost,
expense,
or
claim
of
any
kind
of
character,
including but not limited
to
attorney's
fees,
arising
out
of
(a)
any
use
or
possession
of
the
Software,
or
(b)
any
breach
of
any
warranties
or
representations
made
by
you
in
this
Agreement
or
of
your
obligations
under
this
Agreement.
5.
Disclaimer
of
Warranty.
HORIZON
NAVIGATION,
INC.
does
not
make
any
warranties
or representations,
either
express
or
implied,
with
respect
to
the
software, without limiting
the
foregoing,
HORIZON
NAVIGATION,
INC.
expressly
disclaims
any
implied
warranties
of
quality,
performance,
merchantability, fitness for aparticular
purpose
or non-infringement.
Some
states
do
not
allow
the
exclusion
of
implied
warranties,
so
some
portion of
the
above
exclusion
may
not
apply
to
you.
6.
Limitation
of
Liability.
HORIZON
NAVIGATION,
INC.
shall
not
be
held
responsible for
any
actual,
anticipated
or
speculative
loss
of profit
or
direct, indirect, incidental,
special,
or
consequential
damages,
including, without
limitation,
loss
of
revenue,
data,
or
use
incurred
by
you
or
any
third party
arising
out
of
your
use
or
possession
of
the
software,
whether
in
an
action
in
contract
or
tort
or
based
on
a
warranty,
even
if
HORIZON
NAVIGATION,
INC.
has
been
advised
of
the
possibility
of
such
damages.
7.
Warnings.
A.
Copies
of
the
digital
map
database
reflect conditions
as
they
existed
at
various points
in
time
before
your
receipt
of
such
copies.
Accordingly,
copies
of
the
digital
database
map
may
contain inaccurate
or
incomplete
data
or
information
due
to
inaccurate
or
incomplete
source
materials,
the
passage
of
time,
road
construction,
changing
conditions,
and
other
wise.
B.
Neither
the
Software
nor
the
digital
map
database
include,
analyze,
process,
consider
or
reflect
any
of
the
following
categories
of
information,
i.e.,
neighborhood quality
or
safety;
population
density; availability
or
proximity
of
law
enforcement,
emergency,
rescue,
medical
or
other assistance; construction
work,
zones,
or
hazards;
road
and
lane
closures;
various
legal
restrictions
(such
as
vehicular type,
weight,
load,
height
and
speed
restrictions);
road
slope
or
grade;
bridge
height,
width,
weight
or
other limits;
road,
traffic
or
traffic facilities
safety
or
conditions;
weather
conditions;
pavement
characteristics
or
conditions; special
events;
traffic
congestion;
or
travel
time.
8.
Transfer.
This
Agreement,
including
all
rights, obligations
and
representations
may
be
transferred
to
another
individual
or
single
entity,
provided
the
same
transfer includes
the
simultaneous
transfer of
the
associated
hardware
in
which
the
Software
is
installed,
and
further
provided
that
such
other
individual
or
single entity accepts
all
the
terms of
this
Agreement.
In
the
event
such
individual
or
single
entity
to
which
the
Software
is
transferred
does
not
accept
the
terms
of
this
agreement,
then
the
License
herein
automatically
terminates.
Further
use
of
the
Software
is
unauthorized
and
not
permitted.
9.
Governing
Law.
This
Agreement
shall
be
governed
by
the
laws
of
the
State
of California, without
giving
effect
to
its conflict
of
laws
provisions.

Table
of Contents 4 NAVMATE Software
Thank
you
for
buying
this product. Safety Information
21
Please
read through these operation instructions
Vehicle
Position
22
so
you
will know
how
to operate your model
Map
and
information Database
22
properly. After reading
please
keep
this booklet
NAVMATE
Software Operation
in
a
safe
place for future
reference.
Quick Start
Guide
22
Using
Your
NAVMATE
Software
1
Before
You
Start
Function Buttons
23
Important Safeguards 7 Navigation
Menus
24
About this
manual
7 List
Mode,
Spell
Mode
&
Precautions 8 Most
Recently
Used
24
Maintenance 9
Map
Screen
25
Location &function of the controls
10
Destination Selection
(GO
TO
...)
Remote
control
11
Add
ress/1
ntersection
26
Specifications
13
Point of Interest
(POl)
27
Wiring connection
14
Home
Address
28
Office Address
29
2 Common Operations
Favorites
29
To
Select Source
by
Menu
15
Address Book
29
Reset
the Unit
15
Trail
Book
30
Turning
the Unit On/Off
15
Trip
Book
30
Volume
Control
15
Coordinates
30
Setting the Sound Characteristics
15
History
30
EQ
Setting
16
Using
Map
30
Turning
Loudness On/Off
16
.
Route
Calculation &Guidance
Insert a
SO
Card
16
Route
Calculation
31
Eject a Disc
16
Please
Proceed
31
Mute Function
16
Route
Guidance
31
Mode Selector
16
True
View
(Intersection Zoom)
32
Infrared Sensor
16
Map
Display
Screen Display
16
Current Location
Screen
32
Double Function
16
Arrival
Screen
33
Off-route &
Route
Interruptions
33
3 Main Menu
Edit
Favorites
Menu
33
Main
Menu
Setup
17
Edit
Address Book
33
Video Adjust
17
Edit
Home
Address
34
Audio Adjust
17
Edit
Office Address
34
Time Adjust
18
Edit
Trail
Book
34
Screen Adjust
18
Add
Trail
35
System
18
Edit
Trail
35
Key
Configuration
19
Setup
Trail
Display
36
Background
19
Edit
Trip
Book
37
Default
20
Add
37
Edit
38
Edit
My
POl
38
Add
Category
38

Setup
Display
39
Number
Buttons
54
Edit
Category
39
Pause
the
Playback
54
Add
to
MY
POl
39
Stop
the
Playback
54
Edit
My
POl
40
Play
tracks
at
Random
55
Set-up
Menu
40
Repeat
Playing
55
Setup
Routing
Criteria
40
Skip backward/forward/F.
F/REW
55
Display
Options
41
System
Switch
55
User
Preferences
41
Slow
Motion
Playback
55
Language
Settings
41
Increase
the
size
of
Picture
55
Voice
Guidance
42
On
Screen
Display
56
Set
Time
42
Setting
the
Playback
Time
56
Distance
Units
Settings
42
Changing
Audio
Language
56
Day/Night
Settings
42
Changing
the
Subtitle
Language
56
POl
Icon
Setup
42
Changing
the
Viewing
Angle
57
Location
Reset
43
Selecting
Channel
57
System
43
Program
Playing
57
Volume
43
Playing
PBC(Menu)
57
GPS
Diagnostic
43
Selecting
Menu
57
System
Information
43
DVD
Setup
Menu
58
Trip
Computer
44
Planned
Route
44
6 CD/MP3/SD/USB
Detour
44
CD/MP3/SD/USB
Setup
64
Cancel
Route
45
CD/MP3/SD/USB
Play
64
Follow
Trail
46
Selecting
Tracks
Fast
64
Repeat
Playing
64
APPENDIX
A:
Utilities
Manual
47
Number
Buttons
64
Introduction
47
Playing
Tracks
at
Random
64
Select
Device
&
Language
Function
47
Stop
play
64
Select
Device
47
Pause
the
Playback
64
Language
47
Skip backward/forward/F.
F/REW
POl
Uploader
48
the
Playback
64
Select
Category
Feature
48
Selecting
Track
64
MapNoice Uploader
50
On
Screen
Display
64
Steps
to
Follow
to
Downloading
Program
Playing
64
the
Map
Data
50
Eject
SD
Card
65
Select
Database
Area
50
Eject
USB
65
Select
Language
50
Select
the
Destination
51
7 Tuner
The
Process
of
Copying
51
Listening
to
the
Radio
65
Remove
the
Memory
Device
52
Band
Selector
66
Backup
.
52
Manual/Automatic
Tuning
66
Restore
53
DX/LOC
Selector
66
Selecting
The
Stored
Station
66
5 DVD/VCD/MP4
MOIST
Selector
66
DVD/VCD/MP4
Setup
54
Scanning/Storing
Stations
66
DVD/VCD/MP4
Play
54
Automatically
66
Selecting
Tracks
Fast
54

Go
to
FREQ
67
Number
Buttons
67
RDS SETUP 67
Alternative Frequencies 67
Traffic Alarm 67
Program Type 67
8 AUX
AUX
Touch
Screen
Menu
68
9 Bluetooth Mode
Bluetooth
Operational
Interface
69
Using
a
Bluetooth
Wireless
connection
69
Pairing
Your
Unit
&
Bluetooth
Phone
69
Pairing
in
Hands-free
Mode
69
Phone
Pairing
Mode
69
Bluetooth
Connection
&
Disconnection
70
Using
the
Unit
as
a
Hands-free
Device
70
Last
Number
Dialing
70
To
Dial
by
Cellphone
70
To
Dial
by
the
Unit
70
Using
the
Unit
as
Bluetooth
Music
70
Audio
Transfer
between
the
Unit
&
Phone
71
10iPod
iPod
Play
72
Selecting
Tracks
Fast
72
Playing
Track
F.F/F.REW
72
Repeat
Playing
72
Playing
Tracks
at
Random
72
Pause
the
Playback
72
File
Selector
73
Eject
iPod
73
11
Additional Information
Simple
Troubleshooting
Guide
74

Before
You
Star!
7
ImportantSafeguards
1.
Be
sureto connectthe colorcodedleadsaccording
to
thediagram. Incorrectconnections
may cause the unit
to
malfunction or damage the vehicles electrical system.
2.
Be
sure to connectthe speaker{-) leads tothe speaker{-) terminal. Never connectthe
left
and right channel speaker cables to each other or
to
the vehicle body.
3.
Make sure all the connections are correct before turning on your unit.
4.
When replacing the fuse{s}, the replacement must be ofthe same amperage
as
shown on
the fuse holder.
5.
When installing the
unit~
do not block heat vents. Blocking them may result in fire.
6.
Please install unit properly
to
reduce driver distraction.
7.
Use of the unitwithout having the car started may drain the car battery.
8.
Do
not expose unit to direct sunlight, extreme high
or
low temperature conditions and
avoid exposure to high humidity.
9.
Do
not put credit cards, cassettes,
or
watches around the unit,
or
they may become
inoperable.
10.
To
avoid interference, keep your phone away from the unitwhen using your phone.
11.
The remote control may
not
work
properly
if
exposed to high temperatures or direct
sunlight for prolonged periods
of
time.
About This Manual
This
unit
features
a
number
of sophisticated functions.
All
the
functions
have
been
designed
for
the
easiest
possible
use,
but
many
are
not
self-explanatory.
This
manual
will
help
you
understand
the
functions
and
operations of
the
unit.
This
manual
explains
remote
control operation.
However,
in
·
addition
to
those
functions
related
with
DVD/VCD/CD/MP3/MP4
operation that
can
only
be
operated
by
the
remote
control,
there
are
also
functions
that
can
be
operated
on
the
buttons provided
for
the
main
unit.
Due
to
continuous improvements
and
changes
to
our
products
the
information
within
this
user
guide
may
contain
some
inaccuracies of current information
due
to improvements
to
programs
and/or
equipment
and/or typographical
errors.

a
Bet.cre
You
Slarl
Precautions
This unit can play the following discs only:
Type
of
disc
Label
on
the
disc
Recorded
Material
Size
of
disc
DVD
DVD
Sound
&
moving
pictures
12
em
VIDE
0
VCD
@2
mJo~~
Sound
&
moving
pictures
12
em
VIDEO
CD
(
DIGITAL
VIDEO)
CD
mJo~rn3
Sound
only
12
em
DIGITAL
AUDIO
MP3
mJo~tM
Sound
only
12
em
DIGITAL
AUDIO
MP3
MPEG-4
mJo~rn3
Sound
&
moving
pictures
12
em
DIGITAL
AUDIO
MPEG-4
NOTE:
The
unit
is
compatible
with
VCD1.0/1.1/2.0/3.0
version
and
DVCD
disc.
•
Do
notattemptto
modifytheunit,modifying
the unit may cause permanent damage.
• Stop the vehicle before performing any
operation
that
could interfere with your
driving.
•
Do
not use/operate in extremely high or
low temperatures.
Be
sure the temperature
inside the vehicle is between
+60°
Cand
-10°
Cbefore turning on your unit.
•
To
enjoy optimum sound and images while
playing, handle the discs
as
follows:
-Handle the disc by its edge to keep the disc
clean, and do not touch the surface.
-
Do
not use
COs
with sticky residue or
ink
on
the surface.
-
Do
not use
COs
with labels or stickers
attached, which
may
leave a sticky
residue when they peel off.
(As
shown
in
the
picture)
~
-Clean the discs with
an
optional cleaning
cloth. Wipe each disc from the center out.
(As
shown
in
the picture)

Before
You
Start
Maintenance
Replacing
the
Fuse
Make sure the amperage matches the specified
value when replacing the fuses. If the fuse is
blown, check the power connection and then
replace with a new
one.
If the same problem
occurs, then the unit
is
malfunctioning.
In
such cases, please consult the nearest service
center.
Warning!
Never use a fuse with a rated amperage of more than
what was supplied with your unit, otherwise it will
damage the unit.
Replacing
the
Battery
When the range of operation of the remote
control becomes short or stops operating,
replace the lithium battery with a new button
cell
(CR2025).
-Gently pull out the Battery Holder while
pressing the Button.
-Put the battery with
mark(+)
upward into the
Battery Holder.
9
-Reinsert the Battery Holder into the Remote
Control.
Precautions
on
Using
Lithium
Battery
Always
keep
the lithium battery out ofchildren's
reach.
In
case of swallowing, see a doctor
immediately. Clean the battery with a dry cloth,
to ensure proper connectivity. Make sure to
check polarity when loading the battery.
To
prevent short circuit, do not use metal tweezers
to insert or remove the battery.
Warning!
Improperhandling ofthe batterymay lead to explosion.
It cannot
be
charged, disassembled or disposed of
in
a fire.

10
Before
You
Start
Location
of
the Controls
he Front Panel
1
PWR
When in standby mode, briefly press this button
to
turn on the unit, and then press and hold it to turn off.
REMOTE Infrared Sensor
VOL+/-
Press these buttons to adjust volume up or down.
SEL
Button
Press this button to set the sound characteristics.
DISP
Press this button first to enter the night mode,
press it again to close display, press third to
resume play. Press and hold it to set the sound
characteristics.
MUTE
Button
Press this button to mute, press and hold it to
activate equalizer function.
AUXIN
RES
Button
Press this button to set the unit to initial status.
Micro
SO
CARD Slot
10
USB
Slot
11
SRC
SOURCE
Press it to change modes.
12
Disc loading slot
13
Eject Button
Press it to insert or eject a disc.
14
MENU Button
Press it to enter MAIN menu setup.
15
GPS
CARD
SLOT
16
MIC (for Bluetooth)
Press the Bluetooth button to set the unit to initial
status.
17
Screen Resolution:
800x480
DPI
18
NAVI
During other modes, press this button to change to
navigation mode, press it again to exit.

SECTION 1 USER GUIDE
Before
You
Start
11
Remote
Control
Tips:
For
more
information
as
to
replacing battery, please
refer
to
Replacing the Battery
on
page
9.

12
BefQre
Xou
Start
1 SOURCE/PWR
2 GO TO(playing time/track/[press and hold it
to enter/exit the NAVI])
3 BAND/TITLE
4
AMS(Automatic
Memory
Selection)/MENU
5
LOC/SUB
-T
6
ST
I
AUDIO(mono or stereo/language or channel
selector)
7 PTY/ANGLE (Program type/DVD play angle)
8
OSD
Press it to show the current information;
in
radio
mode, press and hold it to show the version
number.
9
ZOOM(zoom in or zoom out)
10
Slow
Forward/Rewind
11
P/N
Press it to change the TV system, press and hold
it to capture the instant likeness as a logo type.
12
Mute
13 PROG(Program playing)
14
VOL+NOL-/SEL
15
RPT(Repeat Playing)
16 ROM(Playing Tracks at Random)
17
Pause/Play
18
Stop
Playing
19 SETUP
20 F.R/F.F
21
Previous/Next
Track
22 CLEAR
23
0-9
Number
Buttons
24
Eject
Button
25 T
A/LOUD
(Traffic Alarm/Loudness)
26 AF/EQ (Alternative Frequency/Equalizer) Button
27 ENTER (Left/Right/Up/Down
ENTER)
28 BT
Button
(bluetooth mode)
29 PAIR
During bluetooth, press this button to pair.
30 During bluetooth, press to dial, redial or answer
a call.
31
During bluetooth, press to hang up or ignore
a call.

Before
You
Start
Specifications
General
Power
Requirement
Load
Impedance
Max.
Power
Output
Tone
Controls
+1-
?dB
Dimensions
Approx.
Weight
Approx.
FM
Section
Tuning
Range
Optional
(Europe)
(U.S.A.)
(Russia)
IF
Range
Usable
Sensitivity
(-30dB)
Signal-to-noise
Ratio
Stereo
Separation
Frequency
Response
AM
Tuner
Section
Frequency
Range
Optional
(Europe/Russian)
(U.S.A.)
IF
Range
Usable
Sensitivity
(-20dB)
14.4
V
DC
(11-16
V
allowable)
4ohms
45Wx4
Bass
100Hz
Treble
10
KHz
180
X
180
X
105
mm
(d/w/h)
2.75kg
87.5-108
MHz
87.5-107.9
MHz
65-74
MHz
10.7
MHz
10
dB
uV
60
dB
30
dB
(1
KHz)
40Hz-12KHz
522-1620
KHz
530-1710
KHz
450KHz
28
dB
uV
13
VCD/CD
Player
Section
VCD
Signal
System
AUTO/PAUNTSC
Signal-to-noise
Ratio
60dB
Separation
60
dB
1KHz
Distortion
0.3%
DVD
Player
Section
DVD
Signal
System
AUTO/PAUNTSC
Channels
2
Frequency
Response
40Hz
to
16KHz
Signal-to-noise
Ratio
60
d.B
Separation
60
dB
Note:
Due
to
continuousproductimprovement,specifications
and
design
are
subject
to
change without prior
notice.

14
Before
You
Start
Wiring Connection
Brown line with yellow head CAMERA IN
Black line with yellow head VIDEO IN
Black line with red head AUX IN/R
Black line with white head AUX
INIL
Gray
AV
IN-DET
Oran e REVERSE
Battery+
Ignition Key
Antenna
Power
+
Lamp
In
Ground
Speaker
Front
L
+/-
Speaker
Front
R
+1-
YELLOW
RED
BLUE
PINK
BLACK
WHITE
WHITE/BLACK
GRAY
GRAY/BLACK
0 Output Plug
(Male)
f)
Fan
E)
OutputSocket
(Female)
8
GPS
antenna interface
AUX
OUT/R Black line with red head
AUX
OUT/L
Black line with white head
AV-OUT/CVBS 1 Dark Gray line with yellow head
AV-OUT/CVBS 2
Li
ht Gra line with Yellow head
REAR OUT
/R
Li
ht Gra line with red head
REAR
OUT/L
Li
ht Gra line with white head
FRONT OUT/R Dark Gra line with red head
FRONT OUT
/L
Dark Gra line with white head
SUBWOOFER Brown line with brown head
AMP-CTR Brown
0
0
~~
0
@
~
~
@
@~
0
@
~
\..
BROWN PARKING
~
\..
GREEN
~
\..
GREEN/BLACK
Speaker Rear L
+1-
..J
\..
VIOLET
~
\..
VIOLET/BLACK
Speaker Rear R
+/-
~
\.
WHITE STEERING WHEEL KEY 1
STEERING WHEEL KEY 2
Ground
..)
"
GRAY
..)
\..
BLACK
~
0 Tuner Receptor
0 Socket
for
TV-Box
8
Microphone socket
for
Bluetooth
E)
Socket
for
iPod/USB

SECTION 2
Common
Operations
To
Select
Source
by
Menu
In
any
mode,
touching
<
on
the
screen
shows
the
menu
as
follow:
Slide finger horizontally
on
the
screen
menu
to
see
all
options
as
shown
in
the
figure
below:
Click
the
icon
for
the
desired
mode
then
click
SETUP
to
enter
into
the
settings
menu.
If
you
want
to
navigate,
click
the
GPS
icon;
if it
does
not
enter
GPS
mode,
that
means
the unit
does
not
include
the
function.
Note:
* If the font displays
in
grey, that means this function
is
not
included.
Reset
the
Unit
When
operating
the
unit for
the
first time or after
replacing
the
car
battery,
you
must reset
the
unit.
USER GUIDE
15
Press
RES
button
in
the
panel
with a
pointed
object
(such
as
a
ball
point
pen)
to
reset
the
unit
to initial
status.
Note:
* If
an
erroroccurs on thedisplay, you can also press
RES
button to resume to normal, and
it
will erase
the clock setting and some memorized functions.
*This
function can only be operated bythe main unit.
Turning
the
Unit
On/Off
Briefly
press
1
PWR
button to turn
on
the
unit
when
in
standby,
and
then
press
and
hold
it
to
turn
off.
Note:
* Pressing
PWR
button on the main unit also performs
the same function.
Volume
Control
Press
14
VOL+
button to increase
the
sound
level
and
press
14
VOL-
button to
decrease
the
sound
level.
Note:
* Pressing
VOL+/-
on the main unit also performs
the same function.
Setting
the
Sound
Characteristics
Repeatedly
and
briefly press
14
SEL
button to
select
the
mode
in
the following order:
[
VOL
BAL
FAD
J
SUB
TRE
BAS
After
selecting
the desired
mode,
you
can
adjust
the
current
level
by
pressing
14
VOL
buttons.
Note:
*Pressing
SEL
and
VOL+/-
on the main unit also
performs the same function.

16
Common
Operations
EQ
Setting
While listening to pop music, classic music or
rock music,
you
can adjust the sound to your
liking by using 26
EQ
button.
Repeatedly press and hold 26
EQ
button to
choose the following modes
in
order:
C
POP
CLASS~
OFF
ROCK~
The default setting
is
-
OFF.
Note:
*Setting
EQ
on
the
AUDIO
SETUP
menu
also performs
the
same
function.
Turning
Loudness
On/Off
Press 25 LOUD button to activate loud function.
You
can press this button to increase the low
frequency, which can improve sensitivity for
your ears._Press it again to quit this function.
Note:
*
This
function
is
only
available
on
the
remote
control.
Insert
a
SO
Card
Common
SO
C.ard:
insert a common
SD
card
into SD CARD slot and the card will be
played.
Navigation
SD
Card: insert a navigation
SO
Card (with the navigation map loaded onto the
SD
Card) into
SD
slot, otherwise this unit's
NAVI
will not work.
Eject
a
Disc
Press 24
~
button to eject or insert a disc.
Note:
*
Pressing
~
on
the
main
unit
also
performs
the
same
function.
Mute
Function
Press 12
~button
to mute the unit. And "
tJ:J"
will
appear
on
the
LCD.
Press it again to resume to
previous volume level.
Note:
*
Pressing
MUTE
on
the
main
unit
also
performs
the
same
function.
Mode
Selector
Repeatedly press 1 SOURCE button to select
the different modes available.
Notes:
* Briefly
pressing
SRC
on
the
main
unit
also
performs
the
same
function.
Infrared Sensor
Receptor 2
on
the main unit for the remote
control.
Screen Display
Briefly press DISP to enter the screen saver
mode, press again to go back to previous
status.
Note:
*When
the
unit
is
on
black
screen,
touching the
screen
also
performs
the
same
function.
Double Function
Press NAVI
on
the main unit to activate the
double function, which means that the current
mode remains
on
while using the navigation
mode. Press it again to turn off this function,
and go back to the previous mode.

SECTION 3
Main
Menu
Set
Up
Main
Menu
As
shown
on
the
above
menu,
press
and
hold
SETUP
on
the
remote
control
or
click it
on
the
This
menu
includes
VIDEO,
AUDIO,
TIME,
SCREEN
ADJ,
SYSTEM,
KEY
CONFIG,
BACKGROUND,
DEFAULT.
Click
the
desired
item
to enter corresponding setting
sub
menu.
Slide
finger horizontally
on
the
screen
menu
to
see
all
options
as
shown
in
the
figure
below:
Click < icon
on
the
screen
to
go
back
to the
SOURCE
menu.
USER GUIDE
17
1 Video Adjust
After selecting
VIDEO,
the
sub
menu
will
be
as
shown
in
the
figure
below:
~
In
this
menu
you
can
adjust
BRIGHTNESS,
CONTRAST
and
COLOR.
Click+
I-
to adjust
the
corresponding numerical
value,
and
then
click
SAVE
to
save
preferences
or
click
RESET
to
set
back
to
the
default setting.
Click <to
go
back to
the
SOURCE
menu,
click
'>
to
go
back
to
the
previous
menu.
2 Audio Adjust
After selecting
AUDIO,
the sub
menu
will
be
shown
as
in
the
figure
below:
In
this
menu
you
can
adjust
TREBLE,
BASS,
SUBWOOFER
and
EQ.
Click+
I-
to
adjust
the
corresponding
numerical
value,
click >I <to
choose
your desired effect
and
then
click
SAVE
to
save
preferences or click
RESET
to
set
back to
the
default setting.
Click <to
go
back
to
the
SOURCE
menu,
click
'>
to
go
back
to
the
previous
menu.

I r)r-
SE·-=-cr=lo.,...,N-j
--------------
-
18
Main
Menu
3 Time Adjust
After selecting
TIME,
the
sub
menu
will
be
as
shown
in
the
figure
below:
In
this
menu
you
can
adjust the
CLOCK
and
TYPE.
Click
the
hour
(minute,
second) first
and
then
click >I <to adjust
the
proper
time.
Click
SAVE
or click
RESET
to
set
back to the default
setting.
Click <to
go
back to
the
SOURCE
menu,
click
")
to
go
back to
the
previous
menu.
4 SCREENADJ
After selecting
SCREEN
ADJ,
the
sub
menu
will
be
as
shown
in
the
figure
below:
Press
ADJ
SCREEN
to displaythe
above
menu,
there
is
a+ button
at
the
upper-leftcorner of
the
screen.
Press
the button
at
place
1,
then
button
at
place 2,
then
place
3,
then
place
4,
and
press
last.
5
SYSTEM
After selecting
SYSTEM,
the
sub
menu
will
be
as
shown
in
the
figure
below:
.
.....
Iii'"\
'"
""
tt:'f".;~r~r
,~
"~
-
....
-\
••"'•r"'-~"'
tl'-
..,.,,,
-
....
-
(
fH~~
..
·~
...
,-
-
....
--
.,
·--
..
--
·-
,-
,.,., -
....
-
In
this
menu
you
can
set
the
KEY
BEEP,
BRAKE
DETECT,
REVERSE
POLARITY
and
GPS
VOICE
PROMPT.
Click
the
>I <to
choose
your
desired selection.
Click " I v
to
change
page
as
shown
in
the
figure
below:
In
this
menu
you
can
set
the
AMS,
LOCAL
AREA,
PANEL
LIGHT,
BACK
UP
DETECTOR.
Click
the
>I <to
choose
your
desired selection.
Click <
to
go
back to the
SOURCE
menu,
click
")
to
go
back
to
the
previous
menu.
KEY
BEEP:
The
key
beeps
when
set
ON,
silent
when
set
OFF.
BRAKE
DETECT:
Brake
is
detected
when
set
ON,
when
set
OFF
brake
is
not detected.

SECTION 3
Main
Menu
REVERSE
POLARITY:
Reversed
signal
is
sent
to
the
unit
+12
V
when
set
to
BATTERY,
0 V
when
set
to
GROUND.
GPS
VOICE
PROMPT:
GPS
voice prompt
is
heard
only
during
navigate
mode
when
set
OFF,
heard
during
any
mode
when
set
ON.
Note:
*If
GPS
voice
volume
is
too
low
adjust the
volume
on
the
map.
AMS
FULL:
All
the
pre-existing
radio
deposit
expires
no
longer
allowed
to
save
a
new
radio
when
set
ON;
searching
and
then
recover
all
of
the
stored
radio
stations
when
set
OFF.
LOCAL
AREA:
Depending
on
your
area
choose
Europe,
America
or
RUSSIA,
in
order to
search
radio
stations
in
your
area.
PANEL
LIGHT:
The
front
panel
button light
is
not
controlled
by
the
cars
headlights,
as
long
as
the
unit's
working,
the
panel
light
is
lit
when
set
OFF;
the
panel
light
will
be
controlled
by
the
cars
headlight
when
set
ON.
REVERSE
CAMERA
DETECT:
The
unit
will
not
operate
while
in
reverse
when
set
OFF;
if
you
choose
10,
15
or
20
seconds
then
the
unit
would
start automatically while
in
reverse,
and
then
turn
off after
10,
15
or
20
seconds ofdriving
forward.
6
KEYCONFIG
After
selecting
KEY
CON
FIG,
the
sub
menu
will
be
as
shown
in
the
figure
below:
You
can
set
the steering
wheel
buttons to the
·
features
on
the
menu.
For
example,
press a
steering
wheel
button first,
and
then
select
VOL
+
on
this
menu,
after
saving,
you
can
press
the
steering
wheel
button to
increase
the
volume.
Click <to
go
back to the
SOURCE
menu,
click
') to
go
back
to the previous
menu.
Notes:
*There
is
a
defaultsettingforthe
steering
wheel
buttons.
They
will
need
to
be
reprogrammed if
set
to default.
·
*According
to
the
prompt that
appears
on
the
screen,
press
button to
set,
there will
be
a corresponding
voltage
display.
7
BACKGROUND
.
After selecting
BACKGROUND,
the
submenu
will
be
as
shown
in
the figure
below:
You
can
select different background pictures
on
this
menu.
Click a background
in
the
right
side
to
preview,
hold
it to
save.
Click
<
to
go
back to the
SOURCE
menu,
click
')to
go
back
to the previous
menu.

USER GUIDE
~S;!!;;E~C~TI~O.!.!N~3--------------------------
20
Main
Menu
8
DEFAULT
After selecting
DEFAULT,
the
sub
menu
will
be
as
shown
in
the figure
below:
Click
"VERSION"
to display
the
information of
current version, different
models
show
different
data.
Pressing
"RESET"
will prompt a
reset,
pressing
"CONFIRM"
will reset unit to factory settings.
Click <to go back to
the
SOURCE
menu,
click
")
to
go
back to the previous
menu.
Table of contents
Other Metra Electronics Car Video System manuals

Metra Electronics
Metra Electronics MDF-7603-1 User manual

Metra Electronics
Metra Electronics 99-5840CH User manual

Metra Electronics
Metra Electronics 108-FD3B User manual

Metra Electronics
Metra Electronics 99-8153 User manual

Metra Electronics
Metra Electronics 95-9612B User manual

Metra Electronics
Metra Electronics 108-GM1G User manual

Metra Electronics
Metra Electronics 95-9323B User manual

Metra Electronics
Metra Electronics 95-7899 User manual

Metra Electronics
Metra Electronics 107-GM5B User manual

Metra Electronics
Metra Electronics 99-7612A User manual