3
- To keep the LED display always on press MODE & UP simultaneously. Press MODE & OFF simultaneously for the LED
display to auto shut off after 20 seconds of inactivity.
- This unit has a total of 7 operating modes: Master/Slave, Auto, DMX, Sound Active, Colour Fade, Colour Chase and
Static Colour.
MASTER/SLAVE MODE
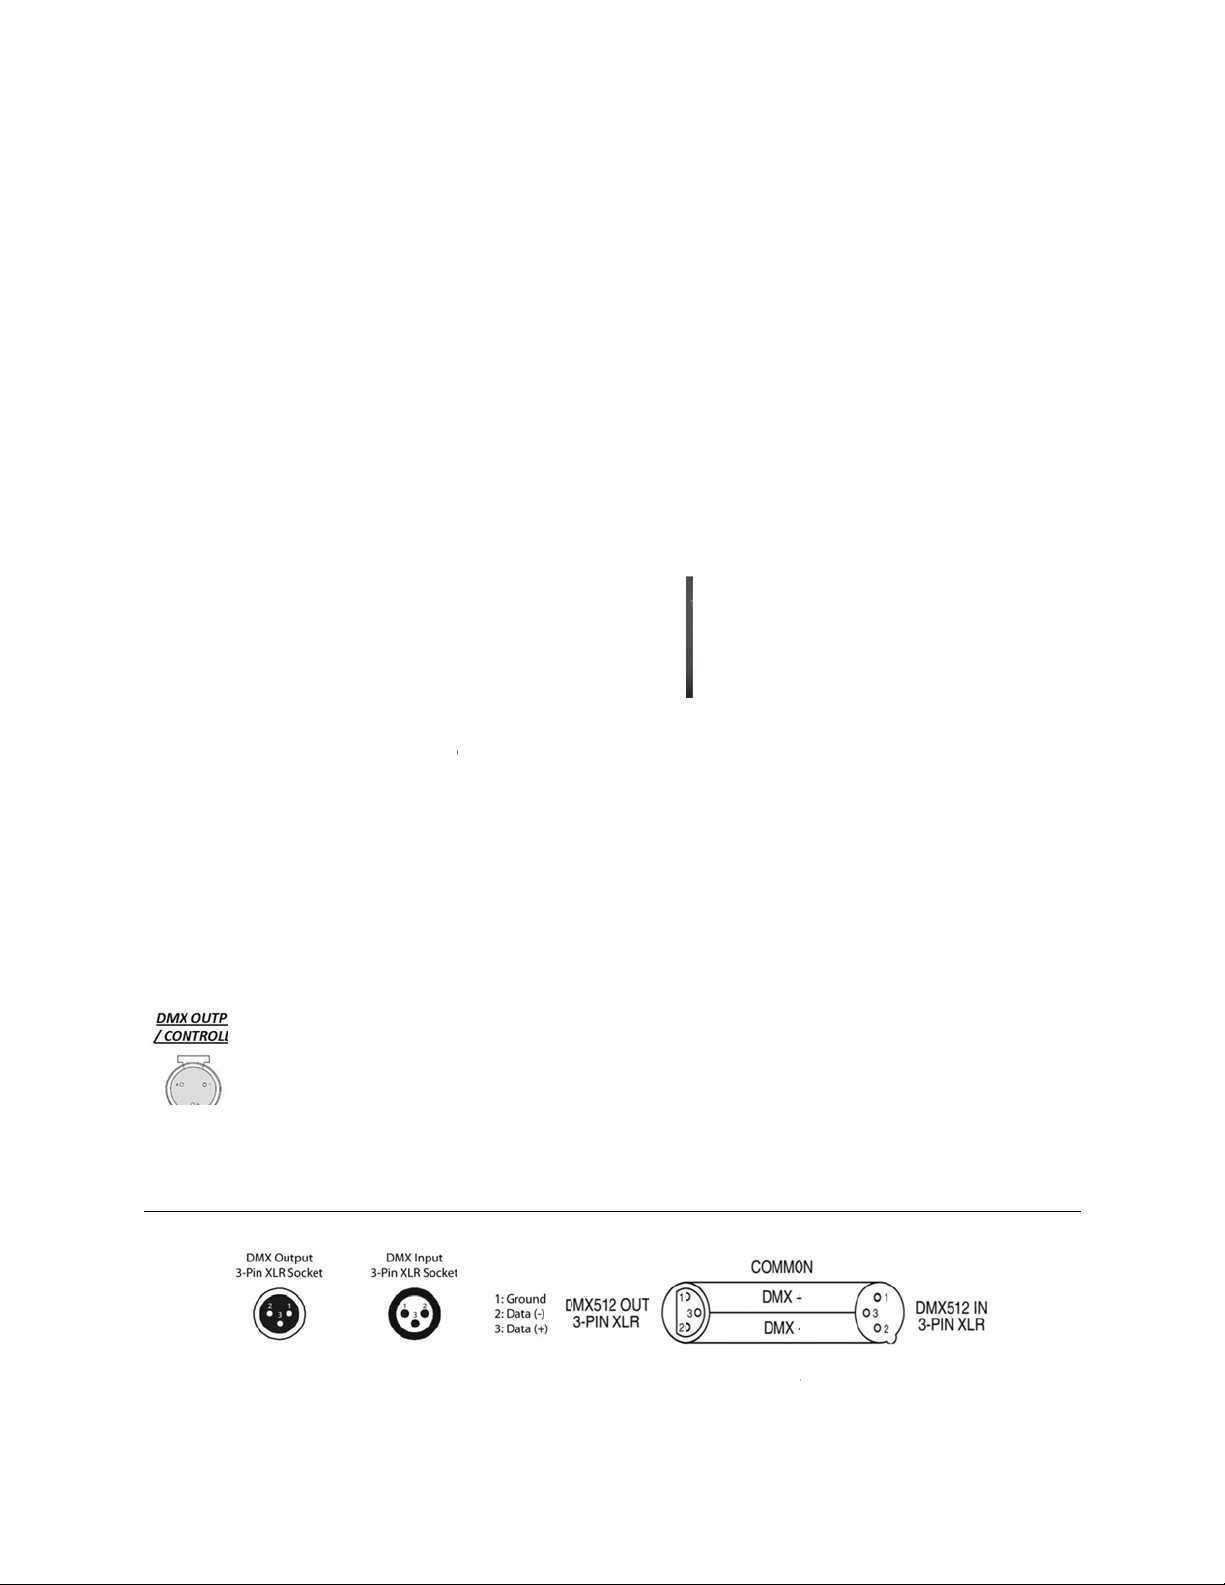
- By connecting the 3 pin DMX, you can daisy chain up to 30 units on master/ slave mode. Daisy chain the fixtures
together by plugging from the DMX output of the first fixture into the DMX input of the second fixture, and so on…
- On your Master fixture set the unit to either AUTO or SOUND control and select one of the internal programs.
- All slave lights must be set “S.L.A.”
AUTO-RUN MODE
- Press MODE and select “A. - -“. This will auto run through colour change and colour fade programs.
DMX MODE
- Press MODE and select “X X X” (X X X=001-512). The first fixture covers 4 DMX channels. Use the UP and DOWN
buttons to select your desired address.
SOUND ACTIVE MODE
- Press MODE and select “S.XX” (XX =00-31). Choose the level of sound sensitivity desired by pressing UP or DOWN
buttons.
COLOUR FADE MODE
- Press MODE and select “F.X.X” (X X = 01-99). Press UP or DOWN button to adjust the speed of color fade.
COLOUR CHANGE MODE
-Press MODE and select “J. X X” (X X =01-99). Press UP or DOWN button to adjust the speed of color change.
STATIC COLOUR SELECT MODE
- Press MODE and select “C.L.X” (X=0-7). Press UP or DOWN button to select desired colour.
4. MOUNTING AND INSTALLATION
Caution: For added protection, mount the fixtures in areas outside walking paths, seating areas, or in areas were the fixture might
be reached by unauthorized personnel. Before mounting the fixture to any surface, make sure that the installation area can hold a
minimum point load of 10 times the device’s weight. Fixture installation must always be secured with a secondary safety attachment,
such as an appropriate safety cable. Never stand directly below the device when mounting, removing, or servicing the fixture.
Whether installing inverted on a truss or ceiling, or set on a flat level surface (see illustration below). Be sure this fixture is kept at
least 0.5m (1.5 ft) away from any flammable materials (decoration etc.). Always use and install the supplied safety cable as a safety
measure to prevent accidental damage and/or injury in the event the clamp fails.
Mounting Points: Overhead mounting requires extensive experience, including calculating working load limits. A knowledge of the
installation material being used, and periodic safety inspection of all installation material and the fixture are all imperative and should
only be performed by a qualified technician. Improper installation can result in bodily injury and damage.
Be sure to complete all rigging and installation procedures before connecting the main power cord to the appropriate wall outlet.
Floor Mounting: Set the 2 brackets at your desired angle and aim your fixture accordingly. Please see diagram below.