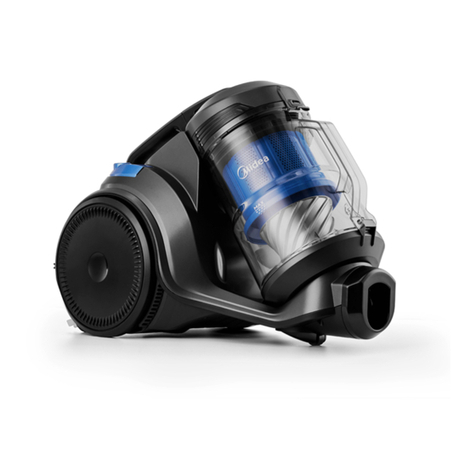
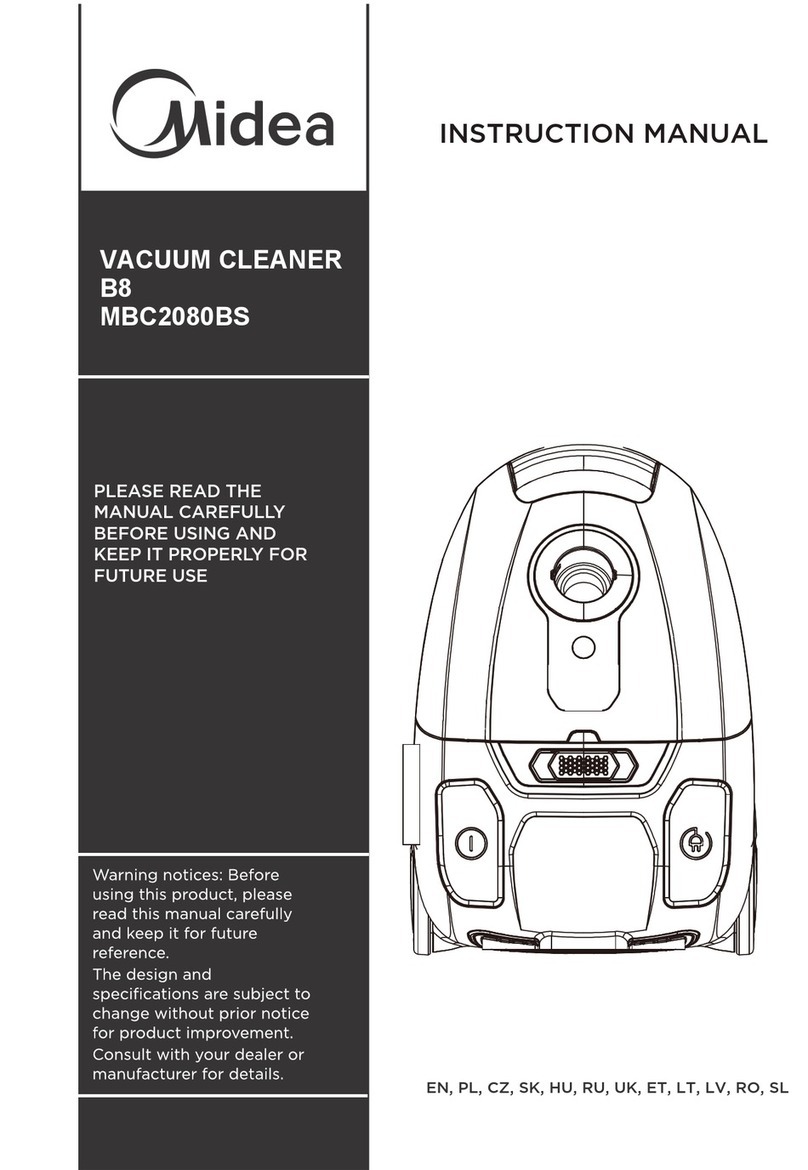
Midea C7 User manual

Vacuum Cleaner
INSTRUCTION MANUAL
C7
MBC1860WB
PLEASE READ THE
MANUAL CAREFULLY
BEFORE USING AND
KEEP IT PROPERLY FOR
FUTURE USE
EN, PL, CZ, SK, HU, RU, UK, ET, LT, LV, RO, SL

Overview of the components
9
10
8
6
7
11
12
1
2
3
5
4
ab
cd
e

Fig. 1 Fig. 2 Fig. 3 Fig. 4
Fig. 5a Fig. 5bFig. 6 Fig. 7
Fig. 8 Fig. 9 Fig. 10 Fig. 11
Bristle
Fig. 12 Fig. 13 Fig. 14 Fig. 15
Fig. 16 Fig. 17 Fig. 18 Fig. 19
Fig. 20

4
English..................................................................
Polish....................................................................
Czech................................................................
Slovakian..........................................................
Hungarian........................................................
Russian..............................................................
Ukrainian..........................................................
Estonian............................................................
Lithuanian........................................................
Latvian............................................................
Romanian.......................................................
Slovenian.......................................................
5-13
14-23
24-33
34-43
44-53
54-63
64-73
74-83
84-93
94-103
104-113
114-123

Thank you for choosing our appliance. We wish you to enjoy your
new vacuum cleaner.
ATTENTION:
Read this user manual thoroughly before first use, even if you are
familiar with this type of product. The safety precautions enclosed
herein reduce the risk of fire, electric shock and injury when
correctly adhered to.
Keep the user manual in a safe place for future reference, along
with the completed warranty card, purchase receipt and the box
with the internal packing. If applicable, pass this user manual on
to the next owner of the appliance.
Always follow basic safety precautions and accident prevention
measures when using an electrical appliance, including the
following:
IMPORTANT SAFETY INSTRUCTIONS:
Electrical safety and cord handling
•Before plugging the appliance into the socket, ensure that
electrical voltage and circuit frequency in the socket correspond
to those indicated on the rating label of appliance.
• To reduce the risk of electrocution, never operate this product
or handle the plug with wet hands, submerge plug in/under
water or spill liquids into/onto the appliance.
• Do not insert any objects into the appliance.
•If the supply cord is damaged, it must be replaced by the
manufacturer or authorized service center in order to avoid
a hazard.
5

•Check the appliance, hose and cord including plug regularly
for visible damage. Do not use the appliance if the hose, plug,
cord, filters, housing or any other part is damaged or not working
properly, if it has been dropped, damaged, left outdoors or
dropped into water, or if it appears faulty in any way. Call the
authorized service center line if any part appears damaged.
• Do not kink, bend, squash, strain or damage the power cord.
•Do not pull or carry the vacuum cleaner by the cord or plug. Do
not use the cord or plug as a handle, close a door on the cord
or pull the cord around sharp edges or corners. Do not run the
vacuum cleaner over the cord.
• Keep the cord away from heated surfaces.
•Always switch off the vacuum cleaner before connecting
or disconnecting it from the mains supply.
•Always switch off and unplug the vacuum cleaner from the
electrical socket before assembling, opening, connecting or
disconnecting the vacuum hose and accessories and before
emptying or cleaning the dust tank and filters.
• Do not pull on the cord to disconnect the plug from the power
supply. To unplug, grasp the plug, not the cord, and gently pull
it out of the socket and then press the cord retraction button to
retract the cord.
• Do not unwind the cord beyond the red mark on cord.
•Hold plug when retracting the cord, to avoid lashing of the cord.
• Do not use electrical extension.
Usage conditions and restrictions
• This appliance is intended for household use only. It is neither
suitable for commercial/industrial nor for outdoor use.
6

•Only use the vacuum cleaner on dry, indoor surfaces, as
described in this user manual and with the original accessories
supplied by the producer.
•Do not use it for any purpose other than described in this
user manual.
•Improper installation and use may result in the risk of fire,
electric shock and/or injury to persons. We assume no liability
for any eventual damages caused by improper or faulty use.
•This appliance is not intended for use by persons with reduced
physical, sensory or mental capabilities, or no experience
and knowledge, unless they have been given supervision or
instructions concerning safe use of the appliance by an adult
person responsible for their safety before and if they
understand the hazards involved.
•Appliance can be used by children aged from 8 years and older
if they have been given supervision or instruction concerning
the safe use of the appliance before and if they understand
the hazards involved.
•Cleaning and maintenance of the appliance shall not be made
by children unless they are older 8 years, were properly
instructed before and supervised.
•Keep the appliance and its cord out of reach of children
younger than 8 years.
•Supervise young children to ensure they do not play with the
appliance. Close supervision is necessary when any appliance
is used by or near children.
•Do not operate the appliance without supervision. If you
leave the room you should always turn the appliance off and
remove the plug from the socket.
7

Safe usage
•Keep hair, loose clothing, fingers and any part of the body or
animal away from openings (inlets/outlets) and moving parts
(such as rotating brush, wheels) of the appliance.
•Keep the end of the hose, wands and other openings away
from your face and any part of body.
•Do not point the vacuum cleaner at people or animals when
in use.
• Do not use the appliance without all filters in perfect conditions
and dust tank at place.
•Clean all filters regularly. The best suction power is reached
with clean filters and empty dust tank.
•Take extra care when vacuuming on stairs.
•Do not use the appliance to vacuum: flammable or combustible
fluids (such as fuel or solvent); hot or burning substances (such
as ash, cigarettes or hot coals), hard or sharp objects (such
as shards of glass, nails or coins); harmful or toxic materials
(such as chlorine bleach, ammonia or drain cleaner); any
liquids or greases (such as water, fats or oils); dust/dirt from
construction work (such as fine dust or construction detritus)
or vacuum in areas where liquids may be present or use it in
the presence of explosive or flammable liquids or vapors. It
can seriously damage appliance or its parts and cannot be
covered by warranty.
•Keep the appliance away from heat sources (radiator, oven
etc.), direct sunlight, moisture and sharp edges.
•Keep all openings free of dust, lint, hair or anything that may
reduce the airflow.
8

•Do not use the product with any openings blocked or restricted
airflow.
•Put the vacuum cleaner away after every use to prevent anyone
tripping over it.
•Washing the washable filters improves vacuum performance.
Make sure all filters are completely dry before reattaching them
back to appliance.
•Only clean the housing with a soft, dry cloth. Do not use liquid
or aerosol cleaners. Do not immerse the appliance into water
for cleaning.
•Store the vacuum cleaner indoors in a cool, dry area, out of
reach of children.
•Never attempt to open the motor base of the vacuum cleaner
yourself or to replace the power cord. If the vacuum cleaner is
damaged, it must be repaired by the manufacturer or authorized
service center in order to avoid a hazard. In case of damage,
call the authorized service center line for advice.
• Do not carry the appliance holding handle of the dust tank,
hose, cord or plug.
•When finished vacuuming check the brushes, nozzles, tube and
hose for caught impurities. Remove them if necessary before
next use.
•Never use this appliance when the suction power becomes
very weak.
When this happens:
•Switch off the unit, unplug it and check whether the dust tank
is full.
•Then check if any part of the floor brush, tube or hose is
blocked.
Do not use the vacuum cleaner until the blockage is removed
and it operates normally again.
9

If you cannot solve the problem, contact the authorized
service center line.
•Always switch the vacuum cleaner off after use, and before
plugging it in again, make sure to hold the vacuum cleaner
firmly when using it.
•If abnormal noise, smell, smoke or any other failure or
breakage was found during the operation, turn off the ON/OFF
button and unplug the appliance immediately. Then contact
with authorized service center for repair. Do not repair it by
yourself.
•Use only original spare parts, filters and accessories
recommended by producer.
Unpacking the Appliance
1. Remove the appliance from the package.
2. Remove all packaging material such as films, fillers, foils and cardboard.
3. Check the delivery contents for completeness.
4. Should the package contents be incomplete or damages be found, do not take the appliance
into operation. Take it immediately back to the dealer.
WARNING:
Do not allow small children to play with the foil. There is a danger of suffocation!
Getting to know your cleaner
1. Floor nozzle
2. Telescopic tube
3. Rubberized handle with suction regulation
4. Hose
5. Hose connector
6. On/Off button
7. Back wheel
8. Suction control knob
9. Cord rewind button
10. Handle
11. Dust tank release button
12. Dust tank
a. Floor nozzle
b. Sofa nozzle
c. 360° Furniture nozzle
d. Crevice nozzle
e. Small tools holder on tube
10

HOW TO USE
ASSEMBLY APPLIANCE PROPERLY BEFORE USE
Fig. 1 Place the hose connector in front of the vacuum cleaner. Then insert it into the inlet hole
and turn it right. If you want to disassemble it, turn the hose connector left and then pull it out.
Fig. 2 Hold the flexural connector of the hose and put it into the bigger hole of the tube.
Fig. 3 Put the metal tube into the hole of the nozzle to fasten them.
Fig. 4 Pull the power cord out of the appliance and stop it when you see the yellow mark. Make
sure the red mark is not out of appliance. When your vacuuming is finished, first turn off the
appliance, pull the plug out of the socket, and then push the rewind button until the cord is
completely in the appliance. Hold plug when retracting the cord
Fig. 5a Put the plug into the socket; push the On/off button to switch the appliance on.
Fig. 5b Rotate the suction control button to adjust the suction power to requested level.
Note: You can adjust the suction power also by using the suction flap on the ergonomic handle.
CLEANING OF THE DUST TANK
Fig. 6 Hold the dust tank handle and push the release button.
Fig. 7 Take the dust tank out of the appliance.
Fig. 8 Push the release button to open the lid of the dust tank and remove the lid.
Fig. 9 Empty the dust tank to the rubbish bin.
Put the lid back to the dust tank and place the dust tank back to appliance. First you make the
dust tank in the right position and then slightly push the dust tank down towards appliance. If
there is a click it means the operation is successful.
HOW TO USE THE ACCESORY
Fig. 10 Floor nozzle: tread on the pedal to protrude bristles out for hard floor cleaning.
Fig. 11 Tread on the pedal of the nozzle again to put the bristles in for carpet cleaning.
Fig. 12 360° Furniture nozzle is used for clean furniture and other upper surfaces.
Fig. 13 Sofa nozzle is used for cleaning upholstery surfaces as furniture, etc.
Fig. 14 Crevice nozzle is used for cleaning narrow areas, such as cracks, corners, recesses, etc.
11

MAINTENANCE
1. Check all filters regularly.
The motor filter should be cleaned always when emptying dust tank.
The HEPA filter should be cleaned twice a year, and when there is obvious dirt on the
filter, it is time.
2. Fix the filters properly back after cleaning before start running the vacuum cleaner.
3. The filters can't be cleaned in the washing machine or by the blower.
4. It will reduce the suction power and damage the motor if you use the wet, dirty or damaged
filters.
5. Steps for maintenance:
a) Fig. 15 Press the outlet lock to open the HEPA outlet cover.
b) Fig. 16 Press upper part of HEPA filter downwards and remove it.
c) Remove dust tank: see CLEANING OF THE DUST TANK chapter.
d) Fig. 17 Push the release button to open the lid of the dust tank and remove the lid.
e) Fig. 18 Remove the motor filter in frame, take the sponge out of the frame.
f) Fig. 19 Clean motor filter and sponge with a dry method first.
g) Fig. 20 Rinse the motor filter without sponge under water and dry it entirely before use.
h) Wash the HEPA filter cover, the HEPA filter assembly, and the dust tank in the warm water
without detergent and dry them entirely before use.
i) Fix the dry HEPA filter assembly on the air outlet and make sure the three salient parts (two at
bottom, one on top) are stuck in the grooves. A click confirms correct placing.
j) Place the outlet cover back. A click confirms correct placing.
k) Place sponge and dry motor filter back to dust tank. Arrow on motor filter cover must point
upwards.
l) Place dust tank back to appliance: see CLEANING OF THE DUST TANK chapter.
CORRECT DISPOSAL OF THIS APPLIANCE
This marking indicates that this appliance should not be disposed with other
household wastes throughout the EU. To prevent possible harm to the environment
or human health from uncontrolled waste disposal, recycle it responsibly to promote
the sustainable reuse of material resources. To return your used appliance, please
use the return and collection systems or contact the retailer where the product was
purchased. They can take this product for environmental safe recycling.
Disposal of appliance
1. Switch off the appliance.
2. Disconnect the mains plug of appliance from electric socket.
3. Pull out the supply cord out of appliance as much as possible.
4. Cut off the supply cord close to appliance and put it to electrical waste to be recycled. Do not
leave cut cord unattended.
5. Press cord rewind button.
12

TECHNICAL DATA
Model: . .....................................................MBC1860WB
Power supply: ...............................220-240V~, 50-60Hz
Power input: ........................................................600 W
Protection class: ...........................................................II
Made in P.R.C.
The right to make technical and design modifications in the course of continuous product
development remains reserved.
TROUBLESHOOTING
In case of malfunction, please refer to the following table
Problem
Possible reason
Solution
The vacuum
cleaner does
not switch on
- Too much dust in the dust bin
- Filter is blocked
- Brush duct is blocked
- Hasn't been fully dried after
washing
- Empty the dust bin in time
- Clean the sponge filter
- Clean the blockage
- Dry the sponge filter in cool place after
washing
The machine
does not work
-The power plugs are loose on the
socket or the power socket is not
live
-The switch fails to be opened
- Inspect whether power plugs are tight
or not or the socket is live or not
- Press the switch button
The machine
suddenly stops
- The dust bin is full
- The sponge filter is blocked
- Suction inlet of brush or the other
accessory is blocked
- Empty the dust bin in time
- Clean the sponge filter
- Clean the blockage
13

C7
MBC1860WB
INSTRUKCJA OBSŁUGI
ODKURZACZ
PRZED ROZPOCZĘCIEM
UŻYTKOWANIA NALEŻY
DOKŁADNIE PRZECZYTAĆ
INSTRUKCJĘ I ZACHOWAĆ
JĄ DO WYKORZYSTANIA W
PRZYSZŁOŚCI
Informacje ostrzegawcze: Przed
użyciem tego produktu należy
dokładnie zapoznać się z niniejszą
instrukcją i zachować ją do
późniejszego wglądu.
Konstrukcja i dane techniczne
mogą bez wcześniejszego
powiadomienia ulec zmianie w celu
ulepszenia produktu.
W celu uzyskania szczegółowych
informacji należy skontaktować się
ze sprzedawcą lub producentem.
PL

Dziękujemy za wybranie naszego urządzenia. Życzymy
przyjemnego korzystania z nowego odkurzacza.
Przed pierwszym użyciem należy dokładnie przeczytać
niniejszą instrukcję, nawet jeśli jesteś zaznajomiony z tego
typu produktem. Środki ostrożności zawarte w niniejszym
dokumencie, jeśli są prawidłowo przestrzegane, zmniejszają
ryzyko pożaru, porażenia prądem i obrażeń.
Instrukcję obsługi należy przechowywać w bezpiecznym
miejscu do późniejszego wglądu, razem z wypełnioną kartą
gwarancyjną, dowodem zakupu i pudłem z opakowaniem
wewnętrznym. Jeśli to możliwe, przekazać niniejszą instruk-
cję kolejnemu właścicielowi urządzenia.
Zawsze przestrzegać podstawowych środków ostrożności i
zapobiegania wypadkom podczas korzystania z urządzenia
elektrycznego, w tym następujących:
Bezpieczeństwo elektryczne i użytkowanie kabla
• Przed podłączeniem urządzenia do gniazdka należy się
upewnić, że napięcie elektryczne i częstotliwość obwodu w
gniazdku odpowiadają wartościom podanym na tabliczce
znamionowej urządzenia.
• Aby zmniejszyć ryzyko porażenia prądem, nigdy nie
obsługiwać tego produktu ani wtyczki mokrymi rękami, nie
zanurzać wtyczki w wodzie ani nie rozlewać płynów na
urządzenie.
• Nie wkładać żadnych przedmiotów do urządzenia.
• Jeżeli kabel zasilający jest uszkodzony, musi on zostać
wymieniony przez producenta lub autoryzowane centrum
serwisowe, aby uniknąć zagrożenia.
UWAGA:
WAŻNE INSTRUKCJE BEZPIECZEŃSTWA:
15

• Regularnie sprawdzać urządzenie, wąż i kabel wraz z
wtyczką pod kątem widocznych uszkodzeń. Nie używać
urządzenia, jeżeli wąż, wtyczka, kabel, filtry, obudowa lub
jakakolwiek inna część jest uszkodzona lub nie działa
prawidłowo, jeżeli urządzenie zostało upuszczone,
uszkodzone, pozostawione na zewnątrz lub wrzucone do
wody, lub jeżeli wydaje się wadliwe w jakikolwiek sposób.
Jeśli jakakolwiek część wygląda na uszkodzoną, należy
skontaktować się z autoryzowanym centrum serwisowym.
• Nie wolno skręcać, zginać, zgniatać, naprężać ani
uszkadzać kabla zasilającego.
• Nie ciągnąć ani nie przenosić odkurzacza za kabel lub
wtyczkę. Nie wolno używać kabla i wtyczki jako uchwytu,
przycinać ich drzwiami lub zawijać wokół ostrych brzegów czy
narożników. Nie należy przejeżdżać odkurzaczem po kablu.
• Kabel należy utrzymywać z dala od rozgrzanych
powierzchni.
• Zawsze wyłączać odkurzacz przed podłączeniem lub
odłączeniem go od sieci elektrycznej.
• Przed montażem, otwarciem, podłączeniem lub
odłączeniem węża odkurzacza i akcesoriów oraz przed
opróżnieniem lub czyszczeniem zbiornika na kurz i filtrów
należy zawsze wyłączyć odkurzacz i wyjąć wtyczkę z
gniazdka elektrycznego.
• Nie ciągnąć za kabel w celu odłączenia wtyczki od
zasilania. Należy chwycić za wtyczkę, a nie za kabel, i
delikatnie wyciągnąć ją z gniazdka, a następnie nacisnąć
przycisk zwijania kabla.
• Nie rozwijać kabla poza czerwony znacznik.
• Podczas zwijania kabla należy trzymać za wtyczkę, aby
uniknąć jego szarpnięcia.
• Nie należy używać przedłużaczy elektrycznych.
16

Warunki i ograniczenia użytkowania
• Niniejsze urządzenie jest przeznaczone wyłącznie do użytku
domowego. Nie nadaje się ani do użytku komercyjnego/
przemysłowego, ani do użytku zewnętrznego.
• Używać odkurzacza wyłącznie na suchych, wewnętrznych
nawierzchniach, zgodnie z opisem w niniejszej instrukcji, i z
oryginalnymi akcesoriami dostarczonymi przez producenta.
• Nie używać go do celów innych niż opisane w niniejszej
instrukcji.
• Nieprawidłowa instalacja i użytkowanie mogą spowodować
ryzyko pożaru, porażenia prądem i/lub obrażeń ciała. Nie
ponosimy odpowiedzialności za ewentualne szkody
spowodowane niewłaściwym lub wadliwym użytkowaniem.
• Urządzenie nie jest przeznaczone do użytku przez osoby o
ograniczonych zdolnościach fizycznych, sensorycznych lub
umysłowych, lub nieposiadające doświadczenia i wiedzy,
chyba że są one nadzorowane lub zostały poinstruowane
przez dorosłą osobę odpowiedzialną za ich
bezpieczeństwo w zakresie bezpiecznego użytkowania
urządzenia i rozumieją związane z tym zagrożenia.
• Urządzenie może być używane przez dzieci w wieku od 8
lat i starsze, jeżeli są one nadzorowane lub zostały
poinstruowane w zakresie bezpiecznego użytkowania
urządzenia i rozumieją związane z tym zagrożenia.
• Czyszczenie i konserwacja urządzenia nie powinny być
wykonywane przez dzieci, chyba że są one w wieku
powyżej 8 lat, zostały wcześniej odpowiednio
poinstruowane i znajdują się pod nadzorem.
• Urządzenie i jego kabel należy przechowywać w miejscu
niedostępnym dla dzieci poniżej 8. roku życia.
• Nadzorować małe dzieci, aby nie bawiły się urządzeniem.
Gdy urządzenie jest używane przez dzieci lub w ich
pobliżu, konieczny jest ścisły nadzór.
17

• Nie pozostawiać uruchomionego urządzenia bez nadzoru.
Wychodząc z pomieszczenia, należy zawsze wyłączyć
urządzenie i wyjąć wtyczkę z gniazdka.
Bezpieczne użytkowanie
• Nie zbliżać włosów, luźnej odzieży, palców i innych części
ciała oraz zwierząt do otworów (wlotów/wylotów) i rucho-
mych części (takich jak szczotka obrotowa, koła) urządzenia.
• Końcówkę węża, ssawki i pozostałe otwory należy utrzymy-
wać z dala od twarzy i innych części ciała.
• Podczas użytkowania nie kierować odkurzacza w stronę
ludzi lub zwierząt.
• Nie używać urządzenia bez wszystkich filtrów w idealnym
stanie i zbiornika na kurz we właściwym miejscu.
• Regularnie czyścić wszystkie filtry. Najlepsza moc ssania jest
osiągana z czystymi filtrami i pustym zbiornikiem na kurz.
• Zachować szczególną ostrożność podczas odkurzania
schodów.
• Nie używać urządzenia do odkurzania: łatwopalnych
płynów (takich jak paliwo lub rozpuszczalnik), gorących lub
płonących substancji (takich jak popiół, papierosy lub
rozżarzone węgle), twardych lub ostrych przedmiotów
(takich jak odłamki szkła, gwoździe lub monety), mate-
riałów szkodliwych lub toksycznych (takich jak wybielacz
chlorowy, amoniak lub środek do czyszczenia kanalizacji),
wszelkich cieczy lub smarów (takich jak woda, tłuszcze lub
oleje), pyłu/brudu z prac budowlanych (takich jak drobny
pył lub odpady budowlane). Nie wolno również odkurzać w
miejscach, w których mogą znajdować się ciecze lub
używać urządzenia w obecności wybuchowych lub łatwo-
palnych cieczy lub oparów. Może to poważnie uszkodzić
urządzenie lub jego części i nie będzie objęte gwarancją.
• Urządzenie należy chronić przed źródłami ciepła (grzejnik,
piekarnik itp.), bezpośrednim nasłonecznieniem, wilgocią i
ostrymi krawędziami.
18

• Wszystkie otwory powinny być wolne od kurzu, kłaczków,
włosów lub innych zanieczyszczeń, które mogą ograniczyć
przepływ powietrza.
• Nie należy używać produktu z zablokowanymi otworami lub
ograniczonym przepływem powietrza.
• Po każdym użyciu należy odłożyć odkurzacz na miejsce,
aby nikt się o niego nie potknął.
• Mycie nadających się do tego filtrów poprawia wydajność
odkurzacza.
Upewnić się, że wszystkie filtry są całkowicie suche przed
ponownym zamontowaniem ich w urządzeniu.
• Obudowę należy czyścić tylko miękką, suchą szmatką. Nie
używać środków czyszczących w płynie lub aerozolu. Nie
zanurzać urządzenia w wodzie w celu jego wyczyszczenia.
• Odkurzacz należy przechowywać w chłodnym, suchym
pomieszczeniu, poza zasięgiem dzieci.
• Nigdy nie próbować samodzielnie otwierać obudowy silnika
ani wymieniać kabla zasilającego. Jeżeli odkurzacz jest
uszkodzony, musi on zostać naprawiony przez producenta
lub autoryzowane centrum serwisowe, aby uniknąć zagroże-
nia. W przypadku uszkodzenia należy zadzwonić do autory-
zowanego centrum serwisowego w celu uzyskania porady.
• Nie należy przenosić urządzenia. trzymając za uchwyt
zbiornika na kurz, wąż, kabel lub wtyczkę.
• Po zakończeniu odkurzania sprawdzić, czy na szczotkach,
ssawkach, rurze i wężu nie znajdują się zanieczyszczenia.
W razie potrzeby usunąć je przed następnym użyciem.
• Nigdy nie używać tego urządzenia, gdy siła ssania jest
bardzo słaba.
Gdy występuje taka sytuacja:
• Wyłączyć urządzenie, odłączyć je od zasilania i sprawdzić,
czy zbiornik na kurz jest pełny.
• Następnie sprawdzić, czy jakiś odcinek szczotki podło-
gowej, rury lub węża nie jest zablokowany.
Nie używać odkurzacza, dopóki przeszkoda nie zostanie
19

usunięta i nie zacznie on znowu normalnie pracować.
Jeśli nie można rozwiązać problemu, należy skontaktować
się z autoryzowanym centrum serwisowym.
• Zawsze należy wyłączyć odkurzacz po skończonej pracy, a
przed ponownym podłączeniem do zasilania pamiętać, aby
mocno trzymać odkurzacz.
• Jeśli podczas pracy pojawią się nietypowe odgłosy, zapachy,
dym lub jakiekolwiek inne usterki lub uszkodzenia, należy
niezwłocznie wyłączyć urządzenie przyciskiem wł./wył. i
odłączyć je od zasilania. Następnie skontaktować się z auto-
ryzowanym centrum serwisowym w celu dokonania
naprawy. Nie należy dokonywać samodzielnych napraw.
• Używać tylko oryginalnych części zamiennych, filtrów i
akcesoriów zalecanych przez producenta.
Rozpakowanie urządzenia
OSTRZEŻENIE:
Getting to know your cleaner
1. Wyjąć urządzenie z opakowania.
2. Usunąć wszystkie materiały opakowaniowe, takie jak folie, wypełniacze i karton.
3. Sprawdzić zawartość dostawy pod kątem kompletności.
4. Jeżeli zawartość opakowania jest niekompletna lub stwierdzono uszkodzenia,
nie należy uruchamiać urządzenia. Natychmiast zwrócić je do sprzedawcy.
Nie pozwalać małym dzieciom na zabawę folią. Istnieje niebezpieczeństwo uduszenia!
1. Ssawka podłogowa
2. Rura teleskopowa
3. Gumowany uchwyt z regulacją ssania
4. Wąż
5. Złącze węża
6. Przycisk wł./wył.
7. Tylne koło
8. Pokrętło regulacji siły ssania
9. Przycisk zwijania kabla
10. Uchwyt
11. Przycisk zwalniania zbiornika na kurz
12. Zbiornik na kurz
a. Ssawka podłogowa
b. Ssawka do kanap
c. Ssawka 360° do mebli
d. Ssawka szczelinowa
e. Uchwyt na rurę do małych
narzędzi
20
This manual suits for next models
1
Table of contents
Languages:
Other Midea Vacuum Cleaner manuals

Midea
Midea Eureka I5C User manual

Midea
Midea VTW21A15T User manual

Midea
Midea C3 VC1707 Administrator Guide

Midea
Midea VCS38A13L Administrator Guide

Midea
Midea MVC-13M-B User manual

Midea
Midea M7 User manual

Midea
Midea 386600-i5C User manual

Midea
Midea Eureka I5C User manual

Midea
Midea M7 User manual

Midea
Midea VSS5800 User manual

Midea
Midea V19P13A20Q0C User manual

Midea
Midea VC-35A1Q3 User manual

Midea
Midea SmartShell MR01 User manual

Midea
Midea MD-VC2121B User manual

Midea
Midea MVC-V18P Wiring diagram

Midea
Midea KH19P User manual

Midea
Midea B5 Administrator Guide

Midea
Midea MVC-V18K-BG User manual

Midea
Midea S8+ User manual

Midea
Midea MVC-V18P User manual