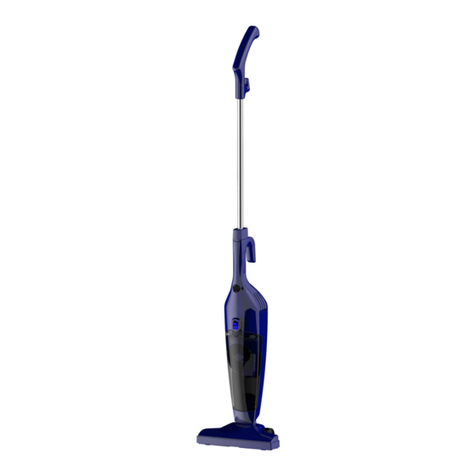
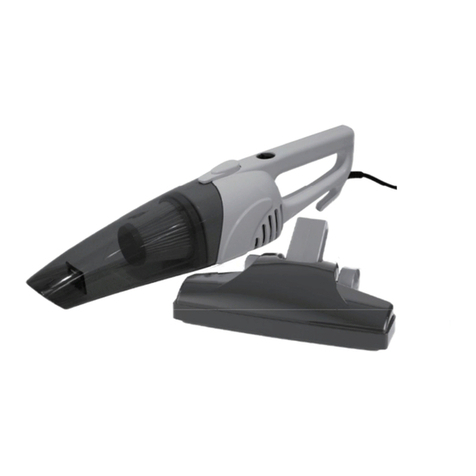
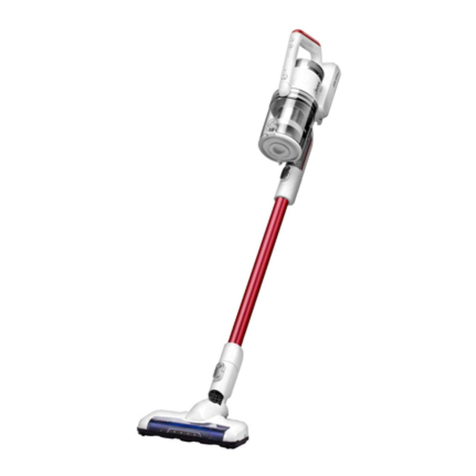
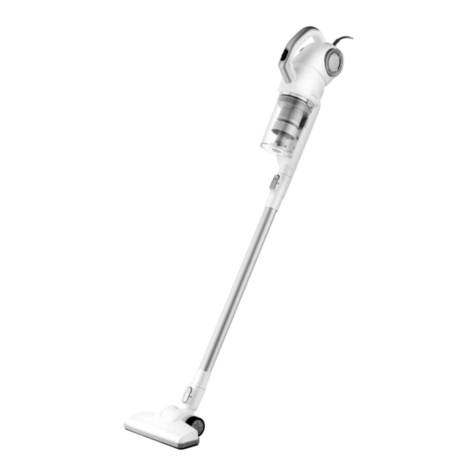
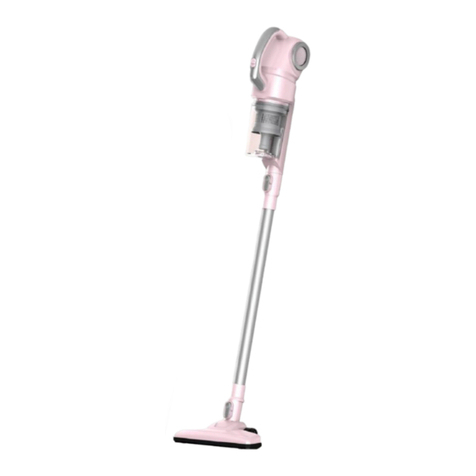
Midea VCS861P User manual

VCS861P
產品若有技術改進,會
編進新版說明書中,恕不另
行通知。產品外觀、顏色如
有改動,請以實物為準。
二合一直立式
吸塵機
本說明書的所有內容均已仔細
檢查。如有印刷錯誤或誤解,
可向美的客戶服務中心查詢。
型號:VCS861P
額定電壓:
220-240V 50/60Hz
額定功率:600W
使用說明書
CNT
www.mideahk.com


安全須知
1. 使用本產品前,請仔細閱讀使用說明書內所提及的操作規則和說明。八歲或以
上的小孩/感官與感知能力受限/缺乏相關知識或經驗人仕,均須在適當人員
監督下安全使用。未滿八歲的小孩均不建議獨自使用本產品。
2. 除非有適當人員監督下或給予如何安全使用本機的指示並讓其了解涉及的風險
,本機並非設計給運動、感官與感知能力受限或缺乏相關知識或使用經驗的人
(包括孩童)來使用。
3. 應監督兒童以避免將本產品當成玩具,電器及電源線亦應存放在兒童無法接觸
的地方。
4. 電源插座供電電壓必須與設備上標明的電壓(僅限交流)一致。
5. 本產品僅供家用,請勿在室外或潮濕的表面上使用。本產品只能用於吸取乾燥
物,請勿使用本產品吸取所有液體,以免引致觸電。
6. 僅參照本說明書使用本產品。只可使用原裝配件及電源線,如使用非原裝配件
引致產品損壞,恕不納入保用。
7. 如發現適配器的電源線損壞或機件有任何異常,請即停止使用及聯繫本公司的
售後服務團隊,以作安排本公司授權之合資格的技術員作檢查及維修。
8. 如需移動本產品,請勿以電源線拉動。以及請放置於門縫、尖角位置或碾壓及
遠離任何受熱位置,以免引致電源線損壞。
9. 完成使用後,請確保已關機並用手抓緊插頭並輕力拔下。觸摸設備或插頭前,
亦請確保雙手乾燥。
10. 切勿將任何物體強行塞入吸嘴,以免堵住吸嘴。吸嘴或進氣口被堵時切勿使用
本設備。注意防止灰塵、絨毛、毛髮和任何可能阻擋氣流的物體堵塞氣流通道。
11. 頭髮、衣服、手指或其他身體部位請勿靠近吸嘴、軟管或可移動零件。
12. 切勿用本設備吸取易燃物品,如:汽油、可燃液體、香煙、火柴或熱灰等燃燒
或冒煙的物體,亦請注意使用時,需遠離一切易燃或可燃液體。
13. 清潔樓梯或其他不平坦的地方需注意安全。
14. 使用本產品前,請確保集塵盒及過濾器已正確安裝。
15. 在使用前後,如需清洗產品或拆卸吸氣軟管,請務必先拔下本產品的插頭。
16. 請將本產品和所有附件存放於室內乾燥的地方。
17. 請勿將本產品完成放置在水中進行清潔,請使用浸有中性清潔劑的濕布進行抹
拭。
2

1、手柄
2、電源線掛勾
3、伸縮杆
4、鎖扣
5、電源線(約6米)
6、手柄
7、電源開關
8、塵杯釋放按鈕
9、電源線掛勾
10、集塵杯
11、扁吸嘴
12、地刷
13、圓形刷
產品配件
1
2
3
5
9
12
4
6
7
8
11
13
3

使用說明
注意:安裝或拆卸配件之前,請拔掉電源插頭。
將金屬手柄杆安裝於機身。
圖1
握住吸塵器手柄,打開手柄上的鎖扣。
圖2
插入金屬手柄杆,直至在手柄上卡入到位。
圖3
將手柄杆牢固地扣在手柄上,從而將手柄固定住。
在機身上安裝各種地刷
圖4
根據清掃需要選擇扁吸嘴或者圓形刷或
地刷插入吸入口
使用地刷建議:
扁吸嘴
適用於清掃散熱器、凹槽、角落、底板和
座墊縫隙。
圖1
圖2
圖3
圖4
扁吸嘴 圓形刷地刷
4

圓形刷:
適用于清潔窗簾、床、沙發和汽車。
地刷:
適用于清潔各類地板,包括地毯和瓷磚。
捲繞和釋放電源線
本吸塵器設計可以快速捲繞和釋放電線。
圖5
將電源線捲繞在上、下繞線鉤上。
釋放電源線時,只要向左或向右旋轉上繞線鉤,
即可快速釋放電源線。
警告:吸入口必須永遠保持通暢的狀態。否則,
將引起馬達過熱造成事故的發生。
電源開關
圖6
電源開關有兩個不同位置。
按“I”端打開真空吸塵器。
按“O”端關閉真空吸塵器。
使用方法(垂直式)
釋放電源線,將其插入220-240V ~的插座中。
將手柄杆插入真空吸塵器(請參見第5頁說明)。選擇正確的吸嘴(扁吸嘴或地刷)並連
接到真空吸塵器上(參見第6頁說明)。
按下電源開關的“I”按鈕打開吸塵器進行清掃。清掃完畢後,按下開關的“O”按鈕關閉
吸塵器。
使用完畢後,將電源線捲繞在繞線鉤處,方便存放。
圖5
圖6
上繞線鉤
下繞線鉤
關位置 開位置
5

使用方法(手持式)
打開手柄開關鎖扣,將手柄杆從吸塵器機身上取下。
注意:使用手動真空吸塵器時,可將扁吸嘴或刷子安裝在機身上進行吸塵。
按下電源開關的“I”按鈕打開吸塵器進行清掃。清掃完畢後,按下開關的“O”按鈕關閉
吸塵器。
清掃與過濾器的更換
清掃與過濾器的更換
為保證真空吸塵器在最佳條件下工作,請在每次使用後清空塵杯,並清潔過濾器。
1. 圖7
若要取出集塵盒,請按下按鈕取出即可。
圖8
將集塵盒從吸塵器上取下。
2. 圖9
拉出過濾器。
3. 清空集塵盒。
4. 用冷水沖洗過濾器,乾燥24小時後再重新裝回真空吸塵器內。
按下集塵盒的按鈕
過濾器
集塵盒
圖7
圖9
將集塵器與主機
身分離。
圖8
6

產品規格
型號 VCS861P
額定電壓 220-240V~ 50/60Hz
額定功率 600W
吸力功率 100W
淨重 1.9kg
產品尺寸 254*1100*135 mm
集塵量 0.8L
重要提示:切勿將過濾器放入洗衣機中或使用吹風機吹乾。
放置戶外自然晾乾即可。
5. 將過濾器小心地放回原位置上。
如過濾器未準確放置,請勿使用真空過濾器。
6. 將集塵盒裝回主機身。
7

常見故障及處理方法
故障現象 存在因素 處理方法
產品未能運作
產品吸入量偏少
灰塵從機器中漏出
附件不能吸入灰塵
• 插頭在插座上插接不良
• 插座未通電
• 集塵盒未正確安裝
• 集塵盒已滿
• 一個或多個過濾器堵塞
• 集塵盒未正確安裝
• 集塵盒已滿
• 集塵盒已滿
• 一個或多個過濾器堵塞
• 吸入口堵塞
• 將插頭插緊。
• 檢查熔斷器或切斷電源,
確定熔斷器是否需要更換。
• 與本公司售後服務中心聯
繫,預約檢查及維修。
• 將集塵盒放回機身,確保
其放置位置正確。
• 清空集塵盒。
• 用溫水或冷水清潔和沖洗
過濾器。
• 關閉設備並拔掉插頭。檢
查吸氣端和/或附件是否有
堵塞現象。
• 將集塵盒放回機身,確保
其放置位置正確。
• 清空集塵盒。
• 清洗集塵盒。
• 用溫水或冷水清潔和沖洗
過濾器。
• 關閉設備並拔下插頭。檢
查吸入端和/或附件是否堵
塞。
8


for details.
MIDEA
2 in 1
Cordless Handstick
Corded Stick Cleaner
VCS861P
All the content in the manual have
been checked carefully. If there
are any errors in printing or
misunderstanding in the content,
please contact Midea customer
service center.
Note: Where there is a technical
improvement on the product, it will
be included in the new edition of
the manual. No further notification
will be provided. Refer to the
actual product for any changes in
the appearance and color of the
product.
Model: VCS861P
Rated Voltage:
220-240V 50/60Hz
Power: 600W
ENG
User Manual
www.mideahk.com


SAFETY INSTRUCTIONS
1. This appliance is not intended for use by children over eight years of age or
persons with reduced physical, sensory or mental capabilities, or lack of experience
and knowledge. Unless they have been given supervision or instruction concerning
use of the appliance by a person responsible for their safety, children should not
use this appliance.
2. This appliance is not designed for use by persons with reduced physical, sensory
or mental capabilities (including children), or lack relevant knowledge or
experience, unless they have been given supervision or instruction concerning safe
use of the appliance and understand the risks involved. The cleaning and
maintenance of this appliance must not be performed by children without
supervision.
3. Keep the appliance and its cord out of reach of children, ensure that they do not
play with the appliance.
4. Always use this vacuum from a power outlet of the same voltage(A.C. only) marked
on the product.
5. This vacuum is for household use only and should not be used outdoor or on wet
surfaces.NEVER TRY to suck up liquid or wet matter, whatever it may be, as it
could cause electrocution.
6. Only use the vacuum cleaner according to the instructions contained in this user
manual. Only use extension cords and accessories recommended by the
manufacturer.
7. Please follow the recommendations to use this product. ONLY allow to use the
original parts. It will be not covered to the warranty service if appear the
non-original parts be used.
8. Please contact with Midea customer service team for reserve checking and repair
service if this is damage on the socket or power cord.
9. Please do not pull the cable to move the product. For avoid the cable damage,
also this is not recommend to place the cable at door or sharp angles.
10. After used the product, please ensure to turn OFF the power and hold the plug by
hand, to remove it gently. * Keep DRY the hand before touch the equipment or
plug. *
11. NEVER put the subject into the suction nozzle to avoid be blocked. STOP to use
the equipment once the nozzle be blocked, such as the substance of dust, fluff or
hair.
12. Stay away from the nozzle or pipe or moveable parts such as hair, clothes, fingers
or any body parts.
13. NEVER suck in the flammables such as cigarettes, matches, hot ashes, or
gasoline. Also stay away the flammables when using the product.
14. Be careful when cleaning stairways or other uneven areas.
15. Ensure to install well the dust container and filters before start use the equipment.
16. Always unplug the vacuum cleaner before placing or removing the suction hose.
17. Keep the vacuum cleaner and all accessories at dry storage area.
18. NEVER immerse the equipment or any parts into water/ liquid. Please wipe with
the soft cloth and neutral detergent.
2

Product introduction
1. Tube Handle
2. Quick Release Cord Hook
3. Extension Tube
4. Locking Clip
5. Power Cord (length around 6meters)
6. Hand Vac Handle
7. On/Off Power Switch
8. Dust Cup Container Release Button
9. Cord Winding Hook
10. Dust Cup Container
11. Crevice Tool
12. Floor Brush
13. Round brush
1
2
3
5
9
12
4
6
7
8
11
13
3

INSTRUCTIONS FOR USE
NOTE: Always remove the plug from the wall socket before adding or taking off
accessories.
Inserting the metallic tube into the vacuum body.
Fig.1
Hold the vacuum cleaner handle, open the clip on the handle
Fig. 2
Insert the extension tube until it firmly snaps into place on the
handle.
Fig. 3
Secure the tube by firmly snapping the clip into place
onto the handle
Securing the crevice tool and brush onto the vacuum body
Fig. 4
Push on the crevice tool or round brush
or floor brush in the suction opening
The following tips are for the accessories:
Crevice tool:
For radiators, slots, angles, baseboards and between cushions.
Fig.1
Fig.2
Fig.3
Fig.4
Crevice tool Round brushFloor Brush
4

Round brush:
For curtain, bed, sofa and car
Floor Brush:
For all types of floors including carpets and tiled
floors.
Unrolling and rolling up the feeder cord
This vacuum cleaner has a good design for
rolling up the cord and a quick cord release.
Fig. 5
Roll up the feeder cord around the quick cord
release latch and cord roll-up latch.
To unroll the feeder cord, simply turn the quick
cord release lock to the left or to the right.
Warning: the suction opening must always be
open and unblocked. If not, the motor will
overheat and can be damaged.
Power switch
Fig. 6
The on/off switch has two positions.
Press on “I” toturn on the vacuum cleaner.
Press on “O” to turn off the vacuum cleaner.
Upright usage of vacuum cleaner
Unroll the cord and plug into a socket of 220-240V ~.
Insert the extension tube into the vacuum cleaner (see instructions provided on page 5).
Choose the suitable nozzle (crevice tool or floor brush) and attach to vacuum cleaner
(see instructions provided on page 6).
Press on the “I” button of the on/off switch to turn on the vacuum cleaner. When you
have finished using it, press on the “O” button of the on/off switch to turn it off.
Fig.5
Fig.6
Quick cord
release latch
Cord roll-up
latch
Stop position Start position
5

After usage, roll up the feeder cord around the rolling clasp for easy storage.
Usage as a hand vacuum cleaner
Detach the extension tube from the vacuum cleaner by unlocking the clip on the
handle.
NOTE: You may leave the crevice tool or the brush attached to the hand vacuum
cleaner when it is thus used.
Press on the “I” button of the on/off switch to turn on the vacuum cleaner. When you
have finished using it, press on the “O” button of the on/off switch to turn it off.
CLEANING AND CHANGING DUST FILTER
Cleaning and changing the dust filter
To have your vacuum cleaner work under the best conditions, empty the dust
container and clean the filter after each usage.
1. Fig. 7
To remove the dust container, press on the button to
release dust container
Fig. 8
Remove the dust container from the vacuum
appliance.
2. Fig. 9
Pull out the dust filter.
3. Empty the dust container.
4. Rinse the dust filter with cold water and let it dry for 24 hours before replacing in the
vacuum cleaner.
Press on the release
button of dust container.
Dust filter
Fig.7
Fig.9
Separate the dust
container from the
main part.
Fig.8
Dust container
6

Important note: NEVER put the dust filter in the washing machine and do not use a
hair-dryer to dry it.
LET IT DRY IN THE OPEN AIR.
5. Carefully replace the dust filter in specific position.
NEVER use the vacuum cleaner without the filter correctly placed.
6. Attach the dust container to the main part of the appliance.
Product specification
Model VCS861P
Rated Voltage 220-240V~ 50/60Hz
Rated Power 600W
Suction Power 100W
Net Weight 1.9kg
Product Size L x W x H 254*1100*135 mm
Dust Container Capacity 0.8L
7

SOLVING POTENTIAL PROBLEMS
Problem Possible cause Possible solutions
The appliance does not
work.
The male plug may not
be properly plugged
into the wall socket.
There is no power in
the wall socket.
Push hard on the plug
to make sure it is well
placed.
Check the fuse or
cut-off the power and
check if fuse should be
changed.
Contact a qualified and
authorized employee
of the after-sales
service.
The vacuum cleaner has
little, or no, power.
The dust container is
not correctly installed
The dust container is
full.
One, or several, filters
are blocked.
Put the dust container
back in the appliance
again, making sure it is
properly placed.
Empty the dust
container.
Clean and rinse the
filter (s) with warm or
cold water.
Turn off the appliance
and unplug. Check if
the suction end and/or
the accessories are
not blocked in any way.
Dust comes out of the
vacuum cleaner.
The dust container is
not correctly installed.
The dust container is
full.
Put the dust container
back in the appliance
again, making sure it is
properly placed.
Empty the dust
container.
The accessories do not
suck in any dust.
A dust container is full.
One, or several, filters
are blocked.
The suction end is
blocked.
Clean the dust
container.
Clean and rinse the
filter (s) with warm or
cold water.
Turn off the appliance
and unplug. Check if
the suction end and/or
the accessories are
not blocked in any way.
8

Table of contents
Other Midea Vacuum Cleaner manuals

Midea
Midea P12 FLEX User manual

Midea
Midea VCP6P User manual

Midea
Midea H3 Series User manual

Midea
Midea VTW21A15T User manual

Midea
Midea MVC-P300 User manual

Midea
Midea M7 User manual
Midea
Midea SmartShell MR01 User manual

Midea
Midea B5 Administrator Guide

Midea
Midea M6 User manual

Midea
Midea V20U01ADS2NA User manual

Midea
Midea P5 Series User manual

Midea
Midea VCS861B User manual

Midea
Midea MCS2025GB User manual

Midea
Midea VTW21A15T-140 User manual

Midea
Midea P7 FLEX Wiring diagram

Midea
Midea C5 Administrator Guide

Midea
Midea MVC-I5C User manual

Midea
Midea U1 User manual

Midea
Midea MVC-V18K-BG User manual

Midea
Midea MVC-B500VM Administrator Guide