Miele CVA 615 Manual

© 2004 Miele
TECHNICAL INFORMATION
CVA615 Coffee System


CVA615 Coffee System - Table of Contents
1.0 CONSTRUCTION & DESIGN
1.1 Appliance Overview 1
1.1.1 Front View 1
1.1.2 Controls 1
1.1.3 Interior (Front of Appliance Open) 3
1.2 Technical Data 3
1.3 Layout of Components 5
2.0 INSTALLATION
Installation Procedures 7
3.0 COMMISSION and OPERATION
3.1 General Operation 9
3.1.1 Preparing Coffee 9
3.1.2 Canceling the Preparation 10
3.1.3 Steam Control 10
3.1.4 Hot Water 11
3.1.5 Adjusting the Coffee Grinder 12
3.1.6 Filling the Coffee Bean Container 13
3.1.7 Filling the Water Tank 14
4.0 DESCRIPTION of FUNCTION
4.1 Door Switch 15
4.2 Overflow (reed) Switch 15
4.3 Brew Unit – Cleaning and Care 16
4.4 Removing the Brew Unit from the Appliance 16
4.5 Connection of Brew Unit to Drive Mechanism 17
4.6 Brewing Procedure 17
4.7 Ground Container 20
4.8 Waste Unit Present Switch 20
4.9 Water Tank 22
4.10 Water Level Switch 23
4.11 Grinder Assembly 25
4.12 Grinder Overload Protection 26
4.13 Ground Coffee Dispensing 28
4.14 Dispenser Switch 29
4.15 Brew Unit Drives 30
4.16WaterPump 32

4.0 DESCRIPTION of FUNCTION (Continued)
4.17 Flow Meter 32
4.18 Heaters 32
4.19 Flow Through Heaters 33
4.20WaterPath 35
4.20.1 Water Intake 36
4.20.2 Water Path – Coffee 36
4.20.3 Water Path – Hot Water 36
4.20.4 Water Path – Steam 36
4.21 Water Valve 37
4.22 Electronic Assemblies 38
4.22.1 Power Electronic 38
4.22.2 CPU Electronic 39
5.0 SERVICE and MAINTENANCE
5.1 Lid – Removal 41
5.2 Interference Suppression Filter – Removal 42
5.3 Rear Panel – Removal 42
5.4 Adjustment Slide Switch Frame – Removal 43
5.5 Door Contact Switch – Removal 44
5.6 Base Plate – Removal 45
5.7 Drip Tray - Removal 46
5.8 Overflow Switch Actuator Float - Removal 47
5.9 Overflow Switch - Removal 48
5.10 Rear Door Panel - Removal 49
5.11 Fascia Panel Cover - Removal 50
5.12 Selector Switch - Removal 51
5.13 Display Module Electronic – Removal 52
5.14 Coffee Dispensing Nozzle - Removal 53
5.15 Coffee Dispensing Nozzle – Installation 54
5.16 Steam Valve and Steam Valve Switch – Removal 55
5.17 Hot Water Nozzle – Removal 56
5.18 Hot Water Valve - Removal 56
5.19 Checking Temperature at Coffee Dispenser 57
5.20 Brew Unit – Removal (in start / home position) 58
5.21 Brew Unit – Removal (NOT in start / home position) 59
5.22 Brew Unit – Installation 61
5.23 Brew Unit – Cleaning Procedure 61
5.24 Brew Unit – Filter Cleaning 62
5.25 Brew Unit – Degreasing via the Rinse Cycle 63

5.0 SERVICE and MAINTENANCE (Continued)
5.26 Brew Unit – Lubrication 65
5.27 Brew Unit – Manual Reset to Home (out of appliance) 66
5.28 Brew Unit Creamer Valve – Removal 67
5.29 Brew Unit Handle – Removal 67
5.30 Brew Unit Funnel – Removal 68
5.31 Brew Unit Ram – Service 69
5.32 Brew Unit Drives – Service 71
5.33 Water Tank Float – Removal 76
5.34 Water Tank Lip Seal – Removal 77
5.35 Lower Section of Tank Valve – Removal 78
5.36 Beans Container – Removal 80
5.37 Beans Container Guide – Removal 81
5.38 Grinder – Disassembly 82
5.39 Grinder Assembly – Basic Setting 85
5.40 Grinder Unit – Removal 86
5.41 Dispensing Solenoid – Removal 88
5.42 Dispenser Switch – Removal 88
5.43 Waterpath & Flowmeter – Testing 89
5.44 Water Path Leakage Test 91
5.45 Water Path Connections – Opening 92
5.46 Water Path Connections – Closing 92
6.0 FAULT DIAGNOSIS
6.1 Programming Mode 93
6.2 Service Mode 94
6.3 Displayed Messages 96
6.4 Fault Diagnosis 98
6.5 Wiring Diagram 101

CVA615 Coffee System – List of Figures
1-1 Front Overview 1
1-2 Controls Overview 1
1-3 Interior View / Door Open 2
1-4 Product Dimensions 3
1- 5 Layout of Components 5
2-1 Operating Instruction Manual (Cover) 7
3-1 Cup placed under dispenser ports 9
3-2 Pressing the Coffee Button 9
3-3 Displayed Message 9
3-4 Canceling the preparation 10
3-5 Steam Selector 10
3-6 Cup under Hot Water Dispenser 11
3-7 Hot Water Button 11
3-8 Grinder Controls 12
3-9 Adding coffee beans 13
4-1 Door Switch 15
4-2 Brew Unit in home position 16
4-3 Brew Unit connections 17
4-4 Brew Unit Filters 18
4-5 Brew Unit Components 18
4-6 Brew Unit with compressed coffee 19
4-7 Waste Unit Present Switch 20
4-8 Waste Unit and magnet 21
4-9 Water Tank and valve 22
4-10 Water Level Switch 23
4-11 Water Level Switch – Float 23
4-12 Grinder Assembly 25
4-13 Components of Grinder Overload Protection 26
4-14 Grinder ball positions 27
4-15 Dispensing components 28
4-16 Dispensing Lever 29
4-17 Brew Unit Connections 30
4-18 Brew Unit Drives 31

CVA615 Coffee System – List of Figures (Continued)
4-19 Hot Water / Coffee Heater 34
4-20 Steam Heater 34
4-21WaterPath 35
4-22 Water Valve 37
4-23 Power Electronic 38
4-24 CPU Electronic 39
5-1 Lid and screws 41
5-2 Interference Suppression Filter 42
5-3 Rear Panel 42
5-4 Removing the Slide Switch Frame 43
5-5 Door Switch 44
5-6 Base Plate Removal 45
5-7 Drip Tray Removal 46
5-8 Overflow Switch Float 47
5-9 Overflow Switch 48
5-10 Rear Door Panel Removal 49
5-11 Fascia Panel Cover Assembly 50
5-12 Selector Switch 51
5-13 Rear of Front Door without cover 52
5-14 Coffee Dispensing Nozzle Components 53
5-15 Steam Valve and Switch and Components 55
5-16 Hot Water Valve Components 56
5-17 Brew Unit Connection Socket 60
5-18 Brew Unit Connection Socket Photo 60
5-19 Brew Unit – Removal for Cleaning 61
5-20 Brew Unit – Installation 62
5-21 Cleaning tablet being placed into Brew Unit 63
5-22 Brew Unit Lubrication Points (left side) 65
5-23 Brew Unit Lubrication Points (right side) 65
5-24 Moving Brew Unit to Home 66
5-25 Brew Unit reset position 66
5-26 Brew Unit Handle Removal 67
5-27 Rear view of Brew Unit 68
5-28 Front view of Brew Unit 68
5-29 Releasing the ram from the Brew Unit 69

CVA615 Coffee System – List of Figures (Continued)
5.30 Brew Unit chamber 70
5.31 Ram Assembly and lubrication points 70
5.32 Front Plate Assembly with Drive Assembly Screw Positions 72
5.33 Grinder Retaining Screws 73
5.34 Grinder Retaining Nuts 73
5-35 Upper Front Plate Assembly 74
5-36 Using a suitable tool to keep Front Plate lifted 75
5-37 Water Tank and Float 76
5-38 Removal of the lip seal 77
5-39 Removing the lip seal (2) 77
5-40 Water Tank Lip Seal 78
5-41 Underside view of CVA615 79
5-42 Removing the Beans Container 80
5-43 Beans Container Guide 81
5-44 Grinder Adjustment Level 82
5-45 Grinder Adjustment Components 83
5-46 Grinder 84
5-47 Grinder Removal 86
5-48 Grinder Coupling 87
5-49 Test Jumper Position 90
5-50 Service Mode Display 90
5-51 Water Path Connection 92
CVA615 Coffee System - List of Tables
6-1 Programming Mode 93
6-2 Service Mode Navigation 95
6-3 Displayed Messages (1 of 2) 96
6-4 Displayed Messages (2 of 2) 97

Technical Information
1
CVA615 Coffee System
1.0 Construction and Design
1.1 Appliance Overview
1.1.1 Front View
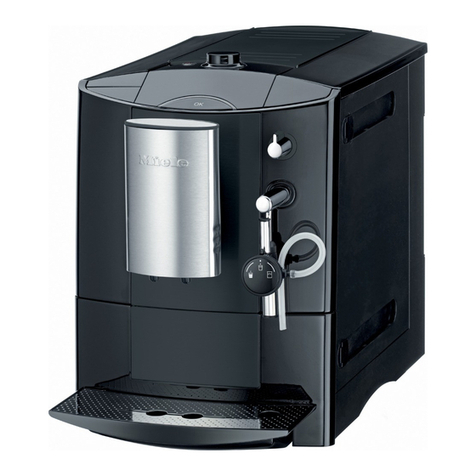
Figure 1-1: Front Overview CVA615
1.1.2 Controls
Figure 1-2: CVA615 Controls

Technical Information
2
CVA615 Coffee System
1.1.3 Interior (Front of Appliance Opened)
Figure 1-3: Interior view of CVA615 with door opened

Technical Information
3
CVA615 Coffee System
1.2 Technical Data
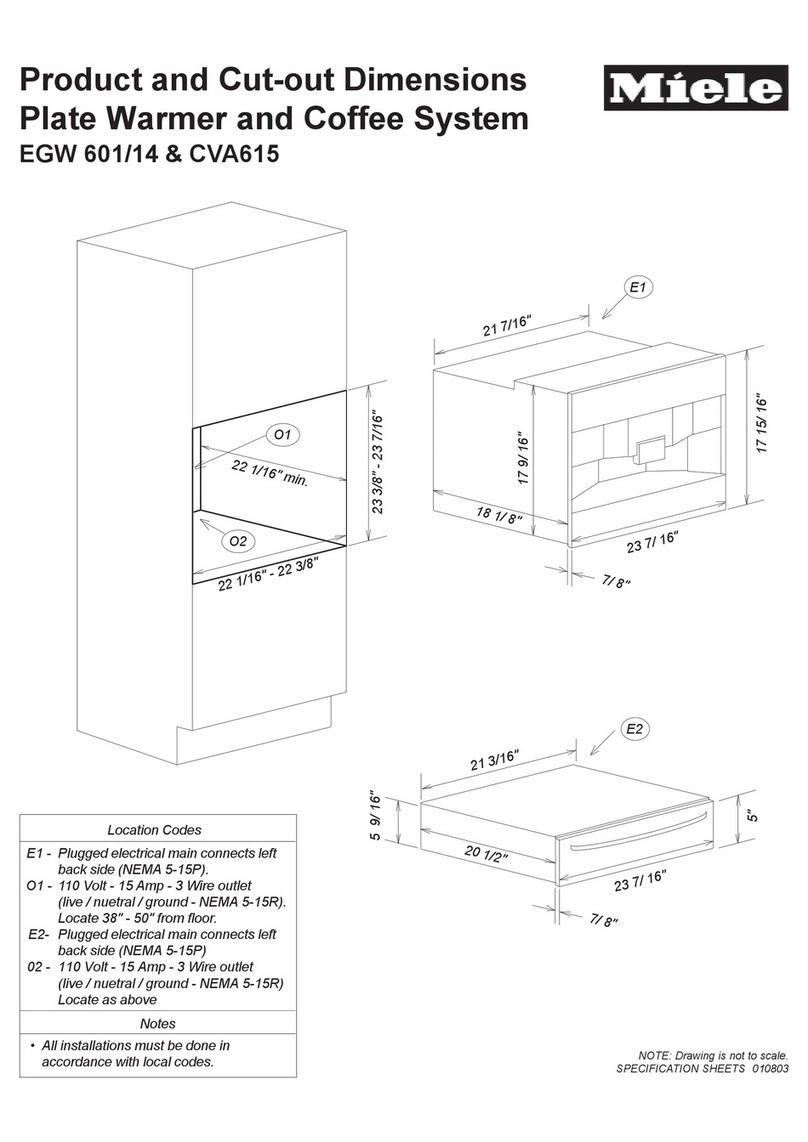
Product Dimensions
Figure 1-4: CVA615 product dimensions
Electrical Information
The appliance comes equipped with a 6 ft (1.8 m) power cord with
a NEMA 5-15P molded plug for connection to a 120 V, 15 A, 60 Hz
power supply.

Technical Information
4
CVA615 Coffee System

Technical Information
5
CVA615 Coffee System
1.3 Layout of Components
Figure 1-5: CVA615 Overhead view of components

Technical Information
6
CVA615 Coffee System

Technical Information
7
CVA615 Coffee System
2.0 Installation
Refer to the Installation section of the Operating Manual.
Figure 2-1: Operating Manual

Technical Information
8
CVA615 Coffee System

Technical Information
9
CVA615 Coffee System
3.0 Commission and Operation
3.1 General Operation
3.1.1 Preparing Coffee
1. Place a cup under both coffee dispensing ports.
Figure 3-1: Cup under the dispensing ports.
2. Press the desired size coffee button once. This will start the
preparation cycle.
Figure 3-2: Pressing the Coffee Button
The following message will appear in the message window,
depending on the button pressed:
Figure 3-3: Displayed message

Technical Information
10
CVA615 Coffee System
3.1.2 Canceling the Preparation
Press any one of the coffee buttons to stop preparation
immediately.
Figure 3-4: Canceling the preparation process
3.1.3 Steam Control
Caution
The steam from the appliance is extremely hot; use caution to
prevent burns.
●Turn the steam ON by turning the Steam Selector counter-
clockwise.
●Turn the steam OFF by turning the Steam Selector clockwise.
Figure 3-5: Steam Selector

Technical Information
11
CVA615 Coffee System
3.1.4 Hot Water
1. Place a cup under the hot water dispenser.
Figure 3-6: Placement of cup under the hot water dispenser
2. Press the hot water button. Hot water will be dispensed.
3. Press the hot water button again to stop the flow of hot water.
Figure 3-7: Hot Water Button
Note
If programmed with the hot water feature activated…
The flow of hot water will stop automatically once a predetermined
amount of hot water has passed through the system

Technical Information
12
CVA615 Coffee System
3.1.5 Adjusting the Coffee Grinder
Controls
Slide to the left for finer grinding
Slide to the right for coarser grinding.
Figure 3-8: Grinder Controls
If the espresso flows too quickly into the cup, the beans may
have been ground too coarsely. The grinder should be adjusted
to a finer setting.
If the espresso only trickles into the cup, the beans may have
been ground too fine and the coffee will be bitter. The grinder
should be adjusted to a coarser setting.
If the crema is evenly colored but pale, the ground coffee is too
coarse.
If the crema is very dark brown on one side, graduating almost
to white on the other, the ground coffee is too fine.
Note
You should be able to feel notches when moving the slide
control.
If the slide control will not move:
Close the machine and dispense a cup of coffee. Then try to
move the slide control again.
Other manuals for CVA 615
4
Table of contents
Other Miele Coffee Maker manuals

Miele
Miele CM 5200 User manual

Miele
Miele CVA 2650 User manual

Miele
Miele CVA 620 User manual

Miele
Miele TX2349 User manual

Miele
Miele CM 5410 User manual

Miele
Miele DGC 6800 User manual

Miele
Miele CM7500 User manual

Miele
Miele CVA 2660 User guide

Miele
Miele MilkPerfection CM6360OBS User manual

Miele
Miele 07 173 930 User manual

Miele
Miele CVA 5065 User manual

Miele
Miele CVA 4080 Specification sheet
Miele
Miele DGC 6800 User manual

Miele
Miele CVA 6401 User manual

Miele
Miele CVA 2662 User manual

Miele
Miele CVA 3660 User manual

Miele
Miele CVA 2662 User manual

Miele
Miele CVA 2660 User guide

Miele
Miele cva 610 Manual

Miele
Miele CVA 7440 User manual