Mini Gadgets MiniClockCamMirror User manual

MIRROR CLOCK
HIDDEN CAMERA
SKU: MiniClockCamMirror
THANK YOU FOR PURCHASING THE MIRROR CLOCK
HIDDEN CAMERA
Please read this manual before operating the mirror clock hidden
camera and keep it handy.
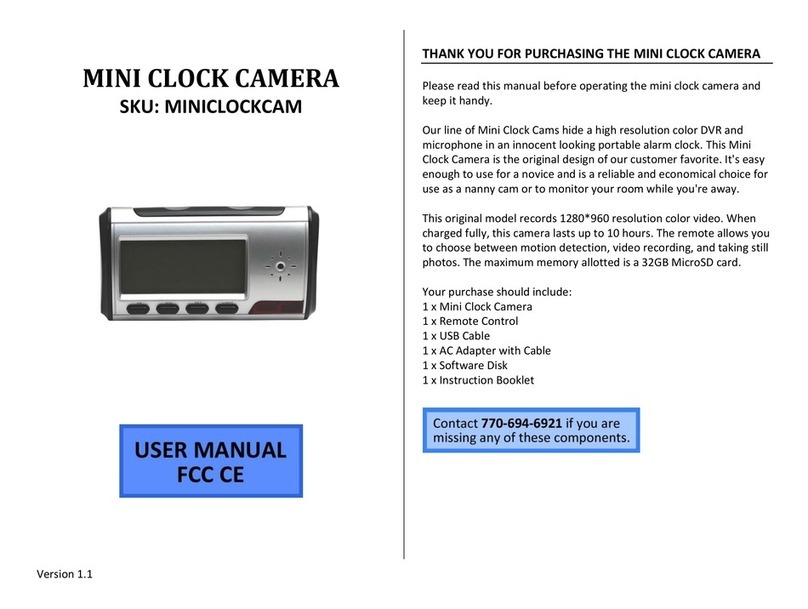
Our line of mini clock cams is one of our bestselling products. These
functional clocks with hidden cameras are a great option for covert
recording. This sleek design not only has a style that will fit right in on
any desk, bedside table, or vanity area. The mirror like finish also
contains a fully functioning alarm clock.
This model records up to 7 hours of 12 0*720 color video. It supports
up to 32GB MicroSD card. The 160° viewing angle ensures almost
everything will be in the shot. Use the remote control to choose
between motion detection and continuous recording settings.
Your purchase should include:
1 x Mirror Clock Hidden Camera
1 x Remote Control
1 x Battery
1 x USB Cable
1 x AC Adapter
1 x Instruction Booklet

GET FAMILIAR WITH YOUR MIRROR CLOCK HIDDEN
CAMERA
Figure 1: Front View
Figure 2: Back View
Clock Function Buttons
Reset
Motion
Detection Camera / Video Standby
Reset
Indicator Light
Camera Lens
Camera Function Buttons

1
Figure 3: Bottom View
Battery
Compartment
SD Card
Slot
USB
Port

1
OPERATING THE MIRROR CLOCK
HIDDEN CAMERA
IMPORTANT NOTICE: Insert the battery
into the battery compartment. The clock
may immediately come on, b t still allow
the device to charge 4 – 6 ho rs before
sing.
HOW TO CHARGE THE MIRROR CLOCK
HIDDEN CAMERA
Using the AC Adapter
1. Plug the AC adapter with cable into
a wall outlet
2. Plug the cable into the mirror
hidden clock manual
• The red and blue indicator
lights will alternate while the
device is charging
Using the USB Cable
1. Push the switch to OFF
2. Plug the USB cable into your PC
3. Plug the USB cable into the mini
clock camera pro
• The red and blue indicator
lights will alternate while the
device is charging
• The blue indicator light will
turn solid when fully charged
HOW TO SET THE TIME AND DATE
With this model, you can manually rotate
between displaying time, date, year, or
alarm.
Four buttons that you need for setting up
the clock are located on the back of the
device (see Figure 2):
• TIME
• ALM (alarm)
• UP
• DOWN
Set the Time
1. Push and hold the TIME button for 3
seconds
• The hour display will flash
2. Push the UP or DOWN button until
the LCD displays the current hour
• The time is military format
with 12:00AM as 0:00
3. Push the TIME button again
• The minutes display will flash
4. Push the UP or DOWN button until
the LCD displays the current minutes
5. Push the TIME button again
• The seconds will flash
6. Push the UP or DOWN buttons until
the LCD displays the current seconds
7. Push the TIME button again to save
Set the Month and Day
1. Push on the front of the clock so
that it leans back on its own base
• There should be a pair of 1s
on the LCD display. This is
the month and day
2. Push and hold the TIME button for 3
seconds
• The year display will flash
3. Push the UP or DOWN buttons until
the LCD displays the current year
4. Push the TIME button again
• The month display will flash
5. Push the UP or DOWN buttons until
the LCD displays the current month
6. Push the TIME button again
• The day display will flash
7. Push the UP or DOWN buttons until
the LCD displays the current day
. Push the TIME button again to save
Set the Alarm
1. Push the ALM button
• The LCD screen should
display the following:
2. Push and hold the ALM button for
three seconds
• The hour display will flash
3. Push the UP or DOWN button until
the LCD displays the hour you want
the alarm to go off
• The time is military format
with 12:00AM as 0:00
4. Push the ALM button
• The minute display will flash
5. Push the UP or DOWN button until
the LCD displays the minute you
want the alarm to go off
6. Push the ALM button to save
Repeat steps 1 – 6 for alarm 2 and 3
Choose an Alarm Ringtone
1. Push the DOWN button while in
alarm setting mode
• Each time you push the
down button, the clock will

1
cycle through one of its eight
ring tones
Turn the Alarm On and Off
• When you first set the alarm, it will
already be turned on
• A red dot on the lower right corner
of the minute display indicates the
alarm is on
• To turn the alarm off
1. Push the UP button while in
alarm setting mode
2. Push on the front of the
clock so that it leans back on
its own base
The red dot should
not be visible,
indicating the alarm is
off
• Repeat steps 1 and 2 to turn the
alarm back on
Silence the Alarm
• When the alarm goes off, simply
push the front of the clock so that it
leans back on its own base
HOW TO USE THE CAMERA FUNCTION
BUTTONS
Three buttons that you need for setting up
the mirror hidden camera are located on
the back of the device (see Figure 2):
• Standby
• Camera / Video
• Motion Detection
Standby Mode
Standby mode is the mode from which all
other functions can be accessed.
1. Push the Standby button
• The indicator light will turn
blue and then red
• The clock is now in standby
mode
Take a hoto
1. Push the Camera / Video button
• The indicator light will flash
blue once and then go back
to red
• The camera has taken a
photo
Record Video
1. Push and hold the Camera / Video
button
• The red indicator light will
flash three times and then
turn off
• The camera is now recording
video
2. Push the Camera / Video button
• The red indicator light will
turn on
• The camera has stopped
recording and saved the file
Use Motion Detection
1. Push the Motion Detection button
• The purple indicator light will
flash 4 times
• The camera is now in motion
detection mode
• When the camera detects
movement, the blue
indicator light will flash once
and then turn off
• The camera is now recording
2. Push the Motion Detection button
• The red indicator light will
turn on
• The camera has stopped
recording and saved the file

1
USING THE REMOTE
Motion Detection Button
Video Button
Camera Button
HOW TO TURN ON THE CAMERA
Standby Mode
Standby mode is the mode from which all other functions can be
accessed.
1. Push the Standby button
• The indicator light will turn blue and then red
• The clock is now in standby mode
HOW TO TAKE A PHOTO
1. Push the Camera button
• The indicator light will flash blue once and then go
back to red
• The camera has taken a photo
HOW TO RECORD VIDEO
1. Push the Video button
• The red indicator light will flash three times and then
turn off
• The camera is now recording video
2. Push the Video button
• The red indicator light will turn on
• The camera has stopped recording and saved the file
HOW TO USE MOTION ACTIVATION
1. Push the Motion Detection button
• The purple indicator light will flash 4 times
• The camera is now in motion detection mode
• When the camera detects movement, the blue
indicator light will flash once and then turn off
• The camera is now recording
2. Push the Motion Detection button
• The red indicator light will turn on
• The camera has stopped recording and saved the file

1
HOW TO RESET THE TIME AND DATE
STAMP (Windows Only
1. Connect the device to your PC using
the USB Cable
2. Go to
http://www.mgidownloads.com/
3. Click on "WriteTime.exe"
4. Click on "camstickma.exe"
• If the program automatically
saves to your Downloads
folder, then skip to step 6.
5. Click "Save File"
IMPORTANT NOTICE: Yo might
receive a warning that this program
contains a vir s. Disregard this
warning. The program is safe to se.
6. Go to Start > Computer > Downloads
> Open WriteTime.exe
7. Click "Run"
. The program will automatically
detect the device.
9. Click "Update"
RETRIE E THE FILES TO YOUR PC
1. Plug the device into your PC using
the USB cable.
2. Locate “Removable Disk” inside the
(My) Computer folder.
• AutoPlay Removable Disk >
Open folder to view files
Or…
• Go to Start > Computer > Removable
Disk
3. Open the Removable Disk drive.
4. Open the DCIM folder.
5. Open the 100DSCIM
6. Double click the file you want to
view.
• VLC Player is recommended
for watching videos.

1
TROUBLESHOOTING
THE DEVICE WON’T TURN ON
• Charge the device for at least 4 hours before the first use.
• Make sure the charging cable is securely inserted into the
device and into the power source.
THE DEVICE ISN’T CHARGING
• Replace the battery or charging cable.
• If you are charging via a wall power source, you may need to
charge via your PC. The A/C adapter might be bad.
THE DEVICE HAS CRASHED
• You need to reset the device.
MY COMPUTER DOESN’T RECOGNIZE THE DEVICE
• Unplug the device from your PC and reboot the device.
• Unplug the device from your PC and reboot your PC.
• Try using a different USB slot on your PC.
• Replace the USB cable.
THE SOUND OR VIDEO IS UNCLEAR
• The device needs charging.
THE RED LIGHT IS FLASHING FOR 3 SECONDS AND THEN
TURNING OFF
• The battery is low.
OTHER PROBLEMS
• Call our technical support at 770–694–6921
SPECIFICATIONS
Pixels
5
Mega
ideo Resolution
12 0*720
ideo Format
AVI
Frames per Second
30
Recording Time
7 hours
ision Angle
160°
Motion Detection
Yes
Photo Resolution
1600*1200
Photo Format
JPEG
Water Resistant
No
Battery Life
7 hours
Type of Memory
MicroSD Card
Memory Capacity
Up to 32GB
Recording Capacity
2GB ≈ 1 hour
4GB ≈ 2 hours
GB ≈ 4 hours
16GB ≈ hours
32GB
≈ 16 hours
USB Interface
2.0 USB
Player Software
VLC is recommended
Operating Systems Windows 2000
Windows Me
Windows XP
Windows Vista
Windows 7
Mac OSX
Linux
Table of contents
Other Mini Gadgets Clock manuals

Mini Gadgets
Mini Gadgets BBSBLUETOOTHCLOCK User manual

Mini Gadgets
Mini Gadgets MCPro User manual

Mini Gadgets
Mini Gadgets MINICLOCKCAM User manual

Mini Gadgets
Mini Gadgets MiniClockPro 720p User manual

Mini Gadgets
Mini Gadgets BB2Clock User manual

Mini Gadgets
Mini Gadgets MiniClockCamHD User manual

Mini Gadgets
Mini Gadgets WIFIWALLCLOCK User manual

Mini Gadgets
Mini Gadgets MCC1080NV User manual

Mini Gadgets
Mini Gadgets MCC1080Wifi User manual

Mini Gadgets
Mini Gadgets MiniClockEcon User manual