miniDSP Flex User manual

3/15/23, 9:45 AM
Print or save - miniDSP Flex
https://docs.minidsp.com/product-manuals/flex/print_page.html
1/86
Table of Contents
miniDSPFlex
Product Overview
The Flex family
DiracLive upgrade
Typical applications
Software Installation
System requirements
Windows
macOS
Download the miniDSP software
Install the miniDSP software
Install on macOS
Install on Windows
The miniDSP Device Console
Finding connected devices
Connecting to a device
Using template devices
Settings
Input sources
Using presets
Selecting a preset
Renaming
Importing and exporting
Resetting
Firmware updates
Convert to Flex (DL)
1. Purchase the Dirac Live upgrade
2. Activate the Dirac Live upgrade
Basic Operation
Front and rear panels
Basic operation
Rear panel connnections
All versions
miniDSP Flex

3/15/23, 9:45 AM
Print or save - miniDSP Flex
https://docs.minidsp.com/product-manuals/flex/print_page.html
2/86
Flex/Balanced
Flex/Digital
Playing Audio
Connecting sources
Connecting an amplier and speakers
Bluetooth audio
About USB Audio
macOS
Windows 11
ASIO
Remote control
Using the miniDSP remote
Using a third-party programmable remote
Programming a Logitech Harmony remote
Android/iOS control app
Signal Flow
Signal ow
Input Channels
Channel label
Current RMS level, Level meter
Channel gain
PEQ
Mute
Signal routing
Overview
Basic routing
Mixing
Routing examples
Subwoofer integration
Two-way active speaker
Output Channels
Channel label
Signal routing
PEQ
CROSSOVER
FIR
Time delay
Gain adjustment

3/15/23, 9:45 AM
Print or save - miniDSP Flex
https://docs.minidsp.com/product-manuals/flex/print_page.html
3/86
Invert
Mute
Current RMS level, level meter
DSP Reference
Parametric EQ
Overview
Editing lters
Disabling individual lters
Filter mode
Basic mode
Frequency
Gain
Q
Filter type
Jumping between channels
Linking channels
Reset to default
Advanced mode
Programming a single biquad
Loading a biquad le
Biquad design software
Crossover
Overview
Crossover mode
Basic mode
Enable
Cut-off frequency
Filter type
Jumping between channels
Linking channels
Hiding channels
Advanced mode
Setting biquads for the crossover block
Biquad design software
FIR Filtering
FIR ltering overview
The FIR lter pane
Enabling and disabling the lter

3/15/23, 9:45 AM
Print or save - miniDSP Flex
https://docs.minidsp.com/product-manuals/flex/print_page.html
4/86
Allocating taps
Loading lters
File mode
Manual mode
Jumping between channels
FIR lter design software
Tips
Compressor
Overview
Enable
Jumping between channels
Additional Information
Migrating to DC
1. Check that you have the latest version of Device Console
2. (Windows only) Check that you have the latest USB driver
3. Update DSP Firmware
4. Download the Migration Pack
5. Upgrade the rmware in your Flex
6. Migrate your conguration presets
Troubleshooting and support
Trouble-shooting audio issues
No sound during playback
Strange soundstage
Obtaining support

3/15/23, 9:45 AM
Print or save - miniDSP Flex
https://docs.minidsp.com/product-manuals/flex/print_page.html
5/86
miniDSPFlex
Product Overview
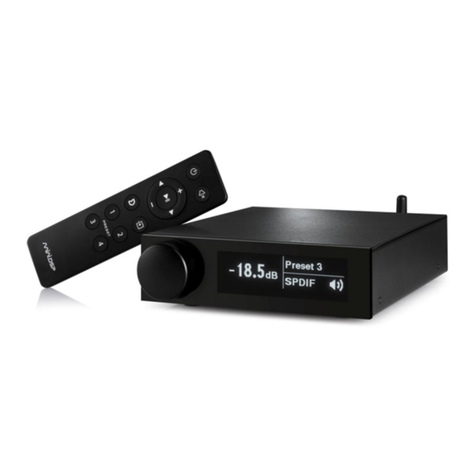
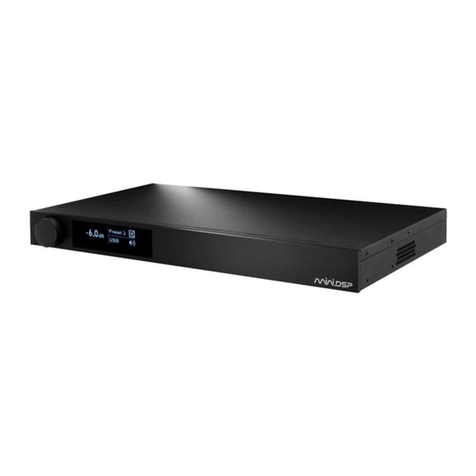
The miniDSPFlex is a stereo-input, four-channel output compact high-resolution audio processor. It features stereo
analog inputs, two digital inputs, USB audio, Bluetooth streaming with LDAC™ and aptX™ HD codecs and automatic
Bluetooth input selection, and an OLED front panel with physical volume control.
The Flex family
There are several versions of the 2-in 4-out miniDSP Flex with different I/O congurations. Refer to the Flex product
page (https://www.minidsp.com/products/minidsp-in-a-box/ex) for the complete list.

3/15/23, 9:45 AM
Print or save - miniDSP Flex
https://docs.minidsp.com/product-manuals/flex/print_page.html
6/86
I O
2
1
2
1
4
3
SPDIF
TOSLINK
D
A
C
USB
RESET
GND
DC 12V
PWR
INPUTS OUTPUTS
2
1
2
1
4
3
SPDIF
TOSLINK
D
A
C
USB
RESET
GND
DC 12V
PWR
SPDIF
TOSLINK
D
A
C
USB
RESET
GND
DC 12V
PWR
SPDIF
TOSLINK
OUT 34OUT 12
SPDIF
TOSLINK
OUTPUTS
INPUTS
2
1
Flex
Our standard model with stereo analog input
and four channels of analog output, all on RCA
connectors. The perfect tiny digital/analog
preamp and room correction device.
Flex/Balanced
For those with balanced equipment whether
audiophile, studio, or on-the-go professional
sound use. TRS jacks keep the compact profile
and are easy to adapt.
Flex/Digital
For specialized needs including driving active
speakers with digital input, use with separate
DACs, or to capture an analog source into a
digital system.
SPDIF
TOSLINK
USB Audio
Bluetooth Audio
Common Inputs
DiracLive upgrade
The miniDSPFlex can be upgraded to run stereo (two-channel) DiracLive® room correction. This requires an
additional purchase for the DiracLive license. You can either purchase the miniDSPFlex with DiracLive already
activated, or purchase the DiracLive upgrade at a later time from within the Device Console. Refer to the instructions
here:
Convert to Flex (DL)
Note that the upgrade applies per device.
Typical applications
The miniDSPFlex has a wide range of applications in home and professional audio. This section illustrates a few of
them.
Figure 1 shows the miniDSPFlex used as a digital preamp with subwoofer integration. The Flex provides accurate and
exible integration between the subwoofers and the main speakers as well as comprehensive EQ and tuning options.
This is a very cost-effective way to build a complete audio system that includes all the benets of modern DSP
technology. Add the optional DiracLive software upgrade for world-class room correction.

3/15/23, 9:45 AM
Print or save - miniDSP Flex
https://docs.minidsp.com/product-manuals/flex/print_page.html
7/86
Analog
3.0dB
Preset 3
Phono preamp
Power amplifier
Powered
subwoofer
Loudspeakers
Computer
USB audio
Digital sources
Turntable
miniDSP
Flex
Figure 1. miniDSPFlex as preamp with subwoofer integration
Figure 2 illustrates a similar use of the miniDSPFlex as a digital preamp, but the output channels have instead been
congured to act as crossover for a pair of active 2-way speakers. Amplication can be via a multichannel power
amplier as shown, or a pair of stereo ampliers.

3/15/23, 9:45 AM
Print or save - miniDSP Flex
https://docs.minidsp.com/product-manuals/flex/print_page.html
8/86
Analog
3.0dB
Preset 3
Phono preamp
Multichannel
power amplifier
Left speaker
Computer
USB audio
Digital sources
Turntable
miniDSP
Flex
Right speaker
Figure 2. miniDSPFlex as preamp and active crossover
In Figure 3, the miniDSPFlex has been used as an accessory in a home theater system, to manage multiple
subwoofers. Driven from the A/V receiver's subwoofer output, the miniDSPFlex can be used to independently adjust
gain, delay and parametric EQ of each subwoofer for optimum multi-sub performance.
Analog
3.0dB
Preset 3
Subwoofer output from AVR
Up to four independent subwoofers
A/V Receiver
miniDSP
Flex
Figure 3. miniDSPFlex for multi-sub management

3/15/23, 9:45 AM
Print or save - miniDSP Flex
https://docs.minidsp.com/product-manuals/flex/print_page.html
9/86
Software Installation
The miniDSPFlex is congured with software running on a PC or Mac.
System requirements
Windows
Windows 10 or later, with all updates installed
At least a dual core i3, i5, or i7 processor, or AMD equivalent
At least 4 GB RAM
One free USB 2.0 port
Internet connection
macOS
OS X 10.11 (El Capitan), or macOS 10.12 (Sierra) or later
At least a dual core i3, i5, or i7 processor, or an Apple ARM processor (M1/M2/Pro/Max)
At least 4 GB RAM
One free USB 2.0 port
Internet connection
Intel and Apple ARM processors are supported with separate binaries.
Download the miniDSP software
If you purchased your Flex directly from miniDSP, your software will be available from the User Downloads
(https://www.minidsp.com/userdownloads) section of the miniDSP website when your order ships. To access the
download, you will need to be logged into the website with the account you created when purchasing.
If you purchased your Flex from a miniDSP dealer, you will receive a coupon together with the product. Redeem this
coupon at this page:
Redeem your miniDSP software (https://www.minidsp.com/support/redeem-coupon)
The User Downloads link is visible from the drop-down menu at the top right of the website:
Info

3/15/23, 9:45 AM
Print or save - miniDSP Flex
https://docs.minidsp.com/product-manuals/flex/print_page.html
10/86
Navigate to the miniDSP Device Console section and select the download according to your platform: Windows,
macOS with Intel CPU, or macOS with Apple ARM CPU.
Install the miniDSP software
Install on macOS
1. Double-click on the downloaded miniDSP Device Console-x.y.z.dmg image le to open it. (The version number
x.y.z embedded in the le name will change over time.)
2. Drag the miniDSP Device Console application icon to your Applications folder.
3. To run the miniDSPDeviceConsole, locate it in the Applications folder and double-click on it. To make it easier to
run in future, right-click on its dock icon and select Options -> Keep in Dock.
The macOS version of miniDSP Device Console is installed for all users on the computer.
Install on Windows
1. Double-click on the downloaded MiniDSP Device Console Setup x.y.z.exe installer to run it. (The version number
x.y.z embedded in the le name will change over time.)
2. Install the miniDSP UAC2 USB Audio driver:
Info

3/15/23, 9:45 AM
Print or save - miniDSP Flex
https://docs.minidsp.com/product-manuals/flex/print_page.html
11/86
a. Start miniDSPDeviceConsole.
b. Navigate to the Settings screen and select Check USB Audio Driver:
Settings
Network Device Discovery
Timeout 40 seconds
Software Update
Check Interval 24 Enable
Last checked: No updates available at 15:49:29 GMT+1000 (Hong Kong Time) on Fri Aug 19 2022
Color Mode
Modes Light Dark System
Support
Check USB Audio Driver
Main M e nu
Create Program Snapshot
Hours
Discover Devices
Template Devices
Settings
About
Version History
CHECK NOW
If the UAC2 driver is not installed, DeviceConsole will offer to install it. If you have previously installed the
miniDSP UAC2 driver but it is not up to date, DeviceConsole will offer to install the latest version. In either
case, click PROCEED.
UAC-2 does not seem to be installed.. Install UAC2 Driver?
UAC-2 Driver
PROCEED NO
Note: we recommend that you accept the default installation location.
The rst time you run the miniDSPDeviceConsole, you may see a Windows Firewall warning such as the one below.
Ensure that "Private networks..." is checked and "Public networks..." is not checked. Then click on "Allow access." This
warning dialog may appear more than once.

3/15/23, 9:45 AM
Print or save - miniDSP Flex
https://docs.minidsp.com/product-manuals/flex/print_page.html
12/86
The most recent miniDSP processors require the UAC2 driver to be at least version 5.40. If you have diculty with the
UAC2 driver or control panel, use Check USB Audio Driver to make sure that you have the latest version.
The Windows installation of miniDSPDeviceConsole is for a single user. If it needs to be run in more than one account
on your PC, it will need to be installed for each account.
Info
Info

3/15/23, 9:45 AM
Print or save - miniDSP Flex
https://docs.minidsp.com/product-manuals/flex/print_page.html
13/86
The miniDSP Device Console
The miniDSPDeviceConsole ("DC") is the new conguration and control software for miniDSP audio processors. It
replaces the earlier "plugin" control software. In contrast to the earlier software, DeviceConsole provides:
A single software program to control all miniDSP processors
Over-the-air (OTA) self-updates
Detection and installation of rmware upgrades for your processor
Purchase and activation of Dirac Live upgrades (where applicable)
If you have not used DeviceConsole with your Flex before, you will need to perform a one-time migration procedure.
See Migrating to DC.
Finding connected devices
The Discover Devices screen displays devices connected to your computer, or which have a network-accessible
control interface.
Main M enu Choose your device:
Devices plugged into your network / USB are shown below.
Flex Eight
Serial#: 900001
USB
VID: 10066 PID: 18
SHD
Serial#: 902607
USB
VID: 10066 PID: 69
Discover Devices
Template Devices
Settings
About
Version History
For network control, the miniDSPFlex requires that a miniDSP Wi-DG be connected to its USB port.
If your device is connected to a Wi-DG but is not visible here, conrm that you have updated the rmware on your Wi-DG
to the latest version.
Connecting to a device
Info
Tip

3/15/23, 9:45 AM
Print or save - miniDSP Flex
https://docs.minidsp.com/product-manuals/flex/print_page.html
14/86
To connect to a device for editing and control, click on its name. While the device is connected, the Device Console
displays three main areas:
The global control area has items that are not specic settings of the processor for the current preset. These items
are described on this page.
The input channels area displays a control strip for each input channel. See Input channels.
The output channels area displays the routing from input to output channels, and a control strip for each output
channel. See Signal routing and Output channels.
Connection
Master Volume
Input Source
Presets
1 2 34
Firmware
Display Versions
Refresh DSP Firmware
Refresh XMOS Firmware
Model Conversion
Convert To Flex (DL)
DISCONNECT
-41.5 dB
TOSLINK
RENAME IMPORT EXPORT RESET RESET-ALL
Global control Input channels Output channels
Flex
Output 1
Input 2
-43.1
Gain (dB)
0
PEQ
0
PEQ
MUTEMUTE
Input 1
-14.0
Gain (dB)
0
PEQ
0
PEQ
MUTEMUTE
Output 2 Output 3 Output 4
RMS-Meter (dBFS)RMS-Meter (dBFS)
PEQ
CROSSOVER
-18.9
FIR
Delay (ms)
0
Gain (dB)
0
INVERT
MUTE
COMPRESSOR
RMS-Meter (dBFS)
PEQ
CROSSOVER
RMS-Meter
FIR
Delay (ms)
0
Gain (dB)
0
INVERT
MUTE
COMPRESSOR
(dBFS)
PEQ
CROSSOVER
RMS-Meter
FIR
Delay (ms)
0
Gain (dB)
0
INVERT
MUTE
COMPRESSOR
(dBFS)
PEQ
CROSSOVER
RMS-Meter
FIR
Delay (ms)
0
Gain (dB)
0
INVERT
MUTE
COMPRESSOR
(dBFS)
-42.9-3.5
-32.4
INPUT 1
0DB
INPUT 1
0DB
INPUT 1
0DB
INPUT 1
0DB
0DB
INPUT 2
0DB
INPUT 2
0DB
INPUT 2
0DB
INPUT 2
If this is the rst time you have used DeviceConsole with your miniDSPFlex, DeviceConsole will check for an existing
preset that was created with the older MiniDSP-2x4-HD "plugin" user interface. If found, DeviceConsole will
automatically import it. This is done on a preset-by-preset basis.
When you are done, click DISCONNECT.
Once you have switched to miniDSPDeviceConsole, don't use the older MiniDSP-2x4-HD "plugin" user interface to
connect to the miniDSPFlex any more.
Tip

3/15/23, 9:45 AM
Print or save - miniDSP Flex
https://docs.minidsp.com/product-manuals/flex/print_page.html
15/86
Using template devices
The Template Devices screen displays the complete list of devices supported by Device Console. This can be used to
explore features of a processor that you do not have, or to edit your processor settings when you are not able to
connect to it.
A template device "mirrors" the real device, so that you can edit your settings while not connected. That is, while you
are editing the real device, the current preset is copied to the corresponding template device whenever you change
presets and when you disconnect. You can then edit those settings in the template device.
To edit a template device, click on it.
Tem pla te Devices
DDRC-24
Flex
Flex (DL)
Flex Eight
Flex Eight (DL)
SHD
Main Menu
Discover Devices
Template Devices
Settings
About
Version History
When you are done editing in the template device, click FINISH.
When you connect to your real device again, DeviceConsole detects that you have edited the template and asks you if
you want to use the settings from the edited template. Or, you can discard the changes you made in the template and
revert to the settings that your device had the last time you were connected to it. This is done on a preset-by-preset
basis:

3/15/23, 9:45 AM
Print or save - miniDSP Flex
https://docs.minidsp.com/product-manuals/flex/print_page.html
16/86
Settings have changed
Different settings have been found for Flex. Would you like to:
Possible reasons:
* The settings for Preset-1 in the template device has been changed since last time this
Flex was connected.
Apply the changes from Preset-1 in the template to the Flex
Continue and use current setting.
(Last Modified: 8/29/2022, 3:46:22 PM)
(Last Modified: 8/29/2022, 1:22:17 PM)
Initialize to default Settings
Disconnect
You will see a similar dialog if you edit the settings of your device using a different computer or the older "plugin" user
interface (the latter is not recommended once you have migrated to the miniDSPDeviceConsole).
If you have more than one device of the same type, only one of them can be edited using the template device. If you have
more than one device of the same type or need to edit your devices from more than one computer, you will need to
manage your presets by exporting them to and importing them from les. See Importing and Exporting.
Settings
These settings are for Device Console itself (and not any connected processor).
Info
Info

3/15/23, 9:45 AM
Print or save - miniDSP Flex
https://docs.minidsp.com/product-manuals/flex/print_page.html
17/86
Settings
Network Device Discovery
Timeout 40 seconds
Software Update
Check Interval 24 Enable
Last checked: No updates available at 15:49:29 GMT+1000 (Hong Kong Time) on Fri Aug 19 2022
Color Mode
Modes Light Dark System
Support
Check USB Audio Driver
Main M e nu
Create Program Snapshot
Hours
Discover Devices
Template Devices
Settings
About
Version History
CHECK NOW
The Modes selection sets the DC to display with a light theme, a dark theme, or with the same theme as your operating
system (Windows or macOS). If you choose the System option, you may need to quit DeviceConsole and restart it for
the change to take effect.
The Check USB Audio Driver feature checks if you have the miniDSP UAC2 audio driver installed, and that it is the
latest version. It appears on Windows only. See Installation for more information.
The Create Program Snapshot feature is used to help miniDSP support diagnose issues you may be having with your
unit. See Obtaining Support.
Input sources
To select the input source, drop down the selector menu.
The selectable inputs can set up by clicking on the CUSTOMIZE SELECTION button. Any input source can be enabled
or disabled here.

3/15/23, 9:45 AM
Print or save - miniDSP Flex
https://docs.minidsp.com/product-manuals/flex/print_page.html
18/86
Analog
TOSLINK
SPDIF
USB
Bluetooth
Please choose selectable Audio Source
If an input is disabled, it cannot be selected here, from the front panel, or by remote control. This is a convenience
feature so that ununused inputs do not need to be cycled through.
Using presets
Presets / Configurations
1 2 34
RENAME IMPORT EXPORT RESET RESET-ALL
The miniDSPFlex has four onboard presets, each of which contains all of the settings for audio processing except
items controlled by the front panel and remote control (volume, mute, input source).
Selecting a preset
Click on the desired preset number. Or if you have renamed the presets, its name.
Renaming
Select the preset, then click the RENAME button. Enter the desired name, then click OK. The name can be up to 12
letters long.

3/15/23, 9:45 AM
Print or save - miniDSP Flex
https://docs.minidsp.com/product-manuals/flex/print_page.html
19/86
Preset Name
OK CANCEL
2Preset Name
OK CANCEL
More Bass
The preset name is displayed in the DeviceConsole only. The front panel of the Flex will still display "Preset 1" through
"Preset 4".
Importing and exporting
To import a preset from a le, click the IMPORT button, then navigate to a saved preset le and click Open. The preset
will be loaded from the le. If Device Console is currently connected to the miniDSPFlex, the preset will also be sent to
the Flex.
To export a preset to a le, click the EXPORT button. Navigate to the desired location in the le system, change the le
name if desired, and click Save.
It is not possible to load a preset from the Flex back to the Device Console. We strongly recommend always exporting
your presets to les when they are complete, to ensure that you don't lose them in future.
To copy all settings from one preset to another, export the rst preset to a le, select the second present, and then import
the le that you just saved.
Resetting
To reset the current preset to default values, click the RESET button.
To reset all four presets to default values, click the RESET-ALL button.
Firmware updates
miniDSPDeviceConsole will check for rmware updates when a device is connected, and notify you if one is available.
To manually update the rmware, click the Refresh DSP Firmware and Refresh XMOS Firmware button.
Info
Info
Tip

3/15/23, 9:45 AM
Print or save - miniDSP Flex
https://docs.minidsp.com/product-manuals/flex/print_page.html
20/86
Firmware
Display Versions
Refresh DSP Firmware
Refresh XMOS Firmware
You do not need to use these buttons in normal operation. They are there in case your Flex has issues and/or miniDSP
Support instructs you to refresh the rmware.
Convert to Flex (DL)
Dirac Live is an optional upgrade to the miniDSPFlex. You can purchase and activate the upgrade from within the
miniDSPDeviceConsole.
To purchase the Dirac Live upgrade, click on Convert to Flex (DL) in the DeviceConsole sidebar:
Model Conversion
Convert To Flex (DL)
Read the information and warning notices and click through if you wish to proceed.
The upgrade is a two-step process: 1. purchase; 2. activate.
Tip
Other manuals for Flex
1
This manual suits for next models
3
Table of contents
Other miniDSP Computer Hardware manuals
miniDSP
miniDSP NANOSHARC User manual
miniDSP
miniDSP HARMONY DSP 8X12 User manual

miniDSP
miniDSP DDRC-88D User manual

miniDSP
miniDSP Flex Eight User manual
miniDSP
miniDSP NANOSHARC User manual

miniDSP
miniDSP DDRC-24 User manual

miniDSP
miniDSP DDRC-22 User manual

miniDSP
miniDSP 4x10 User manual
miniDSP
miniDSP Home Theater Series User manual
miniDSP
miniDSP DDRC-88A Use and care manual