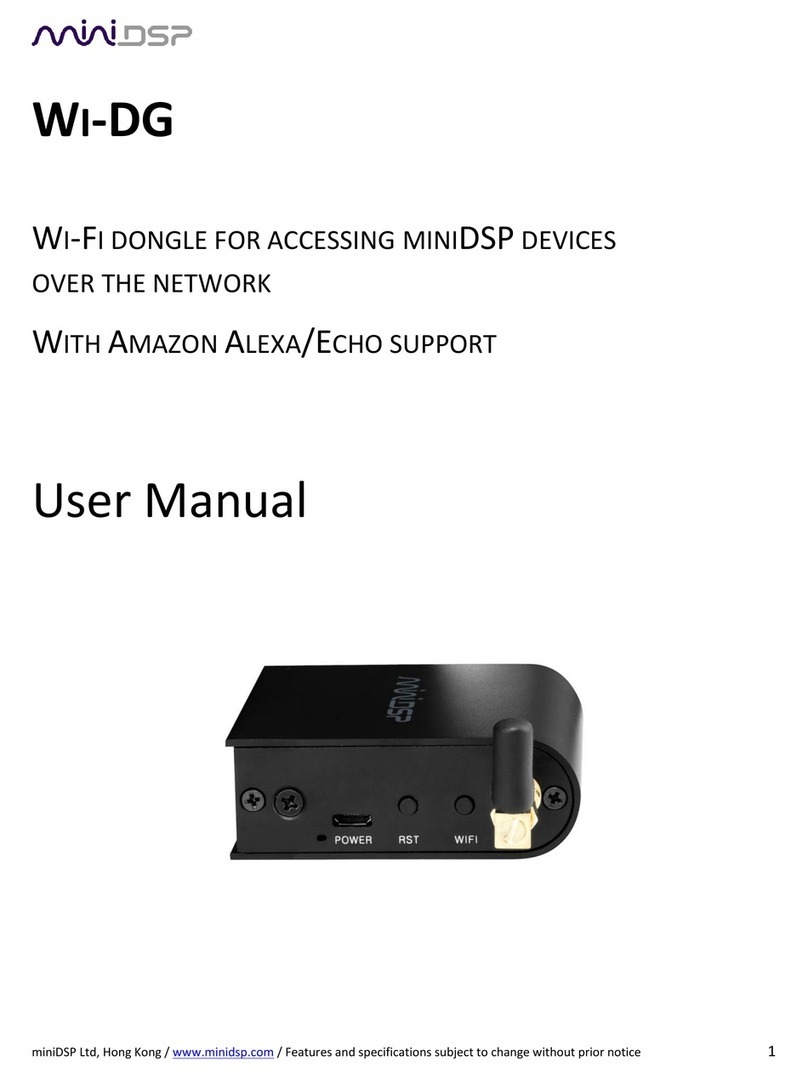
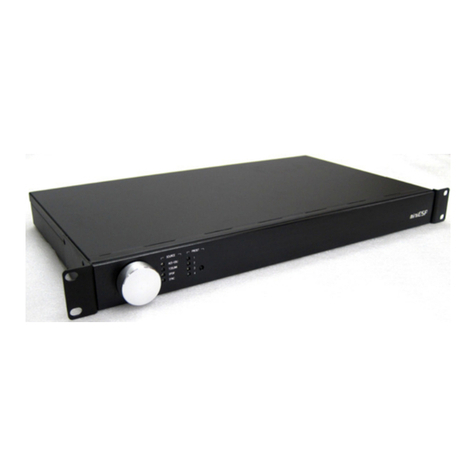
miniDSP SHD User manual

PRELIMINARY
miniDSP Ltd, Hong Kong / www.minidsp.com / Features and specifications subject to change without prior notice 1
SHD Series
STEREO HIGH-DEFINITION ROOM CORRECTION
PROCESSOR AND CROSSOVER
SHD
SHD Studio
Featuring Dirac Live® Room Correction Technology
User Manual

PRELIMINARY
miniDSP Ltd, Hong Kong / www.minidsp.com / Features and specifications subject to change without prior notice 2
Revision history
Revision
Description
Date
0.1
First draft
26 March 2018
0.6
Preliminary for public release
12 June 2018

PRELIMINARY
miniDSP Ltd, Hong Kong / www.minidsp.com / Features and specifications subject to change without prior notice 3
CONTENTS
Contents .....................................................................................................................................................................3
IMPORTANT INFORMATION.......................................................................................................................................6
1 Product Overview ................................................................................................................................................9
1.1 Dirac Live ................................................................................................................................................. 10
1.2 Better connectivity .................................................................................................................................. 11
1.3 Network streaming.................................................................................................................................. 11
1.4 Front panel display and remote control.................................................................................................. 11
1.5 Powerful back-end processing ................................................................................................................ 12
2 Hardware Overview .......................................................................................................................................... 13
2.1 Rear panel connections – SHD................................................................................................................. 13
2.2 Rear panel connections – SHD Studio ..................................................................................................... 14
2.3 Front panel controls and display ............................................................................................................. 15
2.4 Remote control........................................................................................................................................ 16
3 Software Overview............................................................................................................................................ 17
3.1 Configuration steps for stereo room correction ..................................................................................... 17
3.2 Configuration steps with advanced/back-end processing ...................................................................... 18
4 Playing Audio / Quick-start Guide..................................................................................................................... 19
4.1 Basic connections and audio – SHD......................................................................................................... 19
4.2 Basic connections and audio – SHD Studio ............................................................................................. 20
4.3 USB Audio ................................................................................................................................................ 21
4.3.1 Mac OS X.......................................................................................................................................... 21
4.3.2 Windows.......................................................................................................................................... 22
4.4 Network audio......................................................................................................................................... 23
4.4.1 Getting connected........................................................................................................................... 23
4.4.2 Web interface.................................................................................................................................. 24
4.4.3 Playing from USB stick ..................................................................................................................... 25
4.4.4 Spotify streaming............................................................................................................................. 26
5 Software Installation......................................................................................................................................... 27
5.1 Download the software........................................................................................................................... 27
5.2 Software installation ― Windows........................................................................................................... 28
5.3 Software installation ― macOS / OS X.................................................................................................... 30
6 Acoustic Measurement for Dirac Live............................................................................................................... 31
6.1 Loudspeaker and microphone positioning.............................................................................................. 31
6.2 Preparing for acoustic measurement...................................................................................................... 32
6.3 Configuring for measurement ................................................................................................................. 33
6.3.1 Check your configuration/preset (advanced).................................................................................. 34
6.3.2 Sound System tab ............................................................................................................................ 34
6.3.3 Mic Config tab.................................................................................................................................. 35
6.3.4 Output & Levels tab......................................................................................................................... 36
6.4 Running the measurements .................................................................................................................... 37
6.4.1 Listening environment..................................................................................................................... 38
6.4.2 Executing measurements ................................................................................................................ 39

PRELIMINARY
miniDSP Ltd, Hong Kong / www.minidsp.com / Features and specifications subject to change without prior notice 4
6.4.3 Viewing and redoing measurements............................................................................................... 39
6.4.4 Completing the measurements....................................................................................................... 39
6.5 Saving and loading projects..................................................................................................................... 40
7 Dirac Live Filter Design and Download ............................................................................................................. 41
7.1 Working with graphs ............................................................................................................................... 41
7.2 Designing your target curve .................................................................................................................... 43
7.2.1 The Auto Target............................................................................................................................... 43
7.2.2 Editing the target curve................................................................................................................... 44
7.2.3 Guidelines for target curve design .................................................................................................. 45
7.2.4 Saving and loading target curves..................................................................................................... 46
7.3 Generating correction filters ................................................................................................................... 46
7.4 Loading filter sets .................................................................................................................................... 47
8 Configuring backend processing ....................................................................................................................... 48
8.1 How it works............................................................................................................................................ 48
8.2 Plugin user interface................................................................................................................................ 49
8.3 Connecting to the processor ................................................................................................................... 50
8.4 Key features............................................................................................................................................. 52
8.4.1 Master control................................................................................................................................. 52
8.4.2 Configuration/preset selection........................................................................................................ 52
8.4.3 Inputs............................................................................................................................................... 52
8.4.4 Input selection................................................................................................................................. 53
8.4.5 Matrix mixer .................................................................................................................................... 53
8.4.6 Outputs............................................................................................................................................ 53
8.5 Acoustic measurement for back-end configuration................................................................................ 55
8.5.1 Using DLCT....................................................................................................................................... 55
8.5.2 Using Room EQ Wizard.................................................................................................................... 55
8.6 Sample plugin configurations .................................................................................................................. 56
8.6.1 Stereo room correction ................................................................................................................... 56
8.6.2 Add single subwoofer ...................................................................................................................... 57
8.6.3 Add dual subwoofers....................................................................................................................... 58
8.6.4 Stereo supporting woofers/FAST .................................................................................................... 59
8.6.5 Two-way active speaker .................................................................................................................. 60
9 Plugin Reference ............................................................................................................................................... 61
9.1 Input channel status ................................................................................................................................ 61
9.2 Routing .................................................................................................................................................... 61
9.3 Output channels ...................................................................................................................................... 62
9.3.1 Channel label ................................................................................................................................... 62
9.3.2 Level metering and gain adjustment............................................................................................... 62
9.3.3 Parametric EQ.................................................................................................................................. 63
9.3.4 Crossover ......................................................................................................................................... 65
9.3.5 Compressor...................................................................................................................................... 67
9.3.6 Invert and mute............................................................................................................................... 67
9.3.7 Time delay ....................................................................................................................................... 68
9.4 Custom biquad programming.................................................................................................................. 68
9.4.1 What’s a “biquad? ........................................................................................................................... 68
9.4.2 Using custom biquad programming ................................................................................................ 69
9.4.3 Biquad design software ................................................................................................................... 70
PRELIMINARY
miniDSP Ltd, Hong Kong / www.minidsp.com / Features and specifications subject to change without prior notice 5
9.5 Working with configurations ................................................................................................................... 71
9.5.1 Online and offline mode.................................................................................................................. 71
9.5.2 Selecting a configuration................................................................................................................. 71
9.5.3 Saving and loading configurations................................................................................................... 72
9.5.4 Relationship with Dirac Live ............................................................................................................ 72
9.5.5 Restoring to defaults ....................................................................................................................... 73
9.6 Keyboard shortcuts ................................................................................................................................. 73
10 Additional Information ..................................................................................................................................... 74
10.1 Specifications........................................................................................................................................... 74
10.2 Programming a third-party remote......................................................................................................... 76
10.3 Firmware upgrade ................................................................................................................................... 77
10.3.1 Windows.......................................................................................................................................... 77
10.3.2 macOS / OS X ................................................................................................................................... 79
10.4 Troubleshooting ...................................................................................................................................... 80
10.4.1 SHD plugin ....................................................................................................................................... 80
10.4.2 DLCT................................................................................................................................................. 81
10.5 Obtaining support.................................................................................................................................... 82
10.6 Open source licenses............................................................................................................................... 82

PRELIMINARY
miniDSP Ltd, Hong Kong / www.minidsp.com / Features and specifications subject to change without prior notice 6
IMPORTANT INFORMATION
Please read the following information before use. In case of any questions, please contact miniDSP via the
support portal at minidsp.desk.com.
System Requirements
To configure the miniDSP audio processor, you will require a Windows PC or Apple Mac OS X computer with the
following minimum specification:
Windows
•Intel Pentium III or later, AMD Athlon XP or later
•2 Gigabytes (GB) of RAM or higher
•Keyboard and mouse or compatible pointing device
•Microsoft• ® Windows® Vista® SP1/Win7/Win8/Win10
•Two free USB 2.0 ports
macOS / OS X
•Intel-based Mac with 1 GHz or higher processor clock speed
•2 Gigabytes (GB) of RAM or higher
•Keyboard and mouse or compatible pointing device
•OS X 10.9 (Mavericks) or later, macOS 10.12 (Sierra) or later
•Two free USB 2.0 ports
Disclaimer/Warning
miniDSP cannot be held responsible for any damage that may result from the improper use of this product or
incorrect configuration of its settings. As with any other product, we recommend that you carefully read this
manual and other technical notes to ensure that you fully understand how to operate this product. The miniDSP
audio processor is a powerful tool, and misuse or misconfiguration, such as incorrectly set gains or excessive
boost, can produce signals that may damage your audio system.
As a general guideline, you should perform the initial configuration of the miniDSP audio processor before
enabling audio through any connected output device or amplification. Doing so will help ensure that the
software is correctly configured.
Finally, note that the miniDSP audio processor is a very flexible device, and many of the questions we receive at
the tech support department are already answered in this user manual and in the online application notes on
the miniDSP.com website. So please take the time to carefully read this user manual and the online technical
support. Thanks for your understanding!
Warranty Terms
miniDSP Ltd warrants this product to be free from defects in materials and workmanship for a period of one
year from the invoice date. Our warranty does not cover failure of the product due to incorrect connection or

PRELIMINARY
miniDSP Ltd, Hong Kong / www.minidsp.com / Features and specifications subject to change without prior notice 7
installation, improper or undocumented use, unauthorized servicing, modification or alteration of the unit in any
way, or any usage outside of that recommended in this manual. If in doubt, contact miniDSP prior to use.
FCC Class B Statement
This device complies with Part 15 of the FCC Rules. Operation is subject to the following two conditions:
•This device may not cause harmful interference.
•This device must accept any interference received, including interference that may cause undesired
operation.
Warning: This equipment has been tested and found to comply with the limits for a Class B digital device,
pursuant to Part 15 of the FCC Rules. These limits are designed to provide reasonable protection. This
equipment generates, uses and can radiate radio frequency energy and, if not installed and used in accordance
with the instructions, may cause interference to radio communications. However, there is no guarantee that
interference will not occur in a particular installation. If this equipment does cause harmful interference to radio
or television reception, which can be determined by turning the equipment off and on, the user is encouraged to
try to correct the interference by one or more of the following measures:
•Reorient or relocate the receiving antenna.
•Increase the separation between the equipment and receiver.
•Connect the equipment into an outlet on a circuit different from that to which the receiver is connected.
•Consult the dealer or an experienced radio/TV technician for help.
Notice: Shielded interface cable must be used in order to comply with emission limits.
Notice: Changes or modification not expressly approved by the party responsible for compliance could void the
user’s authority to operate the equipment.
CE Mark Statement
The miniDSP SHD Series processor has passed the test performed according to European Standard EN 55022
Class B.

PRELIMINARY
miniDSP Ltd, Hong Kong / www.minidsp.com / Features and specifications subject to change without prior notice 8
A note on this manual
This User Manual is designed for reading in both print and on the computer. If printing the manual, please print
double-sided. The embedded page size is 8 ½” x 11”. Printing on A4 paper will result in a slightly reduced size.
For reading on the computer, we have included hyperlinked cross-references throughout the manual. In
addition, a table of contents is embedded in the PDF file. Displaying this table of contents will make navigation
much easier:
•In Adobe Reader on Windows, click on the “bookmarks” icon at the left. The table of contents will appear on
the left and can be unfolded at each level by clicking on the “+” icons.
•In Preview on the Mac, click on the View menu and select Table of Contents. The table of contents will
appear on the left and can be unfolded at each level by clicking on the triangle icons.

PRELIMINARY
miniDSP Ltd, Hong Kong / www.minidsp.com / Features and specifications subject to change without prior notice 9
1PRODUCT OVERVIEW
Thank you for purchasing a miniDSP SHD Series high-resolution1room correction processor powered by Dirac
Live®, the world’s premier room correction solution. The new SHD Series offers a wealth of input-output
options, powerful back-end processing for subwoofer integration and active systems, and of course Dirac Live.
We are delighted to offer you this powerful software and hardware combination, the fruit of extensive research
and development and years of experience in sound system tuning. As is our custom, the series includes a range
of models for optimum matching to different applications.
1The miniDSP SHD Series processors operate with 32-bit 96 kHz resolution.

PRELIMINARY
miniDSP Ltd, Hong Kong / www.minidsp.com / Features and specifications subject to change without prior notice 10
1.1 DIRAC LIVE
The powerful processor in the SHD Series processor executes Dirac Live® digital room correction, from Dirac
Research. Dirac Live’s mixed-phase filtering technology will improve the imaging of your system, minimize the
effects of room modes and resonances, and improve dynamics and clarity.
To accomplish its remarkable improvement in listening quality, the Dirac Live Calibration Tool for miniDSP
(DLCT) steps you through the procedure for taking measurements around your listening area. Dirac Live®
employs a sophisticated analysis algorithm to make the optimal correction across the whole listening area, not
just at a single point. The user has full control over the target response. Measurements are taken with a
calibrated acoustic measurement microphone, the miniDSP UMIK-1.2
In addition to correcting magnitude response, Dirac Live® corrects the system’s impulse response, which reflects
how the system responds to a sharp transient such as a drumbeat. Reflections, diffraction, resonances,
misaligned drivers, and so on, all combine to smear out the transient. Correcting the impulse response makes
the speaker in the room behave much more like an ideal loudspeaker. The impulse response is a critical factor
for accurate sound-staging, clarity and bass reproduction.
2A UMIK-1 is included in the standard purchase price of each SHD Series processor. Other microphones cannot be used.

PRELIMINARY
miniDSP Ltd, Hong Kong / www.minidsp.com / Features and specifications subject to change without prior notice 11
1.2 BETTER CONNECTIVITY
We’ve listened to our customers who wanted more input-output connectivity and flexibility. Our flagship SHD
processor sports balanced (XLR) and unbalanced (RCA) analog inputs, three digital inputs (SPDIF coax, TOSLINK,
and AES-EBU), USB audio streaming, and a network port for audio streaming.
On the output side, there are four output channels, all available as balanced analog (XLR), unbalanced analog
(RCA) and SPDIF coax digital. The internal digital signal processing supports simple stereo output, integrated
subwoofers or two-way active systems.
1.3 NETWORK STREAMING
miniDSP has previously supported the professional AVB (Audio-Video Bridging) protocol. For home systems, the
SHD Series processors incorporate popular network streaming protocols for the first time. They ship with the
popular network streaming endpoint Volumio, which supports multiple methods of playing networked audio.
1.4 FRONT PANEL DISPLAY AND REMOTE CONTROL

PRELIMINARY
miniDSP Ltd, Hong Kong / www.minidsp.com / Features and specifications subject to change without prior notice 12
Figure 1. Typical audio system configuration using the SHD processor
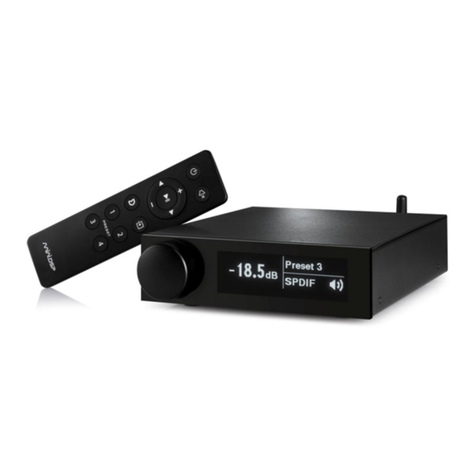
The SHD Series processors provide essential status and control information on a newly-designed front panel
display. The included basic miniDSP remote control provides easy access to the main user operations, including
volume control, room correction preset selection, source selection, mute, and Dirac Live on/off.
1.5 POWERFUL BACK-END PROCESSING
In addition to Dirac Live processing, the SHD Series processors all include a powerful set of additional functions,
controlled by miniDSP’s well-known and easy-to-use software interface. Flexible routing from the inputs through
to the outputs allows applications such as integration of one or two subwoofers and two-way active speakers.
The SHD Series processors are compatible with powerful tools such as Room EQ Wizard and MultiSub Optimizer.

PRELIMINARY
miniDSP Ltd, Hong Kong / www.minidsp.com / Features and specifications subject to change without prior notice 13
2HARDWARE OVERVIEW
2.1 REAR PANEL CONNECTIONS –SHD
1. Power inlet. Connect a standard IEC C13 cable here.
2. Fuse holder. If the fuse needs replacing, remove the power cable. Then use a small flat-bladed screwdriver
to lever out the fuse and fuse holder. Replace the fuse with a 250V rated [TBD] A fuse and push the fuse
holder firmly back in.
3. Power switch.
4. Host port for USB music sticks.
5. Ethernet port for network music streaming.
6. USB port for control and audio streaming. Connect to an available USB port on your computer.
7. Digital inputs. Connect digital sources here using optical (TOSLINK SPDIF), coax (RCA SPDIF), or AES/EBU
(XLR) connections. Sample rates from 32 up to 216 kHz are supported. The three digital inputs can be
separately selected with the front panel encoder or the remote control.
8. Digital outputs. If you prefer to use your own DAC or DACs, connect them here using RCA SPDIF. Each DAC
must be capable of running at 24-bit 96 kHz.
9. Analog inputs. Connect one or two analog sources here, using balanced XLR or unbalanced RCA
connections. The two analog inputs can be separately selected with the front panel encoder or the remote
control. See Specifications for maximum input voltages.
10. Analog outputs. Connect power amplifiers here using balanced XLR or unbalanced RCA connections. See
Specifications for maximum output voltages.

PRELIMINARY
miniDSP Ltd, Hong Kong / www.minidsp.com / Features and specifications subject to change without prior notice 14
2.2 REAR PANEL CONNECTIONS –SHD STUDIO
1. DC power inlet. Connect the supplied 12 VDC power supply here.
2. Host port for USB music sticks.
3. Ethernet port for network music streaming.
4. USB port for control and audio streaming. Connect to an available USB port on your computer.
5. Digital inputs. Connect digital sources here using optical (TOSLINK SPDIF), coax (RCA SPDIF), or AES/EBU
(XLR) connections. Sample rates from 32 up to 216 kHz are supported. The three digital inputs can be
separately selected with the front panel encoder or the remote control.
6. SPDIF Out. Connect external DACs with RCA cables here. Each DAC must be capable of running at 24-bit
96 kHz.
7. AES-EBU. Connect external DACs with XLR AES-EBU cables here. Each DAC must be capable of running at
24-bit 96 kHz.

PRELIMINARY
miniDSP Ltd, Hong Kong / www.minidsp.com / Features and specifications subject to change without prior notice 15
2.3 FRONT PANEL CONTROLS AND DISPLAY
The front panel display shows current volume, present, source, mute, and Dirac Live status.
•To change the volume, rotate the encoder knob. Volume changes in 0.5 dB steps. Minimum volume is -127.5
dB and maximum volume is 0.0 dB.
•To mute output, press the encoder briefly. The speaker icon changes to have a line through it. To unmute,
press briefly again.
•To change preset selection, press and hold the encoder knob until the preset indicator inverts (becomes
black text on a bright background). Then release the encoder. Rotate the encoder knob until the desired
preset is displayed. Press the encoder knob to make the preset take effect (this takes a couple of seconds).
•To change input source, press and hold the encoder knob until the source selection indicator inverts
(becomes black text on a bright background). Release the encoder knob. Rotate the encoder knob until the
desired input source is displayed. To return to normal volume control operation, press the encoder knob
briefly.
•To turn Dirac Live filtering on and off, press and hold the encoder knob until the Dirac Live indicator starts
flashing. Release the encoder knob. Rotate the encoder knob until the Dirac Live icon indicates the desired
state. To return to normal volume control operation, press the encoder knob briefly.
(Note: preset and input selection, as well as turning Dirac Live on and off, is much faster with a remote control.)

PRELIMINARY
miniDSP Ltd, Hong Kong / www.minidsp.com / Features and specifications subject to change without prior notice 16
2.4 REMOTE CONTROL
The remote control provided with the processor controls all key runtime functions.
Source
Cycles through the input sources in the indicated order:
SHD: RCA (unbalanced analog), XLR (balanced analog), USB, LAN (Ethernet),
TOSLINK, SPDIF, AES-EBU
SHD Studio: USB, LAN (Ethernet), TOSLINK, SPDIF, AES-EBU
1, 2, 3, 4
Switches to the selected preset. Note that it takes a few seconds for the preset
selection to complete, while the processor loads the new filters from its flash
memory into the DSP.
[Bell]
Enables or disables Dirac Live filtering. Dirac Live filtering will be effective only
on presets for which Dirac Live filters have been loaded.
Vol
Reduce or increase the volume. Each press changes the volume in 0.5 dB.
Holding down a button will accelerate volume change to 3 dB steps.
Mute
Mutes and unmutes audio output.

PRELIMINARY
miniDSP Ltd, Hong Kong / www.minidsp.com / Features and specifications subject to change without prior notice 17
3SOFTWARE OVERVIEW
SHD Series processors are configured by software running on a PC or Mac. There are two programs: Dirac Live
Calibration Tool (DLCT) and the SHD plugin. If you are interested in using the SHD Series processor for stereo
room correction only, please follow the steps on this page. If you wish to use the full processing features of the
SHD Series, please follow the steps on the next page.
3.1 CONFIGURATION STEPS FOR STEREO ROOM CORRECTION
The steps for configuring the SHD Series processor for stereo Dirac Live® room correction only are summarized
as follows:
1. Connect the SHD Series processor into your system and install
software. See Sections 4 and 5.
2. Run a series of acoustic measurements using the Dirac Live
Calibration Tool for miniDSP program, to capture the acoustic
behavior of your speakers and room. See Section 6.
3. Generate digital room correction filters that will be executed by
the DDRC-88A processor. Up to four filter sets can be
downloaded into the processor for easy real-time recall and
auditioning. See Section 7.
4. Once the digital room correction filters are designed and
downloaded, the computer can be disconnected for normal
listening. Or, use it to stream audio over USB to the SHD
Series processor.

PRELIMINARY
miniDSP Ltd, Hong Kong / www.minidsp.com / Features and specifications subject to change without prior notice 18
3.2 CONFIGURATION STEPS WITH ADVANCED/BACK-END PROCESSING
The steps for configuring SHD Series processor for applications such as subwoofer integration in addition to
Dirac Live® room correction are summarized as follows:
1. Connect the SHD Series processor into your system and install
software. See Sections 4 and 5.
2. Configure back-end processing with the SHD plugin. This sets up
individual control of each output channel in order to (for
example) integrate a subwoofer or implement an active
speaker. See Section 8.
3. Run a series of acoustic measurements using the Dirac Live
Calibration Tool for miniDSP program, to capture the acoustic
behavior of your speakers and room. See Section 6.
4. Generate digital room correction filters that will be executed by
the SHD Series processor. Up to four filter sets can be
downloaded into the processor for easy real-time recall and
auditioning. See Section 7.
5. Once the digital room correction filters are designed and
downloaded, the computer can be disconnected for normal
listening. Or, use it to stream audio over USB to the SHD
Series processor.

PRELIMINARY
miniDSP Ltd, Hong Kong / www.minidsp.com / Features and specifications subject to change without prior notice 19
4PLAYING AUDIO /QUICK-START GUIDE
Each SHD Series processor comes delivered ready-to-go for basic configurations. You can start playing audio
straightaway, then move onto Dirac Live calibration and subwoofer integration.
4.1 BASIC CONNECTIONS AND AUDIO –SHD
The diagram below illustrates a typical example of a simple connection to use to get started with the SHD.
Depending on the specific equipment that you have, you may use a different input, or use the balanced outputs
instead of the RCA outputs.
1. Connect an audio source to the rear panel.
2. Connect either the analog balanced (XLR) or unbalanced (RCA) outputs to a power amplifier. (Or, connect
digital output for channels 1 and 2 to a DAC, then to a power amplifier – see the description on previous
page for the SHD Studio for an example.)
3. Leave the power amplifier turned off for now. Connect the supplied power cable to the IEC socket on the
rear panel.
4. Power on the source equipment.
5. Switch power on using the switch at the rear panel. Wait a few seconds until the display shows the volume
level. Use the knob or included remote control to turn volume down to −60 dB.
6. Use the remote control or front panel encoder to select the source that you want to play audio from.
7. Turn on the power amplifier.
8. Start playing audio on the source.
9. Gradually turn up the volume using the knob or the remote control.
Turn off the power to the SHD Series processor before making or changing audio connections.

PRELIMINARY
miniDSP Ltd, Hong Kong / www.minidsp.com / Features and specifications subject to change without prior notice 20
4.2 BASIC CONNECTIONS AND AUDIO –SHD STUDIO
The diagram below illustrates a typical example of a simple connection to use to get started with the SHD.
Depending on the specific equipment that you have, you may use a different input, or use the AES/EBU digital
output instead of the SPDIF output.
1. Connect an audio source to the rear panel.
2. Connect SPDIF Out 1&2 to your external DAC, and connect the DAC outputs to your power amplifier.
Alternatively, connect the SPDIF Out 1&2 to equipment with digital input and power amplification built-in,
such as an A/V receiver or digital integrated amplifier.
3. Power on the source equipment.
4. Plugin in the power to the SHD Studio. Wait a few seconds until the display shows the volume level. Use the
knob or included remote control to turn volume down to −60 dB.
5. Use the remote control or front panel encoder to select the source that you want to play audio from.
6. Turn on the power amplifier, A/V receiver or integrated amplifier.
7. Start playing audio on the source.
8. Gradually turn up the volume using the knob or the remote control.
Turn off the power to the SHD Series processor before making or changing audio connections.
Other manuals for SHD
1
Table of contents
Other miniDSP Computer Hardware manuals

miniDSP
miniDSP NANOSHARC User manual

miniDSP
miniDSP HARMONY DSP 8X12 User manual

miniDSP
miniDSP Home Theater Series User manual

miniDSP
miniDSP NANOSHARC User manual

miniDSP
miniDSP WI-DG User manual

miniDSP
miniDSP Flex User manual

miniDSP
miniDSP SHD User manual

miniDSP
miniDSP DDRC-24 User manual

miniDSP
miniDSP DDRC-88D User manual

miniDSP
miniDSP DDRC-88A User manual