manuals.online logo
Brands
  1. Home
  2. •
  3. Brands
  4. •
  5. Mirabelle
  6. •
  7. Plumbing Product
  8. •
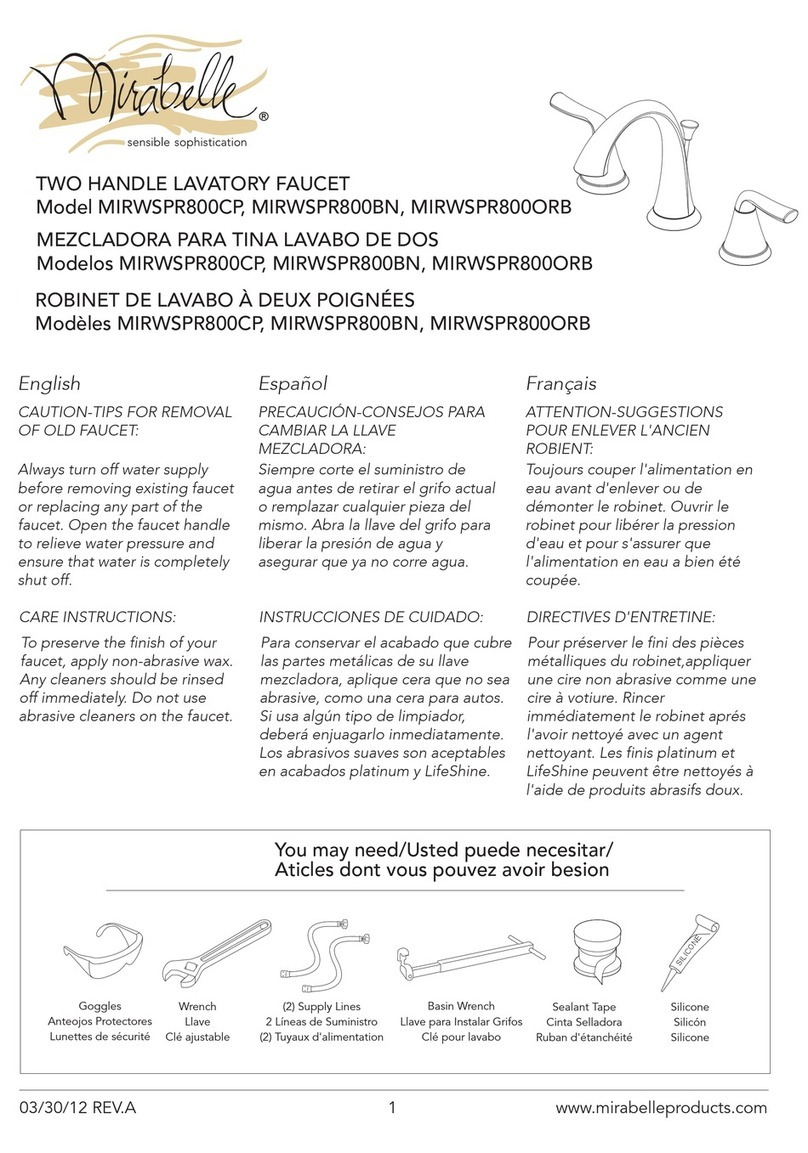
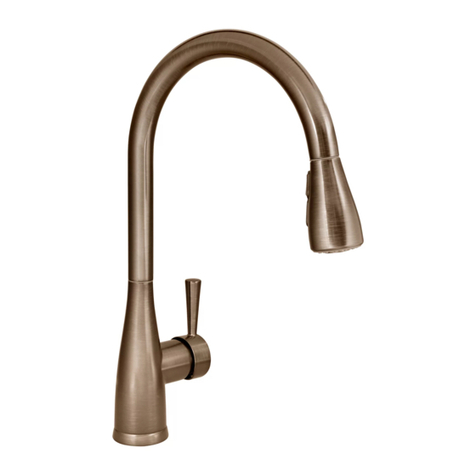
  9. Mirabelle PERDITA MIRXCPD100CP User manual

Mirabelle PERDITA MIRXCPD100CP User manual

www.mirabelleproducts.com
© 2017 Ferguson Enterprises, Inc. 253537 10/17
1
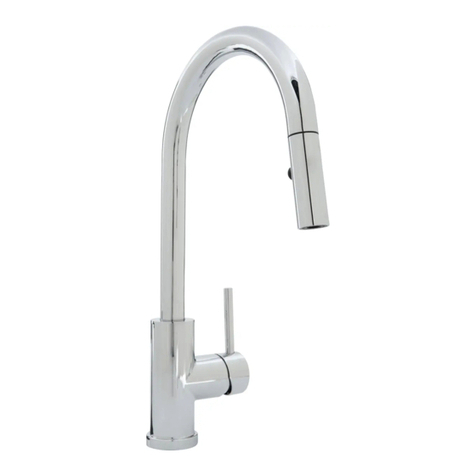
SINGLE HANDLE PULL-DOWN KITCHEN FAUCET
GRIFO DE COCINA RETRAíBLE DE UNA SOLA LLAVE
ROBINET DE CUISINE RETRACTABLE À UNE SEULE POIGNÉE
Installation Instructions
Instructions d’installationt
Instrucciones de instalación
MIRXCPD100CP, MIRXCPD100SS,
MIRXCPD100ORB
IMPORTANT INSTRUCTIONS
Read before you begin
CAUTION-TIPS FOR REMOVAL
OF OLD FAUCET:
Always turn off water supply
before removing existing faucet
or replacing any part of the
faucet. Open the faucet handle
to relieve water pressure and
ensure that water is completely
shut off.
CARE INSTRUCTIONS:
To preserve the finish of your
faucet, apply non-abrasive wax.
Any cleaners should be rinsed
off immediately. Do not use
abrasive cleaners on the faucet.
INSTRUCTIONS IMPORTANTES
À lire avant de commencer
PRECAUCIÓN-CONSEJOS PARA
CAMBIAR LA LLAVE
MEZCLADORA:
Siempre corte el suministro de
agua antes de retirar el grifo actual
o remplazar cualquier pieza del
mismo. Abra la llave del grifo para
liberar la presión de agua y
asegurar que ya no corre agua.
INSTRUCCIONES DE CUIDADO:
Para conservar el acabado que cubre
las partes metálicas de su llave
mezcladora, aplique cera que no sea
abrasive, como una cera para autos.
Si usa algún tipo de limpiador,
deberá enjuagarlo inmediatamente.
Los abrasivos suaves son aceptables
en acabados platinum y LifeShine.
INSTRUCCIONES IMPORTANTES
Leer antes de comenzar
ATTENTION-SUGGESTIONS
POUR ENLEVER L'ANCIEN
ROBIENT:
Toujours couper l'alimentation en
eau avant d'enlever ou de
démonter le robinet. Ouvrir le
robinet pour libérer la pression
d'eau et pour s'assurer que
l'alimentation en eau a bien été
coupée.
DIRECTIVES D'ENTRETINE:
Pour préserver le fini des pièces
métalliques du robinet, appliquer
une cire non abrasive comme une
cire à votiure. Rincer
immédiatement le robinet aprés
l'avoir nettoyé avec un agent
nettoyant. Les finis platinum et
LifeShine peuvent être nettoyés à
l'aide de produits abrasifs doux.
PERDITA
www.mirabelleproducts.com
© 2017 Ferguson Enterprises, Inc. 253537 10/17
2
Recommended Tools and Accessories
Outils et matériaux recommandés / Herramientas y materiales recomendados
(A) Goggles (B) Wrench (C) (2) Supply Lines (D) Basin Wrench (E) Sealant Tape
(A) Anteojos Protectores (B) Llave (C) 2 Líneas de Suministro (D) Llave para Instalar Grifos (E) Cinta Selladora
(A) Lunettes de sécurité (B) Clé ajustable (C) (2) Tuyaux d'alimentation (D) Clé pour lavabo (E) Ruban d'étanchéité
A
B
C D E
(FIG.1)
1. Shut off water supplies.
Insert faucet body through the hole in sink.
Install plastic washer (1) and metal washer
(2) onto the thread mounting shank.
Thread nut (3) onto mounting shank. Lock
nut into position by tightening screws (4).
Do not over tighten.
1. Cierra el suministro de agua.
Inserta el grifo a través del orificio en el
fregadero. Monta la arandela plástica (1) y la
de metal (2) en el vástago de montaje
roscado. Enrosca la tuerca (3) en el vástago
de montaje. Fija la tuerca en posición,
apretando los tornillos (4). No aprietes
demasiado.
1. Coupez l'alimentation en eau.
Insérez le corps du robinet dans le trou du
lavabo. Installez une rondelle en plastique
(1) et une en métal (2) sur la tige de montage
filetée. Vissez l'écrou (3) sur la tige de montage.
Verrouillez l'écrou en place en serrant les vis
(4). Ne serrez pas trop.
3
2
1
4
(FIG.2)
(FIG.3)
2.Screw quick connector to the free end of
hose. Align block (1) and tabs on quick
connect. Push quick connect housing firmly
upward and snap onto receiving block.
Pull down moderately to ensure
connection has been made. If it is necessary
to remove quick connect, squeeze tabs on
hose between index finger and thumb,
then pull down to disconnect. Install the
weight clip (2) at the point of the hose (3)
marking “weight here”. Insert the weight
(4) onto the clip (2) by sliding it down onto
the clip (2).
2.Enrosque el conector rápido en el extremo
libre de la manguera extensible. Alinee las
lengüetas (1) y en las conexiones rápidas.
Empuje las conexiones rápidas hacia arriba
con firmeza y colóquelas a presión dentro
de la lengüeta del tubo receptor. Tire hacia
abajo moderadamente para asegurarse de
que se haya realizado la conexión. Si
necesita quitar la conexión rápida, presione
las lengüetas en la manguera entre los
dedos índice y pulgar, luego tire hacia
abajo para desconectar.Instala el sujetador
de la peso (2) en la punta de la manguera
(3) marcada “weight here” (peso aquí).
Inserta la peso (4) en el sujetador (2)
deslizándola en el sujetador (2).
2.Vissez le raccord à connexion rapide à
l'extrémité libre du tuyau latéral. Alignez les
languettes (1) et sur les raccords rapides.
Poussez fermement le logement des raccords
rapides vers le haut et fixez-le à la languette du
tuyau récepteur. Tirez-le doucement vers le bas
pour vous assurer qu'il est bien fixé. Si vous
devez retirer les raccords rapides, serrez les
languettes du tuyau entre votre index et votre
pouce, puis tirez-les vers le bas pour les
débrancher. Installez la pince lestée (2) au point
du tuyau exible (3) avec la marque 《weight here
(poids ici)》.Insérez le poids de lest (4) sur la
pince (2) en le faisant glisser vers le bas sur la
pince (2).
3.Making the waterline connections
Thread the nut (1) on supply line onto
outlet of water supply valve (2) and tighten
with wrench. Do not over tighten.
3.Cómo hacer las conexiones de las tuberías
de agua
Enrosca la tuerca (1) de la línea de suministro
en la salida de la válvula de suministro de
agua (2) y aprieta con una llave. No aprietes
demasiado.
3.Branchement des conduites d'alimentation en
eau
Vissez l’écrou (1) de la conduite d’alimentation
sur la sortie du robinet d’alimentation en eau (2)
et serrez à l’aide d’une clé. Ne serrez pas trop.
3
2
1
4
4
Weight
here
Weight
here
www.mirabelleproducts.com
© 2017 Ferguson Enterprises, Inc. 253537 10/17
3
1
2
(FIG.4)
4.After installation is complete, remove the
sprayer by unscrewing it in a
counter-clockwise direction. Turn on the
water supply to flush debris from the faucet.
Run the hot and cold water for at least one
minute each.
Important: This flushes away any debris that
could cause damage to internal parts.
4.Finalizada la instalación, desenrosca el
rociador de izquierda a derecha. Abre el
flujo de agua para eliminar los residuos en
el grifo. Deja correr el agua caliente y la
fría al menos un minuto cada una.
Importante: Esto limpia cualquier residuo
que pueda causar daño a las partes
internas.
4.Une fois que l’installation est terminée, retirez
le pulvérisateur en le dévissant dans le sens
inverse des aiguilles d'une montre. Ouvrez l’eau
pour purger le robinet de tout détritus. Laissez
couler l’eau chaude et l'eau froide pendant au
moins une minute chacune.
Important: Cette opération sert à évacuer les
débris qui pourraient endommager les éléments
internes.
www.mirabelleproducts.com
© 2017 Ferguson Enterprises, Inc. 253537 10/17
4
Maintenance:
If faucet leaks underneath handle or water does not completely shut off: replace
cartridge.
Mantenimiento:
Si hay una filtración debajo de la llave o el agua no se corta por completo:
reemplace el cartucho.
Entretien:
S'il y a une fuite sous la poignée ou si le robinet ne se ferme pas complètement:
remplacez la cartouche.
www.mirabelleproducts.com
© 2017 Ferguson Enterprises, Inc. 253537 10/17
5
* Specify Finish
Especifíque el Acabado
Précisez le Fini
RP70512
Bonnet
Capuchón
Chapeau
RP70421
Block
Bloque
Bloc
RP60002
O-ring
Junta en Forma
de Aro Tórico
Joint torique
RP13423*
Handle
Llave
Poignée
RP50002
Set Screw
Tornillo de Fijación
Vis de calage
MIR38266*
Sprayhead
Cabezal del Rociador
Tête de vaporisation
RP50004
Screw
Tornillo
Vis
RP64131
Plastic Washer
Arandela Plástica
Rondelle en plastique
RP64111
Metal Washer
Arandela Metálica
Rondelle de métal
RP60024
O-ring
Junta en Forma de Aro Tórico
Joint torique
MIR70429
Quick Connector
Conector Rápido
Raccord à branchement rapide
RP56077
Nut
Tuerca
Écrou
MIR38267
Hose
Manguera
Rondelle
RP60071
O-ring
Junta en Forma de Aro Tórico
Joint torique
RP70380
Wearable ring
Anillo de uso
Bague d'étanchéité
RP70291
Wearable ring
Anillo de uso
Bague d'étanchéité
RP64118
Washer
Arandela
Rondelle
RP70513
Washer
Arandela
Rondelle
RP17154*
Handle Seat
Asiento de la llave
Base de la poignée
MIR70525
Weight
Peso
Poids
MIR20089
Cartridge&Screw
Cartucho&Tornillo
Cartouche&Vis

This manual suits for next models

2

Other Mirabelle Plumbing Product manuals
Mirabelle MIRKW3RT2CP User manual

Mirabelle

Mirabelle MIRKW3RT2CP User manual

Mirabelle MIRHI8010CP User manual

Mirabelle

Mirabelle MIRHI8010CP User manual

Mirabelle PROVINCETOWN MIRWSCPR100CP User manual
Mirabelle

Mirabelle PROVINCETOWN MIRWSCPR100CP User manual

Mirabelle sophistispa MIRED9009CP User manual

Mirabelle

Mirabelle sophistispa MIRED9009CP User manual

Mirabelle MIRWSCED100P CP User manual

Mirabelle

Mirabelle MIRWSCED100P CP User manual

Mirabelle MIRXCRA101MCP Installation instructions manual

Mirabelle

Mirabelle MIRXCRA101MCP Installation instructions manual

Mirabelle PROVINCETOWN MIRPR8010CP User manual

Mirabelle

Mirabelle PROVINCETOWN MIRPR8010CP User manual

Mirabelle MIRWSPT800CP User manual

Mirabelle

Mirabelle MIRWSPT800CP User manual

Mirabelle Edenton MIRED8030GCP User manual

Mirabelle

Mirabelle Edenton MIRED8030GCP User manual

Mirabelle MIR4001 User manual

Mirabelle

Mirabelle MIR4001 User manual
Mirabelle MIRVL8030CP User manual

Mirabelle

Mirabelle MIRVL8030CP User manual

Mirabelle MIRPR350WH User manual

Mirabelle

Mirabelle MIRPR350WH User manual

Mirabelle ST. MARTIN MIRWSCSM800CP User manual

Mirabelle

Mirabelle ST. MARTIN MIRWSCSM800CP User manual

Mirabelle PROVINCETOWN MIRPR3RTCP User manual

Mirabelle

Mirabelle PROVINCETOWN MIRPR3RTCP User manual

Mirabelle PROVINCETOWN MIRWSCPR800CP User manual

Mirabelle

Mirabelle PROVINCETOWN MIRWSCPR800CP User manual

Mirabelle PENDLETON MIRWSCPT100CP User manual

Mirabelle

Mirabelle PENDLETON MIRWSCPT100CP User manual

Mirabelle MIRBEFS2000GCP User manual

Mirabelle

Mirabelle MIRBEFS2000GCP User manual

Mirabelle VILAMONTE MIRVL4RTGCP User manual
Mirabelle

Mirabelle VILAMONTE MIRVL4RTGCP User manual

Mirabelle sophistispa MIRVL9009CP User manual
Mirabelle

Mirabelle sophistispa MIRVL9009CP User manual

Mirabelle MIRWSCBD101CP User manual

Mirabelle

Mirabelle MIRWSCBD101CP User manual

Mirabelle RIGI MIRWSCRI100CP User manual

Mirabelle

Mirabelle RIGI MIRWSCRI100CP User manual

Mirabelle MIRED9009BN User manual

Mirabelle

Mirabelle MIRED9009BN User manual
Mirabelle MIRU1812WH User manual

Mirabelle

Mirabelle MIRU1812WH User manual

Mirabelle MIRWSCVL100CP User manual

Mirabelle

Mirabelle MIRWSCVL100CP User manual

Popular Plumbing Product manuals by other brands

Sanela SLU 46MD Instructions for use

Sanela

Sanela SLU 46MD Instructions for use

KWC F3SV1011 Installation and operating instructions

KWC

KWC F3SV1011 Installation and operating instructions

Kalia Umani BF1068 Installation instructions / warranty

Kalia

Kalia Umani BF1068 Installation instructions / warranty

Elkay EWMA4820SBC Specifications

Elkay

Elkay EWMA4820SBC Specifications

METHVEN PROMIX SHOWER MIXER installation guide

METHVEN

METHVEN PROMIX SHOWER MIXER installation guide

Hans Grohe ShowerSelect S 15556 Series Instructions for use/assembly instructions

Hans Grohe

Hans Grohe ShowerSelect S 15556 Series Instructions for use/assembly instructions

Franke 7612979002157 Installation and operating instructions

Franke

Franke 7612979002157 Installation and operating instructions

Westfalia Pipe Devil instruction manual

Westfalia

Westfalia Pipe Devil instruction manual

Delabie TEMPOSTOP manual

Delabie

Delabie TEMPOSTOP manual

Bristan CRZ SHXDIVCTFF C Installation instructions & user guide

Bristan

Bristan CRZ SHXDIVCTFF C Installation instructions & user guide

Lacava Kubista 1403X owner's manual

Lacava

Lacava Kubista 1403X owner's manual

Spectrum Iyla Pfister LG42-TR0 Quick installation guide

Spectrum

Spectrum Iyla Pfister LG42-TR0 Quick installation guide

Hans Grohe Croma E 100 VarioJet 04331 0 Series Installation/User Instructions/Warranty

Hans Grohe

Hans Grohe Croma E 100 VarioJet 04331 0 Series Installation/User Instructions/Warranty

Franke KWC SIRIUS BS315N Installation and operating instructions

Franke

Franke KWC SIRIUS BS315N Installation and operating instructions

Elkay LRAD Specifications

Elkay

Elkay LRAD Specifications

JCM 143 installation instructions

JCM

JCM 143 installation instructions

Kohler TAUT 73194T-4 installation instructions

Kohler

Kohler TAUT 73194T-4 installation instructions

Fresca FFT9151CH installation instructions

Fresca

Fresca FFT9151CH installation instructions

manuals.online logo
manuals.online logoBrands
  • About & Mission
  • Contact us
  • Privacy Policy
  • Terms and Conditions

Copyright 2025 Manuals.Online. All Rights Reserved.