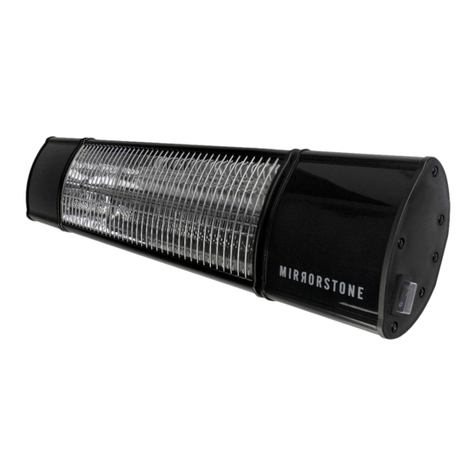
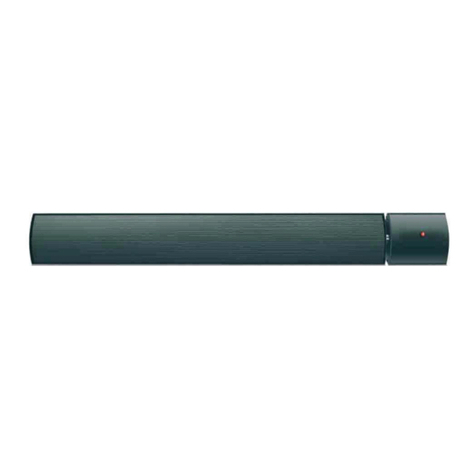
Mirrorstone MS-QHA-12J User manual

Model: MS-QHA-12J | MS-QHA-24J | MS-QHA-12W | MS-QHA-24W
Please read instructions carefully before use.
Remote control not available with all models.
Aurora Wi-Fi Infrared Bar Heater Manual

Thank you for purchasing this Mirrorstone Infrared Heater. In order to get the most out of your
product, please read this manual carefully before use, and keep it in a safe place for future
reference.
Mirrorstone, nor any of its aliated companies are liable for any damages resulting in misuse of
our heaters, nor any failure to comply with the instructions contained in this manual.
Safety Warnings:
To avoid the heater overheating, please do not cover the heater.
Should any substance or material cover the heater, or go near the heating element inside the
heater, you should stop using it immediately, disconnecting it from the mains power. After
disconnecting the heater from the mains, allow the heater adequate time to cool down. Once the
heater has cooled down, ensure that any foreign material has been cleared from the housing of
the heater, and from the heating element.
If the heater is being used in areas with high salt concentrations, like near the sea for example,
then over time, salt, alkali, crystals and other foreign materials may begin to collect on the
housing of the heater or on the heating element. In the event of this happening, you should stop
using the heater immediately, disconnecting it from the mains power. After disconnecting the
heater from the mains, allow the heater adequate time to cool down. Once the heater has cooled
down, ensure that any foreign material has been cleared from the housing of the heater, and from
the heating element.
Due to the intensity of the heat produced by the heater, the front should be placed a minimum of
1.5 metres away from any ammable materials, such as furniture, pillows, bedding, paper, clothes
and curtains. Ensure that there is enough room either side of where the heater is installed too.
Please ensure that the heater is installed at a minimum height of 1.8 metres.
This heater should only be used with a 220-240V AC power supply. Please use the correct power
supply with this heater for safe usage.
Please note that all Aurora IR Bar Heaters must be connected to a either a 10A mains supply, 13A
fused spur or standard 3-pin plug socket. Please consult a qualified electrician before using the
heater for anything other than home/domestic use.
The heater should not be operated or used by vulnerable people such as children, the elderly or
disabled, unless there is an adult present who is responsible for their safety, who can either use
the heater on their behalf, or ensure that the heater is being used on the correct manner by the
vulnerable person.
Do not leave children unattended with the heater.
The re protection grille cover on the front of the heater is to prevent direct contact with the
heating element. When using the heater, the re protection grille cover must be in place.
The heater must be grounded adequately, through use of a properly grounded outlet.
2

When in use, please ensure that the plug, socket and heater are free of dust and dirt.
When disconnecting the heater from the mains supply, please turn o the switch at the mains
socket, then unplug the heater by pulling the plug, not the power cord. Do not operate the
heater or your mains supply with wet hands.
Do not extend the power cord.
Check the power cord regularly for wear and damage. Should there be any damage to the
power cord, plug or socket, do not use the heater. The power cord should be replaced or
repaired by either the manufacturer or a qualied electrician.
Do not use a heater that has sustained any damage or been discarded under any circumstances.
The heater should not be installed directly above the mains power supply or socket.
The power cord should be safely tucked away behind the heater when in use, and should not
be placed in front of the heater, or hung o it.
Do not use the heater in areas with gasoline, paint or other ammable liquids or materials are
stored.
If the heater is installed in a bathroom, please ensure it is installed as far away as possible from
any bath tub, shower, sink or toilet. The heater should not be installed in such a location where
it could fall into a bath tub or any other water container.
Take extra care when leaving the heater running whilst unattended, or when asleep.
Do not insert anything into the heater.
Do not touch the heater when in use, and ensure that the heater has been o for a considerable
length of time before touching it.
Should you need to move the heater, please ensure you disconnect it from the mains supply,
give it ample time to cool down before moving it.
3

Installation Notes
This heater should be installed by a qualied electrician.
Before and during the installation, please ensure that the heater is disconnected from the
power, and that the heater has cooled down if it has been on.
The heater can be installed both horizontally and vertically.
The heater must be installed at a minimum height of 1.8m above the oor, OR at such a
height that it cannot be touched directly whilst on.
When installing on the wall, ensure that the heater is installed at an angle no more than 90o
in relation to the wall, and no less than 45oin relation to the wall.
When installing the heater on the ceiling, ensure that it is either facing directly downwards,
or at an angle no less than 45oin relation to the ceiling.
When installing the heater vertically, please ensure that the power cord is at the bottom of
the heater.
When the heater is on, the body of the heater will increase, so please ensure that the power
cord is tucked away safely and never comes into contact with the body of the heater.
Do not install the heater near any ammable materials.
Ensure that the heater is installed at a minimum of 150mm away from ceilings and walls.
For outdoor installations, please use a weatherproof power socket suitable for outdoor use.
Before drilling into any walls for installation, please ensure there are no wires, water pipes or
gas pipes in the area where the heater is being installed.
The heater must be installed using the mounting brackets provided with the heater from the
manufacturer.
4
Model
MS-QHA-12J
MS-QHA-12W
MS-QHA-24J
MS-QHA-24W
Voltage
220-240V AC
220-240V AC
220-240V AC
220-240V AC
Amps
5A
5A
10A
10A
Power
1200W
1200W
2400W
2400W
Product Size
770 x 160 x 80mm
770 x 160 x 80mm
970 x 160 x
80mm
970 x 160 x
80mm

Heater Installation Instructions
Contents:
- (A) 4 x wall brackets
- (B) 2 x 15mm screw
- (C) 2 x large wing nut
- (D) 4 x small wing nut
- (E) 4 x 60mm screw
- (F) 4 x large wall plugs
- (G) 2 x 12mm screw
- (H) 2 x small wall plugs
- (I) 1 x remote bracket
5
Figure A:
Remove the accessories from the
accessory bag. Drill two holes in the
wall, each with an 8mm diameter, and
depth of approximately 70mm, 32mm
apart vertically. Another two holes
identical to this should be drilled no
further than 450mm away horizontally.
Install the large wall plugs (F) into the
holes, and then mount the wall bracket
(A) onto the wall using the 60mm
screws.
Figure B:
Take the remaining two wall brackets
(A), and ax them to the back of the bar
heater using the screws already on its
back, using the small wing nuts (D).
Figure C:
Using the 15mm screw (B) and large
wing nut (C), join the brackets on the
wall to the brackets on the back of the
bar heater, tilting the angle to your
desired setting, and tightening the
brackets using the wing nut.
(A)
x2 (B) x2
(C) x2
(D) x4
(E) x2
(F) x4 (H)
x2
(G)
x2
(I)
x1
32mm
(A)
L
(E)
(F)
(A) (D)
(A)
(C)
(B)

Remote Installation Instructions
Please note that the following instructions are only applicable to the remote control
(MS-QHA-12W and MS-QHA-24W) models.
The remote control can be used either as a wall mounted unit, or as a conventional remote
control.
To mount it on the wall, drill two holes approximately 40mm apart vertically, at a depth of
approximately 30mm.
6
1. On/o button
2. Timer button
3. Up button
4. Power level button
5. Smart Heating button
6. Child lock button
7. Down button
8. Set button
9. Display button
10. Body Sensor button
Please note that the following instruc-
tions are only applicable to the remote
control (MS-QHA-12W and MS-QHA-24W)
models.
1
2
3
4
5
6
7
8
9
10
Insert the two small wall plugs (H) into the
holes, before axing the bracket to the wall
using the two 12mm screws. Ensure that the
base of the bracket is at the bottom before
screwing it in.
The remote can then ax to the bracket
using the grooves down its side. Push the
remote down until you hear a click.
(H)
(G)
(I)

- Plug the heater into the mains power, ensuring that the socket matches the voltage and current
of the nameplate on the back of the panel.
- Press the On/o button to switch the heater on and o.
- Use the Up button and Down button to alter the desired temperature. The lowest possible
temperature is 5oC, and the highest temperature is 45oC.
- Press the Power level button to switch between the four levels of power. This will alter the
intensity of heat emitted from the bar heater.
- Pressing the Timer button will open the timer setting. You can select any time range between 0
hours and 24 hours, in 1-hour increments. When you are happy with your selection, leave the
remote for 5 seconds and your timer setting will apply. The timer icon will appear on the screen
to indicate that it has been applied.
- Pressing the Display button will switch everything o on the screen except for the current
temperature. Pressing it again will switch the display back on. Pressing the Display button twice
quickly will switch everything o on the display except for the heating on icon. To bring the
screen back on, press the Display button once.
- Pressing the Smart Heating button will toggle smart heating on, where the heater will automati-
cally adjust the power level to maintain your temperature. The intelligent heating icon will
appear on the display when this mode is on.
- Pressing the Body Sensor button will switch Body Sensing mode on. The bar heater will now
begin to detect moving objects in the area, and will only operate as long as it can sense move-
ment. If the bar heater does not detect any movement for 2 minutes, it will switch o.
- To lock the heater, press the Set button followed by the Child Lock button. Repeat the process to
unlock the heater.
- Pressing the Set button followed by the Up button will toggle the display between Celsius to
Fahrenheit.
- Pressing the Set button followed by the Down button resets the Wi-Fi setting for the Bar Heater.
Once reset, the Wi-Fi symbol will begin to ash on the display.
- Pressing the Set button followed by the Power Level button will switch the Open Window
Detection mode on. The symbol “WO” will appear on the display when activated. When on, if the
heater detects a drop in ambient temperature of 3 degrees within a 2-minute time frame, it will
switch o as it will assume a window has been opened. Pressing the Set button followed by the
Power Level button again will switch Open Window Detection o.
- Pressing the Set button followed by the Display button displays the current voltage on the
screen.
7

8
Using The Smart Life App
1. Connect your smartphone or tablet to your Wi-Fi network. (The wireless network must be
2.4GHz. All Wi-Fi routers have a 2.4GHz band, however, some newer routers are dual band with
both 2.4GHz and 5GHz. When scanning your available networks, if you see a single network
belonging to you, then this will be the correct band. If you see two networks, the name of the
network should help you identify which band it belongs to, so a 2.4GHz network will have
24G, 2.4, 24 or something similar in the name, whilst the 5GHz network will have 5 or 5G in the
name).
2. Scan the QR code on the next page using your phone or tablet to download the Smart Life
app, or simply search‘smart life’in your app store. The icon for the app is displayed below.
3. If you don’t already have an account, set one up using either your phone number or email
address by clicking Register. Keep your password in a safe place.
4. Once you’re set up, click either“Add Device”in the centre of the screen, or the “+” icon in the
top right corner.
5. On the next screen, under the “Small Home Appliances”category on the left, scroll down
and select “Heater” in the “Life”subcategory (Fig. 1).
6. Next, the heater needs to placed in pairing mode – you can do this by quickly pressing the
on/o switch at the back of the panel 3-5 times until you see the LED light on the front of the
panel blink red and blue rapidly.
7. Now on the app, conrm that the light is blinking rapidly, and enter your Wi-Fi network
information (the name of the network and the password) (Fig. 2).
8. The app will now scan for the heater, and connect once it has paired.
9. If the panel light blinks red on and o slowly (once every 2 seconds), then you need to click
“Other Mode”in the top right corner of blinking indicator conrmation screen (Fig. 3), and
choose “AP Mode”. If your heater is already paired then you can skip the remaining steps.
10.Conrm on the next screen that the LED light is blinking slowly (Fig. 4).
11. Enter your Wi-Fi network details on the next screen (network name and password), before
connecting your phone to a new Wi-Fi network named“SmartLife_XXXX”where the“XXXX”
will be randomised numbers (Fig. 5).
12. Once you’re connected to “SmartLife_XXXX”, click the button that says“Conrm the hot
spot, next”(Fig. 6), and the app will begin attempts to connect to the wireless temperature
sensor.
13. Once connected, you will see“Device added successfully” on your screen, and you will see
the control menu on your screen (Fig. 7).

Figure 1: Figure 2: Figure 3: Figure 4:
Figure 5: Figure 6: Figure 7: Figure 8:
9

Controlling Your Heater
1. On the main control menu, you will see your desired room temperature in the middle of the
screen (Fig. 7). Beneath that, you will see the current room temperature. Use the“+” and “-“
buttons to adjust this up and down accordingly. If the target temperature is higher than the
current room temperature by 0.5oC or more, it will switch on, and if the target temperature is
lower than the current room temperature by 0.5oC, it will switch o.
2. Pressing the“Mode”button along the bottom will allow you to choose between Manual
heating, Smart heating and Body Sensing heating (Fig. 8).
3. Pressing the“Gear” button allows you to select the intensity of heat emitted by the bar heater
(Fig. 9).
4. Pressing the“Countdown Timer” button allows you to set how many hours you would like
your bar heater on for, ranging between 1 and 24 hours (Fig. 10)
5. Pressing the“Eco button allows you to tweak various settings on your bar heater (Fig. 11).
Here, you can toggle the Display on and o, the Child Lock settings, the temperature display in
degrees Celsius or degrees Fahrenheit, the open window detection, and the weekly timer.
6. The use the weekly timer, enter the weekly timer menu and click “Add” in the middle of the
screen. You will then be able to set what time you want your bar heater to come on or o (Fig.
12) by selecting the time you want it to come on or o, how often you would like to repeat this
setting, any notes for the setting, notications for when this setting happens, whether you want
the heater to switch on or o and the temperature you would like the room to be. Click“Save”
when you are done, and if you would like to add another setting, click“Add Schedule”at the
bottom of the screen.
Figure 9: Figure 10: Figure 11: Figure 12:
10

11
Using The 7-Day Timer With Your Heater
1. On the home screen of the Smart Life app, press the ‘Timer’ button in the bottom right corner.
2. Then, press ‘Add’ in the middle of your screen.
3. The following screen allows you to set your timer settings:
4.Use the sliders at the top of the screen to set what time you want your heater to switch on or o.
5. Press the‘Repeat’ button to set which days you would like the timer to occur on, if any.
6. Press the‘Note’ button to set a note for that particular timer setting.
7. Press the‘Switch’button to set whether you want the heater to switch on or o at the time you have set.
OFF
Switch
PM 2:23
Every day
Switch ON
Add Schedule
AM 01 22
PM 02 23
03 24
Save
Repeat
Note
Notification
ON
Once
Switch
PM 2:23
Every day
Switch ON
Repeat
Note
Notification
ON
Wed.
Add Schedule
Figure 1 Figure 2 Figure 3 Figure 4
Figure 5 Figure 6 Figure 7 Figure 8
Timer
Add
No timer data
Switch
PM 2:23
Every day
Switch ON
Add Schedule
AM 01 22
PM 02 23
03 24
Save
Repeat
Note
Notification
ON
Once
The action will be carried out only once if you do not select it.
Repeat
Sun.
Mon.
Tues.
Wed.
Thurs.
Fri.
Sat. Switch
PM 2:23
Wed.
Switch ON
Add Schedule Save
Repeat
Note
Notification
ON
Wed.
PM 2:23
Wed.
Switch ON
Add Schedule Save
PM 2:23
Once
Switch ON
Schedule
Time variance is +_30s

12
Cleaning & Maintenance
- If the inside of the heater becomes covered or clogged up with dust or dirt, please have it
cleaned from a qualied service engineer, and do not operate the heater in this state.
- Only clean the exterior of the heater.
- When cleaning the heater, always disconnect the heater from the mains supply, and give the
heater adequate time to cool down before cleaning it.
- Do not use solvent cleaners or abrasive materials when cleaning the heater, as this can
damage the exterior. Instead, use a mildly damp cloth.
- Do not touch the heating element with your ngers, as not only can this pose a signicant
risk of injury, but it can also potentially damage the heating element too.
- Do not attempt the repair or adjustment of any mechanical functions of this heater.
- If the heater is damaged or defective, it must be returned to the manufacturer or repaired by
a qualied professional, as there are many non-user-serviceable parts in the heater.
This manual suits for next models
3
Other Mirrorstone Heater manuals
Popular Heater manuals by other brands

TREVIDEA
TREVIDEA G3 FERRARI TEPOR user manual

ORANGE
ORANGE 35-02-001 instruction manual

Bimar
Bimar DQ1535 Instruction booklet

Honeywell
Honeywell HCE870 Series owner's manual

Verine
Verine Marcello NBFP00RP Installation, user and servicing instructions

BRAVILOR BONAMAT
BRAVILOR BONAMAT WHK-001 operating instructions