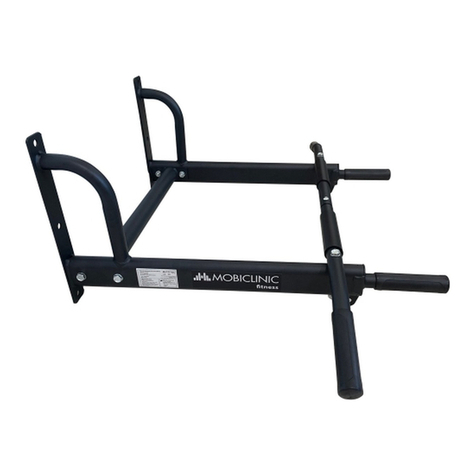
Mobiclinic MULTIFIT User manual

Estación de dominadas
MULTIFIT
ENES
FR IT DE PT NL SWE PL DK
1
MANUAL DE INSTRUCCIONES
Estación de dominadas
MULTIFIT
ESManual de instrucciones
Anweisungen
Manuel D’Utilisation
Gebruiksaanwijzing
Instrukcja obsługi
Instruction manual
Instruções
Manuale D’Istruzioni
Bruksanvisning
Brugsanvisning
DE
EN
PT
FR
NL
PL
IT
SWE
DK
Última revisión: 27 de junio de 2023
Last revision: June 27th, 2023
ES - Lea las instrucciones antes de usar el producto.
EN - Please read instructions before use.
FR - Lisez les instructions avant d’utiliser le produit.
IT - Leggere le istruzioni prima di usare il producto.
DE - Lesen Sie die Gebrauchsanweisung, bevor
Sie das Produkt verwenden.
PT - Leia as instruções antes de utilizar o producto.
NL - Lees de instructies voordat u het product gebruikt.
SWE - Läs instruktionerna innan du använderprodukten.
PL - Läs instruktionerna innan du använder produkten.
DK - Læs vejledningen, før du bruger produktet.

Estación de dominadas
MULTIFIT
ENES
FR IT DE PT NL SWE PL DK
2
IMPORTANTE
CONSERVAR PARA POSTERIORES CONSULTAS.
1. ADVERTENCIAS
1. ¡ADVERTENCIA! Mantenga a los niños alejados de este aparato cuando esté en uso. No permita que
los niños se suban o jueguen sobre el mismo cuando no estén en uso.
2. ¡ADVERTENCIA! Mantenga los dedos alejados de las piezas móviles.
3. ¡ADVERTENCIA! Por su propia seguridad, asegúrese siempre de que haya al menos 0,6 metros de
espacio libre en todas las direcciones alrededor de sus productos mientras hace ejercicio.
4. ¡ADVERTENCIA! Compruebe periódicamente que todas las tuercas, tornillos y accesorios estén bien
apretados. Compruebe periódicamente que todas las piezas móviles no presentan signos evidentes
de desgaste o daños.
5. ¡ADVERTENCIA! Por favor, lleve ropa deportiva.
6. ¡ADVERTENCIA! Caliente antes del ejercicio y estire durante unos 5 minutos después del ejercicio
para ajustar bien el cuerpo.
7. ¡ADVERTENCIA! Debido al peso y la altura del producto, le rogamos que lo transporte o mueva más
de una persona.
8. ¡ADVERTENCIA! No lo coloque ni lo guarde en los siguientes lugares: Un lugar inestable, como
inclinado o resbaladizo, o que vibre con frecuencia. Un lugar con humo, humedad o polvo. Un lugar
con poca ventilación. Lugares extremadamente calientes o fríos. Luz solar directa o cerca de aparatos
de calefacción.
9. ¡ADVERTENCIA! Presta atención a los niños. Las bolsas de plástico pueden provocar asxia.

Estación de dominadas
MULTIFIT
ENES
FR IT DE PT NL SWE PL DK
3
PIEZA CANTIDAD NOMBRE
A 2PCS Tubo de pie
B 2PCS Tubo principal
C 2PCS Tubo de conexión
D 2PCS Asa en“L”
E 2PCS Pieza de inmersión
F 1PCS Tubo trasero
G 2PCS Tubo ajustable
H 1PCS Manillar
I 2PCS Tubo de asa
J 1PCS Cojín de respaldo
K 2PCS Cojín para los brazos
L 4PCS Cubierta del tubo
2. LISTADO DE PIEZAS

Estación de dominadas
MULTIFIT
ENES
FR IT DE PT NL SWE PL DK
4
a 2PCS Tornillo ajustable
b 1PCS “L”llave hexagonal
c 2PCS Llave 14-17
d 4PCS Tornillo (M6*14)
e 2 sets Tornillo (M8*40) + Arandela (M8)
f 4 sets Tornillo (M8*45) + Arandela (M8) +
Tuerca (M8)
g 4 sets Tornillo (M8*45) + Arandela (M8)
h 8 sets Tornillo (M8*55) + Arandela (M8) +
Tuerca (M8)
i 2 sets Tornillo (M8*65) + Arandela (M8) +
Tuerca (M8)
j 6 sets Tornillo (M10*45) + Arandela (M10)
k 2 sets Tornillo (10*55) + Arandela (M10)
m 2PCS Tornillo (M6*10)

Estación de dominadas
MULTIFIT
ENES
FR IT DE PT NL SWE PL DK
5
3. PASOS PARA EL MONTAJE
Paso 1.
Póngale a las dos piezas del tubo de pie (A) las cubierta del tubo (L). Conecte ambos tubos de pie con
el tubo de conexión (C) y con 4 sets de tornillos de la combinación (h) que aparece en la tabla - Tornillo
(M8+55) + Arandela (M8) + Tuerca (M8). Coloque ambas asas en L (D) con los 2 sets de tornillos de la
combinación (k) que aparece en la tabla - Tornillo (M10+55) + Arandela (M10) en los tubos de pie (A).
Paso 2.
Conecte los tubos principales (B) en los tubos de pie (A) con los 6 sets de tornillos de la combinación (j)
- Tornillo (M10*45) + Arandela (M10). Entonces concatene el tubo principal (B) y el tubo de conexión (C)
con 4 sets de tornillos de la combinación (h) - Tornillo (M8*55) + Arandela (M8) + Tuerca (M8).
L
D
A
h
C
k
C
B
j
h

Estación de dominadas
MULTIFIT
ENES
FR IT DE PT NL SWE PL DK
6
Paso 3.
Conectar las piezas deinmersión(E) y los tubosprincipales(B) con los 4setsdetornillosde la combinación
(f) -Tornillo (M8*45) + Arandela (M8) +Tuerca (M8). Concatenar los tubos de asa (I) y las piezasde inmersión
(E) con el tornillo (m) (M6*10) que está en la pieza de inmersión (E). Por último, unir el tubo trasero (F) y
el tubo principal (B) con los 2 sets de tornillos de la combinación (e) - Tornillo (M8*40) + Arandela (M8).
Paso 4.
Conecteelcojínparalosbrazos(K)enlapiezadeinmersión(E) con los4setsdetornillosdela combinación
(g) - Tornillo (M8*45) + Arandela (M8).
E
I
Fe
f
f
K
g
m

Estación de dominadas
MULTIFIT
ENES
FR IT DE PT NL SWE PL DK
7
Paso 5.
Conecte el cojín de respaldo (J) y el tubo trasero (F) con los tornillos (d) (M8*14).
Paso 6.
Coloque el lado recto de los tubos ajustables (G) en el tubo principal (B), utilice los tonillos ajustables (a)
para elegir la altura adecuada. Por último, conecte el manillar (H) y los tubos ajustables (G) con los 2 sets
de tornillos de la combinación (i) - Tornillo (M8*65) + Arandela (M8) + Tuerca (M8).
J
d
i
H
G
a

Pull-up station
MULTIFIT
ENES
FR IT DE PT NL SWE PL DK
8
IMPORTANT
TO KEEP FOR FUTURE REFERENCE.
1. WARNINGS
1. WARNING! Keep children away from this appliance when in use. Do not allow children to climb or
play on it when not in use.
2. WARNING! Keep ngers away from moving parts.
3. WARNING! For your own safety, always ensure that there is at least 0.6 metres of free space in all
directions around your products while exercising.
4. WARNING! Periodically check that all nuts, bolts and ttings are tightened securely. Periodically
check all moving parts for obvious signs of wear or damage.
5. WARNING! Please wear sportswear.
6. WARNING! Warm up before exercise and stretch for about 5 minutes after exercise to adjust the
body properly.
7. WARNING! Due to the weight and height of the product, we kindly ask you to transport or move the
product by more than one person.
8. WARNING! Do not place or store it in the following places: An unstable place, such as a slippery or
slanted place, or a place that vibrates frequently. A smoky, damp or dusty place. A place with poor
ventilation. Extremely hot or cold places. Direct sunlight or near heating appliances.
9. WARNING! Pay attention to children. Plastic bags can cause suocation.

Pull-up station
MULTIFIT
ENES
FR IT DE PT NL SWE PL DK
9
PARTS QUANTITY NAME
A 2PCS Stand pipe
B 2PCS Main tube
C 2PCS Connection pipe
D 2PCS “L”handle
E 2PCS Immersion piece
F 1PCS Rear tube
G 2PCS Adjustable tube
H 1PCS Handlebars
I 2PCS Handle tube
J 1PCS Back cushion
K 2PCS Arm cushion
L 4PCS Tube cover
2. LIST OF PARTS

Pull-up station
MULTIFIT
ENES
FR IT DE PT NL SWE PL DK
10
a 2PCS Adjustable screw
b 1PCS “L”hexagon spanner
c 2PCS Key 14-17
d 4PCS Screw (M6*14)
e 2 sets Screw (M8*40) + Washer (M8)
f 4 sets Screw (M8*45) + Washer (M8) + Nut
(M8)
g 4 sets Screw (M8*45) + Washer (M8)
h 8 sets Screw (M8*55) + Washer (M8) + Nut
(M8)
i 2 sets Screw (M8*65) + Washer (M8) + Nut
(M8)
j 6 sets Screw (M10*45) + Washer (M10)
k 2 sets Screw (10*55) + Washer (M10)
m 2PCS Screw (M6*10)

Pull-up station
MULTIFIT
ENES
FR IT DE PT NL SWE PL DK
11
3. ASSEMBLY STEPS
Step 1.
Fit the two pieces of the foot tube (A) with the tube cover (L). Connect both foot tubes with the connecting
tube (C) and with 4 sets of screws of the combination (h) listed in the table - Screw (M8+55) + Washer (M8)
+ Nut (M8). Fit both L-handles (D) with the 2 sets of screws of the combination (k) listed in the table - Screw
(M10+55) + Washer (M10) into the foot tubes (A).
Step 2.
Connect the main tubes (B) to the foot tubes (A) with 6 sets of combination screws (j) - Screw (M10*45)
+ Washer (M10). Then connect the main tube (B) and the connecting tube (C) with 4 sets of combination
screws (h) - Screw (M8*55) + Washer (M8) + Nut (M8).
L
D
A
h
C
k
C
B
j
h

Pull-up station
MULTIFIT
ENES
FR IT DE PT NL SWE PL DK
12
Step 3.
Connect the immersion parts (E) and the main tubes (B) with the 4 sets of screws of the combination (f) -
Screw (M8*45) + Washer (M8) + Nut (M8). Connect the handle tubes (I) and the immersion pieces (E) with
the screw (m) (M6*10) which is in the immersion piece (E). Finally, connect the rear tube (F) and the main
tube (B) with the 2 sets of screws of the combination (e) - Screw (M8*40) + Washer (M8).
Step 4.
Connect the arm cushion (K) to the immersion piece (E) with the 4 sets of screws of the combination (g) -
Screw (M8*45) + Washer (M8).
E
I
Fe
f
f
K
g
m

Pull-up station
MULTIFIT
ENES
FR IT DE PT NL SWE PL DK
13
Step 5.
Connect the back cushion (J) and the rear tube (F) with the screws (d) (M8*14).
Step 6.
Place the straight side of the adjustable tubes (G) on the main tube (B), use the adjustable screws (a) to
choose the right height. Finally, connect the handlebars (H) and the adjustable tubes (G) with the 2 sets of
screws of the combination (i) - Screw (M8*65) + Washer (M8) + Nut (M8).
J
d
i
H
G
a

Station de traction
MULTIFIT
ENES
FR IT DE PT NL SWE PL DK
14
IMPORTANT
À CONSERVER POUR RÉFÉRENCE ULTÉRIEURE.
1. AVERTISSEMENTS
1. ATTENTION! Tenez les enfants éloignés de cet appareil lorsqu’il est utilisé. Ne laissez pas les enfants
grimper ou jouer sur l’appareil lorsqu’il n’est pas utilisé.
2. ATTENTION! Ne pas approcher les doigts des pièces en mouvement.
3. ATTENTION! Pour votre propre sécurité, assurez-vous toujours qu’il y a au moins 0,6 mètre d’espace
libre dans toutes les directions autour de vos produits pendant l’exercice.
4. ATTENTION! Vérier périodiquement que tous les écrous, boulons et raccords sont bien serrés.
Vérier périodiquement que toutes les pièces mobiles ne présentent pas de signes évidents d’usure
ou de détérioration.
5. ATTENTION! Veuillez porter des vêtements de sport.
6. ATTENTION! Échauez-vous avant l’exercice et étirez-vous pendant environ 5 minutes après
l’exercice an d’ajuster correctement le corps.
7. ATTENTION! En raison du poids et de la hauteur du produit, nous vous demandons de transporter
ou de déplacer le produit par plus d’une personne.
8. ATTENTION! Ne le placez pas ou ne le rangez pas dans les endroits suivants : un endroit instable, tel
qu’un endroit glissant ou incliné, ou un endroit qui vibre fréquemment. Un endroit enfumé, humide
ou poussiéreux. Un endroit mal ventilé. Endroits extrêmement chauds ou froids. La lumière directe
du soleil ou la proximité d’appareils de chauage.
9. ATTENTION! Faites attention aux enfants. Les sacs en plastique peuvent provoquer la suocation.

Station de traction
MULTIFIT
ENES
FR IT DE PT NL SWE PL DK
15
PARTIE QUANTITÉ NOM
A 2PCS Tube de support
B 2PCS Tube principal
C 2PCS Tuyau de raccordement
D 2PCS Poignée“L
E 2PCS Pièce d’immersion
F 1PCS Tube arrière
G 2PCS Tube réglable
H 1PCS Guidon
I 2PCS Tube de la poignée
J 1PCS Coussin de dossier
K 2PCS Coussin d’accoudoir
L 4PCS Couvercle du tube
2. LISTE DES PIÈCES

Station de traction
MULTIFIT
ENES
FR IT DE PT NL SWE PL DK
16
a 2PCS Vis réglable
b 1PCS Clé hexagonale “L”
c 2PCS Clé 14-17
d 4PCS Vis (M6*14)
e 2 sets Vis (M8*40) + rondelle (M8)
f 4 sets Vis (M8*45) + rondelle (M8) + écrou
(M8)
g 4 sets Vis (M8*45) + rondelle (M8)
h 8 sets Vis (M8*55) + rondelle (M8) + écrou
(M8)
i 2 sets Vis (M8*65) + rondelle (M8) + écrou
(M8)
j 6 sets Vis (M10*45) + rondelle (M10)
k 2 sets Vis (10*55) + rondelle (M10)
m 2PCS Vis (M6*10)

Station de traction
MULTIFIT
ENES
FR IT DE PT NL SWE PL DK
17
3. ÉTAPES D’ASSEMBLAGE
Étape 1.
Ajustez les deux pièces du tube de pied (A) avec le couvercle du tube (L). Connecter les deux tubes de
pied avec le tube de connexion (C) et avec 4 jeux de vis de la combinaison (h) indiquée dans le tableau -
Vis (M8+55) + Rondelle (M8) + Ecrou (M8). Monter les deux poignées en L (D) avec les 2 jeux de vis de la
combinaison (k) indiquée dans le tableau - Vis (M10+55) + Rondelle (M10) dans les tubes de pied (A).
Étape 2.
Relier les tubes principaux (B) aux tubes de pied (A) avec 6 jeux de vis combinées (j) - Vis (M10*45) +
Rondelle (M10). Connecter ensuite le tube principal (B) et le tube de connexion (C) avec 4 jeux de vis
combinées (h) - Vis (M8*55) + Rondelle (M8) + Ecrou (M8).
L
D
A
h
C
k
C
B
j
h

Station de traction
MULTIFIT
ENES
FR IT DE PT NL SWE PL DK
18
Étape 3.
Connecter les pièces d’immersion (E) et les tubes principaux (B) avec les 4 jeux de vis de la combinaison (f)
- Vis (M8*45) + Rondelle (M8) + Ecrou (M8). Connecter les tubes de la poignée (I) et les pièces d’immersion
(E) avec la vis (m) (M6*10) qui se trouve dans la pièce d’immersion (E). Enn, connecter le tube arrière (F) et
le tube principal (B) avec les 2 jeux de vis de la combinaison (e) - Vis (M8*40) + Rondelle (M8).
Étape 4.
Relier le coussin du bras (K) à la pièce d’immersion (E) avec les 4 jeux de vis de la combinaison (g) - Vis
(M8*45) + Rondelle (M8).
E
I
Fe
f
f
K
g
m

Station de traction
MULTIFIT
ENES
FR IT DE PT NL SWE PL DK
19
Étape 5.
Relier le coussin arrière (J) et le tube arrière (F) à l’aide des vis (d) (M8*14).
Étape 6.
Placer le côté droit des tubes réglables (G) sur le tube principal (B), utiliser les vis réglables (a) pour choisir
la bonne hauteur. Enn, connecter le guidon (H) et les tubes réglables (G) avec les 2 jeux de vis de la
combinaison (i) - Vis (M8*65) + Rondelle (M8) + Ecrou (M8).
J
d
i
H
G
a

Stazione di sollevamento
MULTIFIT
ENES
FR IT DE PT NL SWE PL DK
20
IMPORTANTE
DA CONSERVARE PER RIFERIMENTO FUTURO.
1. AVVERTENZE
1. ATTENZIONE! Tenere i bambini lontani da questo apparecchio quando è in uso. Non permettere ai
bambini di arrampicarsi o giocare su di esso quando non è in uso.
2. ATTENZIONE! Tenere le dita lontane dalle parti in movimento.
3. ATTENZIONE! Per la vostra sicurezza, assicuratevi sempre che ci sia uno spazio libero di almeno 0,6
metri in tutte le direzioni intorno ai vostri prodotti durante l’esercizio.
4. ATTENZIONE! Controllare periodicamente che tutti i dadi, i bulloni e i raccordi siano ben serrati.
Controllare periodicamente che tutte le parti mobili non presentino segni evidenti di usura o danni.
5. ATTENZIONE! Si prega di indossare abbigliamento sportivo.
6. ATTENZIONE! Riscaldarsi prima dell’esercizio e fare stretching per circa 5 minuti dopo l’esercizio per
regolare correttamente il corpo.
7. ATTENZIONE! A causa del peso e dell’altezza del prodotto, vi chiediamo gentilmente di trasportare
o spostare il prodotto da più di una persona.
8. ATTENZIONE! Non collocare o conservare l’apparecchio nei seguenti luoghi: un luogo instabile, ad
esempio un luogo scivoloso o inclinato, o un luogo che vibra frequentemente. Un luogo fumoso,
umido o polveroso. Un luogo con scarsa ventilazione. Luoghi estremamente caldi o freddi. Luce
solare diretta o in prossimità di apparecchi di riscaldamento.
9. ATTENZIONE! Prestare attenzione ai bambini. I sacchetti di plastica possono causare soocamento.
Table of contents
Other Mobiclinic Fitness Equipment manuals