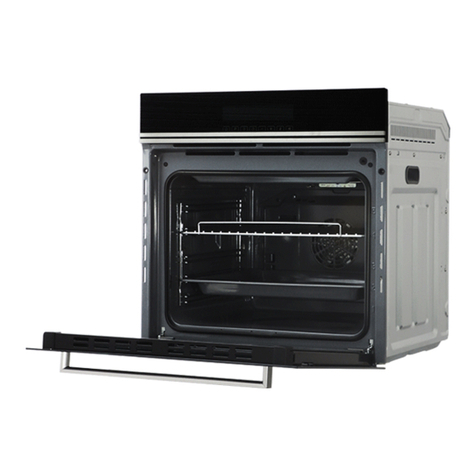
Modena Bravo Series Owner's manual

User
Manual Book
Oven
Bravo Series
BO 7838

2
TABLE OF CONTENTS
Part 1: Safety Warnings 4
Electrical Safety 6
Intended Use 8
Part 2: Name of Parts 9
Part 3: Installation 11
Important Warnings for Installation 11
Installation Under Counter 12
Installation in a High Cabinet 12
Installation Conditions 13
Placing and Securing the Oven 13
Electrical Connection 14
Part 4: How To Use 15
Operating Oven Control Unit BO 7838 15
Display 15
User Entries 15
Symbols on the Display 16
Temperature 16
Time Management 16
Cook 16
Setting 17
Automatic Cooking Menu 17
End of Cooking Function 17
When the Oven Is Turned On for the First Time 18
Cooking Function Displays and Their Features 18
Oven Function Settings BO 7838 19
Delayed Cooking 21
Cooking With Pre-Heating 22

3
Auto Cooking 22
To Start Auto Cooking Cycle 23
Meat Probe Function 25
Economic Cooking Function 27
Slow Cooking Function 28
Shabbat Function 29
Defrosting Function 30
Yogurt Function 30
Dough Function 31
Keeping Warm Function 32
Favorite Mode Setting 33
Using Saved Favorite 35
Cleaning 35
To Set the Steam Cleaning Function 36
Minute Minder 37
Settings 39
Part 5: Maintenance 44
Maintenance and Cleaning BO 7838 44
Cleaning the Oven Glass 45
Catalytic Panel 45
Replacing the Oven Lamp 46
Cleaning and Assembly of the Oven Door 46
Part 6: Troubleshooting 47
Part 7: Precaution 49
Advice and Precautions 49
General Safety Instructions 49
Part 8: Specification 51
Appendix 1 52
Appendix 2 53

4
General Information
•Installation and repair should always be performed by “AUTHORIZED
SERVICE”. Manufacturer shall not be held responsible for operations
performed by unauthorized persons.
•Please read this operating instructions carefully. Only by this way
you can use the appliance safely and in a correct manner.
•The oven should be used according to operating instructions.
•Keep children below the age of 8 and pets away when operating.
•WARNING: The accessible parts may be hot while using the grill.
Keep away from children.
•WARNING: Fire hazard; do not store the materials on the cooking
surface.
•WARNING: The appliance and its accessible parts are hot during
operation.
•Setting conditions of this device are specified on the label. (Or on
the data plate)
•The accessible parts may be hot when the grill is used. Small children
should be kept away.
•WARNING: This appliance is intended for cooking. It should not be
used for other purposes like heating a room.
•To clean the appliance, do not use steam cleaners.
•Ensure that the oven door is completely closed after putting food
inside the oven.
•NEVER try to put out the fire with water. Only shut down the device
circuit and then cover the flame with a cover or a fire blanket.
•Children under 8 years of age should be kept away, if they cannot
be monitored continuously.
•Touching the heating elements should be avoided.
•CAUTION: Cooking process shall be supervised.
•This device can be used by children over 8 years of age, people with
physical, hearing or mental challenges or people with lack of
experience or knowledge; as long as control is ensured or
information is provided regarding the dangers.
•This device has been designed for household use only.
PART 1: SAFETY WARNINGS

5
•Children must not play with the appliance. Cleaning or user
maintenance of the appliance shall not be performed by children
unless they are older than 8 years and supervised by adults.
•Keep the appliance and its power cord away from children less than
8 years old.
•Put curtains, tulles, paper or any flammable (ignitable) material away
from the appliance before starting to use the appliance. Do not put
ignitable or flammable materials on or in the appliance.
•Keep the ventilation channels open.
•The appliance is not suitable for use with an external timer or a
separate remote control system.
•Do not heat closed cans and glass jars. The pressure may lead jars
to explode.
•Oven handle is not a towel drier. Do not hang towels, etc. on the
oven handle.
•Do not place the oven trays, plates or aluminium foils directly on the
oven base. The accumulated heat may damage the base of the oven.
•While placing food to or removing food from the oven, etc., always
use heat resistant oven gloves.
•Do not use the product in states like medicated and/or under
influence of alcohol which may affect your ability of judgement.
•Be careful when using alcohol in your foods. Alcohol will evaporate
at high temperatures and may catch fire to cause a fire if it comes in
contact with hot surfaces.
•After each use, check if the unit is turned off.
•If the appliance is faulty or has a visible damage, do not operate the
appliance.
•Do not touch the plug with wet hands. Do not pull the cord to plug
off, always hold the plug.
•Do not use the appliance with its front door glass removed or broken.
•Place the baking paper together with the food into a pre-heated
oven by putting it inside a cooker or on an oven accessory. (tray,
wire grill etc.)
•Do not put objects that children may reach on the appliance.
•It is important to place the wire grill and tray properly on the wire
racks and/or correctly place the tray on the rack. Place the grill or
tray between two rails and make sure it is balanced before putting
food on it.

6
•Against the risk of touching the oven heater elements, remove
excess parts of the baking paper that hang over from the accessory
or container.
•Never use it at higher oven temperatures than the maximum usage
temperature indicated on your baking paper. Do not place the baking
paper on the base of the oven. Against the risk of touching the oven
heater elements, remove excess parts of the baking paper that hang
over from the accessory or container.
•When the door is open, do not place any heavy object on the door
or allow children to sit on it. You may cause the oven to overturn or
the door hinges to be damaged.
•The packaging materials are dangerous for children. Keep packaging
materials away from the reach of children.
•Do not use abrasive cleaners or sharp metal scrapers to clean the
glass as the scratches that may occur on the surface of the door
glass may cause the glass to break.
•User should not handle the oven by himself.
•During usage, the internal and external surfaces of the oven get hot.
As you open the oven door, step back to avoid the hot vapour
coming out from the interior. There is risk of burning.
•Do not place heavy objects when oven door is open, risk of toppling.
•Oven supply can be disconnected during any construction work at
home. After completing the work, re-connecting the oven shall be
done by authorized service.
•User should not dislocate the resistance during cleaning. It may
cause an electric shock.
•To prevent overheating, the appliance should not be installed behind
of a decorative cover.
•Turn off the appliance before removing the safeguards. After
cleaning, install the safeguards according to instructions.
•Cable fixing point shall be protected grid. Please put the food into or
on appropriate tools before putting them in the oven.
•Please don’t cook the food directly on the tray.
•Please use temperature probe from factory only.
Electrical Safety
•Plug the appliance in a grounded socket protected by a fuse conforming to the
values specified in the technical specifications chart.

7
•Have an authorized electrician set grounding equipment. Our company shall not
be responsible for the damages that shall be incurred due to using the product
without grounding according to local regulations.
•The circuit breaker switches of the oven shall be placed so that end user can
reach them when the oven is installed.
•The power supply cord (the cord with plug) shall not contact the hot parts of
the appliance.
•If the power supply cord (the cord with plug) is damaged, this cord shall be
replaced by the manufacturer or its service agent or equally qualified personnel
to prevent a hazardous situation.
•Never wash the appliance by spraying or pouring water on it. There is a risk of
electrocution.
•WARNING: To avoid electric shock, ensure that the device circuit is open before
changing the lamp.
•WARNING: Cut off all supply circuit connections before accessing the terminals.
•Do not use cut or damaged cords or extension cords other than the original cord.
•Make sure that there is no liquid or humidity in the outlet where the product
plug is installed.
•The rear surface of the oven also heats up when the oven is operated. Electrical
connections shall not touch the rear surface, otherwise the connections may be
damaged.
•Do not tighten the connecting cables to the oven door and do not run them over
hot surfaces. If the cord melts, this may cause the oven to short circuit and even
a fire.
•Unplug the unit during installation, maintenance, cleaning and repair.
•If the power supply cable is damaged, it must be replaced by its manufacturer
or authorized technical service or any other personnel qualified at the same
level, in order to avoid any dangerous situation.
•Make sure the plug is inserted firmly into wall socket to avoid sparks.
•Do not use steam cleaners for cleaning the appliance, otherwise electric shock
may occur.
•An omni polar switch capable to disconnect power supply is required for
installation. Disconnection from power supply shall be provided with a switch
or an integrated fuse installed on fixed power supply according to building code.
•Appliance is equipped with a type ‘’Y’’ cord cable.
•Fixed connections shall be connected to a power supply enabling omni polar
disconnection. For appliances with over voltage category below III,
disconnection device shall be connected to fixed power supply according to
wiring code.

8
Intended Use
•This product has been designed for domestic use.Commercial use is not
permitted.
•This appliance may only be used for cookingpurposes. It shall not be used for
other purposes like heating a room.
•This appliance shall not be used to heat platesunder the grill, drying clothes or
towels by hanging them on the handle or for heating purposes.
•The manufacturer assumes no responsibility for anydamage due to misuse or
mishandling.
•Oven part of the unit may be used for thawing, roasting, frying and grilling food.
•Operational life of the product you have purchased is 10 years. This is the period
for which the spare parts required for the operation of this product as defined
is provided by the manufacturer.

9
1. Control Panel
2. Deep Tray
3. Chicken roast skewer
4. Wire grill inside the tray
5. Standard tray
6. Oven door
7. Light
8. Grilling wire
9. Standard tray
ACCESSORIES (optional)
Deep tray
Used for pastry, big roasts, watery foods. It can also be
used as oil collecting container if you roast directly on
grill with cake, frozen foods and meat dishes.
Tray / Glass tray
Used for pastry (cookie, biscuit etc.), frozen foods.
Circular tray
Used for pastry frozen foods.
PART 2: NAME OF PARTS

10
Wire grill
Used for roasting or placing foods to be baked, roasted
and frozen into desired rack.
Telescopic rail
Trays and wire racks can be removed and installed easily,
thanks to telescopic rails.
In tray wire grill
Foods to stick while cooking such as steak are placed on
tray grill. Thus contact of food with tray and sticking are
prevented.
Pizza stone and peel
They are used for baking pastries such as pizza, bread,
pancake and removing baked food from the oven.
Tray handle
It is used to hold hot trays.

11
Important Warnings for Installation
Cooling fan shall take extra steam out and prevent
outer surfaces of appliance from overheating during
operation of the oven. This is a necessary condition
for better appliance operation and better cooking.
Cooling fan shall continue operation after cooking is
finished. Fan shall automatically stop after cooling is
completed.
A space shall be left behind the compartment where you shall place your appliance
to ensure efficient and proper operation of your appliance. This space shall not be
neglected as it is necessary for the operation of the ventilation system of the
appliance.
Installation and Assembly of the Oven
Operating space of the appliance shall be determined before starting the
installation. Appliance shall not be installed on areas with high flow of air.
Handle the appliance with two persons at least. Do not drag the appli-ance to
prevent damage to the ground.
Remove all transportation materials inside and outside of the packaging. Remove
all materials and documents inside the product.
PART 3: INSTALLATION

12
Installation Under Counter
Cabinet shall conform with dimensions specified in picture 2.
Picture 2
Installation in a High Cabinet
The cabinet shall comply with the dimensions given in picture 3.
In the rear part of the cabin, and at the top and bottom, spaces with the dimensions
specified in the picture shall be ensured to provide the required ventilation.
Picture 3

13
Installation Conditions
The dimensions of the appliance are given in
picture 3.
The furniture surfaces to be installed and the
installation materials to be used shall resist a
temperature of at least 100 °C.
To prevent the appliance from turning over, the
cabinet to be installed shall be fixed and the
cabinet floor shall be level.
The floor of the cabinet shall be strong enough to
withstand a load of at least 60 kg.
Placing and Securing the Oven
Place the oven to the cabinet with two or more persons. Make sure that the frame
of the oven and the front of the furniture are properly aligned. The supply cord
shall not be left under the oven or be stuck or bent between the oven and the
furniture. Secure the oven to the furniture using the screws supplied in the
appliance. Screws shall be installed by putting them through the plastics attached
on the frame of the appliance as shown in picture 5. The screws shall not be
tightened too much. Otherwise, the screw holes may wear out. Check that the oven
does not move after installation. If the oven has not been installed in accordance
with the installation instructions, there is a risk of overturning during operation.
MODEL
A (mm)
B (mm)
C (mm)
BO 7838
550
560
590

14
Electrical Connection
The place where the product is installed shall have proper electrical installation.
The mains voltage shall comply with the rating given on the product type plate.
Electrical connection for the appliance shall be made in accordance with local and
national electrical regulations. Disconnect the mains power before starting to
install the product. Do not connect the product to the mains until the installation is
finished.
At the front of the kitchen counter, there should be a space at least 5 mm high from
the bottom of the counter
Picture 5

15
Operating Oven Control Unit BO 7838
Display
1. Meat probe
2. Child lock
3. Minute minder
4. Hour
5. Settings
6. Auto cooking
7. Special functions
8. Favorites
9. Cleaning
User Entries
1. Return Button
•Short press: Returns back when navigating the menus.
•Long press: When cooking, cancels the cooking cycle.
2. Rotary Knob
•Right/Left turning: Navigates between selections.
•Short press: Enables the selection.
•Long press: Pauses cooking, cleaning and other functions.
3. MENU Button
•Enters to the menu.
•Adds, records and deletes favorites.
•Enables reminder and child lock during cooking cycle.
4. ON/OFF Button
PART 4: HOW TO USE

16
•Short press: Turns the oven on/off.
•Long press: Cancels the cooking cycle and turns off the oven during cooking.
Symbols on the Display
Appliance features a TFT display.
Eco (Economic) cooking
Low temp cooking
Meat Probe
Shabbat
Defrost
Yoghurt
Dough
Warm Keeping
Temperature
Temperature symbols of the oven are defined in the following table.
Quick heating ( pre –heating )
Meat Probe
Heat bars ( oven cavity
temperature display )
Temperature Display (°C)
Time Management
The oven time symbol is determined in the following table
Normal Cooking
Delayed Cooking
Minute Minder
Cook
The oven cooking symbol is defined in the following table

17
Lower Resistance
Upper Resistance
Grill Resistance
Turbo Resistance
Turbo Fan
Setting
The oven setting symbol is defined in the following table
Key Tone
Child Lock
Automatic Cooking Menu
The automatic cooking menu symbol is defined in the following table.
Meat
Pizza
Poultry
Bread
Fish
Oven Food
Cake
Spesial
End of Cooking Function
End of Cooking Function menu symbol is defined in the following table.
Save Favorite
Extend Duration
Finish Cooking

18
When the Oven Is Turned On for the First Time
Oven is deactivated when it is turned on for the first time. Clock that is not updated
displays on the screen.
Simply follow several steps below to perform the clock setting;
•Press ON/OFF button to turn on the oven. Then press MENU button to enter
the menu.
•Select time of day entering settings sub-menu.
•Make hour and minute adjustment using rotary knob.
Cooking Function Displays and Their Features
Lower and upper resistances
Recommended temperature is
200°C. Allows cooking from 45°C
to 240°C. Up to 6 hours of cooking
is possible.
Grill, Turbo and fan
Recommended temperature is
220°C. Allows cooking from 120°C to
230°C. Up to 6 hours of cooking is
possible
Lower resistance , upper
resistance and fan
Recommended temperature is
180 * C. Allows cooking from 45°C
to 240°C. Up to 6 hours of cooking
is possible .
Upper resistances
Recommended temperature is
150°C. Allows cooking from 120°C to
230°C. Up to 2 hours of cooking is
possible.
Turbo and fan
Recommended temperature is
175°C. Allows cooking from 45°C
to 240°C. Up to 8 hours of cooking
is possible.
Lower resistances
Recommended temperature is
200°C. Allows cooking from 60°C to
230°C. Up to 8 hours of cooking is
possible
Lower - upper resistances , turbo
and fan
Recommended temperature is
180 * C. Allows cooking from 60°C
to 240°C. Up to 5 hours of cooking
is possible .
Lower resistances ,Turbo, and Fan
Recommended temperature is
150°C. Allows cooking from 45°C to
230°C. Up to 4 hours of cooking is
possible
Grill
Recommended temperature is
180°C. Allows cooking from i20°c
to 230°C. Up to 1 hours of cooking
is possible
Upper resistances ,Turbo, and Fan
Recommended temperature is
150°C. Allows cooking from 45°C to
230°C. Up to 4 hours of cooking is
possible
Grill & Upper resistance
Recommended temperature is
200°C. Allows cooking from 120°C
to 230°C. Up to 1 hours of cooking
is possible.
Grill, Upper Resistance ,and Turnspit
Recommended temperature is
200°C. Allows cooking from 120°C to
230°C. Up to 1 hours of cooking is
possible

19
Grill & Fan
Recommended temperature is
175°C. Allows cooking from 120°C
to 230°C. Up to 1 hours of cooking
is possible
Grill, Fan ,and Turnspit
Recommended temperature is
175°C. Allows cooking from 120°C to
230°C. Up to 1 hours of cooking is
possible
Grill, fan,& upper resistance
Recommended temperature is
185'C. Allows cooking from 120°C
to 230°C. Up to 1 hours of cooking
is possible.
Grill, Turbo, Fan, and Turnspit
Recommended temperature is
185°C. Allows cooking from 120°C to
230°C. Up to 1 hours of cooking is
possible
Oven Function Settings BO 7838
Manual Cooking
Normal Cooking
The steps you need to follow to start cooking are explained below:
The oven is turned on by pressing the on/off
button. Then, when the rotary knob is pressed
once, the cooking menu opens.
Rotate the rotary knob to navigate between
functions. Press the rotary knob to select a
function.
Rotate the rotating knob to select temperature
and press the rotating knob to select the time
WARNING
While navigating between functions, the temperature values
displayed on the temperature display are the recommended
temperature values. Temperature may be changed between
maximum and minimum temperatures specified at 5°C intervals

20
Rotate the rotating knob to select the time.
Before cooking cycle starts, summary
information screen will be displayed. Press the
rotary knob to start cooking or press return
button to change the settings
Once cooking starts, the screen on the side will
be displayed.
WARNING
•Simply press the rotary knob for 1 second to pause cooking.
•Simply press and hold return button for 2 seconds to cancel
cooking completely
WARNING
To change cooking settings; press return
button after pausing the cooking cycle
and return back to cooking time,
temperature setting and cooking function
adjustment. Cooking cycle can be
restarted with desired settings.
WARNING
Reminder can be set or child lock can be
activated by pressing MENU button
during cooking.
Other manuals for Bravo Series
1
This manual suits for next models
1
Table of contents
Other Modena Oven manuals

Modena
Modena BO 7838 Owner's manual

Modena
Modena SA 0624G Owner's manual

Modena
Modena BO 6633 Owner's manual

Modena
Modena Bravo Series Owner's manual

Modena
Modena BO 4630 Owner's manual

Modena
Modena BT Series User manual

Modena
Modena Vicino Series User manual

Modena
Modena GR 7741GO Owner's manual

Modena
Modena BO 9130 SAM Owner's manual

Modena
Modena Vicino Series Owner's manual