manuals.online logo
Brands
  1. Home
  2. •
  3. Brands
  4. •
  5. modway
  6. •
  7. Indoor Furnishing
  8. •
  9. modway EEI-3919-WHI User manual

modway EEI-3919-WHI User manual

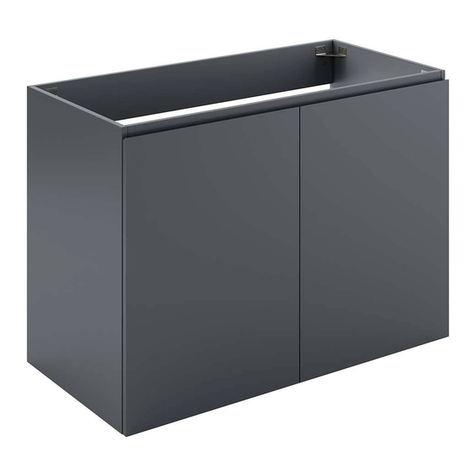
Thank you for purchasing the MODWAY Vanity!
Before you start, here are some helpful advice:
1.We suggest you spend a short time reading through this leaflet and then follow the simple step-by-step instructions.
2.Owing to the size and weight of the vanity, we recommend that it is assembled by two adults, on a carpeted or
padded area, in the room that it is intended for. Approximate assembly time: 60 minutes.
3.Please do not use any tools other than those provide or recommended in these instructions.
4.Please do not throw away any of the packaging or instructions until you have checked all the components and
hardware and the furniture is fully assembled.
5.Assemble all components loosely until advised to tighten. Depending on use, it may be necessary to tighten the
components from time to time, so please save the tools that have been provided.
6.Please keep all pieces out of reach of children.
Hardware required. Hammer not included
Hardware required. Screwdriver not included
Carefully insert the Wood Dowels (A) at the designated holes on the relevant parts.
Use Philips screwdriver to insert the Cambolt (B) carefully at the designated holes on the relevant parts.
Please ensure the Cambolt is inserted and secured at the correct pre-drilled holes.
(Power tool not recommended)
Hardware required. Screwdriver not included
Secure the Door Stopper (K) to the Bottom Panel (3) with Screw (J).
Secure the Vertical Panel 1 (8) to the Side Panel Left (1) and Side Panel Right (2) with
16 pieces of Screws (L).
Hardware required. Screwdriver not included
Assemble 2 pieces of Door Hinges (G) to the 'Door Left (9)' and 'Door Right (10)' on each sides and secure
it with 2 pieces of Screws (F) for each hinges.
6.1- Secure the Horizontal Panel (13) to the Base Panel 1 (4) with 2 pieces of Screws (L).
6.2- Use screwdriver to secure the Metal Bracket (H) to the Horizontal Panel (13) with
2 pieces of Screws (F).
Hardware required. Screwdriver not included
Properly insert the Camlock (C) in the pre-drilled hole then align it to the assembled Cambolt (B) to secure
both Side Panel Left (1) to the Vertical Panel 2 (11) and Vertical Panel 3 (12).
This assembly namely Side Frame Assembly
8.1- Lay flat the Side Panel Left (1) which already assembled with 4 pieces of Cambolt (B).
8.2- Insert Camlock (C) to the pre-drilled hole of the Bottom Panel (3) then properly align the Wooden
Dowel to the pre-drilled hole of the Side Panel Left (1).
8.3- Once aligned and attached, make sure to secure Camlock (C) from the Bottom Panel (3) to the
Cambolt (B) of the Side Panel Left (1).
8.4- Repeat steps to secure the Base Panel 1 (4), Base Panel 2 (5) and Back Panel 7 to
the Side Panel Left (1) as shown.
Hardware required. Screwdriver not included
Properly insert the Camlock (C) in the pre-drilled hole then align it to the assembled Cambolt (B) to secure
Side Panel Right (2) to the Vertical Panel 2 (11) and Vertical Panel 3 (12).
This assembly namely Side Frame Assembly
Make sure the Adjustable Shelf (6) with Wood Dowel was attached to the Vertical Panel 2 (11).
Secure a Screw (L) to the Adjustable Shelf (6) thru the Vertical Panel (11&12) by using
screwdriver as shown.
Hardware required. Screwdriver not included
Carefully turnover the assembled vanity from STEP 11. Secure a Screw (L) on each side of the
Adjustable Shelf (6) thru the Vertical Panel (11&12) by using screwdriver as shown.
Repeat steps from STEP 8.2 -8.3 to secure Bottom Panel (3), Base Panel 1 (4), Base Panel 2 (5),
Back Panel (7) and Adjustable Shelf (6) as shown.
Hardware required. Screwdriver not included
Assemble Door Knob (D) on each 'Door Left (9)' and 'Door Right (10)' and secure it
with a Screw (E) by using screwdriver.
Screw and Wall Plug are not provided.
Please use appropriate fixtures for your wall.
Hardware required. Screwdriver not included
Hole=Ø6mm
Note: Professional work required.
Use Screwdriver to secure the Metal Bracket (I) on each corner of the top portion of the Vanity Cabinet
with 4 pieces of Screw (F).

This manual suits for next models

3

Other modway Indoor Furnishing manuals

modway MOD-6707 User manual

modway

modway MOD-6707 User manual

modway MOD-6964-WAL User manual

modway

modway MOD-6964-WAL User manual

modway MOD-6271 User manual

modway

modway MOD-6271 User manual

modway EEI–2697 User manual

modway

modway EEI–2697 User manual

modway EEI–163 User manual

modway

modway EEI–163 User manual

modway EEI-6786 User manual

modway

modway EEI-6786 User manual

modway EEI-3046 User manual

modway

modway EEI-3046 User manual

modway EEI-2709 User manual

modway

modway EEI-2709 User manual

modway EEI-5011 User manual

modway

modway EEI-5011 User manual

modway EEI-3682-NAT User manual

modway

modway EEI-3682-NAT User manual

modway EEI-2549 User manual

modway

modway EEI-2549 User manual

modway EEI-3718-NAT-TAU User manual

modway

modway EEI-3718-NAT-TAU User manual

modway EEI-2704 User manual

modway

modway EEI-2704 User manual

modway EEI-4404 User manual

modway

modway EEI-4404 User manual

modway MOD-6005 User manual

modway

modway MOD-6005 User manual

modway Origin EEI-2995 User manual

modway

modway Origin EEI-2995 User manual

modway Tracy MOD-5241 User manual

modway

modway Tracy MOD-5241 User manual

modway Response EEI-1789 User manual

modway

modway Response EEI-1789 User manual

modway MOD-6220 User manual

modway

modway MOD-6220 User manual

modway EEI-1798 User manual

modway

modway EEI-1798 User manual

modway EEI -2785 User manual

modway

modway EEI -2785 User manual

modway MOD-5473 User manual

modway

modway MOD-5473 User manual

modway EEI-5881 User manual

modway

modway EEI-5881 User manual

modway EEI-5706 User manual

modway

modway EEI-5706 User manual

Popular Indoor Furnishing manuals by other brands

Dorel Living DA7358C Assembly instructions

Dorel Living

Dorel Living DA7358C Assembly instructions

Canvas AXEL 168-0005-2 Assembly instructions

Canvas

Canvas AXEL 168-0005-2 Assembly instructions

Acme Furniture Raina R5101 Assembly instruction

Acme Furniture

Acme Furniture Raina R5101 Assembly instruction

Teknik 5418793 Instruction booklet

Teknik

Teknik 5418793 Instruction booklet

Coaster Tatum 805893 Assembly instructions

Coaster

Coaster Tatum 805893 Assembly instructions

BLACK RED WHITE STYLIUS B169-LOZ160 Assembly

BLACK RED WHITE

BLACK RED WHITE STYLIUS B169-LOZ160 Assembly

Habitat 206669 user manual

Habitat

Habitat 206669 user manual

HOMCOM 503-019V00 manual

HOMCOM

HOMCOM 503-019V00 manual

Hulsta PASO Assembly instruction

Hulsta

Hulsta PASO Assembly instruction

World Market Adirondack 502829 Assembly instructions

World Market

World Market Adirondack 502829 Assembly instructions

Steelcase Context quick start guide

Steelcase

Steelcase Context quick start guide

Crate&Barrel Mid-Century Spindle Toddler Rail Assembly instructions

Crate&Barrel

Crate&Barrel Mid-Century Spindle Toddler Rail Assembly instructions

Ticaa Merci 140 Instructions for use

Ticaa

Ticaa Merci 140 Instructions for use

Smith & Noble Fabric Series Step by step installation instructions

Smith & Noble

Smith & Noble Fabric Series Step by step installation instructions

STRUCTUBE HANEDA Assembly instructions

STRUCTUBE

STRUCTUBE HANEDA Assembly instructions

Whittier Wood 7031GDRC Assembly instructions

Whittier Wood

Whittier Wood 7031GDRC Assembly instructions

VERTBAUDET BUNNY 010478 manual

VERTBAUDET

VERTBAUDET BUNNY 010478 manual

convenience concepts ASHLEY LOUNGE Assembly instructions

convenience concepts

convenience concepts ASHLEY LOUNGE Assembly instructions

manuals.online logo
manuals.online logoBrands
  • About & Mission
  • Contact us
  • Privacy Policy
  • Terms and Conditions

Copyright 2025 Manuals.Online. All Rights Reserved.