manuals.online logo
Brands
  1. Home
  2. •
  3. Brands
  4. •
  5. modway
  6. •
  7. Indoor Furnishing
  8. •
  9. modway EEI-4264 User manual

modway EEI-4264 User manual

Customer Service 908-368-1025︱www.modway.com Page 1 of 10
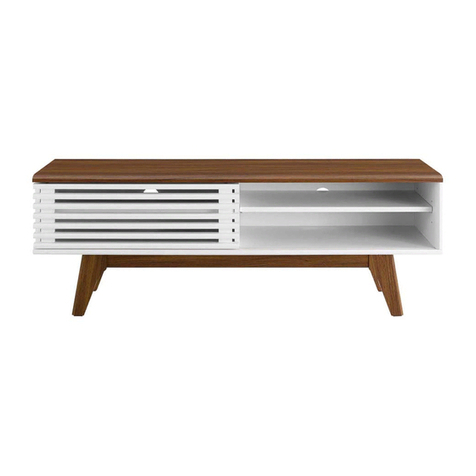
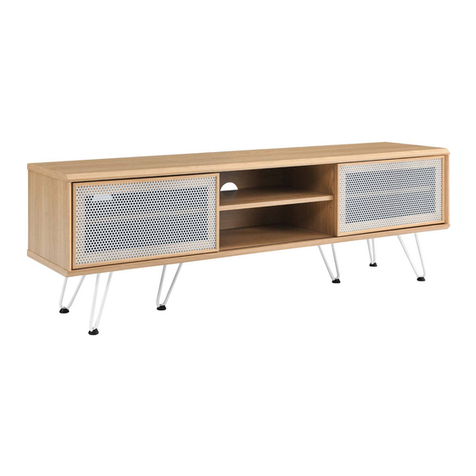
Thank you for purchasing the MODWAY TV STAND !
Before you start, here are some helpful advice:
1.We suggest you spend a short time reading through this leaflet and then follow the simple step-by-step
instructions.
2.it is assembled by two adults, on a carpeted or
padded area, in the room that it is intended for. Approximate assembly time: 70 minutes.
3.Please do not use any tools other than those provided or recommended in these instructions.
4.Please do not throw away any of the packaging or instructions until you have checked all the components and
hardware and the furniture is fully assembled.
5.Assemble all components loosely until advised to tighten. Depending on use, it may be necessary to tighten the
components from time to time, so please save the tools that have been provided.
6.Please keep all pieces out of reach of children.
EEI-4264 TV STAND
Owing to the size and weight of the TV Stand, we recommend that
Q)
x 2
L)
x 6
G)
x 2
B) Camlock/Metal
Ø 15 mm x 14
R)
M)
x 6
H)
x 2
C) Dowel/Wood
Ø 8 x 30 mm x 24
P)
x 6
K)
x 8
F)
x 2
A) Cambolt/Metal
Ø 6 x 35 mm
Ø 15 mm
x 14
N)
x 2
I)
x 4
D)
x 12
O)
x 4
J)
x 1
E)
Screw/Metal
Screw/Metal Screw/Metal
M 7 x 50 mm
M 6.4 x 14 mm M 12 x 45 mm
x 1
Hardware :
Grommet Cover / Plastic Short Bracket / Aluminium Long Bracket /Aluminium
Ø 8 x 19 mm
Pin Sliding Top/Plastic
Ø 8 x 16 mm
Pin Sliding Bottom/Plastic
5002
Wall Plug/Plastic Wall Mounted Bolt/Metal Plastic
Ø 8 mm
Screw Cap/Plastic
Screwdriver (Not Include)
x 1
L 4
Hex/Allen Key/Metal
Bumper /Silicon
Shelf Support/Metal
Customer Service 908-368-1025︱Page 2 of 10www.modway.com
Components:
5
1 2 3
67
4
8
Top Board x1
Center Board 1 x1 Back Board x1
Wooden Door x1
Adjustable Shelf x1
Bottom Board x1 Side Board Left x1 Side Board Right x1
TV STANDEEI-4264
Customer Service 908-368-1025︱Page 3 of 10www.modway.com
STEP 1:
Hardware required.
Screwdriver not included
Ax4 Cx12 Rx1
TV STAND
Hardware required.
Screwdriver not included
Ax10 Cx12 Ex1
Ix4
Kx8
Rx1
STEP 2:
IK
E
EEI-4264
Customer Service 908-368-1025︱Page 4 of 10www.modway.com
STEP 3:
STEP 4:
Bx4Rx1
Hardware required.
Screwdriver not included
TV STAND
Hardware required.
Screwdriver not included
Bx4 Hx1 Px4
Rx1
H
P
BACK VIEW
EEI-4264
Customer Service 908-368-1025︱Page 5 of 10www.modway.com
STEP 5:
STEP 6:
Hardware required.
Screwdriver not included
Bx4Rx1
TV STAND
Hardware required.
Screwdriver not included
Bx2Rx1
Px2
EEI-4264
5
PB
Page 6 of 10Customer Service 908-368-1025www.modway.com
STEP 7:
STEP 8:
TV STAND
Hardware required.
Dx10 Ex1
Hardware required.
Dx2Hx1
E
EEI-4264
H
Customer Service 908-368-1025︱
Page 7 of 10
www.modway.com
STEP 9:
STEP 10:
TV STAND
Determine your desired (Y) height, then subtract by 127 mm.
This is the drill holes height from the floor (Z).
( Z )
127
( Y )
EEI-4264
Please use minimum 1 hole from each hole group to apply the wall plug
and screw. Use additional holes when necessary.
Different wall materials require unique wall fasteners.
The wall plugs (M) and screws (L) are designed for fixing to concrete walls only.
Please consult your local hardware store to ensure you are using the correct
hardware for your wall type.
* Long Bracket
L M
J
Customer Service 908-368-1025︱Page 8 of 10www.modway.com
STEP 11:
STEP 12:
TV STAND
Hardware required.
Screwdriver not included
Jx1 Lx4 Mx4
Rx1
Nx2Rx1Hardware required.
Screwdriver not included
N
*Start from middle hole (1) then use waterpass to mark
screw position (2),(3) then followed by (4), or additional
holes when necessary
EEI-4264
L
J
M
Use Waterpass to ensure the drill position
1
2
3
4
Hardware required.
Ox4
STEP 13:
Customer Service 908-368-1025︱Page 9 of 10www.modway.com
TV STAND
O
Fx2Gx2Hardware required.
STEP 14:
EEI-4264
F
G
Qx2Hardware required.
Q
STEP 15:
Customer Service 908-368-1025︱Page 10 of 10www.modway.com
TV STAND
Assembly is complete. The TV Stand is ready to enjoy now !
EEI-4264
STEP 16:

This manual suits for next models

1

Other modway Indoor Furnishing manuals

modway MOD-6670 User manual

modway

modway MOD-6670 User manual

modway EEI-3581 User manual

modway

modway EEI-3581 User manual

modway EEI-3438 User manual

modway

modway EEI-3438 User manual

modway MOD-5569 User manual

modway

modway MOD-5569 User manual

modway Genevieve MOD-6048 User manual

modway

modway Genevieve MOD-6048 User manual

modway Silas EEI-6580 User manual

modway

modway Silas EEI-6580 User manual

modway Energize EEI-5549 User manual

modway

modway Energize EEI-5549 User manual

modway EEI-6354 User manual

modway

modway EEI-6354 User manual

modway EEI -1199 User manual

modway

modway EEI -1199 User manual

modway EEI-4343 User manual

modway

modway EEI-4343 User manual

modway Amistad EEI-6342 User manual

modway

modway Amistad EEI-6342 User manual

modway EEI-6727 User manual

modway

modway EEI-6727 User manual

modway EEI-2704 User manual

modway

modway EEI-2704 User manual

modway MOD-6219 User manual

modway

modway MOD-6219 User manual

modway EEI-4409 User manual

modway

modway EEI-4409 User manual

modway EEI-4675 User manual

modway

modway EEI-4675 User manual

modway EEI-5862 User manual

modway

modway EEI-5862 User manual

modway EEI-3343 User manual

modway

modway EEI-3343 User manual

modway MOD-6119 User manual

modway

modway MOD-6119 User manual

modway EEI-3508 User manual

modway

modway EEI-3508 User manual
modway Prospect EEI-813 User manual

modway

modway Prospect EEI-813 User manual

modway MOD-6388 User manual

modway

modway MOD-6388 User manual

modway EEI-3348 User manual

modway

modway EEI-3348 User manual

modway EEI-2920 User manual

modway

modway EEI-2920 User manual

Popular Indoor Furnishing manuals by other brands

Happy Beds Divan Bed Assembly instructions

Happy Beds

Happy Beds Divan Bed Assembly instructions

Closet Maid Custom Closet Organizer S16TS Assembling instructions

Closet Maid

Closet Maid Custom Closet Organizer S16TS Assembling instructions

Simpli Home Wyndenhall Brooklyn + Max LOWRY AXCLRY-10 manual

Simpli Home

Simpli Home Wyndenhall Brooklyn + Max LOWRY AXCLRY-10 manual

Simpli Home WyndenHall Brooklyn + Max AXCHAR-06 manual

Simpli Home

Simpli Home WyndenHall Brooklyn + Max AXCHAR-06 manual

3-form SimpleSpec 400.48 installation manual

3-form

3-form SimpleSpec 400.48 installation manual

West Elm Nook Side Table 1233501 Assembly instructions

West Elm

West Elm Nook Side Table 1233501 Assembly instructions

Fromm&Starck STAR AS 100 user manual

Fromm&Starck

Fromm&Starck STAR AS 100 user manual

HAMPTON BAY OAK CLIFF 176-411-28BT Use and care guide

HAMPTON BAY

HAMPTON BAY OAK CLIFF 176-411-28BT Use and care guide

Konig + Neurath VALYOU Assembly instructions

Konig + Neurath

Konig + Neurath VALYOU Assembly instructions

Home Styles 88 5516 991 Assembly instructions

Home Styles

Home Styles 88 5516 991 Assembly instructions

HOMEDEPOT LT0041 Assembly

HOMEDEPOT

HOMEDEPOT LT0041 Assembly

Home Styles 88 5080 941 Assembly instructions

Home Styles

Home Styles 88 5080 941 Assembly instructions

guide craft G85710 Assembly instructions

guide craft

guide craft G85710 Assembly instructions

Forms + Surfaces TANGENT Series installation instructions

Forms + Surfaces

Forms + Surfaces TANGENT Series installation instructions

Closet Maid 5063 Assembly instructions

Closet Maid

Closet Maid 5063 Assembly instructions

Light Headed 20197 Assembly instructions

Light Headed

Light Headed 20197 Assembly instructions

RIGHT ANGLE R-Style T-Base Table Assembly instructions

RIGHT ANGLE

RIGHT ANGLE R-Style T-Base Table Assembly instructions

HOMEDEPOT C-1368-1B instruction manual

HOMEDEPOT

HOMEDEPOT C-1368-1B instruction manual

manuals.online logo
manuals.online logoBrands
  • About & Mission
  • Contact us
  • Privacy Policy
  • Terms and Conditions

Copyright 2025 Manuals.Online. All Rights Reserved.